


Solar System Installation Guide for California Homeowners
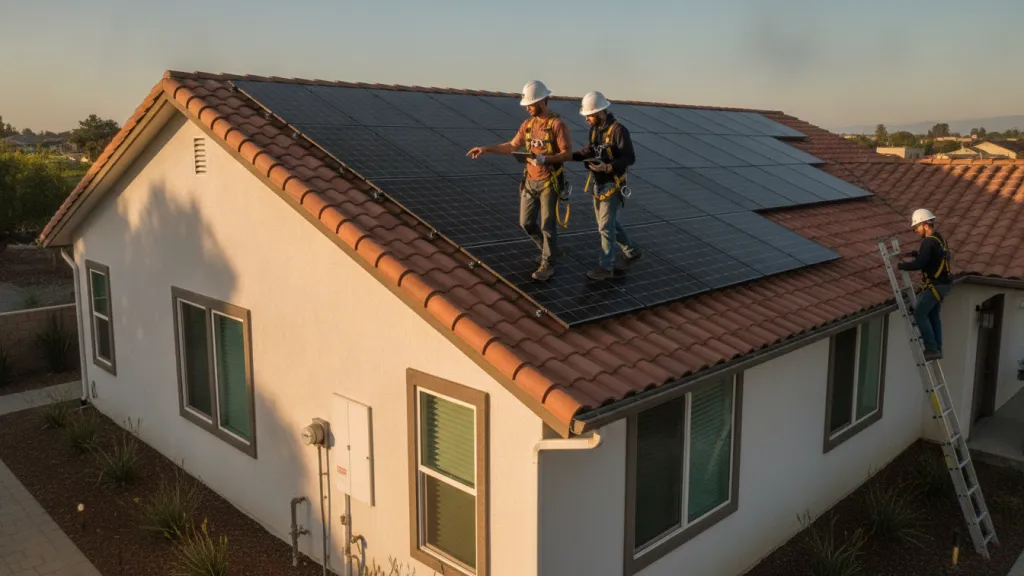
Installing solar in California is not just a matter of placing panels on a roof. The project connects your home, roof condition, electrical service, local permitting authority, and utility territory, so the right sequence matters from the first assessment through system activation.
A solar system installation guide should explain how homeowners evaluate electricity use and roof readiness, choose a project-specific design, complete permits and inspections, obtain utility approval, and begin monitoring the system. Requirements, costs, timelines, and incentive eligibility can vary by property, city, equipment, utility, and homeowner circumstances.
For California homeowners, preparation is especially important when a roof may need repair, when future electrical loads are changing, or when battery storage could support outage resilience. The process below breaks each decision into practical steps, starting with the scope a reliable guide should cover before any installation work begins.
What does a California solar system installation guide need to cover?
A useful guide should show the project as a sequence of decisions, not as a single installation appointment. The process generally starts with understanding the home's electricity use and evaluating the property. Then moves through roof and electrical review, system design, permitting, construction, inspection, utility interconnection, activation, and monitoring. The U.S. Department of Energy recommends reviewing previous electricity bills because annual and seasonal usage helps inform system sizing. It also recommends comparing installers and asking them to assess the roof. Read the DOE's homeowner solar guidance for additional questions.
California conditions make the order and details especially important. A roof's age, replacement history, condition, shade, orientation, and available space can affect the design. An installer, roofing expert, or structural engineer can help evaluate whether the roof is suitable. If repair or replacement is needed, coordinating that work with solar may prevent the need to remove and reinstall equipment later. Roof preparation can involve repairs, reinforced mounting points, integrated flashing, and weatherproofing, depending on the property.
What changes from one California home to another?
System sizing should reflect actual energy use, usable roof space, equipment choices, and expected future consumption rather than a standard size for every household. A site assessment may use satellite imagery and utility-bill analysis as an initial screen. But on-site measurements are important for confirming roof condition, structural capacity, electrical compatibility, and final dimensions. Shade and the home's position relative to the sun also affect the property's solar potential.
The local approval path varies as well. Local governments generally require a permit before rooftop panels are installed, and a professional inspection follows construction. The Department of Energy notes that permitting and inspection rules, details, and fees differ by jurisdiction. After approval, the utility connection process depends on the service territory. In California, Rule 21 describes interconnection, operating, and metering requirements, while each investor-owned utility administers its own version. Homeowners may be served by PG&E, SCE, SDG&E, LADWP, or another utility, so a guide should not promise one universal timeline or approval outcome.
What should homeowners track during the project?
- Roof condition, structural questions, and any repair or replacement scope.
- Electricity-use history, future loads, and the assumptions behind system sizing.
- Equipment, monitoring, battery options, permits, inspection responsibility, and utility paperwork.
- Which steps are complete before installation, permission to operate, and system handoff.
For California homeowners, an integrated team can help coordinate the solar and roofing portions of the work. AMECO's solar solutions process is designed to connect site evaluation, design, permitting, installation, activation, and support, while the final scope remains specific to the home and utility.
How do you prepare your home for solar installation?
Good preparation gives the installer a clearer picture of your home's energy needs and the conditions that will shape the design. Start by collecting about 12 months of electric bills, including seasonal usage changes if available. Reviewing bills helps estimate annual and seasonal electricity needs, while an energy audit can identify efficiency improvements worth addressing before the system is sized. Note planned changes too, such as an electric vehicle, heat pump, pool equipment, addition, or other large electrical load.
Next, look at the roof as part of the project rather than treating it as a separate detail. Record the approximate installation or replacement date, any history of leaks or repairs, and the roofing material. A site assessment should verify roof condition, structural capacity, electrical compatibility, and final dimensions. If the roof may need work, coordinate repairs or replacement before panels are installed. Solar-ready roofing can involve reinforced mounting points, integrated flashing, and weatherproofing. AMECO's guide to roofing for solar panels provides additional context on this decision.
Shade and roof layout also deserve a practical review. Notice trees, neighboring structures, chimneys, vents, and other features that could affect sunlight during the day. Orientation, available roof area, slope, and shading all influence the usable solar potential. Satellite tools and a 3D model can support an early review, but they do not replace an installer evaluation of the actual property. Take photos of each roof plane and note anything that may affect access, such as a narrow driveway, locked gate, steep terrain, or fragile landscaping.
- Gather recent electric bills and identify your typical and highest-use months.
- List future loads, including an EV charger, heat pump, pool, workshop, or home addition.
- Document roof age, material, leaks, repairs, skylights, vents, and attic concerns.
- Identify shade sources and note how they change from morning to afternoon.
- Locate the main electrical panel and note any visible capacity, damage, or prior upgrades.
- Confirm how an installation crew can reach the roof, electrical equipment, and staging area.
- Write down questions about equipment, battery storage, monitoring, maintenance, and who handles permits and utility coordination.
California projects also depend on the home's utility territory and local requirements. Homeowners in PG&E, SCE, SDG&E, or LADWP areas may encounter different application and interconnection steps, so ask which requirements apply to your address. You should not attempt electrical or structural work yourself. Instead, bring your goals and observations to the design appointment, then use the proposal to confirm assumptions about roof work, future loads, equipment, and responsibilities. Reviewing custom solar system design can help you prepare for that conversation.
What happens during solar system design?
Once the initial site review is complete, the design stage turns your home's conditions and energy goals into a system that can be evaluated before installation. A designer considers recent electricity use, roof area, orientation, shade, electrical service, future loads, and the local utility requirements. The goal is not to choose the largest possible array. It is to develop a practical configuration that fits the property and the way your household expects to use electricity.
How is the array layout and system size determined?
The proposed layout shows where panels could be placed and how roof sections affect the design. Solar potential depends on location, the home's position relative to the sun, shading. And the photovoltaic system selected, so a satellite-based estimate is useful but does not replace a detailed evaluation. The Department of Energy recommends speaking with an installer for that closer assessment. Reviewing previous electricity bills also helps establish annual and seasonal energy needs.
System sizing must balance energy use, available roof space, equipment, and forecast consumption. An on-site visit can verify roof condition, final dimensions, structural load capacity, and electrical compatibility. If the roof needs work, the design conversation should address repairs or replacement before panels are mounted. Solar-ready roofing may include reinforced mounting points, integrated flashing, and weatherproofing. AMECO's roofing solutions can be reviewed alongside the solar design when both scopes need to be coordinated.
Which equipment and battery options are reviewed?
The proposal should explain how the panels, racking, inverter, monitoring, and any battery fit together. Inverters convert the panels' output into electricity the home can use, while monitoring helps track system performance. AMECO lists REC panels and SolarEdge or Enphase inverter systems among its equipment options, but the appropriate selection remains project-specific. A battery is an option to evaluate when outage resilience, evening energy use, or a different approach to managing solar production matters to the homeowner. It should be assessed with the home's loads, electrical service, utility territory, and operating goals in mind.
What should you review in the proposal?
Before approving the project, look for the proposed panel locations, system capacity, inverter configuration. Battery scope if applicable, roof work, electrical path, monitoring access, and assumptions behind production estimates. Ask which figures depend on future utility rates, household consumption, shade, equipment, or eligibility rather than treating them as guarantees. AMECO's custom solar system design guide offers additional context on how these decisions are tailored.
A 3D model or 3D home visualizer can make the proposed array easier to understand from the ground. Use it to discuss panel placement, roof visibility, and design alternatives before permitting begins. For project-specific figures, the solar cost calculator can provide an initial planning reference, while the final proposal should reflect the verified property and utility conditions.
How do permits and utility approvals work in California?
Permitting and utility approval are separate parts of a California solar project. The local authority having jurisdiction, or AHJ, reviews whether the proposed work meets applicable building, electrical, fire, and structural requirements. The serving utility reviews how the system will connect to the electric grid. These steps protect the home, workers, utility equipment, and the broader distribution system.
For rooftop solar, the installer typically prepares a permit package with the site plan. Equipment specifications, electrical design, structural information, and other documents requested by the city or county. Local governments generally require approval before installation, and an inspection follows construction to verify that the array was installed safely. The U.S. Department of Energy notes that permitting and inspection rules, details, and fees can vary by jurisdiction. Administrative errors or local backlogs can also affect the review process.
California homeowners should also expect utility paperwork. Under California Rule 21, interconnection requirements address how generating facilities connect, operate, and use metering while protecting grid safety and reliability. The California Public Utilities Commission explains that PG&E, Southern California Edison, and San Diego Gas & Electric each administer Rule 21 in its own service territory. LADWP has its own utility procedures. In practice, application forms, technical requirements, review steps, and approval sequence can differ based on the utility serving the property.
| Review. | Primary reviewer. | What it covers. |
|---|---|---|
| Construction permit. | Local AHJ. | Plans, code compliance, and project approval. |
| Final inspection. | Local AHJ. | Installed equipment, wiring, mounting, and safety. |
| Interconnection. | Serving utility. | Grid connection, operating requirements, and authorization. |
Homeowners can make the process easier by providing accurate utility bills and confirming the serving utility. They should also disclose planned electrical upgrades and respond promptly when the installer needs signatures or access.
Ask who is responsible for submitting the permit and interconnection applications, tracking corrections, scheduling inspection, and requesting permission to operate. Do not assume that paying a deposit or completing roof work means the system can be switched on. The system should be energized only after the required inspections and utility authorization are complete.
There is no universal California approval timeline. City or county workload, project complexity, correction requests, utility territory, service-panel conditions, and whether storage is included can all change the sequence. The CPUC's Rule 21 guidance is a useful starting point, while AMECO's solar solutions page explains how site conditions and system design inform the project. A qualified installer should confirm current requirements for the specific property rather than promise a fixed approval date.
What happens on installation and inspection day?
Installation day is the point where the approved design becomes a working system. A professional crew should follow the permitted plans, protect the home while work is underway, and explain any field condition that requires a decision. Homeowners should not perform electrical or rooftop work themselves. The U.S. Department of Energy notes that permitting and inspection help confirm that a solar installation is safe and properly installed.
- Prepare and protect the work area. The crew reviews access points, stages equipment safely, and protects landscaping, walls, walkways, and roofing surfaces from unnecessary damage. Before work begins, confirm where materials will be placed and how the crew will keep debris contained.
- Verify the roof and mounting locations. Installers confirm the approved layout against the roof's actual condition. They identify rafters or other structural attachment points, account for setbacks and obstructions, and install flashing and weatherproofing around penetrations. If the roof needs repair or replacement, coordinate that work before mounting solar. AMECO's roofing for solar panels guidance explains why roof condition matters to the installation plan.
- Install the racking and modules. The crew secures the racking system, then attaches the solar modules according to the approved design. They check alignment, attachment points, clearances, and cable management as the array takes shape. The final module count and placement should match the documents submitted for permitting, unless a documented field change is approved.
- Mount inverter equipment and complete wiring. Inverters convert the electricity produced by the modules into usable household power. Depending on the design, the project may use string inverters, microinverters, or related equipment. Installers connect the array to the inverter and electrical equipment, label circuits, install required safety components, and keep conductors protected from weather and physical damage. See AMECO's overview of essential solar system components for a component-by-component explanation.
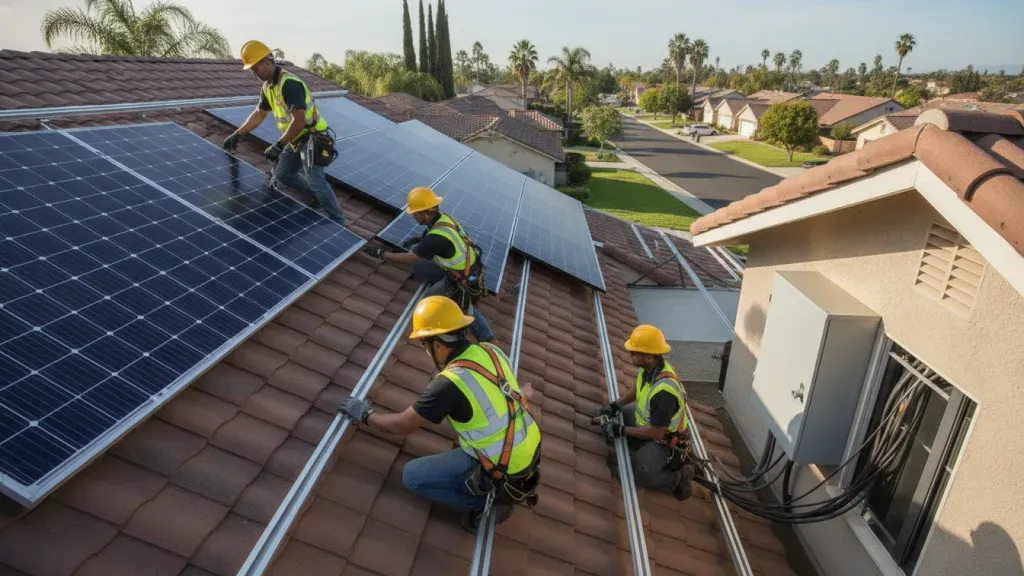
- Commission and test the system. After installation, the crew checks connections, verifies equipment communication, and performs commissioning tests. Monitoring equipment should be configured so production data can be viewed after activation. The installer should also review shutdown procedures, basic system operation, and any battery or backup features included in the design.
- Complete the local inspection. The permitting authority or its inspector reviews the completed array and related electrical work for compliance with the approved plans and applicable safety codes. California requirements vary by city, county, and project. The Department of Energy confirms that local governments have different permitting and inspection rules.
- Resolve corrections and preserve records. If the inspector identifies a correction, the installer addresses it and schedules a reinspection when required. Ask for copies of the final plans, inspection approval, equipment documentation, monitoring instructions, and records of any approved changes. Utility interconnection and permission to operate generally follow the permitting and inspection stage, so the system may not be ready for normal operation immediately after the crew leaves.
A careful handoff is as important as the physical installation. Before signing off, walk the site with the installer, note the location of shutoffs and equipment, and confirm who will coordinate remaining utility steps. The sequence and timing depend on the property, local authority, equipment, and utility territory, so treat any general installation timeline as an estimate rather than a promise.
How are interconnection, activation, and monitoring completed?
After the installation passes its required inspection, the project moves from construction into authorization and operation. The local authority having jurisdiction confirms that the installed array meets applicable safety requirements. The utility then reviews the interconnection materials and completes the steps required to connect the system to the grid. The U.S. Department of Energy describes this sequence plainly: utility connection follows permitting and inspection, after which the system can begin generating power. Requirements and responsibilities can vary by jurisdiction, property, and utility territory.
In California, the interconnection process is shaped by the utility serving the home. California Public Utilities Commission Rule 21 describes interconnection, operating, and metering requirements for certain generating facilities. While each investor-owned utility administers the rule in its own territory and maintains its own version. That means a homeowner in PG&E, Southern California Edison, or San Diego Gas & Electric territory may encounter different forms, technical requirements, or review steps. LADWP customers also need to follow that utility's applicable process. The installer should identify the responsible utility, submit the required documentation, and explain which actions, if any, remain with the homeowner.
What happens before the system is turned on?
Before activation, the project team confirms that inspection documentation is complete and that the utility has authorized operation. A meter change, meter reconfiguration, or other utility-side step may be necessary, depending on the existing service and the approved system design. Do not assume that energized equipment means the system is authorized to export electricity. The system should be operated according to the utility's approval and the installer's instructions.
A proper handoff also includes system records. Keep the final design or as-built information, inspection approval, interconnection authorization, equipment documentation, and monitoring login details in one place. These records can help when troubleshooting, transferring property information, requesting service, or evaluating future electrical work. They also make it easier to understand which equipment is producing power and which component may need attention if performance changes.
How does monitoring support the homeowner?
Monitoring equipment reports system activity through a gateway, inverter platform, or manufacturer application. During handoff, the installer should show you how to view production, recognize normal status indicators, and report an alert. Monitoring is a diagnostic aid, not a guarantee of a particular production level. Weather, shade, equipment settings, roof conditions, utility interruptions, and household electricity use can all affect what you see.
If outage resilience is a priority, ask how a battery changes the operating sequence. A battery may store available solar energy for later use, but backup coverage depends on the selected equipment, essential-load circuits, electrical configuration, and approved design. Review solar battery storage installation considerations before finalizing the equipment package, especially if your household relies on medical devices, home offices, or other critical loads.
Once authorization and handoff are complete, retain the records and use monitoring to spot unusual changes rather than to make assumptions from a single day's data.
What should homeowners ask before approving the project?
Before signing a solar agreement, make sure you understand what is included, who is responsible for each approval, and how the system will be supported after activation. A clear proposal should connect the design to your home's energy use, roof condition, electrical setup, equipment choices, and utility territory rather than relying on a one-size-fits-all package.
- What exactly is included in the scope? Ask whether the proposal covers site measurements, system design, equipment, racking, wiring, permitting, installation, inspection, utility interconnection, commissioning, monitoring setup, and homeowner training. Confirm which items are excluded or may require a change order.
- Is the roof ready for the project? Ask when the roof was installed or last replaced, whether its condition and structure have been evaluated. And how penetrations, flashing, weatherproofing, and future roof work will be handled. If repairs or replacement are needed, clarify whether the solar and roofing work will be coordinated. AMECO's guide to roofing for solar panels explains the issues worth reviewing.
- Why were these system components selected? Request the panel, inverter, racking, and monitoring specifications, along with an explanation of how they fit the property's energy needs and roof layout. If a battery is included or under consideration, ask what loads it is intended to support. How backup operation works, and what additional equipment or approvals may be required.
- Who handles permits, inspection, and utility paperwork? Local permitting and inspection requirements vary, and California utility procedures can differ by territory. Confirm who prepares and submits the permit package, responds to corrections, files the interconnection application, and tells you when the system is authorized to operate. Do not assume that installed means fully interconnected.
- What will I receive after commissioning? Ask how monitoring access will be set up, what normal production information you should review, and whom to contact if the system reports an issue. Request copies of the final design, equipment manuals, inspection approval, utility correspondence, monitoring instructions, and applicable service or warranty documents.
Also ask how future changes, such as a main-panel upgrade, electric vehicle, heat pump, or battery, could affect the design. Comparing these answers across proposals is more useful than comparing system size alone. For more context on the equipment itself, review the guide to essential solar system components.
Get An Estimate when you are ready to discuss a project-specific design and approval path.
Frequently Asked Questions
Can I install solar panels myself?
Homeowners can research equipment and prepare questions, but rooftop solar should not be treated as a do-it-yourself electrical project. A qualified installer must evaluate the roof, structural conditions, electrical service, safety requirements, permits, inspections, and utility interconnection. Professional installation also helps coordinate the solar array with roofing work when the roof needs repair or replacement.
How do I know whether my roof is ready for solar?
Review the roof's age, replacement history, condition, orientation, shade, and available area. A solar installer, roofing professional, or structural engineer can assess solar suitability, while an on-site evaluation can verify roof condition, dimensions, electrical compatibility, and structural capacity. If the roof is near the end of its serviceable life, resolve that question before mounting panels.
Who handles solar permits in California?
The installer commonly prepares and submits the permit package, but the authority having jurisdiction reviews the project under local requirements. California permitting and inspection rules, details, and fees vary by jurisdiction, so homeowners should confirm responsibilities with their installer and local building department. The U.S. Department of Energy permitting guidance explains that local governments generally require a permit before rooftop panels are installed.
When can my system be turned on?
After installation, the project typically needs a local inspection and utility interconnection approval before normal grid-connected operation. The exact sequence depends on the authority having jurisdiction and utility territory. In California, investor-owned utilities administer their own versions of Rule 21, so requirements can differ between PG&E, SCE, and SDG&E territories. The CPUC describes these interconnection requirements in its Rule 21 guidance.
Get started with a project-specific solar estimate
Every California solar project depends on the home, roof, energy use, equipment, utility territory, and any battery backup goals. A project-specific review can help you understand the right sequence, identify questions about roofing or electrical readiness, and plan the next step with clearer expectations. To request an estimate for solar, roofing, or battery backup planning, get an estimate from AMECO Solar & Roofing.


.svg)
