


Blog
Need to get up to speed on solar or roofing? Ameco has deep reach and insights into the latest and greatest technology and innovations.
10.23.2026
NEM 3.0 California refers to the state’s shift from traditional net energy metering to net billing for many new solar customers. The change affects how exported electricity is valued, so homeowners should compare energy use, utility rules, and battery options before choosing a system. The practical question is not simply how much a roof can produce; it is how well production lines up with household use and the tariff that governs imports and exports.
Request a solar and roofing estimate
What does NEM 3.0 mean for California homeowners?
The California Public Utilities Commission (CPUC) adopted the Net Billing Tariff, commonly called NEM 3.0, for customers of the state’s large investor-owned utilities. It changed the compensation framework for electricity sent from a home solar system to the grid. Exact bill effects depend on the utility, rate plan, system configuration, and when electricity is generated and used.
Under a net billing structure, electricity used at home and electricity exported are treated differently. Solar power that serves appliances in real time can reduce the amount drawn from the grid. Surplus power may be exported, but the credit is not necessarily equal to the retail price paid to buy power at that moment. The CPUC’s overview of net energy metering and net billing describes the customer-generation framework and transition. Confirm current terms with your utility and review the tariff that applies to the project.
In practice, policy labels do not determine a household’s result by themselves. Two homes with similar annual electricity use can have different patterns: one may use substantial power during sunny hours, while another may consume most electricity after work. Their export and import profiles differ, which is why a proposal should explain the timing assumptions rather than rely only on an annual production total.
How is net billing different from older net metering?
Traditional net metering generally credited exported electricity at a rate closer to the retail price of electricity. Under the newer net billing approach, exported power receives credits based on time-dependent values, which can differ from the price of electricity the household buys. This makes timing more important.
For example, a home may produce abundant electricity around midday when demand is modest. In the evening, when solar production falls and appliances are active, the home may draw electricity from the grid. A battery can store some midday surplus for later use, subject to equipment limits, system design, and household operating needs. Solar used immediately at home and solar exported to the grid therefore have distinct roles in the energy picture.
These differences do not mean every home needs the same equipment or that a battery will always be the right choice. A useful proposal should show how the design responds to the household’s load profile, utility tariff, roof, and export assumptions. Ask whether the estimate separates self-consumed solar, exports, battery charging, and grid imports so you can see what drives its projection.
What should you examine before estimating solar value?
Begin with actual electricity use rather than a generic system-size target. Gather several recent bills if available, note seasonal changes, and identify major loads such as air conditioning, electric vehicle charging, or electric water heating. Also consider planned changes: a new EV or heat pump can alter future demand. Bills show total energy and charges, but they may not give a complete picture of the hours when power is consumed, so ask what interval data or other usage information the design uses.
- Utility and rate plan: Identify the serving utility and current rate schedule. Import prices, export values, and relevant time periods can vary.
- Usage by time: Note when people are home and when large appliances run. Daytime consumption may use solar directly.
- Seasonal pattern: Compare summer and winter bills. Cooling, heating, and daylight vary by season, affecting both production and demand.
- Roof condition: Check roof age, material, orientation, shade, and repair or replacement plans before panels are designed.
- Outage priorities: List circuits or equipment you would want powered during an outage. Backup design differs from bill-focused design.
- Proposal assumptions: Ask what production, export, usage, and rate assumptions were used, and how changes affect the estimate.
For a starting point, review AMECO’s residential solar solutions, its explanation of how net metering works, and the basics of a photovoltaic system. A system estimate should use your property and utility details, not a statewide average.

A useful preparation exercise is to map a typical weekday and weekend. Write down when the home is occupied, when cooking or laundry happens, and whether vehicle charging can be scheduled. This is not a substitute for measured data, but it helps identify questions for the designer. If the household expects to electrify more appliances, note those plans and approximate when they may happen. A system sized only around yesterday’s use may not reflect a near-term change, while a design that assumes unconfirmed future loads can also mislead.
Does a battery make sense under NEM 3.0?
A battery can store some solar electricity for use after sunset or during certain outages. Under time-based export values, shifting energy from sunny hours to later household use may be useful for some homes. However, the answer depends on system cost, battery capacity, rate plan, load pattern, equipment settings, and household goals. It is helpful to separate two reasons for storage: managing energy use under a tariff and supplying selected loads when grid power is unavailable. A system can be designed with one or both priorities, but the expected operation needs to be stated clearly.
Consider the practical differences:
| Configuration | How it is used | Key questions |
|---|---|---|
| Solar without a battery | Serves daytime loads; surplus may be sent to the grid | How much power is used while panels produce? What export credit applies? |
| Solar with a battery | Stores some energy for later use and may support selected loads in an outage | What capacity and backup circuits are needed? How will it operate under the utility rate? |
| Battery added later | Potential future addition, if system and site support it | Will the inverter and electrical design accommodate it? What retrofit work may be required? |
Ask the designer to explain how much of the home will be backed up, which loads are prioritized, and how the system behaves during an extended outage. A battery’s usable energy and power output are not interchangeable: the first affects how long loads may run, while the second affects which loads can operate together. The exact answer depends on the selected equipment and design. Clarify whether the system is intended to recharge from solar during an outage and what operating conditions limit that capability.
A battery is not an automatic route to lower bills or whole-home backup. Ask what loads can be supported, for how long under stated conditions, and what happens when the battery is depleted. Explore home battery backup considerations and compare them with your outage priorities. The battery system FAQ is another place to review general questions before discussing a specific design.
How do roof condition and solar design connect?
Solar equipment is planned around the roof’s usable area, orientation, shade, structure, and electrical layout. If a roof is nearing the end of its useful life or needs repairs, resolving that work before installing panels can avoid having to remove and reinstall equipment later. The right sequence depends on inspection and project scope.
When comparing options, ask whether the proposal includes a roof assessment, what repairs are recommended, and how the solar layout would change if roof work is needed. Request a written scope that distinguishes roof repairs or replacement from solar equipment and electrical work. It should also make clear who coordinates permits, inspections, and the sequence of work. An integrated solar-and-roofing approach can make coordination more straightforward, but the project still needs a clear written scope. See AMECO’s roofing services and solar and roofing planning guide for related considerations.
Before work begins, confirm how the proposed panel layout relates to roof planes and any obstructions, and whether roof work changes that layout. If roof replacement is likely soon, ask how project timing affects the installation sequence. Homeowners can also ask how the system will be documented for future roof maintenance. These questions help avoid treating roof readiness as a separate afterthought when it can affect design and project coordination.
How can you compare solar proposals fairly?
Do not compare proposals by panel count alone. Review assumptions, equipment, roof work, battery configuration, utility treatment, and payment structure together. Ask each provider to explain its model in plain language and identify what is excluded. To make a meaningful comparison, give each provider the same bills and describe the same expected changes to the home.
- Match the proposals to the same recent energy-use information and planned household changes.
- Check estimated production and ask how shade, roof orientation, and seasonal variation were modeled.
- Confirm which utility tariff and export assumptions are used, and whether the proposal distinguishes energy used at home from energy exported.
- Compare equipment specifications, monitoring, electrical work, roof scope, permitting, and interconnection responsibilities.
- Review ownership or prepaid lease terms carefully. Clarify payment timing, maintenance responsibilities, transfer conditions, and obligations in the agreement.
- Ask what assumptions could change after site assessment, permitting, or utility review, and how revisions would be documented.
- Request a plain-language explanation of projected bill effects, including charges that may remain and what could cause actual results to differ.
AMECO has served California homeowners since 1974 and provides solar and roofing services under one company. Learn more about its company background and project approach. A written proposal should let you trace the result back to assumptions about usage, production, exports, and the tariff rather than asking you to accept a single headline figure.
For an initial comparison, the solar cost calculator can help organize questions, but a final design and estimate require property-specific review. Bring a list of priorities, such as daytime bill management, outage support, roof work, or capacity for a future EV. Ranking these priorities can help clarify tradeoffs when a single design cannot maximize every goal at once.
What incentives or program details should you verify?
Incentives and eligibility rules are not universal. They can depend on project ownership, equipment, installation date, the customer’s tax situation, and current program requirements. Do not rely on a proposal’s incentive line without checking its source and applicable conditions with a qualified tax professional or administering authority. Ask the provider to identify which program or rule is being discussed, the relevant date, and what assumptions about ownership or eligibility the estimate makes. Avoid treating a possible incentive as guaranteed savings.
For utility billing, confirm the applicable tariff and enrollment steps directly with the utility. For state policy background, consult the CPUC’s California consumer guide to going solar. The guide addresses considerations such as contractor selection and financing; check current program documents because policy information can be revised. Keep copies of utility correspondence and project documents so the assumptions discussed during proposal review can be compared with the final interconnection and billing setup.
How can you turn these details into a useful decision?
One practical way to keep the analysis manageable is to separate facts, estimates, and preferences. Facts include the utility, current tariff, roof condition, historic bills, and appliance inventory. Estimates include modeled production, expected self-consumption, potential exports, and battery dispatch. Preferences include the importance of backup, willingness to shift appliance use, and whether roof work should be coordinated with solar. Keeping these categories distinct makes it easier to spot where a proposal depends on an assumption rather than a known condition.
For example, imagine two households with comparable annual use. Household A is home during the day and runs cooling and laundry while panels are producing. Household B is away until evening and charges an EV after returning. A single annual kilowatt-hour figure hides this difference. The first home may use more solar directly; the second may export more midday energy and import later. A designer might explore different operating schedules or storage options, but the household should ask for the assumptions and avoid treating an illustrative example as a forecast for its own bills.
Build a side-by-side worksheet with a row for each major assumption: rate plan, annual consumption, seasonal variation, estimated solar production, expected exports, battery configuration, backup loads, roof scope, and payment arrangement. Add a column for the evidence behind each item, such as a utility bill, site observation, equipment specification, or estimate. If two proposals disagree, ask each provider to explain the difference. The goal is not to force every proposal into the same design; it is to understand why their recommendations differ and which assumptions matter to you.
Also ask what happens if a key input changes. If the household adds an EV, if roof repairs are needed, or if the utility tariff changes, which parts of the proposal need to be revisited? A thoughtful review identifies these dependencies before signing. It can also clarify which decisions are time-sensitive and which can be deferred, such as whether a battery-ready electrical design is feasible even if storage is not installed immediately.
What does a property-specific solar review include?
A useful review connects the home’s electrical use with site conditions and utility requirements. Start with bills and interval data where available. Confirm the service address and utility account information are handled through appropriate channels, and ask what data will be used for the design. Then review roof planes, shade, structural considerations, and electrical equipment. The proposal should identify any additional site assessment needed rather than imply that a bill alone settles system size.
Ask for the proposal to show the proposed system layout and the estimated production basis. Clarify whether the calculation assumes typical weather, particular panel orientation, or shade mitigation. If battery storage is included, ask for capacity, output, reserve settings, and the circuits selected for backup. If there is no battery, ask how daytime use and exports appear in the bill projection. Each answer should connect to a choice the homeowner can make, not simply add technical detail without explaining its impact.
Project scope deserves the same care. Identify whether roof repair or replacement is included, whether electrical upgrades are anticipated, and who handles permit applications and utility interconnection paperwork. Ask what may change after the site visit or utility review, how those changes will be priced or approved, and whether any work is outside the estimate. If the home is part of an association or has other approval requirements, identify those early and confirm who is responsible for the relevant submissions.
AMECO’s project examples can help readers see the kinds of residential work shown by the company, while its residential solar information offers another starting point. Examples are not substitutes for a site-specific assessment. Use them to prepare questions about layout, roof coordination, and equipment rather than assuming another home’s design will fit yours.
What should you ask about daily operation and monitoring?
Solar and storage equipment does not remove the need to understand how a system operates. Before deciding, ask what monitoring tools are included, what information they display, and who can help interpret a warning or production change. Learn how the inverter reports status, whether battery settings can be adjusted, and what conditions might temporarily limit output. The exact functions depend on the equipment selected, so request a demonstration or clear written explanation of the proposed setup.
Consider how the household will use energy once the system is active. Flexible activities such as laundry, dishwashing, and EV charging may sometimes be scheduled for solar production hours, subject to household needs and equipment settings. This does not mean every homeowner must change routines. Rather, a conversation about flexibility helps the designer understand whether the system should prioritize immediate use, battery charging, or backup reserves. If nobody is home during the day, ask whether automated schedules or battery settings can align with evening demand.
For an outage, understand the boundaries before relying on backup. Grid-connected solar systems commonly shut down during outages unless designed with suitable equipment and controls to operate safely in backup mode. A battery system may serve selected circuits, but the supported loads, duration, and ability to recharge depend on design and conditions. Identify essentials such as refrigeration, communications, lighting, or medical equipment and discuss their electrical demand with a qualified designer. Do not assume every outlet or large appliance will remain powered.
After installation, keep the final design, equipment documents, utility approval, and operating instructions together. Record who to contact for system support and how to report a concern. If the roof later needs maintenance, use the system layout and installation records to plan work with the appropriate professionals. Clear documentation helps future service conversations and makes it easier to distinguish a utility-billing question from an equipment or roof issue.
Frequently asked questions about NEM 3.0 California
Does NEM 3.0 mean solar no longer works in California?
No. It changes how exports are credited, not whether a home can generate and use solar electricity. The effect on a particular project depends on usage, rate plan, equipment, and system design.
Do I need a battery with a new solar system?
Not necessarily. A battery may help shift solar energy to later use or support selected loads during outages, but its fit depends on household goals, costs, site design, and utility rules. Compare a proposal with and without storage.
Can I use an older net-metering arrangement?
Eligibility and transition rules depend on utility, application and interconnection status, and current program rules. Ask the utility and installer to explain which tariff applies and what deadlines or requirements matter.
Will solar eliminate my electricity bill?
Not necessarily. Utility charges, remaining grid use, export credits, and rate-plan terms can leave a bill even when a home has solar. A proposal should describe its assumptions rather than promise a particular bill outcome.
What is a practical next step for a California homeowner?
Gather recent utility bills, note your roof’s condition, and write down whether your priority is bill management, backup power, or both. Then compare a property-specific solar design and ask how NEM 3.0 assumptions shape the proposed system. If you request estimates, provide the same information and questions to each provider so the options are easier to evaluate side by side.
Request a property-specific estimate
A careful review of your utility tariff, energy use, roof, and backup priorities can help you choose a system that fits your home rather than relying on a one-size-fits-all claim.
10.22.2026
Understanding solar panel insurance California homeowners may need starts with one essential step: ask your own insurer how the panels and related work fit into your specific policy. Coverage can vary by carrier, contract, roof, system design and property. A conversation before installation can help you identify questions early and know what information to keep if you ever need to report damage.
Discuss your solar and roofing project
Why should you talk with your insurer before installing solar?
Solar equipment becomes part of the physical risk profile of a home. The installation may change the roof surface, add equipment and wiring, and introduce new records and maintenance considerations. That does not automatically mean a policy will change in a particular way. It does mean a homeowner should not rely on a general online answer or an installer’s assumptions about insurance.
Ask the insurer to explain how the policy in force applies to the planned system. If you are comparing proposals, describe the proposed equipment and installation as accurately as you can. Request the answer in writing, or ask the representative to point you to the exact policy language and endorsements that apply. Keep the date, representative’s name or reference number, and copies of any follow-up correspondence.
AMECO Solar & Roofing provides solar installation and roofing services in California. Its solar and roofing approach covers project planning through installation. For the insurance decision, however, the insurer and your policy documents are the sources to rely on. A contractor can provide project details, but cannot determine how an individual carrier will interpret its coverage.
Which parts of a solar project should you ask about?
Use clear, separate questions instead of asking only, “Is solar covered?” The phrase can mean several different things: damage to panels, damage to the home, liability for an incident, or costs tied to repairing or removing equipment. Ask about the solar equipment and the roof as related but distinct parts of the discussion.
- Panels and attached equipment: Ask how the policy treats the modules, racking, inverter, wiring and any other equipment included in the planned system.
- Damage to the house: Ask what happens if a covered event damages both solar equipment and the roof or another part of the home.
- Removal and reinstallation: Ask whether the policy addresses the labor or other costs of removing and replacing panels when roof work is needed after a covered loss.
- Liability: Ask whether the installation changes any liability terms or requires information about contractors, work practices or property conditions.
- Policy limits and deductibles: Ask whether limits, exclusions, deductibles or endorsements apply differently to the system or a related claim.
- Notice and documentation: Ask whether the carrier wants project information before work begins and what to provide if damage occurs.
These are questions, not assumptions that a particular policy includes or excludes a cost. Ask the insurer to distinguish damage caused by a covered event from wear, maintenance, installation defects or other circumstances. The applicable wording and facts of a loss matter.
What coverage questions should you put on your checklist?
Write your questions down before calling so you can compare the answers with the policy documents later. If a representative gives a brief yes or no, ask what the answer means for a specific example. For instance, ask how the policy would address a storm-damaged panel that also damages roofing material, and whether separate deductibles or limits could apply. Avoid treating a hypothetical answer as a promise of claim payment.
- Is the planned solar system treated as part of the dwelling, other property, or another category? Ask which policy section applies and whether the answer depends on how the system is attached or owned.
- Does the policy require a change in the insured amount? Ask whether the system’s installation value or any other property information should be reflected in the policy. Do not choose a new limit based on a contractor’s estimate alone.
- Are there relevant exclusions or endorsements? Ask for the names and wording of any provisions that could affect panels, roof penetrations, electrical equipment, water intrusion, wind, fire or other perils relevant to the home.
- Could a claim involve more than one deductible or limit? Ask the insurer to explain how it evaluates damage to panels, roof and interior areas arising from one event.
- Does the carrier need advance notice or documents? Find out whether you should send the plans, contract, equipment information or completion records before or after installation.
- Who should be contacted if something changes? Confirm the right channel for reporting a completed project, a roof replacement, a system alteration or a loss.
When the answer is unclear, ask the carrier to identify the controlling policy language. A general description from a call center may not include all policy conditions. You can also consult the California Department of Insurance for consumer insurance information and ways to understand your options. The department is not a substitute for reading your policy or obtaining a coverage explanation from your insurer.
How should roof condition factor into the discussion?
The roof is both the surface that supports the system and a building component that may eventually need repair or replacement. Before work starts, document its visible condition and discuss the roof’s age, material, known leaks, past repairs and any planned roofing work with the insurer and installer. If the roof needs attention, consider the sequence of roof and solar work rather than assuming panels can remain in place throughout future repairs.
Ask the insurer whether the roof’s condition or prior damage affects relevant coverage, and ask the installer what roof work is included in the proposal. These are different questions. The insurer explains policy terms; the contractor explains the proposed scope. A written scope should make clear what is being installed and whether roofing work is included, excluded or handled separately.
For a project that may involve both roof and solar work, review AMECO’s information about coordinating solar and roofing and its roofing services. These resources can help frame the project conversation, but they do not determine policy coverage. Confirm any roof-specific insurance terms directly with your carrier.

Questions about roof work and future repairs
- Does the insurer need a roof inspection, photographs or other condition records before installation?
- Are there policy requirements for prompt reporting of leaks or other damage?
- If the roof is damaged, how does the insurer distinguish the cost of repairing the roof from the cost of removing or reinstalling solar equipment?
- Would a later roof replacement require advance notice, a separate contractor, or information about the solar system?
- What records should I keep to show the roof condition before and after the project?
Do not assume that a roof issue is caused by the solar installation, or that it is unrelated. If a problem appears, document when it began, where it is located and what changed. Notify the appropriate parties promptly and follow the policy’s reporting instructions. Avoid authorizing extensive repairs before understanding any inspection or documentation requirements, except where immediate action is needed to prevent further harm or address a safety concern.
What should you ask about equipment damage?
Panels are only one part of a solar array. The planned equipment may include racking, an inverter, electrical components and monitoring hardware. If the home includes battery storage, ask specifically about the battery as well; do not assume that an answer about rooftop panels automatically addresses equipment installed elsewhere. System configuration, ownership and policy language can affect how the insurer views each component.
Use concrete scenarios when asking about damage. Ask how the insurer handles a panel cracked by an external impact, equipment affected by a fire or water event, or damage to wiring associated with a larger home loss. Ask whether the policy has special limits or exclusions for equipment at the property. The insurer may need the equipment schedule, location and other system details to give a useful response.
For homes considering battery storage, review the project details and ask about the proposed equipment’s location and installation. AMECO’s battery backup information can help you prepare questions about a system, but coverage decisions remain with the carrier. If your system includes a battery, record its model and serial number, installation date and location along with the other project documents.
Be precise about causes. Damage from a sudden event, a gradual condition, a manufacturing issue or an installation problem may be handled differently under a policy or warranty. Ask the insurer what documentation it expects and ask the installer or equipment provider about the appropriate warranty channel. A warranty and an insurance policy are separate arrangements; one does not automatically replace the other.
What liability questions belong in the conversation?
Liability questions are not limited to whether a panel is damaged. Homeowners may want to ask whether adding equipment or arranging work affects the policy’s liability provisions, whether a contractor’s insurance information should be retained, and what to do if an incident involves a visitor, a neighboring property or property damage. The answer depends on the circumstances and the specific policy.
Ask your insurer these direct questions:
- Does the planned installation require any change to my liability coverage or a notice to the carrier?
- Should I provide the contractor’s certificate of insurance or other project documents?
- Are there policy conditions related to construction work, roof access or temporary work at the home?
- How should I report an incident involving property damage or an injury during or after installation?
- Does the answer change if I own the system, use a lease arrangement, or have battery equipment?
Do not infer that a contractor’s insurance means the homeowner has no responsibilities, or that the homeowner’s policy covers every contractor-related event. Ask the insurer and contractor to explain their respective roles, and keep copies of relevant documents. If an incident occurs, follow the insurer’s reporting instructions and avoid making statements about fault before the facts are understood.
What records should you keep before and after installation?
A well-organized file makes it easier to answer questions later. Keep digital copies in a secure location and retain original records where appropriate. The exact documents a carrier may request will vary, so ask before work begins and update your file when the system is changed, repaired or expanded.
- Current homeowners policy, declarations page, applicable endorsements and renewal notices.
- Written answers from the insurer, with the date and contact or reference details.
- Solar and roofing proposals, contracts, scope descriptions and change orders.
- System plans or equipment schedules identifying panels, inverter, battery if applicable, and equipment locations.
- Permits, inspection records and documents showing project completion, when provided.
- Before-and-after roof photographs, plus clear images of the completed installation.
- Invoices, payment records, warranties and manufacturer documentation.
- Maintenance, repair and service records, including dates and descriptions of work.
- Claim correspondence, adjuster communications, estimates and receipts if a loss occurs.
Make photographs useful: take wide views that show the roof and system location, then closer images that document visible equipment and conditions. Keep the original files when possible and note when they were taken. Avoid climbing onto a roof if it is unsafe; ground-level images or records supplied by a qualified professional may be more appropriate.
If you are still gathering project details, AMECO’s residential solar information and project examples can help you understand the kinds of materials to discuss with a contractor. Examples do not establish what your carrier will cover. Give the insurer accurate information about your own home and proposed equipment.
How can you compare insurer answers with your project options?
Insurer conversations are more useful when the project information is specific. If you are reviewing different proposals, collect the same basics for each: system configuration, equipment locations, whether storage is included, roof work, ownership arrangement, and the planned scope. Then ask the insurer whether any differences matter to its policy review. Do not assume that two projects are equivalent merely because both are described as rooftop solar.
| Project detail | What to share or ask | Why it matters to the discussion |
|---|---|---|
| Panels and mounting | Proposed layout, equipment schedule and attachment details | Helps the insurer understand what is being added to the roof and what records may be needed. |
| Roof condition | Roof age if known, visible issues, previous repairs and planned work | Separates existing roof concerns and project scope from questions about future damage. |
| Inverter and electrical equipment | Equipment type and location, where available | Clarifies which system components are part of the insurance conversation. |
| Battery storage | Whether included, equipment location and model information | A battery may have different location and documentation details than rooftop panels. |
| Ownership and contract | Whether the system is purchased or arranged through another payment or ownership structure | Prompts the insurer to explain whether ownership affects its questions or policy treatment. |
| Roof removal or replacement | Ask how costs and procedures are handled if a covered loss requires roof work | Identifies whether removal and reinstallation are addressed and what terms apply. |
Use the table as a conversation guide, not as a coverage chart. It does not promise that a policy covers an item or expense. Carrier answers should be tied to the current contract and to your home’s details. If you are comparing costs or system designs, AMECO’s solar project estimate resource may help you organize the project discussion; any project-specific estimate and scope need to be reviewed on their own terms.
How can you prepare for a policy renewal after adding solar?
Renewal is a useful point to check that your insurer has current information about the home. Do not assume that a policy file updated during installation will remain accurate after later changes. Before the renewal date, review the declarations page and ask whether the carrier has recorded the solar system, any battery, the roof work and the insured property details in the way it expects. If the policy has changed, compare the new documents with the prior version and ask about terms you do not understand.
Keep a short project summary with the date the system was completed, the equipment included and any roof work performed. If you later add storage, replace an inverter, expand the array or make a substantial roof repair, ask whether the insurer needs an update. The carrier may not require the same information in every situation, so use its guidance rather than guessing. If you change insurers, provide accurate answers on the new application and do not assume a prior carrier’s treatment will carry over.
When comparing policies, do not focus only on a premium quote. Ask how each option addresses the system and related roof work, what limits and deductibles apply, and whether relevant exclusions or endorsements differ. Confirm that the same facts about the property and equipment were used in each discussion. A lower price does not by itself establish that two policies provide the same protection. For help organizing project information, review the factors that can affect solar installation proposals; policy comparison still belongs with the insurers.
Discuss your solar project details
What if the home is sold or the solar system changes?
A home sale, system expansion or change in equipment can create new questions for both the homeowner and the insurer. If you plan to sell, check the solar agreement and system records so you can explain what equipment is present and how it is owned. Ask the insurer whether a pending sale affects policy dates or reporting obligations. A buyer should confirm coverage with their own insurer rather than relying on the seller’s coverage answer, because the buyer’s policy and property circumstances may be different.
For an addition or replacement, record what changed and when. Keep the updated equipment schedule, invoices, permits or inspection records when available, and photographs of the work. Ask the carrier if it needs revised information about the system value, location, ownership or roof condition. If the work involves a battery, include its placement and model details rather than describing the change only as “more solar.” Specific facts help the representative give a more useful answer.
Ask project providers to explain the work scope in plain terms and retain the signed documents. If a system is removed temporarily for roof work, record who is responsible for handling it, what condition it was in beforehand and how the work will be documented. These records do not decide whether a claim is covered, but they can help clarify the sequence of events if a question arises later.
How can you keep roof and system records useful?
Choose a consistent place to store policy documents and project records, such as a secure digital folder with a backup. Use clear file names that include the date and describe what each item shows. For example, separate the original proposal, final equipment schedule, roof photographs and insurer correspondence. This avoids relying on memory when the policy renews or an adjuster asks when a condition first appeared.
After a repair, save the work order and photographs showing the repaired area. If a contractor identifies a condition that could affect the roof or electrical system, note the date and request a written description. Keep records of routine monitoring or maintenance if available, but do not treat a monitoring alert as a professional diagnosis. Report problems according to the policy and equipment provider instructions, and retain copies of the communications.
Review the file at least when the policy renews, when roof work is planned, or when the system changes. Remove duplicate or outdated copies only after confirming that the current policy and project records are preserved. A simple, current record set is more useful than a large folder of documents with no dates or context.
What should you do if solar equipment or the roof is damaged?
Start with safety. Keep people away from damaged electrical equipment, exposed wiring or an unstable roof, and follow emergency instructions from local authorities when applicable. Do not touch equipment that may be energized. Once the immediate hazard is addressed, read the policy’s instructions for reporting a loss and contact the carrier through its designated channel.
- Report the event promptly. Ask what claim information the insurer needs and whether there are deadlines or inspection steps under your policy.
- Record what you can safely observe. Take photos from a safe location and note the date, weather or event details, and when you first noticed the damage.
- Protect the property from further damage. Ask the insurer what temporary measures are appropriate and keep receipts for necessary work.
- Do not discard damaged components without guidance. Ask whether the adjuster or another party needs to inspect or document them.
- Notify relevant project parties. Contact the installer, equipment provider or roofer when appropriate, while keeping insurance reporting separate.
- Keep a communication log. Record claim numbers, dates, names and the information exchanged.
Claim decisions depend on policy language, the cause and evidence of loss, and the facts found during review. Do not assume that damage is insured simply because solar equipment is present, or assume it is excluded based on a general statement. If the insurer requests a repair estimate, make sure it distinguishes the affected roof areas, solar equipment and any temporary work as clearly as possible.
How do California homeowners get a clear answer?
There is no single answer that applies to every carrier and every property. The policy, endorsements, system design, roof condition, ownership and the details of a loss can all matter. A short checklist can help keep the conversation focused:
- Describe the proposed system accurately, including battery storage if planned.
- Explain any roof work, known roof concerns or prior damage.
- Ask about property coverage, limits, deductibles, exclusions and liability separately.
- Ask how roof repairs and solar removal or reinstallation are treated after a covered event.
- Request the applicable policy wording or written clarification.
- Save the answer and project records with your policy documents.
- Revisit the conversation after major changes, such as adding equipment or replacing the roof.
For additional project context, read AMECO’s overview of residential solar solutions and its information on solar systems for a home. These resources can help you identify project details to share, while the carrier remains the authority on its own policy terms. If you need help defining the solar or roofing scope, contact the project provider separately from your coverage discussion.
Plan a solar and roofing consultation
Frequently asked questions about solar panels and homeowners insurance
Will installing solar panels automatically raise my homeowners insurance premium?
There is no universal answer. A carrier may consider the home, system, policy and other underwriting details when reviewing a change. Ask your insurer whether the planned installation affects the premium, insured amount, deductible, limits or any policy conditions. Request the explanation for your own property rather than relying on another homeowner’s experience.
Does homeowners insurance cover solar panels?
Coverage depends on the individual policy, carrier, equipment and facts of a claim. Ask how your contract classifies the system and whether specific limits, exclusions or endorsements apply. Confirm whether the answer includes panels and related equipment such as mounting hardware, inverter, wiring or battery storage.
Does insurance pay to remove and reinstall solar panels during roof repairs?
Do not assume that removal or reinstallation costs are included. Ask the insurer how those expenses are treated when a covered event requires roof work, and ask whether the answer changes for routine roof replacement or damage that is not covered. Request relevant policy wording and keep it with the project records.
Should I tell my insurer about a leased or prepaid solar arrangement?
Yes, explain the arrangement accurately and ask whether ownership or contract terms affect the carrier’s questions. Do not assume an insurer will treat purchased, leased or otherwise arranged equipment the same way. Keep the relevant agreement and equipment information available, and ask whether another party has insurance requirements that should be documented.
What should I do if the insurer and installer give different answers?
Ask each party to clarify the part of the question within its role. The insurer should explain its policy terms and underwriting requirements; the installer should explain equipment, project scope and workmanship documentation. Request written information from both and do not treat a contractor’s opinion as a coverage determination. If needed, contact the insurer again with the exact project documents.
What is the next step for your solar and roofing project?
Before you sign or schedule work, gather the proposed system and roof details, contact your carrier, and save its response. If a roof replacement may be part of the project, coordinate the scope early and ask how the work sequence affects access to the roof and system. A project-specific review is more useful than relying on broad statements about what California policies usually do.
Request a project conversation
Solar panel insurance in California depends on your insurer, policy and property, so confirm the terms directly with your carrier and keep the written answer with your home and system records.
10.21.2026
Problems with solar panels on roofs are often connected to the roof, the installation details, or a mismatch between a home’s needs and the system design. A careful review can help California homeowners separate a genuine defect from normal wear, shading, or a performance change that needs a different fix. Here is what to look for, what to ask, and when to get qualified help.
Request a property-specific estimate
What problems can rooftop solar create or uncover?
A solar array is attached to a building system that already has its own age, materials, and maintenance needs. Problems may be linked to roof condition before installation, the way mounting and flashing were completed, electrical components, or access for later repairs. Solar can also make an existing issue harder to notice quickly because parts of the roof are covered.
That does not mean rooftop solar is inherently damaging or that every roof needs replacement first. It means the roof and proposed system should be reviewed together. A good assessment considers the roof covering and its condition, framing and loading, water-management details, electrical design, shading, utility requirements, and the homeowner’s plans for future repairs.
Some warning signs deserve prompt attention: active water entering the home, a burning smell, visible damage to wiring, repeated system shutdowns, or loose equipment after severe weather. Keep away from damaged electrical equipment and do not climb onto a roof to investigate. Contact the appropriate qualified roofing or solar professional; if there is an immediate safety hazard, follow local emergency guidance.
It helps to separate a symptom from a diagnosis. A ceiling mark is evidence of moisture, but it does not identify the entry point. A lower production reading means the system made less energy during that interval, but it does not prove a panel failed. Note the date, weather, location, and what changed; these details give an inspector or service provider a useful starting point and reduce the temptation to guess at the cause.
Could the roof be too old or in poor condition?
Solar equipment may remain in place for many years, so putting it on a roof near the end of its service life can lead to extra work later. If shingles are brittle, tiles are cracked or displaced, the roof has a history of leaks, or repairs are already being planned, those conditions should be addressed before installation is scheduled. A roof inspection should assess the whole roof, not only the visible area around the array.
Age alone does not determine whether a roof is suitable. Materials, installation quality, weather exposure, maintenance history, and the condition of the roof deck all matter. A California homeowner with a relatively new roof can still have localized damage; an older roof may have been maintained well. Ask the roofing professional to describe observed conditions and explain what evidence supports any proposed repair or replacement.
The Colorado Roofing Association’s homeowner guidance on roof readiness for solar panels identifies surface issues such as sagging or uneven areas and missing, curled, or cracked shingles as signs to review. The specific roof materials and climate differ from one home to another, but the practical point holds: evaluate the roof before equipment hides portions of it.
Ask for findings that can be understood and checked. The report or conversation should identify which roof slopes were reviewed, whether visible damage is localized or widespread, and whether the inspector could assess the deck and attic from accessible areas. Photos are useful when they show the area in context, not just a close-up without location. If the recommendation is replacement, ask what condition makes a repair insufficient; if the recommendation is repair, clarify its scope and what remains outside it.
For a roof that needs work, compare the sequence and scope before signing. You might need targeted repairs, a larger roof project, or no work at all. The answer depends on inspection findings. If the home needs roofing and solar, coordinated planning can reduce the risk of installing an array and then removing it soon afterward. AMECO offers both roofing services and solar solutions, so homeowners can explore the two scopes together rather than treating the roof as an afterthought.
How can roof penetrations and flashing lead to leaks?
Mounting hardware must be attached and sealed in a way that works with the specific roof covering and water-shedding design. A leak may arise from poor flashing, an unsuitable attachment, damaged roofing, or a separate roof defect that happens to be near the array. Water can travel along framing or under roofing before it appears on a ceiling, so the spot where a stain shows up may not be the place where water entered.
Look for interior clues such as new ceiling stains, damp insulation, peeling paint, or a musty smell after rain. Outside, from the ground, note visibly displaced materials, sagging areas, or debris. Do not assume a leak is caused by a panel simply because it appears after installation. Record when the issue occurs and where it appears, then ask a qualified professional to inspect both the roof and the relevant solar attachment points.
When arranging an inspection, share the installation date, any prior roof work, photos of the interior symptom, and whether the leak follows particular weather. Ask the inspector to explain the likely entry point and whether the proposed correction involves roofing, solar attachments, or both. A diagnosis that only covers one part of the assembly may miss the source.
A practical sequence can make the visit more useful. First, mark the interior symptom on a simple room sketch and take a photo with the date. Next, note whether it appeared after wind-driven rain, prolonged rain, or another event. Then collect any roof and installation records, including dates of repairs. Give this information to the professional before the inspection, and ask them to record what they could and could not see. If the source is uncertain, ask whether additional observation during rain or a follow-up inspection is appropriate rather than accepting an unsupported conclusion.

Can the roof support the equipment?
A solar project adds equipment and mounting hardware to a structure. The relevant question is not a generic panel weight figure; it is whether the roof framing and attachment plan are suitable for this particular building and system. Roof shape, spans, framing condition, existing loads, local requirements, and the planned equipment all inform the assessment.
Do not infer structural safety from the fact that a roof has held up for years or that a neighbor has solar. Homes can look similar from the street and differ in framing, additions, repairs, and roof condition. Ask how the project review accounts for the home’s structure and which professional is responsible for evaluating any concern. If the assessment calls for engineering review, ask what information is needed and whether it is included in the proposal or handled separately.
Warning signs such as visible sagging, unusual movement, or damaged framing deserve investigation before installation. They do not, by themselves, prove that a roof cannot support solar. A qualified review should distinguish a real structural issue from normal roof geometry and explain the next step in plain language.
When a home has an addition, a past roof repair, or an attic that is difficult to access, tell the project team early. Those details may affect what can be verified during an initial review. If there are plans, permits, or records from previous work, share copies rather than relying on memory. Ask which assumptions remain provisional until a closer inspection and whether the design or schedule would change if those assumptions prove inaccurate. This makes the decision process clearer without asking a homeowner to perform structural calculations.
Will solar make roof replacement or repair harder?
Panels cover portions of the roof, which can complicate access when roofing work is needed underneath or nearby. Depending on the work, some or all of the array may need to be disconnected and removed, then reinstalled and inspected. That adds coordination and may affect the schedule and total project scope. The exact work depends on the roof and system; do not assume every repair requires full removal.
If you expect to replace the roof in the near future, compare the total project sequence before proceeding. Ask for a roofing assessment, clarify which roof areas need work, and find out how solar installation timing would change if repairs happen first. If the roof is in good condition, ask how future access and repair responsibilities will be handled. Keep project drawings, equipment information, and completion records where they can be found later.
Roofing and solar coordination also matters when a homeowner is comparing contractors. A single project plan can make it easier to identify where roofing scope ends and solar scope begins, who handles each inspection, and how questions are routed. Read more about planning a solar-and-roofing project together and AMECO’s approach from consultation and design through installation.
Before work starts, ask for a written sequence: who will disconnect the system, how equipment will be protected and stored, who completes the roof work, and who reinstalls and checks the array. Confirm what work requires permits or inspections and who coordinates them. Also ask how a change in scope is communicated if the roofer finds concealed damage after the covering is removed. These questions are useful whether the roof and array are handled in one coordinated project or by separate providers; clear handoffs help prevent a gap in responsibility.
Why might a rooftop system produce less electricity than expected?
Lower-than-expected production is not always a panel failure. Shade from a growing tree, a new building, roof debris, soiling, equipment downtime, inverter or wiring issues, and seasonal changes can all affect output. Utility billing changes can also make the bill feel different even if the system is operating. Compare the system’s production data with the design expectations and the same period of the year, rather than relying on a single bill or one cloudy week.
Start with safe, simple checks. Review the system monitoring application or display for alerts, note when output changed, and compare production across similar seasons if historical data is available. From the ground, notice whether new shade or debris has appeared. Do not open electrical enclosures, handle rooftop wiring, or walk on the roof to clean panels. If the monitoring platform shows an error or the system is offline, contact the installer or service provider listed in your project documents.
A useful comparison uses more than one data point. For example, if a homeowner notices lower output in late winter, compare several days with similar weather and daylight conditions, then review the same season from a prior year if the records are available. Record whether the system showed an alert, whether a tree or nearby structure now casts shade, and whether a power interruption occurred. A brief dip during cloudy weather may not signal a fault; a persistent change or repeated alert is a better reason to request service. Your installer can compare actual system data with the original design assumptions.
Shade can be especially complicated when trees are close to the roof. Trimming may help in some cases, but mature trees provide other benefits and local rules or property boundaries may limit work. Before removing vegetation, understand the source and timing of shade and ask how the design accounts for it. If the system is still being planned, request an explanation of roof orientation, obstructions, and the expected production assumptions for the home.
Homeowners considering storage should also distinguish production from backup. A battery can store or deliver energy according to its design and operating settings, but it does not correct a damaged roof, a faulty panel, or inadequate solar production. Learn about the role of home battery backup and ask how the proposed equipment would work with the solar system and the home’s priorities.
What electrical or equipment issues need a professional?
Solar systems include modules, wiring, inverters, disconnects, and protective equipment. An alert, a system that repeatedly stops producing, visible damage, or a burning odor calls for qualified attention. Keep clear of exposed or damaged wires and do not try to reset, open, or repair equipment unless the manufacturer’s instructions and a qualified professional specifically direct you to a safe action.
When you report a problem, provide the system address, the date the symptom began, any monitoring alert or error code, and whether there was recent weather or construction nearby. Avoid sharing private account credentials. Ask whether the provider needs remote monitoring access or an on-site visit, what area will be inspected, and whether the roof and electrical portions will both be considered. The project’s warranty and service documents may specify how to request support, so review them before authorizing repairs.
For a new installation, ask what equipment is included, where key components will be placed, what monitoring is available, and how the homeowner will be shown normal operation. A useful handoff should help you identify the system’s status and know whom to contact if an alert appears. Manufacturer names alone are not enough; the proposal should explain how components work together in the design.
During a service call, it is reasonable to ask what tests or observations support the diagnosis, what work is proposed, and whether the system will be returned to normal operation before the visit ends. Request a written record of the alert, part or area involved, and any recommended follow-up. If a professional identifies a roof concern while reviewing electrical equipment, ask whether a roofing specialist should evaluate it separately. A clear service record can help a later provider understand what has already been checked.
What routine checks can homeowners do safely?
Routine awareness helps you notice a change without turning roof maintenance into a do-it-yourself electrical job. From a safe position on the ground, look for a new ceiling stain after rain, visible debris or shading changes, damaged-looking equipment, or a change in the system monitoring status. A quick note of the date and condition can help a professional compare the issue with earlier records.
Keep the installation documents, equipment details, roof inspection reports, service contacts, and any repair records together. If a roofing contractor works near the array, tell them solar equipment is present before the visit so the work can be planned safely. If a solar professional needs to access the roof, ask how the roof covering and attachment areas will be protected during the work.
Do not climb onto a roof, step on panels, move wiring, or open electrical enclosures to inspect the system. Do not use tools or cleaning methods that might damage roofing or equipment. If the system appears damaged or produces an alert, rely on the manufacturer’s directions and a qualified service provider. Maintenance needs vary by roof, surroundings, and equipment, so ask for instructions specific to your installation rather than assuming one cleaning or inspection schedule fits every home.
A simple home record can be enough: note the date, what you observed, relevant weather, and whether the monitoring system showed an alert. Keep copies of any service visits and roof work with that record. If the home changes hands, those documents help the next owner or service professional understand the system’s history. Avoid recording guesses as facts; label an entry as an observation, such as “stain appeared after rain,” rather than “panel attachment is leaking.”
How should homeowners compare common roof-and-solar concerns?
The table below is a triage guide, not a diagnosis. Several different problems can produce similar symptoms, and a qualified inspection may be needed to identify the cause.
| Concern | What you may notice | Practical next step |
|---|---|---|
| Roof wear before installation | Cracked or missing covering, recurring repairs, visible uneven areas | Request a roof-condition assessment and discuss repair timing before the array is installed. |
| Possible water intrusion | New ceiling stain, damp area, or leak after rain | Document the symptom and arrange an inspection of the roof and solar attachment details. |
| Structural concern | Visible sagging, damaged framing, or a proposed installation with unanswered load questions | Pause installation decisions until a qualified assessment explains the structure and any needed review. |
| Lower system output | Monitoring alert or a sustained change compared with expected production | Check monitoring records and contact the installer or service provider; do not handle wiring. |
| Future roof work | Roof replacement is likely or a repair falls beneath the array | Ask whether removal and reinstallation are needed, who coordinates the work, and what scope is included. |
| Shade or debris | New obstruction or visible debris on portions of the array | Identify the source safely from the ground and ask whether it affects the system’s production. |
Use the guide to decide whom to contact, not to decide on a repair yourself. A roof leak with no system alert calls for a roof-focused inspection that also considers attachments. A monitoring alert with no visible roof symptom may require a solar service review. When the signs overlap, let the providers know about both sets of observations and ask them to coordinate their findings. This avoids treating the roof and the electrical system as unrelated when one inspection may affect the other.
What should you ask before choosing a solar proposal?
Proposals can be difficult to compare when one describes the roof in detail and another focuses only on equipment. Ask each provider to explain the same practical issues in writing. The answers can reveal whether the plan fits your roof and whether responsibilities are clear.
- What roof materials and existing conditions were reviewed, and what remains uncertain?
- Does the roof need repairs before solar work? If so, which specific findings support that recommendation?
- How will mounting attachments and flashing be suited to this roof covering?
- How is the structure being evaluated, and who handles any required technical review?
- What assumptions about shade, roof orientation, equipment, and energy use shape the system design?
- What monitoring will be available, and what should I do if the system reports an alert?
- If future roof work is needed, how are disconnection, removal, storage, and reinstallation handled?
- Which company or professional is responsible for each roofing, solar, and inspection step?
- What documents will I receive after installation, and how do I request service?
Also compare the scope, not just the headline system size or payment structure. An estimate should make clear what equipment and work are included, what conditions could change the plan, and which decisions still depend on an inspection or approval. Avoid treating a general estimate as a promise about final costs, output, savings, or eligibility; those depend on the home, energy use, utility territory, equipment, and project details.
To make a fair comparison, read each proposal against the same roof and system questions. One provider may include repair work while another assumes the roof is ready; those are different scopes, not directly comparable totals. Note any exclusions, allowances, or decisions deferred until site review. Ask for unfamiliar terms to be explained without relying on a verbal summary. A short written clarification can prevent later disagreement about what the estimate covered.
AMECO Solar & Roofing has served California since 1974 and coordinates solar and roofing services. Homeowners can review its company background and use the solar project estimate tool to begin a property-specific conversation. For a broader look at residential planning, see AMECO’s residential solar information.
Discuss your roof and solar project
Frequently asked questions about problems with solar panels on roofs
Can solar panels cause a roof to leak?
A leak can be related to roof attachments or flashing, but timing alone does not establish the cause. Existing roof defects or unrelated damage may also be involved. Have a qualified professional inspect the roof and attachment points together, and document the location and timing of any water intrusion.
Should I replace my roof before installing solar?
Not automatically. The decision depends on the roof’s material, condition, repair history, and expected remaining service life, as well as the solar design. Ask for an inspection and a clear explanation of whether repair or replacement is recommended before the array is installed.
Do solar panels need to be removed for roof repairs?
Sometimes, but not for every repair. Work beneath or close to the array may require some equipment to be disconnected and removed, then reinstalled. Ask the roofing and solar providers to define the affected area, responsibilities, and scope before work begins.
What should I do if the system stops producing?
Check the monitoring platform for an alert and note when the change began. Contact the installer or service provider named in your project documents. Do not climb onto the roof or open electrical equipment to troubleshoot it yourself.
What is the next step if you are concerned about your roof?
Begin with the specific concern: roof condition, water intrusion, system output, structural review, or future repair access. Gather available project documents and observations, then ask a qualified professional to explain what they inspected, what they found, and what remains uncertain. A clear, property-specific review is more useful than assuming every symptom has the same cause.
To discuss solar and roofing options for your home, request an estimate from AMECO. A project conversation can help identify which details need closer review before you decide how to proceed.
10.20.2026
For a California business, the best solar location may be above the building, above the parking lot, or a combination of both. The right choice depends on more than available sunlight: roof condition, structural capacity, parking circulation, electrical design, utility requirements, and local permitting all shape the project.
Get an estimate for your commercial solar project
Commercial solar carport versus rooftop california is ultimately a site-fit decision. Rooftop solar can use existing building space without changing parking operations. A carport can add vehicle shade and potentially support EV charging in areas that may not otherwise be used for photovoltaic systems, as the U.S. Department of Energy explains.
Comparing the two configurations starts with how each one uses your property, then moves into engineering, operations, permitting, and project economics. Those factors clarify which approach best supports your facility's energy goals without assuming one design is right for every business.
What Does Commercial Solar Carport Versus Rooftop California Mean for a Business Site?
For a California business, this comparison is mainly about where a photovoltaic system can fit the property and support its operating goals. A rooftop system places modules on an existing building, subject to roof condition, available area, structural capacity, shading, and electrical design. A solar carport, also called a solar canopy, places modules over parking or another usable site area. It can add a second function to that space rather than requiring a separate parcel.
The U.S. Department of Energy identifies vehicle shade, potential electric-vehicle charging locations, and reduced heat-island effects as possible solar-canopy benefits. It also describes canopies as a way to use areas that may not otherwise be considered eligible for photovoltaic systems. These benefits matter when parking is central to the property, but they do not make a carport the right choice for every facility.
Start with the site, not a preferred technology. A business with a suitable roof and limited parking flexibility may have a stronger rooftop pathway. A site with substantial parking, a roof that needs coordinated work, or a need for shaded vehicle areas may warrant carport analysis. The comparison should also account for access, construction impacts, interconnection, permitting, and future operations.
DOE frames canopy, ground-mounted, and rooftop systems as different options whose costs should be compared, rather than presenting one universal answer. That project-specific approach is consistent with AMECO's commercial solar solutions and its emphasis on custom design. Before choosing a configuration, review the commercial solar system benefits alongside the property's physical constraints and business priorities.
In practice, the better question is not whether carports or rooftops always win. It is which location can deliver a workable system while preserving the building, parking, safety, and operational functions the business needs.
How Do Carports and Rooftop Solar Use Commercial Property Space?
| Planning factor | Solar carport | Rooftop solar |
|---|---|---|
| Land and space | Uses existing parking areas and can add shade without requiring a separate ground parcel. | Uses roof area, which can preserve ground and parking space for operations. |
| Site constraints | Depends on parking layout, vehicle circulation, clearance, foundations, and supporting infrastructure. | Depends on usable roof area, roof condition, structural capacity, obstructions, and shade. |
| Operational fit | Can provide vehicle shade and may support protected charging areas, but construction affects parking operations. | Can suit properties with limited ground space, with less direct change to parking use. |
A carport can turn an already paved parking area into a dual-use part of the site. The U.S. Department of Energy describes canopies as an opportunity to use areas that might not otherwise be considered eligible for photovoltaic systems and identifies vehicle shade as a potential benefit. That makes the option relevant for businesses with substantial parking and a layout that can accommodate structural supports without disrupting traffic or access.
Rooftop solar generally concentrates the project on the building envelope. The U.S. Department of Energy's Alternative Fuels Data Center notes that building-mounted solar can benefit employers with limited ground space. This can be a practical fit when parking is heavily used, expansion is constrained, or preserving vehicle circulation matters more than adding covered spaces.
Neither configuration is automatically better. The same AFDC source notes that parking canopies require larger parking spaces and infrastructure investment. A commercial site review should therefore examine roof readiness, parking geometry, shade patterns, access requirements, and the facility's energy profile together. A detailed commercial solar installation process can help coordinate those questions before the project is assigned to one location.
What Structural Work Does Each Solar Option Require?
Structural planning is one of the clearest differences in a commercial solar carport versus rooftop California comparison. A rooftop project starts with the existing building: its roof condition, framing, load capacity, mounting method, penetrations, and access requirements. If the roof needs repair or replacement, coordinating that work with solar design can affect the practical sequence and suitability of the project.
California solar-ready guidance also illustrates the importance of roof planning. A designated solar zone is intended to be free of penetrations, obstructions, and significant shade, while still meeting access, pathway, smoke-ventilation, and spacing requirements. Those provisions do not establish that every existing roof is ready for panels, so a site-specific structural review remains essential. AMECO's solar solutions planning can be evaluated alongside the property's roofing and electrical conditions.
A carport creates a separate structure rather than relying on the building roof. Design teams must account for foundations, column locations, vehicle clearance, drainage, wind and other structural loads, equipment placement, and how construction will affect parking circulation. The U.S. Department of Energy highlights structural and mechanical challenges associated with canopy code gaps and the need to procure safe, reliable long-life structures. Foundation conditions and local requirements can vary significantly by site.
Shade analysis and project modeling apply to both options. Array geometry, tilt, pitch, module spacing, and clearance height can change how a system performs and how it fits the property. NREL's photovoltaic modeling toolkit supports these parameters and can calculate shading and electrical mismatch, including for custom arrays and carport applications. A useful review should confirm:
- Roof condition, structural capacity, mounting approach, and future roof work.
- Carport foundation locations, clearance, drainage, parking circulation, and equipment access.
- Shade from buildings, parapets, trees, and adjacent structures across the planned array.
- Electrical routing, interconnection location, and the design assumptions used to model the project.
The stronger option is the one whose structural and operational requirements fit the property without creating avoidable conflicts with roofing, parking, or future facility plans.
Which Option Better Supports Parking, Shade, and EV Charging?
For a commercial property with active parking, a solar carport can do more than host photovoltaic modules. It can place generation above spaces that are already part of the site plan while adding shade and weather protection for vehicles. The U.S. Department of Energy identifies vehicle shade and EV charging locations as potential solar-canopy benefits.
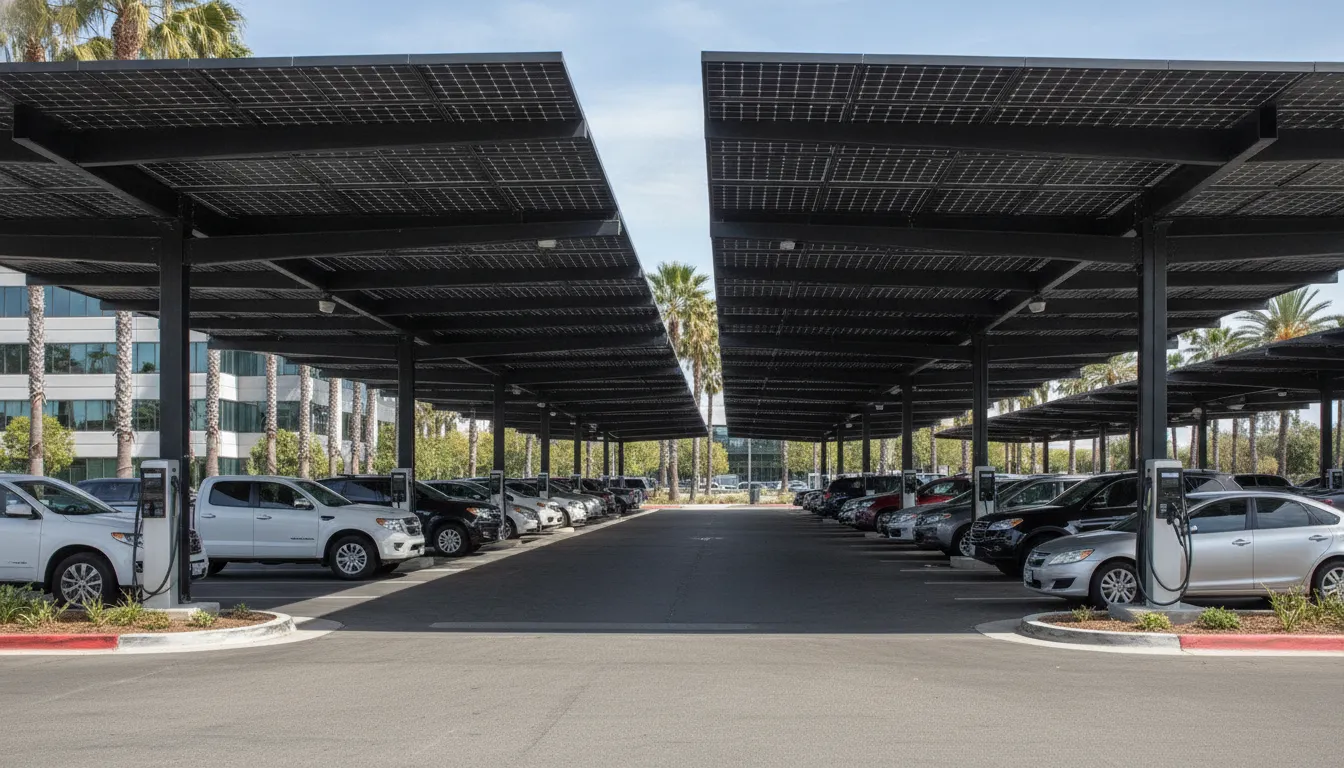
That arrangement may be valuable for offices, retail properties, and other facilities where employees, customers, or fleet vehicles remain on site during daylight hours. The solar panels for California businesses decision should account for how parking functions today and how transportation needs may change.
What a carport can add to the parking plan
Canopy shade can help keep vehicle interiors cooler after parking and may reduce ultraviolet exposure to vehicle interiors and exteriors. Canopies can also create shaded, protected spaces for EV charging. A project may be designed as EV-charger-ready, allowing chargers to be added later with less site disturbance. That preparation does not mean chargers are included in every solar project. Equipment selection, electrical capacity, charging demand, and the property owner's scope all require separate review.
Where rooftop solar may be the better operational fit
Rooftop solar preserves parking lanes and avoids placing columns, foundations, and overhead structures within vehicle circulation areas. It may be especially practical when a site has limited ground space or when parking must remain flexible for deliveries, events, accessible spaces, or future expansion. By contrast, solar parking canopies require appropriate parking dimensions and infrastructure investment, so the tradeoff is not limited to the panel array.
The right comparison weighs shade and charging value against driving-lane access, construction impacts, clearance requirements, and future parking operations. A site-specific design can determine whether the canopy's added function justifies its infrastructure or whether the roof provides a simpler energy location.
How Do Maintenance and Daily Operations Compare?
Maintenance planning differs because the equipment occupies a different part of the property. A rooftop system keeps parking lanes available, but service teams may need controlled roof access and coordination with roofing work. A carport places the array over active parking, so inspections, cleaning, and repairs must account for vehicle circulation, pedestrian safety, clearance, and temporary space closures.
Access and roof coordination
For rooftop solar, future repairs can involve roof access, fall-protection procedures, and coordination with roof inspections or replacement. If a roof is nearing the end of its useful service life, the owner should address that condition before installing equipment or establish a plan for coordinated work. AMECO's commercial solar installation process explains why site assessment and roofing coordination belong in the early design discussion.
Carport maintenance avoids routine foot traffic across the building roof, but it introduces structural and parking-area considerations. Columns, foundations, drainage, vehicle clearance, and protective barriers remain part of the operating environment. The U.S. Department of Energy specifically discusses procuring safe, reliable long-life canopy structures, which reinforces the need to evaluate the structure as carefully as the modules.
Inspections, cleaning, and future repairs
Both configurations require a site-specific plan for visual inspections, electrical troubleshooting, cleaning decisions, vegetation or debris management where relevant, and safe access to equipment. A rooftop repair may affect roof membranes or other building operations. A carport repair may require isolating parking rows, redirecting traffic, or scheduling work outside peak occupancy. Neither layout should be assigned a universal maintenance schedule without reviewing the equipment, site conditions, weather exposure, and owner operating procedures.
When comparing a commercial solar approach, include access and future repair planning alongside energy design. The better fit is the system that can be safely serviced without creating unacceptable disruption for the building, roof, or parking operation.
What Should California Businesses Know About Permitting and Interconnection?
Permitting is not a single statewide checklist that produces the same result for every commercial solar project. The review can involve the local building department, fire and safety requirements, electrical design, structural plans, parking or site changes, and the serving utility's interconnection process. A rooftop array and a solar carport may therefore require different drawings, inspections, and coordination even when they serve the same facility.
California's solar-ready provisions are an important distinction. The cited California Energy Commission manual describes requirements for specified newly constructed buildings, along with certain additions that meet the stated conditions. Those provisions reserve a suitable area for possible future solar. They do not, by themselves, mean that an existing business can install a system without project permits, nor do they require panels or mounting equipment to be installed. The CEC solar-ready manual is the appropriate source for the covered building types, exceptions, and compliance details.
For covered construction, the solar zone must account for access, pathways, smoke ventilation, spacing, and other applicable Title 24 and local-jurisdiction requirements. The compliance form described in the manual is submitted with the building permit application. Plans also include a pathway for routing conduit from the solar zone to the electrical interconnection point. That planning can reduce future design conflicts, but it is not the same as utility approval for an operating photovoltaic system.
For a proposed carport, reviewers may also need to assess foundations, clearances, parking circulation, drainage, electrical equipment locations, and how construction affects daily site use. For a rooftop project, roof condition, structural capacity, fire access, equipment placement, and any planned roof work can shape the permit package. The serving utility then evaluates the proposed system and point of interconnection under its applicable process.
Before choosing between configurations, use a documented commercial solar installation process that identifies the authority having jurisdiction, utility territory, building status, and site-specific engineering requirements. AMECO's commercial solar solutions team can use those inputs to compare a rooftop and carport concept without treating solar-ready provisions as a universal installation permit.
How Should You Compare the Project Economics of a Carport and Rooftop System?
A sound comparison starts with the whole property, not a panel count. The U.S. Department of Energy identifies canopy, ground-mounted, and rooftop systems as distinct cost options. Which means the right question is how each design uses your site's existing assets and creates new obligations. Review the tradeoffs with your facilities and finance teams before selecting a configuration.
Land and roof readiness: A rooftop system may preserve parking and use space that is already part of the building envelope. Its economics still depend on roof age, condition, structural capacity, access, and whether roofing work should be coordinated with solar. A carport can open a solar opportunity where building-mounted space is limited. The Alternative Fuels Data Center notes that building-mounted solar can benefit employers with limited ground space, while parking canopies require infrastructure investment. Those requirements can include foundations, steel, clearances, drainage, traffic protection, and construction coordination.
Parking and infrastructure value: A carport can turn an active parking area into a shaded, productive asset. Shade, protected vehicle spaces, and future EV-readiness may support operational goals, but only if the layout preserves circulation, accessible parking, emergency access, and customer or employee usability. The added infrastructure should be evaluated as part of the project scope rather than treated as an incidental mounting cost.
Energy profile and utility connection: Compare each option against the facility's load shape, available electrical service, equipment locations, and interconnection path. A design that fits the roof may not align with the strongest load or the practical point of connection. Conversely, a parking-area design may require longer electrical runs or additional site coordination. Modeling should account for orientation, shading, equipment placement, and operating priorities.
Operations and long-term value: Include roof maintenance coordination, parking-lane disruptions, inspection access, cleaning, replacement access, and future changes to the facility. DOE frames these systems as options to compare rather than a universal winner. Review a project-specific cost exploration and discuss the site's priorities with AMECO's commercial solar team. A disciplined comparison weighs usable land, roof readiness, infrastructure, utility requirements, maintenance, and the value of shade or preserved parking together.
Request a site-specific commercial solar estimate
Frequently Asked Questions
Which is usually better for a California commercial property, a solar carport or a rooftop system?
Neither configuration is universally better. Rooftop solar can preserve parking and use an existing structure when the roof has suitable condition, orientation, shade conditions, and structural capacity. A carport can add covered parking and place solar over a paved area, but it introduces separate structural, foundation, drainage, vehicle-clearance, and construction considerations. Compare both options against the facility's energy profile, available roof and parking area, site layout, and long-term operating plans.
Does a solar carport provide useful shade for commercial parking?
Yes. A properly designed canopy can shade vehicles and may support related uses such as electric-vehicle charging. The final benefit depends on canopy height, orientation, row spacing, clearance, and the way vehicles circulate through the lot. The U.S. Department of Energy identifies vehicle shade and EV charging among potential solar-canopy benefits, while also noting that site and structural design require careful evaluation: DOE solar canopy guidance.
Is rooftop solar easier to permit than a commercial solar carport?
Not automatically. Both projects may require building, electrical, fire, zoning, utility, and interconnection review, with requirements varying by jurisdiction and project scope. California solar-ready provisions are a separate design requirement for specified new buildings and certain additions. They reserve a suitable roof area but do not themselves require panels or mounting hardware, according to the California Energy Commission manual. A project team should confirm the applicable local process before selecting a configuration.
How should a business compare the economics of a carport and rooftop system?
Start with a site-specific comparison rather than a fixed price or savings estimate. Review usable solar area, structural and civil work, roof repairs or replacement, parking disruption. Electrical upgrades, interconnection requirements, operations and maintenance access, and the value of shade or future EV charging. Then model production and energy use using the facility's load profile, utility territory, equipment design, and eligibility for any currently available incentives.
What should a facilities team inspect before choosing between the two?
For a roof, inspect age, remaining service life, membrane or tile condition, penetrations, drainage, shade, and structural capacity. For a carport, inspect parking geometry, setbacks, foundations, underground utilities, stormwater, vehicle clearance, fire access, lighting, and construction phasing. Engineering and permitting review should confirm whether the preferred location can support the electrical and structural design before the project is priced.
Ready to Compare Your Commercial Solar Options?
A site-specific review can help clarify whether rooftop solar, a solar carport, or a combination better fits your roof condition, parking layout, structural needs, and energy goals. Get an estimate for a commercial solar review that compares the practical considerations for your California property.
10.19.2026
A commercial solar power purchase agreement in California can let a property owner use electricity from a solar system without purchasing the system upfront. The arrangement changes who owns and operates the equipment, how the business pays for the energy, and what happens when the contract ends. The details depend on the project and the contract, so it helps to understand the moving parts before comparing proposals.
Discuss a commercial solar project
What is a commercial solar power purchase agreement?
A power purchase agreement, or PPA, is a contract in which a customer agrees to buy electricity produced by a solar system from a project developer or system owner. The provider generally arranges the project and retains ownership of the equipment during the agreed term. The customer pays for the energy under the contract rather than buying the system outright. The U.S. Environmental Protection Agency describes a solar PPA as a way to obtain solar power without an upfront capital cost, while noting that contract arrangements determine the details. Read the EPA overview of solar power purchase agreements.
For a commercial property, the project may use a rooftop, parking structure, or other suitable site, depending on the property's conditions and project design. A PPA is not the same as a utility bill discount, and it does not mean the building automatically avoids utility charges. The business may continue receiving a utility bill, and the contract may create a separate payment obligation. The California Public Utilities Commission notes that customers with a lease or PPA can receive a monthly bill from the solar provider in addition to their utility bill. See the California Solar Consumer Protection Guide FAQ for its general explanation.
On a commercial project, the buyer, system owner, property owner, and electricity customer may be different entities. That makes it important to map each party's role before signing. A building owner may control the roof while a tenant uses the electricity, or one company may occupy and own the building. The contract, property documents, and utility account should fit together.
For example, a property company could own a warehouse, lease it to an operating business, and have the tenant pay the utility. A PPA proposal then needs to explain who signs the energy contract, who authorizes rooftop access, and how the arrangement works if the tenant leaves. If these roles are not settled early, a promising design can still encounter delays during contract review or project coordination. Put the parties and their obligations in a simple responsibility map before treating a proposal as ready to sign.
How does a PPA compare with owning a commercial solar system?
With direct ownership, the business or property owner buys the system, either with available capital or separate financing, and owns the equipment. With a PPA, a third-party provider owns the system and sells the generated electricity under the contract. Ownership can offer more control over equipment and operations, while a PPA may reduce the need for the customer to manage system ownership. Neither option is automatically better. The right comparison depends on a company's capital priorities, operating capacity, site plans, contract terms, and appetite for long-term obligations.
| Consideration | Commercial PPA | Direct ownership |
|---|---|---|
| System owner | Typically the provider or project owner during the contract term | The business or property owner |
| Payment structure | Payment for energy as specified in the PPA; utility charges may also apply | Purchase or financing costs, plus ongoing operation and maintenance responsibilities as agreed |
| Project decisions | Provider and customer responsibilities are allocated by contract | Owner generally has direct control, subject to permits, utility rules, warranties, and service agreements |
| Roof and site obligations | Must be coordinated among the property owner, customer, and system provider | Owner coordinates roof, system, and site decisions directly or through its contractors |
| End of arrangement | Contract states available renewal, purchase, removal, or other options | Owner continues to operate, maintain, upgrade, or remove its system |
This is a planning comparison, not a statement of universal contract terms. In either structure, the customer should confirm which costs are included, who bears performance and repair responsibilities, how utility arrangements work, and how the project affects future building decisions. For general information on PPAs as a financing approach, the U.S. Department of Energy's Better Buildings Solution Center explains the power purchase agreement structure.
To learn more about AMECO's commercial solar and roofing capabilities, visit the commercial solar solutions page or review the company's approach to solar and roofing projects.
A useful comparison starts by treating the two options as complete project structures rather than comparing a PPA price with the cost of purchased equipment alone. Under ownership, consider the purchase or financing arrangement plus the maintenance and operating duties the owner retains. Under a PPA, examine the energy payment alongside utility charges and the obligations the customer still has for access, site coordination, and property changes. Ask each proposer to label assumptions in the same way: annual use, expected production, operating hours, utility account, project scope, and any roof work. That lets decision-makers identify differences in assumptions before concluding that one offer is less costly or easier to manage.
Capital planning is another distinction. A PPA may shift equipment ownership and project financing to the provider, but it still creates a contract with payments and duties over time. Direct ownership places the asset and its management with the customer, subject to any financing and service agreements. Finance and operations teams should therefore review both near-term cash requirements and the long-run administrative responsibility, rather than looking only at the initial commitment.
Which PPA terms should a California business examine?
The headline energy price is only one part of a PPA. Ask for a plain-language explanation of all payment provisions and of the events that could change the business's obligations. Compare offers using consistent assumptions and project-specific utility information rather than focusing on a single advertised rate.
- Starting price and unit: Identify the initial price, how it is measured, and which energy output is billed. Confirm the treatment of system output that the customer does not use.
- Escalation provision: Some contracts increase the energy price on a schedule or by a stated formula. Check when increases begin, how often they apply, and whether the percentage or calculation is fixed, capped, or variable.
- Term and renewal: Record the contract length, start date, renewal process, notice deadlines, and any changes to pricing or responsibilities at renewal.
- Minimums and other payments: Review any minimum purchase, production, service, access, or administrative charges, along with how taxes and other project costs are allocated.
- System output and performance: Understand any production estimates, measurement method, reporting access, and remedies if output differs from expectations. Do not assume an estimate is a guaranteed result.
- Utility interaction: Ask how the project connects to the building's utility account, what happens to exported electricity, and which utility charges remain the customer's responsibility.
- Default and termination: Look for late-payment provisions, cure periods, early termination conditions, transfer requirements, and any fees or buyout calculations.
- Insurance, damage, and access: Determine who maintains coverage, responds to equipment damage, obtains access, and pays for repairs that involve the roof or electrical systems.
Get a sample invoice or an illustrative payment schedule if available, and ask the provider to walk through it using the contract's definitions. Keep the assumptions visible: energy use, operating schedule, utility territory, system size, roof conditions, and any planned building changes can affect the project analysis.
One way to test the escalation language is to ask for a year-by-year schedule using the stated contract formula. The business does not need to forecast future utility prices to understand the PPA's own payment path. It should be able to see the starting unit price, when each change applies, and whether an increase is triggered by a calendar date or another event. Then compare that schedule with a flat-price scenario only if the alternative proposal uses a comparable scope and billing basis. This is a contract-reading exercise, not a prediction of future utility rates or project savings.
Also establish what quantity the invoice measures. A contract may refer to delivered energy, measured production, or a defined billing quantity. Ask where the meter is located, who can access the data, how readings are handled if monitoring is interrupted, and how a disputed invoice is reviewed. A worked sample should show how the contract's terms become an actual bill, including any separate charges or adjustments. If a proposal uses a price per unit, make sure the unit and measurement period are stated clearly so that different bids are genuinely comparable.
Who handles operations, repairs, and insurance?
A third-party owner may take on many system-related duties, but the contract defines the actual division of responsibility. Do not treat phrases such as “maintenance included” as a complete answer. Confirm the scope, response process, exclusions, and the customer's duties.
Clarify who monitors the system, schedules inspections, handles equipment failures, coordinates warranty claims, and pays for repairs. Ask who is responsible for damage to the building, how emergency access is arranged, and whether the provider or customer must carry particular insurance. Check whether the provider's access rights extend beyond the equipment area or require notice to tenants. The contract should also explain what happens when the building owner needs roof work, electrical upgrades, or other construction during the term.
These questions matter even when the PPA provider retains system ownership. The customer may still have obligations to keep access available, report issues, protect equipment from interference, or coordinate work around the installation. Compare the PPA with any separate roof, facilities, or service agreements so that duties do not conflict or fall between parties.
Translate general statements about service into a practical workflow. For example, identify the person or organization the customer notifies when monitoring shows an interruption, what information the customer must provide, and who decides whether a site visit is needed. Confirm who communicates with the utility if an issue affects interconnection or billing. If a repair requires access during business hours, clarify whether the provider gives advance notice, follows site safety rules, and coordinates with the facility manager. These details help operations staff understand what they must do without assuming that system ownership removes every site obligation.
Ask how routine and urgent matters differ. A scheduled inspection may be arranged in advance, while a safety concern or equipment fault could require a faster response. The agreement should explain how the customer reports each type of issue, how the provider responds, and what happens if the system is unavailable. Where responsibilities are split among the provider, property owner, tenant, and facilities team, write down who initiates each action and who confirms completion.
How do roof condition and roof obligations affect the agreement?
A rooftop system is a long-term addition to a building. Before moving forward, assess the roof's age, condition, expected maintenance needs, drainage, and any planned renovation. If a roof replacement is likely during the agreement, work through the timing and cost implications before the panels are installed. Removing and reinstalling equipment can require coordination, access, and expense, and the contract should say who is responsible.
Review who may approve roof work, how much advance notice is required, who removes and reinstalls the solar equipment, and who pays for that work. Ask whether the provider's obligations change if the customer hires a roofer or makes a building alteration. Confirm how the solar installation interacts with roof warranties and what documentation the property owner should retain. For an integrated project, coordinating solar design and roofing decisions early can help clarify scope and reduce avoidable scheduling conflicts.

AMECO Solar & Roofing provides solar installation and roofing services in California. A project discussion can help identify the roof and solar questions that need to be addressed before comparing ownership structures. Businesses can also review roofing services and solar solutions when planning related work.
When roof work and solar are both under consideration, request a commercial project discussion to identify the site details to review.
A roof review should include more than a visual check from the ground. Gather available maintenance records, prior repair notes, roof plans, and information about expected renovations. Ask the project team to identify how penetrations, equipment placement, drainage paths, and access routes are considered in the proposed layout. The property team can then compare the installation plan with existing roof documents and building operations. If roof replacement is already planned, compare a coordinated schedule with an installation-first schedule; the decision should account for access and removal work as well as the solar design.
For a leased building, coordinate roof decisions with the lease and tenant responsibilities. Confirm who has authority to approve work, who must receive notice, and whether a tenant's operations limit access at certain times. Keep records of the agreed equipment locations, roof condition before installation, and any work performed. Documentation can help the parties understand the condition and responsibilities later, especially if maintenance, renovations, or a transfer occurs during the PPA term.
What site control and property rights are needed?
The agreement should identify the precise installation area and establish the rights needed to build, operate, maintain, and eventually remove or transfer the system. These rights may appear in the PPA, a lease, an easement, or related property documents. The arrangement should match the building's ownership structure and any lender, tenant, or association requirements.
Review whether the provider needs rights to the roof, electrical rooms, conduits, access paths, monitoring equipment, and staging areas. Identify how employees, contractors, and emergency responders can reach the equipment. Check whether the rights continue after a sale or refinancing, and what consents are required. If the property is leased, verify that the lease term, tenant rights, and solar contract term can coexist. A commercial customer should not assume that the right to use the roof follows automatically from occupying the building.
Before committing, map the contract parties and property roles: who owns the land and building, who signs the PPA, who pays for electricity, and who can approve work. This is particularly important when a building is sold, a tenant changes, or a portfolio is reorganized. For questions about property rights and transfer language, obtain review from qualified professionals familiar with the transaction.
Make the site-control review concrete by marking the proposed array, equipment areas, access paths, and any space needed for installation or service on a property plan. Compare that plan with loading zones, fire and safety routes, rooftop equipment, tenant areas, and planned construction. Ask whether the provider's access rights cover only the equipment footprint or also staging and temporary work areas. The parties can then identify conflicts before the project reaches installation planning, rather than trying to resolve them after contract execution.
If a lender, landlord, tenant, or property manager must consent, find out what document or review they need and when they need it. A contract may also describe how site rights survive a transfer, refinancing, lease expiration, or change in ownership. The decision-makers should check whether those provisions align across the PPA and property documents. A checklist of required notices and approvals can make the review easier to coordinate, but it does not replace professional review of the actual legal documents.
How can a business evaluate a proposal step by step?
A consistent review makes proposals easier to compare. Start by gathering the information each provider needs, then compare the contract and design assumptions together rather than evaluating the rate in isolation.
- Define the business goal. Decide whether the priority is reducing upfront capital, owning the equipment, managing energy costs, supporting resilience planning, or aligning solar work with a roof project.
- Assemble site information. Collect utility bills, operating schedules, roof records, electrical information, property plans, and known construction plans. Remove or protect sensitive information when sharing documents.
- Check project fit. Have the provider explain the proposed system, expected production assumptions, utility arrangement, and any constraints specific to the site.
- Compare the complete payment picture. Review the PPA price, escalation, remaining utility charges, likely operating costs, and potential charges under different scenarios. Compare these against an ownership proposal using the same assumptions.
- Allocate responsibilities. Make a written list covering equipment, roof, access, insurance, maintenance, repairs, permitting, utility coordination, and future building work.
- Review transfer and exit provisions. Consider a property sale, lease termination, refinancing, early termination, and each stated end-of-term option before signing.
- Seek independent review. Ask qualified legal, tax, accounting, engineering, and utility professionals to review the portions relevant to their expertise. This article is general education, not legal or financial advice.
For project-specific information, a business can review the solar project estimate options and request a conversation about its site. See also the guide to why solar project estimates can vary and the overview of utility incentives for commercial solar. Any incentive or eligibility assumption should be verified for the specific project and current rules.
To make the review manageable, assign an owner for each workstream. Facilities staff can assemble roof and electrical records; the finance team can compare payment schedules and assumptions; property or legal staff can check site rights and transfer clauses; and the utility-facing project team can explain interconnection and account details. A short list of unresolved questions helps the business distinguish missing information from an actual contract concern. Request written answers or revised proposal language where a verbal explanation is not reflected in the documents.
Use the same comparison sheet for every proposal. Record the contract term, price basis, escalation schedule, expected production assumptions, continuing utility charges, customer duties, roof-work process, transfer rules, and end-of-term choices. Mark each item as stated, unclear, or absent. For instance, if one offer explains a roof-removal process and another says only that maintenance is included, the difference is an open scope question rather than a basis for assuming equivalent service. Ask each provider to address the same gaps.
Finally, allow time for the people who will live with the agreement to review it. A facilities manager may spot access conflicts that are not visible in a financial summary. A property manager may know of a planned sale or lease renewal. An accounting or legal professional can identify issues within their expertise. Consolidating questions before a review meeting can make the discussion more focused and help ensure the final contract, exhibits, and project plans reflect the same assumptions.
What happens when the PPA term ends?
End-of-term choices are contract-specific. A PPA may provide options to renew, purchase the system, have the equipment removed, or continue under another agreed arrangement. The exact choices, timing, price, condition standards, and notice periods should be written into the documents. Do not assume that the system transfers to the customer automatically or that removal is included without cost.
Check when the customer must elect an option and how the provider will notify the property owner. Ask how a purchase price is determined, what happens if the customer does not respond, and who pays for removal or roof restoration. Clarify whether the system must meet an operating or condition standard at transfer and which warranties, monitoring access, and service arrangements continue. Consider the effect of a property sale near the contract's end date as well.
Where several documents govern the arrangement, compare their end-of-term terms. A PPA, roof access agreement, lease, and property loan documents may contain different notice and consent rules. Have the complete set reviewed together by appropriate professionals, not just the energy-price page.
Work backward from the end date when evaluating notice deadlines. Put each election date, required form of notice, contact method, and response consequence on a calendar. If purchase is an option, determine whether the price is set by a formula, appraisal, or another stated method, and what information will be available to evaluate the system's condition. If removal is an option, clarify who selects the contractor, how access is coordinated, what condition the roof must be left in, and who bears related costs. These details can affect future capital planning even if the contract is years from ending.
Also consider an earlier property transaction. A sale, refinancing, or tenant turnover may require assumption, consent, or other steps before the scheduled end date. Reviewing those paths at the outset makes it easier to understand whether the arrangement fits expected ownership and occupancy plans. When project documents refer to one another, professional reviewers should examine them together so that notice, access, and responsibility terms do not conflict.
Frequently asked questions about commercial solar PPAs
Does a commercial PPA eliminate the utility bill?
No. A PPA sets out payments for electricity generated by the solar system, while utility charges may continue. The result depends on system production, the business's energy use, utility rules, and the contract. Ask for a project-specific explanation of both bills.
Is a PPA the same as a solar lease?
No. Under a PPA, the customer generally pays for energy produced under the agreement. Under a lease, the customer typically pays to use the equipment. Actual terms vary, so review the payment structure and allocation of responsibilities in the specific documents.
Can a business sell a property with a PPA in place?
A sale may be possible, but the contract can require notice, buyer assumption, provider consent, or other steps. Review transfer and sale provisions early, especially if the property could change hands before the contract ends.
Who pays if the roof needs work?
The contract should specify the process and allocation of costs for roof repairs or replacement involving the solar system. Confirm who arranges removal and reinstallation, how timing is coordinated, and whether any roof or equipment warranties are affected.
How can a California business choose its next step?
Compare a PPA with ownership using the same site, utility, and operating assumptions. Focus on the complete term: payments, escalation, operating duties, roof work, access rights, property transfers, and end-of-term choices. Before signing, have the project documents reviewed by qualified professionals who can assess the business's specific legal, financial, tax, engineering, and utility questions.
AMECO Solar & Roofing has served California since 1974 and brings solar and roofing expertise together under one company. Start a conversation about your commercial project to discuss site-specific considerations and next steps.
10.16.2026
A commercial solar feasibility study California businesses can use should do more than estimate panel capacity. It should connect the property’s electricity use, roof or site conditions, utility rules, possible storage, and project costs in one clear analysis. The result is a way to decide whether to investigate a project further, revise its size, or pause before requesting proposals.
What questions should a feasibility study answer?
A study is an early decision tool, not a final engineering package or a promise of savings. It should define the project being evaluated and explain the assumptions behind its conclusions. For a California business, a useful report should answer practical questions such as:
- How much electricity does the site use, and when does it use it?
- What solar capacity may fit the roof, parking area, or other proposed site?
- What roof, structural, shading, electrical, or access issues need further review?
- How do the utility’s rate structure and interconnection process affect the design?
- Would storage or load management address a documented operating need?
- Which incentives or program rules might apply, and what must be verified?
- How do the project’s costs and benefits compare under different assumptions?
The report should distinguish known facts from estimates and open questions. A preliminary desktop assessment may rely on bills, drawings, and aerial imagery. A later design review may require a site visit, structural information, electrical plans, utility correspondence, and professional engineering. The study should identify which stage it represents so decision-makers do not mistake an early estimate for a construction-ready design.
It also helps to define the decision the study is meant to support. A property owner deciding whether to fund a detailed engineering phase needs a different level of detail from a facilities team comparing several possible locations. Put the intended decision, project boundary, and evaluation period in writing at the start. For example, clarify whether the analysis covers one building, several meters, or a proposed expansion, and whether planned roof replacement is part of the scope. This keeps the conclusions tied to the actual business question.
Which load data belongs in the analysis?
Electricity bills are a starting point, but monthly totals alone may not show how a commercial building operates. Gather as much interval usage data as the utility makes available, ideally covering a full year so the analysis can account for seasonal differences. Include the bills and rate schedules for every relevant meter, not only the largest account.
Useful operating information includes business hours, days of operation, seasonal closures, planned expansions, major equipment, and scheduled changes such as new refrigeration or electric vehicle charging. If the property has multiple tenants or meters, explain which loads belong in the proposed project and whether the ownership and billing arrangements allow them to be considered together.
Interval data can reveal whether a site’s demand is concentrated during daylight hours or extends into evenings and overnight. That distinction affects how much onsite generation may serve the building directly and whether storage or operational changes deserve closer review. It does not, by itself, establish project economics. The utility’s billing rules, export treatment, demand charges, and future operating pattern also matter.
Ask the analyst to list the data used, its coverage period, and any gaps. If only a few bills are available, the report should state that limitation and show how it affects confidence. For a plain-language overview of how grid connections work, AMECO’s guide to grid-tied solar systems and net metering explanation can help frame questions for the project team.
A practical way to prepare the load packet is to create a simple meter register. For each meter, record the account identifier, building or tenant served, utility, billing period, rate schedule, and whether the account is expected to remain in place. Then mark any unusual months, such as a temporary shutdown or a change in production. If production volume, occupancy, or operating hours changed during the year, note when and why. That context prevents the analyst from treating a one-time operating condition as a normal pattern.
Consider a warehouse that runs refrigeration around the clock but has office and shipping loads concentrated during business hours. A single annual consumption number conceals those separate patterns. Hourly or interval data, paired with a schedule of major equipment, can help determine whether a candidate system’s daytime output aligns with the site’s use. For a manufacturer expecting a new shift, model the future schedule separately from the historical baseline rather than silently scaling past consumption.
How should the roof or site be evaluated?
The proposed array area is not the same as the usable array area. A study should consider roof geometry, orientation, shading, obstructions, fire-access pathways, equipment clearances, and the space required for safe maintenance. For a ground-mounted or canopy project, it should also consider boundaries, grading, drainage, access, setbacks, and any conflicts with parking or daily operations.
Roof condition deserves a separate, specific review. Document the roof type, approximate age if known, visible repairs, leak history, and any available drawings or past inspection reports. A feasibility study should flag when a structural assessment or roofing inspection is needed. It should not assume that a roof can support a proposed system simply because panels appear to fit in an aerial image.
Solar and roof work can affect one another. If a roof may need replacement during the expected life of the solar equipment, the owner should compare sequencing options before choosing a design. That might mean coordinating roof work and solar installation, reducing the proposed array, or delaying a decision until more information is available. A coordinated review can help avoid treating roofing and energy work as unrelated scopes. See AMECO’s roofing services and its overview of solar and roofing coordination for context.
A study may also need to assess unusual site constraints. A U.S. Department of Energy-hosted feasibility study of a photovoltaic system on a landfill, for example, identifies available area and solar resource among the factors affecting project feasibility (DOE-hosted landfill solar feasibility study). A separate California analysis examined solar generation over waterways, illustrating how nonstandard sites require site-specific evaluation (UCLA analysis of solar over California waterways). These examples are not substitutes for reviewing a particular business property.

For a first site review, ask for a marked layout that identifies both candidate array areas and excluded areas. The exclusions should have reasons: shade, rooftop equipment, access routes, setbacks, or a structural concern. This makes the capacity estimate auditable. A drawing that shows panel rectangles without explaining walkways, inverter locations, conduit routes, and service access is not enough to understand what may be buildable.
For a multi-building site, compare locations rather than assuming every roof is equally suitable. A newer building may offer more usable area but have electrical constraints, while another roof may be easier to connect but heavily shaded. Canopies or ground-mounted options may add usable space, yet they can affect parking circulation, drainage, landscaping, or deliveries. Ask the study to identify these tradeoffs and any site investigations needed before a preferred option is selected.
What utility and interconnection constraints need review?
Utility requirements can shape a project before equipment is selected. The study should identify the serving utility, applicable rate schedule, meter arrangement, and any known interconnection requirements. It should explain whether the analysis assumes that all solar generation serves the building, that some generation may be exported, or that export approval remains uncertain.
Interconnection is a process, not a box to check on a layout. The utility may require an application, technical documents, review, equipment changes, or additional work before a system can operate. The study should state whether an interconnection application has been filed and distinguish confirmed utility information from assumptions. It should also identify potential points of uncertainty, such as export limits or upgrades that have not yet been evaluated.
Businesses should ask how the proposed system relates to demand charges, time-of-use pricing, and any changes expected in the building’s load. The answer varies by utility territory and tariff. Do not compare system proposals using a single blended electricity rate unless the report explains why that rate represents the site’s actual bill.
When reviewing a proposal, look for a transparent list of utility assumptions and the next steps needed to confirm them. AMECO’s PV system overview and its page on the role of an inverter provide basic equipment context, but project-specific utility requirements must be checked for the property.
A rate schedule can affect the value assigned to generation at different times, so the study should show how it applied the actual tariff rather than using a generic per-kilowatt-hour figure. Ask whether the analysis uses recent bills, a published tariff, or an assumed future rate. If the utility has multiple demand components or time periods, the report should describe which ones are included and which are outside its scope.
Clarify the status of each interconnection milestone: not yet researched, preliminary utility discussion, application submitted, or written utility response received. These are not interchangeable levels of certainty. If a network or service upgrade might be needed, ask whether its cost and schedule are known or simply flagged for investigation. The feasibility stage may not resolve every utility issue, but it should show who will resolve it and what information is required.
When should a business consider battery storage?
Storage should be evaluated against a defined operating goal. A business may want to keep selected equipment operating during an outage, shift some energy use to another time, or manage a particular demand pattern. These goals involve different system designs. A battery sized for limited backup of critical circuits may not provide whole-building backup or operate through a long outage.
The feasibility study should explain which loads matter during an outage, how much power they need, how long they should run, and whether they can be grouped on a backup circuit. It should identify whether the proposed system is intended to provide backup, bill management, or both, and what operating limits apply. Critical equipment, starting surges, control systems, and the ability to isolate from the grid can all affect the design.
For a bill-management scenario, the analyst should show how the assumed charging and discharging schedule relates to the site’s load and utility tariff. The study should also clarify what happens if usage patterns or rates change. A battery is not automatically economical simply because a business has high bills, and a solar array does not necessarily provide backup during an outage without compatible equipment and design.
Explore the design questions in AMECO’s battery backup overview and solar and battery FAQ. A project assessment should translate those general concepts into the site’s specific loads and priorities.
To make the storage analysis concrete, prepare a critical-load list with equipment name, approximate power requirement, operating hours, and whether the load can be paused or reduced. A cold-storage facility may prioritize refrigeration controls and essential compressors; an office may prioritize network equipment, access controls, and a limited set of workstations. The list is a planning input, not a final electrical design. An engineer or qualified project team may need to confirm circuit arrangement, starting current, and safe operating requirements.
Ask the analyst to compare at least the stated storage objective against a solar-only case. If resilience is the main concern, explain the outage duration and operational consequences the business is trying to manage. If bill management is the goal, have the report state its assumed dispatch pattern and any tradeoff between keeping reserve energy and using the battery for routine operation. This avoids combining distinct goals into one vague claim of “backup and savings.”
How should incentives and program rules be handled?
Incentives can affect project economics, but eligibility and value depend on current program rules, project ownership, equipment, timing, and the business’s circumstances. A feasibility study should name each incentive or program it includes, explain the assumed eligibility, identify who must confirm it, and show the financial scenario both with and without uncertain benefits when practical.
Do not treat an incentive as guaranteed cash or assume that a program will remain unchanged through a project’s completion. Tax treatment and program eligibility should be confirmed with qualified advisers and current official guidance before a business uses them in its decision. The report should also clarify whether incentives apply to the system owner, the property owner, or another party under the proposed arrangement.
California rules and utility programs can vary by location and project type. Ask the analyst to date the information and list what still needs verification, including application deadlines, documentation, and any conditions on system operation. Avoid relying on a generic incentive figure copied from another property or an older proposal.
For any listed program, request the exact program name, the version or date of the rules reviewed, and the documentation needed to establish eligibility. For tax-related treatment, the study can identify a potential provision, but a qualified tax adviser should assess how it applies to the business and ownership structure. If an incentive depends on a deadline, equipment specification, or application approval, show those conditions beside the modeled amount instead of burying them in a footnote.
One useful comparison is to review the project before and after any unconfirmed incentive. If the project only appears workable under the most favorable eligibility assumption, that is an important decision point. A conservative case does not predict the outcome; it shows whether the business would still consider proceeding if the uncertain benefit were unavailable, delayed, or lower than assumed. Confirm current-year details before acting, including provisions such as the Section 48E clean electricity investment credit where relevant.
What financial scenarios make the report useful?
A sound financial analysis makes its inputs visible. It may compare a baseline with no project against one or more solar configurations, and it can add storage or roof work as separate scenarios. The report should specify the estimated installed cost, operating assumptions, utility-bill treatment, maintenance assumptions, incentive assumptions, and any financing or ownership approach being modeled. Final costs and terms need project-specific verification.
Rather than presenting one definitive payback number, the study should show how results change when important inputs change. Sensitivity scenarios can test a smaller system, lower-than-expected energy production, a different rate assumption, delayed interconnection, a roof project, or storage added later. This makes uncertainty visible and helps an owner identify which unknowns are worth resolving first.
Useful financial outputs may include estimated annual generation, the share of generation used onsite, expected bill effects under the stated tariff, total project cost assumptions, and a simple comparison of scenarios. Each output needs a clear time period and explanation. Savings and payback are not universal: they depend on the building, energy use, site, utility territory, equipment, costs, ownership, and verified eligibility.
| Scenario | What it evaluates | Key items to verify |
|---|---|---|
| Solar only | Potential generation matched to the building’s load and site | Usable area, production assumptions, rate schedule, interconnection |
| Solar with storage | Solar plus a defined backup or energy-shifting use | Priority loads, operating schedule, equipment limits, tariff assumptions |
| Roof work coordinated with solar | Roofing scope and solar timing considered together | Roof condition, structural review, scope boundaries, project sequence |
| Phased project | Smaller initial scope or later addition of storage or capacity | Electrical capacity, future load, design compatibility, later costs |
Use the table as a comparison framework, not a substitute for quotes. AMECO’s explanation of why solar installation prices vary and its solar project cost calculator can help organize questions, while a site-specific estimate should confirm costs and assumptions. You can also review AMECO’s commercial solar information when considering a business project.
For broader market context, the Solar Energy Industries Association’s Q4 2025 Solar Market Insight report discusses commercial solar market conditions. Market reporting can provide context, but it does not forecast the economics of an individual property.
Ask for scenario outputs in a format that separates physical estimates from financial assumptions. Annual generation is a modeled output; the value assigned to that generation depends on the tariff and operating schedule. Similarly, the modeled project cost may exclude roof repairs, electrical upgrades, utility work, or other scope items that have not been investigated. A report should list those exclusions clearly so the owner can distinguish an estimate from a complete project budget.
A useful sensitivity check changes one assumption at a time before combining several risks. For example, compare the base case with a smaller system, then with a higher cost estimate, then with a delay in interconnection. This reveals which input has the greatest effect on the decision. A combined downside case can follow, but it should not hide the individual drivers. If one unresolved issue dominates the result, such as roof condition or utility upgrade cost, the rational next step may be to investigate that issue before refining the financial model.
How can a business compare study options and proposals?
Compare proposals using the same core facts and assumptions. If one report includes storage, roof work, or an incentive and another does not, the headline numbers are not directly comparable. Ask each provider to separate equipment and project scopes, clarify what is excluded, and identify which estimates require a site visit, utility review, or engineering.
Before selecting a path, check that the report includes:
- The source and period for load data, with missing information disclosed.
- A site layout that identifies usable and excluded areas.
- Roof and structural questions that remain open.
- The utility tariff and interconnection assumptions used.
- A clear description of any storage purpose and operating limits.
- Named incentives, eligibility assumptions, and verification steps.
- Financial scenarios with assumptions, exclusions, and sensitivity cases.
- A list of next steps, responsible parties, and decisions needed to advance.
A provider should be willing to explain what the study can and cannot establish. AMECO Solar & Roofing is a California-owned solar and roofing contractor operating since 1974, with solar and roofing coordination among its services. Its company background and project approach offer additional context about its work. For a project-specific discussion, contact AMECO with the property’s bills, site details, and goals.
When two analyses disagree, compare their inputs before deciding which conclusion to trust. Check whether they used the same utility bills, meter boundaries, array area, energy-price assumptions, and project scope. Ask each analyst to explain differences in plain language and identify whether a change comes from better data, a different design, or a different assumption. If a provider cannot trace its conclusion back to inputs, the estimate is difficult to use in a capital decision.
It can also help to assign each open item to an owner and a next action. The facilities team may confirm operating hours and planned equipment; the property manager may locate roof plans; the utility account holder may obtain interval data; and an engineer may evaluate structural or electrical questions. Set a decision gate after those items are resolved. This turns the report into a work plan rather than a static document and keeps the business from treating every unknown as an immediate reason either to proceed or stop.
Discuss a commercial solar project
Frequently asked questions about commercial solar feasibility
How much information does a business need to start?
Start with utility bills and interval data if available, the service address and utility account details, basic building and roof information, and a description of operating hours and major loads. Existing roof plans, electrical drawings, and planned renovations can improve the initial review. The study should note any missing documents rather than quietly filling gaps with assumptions.
Does a feasibility study guarantee project savings?
No. It estimates possible outcomes using stated assumptions. Actual results depend on final design, installed cost, building use, utility rules, equipment performance, interconnection, and any verified incentives. Treat payback and savings as scenario results, not guarantees.
Should a company include roof replacement in the study?
If the roof may need work during the planned solar project, include that issue early. A roof inspection or structural review may be needed to confirm condition and capacity. Coordinating the scopes can help the owner compare timing and avoid basing an energy decision on an unverified roof assumption.
Does adding a battery always improve the financial case?
No. Storage can address a specific backup or operating goal, but its fit depends on the loads, equipment, utility tariff, usage schedule, and project cost. The study should compare storage with a solar-only scenario and explain the purpose and limits of each option.
What is the next step after the study?
Use the findings to resolve the highest-impact unknowns first: confirm load data, arrange any needed roof or structural review, check utility requirements, and verify program eligibility. Then compare proposals built on the same scope and assumptions. Schedule a project conversation to discuss the next steps for your California property.
A careful feasibility study helps a business make a clearer decision by showing what is known, what remains uncertain, and what must be confirmed before committing to a commercial solar project.
10.16.2026
Planning solar for multifamily properties in California involves more than sizing panels to a roof. Owners and property managers need to decide which building loads the system should serve, how benefits may reach residents, and whether the utility arrangement fits the property’s meters. This guide to solar for multifamily properties in California focuses on those decisions, plus roof rights, storage, tenant communication, and project coordination.
Request a multifamily solar consultation
How does solar for multifamily properties in California differ from a single-family project?
A single-family home often has one primary customer, one electric meter, and a clear relationship between household use and the solar system. A multifamily property may have a meter for each apartment, separate meters for common areas, and additional meters for commercial spaces or central equipment. The property may also have several decision-makers: an owner, asset manager, property manager, residents, lenders, and a utility account holder.
That changes the first question. Rather than asking only how many panels fit, start by defining the project’s purpose and who is expected to benefit. An owner might want to offset electricity for corridors, elevators, laundry rooms, or central systems. Residents may be interested in whether they can receive bill credits or access an on-site energy service. A property manager may prioritize predictable operations and a clear plan for outages. These goals can overlap, but they do not automatically lead to the same system design.
Multifamily solar is also distinct from generic commercial solar planning. The site may have commercial-style electrical equipment and a larger roof, but the housing arrangement introduces tenant communication, meter allocation, lease terms, and resident protections. A proposal should describe how the design fits the property’s specific ownership and utility structure, not treat the building as a single undifferentiated load.
For an early overview of residential system planning, owners can review AMECO’s solar solutions. Multifamily projects still need property-specific engineering and a separate review of the applicable utility and program rules.
A useful way to frame the difference is to separate the physical project from the benefit arrangement. Physically, panels may occupy one roof and connect through a limited number of electrical points. Financially and operationally, the property may involve many accounts and people. The engineering plan answers where equipment can go and what it can produce. The allocation and operating plan answers which account receives the value, who manages the records, and how residents are informed. Both plans need to be understandable before the owner approves a scope.
Ownership structure matters as well. A single owner may be able to authorize common-area work after internal review, while a condominium association may need a board decision, member approval, or a process set out in governing documents. A building with retail or office tenants may also have lease provisions that affect roof access or work scheduling. Identify these approval paths at the beginning, because a technically sound design can still stall if the project lacks authority to use the roof or modify shared electrical infrastructure.
Which property loads should the system serve?
List the loads before discussing system size. Begin with utility bills and account records for the building, then match each meter to the area or equipment it serves. A site plan and a meter schedule help prevent assumptions about which common loads share a meter and which apartments have individual accounts.
- Common-area loads: hallway and exterior lighting, elevators, shared laundry, amenity rooms, and other equipment billed to the owner.
- Central building systems: pumps, ventilation, heating or cooling equipment, and other shared mechanical loads where applicable.
- Resident loads: apartment electricity consumption that may be billed directly to tenants through individual utility accounts.
- Other on-site uses: a leasing office, retail space, parking-area equipment, or electric vehicle charging, if present and in scope.
Then gather enough usage history to see how demand changes over time. Seasonal patterns, occupancy changes, equipment schedules, and planned electrification can affect the shape of the load. A single monthly bill may not capture that variation. Where available, interval data can help the design team understand when electricity is used, but access may depend on who holds the account and what the utility can provide.
Record which loads are essential during an outage and which are simply desirable to offset. Those are different design questions. A solar-only system connected to the grid generally does not provide power during a grid outage unless configured with appropriate equipment and controls. Backup capability requires a deliberate system design, and not every load can necessarily be supported at once.
Keep future changes visible. A roof project, new cooling equipment, EV charging, or a planned renovation could affect the best sequence and system scope. AMECO’s guide to coordinating solar and roofing is a useful starting point when roof work may be part of the project.
To make the load list useful, label each meter with three details: the account holder, the physical loads served, and whether the use is expected to change. For example, a common-area meter might serve hallway lights and an elevator, while another owner account serves a central pump and leasing office. If electric vehicle charging is planned but not installed, record it as a future scenario rather than quietly folding an unconfirmed estimate into today’s system size.
Where accounts are difficult to match to equipment, ask the building engineer or facilities team to walk the site with the utility bills and electrical schedules. Note shared panels, mechanical rooms, and any spaces billed through a tenant account. A simple meter map can reveal that a load assumed to be common is actually billed to a resident, or that an owner-paid account includes equipment outside the solar project boundary. Clarifying those relationships early makes later production and benefit estimates easier to evaluate.
How do meters and bill-credit arrangements affect the plan?
Metering determines where electricity is recorded and how a project’s energy value could be assigned. In a multifamily property, the solar array may connect to a common-area meter, one or more building meters, or an arrangement intended to allocate credits among accounts. The right fit depends on the utility territory, the property’s meter configuration, program rules, and project eligibility. Do not assume that panels on a shared roof automatically reduce every resident’s bill.
Virtual net metering is one term owners may encounter. It can allow energy credits from a shared system to be allocated to multiple accounts under an applicable arrangement. The Bay Area Air Quality Management District’s Bay Area Solar Photovoltaic Ordinance Toolkit describes virtual net metering as a way for multifamily properties to allocate solar energy credits. That reference is useful for understanding the concept, but it is not confirmation that a particular building qualifies or that the same arrangement is available under every utility’s current rules.
For a plain-language introduction to how utility-metered solar can interact with the grid, AMECO’s net metering explainer is a helpful starting point. It does not replace a property-specific review of multifamily account allocation. Ask the utility or qualified project team to confirm, in writing, the applicable tariff, interconnection pathway, account eligibility, allocation method, and any required customer authorization. Verify what happens if a tenant moves, an account changes, or the property’s ownership changes. Also ask who receives bills and credits, how credits appear, and which party handles account corrections. These details are as important to an owner’s operating plan as the panel layout.
California has programs directed at certain multifamily properties. For example, the California Public Utilities Commission describes the Solar on Multifamily Affordable Housing (SOMAH) Program as providing incentives for photovoltaic systems for multifamily affordable housing. Eligibility and availability depend on program requirements and project circumstances; owners should check current program materials and confirm eligibility before using an incentive assumption in a budget.
Common-area meter
What it may serve: Owner-paid shared loads billed to a common account.
Key question to resolve: Does the system’s expected production align with the account’s usage and applicable utility rules?
Separate resident meters
What it may serve: Individual apartment accounts, if an approved allocation approach is available.
Key question to resolve: Can credits be allocated to these accounts, and what approvals or program conditions apply?
Shared or virtual allocation
What it may serve: Multiple eligible accounts associated with a property or project.
Key question to resolve: Which accounts qualify, how are credits assigned, and who manages changes?
Solar with storage
What it may serve: Selected loads during defined operating conditions, subject to system design.
Key question to resolve: Which circuits are prioritized, and what backup duration and operating limits are intended?
The table is a planning aid, not a guarantee that each route is available. Metering, rate structures, and incentive rules change, and a property may have constraints that rule out an otherwise attractive option.
Request a sample bill or allocation illustration before treating projected credits as a resident benefit. The illustration should show the accounts included, the method used to assign energy or credits, the party that administers changes, and what happens when occupancy or account details change. Ask whether account holders must sign forms or maintain particular service arrangements. If a proposal relies on a program or tariff, identify each approval still pending and who is responsible for obtaining it.
For affordable housing, confirm program fit at the property and project level. A building’s broad description is not enough to determine eligibility, and requirements or funding availability may change. Separate the baseline project economics from any conditional incentive in the proposal. That lets ownership assess the project without treating an unconfirmed benefit as certain, while still understanding how a qualified incentive could alter the plan if approved.
Also agree on the administration after installation. A building may need a person to track tenant turnover, submit account updates, reconcile statements, and answer questions when the allocation does not match expectations. Put that ongoing work in the operations plan. If no one is assigned to it, even a workable technical arrangement can become confusing for residents and property staff.
What roof rights and building conditions should owners review?
A large roof is not automatically a usable solar surface. Confirm who owns or controls it, whether leases or governing documents grant access rights, and whether residents or commercial tenants have rights that affect installation or maintenance. For a condominium or cooperative, review the association’s approval process and the governing documents before assuming that one owner can authorize work for the entire building.
Next, review the roof’s condition, age, materials, drainage, penetrations, and access routes. A roof that needs replacement or substantial repair may call for coordinated roofing and solar work. Installing equipment without addressing known roof issues can lead to avoidable removal and reinstallation later. A qualified assessment should consider structural capacity and local permitting requirements rather than relying on visual estimates alone.
Owners can organize the initial roof review with a few practical records:
- Roof plans, available structural documents, and records of past repairs or replacements.
- Any existing warranties, maintenance agreements, access rules, or roof-use restrictions.
- Photos of equipment, vents, skylights, parapets, and shaded areas that may limit panel placement.
- Planned roof work, tenant improvements, or building renovations that could overlap with installation.
Look for coordination issues beyond the array itself. Equipment staging, resident access, noise, parking, fire access, and safe roof pathways can affect scheduling and day-to-day operations. For properties considering a combined project, compare a coordinated scope with separate solar and roofing scopes, and ask who will manage sequencing, inspections, and any equipment removal needed for future roof work.
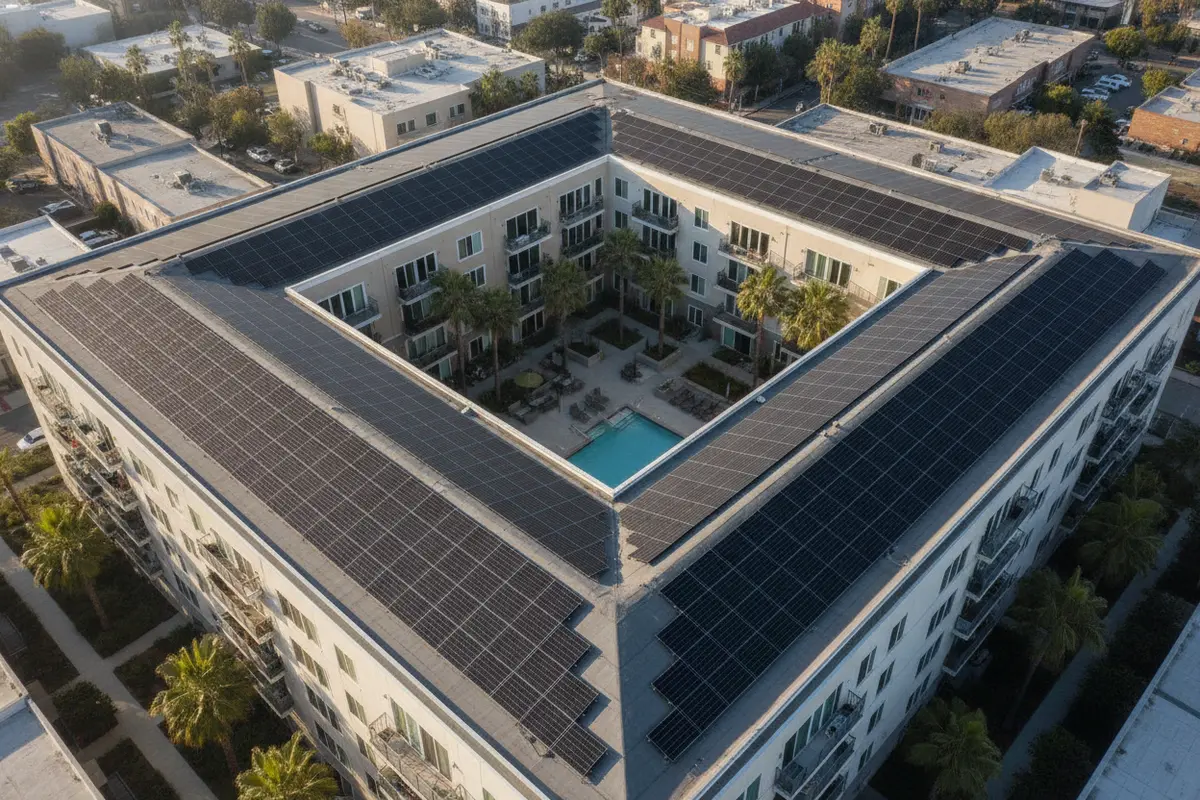
Owners should also distinguish legal access from practical access. A document may permit contractors to reach the roof, but the project still needs a workable route for equipment and materials, a plan to protect occupied areas, and a process for notifying residents about temporary disruptions. Check whether roof access is shared with telecommunications, HVAC, or other service providers. Existing equipment agreements can set limits on where panels or pathways may go.
Ask how the design addresses drainage and maintenance. Panels and mounting equipment should be considered alongside roof drains, scuppers, walkways, and service clearances. Property staff will need to know which areas remain accessible and whom to contact when roof work is needed later. If a roof warranty or maintenance agreement applies, have the responsible parties review the proposed attachment and service plan before approval. Record any conditions in the scope so they do not get lost between design and construction.
When comparing a combined roof-and-solar project with separate contracts, look beyond the initial schedule. A coordinated scope may make sequencing easier, but the owner should still understand the separate work descriptions, responsibilities, inspection points, and remedies if a roof issue is uncovered. If roof work is deferred, ask how the array can be serviced or removed if repairs become necessary during its operating life. A decision record should state why the selected sequence fits the building’s roof condition and capital plan.
Should the project include battery storage?
Storage should be evaluated against a defined operating goal, not added simply because a property has solar. A battery can be considered for backup of selected circuits or to manage how energy is used over time, subject to equipment, utility, and project rules. Its value depends on the building’s load profile, the selected operating strategy, system configuration, and costs. A battery does not necessarily power an entire building, and backup duration depends on the loads being served and system design.
Ask the design team to show which circuits are intended for backup and which remain outside that scope. In a multifamily building, possible priorities might include limited life-safety or operational loads, but the owner should not treat a solar-and-storage proposal as a substitute for required emergency systems. Confirm how the system behaves during an outage, what controls are involved, and whether the property’s electrical configuration supports the intended use.
Owners can compare storage scenarios by asking for separate proposals or clearly separated line items: solar without storage, solar with storage for defined backup loads, and any larger configuration under consideration. Review equipment space, ventilation and access requirements, maintenance responsibilities, permitting, and emergency response procedures. The battery backup overview can help frame questions about storage, but the building’s load study and proposal should determine the configuration.
Prioritize the property’s resilience goals. If the main concern is keeping a few shared systems operating, a targeted backup scope may differ from the needs of residents expecting apartment-level backup. Explain those limits early to avoid mismatched expectations.
A practical comparison starts with a list of loads, not a battery capacity figure. For each candidate circuit, note whether it supports building operations, resident comfort, communications, or another purpose, and estimate how critical it is during an outage. Then ask the project team to describe the proposed controls and how loads are managed if available energy is limited. The answer should make clear whether backup is automatic, what staff action may be needed, and what the system cannot serve.
Storage also introduces operating responsibilities. Identify who receives system alerts, who can access monitoring, who coordinates service, and how residents are told what to expect during an outage. If the equipment serves only common circuits, make that distinction clear in resident notices. If future plans include new shared loads, such as charging equipment or central HVAC changes, ask whether those plans affect the storage design or should be treated as a separate later phase.
Compare alternatives on a consistent basis. A proposal with storage should not be judged only by its combined headline production or backup claim. Review the added equipment, the specific loads served, operating assumptions, maintenance duties, and any utility or permitting conditions. Keep the selected purpose in writing so later staff and residents understand why the system was configured that way.
How should owners handle tenant questions and benefit allocation?
Resident communication needs to reflect the project’s actual structure. Before promising lower bills or uninterrupted power, confirm who owns each meter, whether residents are included in the project, how any credits would be allocated, and what utility documentation supports the arrangement. A shared roof alone does not answer those questions.
Make tenant communication part of project planning, not a notice sent at the last minute. A clear resident update can explain the project’s purpose, expected work areas, likely access needs, timing once confirmed, and a contact route for building operations. If residents may receive an energy-related benefit, show how it will be calculated and administered only after the details are confirmed. Avoid implying that every household will receive an identical bill reduction.
Property managers should coordinate with ownership, legal and finance teams, the utility account holder, and resident representatives as appropriate. Review lease language and local requirements before changing how electricity is billed or allocated. Preserve records of notices, approvals, account assignments, and the final operating plan.
For building operators who are comparing how a property’s usage affects a solar proposal, AMECO’s on-grid solar system guide provides useful background on grid-connected systems. A multifamily project still requires separate evaluation of tenant accounts and property-specific utility rules.
A communication plan can be organized around three stages. Before construction, explain what work is planned, which areas may be affected, how residents will receive schedule updates, and where questions should go. During installation, provide notices when access, parking, or shared amenities may change. After the system is operating, explain only the confirmed features: which meters or loads it serves, whether residents participate in an allocation arrangement, and how to report a billing or operations concern.
Use plain language and separate confirmed facts from pending decisions. For example, an update can say that the owner is evaluating a shared solar project while utility approval and account eligibility are still under review. It should not say that tenants will receive a specific savings amount before the allocation details are settled. If residents will not directly receive credits, state the project’s intended purpose honestly, such as serving owner-paid common loads, rather than suggesting a household benefit that is not part of the plan.
Plan for turnover and continuity. A property may have different residents, account holders, or management staff by the time the system is operating. Keep a short reference file with approved resident notices, the account or allocation list, utility correspondence, and the name of the person responsible for updates. This gives new staff a reliable source of information and reduces the risk that informal explanations become promises the project cannot support.
What should a multifamily solar proposal include?
A useful proposal should connect the design to the building’s actual records and intended outcomes. Ask for the system assumptions, the loads it is designed to serve, the utility and meter configuration used, and any dependencies that remain unresolved. If multiple options are presented, compare them on the same basis rather than choosing by panel count alone.
- Property and load assumptions: meter list, usage history, shared versus resident loads, and any future equipment changes included.
- System design: roof layout, estimated production assumptions, equipment, interconnection approach, and any required electrical work.
- Benefit pathway: which accounts or loads could receive value, how allocation is expected to work, and what utility or program confirmation is still pending.
- Storage scope: backup circuits, operating limits, equipment location, and the intended outage response.
- Roof and construction coordination: repairs, access, staging, resident notices, inspections, and responsibilities for future roof maintenance.
- Project economics: itemized costs and clearly stated assumptions for incentives, financing, or other benefits, each subject to verification and eligibility.
- Operations and support: monitoring access, maintenance process, warranty documents, and the party responsible for each ongoing task.
Compare not only estimated production, but also the assumptions behind it. Ask which utility rate and tariff information was used, how shading and roof obstructions were modeled, and whether the proposal accounts for the building’s load timing. Review any savings estimate as a scenario, not a universal promise. Actual results depend on site conditions, utility arrangements, usage, system performance, program eligibility, and other factors.
AMECO Solar & Roofing provides solar installation and roofing, allowing owners to discuss those scopes together. Learn more about the company’s California solar and roofing background and its project approach. Ask any installer to explain the people, approvals, and project stages involved for your particular building.
For a fair comparison, create one page that lists each proposal’s system boundary, accounts or circuits included, unresolved approvals, and major assumptions. Then compare costs and expected outcomes only where the assumptions match. One proposal may cover common loads only, while another may include an allocation process or storage; placing them side by side without noting that difference can make the comparison misleading.
Ask the proposer to identify what is fixed and what can change after a site or utility review. Roof repairs, electrical upgrades, equipment substitutions, interconnection requirements, or program decisions can affect scope. Clarify how proposed changes will be documented and approved. If estimates include incentive or financing assumptions, ask for the source and eligibility conditions, and request a version that shows the project without any unconfirmed benefit.
Finally, check whether the proposal names an owner for each next step. Utility communications, association approvals, roof review, resident notices, and monitoring setup may be handled by different parties. A responsibility list with a named role and target checkpoint helps prevent gaps between design approval and the start of work. It also gives property managers a way to plan staff time and keep residents informed.
To discuss how the property’s roof, electrical layout, and solar scope may fit together, request a property-specific review.
How can the project be coordinated from review to operation?
A phased process helps reveal missing information before commitments are made. The exact sequence can differ by building, utility, and project scope, but owners can use the following checkpoints to organize a discussion:
- Set the project goals. Identify whether the priority is offsetting owner-paid common loads, exploring resident benefits, backup for selected equipment, or a combination.
- Build a property file. Collect bills and meter data, site and roof plans, ownership documents, roof records, electrical information, and renovation plans.
- Map accounts and stakeholders. Identify the account holders, property decision-makers, resident communication needs, and parties authorized to approve roof or electrical work.
- Request a site and utility review. Have the project team assess roof, structural, electrical, shading, and interconnection considerations. Confirm which utility and program assumptions require direct verification.
- Compare distinct options. Review common-load solar, any valid allocation pathway, and storage alternatives separately so the tradeoffs are clear.
- Confirm approvals and scope. Resolve roof rights, permitting, utility steps, program eligibility, resident notices, construction access, and responsibility for ongoing operation.
Owners can use AMECO’s project examples as a way to discuss system types and installation considerations, while recognizing that a case study does not establish the fit or outcome for another property. To organize the first conversation, prepare the meter list and recent bills if available. A property-specific review can then identify the next information needed.
It can help to assign a coordinator who maintains the project file and logs open questions. That person does not need to make every technical or legal decision; the role is to route questions to the right reviewer and ensure answers return to the owner and property team. A concise issue log might list the question, responsible party, evidence needed, and status. Examples include confirmation of roof authority, utility account eligibility, the proposed interconnection route, and which resident notices require approval.
Before construction, hold a readiness review that includes ownership, the property manager, the installer, and other relevant building personnel. Confirm the approved scope, work area, access arrangements, resident communications, emergency contacts, and inspection responsibilities. After commissioning, collect final plans, operating instructions, utility records, monitoring access information, and maintenance contacts in the same property file. The handoff should explain what the system does and what it does not do, particularly if storage or tenant credit allocation is part of the project.
Discuss your property’s solar and roofing needs
Frequently asked questions about multifamily solar
Can one rooftop system serve several apartment accounts?
Potentially, but it depends on the utility arrangement, account eligibility, project rules, and any allocation process. A shared rooftop system does not automatically distribute credits across individual tenant meters. Ask the utility and project team to confirm the specific pathway and required approvals.
Does a multifamily property qualify for SOMAH?
Not every multifamily building qualifies. The California Public Utilities Commission describes SOMAH as an incentive program for solar photovoltaic systems for multifamily affordable housing. Owners should review current program requirements and confirm property and project eligibility with the program administrators before including an incentive in a budget.
Will solar keep the whole building powered during a blackout?
Not by itself. Grid-connected solar generally needs compatible backup equipment and a defined system design to serve loads during an outage. Storage capacity, controls, electrical configuration, and the circuits selected determine what can operate and for how long.
Should the roof be replaced before solar panels are installed?
That depends on roof condition, remaining service life, structural findings, warranties, and the building’s maintenance plans. If significant roof work is anticipated, compare a coordinated roof-and-solar schedule with a solar-only scope before deciding. A qualified site assessment can help identify the relevant constraints.
Ready to evaluate solar for your multifamily property?
Start with the building’s meters, usage records, roof documents, and project goals. Then ask for a proposal that explains how the design serves those goals, what utility or program assumptions need confirmation, and how residents and building operations will be affected.
Request a property-specific review with AMECO Solar & Roofing.
A careful review of loads, roof rights, metering, storage needs, and tenant communication gives owners a more useful basis for deciding whether and how to move forward.
10.15.2026
Solar panel fire safety in California homes starts with good system design, careful installation, and a clear plan for maintenance and emergencies. Solar equipment does not make a home fireproof, and no single device or credential can promise a particular outcome. Homeowners can, however, learn what the design should address and what information to keep available after installation.
Request a solar and roofing consultation
This guide covers roof layout, clearances, shutoff equipment, code-aware installation, upkeep, and questions to ask before approving a proposal. The right details depend on the home, equipment, local requirements, and the authority reviewing the project. For an overview of AMECO's coordinated solar and roofing approach, see how its home solar projects are approached.
What does solar panel fire safety involve?
A rooftop photovoltaic (PV) system includes more than the panels. It may include mounting hardware, wiring, inverters, protective devices, and, if selected, battery storage. Each part must be designed to work with the others and with the home's electrical service. Fire safety therefore is not simply a question of buying a panel with a particular label.
Good planning considers the roof's condition and shape, where electrical equipment will sit, how wiring will be routed and protected, and how emergency responders can identify the system. The design also needs to follow applicable electrical, building, and fire requirements. Those rules can depend on project details and local review, so a homeowner should ask the installer to explain the requirements that apply to the specific property rather than assume one checklist covers every California home.
The U.S. Department of Energy's Guide to Fire Safety with Solar Systems offers safety guidance for PV system owners and first responders. DOE also discusses resilience considerations for rooftop solar in wildfire conditions in its solar photovoltaic hardening guidance. These resources are useful context, but they do not replace a property's plans, inspection, or local authority requirements.
It helps to think in layers instead of searching for a single “fire-safe” feature. A well-planned roof layout, sound electrical work, required protection and labeling, a proper inspection, and a useful owner handoff each address different parts of the project. A homeowner can ask about each layer, then keep the answers and approved documents together. That approach makes the discussion specific to the system rather than turning a broad safety label into a promise.
How should the roof and panel layout be planned?
The roof is both the mounting surface and part of the home's building envelope. Before a system is installed, the design process should take account of roof condition, material, slope, framing, and the location of vents, skylights, ridges, and other features. Panels should not be placed in a way that blocks required access or creates conflicts with roof features and equipment.
Ask to review a site-specific layout, not just a rendering of a generic panel array. The plan can help you understand which roof areas will be used and how the design accommodates access and code requirements. If the roof may need work, discuss that before installation. A roof repair or replacement coordinated with solar can help avoid removing and reinstalling equipment later, but the sequence and scope depend on the roof and project. AMECO offers both solar and roofing services; homeowners can review its roofing solutions and solar solutions when considering a coordinated project.
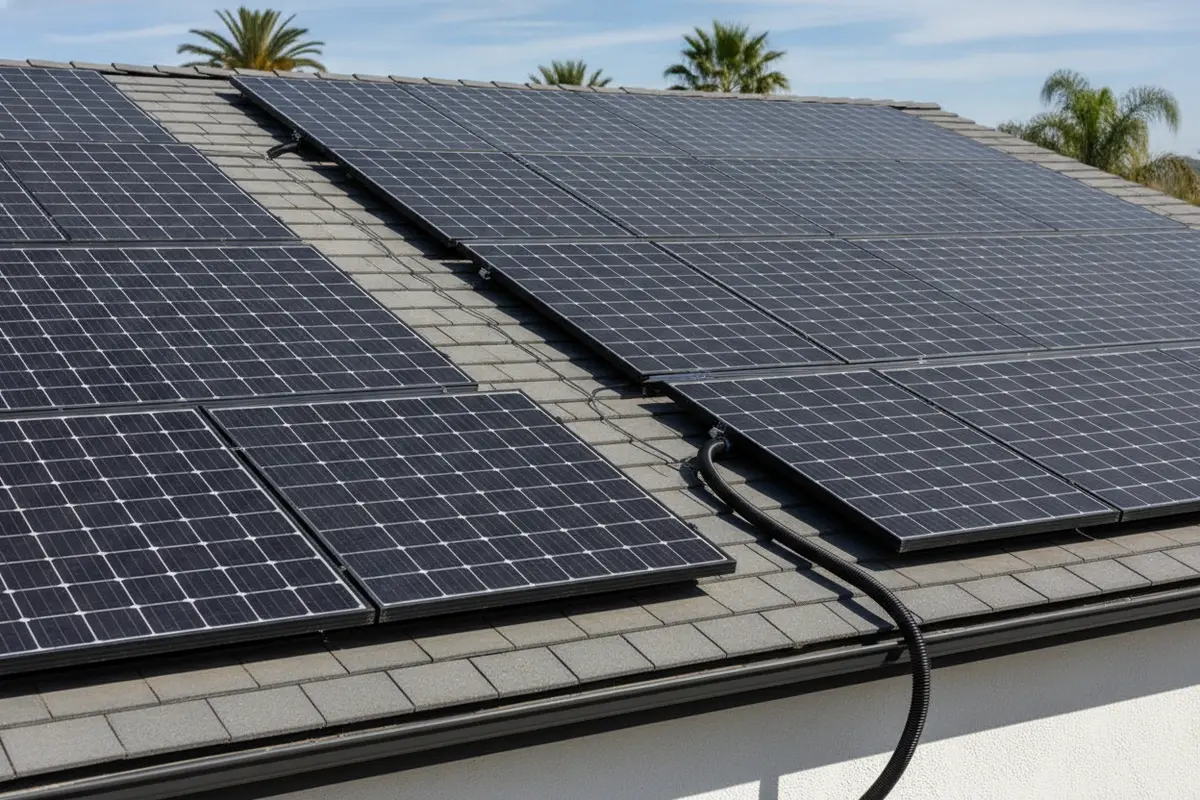
Clearances and access paths are not decorative details. They may relate to applicable fire-code provisions, safe service access, roof geometry, and the local plan review. The amount and placement of open space should be confirmed for the property's approved design; do not rely on a universal distance found in an online discussion. Keep in mind that a roof layout can change after a site survey or plan review.
A practical review begins with the drawing and the actual roof. Check that the plan identifies the array, roof edges, ridges, access points, vents, skylights, chimneys, and any equipment near the home. If a feature is missing or appears in the wrong place, ask for the plan to be corrected before it becomes the basis for construction. For example, a vent shown under a proposed panel row may need a design adjustment; the homeowner should not assume the installation crew will decide how to resolve it on the roof.
Roof condition deserves its own conversation. Ask whether the installer or roofing professional observed damaged materials, signs of prior repair, or areas that may need attention before mounting. If roof work is part of the plan, clarify the order of work, which party handles each scope, and how the final solar layout will reflect the roof that is actually installed. Keeping this sequence clear can help reduce avoidable changes after materials arrive.
- Ask which roof areas are included and what access or clearance areas remain open.
- Confirm that vents, skylights, chimneys, and other roof features are shown accurately.
- Discuss the roof's present condition and any work recommended before panels are mounted.
- Request clarification if a proposed layout changes between the initial design and final plans.
- Ask who will provide the approved final drawing and where you should keep it after the project.
These questions support a more useful design conversation. They do not replace the installer's engineering review or the local authority's approval. For examples of completed projects, see AMECO's California solar installation projects.
What should homeowners know about shutoff equipment?
Solar panels produce electricity when illuminated. That fact matters during maintenance and emergency response: switching off the home's main service does not necessarily mean every part of a PV array is de-energized. The system's design should include the required disconnecting and safety equipment, and the homeowner should know where the relevant controls are and how to communicate that solar is present.
Ask the installer to show you the disconnect locations and explain what each control does. The system may have more than one shutoff point, and equipment and labeling vary. Do not open enclosures, handle exposed wiring, or attempt to isolate components yourself. Follow the instructions provided for your specific system and leave electrical work to qualified professionals.
Request a simple handoff that identifies the main electrical equipment, provides the system diagram or documentation, and tells you whom to call for service. Keep this information somewhere accessible, not only in an email account. The DOE's fire-safety guide provides additional information about communicating PV system details during an emergency. Homeowners adding storage should also ask how the battery is included in the shutdown and emergency information; AMECO's home battery backup overview can help you understand the separate system-planning topic.
During the handoff, ask the installer to walk through the labels and explain which equipment they identify. You do not need to memorize technical terminology, but you should be able to find the information sheet or diagram and tell a responder that a PV system is present. Have the installer note any system-specific limits on what a homeowner may operate. A control that looks like a simple switch is not an invitation to experiment during an emergency.
For a household with more than one adult, consider reviewing the handoff together. Show family members where the system documents are stored and how to describe the equipment to emergency personnel. If you rent part of the home or expect guests to stay for an extended period, make sure the people responsible for the property know that solar is installed. The goal is not to ask household members to diagnose or shut down the system; it is to ensure they can share accurate information and avoid unsafe contact.
How can installation and code review support safety?
Code-aware installation means that the project is planned and completed to the requirements that apply to its equipment, location, and permit. The specific review can involve electrical and building requirements and, where applicable, fire access provisions. California jurisdictions can adopt or administer requirements through their own processes, so the permit set and the authority having jurisdiction matter for the individual home.
Ask who is responsible for permitting, what inspections are expected, and what documents you will receive at completion. A reliable handoff should make it possible to identify installed equipment and understand how the system was configured. A product listing or certification may address a particular component or test; it is not, by itself, proof that every design choice or installation detail is appropriate for every property.
Homeowners can use this checklist when reviewing a proposal:
- Does the plan show the actual roof, array location, and electrical equipment locations?
- Who handles permit applications, plan updates, inspections, and correction notices?
- How are wiring routes and connections protected and documented?
- What labels, diagrams, manuals, and emergency information will be provided?
- Who should be called if an inspection requires a change or if equipment needs service?
- How will approved changes be recorded so the final documents match the installed system?
It can also help to distinguish the stages in the process. A proposal describes the intended scope; a permit submission presents plans for the applicable review; construction follows the approved project documents and any authorized revisions; and inspection checks the work under the relevant process. Homeowners do not have to interpret technical code language on their own. They can ask the project team to explain what has been submitted, what approvals or inspections remain, and whether a change requires updated documentation.
Compare answers in writing, especially when comparing multiple proposals. One contractor may include steps or documentation that another proposal leaves unclear. AMECO has operated in California since 1974 and coordinates solar and roofing services; its company background describes its California roots and integrated focus. The relevant project scope and approvals still need to be confirmed for each home.
For a homeowner comparing bids, a short written scope can prevent assumptions. Note who prepares and submits permit documents, who communicates review comments, and who schedules inspections. Ask whether the contractor will provide final system diagrams and equipment instructions, and whether the array layout could change during review. A clear answer is more useful than a broad claim about credentials because it tells you what will happen on this property and what records you will have afterward.
What routine maintenance is appropriate?
Most homeowners should not climb onto a roof or touch electrical components to inspect a solar system. Instead, keep the system's documents and service contact information available, monitor the system using its provided monitoring method if available, and report an unusual alert or visible damage to the installer or a qualified service provider. Follow the manufacturer's instructions for the equipment you have.
After high winds, a nearby fire, roof work, or other event that may have affected the array, look from a safe location for obvious changes such as displaced equipment, damaged conduit, or debris. Do not approach downed wires or damaged electrical equipment. If there is smoke, sparking, or an active fire, move away and call emergency services. Do not try to extinguish an electrical fire or operate equipment in an unsafe area.
Routine care is not a reason to spray, open, or modify the system. If a roof inspection or repair is needed, tell the roofing professional that solar equipment is installed and coordinate any required system work. For basic PV terminology, AMECO's guide explains what a PV system is. For broader care topics, consult the system documentation and a qualified provider rather than treating a generic maintenance schedule as a substitute.
A simple record can make service calls more productive. Keep the installation date, equipment list, final layout, inspection or permit records, manuals, and service contact in one place. Add a note when a professional checks the system or performs roof work. If you receive a monitoring alert, write down its date and wording and take a screenshot if the system offers that option. Share the information with the service provider rather than trying to clear an alert by opening equipment or changing wiring.
Homeowners can also decide in advance who will arrange professional review after a significant event. For example, if a roofer needs to work near the array, tell them about the solar system before work begins and ask how any required electrical or mounting work will be coordinated. If the monitoring app goes offline, distinguish a communications issue from a physical warning by following the maker's instructions and asking a qualified provider when uncertain. Remote observations are not a substitute for an on-site inspection when one is needed.
Discuss a solar and roofing plan for your home
What changes when a home has battery storage?
A battery adds equipment and another part of the electrical system to consider. Its location, installation requirements, operating instructions, and emergency information should be covered in the project plan. Ask which equipment is included, where it will be placed, what clearances or environmental conditions apply, and how its shutdown instructions relate to the solar array and home electrical service.
Do not assume that a battery will power every circuit during an outage or that it changes how every solar system behaves when grid power is lost. Backup capability depends on system design and selected equipment. Ask for a clear explanation of the circuits supported, operating modes, and limitations. AMECO's guide to solar during a blackout provides additional background, and its battery backup FAQ addresses the subject from a system-planning perspective.
Before approving storage, ask the installer to identify the battery and related components on the plans and explain their location relative to the home and other equipment. Request the applicable operating and emergency information for the chosen system. Ask how the battery affects the shutdown sequence and who should assess it if it has been exposed to fire, impact, water, or other damage. Do not approach a damaged unit or attempt to restart it; follow the manufacturer's instructions and emergency responders' directions.
It is also useful to clarify what the battery does not do. Backup operation depends on the designed system and selected circuits, and it should not be treated as a substitute for emergency services or a guarantee that power will be available in every condition. A proposal should state what equipment is included and what backup behavior to expect. This helps homeowners understand both the practical function and the safety information for the complete system.
Which questions help compare solar proposals?
Fire-safety questions are most useful when they invite a specific explanation, drawing, or written answer. Avoid relying on a slogan such as “fire-safe” without asking what it means for the actual design. A proposal should make it possible to understand the equipment, installation scope, permitting, and owner handoff.
| Topic | What to ask | What to look for in the answer |
|---|---|---|
| Roof layout | Where will panels and equipment go, and what access areas remain? | A site-specific layout that reflects roof features and applicable review requirements. |
| Roof condition | Does the roof need work before installation? | A clear explanation of observed conditions, proposed work, and how solar and roofing scopes coordinate. |
| Electrical safety | Where are shutoffs and disconnects, and what does each one control? | Equipment-specific explanation and locations shown in project documentation. |
| Permits and inspection | Who manages permits and what inspections are expected? | Defined responsibilities and a plan for addressing review comments. |
| System handoff | What information will I receive after installation? | Applicable diagrams, equipment instructions, labels, and service guidance. |
| Battery storage | If included, where is the battery and how does it operate in an emergency? | Equipment-specific siting and operating information, including system limitations. |
To use the table, compare the same topics across each proposal rather than letting different sales materials set different standards. Mark an item as “confirmed,” “needs clarification,” or “not included,” then follow up on gaps before signing or approving a final design. If a contractor gives a verbal answer about a material detail, ask for it to be reflected in the scope or project documents. This is especially useful for roof repairs, access space, equipment locations, and who will deliver the final system records.
Ask for any unclear point to be explained before you sign or approve a final design. You can also read AMECO's overview of its design and installation approach and its residential solar information as you prepare to discuss a project. A comparison is most useful when each company is answering the same questions about the same home.
What should you do if there is a fire or visible damage?
Put personal safety first. If a fire is active, there is smoke or sparking, or electrical equipment appears damaged, move to a safe location and call emergency services. Tell responders that the property has a solar PV system and, if applicable, battery storage. Do not touch the array, wiring, damaged equipment, or downed lines, and do not go onto the roof.
After the immediate hazard has passed, wait for emergency responders or qualified professionals to say the area is safe. Contact the installer or an appropriate service provider to assess the system before it is operated again. Keep records of the event and any repair recommendations. The system's manuals and diagram can help a professional understand what was installed, but do not use them to perform electrical work yourself.
Preparedness can be simple: store the system information in a known location, make sure household members know the system is present, and include solar and battery details when communicating with emergency responders. DOE's fire safety resource for solar systems is a useful reference for owners reviewing emergency considerations.
Consider making a brief household note that says the home has rooftop PV and identifies where the system documents can be found. Include the installer or service contact details and whether battery storage is present. Keep the note with other emergency information, but do not post private system details where they create a security concern. If you move, pass the manuals and system records to the new owner or property manager so the information remains with the home.
During a wildfire warning or nearby fire, follow local emergency instructions first. Do not go onto the roof to cover panels, move equipment, clear debris, or operate a control. DOE's wildfire resilience guidance discusses planning considerations for PV systems; the specific actions for a household should come from emergency authorities and the system's qualified professionals, not from improvised rooftop work.
Ask about planning a coordinated solar and roofing project
Frequently asked questions about solar panel fire safety
Can solar panels be shut off during an emergency?
PV systems include disconnecting and safety equipment, but the exact controls and what they isolate depend on the system. Ask your installer to show you the installed controls and explain them. Do not assume that turning off the home's main service de-energizes every panel or wire, and do not handle electrical equipment during an emergency.
Do panels need a specific amount of open roof space?
Clearance and access requirements depend on the applicable rules, roof, system layout, and local review. There is no single measurement that should be assumed to apply to every home. Have the installer show the project's planned access areas and explain how they meet the requirements for that property.
Does a product certification guarantee a fire-safe installation?
No single label guarantees the outcome of every installation or eliminates risk. Product testing or listing addresses defined criteria; the full project also depends on system design, compatible components, installation, inspection, and maintenance. Ask what each certification applies to and request the project-specific permit and equipment information.
Should I inspect or clean panels myself after a fire?
No. Stay away from damaged panels, wiring, and electrical equipment, and do not climb onto the roof. Let emergency responders determine when the area is safe, then ask a qualified professional to inspect the system before it is used again.
What records should I keep after installation?
Keep the final layout or system diagram, equipment manuals, permit and inspection documents, shutdown instructions, and the service contact in an accessible place. These records help you explain what is installed and give a qualified professional a starting point if the system needs service. Store digital copies as well as any paper documents you receive.
How can you plan a safer solar project?
Start with a site-specific design and ask for clear answers about roof condition, array layout, access, electrical equipment, shutoffs, permitting, and the final handoff. If you are considering a battery or roof work as part of the project, include those choices in the same conversation so their requirements are considered together. Requirements and equipment vary, so use the approved plans and system documentation as the reference for your home.
To discuss a California solar and roofing project, request a consultation with AMECO Solar & Roofing. Bring your questions and any available roof, utility, or prior system information so the project team can understand the property and explain the next steps.
10.14.2026
Choosing a solar company in San Jose takes more than comparing a few headline prices. Proposals can differ in system design, roof assumptions, battery capacity, equipment, and the work included. A careful comparison helps you understand what each installer is actually offering before you decide.
Request a solar and roofing estimate
This guide focuses on practical checks for homeowners in San Jose and nearby communities. It is not a list of local installers, and it does not assume that every California contractor serves every address. Confirm service availability for your specific property before investing time in a proposal. AMECO Solar & Roofing has served California since 1974 and offers solar and roofing services; homeowners should verify whether their address is within the current service area.
How can you verify a solar installer's license and local coverage?
Start with identity and accountability, not a sales presentation. Ask for the company’s full legal business name, contractor license number, and the name of the entity that will sign your agreement. Search the California Contractors State License Board (CSLB) website and confirm the license status and classification for the work being proposed. The CSLB website provides the official starting point for contractor license information. Check that the details match the business and contract rather than relying only on a badge or a salesperson’s verbal assurance.
Ask who is responsible for each part of the project. A solar installation may involve system design, electrical work, roof work, permits, utility coordination, inspections, and post-installation support. If different companies or trades are involved, find out who manages handoffs and who you contact when an issue arises. Get the answer in writing. A clearly described process is more useful than a vague promise that “everything is handled.”
Local service coverage is a separate question from licensing. A California license does not establish that a company currently works in San Jose or in your utility territory. Ask whether the installer can serve your exact address, whether it regularly coordinates permits and interconnection in the relevant jurisdiction, and which team handles those steps. Do not infer a local office from a service-area page or a project photo.
- Confirm the contracting entity and license details through the CSLB.
- Ask whether the company currently serves your property address.
- Identify who handles design, permits, installation, inspections, and support.
- Request written clarification when more than one contractor or trade is involved.
For a general overview of how solar projects move from consultation toward installation, review the process carefully and ask how it applies to your home. A description of a company’s approach is not a substitute for confirming the specific scope in your own agreement.
What should a complete solar proposal show?
A useful proposal should let you connect the recommended equipment to your home’s energy use and roof. It should explain the system size, expected production assumptions, equipment models, installation scope, major exclusions, and the basis for any savings estimate. Compare those details line by line instead of treating the total price or estimated monthly figure as the whole offer.
Look for the assumptions behind the estimate. Does the proposal use your recent electricity usage? Does it describe roof orientation, shading, and usable roof area? Does it explain whether production estimates account for the site conditions? If the installer has not inspected the roof or reviewed relevant utility information, ask which inputs are preliminary and what could change after a site assessment.
A solar proposal should also make the payment structure understandable. AMECO offers prepaid lease options, but terms and availability depend on the particular offer and project. Ask each company to spell out the payment schedule, ownership and maintenance responsibilities, included services, and any conditions that affect the arrangement. Do not compare a purchase price with a lease payment as if they were identical measures. Review the agreement itself and get qualified advice if a term is unclear.
Proposals may use different assumptions about energy use, future utility charges, system output, and equipment. Those differences can make projected savings look unlike one another. Treat a projection as an estimate, not a guaranteed result. Ask the installer to explain the assumptions in plain language and to show which figures are measured, modeled, or dependent on future rates and household behavior.
| Proposal item | What to compare | Question to ask |
|---|---|---|
| System design | Panel count, system capacity, roof layout, and production assumptions | What site and usage information supports this design? |
| Equipment | Panel, inverter, monitoring, and battery models where included | What does each component do, and what support applies? |
| Roof work | Whether inspection, repairs, or replacement are included or excluded | What roof conditions could change the scope or price? |
| Project responsibilities | Design, permits, installation, inspections, utility coordination, and support | Who owns each step and gives me status updates? |
| Payment and terms | Payment structure, ownership, service duties, and contract conditions | Which terms differ between these proposals? |
| Battery option | Usable capacity, backup loads, controls, and included installation work | Which circuits are intended to operate during an outage? |
Use the table as a starting checklist, not a substitute for the contract. When a proposal leaves an item blank, ask whether it is excluded, not yet determined, or included elsewhere. This prevents a low initial figure from appearing comparable to a more complete scope.
Make a simple comparison sheet with one row for each major scope item and one column for each installer. Record the proposal date and version, then copy the stated system capacity, component models, roof assumptions, payment structure, and exclusions into the sheet. Add a separate column for open questions. This makes it easier to spot a missing detail without assuming that a blank means the work is included.
When an answer changes the design or price, ask for an updated proposal rather than relying on a verbal correction. For example, if a roof inspection leads to a different panel layout, the revised document should identify the new design and explain whether equipment, production estimates, or project responsibilities changed. Keep earlier versions so you can see what changed and why.
AMECO’s guide to why solar installation prices can vary offers another prompt for questions. You can also review the company’s solar system cost FAQ and use the solar cost calculator as an initial planning tool; a calculator is not a final, site-specific quote.
Explore a preliminary solar estimate

How should you compare roof condition and solar work?
The roof is part of the solar decision because panels and electrical equipment are expected to remain in service over a long period. Before choosing a design, understand the roof’s current condition, age as assessed by a qualified professional, existing damage, and any repairs that may be needed. The right next step depends on the roof material and its actual condition; no single age cutoff answers every homeowner’s question.
Ask each installer how the roof was evaluated and whether the proposal assumes that it is ready for the project. Find out what happens if the installation team discovers damage or a need for repair after work begins. Clarify which repairs are included, how additional work would be approved, and whether removing or reinstalling panels later for roof work has been considered. A written scope helps you avoid assuming that “solar-ready” includes roof repairs.
If your roof may need substantial work, compare two paths: completing roofing work before solar installation, or coordinating roofing and solar under a defined project plan. Combining the work may simplify communication, but it is not automatically the right choice for every home. Compare the scope, schedule assumptions, materials, warranties or service terms, and responsibility for coordinating trades. AMECO provides both solar and roofing services, which can allow the work to be discussed together; the actual scope must still be confirmed for your property.
Request that the roof conversation move from a general impression to documented observations. Ask which roof areas can support the proposed array, whether shading or obstructions alter the layout, and whether the plan leaves access for maintenance. If repairs are proposed, request a description of the affected area, materials, and approval process before work proceeds. These details help you distinguish a necessary scope change from a change that has not yet been explained.
Review roofing services and options alongside the solar proposal if roof work is part of your decision. This guide to combining solar and roofing can help you prepare questions about sequencing and coordination. Ask for a roof-specific explanation rather than accepting a generic statement that the roof is suitable.
Which battery options fit your backup needs?
A battery changes how a solar system can serve your home, but it does not make every circuit operate during a blackout. Backup capability depends on the equipment, system design, battery capacity, selected loads, and installation configuration. Begin by deciding what you want to keep running rather than starting with a battery brand or a large capacity number.
Make a practical list of essential loads. A household might prioritize refrigeration, selected lights, internet equipment, or medical devices; the actual list and power needs vary by home. Note whether you want short-duration backup for essentials or broader backup, and whether major loads such as air conditioning or an electric vehicle charger are priorities. An installer can use that information to explain the design tradeoffs and what can operate together.
Compare battery proposals by asking for the usable energy capacity, power output, backup circuits, operating mode, and any equipment needed to isolate backed-up loads from the grid. Ask how solar recharges the battery and what the system is designed to do during an extended outage. Request an explanation of the monitoring and support process. Battery capacity alone does not tell you how long your home will run: duration depends on the load and operating conditions.
Ask the installer to walk through a realistic outage scenario, not just the battery’s headline capacity. For example, have them explain whether the selected backup circuits can support refrigeration, lights, and network equipment at the same time, and what happens if a high-demand appliance starts. Ask whether the system automatically manages loads or whether a homeowner must change usage. A written list of backed-up circuits and operating limits is more useful than a broad statement that the battery provides whole-home backup.
Battery economics also depend on your household use, utility rules, project design, and payment terms. Avoid relying on a universal savings claim. If a proposal includes a battery, ask the installer to show the assumptions behind its value and compare them with a solar-only option. Learn more about home battery backup options, the basics of solar systems with battery backup, and what happens to solar power during a blackout. For additional background, see AMECO’s home solar battery guide.
How do utility rules and household usage affect the design?
Solar production and its value are not the same thing. Panels generate electricity when sunlight is available; the home uses energy at different times, and utility rules determine how exported power is treated. A proposal should explain the relevant assumptions rather than rely on a general claim that every kilowatt-hour has the same value.
Gather recent utility bills or usage records before comparing designs. Look at total consumption and, if your bill provides it, when the household tends to use electricity. Think about planned changes such as an electric vehicle, heat pump, or a change in occupancy, but distinguish a likely change from a possibility. A system sized around an outdated or incomplete usage picture may not match your needs.
Ask the installer which utility and rate assumptions were used and whether the design accounts for your usage pattern. Confirm who will prepare and submit interconnection materials and what approvals are needed. For background, read about how net metering works and the differences between grid-tied solar systems. Your utility’s current rules and your individual rate plan matter, so check current documents rather than assuming an older article or estimate reflects today’s terms.
When you compare savings projections, ask each company to use the same bill history and to identify assumptions that differ. Request a version with and without a battery if you are still weighing backup. A useful comparison helps you see what the battery changes, what it costs under the stated terms, and which benefits are functional rather than financial.
Ask how the proposal treats seasonal differences and changes in household routines. A family that uses more electricity in the evening may have different priorities from a household that can shift some use to daylight hours. You do not need to predict every future bill, but you should understand whether the model uses annual totals, time-based usage, or other inputs. Ask which records could improve the estimate and whether the installer can revise it when those records are available.
How can you make the estimates easier to compare?
Put the proposals side by side and normalize the inputs before judging the projected outcome. If one company modeled a different amount of electricity use, a different system size, or a battery while another did not, the projections are answering different questions. Ask each installer to explain the effect of those differences. Where possible, request a revised comparison using the same usage history and clearly stated design goals.
Separate the proposal into three parts: what equipment and work you receive, what you pay and under which terms, and what the modeled system is expected to do. This keeps a production estimate from being mistaken for a promise about a bill. It also makes it easier to see whether a lower quoted amount reflects a smaller system, a different roof scope, equipment differences, or an item that is not included.
For example, imagine one proposal includes solar only and another includes solar plus a battery. Do not compare their projected savings totals without first asking what each estimate assumes about household use, grid exports, battery operation, and payment terms. The battery proposal may be designed partly around backup needs, which are not captured by a savings figure alone. Decide whether backup is a priority, then compare the added equipment and the stated financial assumptions separately.
Keep a short record of answers and revisions. Note the version date, proposed equipment, system size, roof assumptions, and any open questions. If an installer updates the plan after reviewing a bill or roof condition, ask for a revised written proposal so you are not comparing figures from different versions. A consistent record also helps household decision-makers discuss tradeoffs without relying on memory from several sales calls.
What questions should you ask before signing?
Once you have comparable proposals, use a short, consistent question list with every installer. Listen for specific answers tied to your roof and usage, and ask for any important commitments in writing. A clear response should identify who is responsible and what happens if an assumption changes.
- Which company is signing the contract, and what is its current CSLB license information?
- Do you currently serve my exact address, and who handles local permits and utility coordination?
- What electricity usage, roof conditions, shading, and utility assumptions shaped the system design?
- Which equipment models are included, and what is excluded from this price and scope?
- What roof repairs are assumed, and how would additional work be approved?
- If I choose a battery, which circuits are backed up and what loads cannot run together?
- Who will communicate project status, manage inspections, and provide support after installation?
- How do payment options differ in ownership, service responsibilities, and contract conditions?
- Which estimate figures are projections, and what could cause them to change?
Ask for a written answer if a sales conversation includes a promise that is not reflected in the documents. Read the agreement and attached scope before signing. If language is unclear, request an explanation or seek independent professional advice. Do not let a deadline replace understanding the project you are agreeing to.
It can help to send the same questions to each company in one email or shared document and keep the answers beside the proposal versions. Mark each item as confirmed, pending, or excluded. If a company cannot answer until after a site visit, note that as pending rather than treating it as settled. This is a practical way to compare the quality of communication as well as the equipment and project scope.
To see the range of work a company has documented, you can review solar installation projects and learn more about AMECO’s California history. Examples can illustrate the types of projects completed, but they do not establish that another home has the same roof, utility conditions, scope, or service availability.
Frequently asked questions
Does a California contractor license prove an installer serves San Jose?
No. Licensing and service coverage are different checks. Verify the contractor’s license through the CSLB, then ask the company directly whether it currently serves your address and handles projects in the relevant jurisdiction and utility territory.
Should I choose the lowest solar proposal?
Not based on the total alone. Compare system design, equipment, roof assumptions, included work, battery scope, payment terms, and support. Ask each installer to explain exclusions and any assumptions that could change the final project.
Do I need to replace my roof before adding solar?
That depends on the roof’s condition, material, and the work required. Ask for a qualified roof assessment and a written explanation of how any needed repairs or replacement would affect the solar plan. Compare coordinated and separate project options when both roofing and solar work are being considered.
Will a solar battery keep the whole house running during an outage?
Not necessarily. Backup depends on the equipment, system configuration, battery capacity, and selected loads. Ask the installer to identify the backed-up circuits and explain which appliances can operate at the same time.
How can you make a confident installer comparison?
Compare contractors using the same checklist: verified license information, confirmed address coverage, a transparent proposal, a roof plan, clearly defined battery expectations, and written project responsibilities. Take time to reconcile differences in assumptions before comparing projected costs or benefits. The best proposal for your home is the one you understand and can evaluate against your own priorities.
AMECO Solar & Roofing provides solar installation and roofing services in California and has operated since 1974. Availability and project details depend on the property and current service coverage. Schedule a consultation to discuss your home’s needs and confirm the next steps.
With a consistent set of questions and a written, side-by-side comparison, you can make a more informed decision about solar for your San Jose-area home.
10.13.2026
When you get a quote for solar panel installation, the most useful estimate is based on your home, energy use, roof, and goals rather than a standard package. A little preparation can help an installer understand your property sooner, explain the assumptions behind the proposal, and identify questions that need an on-site review.
Get An Estimate for Your Solar Project
California homeowners do not need to become solar engineers before requesting an estimate. Start by gathering the information you already have, then use the consultation to fill in the gaps. Final figures still depend on the property, selected equipment, utility territory, project scope, and applicable eligibility requirements.
What Should You Prepare to Get a Quote for Solar Panel Installation?
A strong first conversation gives the installer enough context to build a property-specific starting point. Gather these details before submitting a request:
- Property address: The address helps the team review the roof layout, local conditions, utility territory, and project requirements.
- Recent electric bills: A bill or usage history can show how much electricity the home uses and how the utility charges for it. If you have several months of bills, bring them together rather than relying on one unusually high or low month.
- Roof information: Note the roof material, approximate age, areas with visible wear, and any previous repairs. Do not climb onto the roof to inspect it yourself.
- Shade and obstructions: Identify mature trees, nearby buildings, vents, skylights, chimneys, and other features that could affect usable roof area or sunlight.
- Electrical details: If it is safe to do so, take a clear photo of the main electrical panel from the floor. Do not remove the cover or handle wiring.
- Energy plans: Mention an electric vehicle, heat pump, room addition, pool equipment, changed occupancy, or other future load that could affect system sizing.
- Backup goals: Decide whether you are considering solar only, battery storage, or backup for selected essential circuits. The answer changes the design conversation.
This checklist is not a substitute for site review. It simply helps prevent the first estimate from being built on missing assumptions.
How Does Your Electricity Use Shape a Quote for Solar Panel Installation?
Your electricity use is one of the main inputs in a residential solar design. An installer may review your historical kilowatt-hour usage, seasonal patterns, rate plan, and the amount of power you expect to use in the future. A home that is adding an electric vehicle or replacing gas appliances may need a different design from a home with stable energy demand.
Your monthly bill alone may not tell the whole story. The bill can include fixed charges, time-of-use rates, delivery and generation details, and other utility-specific information. Ask whether the proposal uses actual usage data or an assumption, and ask which rate plan was used for the savings analysis.
The U.S. Department of Energy explains that a solar system's production and potential savings depend on factors including electricity consumption, system size, roof direction, sunlight, and utility rates. Its Homeowner's Guide to Solar is a useful neutral resource when you want to understand why a custom estimate is more meaningful than a generic price.
AMECO's solar solutions overview and residential solar information provide additional context on system design, installation, and activation. Use those pages to build questions, not to assume that another home's system size or projected result will apply to yours.
What Roof Details Affect a Solar Panel Installation Estimate?
The roof is both the mounting surface and a major part of the installation scope. An estimate may change based on the roof's material, age, pitch, orientation, condition, available area, and the location of penetrations or obstructions. Tile roofs, for example, require careful planning around tile handling, attachment methods, flashing, and waterproofing.
If your roof may need work before the solar project, ask how that work will be evaluated and whether solar and roofing can be coordinated. Installing panels on a roof that is near the end of its useful life can create avoidable disruption later. AMECO provides both solar and roofing services, so homeowners can review the relationship between roof condition and solar planning in one conversation. See the roofing solutions page and the guide to solar on tile roofs in California for related planning considerations.
Do not treat roof material as an automatic yes or no for solar. A professional review should determine whether the roof can support the proposed work. What mounting approach fits the property, and whether repairs or replacement should be part of the plan.
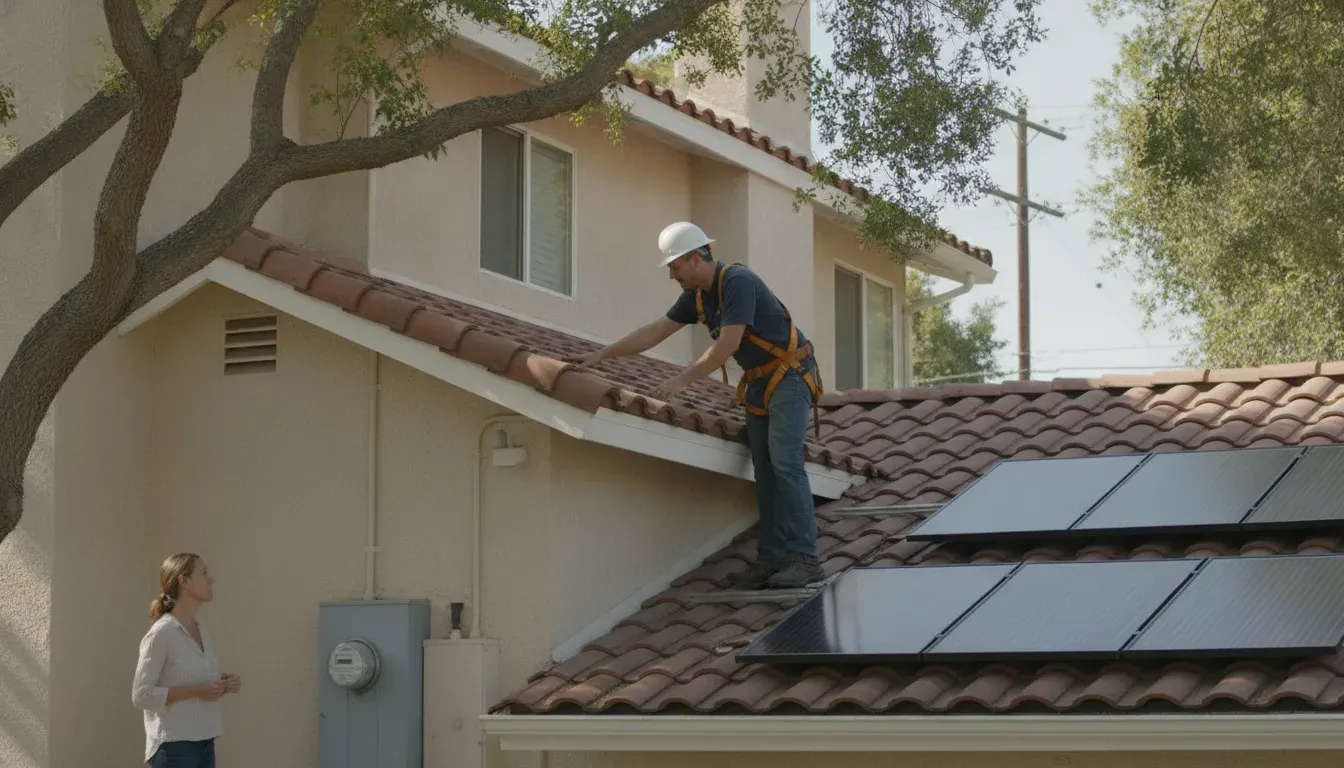
How Can Shading and Roof Layout Change the Design?
Roof area is not the same as usable solar area. Trees, neighboring structures, dormers, vents, chimneys, roof edges, and different roof planes can reduce the space available for panels or affect expected production. Shade can also change how an installer evaluates equipment and panel placement.
Share what you know about seasonal shade. A tree that looks harmless during one visit may cast a longer shadow in winter. While a tree that is currently small may grow into the solar access area. The goal is not to remove every tree or force panels onto every roof plane. The goal is to understand the tradeoffs and design around the property responsibly.
Request a Property-Specific Solar Estimate
What Electrical and Battery Information Should You Share?
Electrical service affects how solar equipment connects to the home. The installer may need to understand the main panel, available capacity, existing electrical equipment, service configuration, and the intended location of the inverter or other components. A photo can help with an early conversation, but it does not replace a qualified electrical assessment.
Battery goals should be just as specific as solar goals. Tell the installer whether your priority is backup during outages, using more of your solar energy after sunset, managing utility rates, or planning for future energy use. Also mention any critical equipment that needs power. A proposal for limited essential-circuit backup is not the same project as a design intended to support broader household loads.
Battery storage can be evaluated with a new solar system or as part of a future plan, depending on the equipment and property. AMECO's battery backup overview and guide to adding a battery to an existing solar system can help you organize questions about storage, compatibility, and backup priorities.
How Does Your Utility Territory and Incentive Eligibility Affect the Quote?
Your utility territory can affect rate-plan assumptions, interconnection requirements, export treatment, and the information needed for the proposal. Tell the installer which utility serves the property and whether you are considering changes to the rate plan. The same equipment can produce different planning questions in different utility territories.
Incentive eligibility should be treated as a verification step, not as an automatic discount. A quote should identify which programs or tax provisions may be relevant and what remains to be confirmed. Eligibility can depend on the property, equipment, taxpayer, installation details, placed-in-service timing, utility program rules, and current law.
For example, current IRS instructions for Form 3468 discuss the Section 48E clean electricity investment credit and include specific rules and limitations. Those instructions are written for tax filing and do not turn a preliminary sales estimate into tax advice. Review the IRS Section 48E guidance and consult a qualified tax professional about your situation before relying on an incentive in a financial decision.
Ask the installer to separate the project price from any incentive assumption. That makes it easier to understand what the project costs if an eligibility condition changes.
Which Details Should a Solar Quote Show?
When you receive a proposal, look for clear assumptions rather than a single unexplained total. The following details help you compare proposals that are actually describing similar projects:
| Quote detail | Why it matters | Question to ask |
|---|---|---|
| Energy-use basis | Shows how the proposed system relates to actual or expected consumption. | Was the design based on my usage history and rate plan? |
| Roof and shade assumptions | Explains which roof areas and sunlight conditions were included. | What roof conditions still need field verification? |
| Equipment selection | Clarifies the panels, inverter, monitoring, and optional storage being considered. | What alternatives were evaluated and why? |
| Electrical scope | Shows whether panel work, equipment relocation, or other electrical work is included. | Which electrical items could change after inspection? |
| Permitting and interconnection | Separates installation work from approvals and utility coordination. | Which approvals are included in the proposed scope? |
| Warranty and support | Helps you understand who supports the equipment and workmanship after installation. | Who handles service if a system issue occurs? |
A detailed quote is easier to evaluate when it explains what is included, what is optional, and what could change after engineering, permitting, or site verification.
How Should You Compare Solar Installation Quotes?
Comparing solar quotes is not just a matter of choosing the lowest total. First, confirm that each proposal uses similar assumptions for system output, battery coverage, roof work, electrical scope, permitting, monitoring, and utility coordination. A lower figure may reflect a smaller system, fewer backed-up circuits, different equipment, or excluded work.
Review the company as carefully as the equipment. Ask who is responsible for design, installation, roof coordination, permits, inspections, interconnection, monitoring, and support. AMECO's guide to comparing solar installation companies in California offers a broader checklist for evaluating these differences.
If financing is part of the discussion, compare the full terms of each current offer rather than relying on a monthly payment alone. The solar financing guide can help you identify questions about ownership, payments, incentives, and long-term assumptions. The right choice depends on your goals and financial situation.
What Happens After You Request a Quote?
A quote is usually the beginning of a design process, not the final construction document. The exact sequence varies, but a residential solar project may move through these stages:
- Initial information review: The installer reviews your address, energy use, roof context, utility, and goals.
- Preliminary design: The team develops an initial system concept and identifies questions that require confirmation.
- Site and electrical verification: Qualified professionals confirm roof conditions, measurements, electrical details, and equipment locations.
- Proposal refinement: The design and scope are adjusted to reflect verified conditions, selected equipment, and requested options.
- Approvals and installation planning: The project moves through the applicable permits, inspections, utility steps, and scheduling requirements.
AMECO's California solar installation guide explains the broader path from assessment and design through activation. Asking where your project is in that process can help you distinguish an early estimate from a final project scope.
Get An Estimate Based on Your Home and Energy Goals
FAQs: What Should California Homeowners Ask Before Accepting a Solar Quote?
Can I get an accurate quote without an in-person visit?
A remote review can often support an initial estimate, but final figures may require field measurements, roof inspection, electrical verification, engineering, and utility or permitting review. Ask which parts of the proposal are preliminary and which have been confirmed.
Should I repair or replace my roof before installing solar?
That depends on the roof's age, condition, material, and expected remaining service life. A professional should evaluate whether repairs or replacement should happen before panel installation and explain how the scopes interact.
Should I include a battery in the first quote?
If backup power, outage resilience, or evening energy use matters to you, ask for a solar-only option and a solar-plus-storage option when both are appropriate. Comparing the two designs can make the tradeoffs easier to understand.
What information should I bring to the consultation?
Bring a recent electric bill or usage history, your property address, roof information. Any safe photos of the electrical panel, and a list of planned changes such as an EV or heat pump. Also write down your priorities so the proposal reflects what you actually want the system to do.
Are incentives guaranteed when they appear in a quote?
No. Incentive eligibility should be verified against current federal, state, utility, property, equipment, tax, and timing rules. Treat an incentive shown in a preliminary estimate as an item to confirm, not as a guaranteed reduction in your project cost.
Ready to Prepare for Your Solar Installation Quote?
The more clearly you can describe your energy use, roof, shade, electrical service, battery goals, utility, and future plans, the more useful your first conversation can be. Get An Estimate from AMECO Solar & Roofing to start a property-specific discussion about solar, roofing, and storage options in California.
10.13.2026
For many California businesses, the value of adding a battery is less about storing solar in the abstract and more about controlling when energy is available. A manufacturing site, retail property, office, or warehouse may have different load peaks, operating hours, outage concerns, and utility rate structures. The right project starts with the facility's actual data and priorities.
Request a project estimate for your commercial solar and storage needs.
Commercial solar battery storage combines solar generation with a battery energy storage system that can shift energy for later use. It can help manage selected demand peaks and support critical loads during an outage. Whether it is a sound investment depends on the site's load profile, tariff, desired resilience, system design, controls, and lifecycle costs, not on a universal price or payback.
A practical evaluation should therefore connect technical capabilities to business needs. Before comparing equipment, it helps to understand how the system works and which operating goals it can realistically support.
What Is Commercial Solar Battery Storage?
Commercial solar battery storage combines a battery energy storage system (BESS) with a business's solar photovoltaic (PV) system and electrical loads. Instead of using solar generation only when the array is producing, the battery can store electrical energy for later use. The system may also be configured to support selected critical loads when the grid is unavailable, depending on the equipment, controls, interconnection, and the facility's operating requirements.
The terms power capacity and energy capacity describe different parts of the system. Power capacity, measured in kilowatts (kW), indicates how much electricity the battery can deliver or absorb at one time. Energy capacity, measured in kilowatt-hours (kWh), indicates how much energy it can hold. A business may need substantial power for a short, high-demand event, greater energy capacity for a longer operating period, or a design that balances both. The right combination depends on the loads the system is intended to serve.
How does a BESS work with commercial solar?
Solar integration connects the PV array, battery, building loads, and utility service through equipment and operating controls. During periods when solar production exceeds the facility's immediate use, the system may direct some of that energy into the battery. Later, the battery may discharge when the business needs energy, including outside daylight hours. Actual operation depends on the system design and the rules established for the property.
For a California business, the design conversation should start with the loads that matter most. Critical loads might include selected refrigeration, communications, security, production, or life-safety equipment, but the appropriate circuits must be identified during project planning. A battery is not automatically a whole-building backup system. Its output, energy capacity, electrical configuration, and controls determine what it can support and for how long.
Why do controls matter?
Controls coordinate battery operation with solar production and connected building loads. The U.S. Department of Energy's commercial building technology guide describes battery storage, building controls, and load flexibility as related tools for managing energy use. That illustrates why storage is more than a battery cabinet: the system must be evaluated as part of the facility's electrical and operational environment.
Explore AMECO's battery backup systems and storage options, then discuss the property's solar array, load priorities, and operating goals with a qualified project team.
Which Business Problems Can Storage Help Solve?
Commercial battery storage is most useful when it is matched to a specific operating problem. A battery can store available solar energy, discharge when the facility needs power later, and coordinate with site controls. The right use case depends on the building's load profile, utility tariff, critical equipment, and operating schedule. A storage system should be evaluated as part of the property's broader energy plan, not as a standalone product.
Managing peaks and shifting energy use
Many commercial facilities experience their highest demand when solar production is declining or has ended. Solar generation may not align with a building's peak load, particularly when demand moves into the afternoon or evening. Storage can discharge during those periods and can also buffer a temporary drop in solar output caused by passing clouds. These capabilities may help a facility manage demand, but the result depends on the tariff's demand-charge rules, peak windows, and the battery's power and energy capacity. Research from Lawrence Berkeley National Laboratory explains why load shape and peak timing matter when evaluating storage.
For a California business, useful questions include:
- When do the facility's monthly demand peaks occur, and how long do they last?
- Does the utility measure demand during a defined peak period or across the billing period?
- Can the system reserve enough capacity for the most important operating windows?
- What happens if the site load changes because of new equipment, production shifts, or electric vehicle charging?
Storage can also increase solar self-consumption by moving some daytime generation to later use. That may be relevant for facilities whose operating schedule does not match the hours of strongest solar production. Review solar system design and project process alongside storage planning so the PV array, battery, controls, and site load are evaluated together.
Supporting selected critical loads during an outage
Backup planning starts with identifying what the business must keep operating, rather than assuming the entire building can remain energized. Critical loads might include refrigeration, networking, security, life-safety equipment, selected production controls, or lighting. The required battery power, usable energy, transfer equipment, and recharge strategy all depend on those loads and the expected operating conditions. Storage can improve resilience for selected circuits, but it does not guarantee uninterrupted service or a universal backup duration.
Preparing for more coordinated controls
Modern energy-management systems can use load data, solar forecasts, battery state of charge, and operating priorities to adjust dispatch. The DOE Connected Communities project description shows how batteries, solar, and flexible building loads can be coordinated, although any program eligibility and value must be confirmed for the specific site. AMECO's commercial solar solutions for businesses can be a starting point for discussing how these goals fit a facility's design.
Request a project estimate to review your load profile, solar opportunity, critical circuits, and control objectives before selecting a system configuration.
How Do You Evaluate the Economics of a Commercial System?
The financial case for commercial solar battery storage begins with the utility tariff, not a generic battery price or a promised payback period. Behind-the-meter storage savings are intrinsically linked to retail rate design, so the same equipment can produce different results at two facilities. A useful analysis should model the property's actual interval load data, solar production, operating schedule, and business priorities.
Start with the tariff and the load shape
Review the complete tariff. Check energy charges, demand charges, and time-of-use (TOU) periods. Also check critical-peak pricing (CPP), real-time pricing (RTP), and net-billing treatment for exported solar. Demand-charge savings depend on the charge rate and whether demand is coincident with a defined peak period. The peak window's duration, the billing-demand averaging interval, seasonal rates, and any demand ratchet also matter. Common averaging intervals include 15, 30, and 60 minutes. A ratchet can establish a minimum billing demand based on a portion of the prior year's maximum.
Then test the tariff against interval data rather than monthly totals. A peaky or variable load, and the timing of its peaks, can materially change the value of storage. Dispatch assumptions should state when the battery charges, when it discharges, how much reserve is held for outages, and how controls respond to forecasts. Longer-duration systems may create more energy-arbitrage value than demand-charge value in some cases, but that outcome is not universal.
Commercial storage economics: key inputs.| Driver. | Check. | Purpose. |
|---|---|---|
| Demand charges. | Rate, peak window, interval, seasonality, ratchets. | Tests billed demand reduction. |
| Energy charges. | TOU, CPP, RTP, net billing, price differences. | Tests energy-shifting value. |
| Lifecycle costs. | Capacity, power, degradation, maintenance, controls, replacements. | Tests long-term model quality. |
Model the full lifecycle, not just the first-year bill
A responsible model includes installed system and interconnection costs. It also includes financing or capital assumptions, software, controls, maintenance, degradation, warranty limits, and future component replacement.
Compare operating cases, such as solar alone, storage alone, and solar plus storage, using documented dispatch rules. State the assumptions for demand-charge management, energy shifting, outage reserve, controls, and lifecycle costs. Use current utility and program information for a specific project.
For context, compare the storage model with the broader commercial project cost factors and review commercial tax credit details separately. Universal price, savings, or payback claims are invalid because tariffs, load profiles, system sizing, controls, degradation, and site conditions differ. Use a site-specific lifecycle analysis instead.
What Should a California Business Ask Before Installation?
A well-designed project starts with questions that connect the battery to the facility's actual operations. Use this checklist with your installer, utility, engineer, and facilities team. The goal is not to select equipment from a brochure. It is to confirm that the proposed commercial solar battery storage system fits the building, electrical service, operating priorities, and approval requirements.
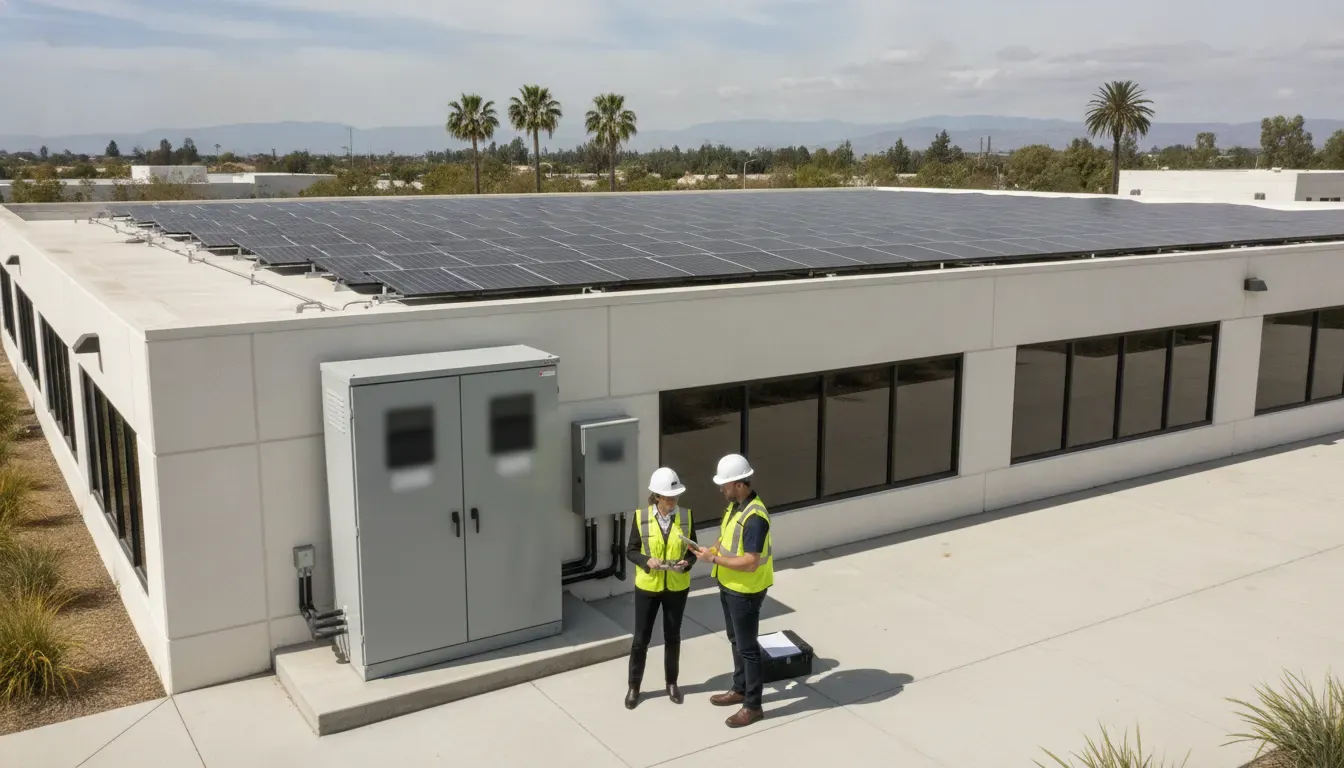
- Can you model the facility using interval-load data? Ask which utility data will be used, how the billing-demand interval is measured, and whether the analysis covers seasonal operations, production schedules, weekends, and unusual peaks. A monthly total is not enough to show when the building uses power.
- Which loads must remain available during an outage? Identify critical circuits, their starting loads, and how long they may need support. Separate life-safety, refrigeration, communications, security, production, and convenience loads instead of treating the entire building as one backup circuit.
- Are power and energy sized separately? Power, measured in kW, describes how much the system can deliver at once. Energy, measured in kWh, describes how long it can deliver under a given load. Ask the designer to show both assumptions and explain how battery discharge limits affect the operating plan.
- What controls will manage solar, loads, and the battery? Confirm the dispatch strategy, monitoring, forecasting, manual override, outage detection, and testing plan. The DOE's battery storage implementation materials describe energy shifting, peak shaving, backup functionality, and control strategies as distinct applications.
- What will interconnection require? Ask who coordinates with the utility, what changes may be needed at the service equipment, and how export limits, protection settings, and anti-islanding functions will be verified.
- Is the roof and electrical infrastructure ready? Review roof condition, structural capacity, equipment clearances, switchgear, transformers, conduits, and available space before finalizing the layout. AMECO's project approach and support should account for these site conditions during planning.
- Which permits and safety standards apply? Confirm the permitting path and responsibility for fire, building, and electrical approvals. The DOE battery storage materials note that safety, controls, and operating requirements must be considered for a complete system. Also ask how the design addresses thermal-runaway detection, separation, response, and emergency access.
- What happens after installation? Get warranty terms, degradation assumptions, maintenance intervals, software-support conditions, response procedures, and commissioning deliverables in writing. Commissioning should verify controls, alarms, operating modes, backup transitions, and performance against the approved design, not simply confirm that the equipment powers on.
Request a project estimate for your commercial solar and storage needs.
Bring these answers into the economic review and the final scope before moving to the frequently asked questions.
FAQs: Commercial Solar Battery Storage
What is a commercial battery storage system?
A commercial battery storage system stores electricity for use at a later time. When paired with solar, it can capture excess daytime production and discharge it when the facility needs more power. Depending on the design, storage may also support selected critical loads during an outage. The battery, inverter, controls, electrical equipment, and site connections must be evaluated as one system.
Is battery storage worth adding to a commercial solar system?
It can be, but the answer depends on the facility's load profile, utility tariff, demand charges, operating schedule, outage priorities, and project goals. Storage may help shift solar energy, manage certain peak periods, or support selected operations during an outage. A useful evaluation uses interval utility data and models dispatch assumptions rather than relying on a universal savings or payback estimate.
How much does a commercial battery cost?
There is no reliable universal price for a commercial system. Cost depends on the battery's power and energy capacity, electrical upgrades, controls, interconnection requirements, site conditions, permitting, and the loads the system is expected to serve. Ask for an itemized proposal that separates equipment, installation, design, permitting, commissioning, maintenance, and expected replacement considerations.
How much storage does a solar battery have?
Storage is described by both power capacity and energy capacity. Power capacity indicates how much electricity the system can deliver at one time, while energy capacity indicates how much electricity it can store. The appropriate size depends on the facility's load shape, critical circuits, desired operating duration, solar production, and control strategy. More capacity is not automatically the best fit.
What is the best solar battery storage system?
The best system is one that matches the property's electrical conditions, operating goals, safety requirements, tariff, and budget. Compare usable capacity, output, controls, monitoring, integration with solar, service support, warranty terms, and expansion options. A qualified project team should also explain how the proposed system will be permitted, commissioned, maintained, and tested for the business's intended use.
Plan Your Commercial Solar and Storage Project
A project estimate can help your team connect storage goals with your facility's load profile, operating priorities, and site conditions. AMECO can help you define the questions and information needed for a more informed commercial solar and battery storage plan. To discuss your needs, request a project estimate.
10.12.2026
To get a quote for commercial solar panels that you can compare and act on, prepare more than a recent electricity bill. A useful proposal depends on how your building uses power, the condition and ownership of the roof, electrical capacity, operating hours, resilience goals, and the assumptions behind the financial model. Gathering these details early can help a solar contractor identify what needs verification and explain the next steps clearly.
Discuss your commercial solar project
This guide is for commercial property owners, facility managers, and finance or operations teams preparing to request an estimate. It is not a substitute for a site assessment or engineering review. Final system design and pricing depend on the building, equipment, utility requirements, and project scope.
What should you prepare to get a quote for commercial solar panels?
Start with a shared project folder. Include the documents you already have and note anything that is unavailable. Do not delay an initial conversation just because one item is missing; a contractor can tell you what matters most for your property. The goal is to provide enough context to frame a preliminary assessment, not to design the system yourself.
Use this five-step pre-quote checklist:
- Define the properties, buildings, meters, and utility accounts in the first project phase.
- Collect recent utility bills and available interval data, then flag unusual periods or future load changes.
- Share roof, site, structural, electrical, and access records, while labeling unknown conditions for field review.
- Describe operating hours, major loads, resilience goals, and any battery or outage-protection priorities.
- List ownership, approval, lease, permitting, and scheduling constraints that could affect the project.
- Electricity records: recent utility bills and, if available, interval or hourly usage data.
- Building information: address, site plan, roof plans, structural records, and photos of the roof and electrical equipment.
- Operating profile: business hours, seasonal changes, planned expansion, and large equipment loads.
- Decision and ownership details: who owns the property, who pays the utility bill, and who can approve work.
- Project goals: cost management, emissions goals, resilience, battery storage, or a phased installation.
- Known constraints: roof work, leases, planned renovations, access limits, or permitting questions.
For a company with multiple buildings, identify which meters and facilities belong in the first phase. Combining unrelated buildings or utility accounts can complicate an estimate. If you are still defining the project boundary, AMECO's commercial solar and roofing information can help orient your initial planning.
A short cover sheet makes the folder easier to use. Include the property address, the person coordinating the request, the facilities involved, and the decision date if one exists. Label documents by site and date. If there are multiple meters, use a simple table to connect each meter to a building or major operation. For example, a warehouse might have one account for the main facility and a separate meter for a refrigerated annex. Clear labels reduce the chance that an estimator will treat the combined usage as one load without understanding how it is distributed.
Also distinguish between confirmed information and open questions. Write "roof replaced in 2018, records attached" when you have documentation, and "roof age unknown" when you do not. This is more useful than an unsupported estimate. A proposal can then identify the additional inspection or document needed, instead of building a design around an assumption that may later prove wrong.
Which utility information helps shape the estimate?
A bill shows charges and usage for one billing period, but it does not always show when energy is used. Ask your utility or account administrator whether interval data is available, and collect a full year if possible. A year of records helps reveal seasonal patterns, peak demand periods, and changes that a single month could hide.
Bring the bills and account details
Gather the full bill pages rather than only a summary screenshot. Useful details include the service address, billing dates, account or meter identifiers, total consumption, rate schedule, demand charges when applicable, and any export or time-of-use information shown. You can redact sensitive account identifiers if needed for an early discussion, but retain enough information to distinguish meters and service locations.
List each meter and explain what it serves: production equipment, office space, refrigeration, lighting, or another major load. If the utility account covers several buildings or tenants, clarify how usage is allocated. A contractor needs to understand which loads a proposed system is intended to serve.
Request interval or load data when it is available
Interval data records energy use in shorter time increments than a monthly bill. It can show whether consumption is concentrated during sunny daytime hours or rises in the evening. That distinction matters when evaluating how much on-site solar generation may align with operations and whether storage should be examined. Data access and formats vary by utility and account, so ask the utility representative or your energy manager how to obtain it.
Include known future changes. A new production line, electric vehicle fleet, shift schedule, cooling system, or planned tenant move can alter the load profile. Mark what is confirmed and what is only being considered. This helps keep preliminary assumptions visible instead of treating a forecast as current usage.
When reviewing records, check that the billing periods cover a complete operating year and flag unusual months. A temporary shutdown, equipment failure, construction period, or change in tenant occupancy can make one month unlike a normal month. Do not remove that month from the packet; explain why it looks different. The estimator can decide how it should be represented and can show whether the financial model relies on actual history, an adjusted profile, or a forecast.
For properties with multiple meters, ask the utility account holder to export each account separately, then note whether the meters serve separate legal parcels, tenants, or parts of one facility. Avoid totaling the figures without stating which service addresses and rate schedules are included. If demand charges or time-based rates appear on the bills, point them out and ask how they are handled in the analysis. A comparison is more meaningful when each proposal starts with the same set of accounts and the same period of usage.
For background on how grid-connected systems interact with utility service, see AMECO's explanation of net metering and its guide to grid-tied solar systems. Utility tariffs and interconnection requirements are property- and utility-specific, so a general explainer cannot replace a review of your account.
What roof or site information should you share?
Solar layouts depend on usable area, orientation, shading, obstructions, access, and structural suitability. A roof drawing or site plan can help a contractor understand the property before a site visit, but it does not prove that every roof section is suitable. Field verification and engineering are needed to confirm conditions.

Share any roof plans, structural drawings, prior inspection reports, and records of repairs or replacements. Include the roof type and approximate age if known. If you have experienced leaks or have concerns about the roof's remaining service life, say so early. Installing panels on a roof that may soon need major work can affect project sequencing and total scope.
Also identify rooftop equipment, skylights, vents, parapets, shade from nearby buildings or trees, and safe access routes. Photos taken from safe, accessible areas can provide helpful context, but do not climb onto a roof or open electrical equipment to gather information. A qualified professional can arrange an appropriate inspection.
When a roof upgrade and solar installation may overlap, compare the scopes and sequence rather than treating them as separate decisions. AMECO provides both solar and roofing services, which can make coordination relevant for a property that needs work in both areas. Learn more about roofing options and the considerations involved in a solar-and-roofing project.
For a useful roof packet, include drawings with dimensions when available, the roof material, known repair history, and the location of drains and major equipment. If there are several roof sections built at different times, identify them separately. A plan may show that one section has clear area while another has heavy shading or access constraints. These are starting observations only; they do not establish structural capacity or final panel placement.
Ask the property or facilities team whether roof work is already planned or budgeted. A planned membrane replacement, warranty requirement, or tenant improvement can affect when solar work should proceed. Make clear which work is approved, which is under consideration, and who controls that decision. If access is restricted to certain hours or requires escorts, include those logistics as well. The site visit can then be scheduled and scoped around actual building procedures.
How does the building's load profile affect the proposal?
Tell the estimator how the property operates across a typical week and across the year. Office buildings, warehouses, manufacturing facilities, retail sites, and cold-storage operations can have very different demand patterns. Even buildings with similar monthly usage may have different daytime peaks and seasonal needs.
Prepare a short operating profile with the following details:
- Normal opening hours, shifts, and weekend operations.
- Seasonal shutdowns, production cycles, or periods of unusually high demand.
- Large electrical loads, such as process equipment, HVAC, refrigeration, pumps, or charging.
- Planned additions or efficiency upgrades that could change consumption.
- Whether a landlord, tenant, or multiple occupants control the relevant meters.
Where there are several tenants, explain who holds each utility account and whether leases address roof access, construction, or energy equipment. If the property owner pays for roof work but tenants receive the utility benefit, that split should be understood before the project is evaluated. The commercial proposal should make its meter and load assumptions explicit.
For example, a distribution center that runs conveyor equipment during the day and has a weekend schedule will have a different operating pattern from a facility that runs a continuous process around the clock. A simple note describing shifts, scheduled maintenance, seasonal peaks, and expected changes can help an estimator ask focused questions. The point is not to calculate a system size internally; it is to explain when and where the facility uses electricity.
Separate present-day conditions from future plans. If a new line is approved and expected to start next year, include the best available load estimate and the expected start date. If an expansion is only a possibility, label it as a scenario rather than adding it to current consumption. You can ask for the proposal to state how the design changes under each scenario, or to identify what information would be needed before a future phase can be evaluated.
For a preliminary view of the information used to estimate a project, AMECO's solar production overview may be useful. Actual production depends on the site, system design, equipment, and conditions; a general figure should not be treated as a forecast for your building.
Who owns the property and who can approve the project?
Ownership affects access, contract authority, roof rights, and the ability to make long-term decisions. Before requesting a detailed estimate, clarify whether the business owns the building or leases it. If a parent company, property manager, landlord, tenant, or board must approve the work, identify those parties and the approval process.
For leased properties, review the lease provisions that may apply to roof access, construction, equipment ownership, insurance, repairs, and the end of the lease term. The solar provider is not a substitute for your legal or financial advisors, but flagging these issues early can prevent delays after a design is developed.
Assign a project contact who can coordinate utility records, facility access, and internal questions. If several teams participate, include the facilities lead, finance contact, property owner, and whoever manages the utility account in the conversation. One clear point of contact helps ensure the proposal is based on consistent assumptions.
Before a site visit, map the decision process in practical terms. Who can approve access to the roof? Who can authorize an engineering review? Who reviews the budget and contract? Are there board meetings, capital-planning cycles, or tenant approvals that set the timing? A project may be technically feasible but still need internal review. Identifying those steps helps the contractor explain which decisions are needed first and which can wait until a more developed proposal is available.
If a property owner and tenant have different priorities, document them rather than assuming they are aligned. The owner may be focused on roof condition and asset planning, while the tenant may care most about operating costs or continuity. Establish which party would own or control the equipment and who would coordinate maintenance or access. These are business and legal questions for the parties and their advisors, but they can influence the scope that an estimate should address.
Should you include batteries or outage protection in the request?
Describe resilience goals separately from energy-cost goals. For example, identify critical loads, how long they need to operate during an outage, and whether the business needs backup for the whole building or only selected equipment. Note any existing generator or backup system and whether there are operating constraints.
Solar panels alone generally do not keep a standard grid-connected system running during a utility outage. Backup operation depends on system design, compatible equipment, storage, and applicable safety requirements. A battery may support selected loads, but its usefulness depends on the load, available capacity, controls, and expected outage conditions. Ask the estimator to explain the backup scope and assumptions rather than assuming that a solar proposal includes outage protection.
AMECO's overview of battery backup solutions and its discussion of what happens to solar during a blackout can help frame those questions. List the loads that matter most, such as communications, security, refrigeration, or essential production systems, and ask whether backup is technically and financially practical for those priorities.
Make the resilience request specific enough to evaluate. Rather than asking only for "backup," list the equipment that must remain available, its approximate electrical demand if known, and whether it needs continuous operation or can tolerate an interruption. Note any starting surges or critical restart procedures if facility staff have that information. Do not estimate electrical loads by opening panels or testing equipment; facility records or a qualified professional can help document them safely.
Ask the proposal to separate the solar-only option from any storage or backup option. This makes it easier for decision-makers to see what each configuration is intended to do, what equipment or controls are included, and what remains unsupported during an outage. Also ask whether the design is intended to serve selected circuits or a broader portion of the facility. A clearly stated operating goal allows your team to assess whether the proposed system addresses the actual continuity concern.
Talk with AMECO about your commercial project
What electrical and permitting details should you flag?
Share the location of the main electrical service, available one-line diagrams, panel schedules, transformer information, and prior electrical upgrade records if you have them. Do not guess at capacity or open panels to check labels. If records are missing, note that so the site review can identify what needs to be verified.
Large projects may require utility interconnection review, local permits, plan checks, inspections, and coordination with property or fire-safety requirements. The exact process depends on the jurisdiction, system design, utility, and site. If the building is in a business park, has restricted access, or is subject to design review, mention those conditions.
Ask who will identify the applicable approvals and at what project stage those requirements are confirmed. A preliminary estimate may include assumptions rather than final engineering. The proposal should distinguish known scope from items that need utility feedback, structural review, or permitting confirmation.
Electrical documents can be incomplete or out of date, especially after equipment changes. Share what you have and identify when it was prepared, if known. If a one-line diagram predates a major service upgrade or new production equipment, say so. An estimator can flag whether a current drawing or site verification is necessary. Avoid presenting a panel nameplate, transformer record, or old project document as proof that the proposed system can connect without further review.
Permitting can involve several parties, so make a list of known constraints. Examples include a property manager's construction rules, a campus review process, limited delivery hours, tenant notification requirements, or restrictions on rooftop access. Ask the provider to distinguish work it expects to coordinate from decisions that remain with the owner, utility, or local authority. That clarity helps your team plan internal approvals without assuming a specific review timeline before the relevant parties have responded.
What should you compare after you get a quote for commercial solar panels?
Do not compare only the headline system size or a single total. Two proposals may assume different roof areas, equipment, utility treatment, installation scope, or financial inputs. Ask each provider to state assumptions in writing and to separate confirmed facts from estimates.
| Proposal item | What to check | Why it matters |
|---|---|---|
| System design | Proposed capacity, layout, equipment, and any storage scope | Shows what is included and how the design relates to your load and site. |
| Site and roof scope | Structural review, roof repairs, access, and exclusions | Clarifies whether roof or access work may be separate or remain unverified. |
| Utility assumptions | Rate schedule, meter arrangement, interconnection, and export assumptions | Financial projections can change when the utility treatment differs. |
| Financial model | Energy use, escalation assumptions, costs, incentives if applicable, and ownership structure | Lets you identify inputs that require review by your finance or tax advisors. |
| Schedule and approvals | Milestones, utility review, permitting, inspections, and dependencies | Shows which steps are estimated and which depend on third parties. |
| Operations and support | Monitoring, maintenance responsibilities, and warranty documentation | Helps define what happens after installation and who handles each task. |
Ask what is excluded, which figures are preliminary, and what conditions could change the scope or price. Look for the assumptions behind any projected savings or payback estimate. Those results are not guaranteed; they depend on project costs, usage, utility rates, system output, ownership arrangements, and applicable eligibility rules. Have appropriate financial and tax professionals review assumptions that affect your business.
The U.S. Department of Energy publishes solar photovoltaic system cost benchmarks, including commercial PV and storage examples. Such benchmarks provide a broader reference point, not a quote for a particular building or a replacement for site-specific design.
When two bids use different inputs, ask for a side-by-side clarification before deciding which total appears more attractive. For example, one proposal might include a roof allowance while another excludes roof work pending inspection. Another might model a different usage period or treat future loads differently. The comparison should show whether differences reflect system scope, assumptions, or a true price difference for comparable work.
Review the financial worksheet in stages. First confirm the utility accounts and usage history. Then check the system output assumptions and the way self-consumption or exported energy is handled. Next identify project costs, exclusions, ownership structure, and any incentives or eligibility assumptions. Finally, ask which values are estimates and which have been verified. You do not need to assess tax treatment alone; the goal is to surface the inputs for review by your finance, legal, or tax advisors.
Ask for a revised proposal when a material assumption changes, such as adding a building, correcting a meter history, changing the roof scope, or including storage. Keep a record of the date and version of each proposal so internal reviewers do not compare a current scope with an outdated draft. A concise list of open items, such as structural review, utility feedback, or confirmation of a tenant's operating schedule, makes the next discussion more productive.
Before committing, check that the proposal clearly identifies the property and meters it covers, the scope of work, major exclusions, assumptions, and the process for revising the estimate when field findings differ from the information initially provided. AMECO's approach to solar and roofing projects and examples of completed work offer additional context as you evaluate project fit.
A practical review meeting can follow a simple agenda: confirm the site and accounts; review what is included and excluded; note open engineering, utility, and permit items; discuss the assumptions behind the financial projection; and assign an owner for each unanswered question. If you are collecting multiple bids, use the same agenda and the same baseline records with each provider. This makes it easier to spot gaps without treating preliminary estimates as final commitments.
Request a commercial solar consultation
Frequently asked questions
Can I request an initial quote before arranging a site visit?
You can begin with utility bills, site details, and a description of your goals. A preliminary review can identify missing information and possible next steps. A firm, property-specific scope requires appropriate site verification, design work, and review of relevant utility and permitting conditions.
What if I do not have interval data or roof drawings?
Share the records you have and identify what is missing. Ask your utility or energy manager about available interval data, and ask your facilities team or building owner for roof and electrical documents. Missing records do not necessarily prevent an initial discussion, but they may limit how specific early estimates can be.
Should I combine a roof replacement and commercial solar project?
If the roof may need repair or replacement, discuss that before solar design is finalized. Coordinating the scopes can help the project team evaluate sequence, access, and responsibilities together. Whether combining the work makes sense depends on the roof's condition, project timing, and the building owner's plans.
Does a commercial solar quote guarantee savings or a payback period?
No. A proposal can provide projections based on stated assumptions, but actual results depend on system performance, energy use, utility rates, costs, and other project-specific factors. Ask for the inputs and assumptions, and review financial or tax matters with qualified advisors.
Ready to prepare a commercial solar estimate?
Request a conversation about your commercial solar project.
Gather the utility records, site and roof information, operating profile, ownership details, electrical documents, and resilience goals that are available. A clear outline of what is known and what still needs verification gives a contractor a stronger starting point and helps your team compare proposals on the same basis.
10.9.2026
Understanding AC coupled battery storage cost starts with a key distinction: adding a battery to an existing solar system is not the same project as designing solar and storage together from the start. An AC-coupled battery can often be added without replacing the solar inverter, but the final scope depends on your equipment, electrical layout, backup goals, and property conditions. There is no reliable one-price-fits-all estimate.
Request a property-specific solar and battery assessment
What does AC-coupled battery storage mean?
Solar panels produce direct current (DC) electricity. Most homes use alternating current (AC), so an inverter converts the solar electricity into a form that household circuits can use. In an AC-coupled design, the battery has its own inverter and connects to the home's AC electrical system. This is one reason AC coupling is commonly considered for an existing solar installation: the existing solar inverter may remain in place, subject to compatibility and system design.
In a DC-coupled design, solar energy and battery storage share a path on the DC side before electricity is converted for home use. Neither approach is automatically the better choice for every home. The right configuration depends on whether the system is new or existing, the current inverter, the battery equipment, the backup design, and the amount of electrical work required. AMECO's overview of AC-coupled solar batteries explains the configuration tradeoffs in more detail.
Cost comparisons need context. A 2017 National Renewable Energy Laboratory benchmark found a lower modeled price for a DC-coupled system than an AC-coupled system for a new PV-plus-storage installation. That historical benchmark is not a current quote and does not establish that DC coupling is less expensive for a retrofit. It compares a particular modeled new-installation scope, not the equipment and labor at your home. See the NREL residential solar-plus-storage cost benchmark for that limited comparison. Rocky Mountain Institute also discusses cost drivers for residential solar-plus-storage systems in its solar-plus-storage cost analysis.
Which factors shape the cost of an AC-coupled retrofit?
The battery hardware is only one part of the project. An estimate may also include an inverter or other power-conversion equipment, controls, electrical labor, protective equipment, permitting, inspection, and work to prepare the location. Some homes need only a straightforward tie-in; others require a more involved redesign. A complete proposal should show which items are included and which assumptions could change after a site review.
It helps to think of the estimate as several related scopes rather than a single battery price: storage equipment, the path that connects it to the existing solar and home circuits, backup controls, installation labor, and approvals. A proposal may group some of these together, but you should still be able to understand the function of each component. If two bids use different assumptions—for example, one backs up a few circuits and another proposes broader coverage—their totals do not describe the same project.
Battery capacity and the outcome you want
Battery capacity affects equipment selection, but choosing the largest available unit is not a reliable way to plan. Start by deciding what you expect the system to do. Do you want to cover a few essential circuits during an outage, or run more of the home? Do you want to shift some solar energy into evening use, or prioritize backup? Those goals affect usable energy capacity, power output, controls, and the number of batteries or related components needed.
Energy capacity and power are different. Capacity describes how much energy a battery can store. Power describes how much it can deliver at one time. A proposal should identify both and explain which loads the design can support. A larger capacity alone does not ensure that several high-demand appliances can run together, nor does it guarantee backup for every circuit.
List the loads that matter to you before requesting a design. Note whether you want to support refrigeration, lighting, internet equipment, medical devices, a well pump, or air conditioning. These examples have different power demands and operating patterns. The design team can use your priorities to discuss battery capacity, backed-up circuits, and any practical limits. For more on the purpose and configuration of storage, see AMECO's home battery backup overview.
A simple planning exercise can clarify the tradeoff. Make one list of loads you consider essential for a short interruption, then a second list of items you would like to use if the outage lasts longer. Include whether each appliance runs continuously, cycles on and off, or draws substantial power when it starts. This is not a substitute for an electrical load calculation, but it helps you explain priorities. Ask the installer to show which list the proposed design serves and what you would need to turn off when several loads are operating at once.
Existing solar equipment and system compatibility
An existing solar system is not automatically ready for a battery. The installer needs to identify the solar inverter make and model, system age, panel configuration, monitoring and communications equipment, and any previous upgrades. The proposed battery must be compatible with the electrical design and its controls. Product compatibility can depend on specific models and configuration details, so a general statement that a battery is “AC-coupled” is not enough to confirm that it will work with a particular system.
Some projects can retain the existing solar inverter; others may call for additional equipment or changes to the system design. The estimate should spell out what stays, what is added, and whether any existing components need to be replaced. If you do not have the original solar plans, utility paperwork, or equipment list, provide clear photos of equipment labels if available. An installer can tell you what further information is needed.
AMECO's guides to what a solar inverter does and how a grid-tied solar system works can help you identify the equipment and system type to discuss.
When gathering system details, note whether the equipment has been replaced or serviced since the original installation. A clear photo of the label is more useful than a guess based on appearance, because product families can include different models. Share any monitoring screenshots or system plans you still have, but avoid removing covers or handling wiring to find a label. If a key detail cannot be seen safely, flag it for the site assessment instead.
Electrical work, controls, and backup circuits
Electrical scope can make two apparently similar battery proposals differ. The layout of the main service panel, available breaker space, the location of the battery, the distance between equipment, and the desired backup arrangement all matter. A backup system may need a transfer device, gateway, critical-loads panel, or other controls, depending on the equipment and design. These are not interchangeable line items; ask the contractor to explain the specific function of each included component.
If only selected circuits will receive backup, the proposal should state which circuits and describe any load-management limits. Whole-home backup is a different design conversation. It may involve the home's peak demand, large appliances, electrical service, and the battery system's power capability. During a grid outage, a standard grid-tied solar system may shut down for safety unless it has suitable equipment and controls to operate in backup mode. Read AMECO's explanation of what happens to solar power during a blackout before assuming that existing panels will keep powering the home.
Ask for a circuit-by-circuit explanation rather than relying on phrases such as “backup ready” or “whole home” alone. Confirm whether the design supports the circuits you care about simultaneously, whether any loads must be managed, and what happens when the battery reaches its reserve setting. If you want solar to recharge storage during a prolonged outage, ask how the system is designed to operate in that condition and what factors can limit charging. These questions expose design differences before you compare totals.
Permits, inspection, and utility requirements
Permitting and inspection are part of the project, not optional extras. Requirements and review processes can vary by jurisdiction and project scope. A proposal should say who prepares and submits the plans, what permit and inspection work is included, and whether utility coordination is part of the service. Ask how changes requested during plan review would be handled and whether they could affect the final project scope.
Utility rules also matter to system configuration and operation. Do not assume a retrofit can simply be connected in the same way as the original solar installation. The project team should review the existing system documents and the applicable interconnection requirements. The timing and fees, if any, depend on the project and local process; confirm them for your address rather than relying on a generic estimate.
Before signing, make clear who is responsible for each approval step and what you may need to provide. Ask whether the proposal includes plans, application submissions, inspection coordination, and any required revisions, or whether some tasks are excluded. If an allowance or assumption appears in the bid, ask what would cause it to change. That way, a later adjustment has a documented reason rather than arriving as an unexplained addition.
Site conditions and installation access
The battery needs a suitable location with appropriate clearances and conditions for the selected equipment. The route for conduit, distance to electrical equipment, wall or mounting conditions, exposure, and access for installation can affect labor and materials. A narrow side yard, finished surfaces that need protection, or equipment placed far from the service panel may require additional planning. A remote review can help identify questions, but photos alone may not verify every condition.
Think through the proposed location from both the installation and daily-use perspective. Is the area accessible for service? Would equipment or conduit interfere with a walkway, gate, or planned improvement? Are there site features that could affect the mounting surface or route to the panel? Share those constraints early, including any planned landscaping or construction, so the design does not assume an installation path that will later be blocked.
Roof condition is usually not the central cost driver for an AC-coupled battery added to an existing solar array, but it can matter if the solar system itself needs changes or if roof work is already planned. If the roof may need replacement, discuss sequencing before authorizing separate projects. Solar and roofing coordination can reduce the risk of overlooking removal, reinstall, or scheduling requirements. AMECO provides both solar services and roofing services, and its guide to planning solar and roofing together covers that coordination.
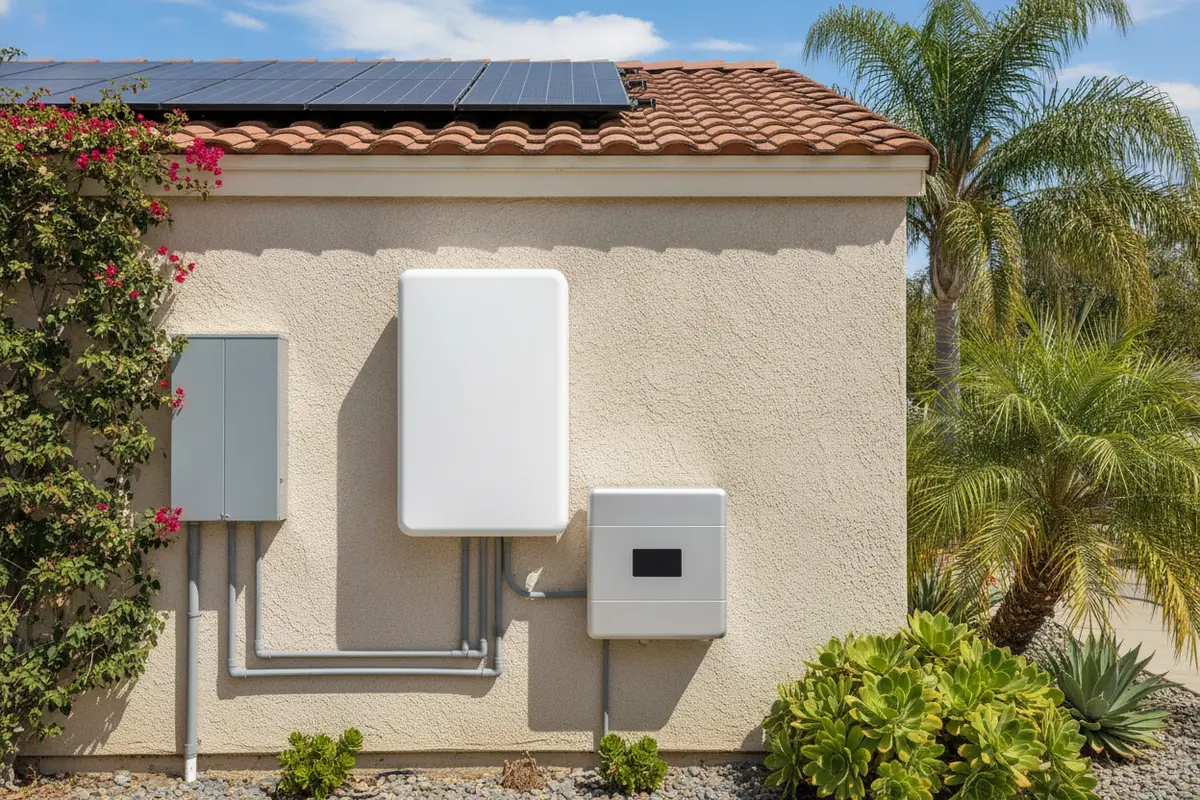
How do incentives affect the project budget?
Available incentives can change over time and may depend on the equipment, project structure, location, utility, and homeowner eligibility. Do not subtract a general incentive amount from a quote unless the program is current and the project has been checked against its rules. Ask the installer to separate the gross project price from any incentive assumptions and to identify who confirms eligibility.
Also distinguish an incentive from a payment arrangement. If a proposal includes a lease or another financing structure, review the full written terms, including payment schedule, ownership, maintenance responsibilities, and what happens if you sell the home. Do not compare a financed or leased figure directly with a cash price without understanding what each figure includes. Incentive treatment can differ by ownership and project structure, so verify details with the relevant program administrator or a qualified tax professional where appropriate.
For a careful comparison, record incentives in a separate line from the installed project amount. Write down the program name, the date the estimate was prepared, the eligibility conditions still to be checked, and whether the benefit is applied upfront or claimed later. Do not treat an estimated incentive as guaranteed cash available at installation. If the quote uses a net figure, request the gross amount as well so you can compare proposals on the same basis and understand the amount due under the stated contract terms.
How can you compare AC-coupled battery proposals?
Compare the scope, not just the headline price. Ask each installer to specify the equipment, backup capability, electrical work, permits, and exclusions. The table below is a checklist for reviewing proposals; it does not assign universal prices because costs depend on the home and selected design.
| Proposal item | What to check | Why it can change the scope |
|---|---|---|
| Battery equipment | Model, number of units, usable capacity, power rating, and included controls | Capacity and output should match the loads and backup goals, not an assumed one-size-fits-all design. |
| Compatibility | Existing solar inverter and system details; components retained or replaced | Existing equipment may affect the connection method and required hardware. |
| Electrical work | Panel work, gateway or transfer equipment, backed-up circuits, conduit, and labor | Panel layout, equipment distance, and backup coverage can change installation effort. |
| Permits and utility process | Plan preparation, application, inspection, and coordination responsibilities | Requirements vary by location and project; responsibilities should be explicit. |
| Site and access | Battery location, mounting, clearances, access, and any site preparation | Property layout and installation conditions can add work or constrain placement. |
| Incentive assumptions | Program name, eligibility basis, timing, and whether the price assumes approval | Programs and eligibility are not universal; separate confirmed benefits from estimates. |
| Warranty and support | Equipment coverage, workmanship terms, monitoring, and service process | Coverage and responsibilities depend on the specific contract and equipment. |
For each proposal, ask the installer to answer these questions in writing:
- Which circuits will operate during a grid outage, and what limits apply?
- Will the current solar inverter remain? If not, what is the reason for replacing it?
- Does the design include battery controls, required electrical equipment, permit work, and inspection?
- What site details still need an in-person check before the price and scope are final?
- Are incentive assumptions included in the quoted total, and who is responsible for verifying eligibility?
- What monitoring and support are included after installation?
Use the answers to make a side-by-side scope sheet. For each bid, note the battery model and capacity, power rating, backed-up circuits, equipment to be retained, permit responsibilities, and exclusions. Mark any item as “not stated” rather than assuming it is included. Then send the same follow-up questions to each provider. If a detail changes the design, request an updated written proposal instead of comparing an old total with a revised verbal description.
Pay attention to exclusions. A proposal that omits electrical upgrades or permitting may appear less expensive while leaving costs unresolved. If a contractor cannot yet confirm an item, ask for the condition that would trigger a change and how that change would be documented. For more background on price differences among solar projects, see AMECO's explainer on why solar installation estimates vary.
A remote review can be a useful starting point when you have the solar equipment details, utility bill, and photos of the electrical panel and proposed battery location. It cannot always verify wall conditions, clearances, wiring routes, or code requirements. Your final scope may require an on-site assessment and review of system records.
If you are ready to compare a design against your actual home and solar equipment, request an estimate and discuss your battery goals with AMECO. AMECO has served California since 1974 and coordinates solar and roofing services under one company.
What should you prepare before requesting an estimate?
A few details can make the first conversation more useful. Gather what you have; you do not need to know the technical answer to every question.
- Your recent electricity bills and utility name, if readily available.
- The solar installation year, system size, inverter make and model, and any available system plans.
- Photos of the inverter, main electrical panel, meter area, and potential battery location.
- A short list of appliances or circuits you want to operate during an outage.
- Any planned roof work, electrical upgrades, or home additions that could affect the design.
- Your preferred project structure, such as a purchase or a prepaid lease, so the proposal can explain the applicable terms.
For useful photos, take one image that shows the full panel or inverter location and closer views of equipment labels if they are accessible. Keep the surrounding area in the frame so the reviewer can understand access and spacing. Do not open electrical equipment or move installed components to get a better picture. If you have a utility bill, share it through the process the installer specifies and remove unrelated personal information if appropriate.
These details help an installer identify likely compatibility questions and the right next steps. They do not replace a site-specific design, permit review, or written proposal. If you are still comparing battery options, AMECO's home solar battery guide offers additional context.
Request a project-specific battery estimate
Frequently asked questions
Is an AC-coupled battery always cheaper to add to existing solar?
No. AC coupling can be a practical retrofit option, but the total depends on the existing inverter, battery compatibility, controls, electrical work, site conditions, and backup scope. A cost comparison should use the same assumptions for capacity, backed-up loads, permitting, and included equipment.
Can an AC-coupled battery work with any existing solar system?
No. Compatibility depends on the specific solar inverter, battery equipment, controls, and system configuration. An installer should review model numbers and system records before confirming a design. A general description of a battery as AC-coupled is not proof that it works with every existing system.
Will my solar panels charge the battery during an outage?
Not necessarily. The system needs equipment and controls designed for backup operation, and the design must account for the battery, solar system, and backed-up loads. Ask the installer to explain how the system behaves during an outage and what operating limits apply.
Do incentives make the battery cost predictable?
No. Incentives can depend on current program rules, location, equipment, ownership, and individual eligibility. Treat an incentive as an assumption until the applicable program and your project have been verified. Request separate figures for the project price and any estimated incentive.
How can you budget with confidence?
The most useful AC-coupled battery budget is a property-specific proposal that makes the system design and assumptions visible. Confirm battery capacity and output, what solar equipment stays in place, which circuits receive backup, what electrical and permit work is included, and which incentive assumptions remain unverified. That gives you a fair basis for comparing proposals without treating a generic price as a promise.
To discuss your existing system, backup priorities, and site conditions, request a project-specific evaluation from AMECO Solar & Roofing. A clear review can help you understand the scope before you decide how to proceed.
10.8.2026
If you need emergency solar panel repair for home equipment, start by protecting people—not by climbing onto the roof or opening electrical gear. A warning light, storm impact, water leak, or sudden production drop may need prompt attention, but the safest response depends on what you can observe without touching the system.
Request help with your solar system
What counts as a solar emergency at home?
A solar problem is urgent when it creates an immediate hazard or may be causing damage that can spread. Examples include smoke, a burning smell, sparking, a visibly damaged electrical component, water reaching electrical equipment, or roof damage that leaves parts of the system loose. A warning on an app or inverter deserves attention too, but it does not automatically mean there is an immediate fire or shock hazard.
Use the situation, not just the word “error,” to decide what to do next. If you see smoke, flames, arcing, or feel unsafe, move people away and contact emergency services. Do not approach damaged equipment. If there is no immediate danger but the system has stopped producing or shows a persistent fault, document what you see and contact a solar professional for guidance.
Solar equipment can include rooftop modules, wiring, inverters, disconnects, batteries, and utility connections. A solar system may still present electrical risks in daylight even when the home has lost utility power. Never assume that a dark display or outage has made the equipment safe to handle.
It helps to separate urgency from inconvenience. A system that is not reporting data can be frustrating and may deserve a prompt service inquiry, but it is different from smoke, exposed wiring, or water around energized equipment. If you are unsure which category fits, choose the safer one: keep your distance, describe what you see to a qualified service professional, and do not perform an experiment to find out whether the equipment still works.
What should you do first if there is smoke, sparking, or a burning smell?
Treat smoke, flames, sparking, unusual heat, or a strong burning odor near solar equipment as a serious hazard. Keep people and pets away from the equipment and the area below it. Do not touch the panels, inverter, battery, conduit, disconnects, or fallen wires. Do not spray water on electrical equipment or attempt to put out an electrical fire yourself.
- Move to a safe location and warn others to stay clear.
- Call emergency services if there is fire, smoke, active sparking, or immediate danger.
- Tell responders that the property has rooftop solar and, if applicable, battery storage.
- Do not re-enter an unsafe area to switch off equipment or retrieve belongings.
- After the immediate hazard is addressed, contact the solar company or a qualified electrician for inspection and next steps.
Do not try to identify which wire or switch is responsible. A label or shutdown instruction may be useful to a trained responder, but it is not permission to approach equipment during an active hazard. The Town of Hamburg’s solar equipment safety and emergency response plan describes familiarizing local responders with system equipment and operation. That is a useful reminder to disclose the presence of solar and storage when calling for emergency help; it is not a homeowner repair manual.
Make the call from a safe place and give responders the address, a clear description of the visible hazard, and whether anyone is injured or unable to leave. Mention if the system includes battery storage, but do not go closer to verify equipment labels. If the hazard is outside, keep neighbors and passersby away from the area as well. Once responders have taken over, follow their instructions rather than trying to coordinate a shutdown yourself.
What can you safely check when an inverter shows a warning?
If there is no smoke, odor, water, physical damage, or other immediate hazard, you can make a few observations from a safe, dry location. Look at the inverter’s display or monitoring app without removing covers. Record the exact message or code, the time it appeared, and whether the reading is persistent or intermittent. Take a photo of the display if that can be done without touching the unit.

Some messages describe a temporary condition; others need professional diagnosis. The display alone may not tell you whether the issue is with the panels, inverter, communications, grid connection, or another component. If you want background on equipment terminology, AMECO’s guide to what an inverter does can help you understand the equipment’s role, but it cannot diagnose a particular fault.
Do not open the inverter enclosure, disconnect wires, remove fuses, or repeatedly reset breakers to clear a warning. Avoid switching equipment on and off unless the manufacturer’s instructions specifically direct you to do so and you can follow them without entering a hazardous area. If the warning persists, or you are not sure whether a step is safe, stop and ask a qualified professional.
There is a practical difference between reading information and troubleshooting. Reading a message, checking whether the app updated, and noting whether the home has utility power are observations. Removing a cover, probing a circuit, changing a setting, or cycling a disconnect changes or tests the system. If an instruction is unclear, or reaching a control would require walking through water, passing damaged equipment, or entering a restricted area, skip it and report the obstacle.
What if a storm has damaged the panels or roof?
After wind, hail, falling branches, or another severe-weather event, inspect only from the ground or another safe vantage point. Look for obvious changes such as a fallen branch, displaced-looking panels, broken glass, hanging material, or water entering the home. Do not use a ladder to get a closer look, walk on the roof, or pull on anything that appears loose. Roof surfaces and equipment can be unstable after a storm.
If debris or a panel appears to be hanging, keep people away from the area below it. If wires are down, treat them as energized and stay well clear. For visible roof damage, protect people and belongings from inside the home if you can do so safely, then contact appropriate emergency or roofing help. Tell the solar service professional that the roof and array may have been affected.
Solar and roof repairs can interact: a repair that disturbs mounting hardware, flashing, wiring, or modules may affect other parts of the installation. A professional should assess the specific roof and system before anyone removes panels or attempts a patch. For background on how the two scopes fit together, see AMECO’s overview of solar and roofing work.
When you make a ground-level observation, be precise without trying to determine the cause. “A branch is resting across the roof near the array” is more useful than concluding that a particular panel is broken. Note whether the concern is visible from the street, yard, or a window, and whether debris is still moving in the wind. Do not move a branch, glass, or roofing material yourself, even if it seems accessible from a ladder.
If the roof is actively leaking, move valuables away from the water only if the floor and surrounding area are dry and safe. Use a container to catch drips only when there is no water near electrical equipment. Do not climb into an attic or onto a roof if storm damage could have weakened the structure. Describe any indoor damage when arranging an assessment so the solar and roofing scopes can be considered together.
How should you respond to water near solar equipment?
Water inside the home near a roof penetration or water reaching an inverter, battery, electrical panel, or conduit calls for caution. Do not touch wet equipment, stand in pooled water near electrical gear, or open a cabinet to check for moisture. Keep others away from the area. If water is actively entering the home, address personal safety first and contact suitable emergency or property-repair help; do not climb onto a wet roof.
From a dry, safe location, note where water is appearing and whether it began after rain or another event. Take photos of the ceiling or wall damage if safe. A solar technician and a roofing professional may both need to assess the cause; the correct sequence depends on the conditions at the property. AMECO provides roofing services as well as solar work, but no online description can determine the source of a specific leak.
Do not cover wet electrical components with a tarp or attempt to seal a roof penetration around installed equipment. Improvised materials can hide damage or create additional problems. Keep the area clear and describe the location and extent of the water when requesting an assessment.
When reporting water intrusion, distinguish what you know from what you suspect. Share the room or ceiling area affected, whether the water is still appearing, and whether you can see moisture close to electrical equipment. A stain that appeared after rain and a drip near an inverter are both worth reporting, but they do not establish that the solar installation caused the leak. Avoid removing ceiling material or opening a wall to trace the path; the visible entry point indoors may not match the source on the roof.
What should you do when solar production suddenly drops?
A sharp drop in reported production can be frustrating, but it is not always an emergency. First, distinguish an apparent monitoring issue from a system fault. Check whether the app is current, whether the reported date and time are correct, and whether the system has been shaded by clouds or another temporary condition. Compare readings across similar daylight periods rather than drawing conclusions from one short interval.
Do not climb onto the roof to look for dirt, debris, or damage. Do not spray panels, move wiring, or clear branches that are near electrical equipment. If your monitoring display reports an error, preserve the message. A professional can use it along with system information to determine whether a site visit or other next step is appropriate.
For context, AMECO explains what can affect a system’s electricity production. The output expected for a specific home depends on its system and conditions. If the issue seems to be a grid outage, read about the difference between a grid-tied solar system and a system designed with backup capabilities. Do not expect rooftop solar to keep household circuits powered during an outage unless the system is configured for that function.
For a useful comparison, write down a few data points rather than relying on memory: the date and time of the first noticeable change, the app’s reported production, any warning message, and whether utility power was available. If monitoring stopped updating entirely, say so; missing data is not the same observation as a live reading of zero production. Do not spend time collecting a long history during a suspected electrical hazard. Safety comes first, and a brief, accurate description is enough to start a non-emergency inquiry.
Weather, shade, seasonal daylight, and monitoring connectivity can all affect what a homeowner sees, so one unusual reading is not by itself a diagnosis. Compare like with like: similar daytime hours and, when possible, similar weather conditions. If there is a persistent change, a recurring error, or visible physical damage, share the pattern with a professional instead of trying to compensate by changing system settings.
Which checks should homeowners leave to a qualified professional?
Homeowners can observe and report symptoms. Electrical diagnosis, rooftop access, and equipment repair are different tasks. The boundary is straightforward: if a step requires opening electrical equipment, handling conductors, disconnecting components, removing panels, or working at height, leave it to an appropriately qualified professional.
| Situation | Safe homeowner action | Leave to a qualified professional |
|---|---|---|
| Inverter warning or app alert | Record the exact message, time, and visible status from a safe, dry location. | Opening the enclosure, testing circuits, replacing parts, or repeatedly resetting equipment. |
| Storm damage or loose-looking equipment | Observe from the ground; keep people away from the area below. | Roof inspection, panel removal, wiring repair, or securing equipment. |
| Water near equipment or a roof penetration | Stay clear of wet electrical areas; document visible water from a safe place. | Opening wet equipment, tracing electrical faults, or repairing flashing around the array. |
| Sudden production loss | Check the app’s timestamp and note the pattern without approaching the roof. | Electrical testing, component replacement, and diagnosis of a persistent system fault. |
| Smoke, arcing, fire, or fallen wires | Move away, warn others, and call emergency services. | Any attempt by an unqualified person to approach, shut down, or repair the equipment. |
This distinction matters even if a homeowner is comfortable with ordinary household maintenance. Solar installations connect multiple components and can involve direct-current wiring, alternating-current equipment, utility connections, and roof penetrations. The appropriate professional and response depend on the system, the hazard, and the condition of the property.
When in doubt about a proposed do-it-yourself check, consider what it would require you to touch, open, climb, or switch. A step that seems simple on another kind of appliance may expose you to roof-fall or electrical hazards on a solar installation. You can still be an effective partner in the diagnosis by sharing documents, symptoms, photos taken from a safe place, and the sequence of events. The professional can decide what tests, access, and protective measures are appropriate.
What information helps a solar professional assess the problem?
Good notes can make the first conversation more useful without requiring you to troubleshoot. Collect only information you can access safely. You may be asked for the property address, a brief description of the symptom, when it began, and whether there was a storm, outage, roof leak, or recent change before it occurred.
- Write down the exact warning text or code; do not paraphrase if you can capture it accurately.
- Note whether the alert is constant, intermittent, or limited to certain times.
- Take pictures from a safe location of the inverter display, visible roof damage, or water intrusion.
- Say whether there is smoke, odor, heat, sparking, exposed wiring, or a person at risk.
- Share whether the home has battery storage and whether utility power is out.
- Keep available system documents, prior service notes, or monitoring screenshots nearby.
Never delay calling emergency services to gather records or take photos. For a non-emergency issue, these details can help the service team understand what you are seeing and determine what further assessment may be needed. AMECO’s residential solar information describes the general scope of home solar; a property-specific assessment is needed for repair decisions.
A concise timeline is often more useful than a long guess at the root cause. For example: “The inverter displayed a warning at 9 a.m. after last night’s storm; the app has shown no new data since then; there is no smoke or visible water from where I am standing.” That describes what happened and what you observed without claiming to know which part failed. Mention any prior work on the roof or system if you know it, but do not search near equipment for records or labels.
If someone else in the household noticed the symptom first, ask them to share the time and exact message they saw. Keep photographs original where possible so dates and details remain easy to review. Avoid posting images of exposed wiring or damage publicly while waiting for professional guidance; send relevant information through the service provider’s appropriate contact channel.
How do repair needs change when a home has a battery?
A battery adds equipment and operating considerations, so mention it when reporting an alarm, outage, or suspected damage. Do not open the battery enclosure, disconnect it, or attempt to reset it during a hazard. Follow the manufacturer’s instructions only when you can do so safely; if there is smoke, unusual heat, odor, or physical damage, move away and contact emergency responders as appropriate.
Solar panels and a battery do not automatically provide backup power to every home circuit in every outage. The way the system behaves depends on its design and configuration. AMECO’s page on home battery backup solutions offers general context, while a qualified professional can review the actual installation. Avoid assuming that a display, switch, or app status confirms the whole system is safe or functioning normally.
When you describe a battery-related concern, identify the visible symptom and the location of the equipment without getting close to it. Tell the professional whether the home also has rooftop solar and whether the utility outage happened at the same time. Do not infer that a quiet or dark battery is shut down, and do not move nearby objects if that would take you close to damaged equipment. The system’s design and manufacturer guidance matter, so generic online steps should not replace instructions for the installed model.
How can you compare the next steps without rushing into unsafe work?
For a situation without immediate danger, use a simple sequence: document what you can see, avoid physical troubleshooting, contact the relevant service provider, and ask what information or inspection is needed. Ask whether the reported condition appears to require urgent attention, whether the roof or electrical scope may overlap, and what should remain untouched while you wait for guidance. Do not rely on a promised response time or outcome; availability and repair scope vary by situation.
If you are comparing proposals or seeking a new system assessment, the questions should be specific to the fault. Ask what observations support the diagnosis, which components are included in the proposed work, whether roof work is also needed, and what assumptions affect the estimate. For general background, AMECO’s guide to why solar project costs can vary explains why a final figure depends on the property and scope. A repair estimate likewise needs to reflect the system and conditions rather than a generic online price.
For a clearer comparison, ask each provider to distinguish inspection from repair and to list what the proposed scope includes. A diagnostic visit may identify a concern without resolving it on the same visit; parts, roof access, system records, and site conditions can affect what happens next. Ask how they will document the finding, whether roof and electrical work are being treated separately or together, and what further approval is needed before work proceeds. Do not accept a universal price or timeline from a description alone.
When you are ready to discuss a non-emergency issue or request a project-specific assessment, start with AMECO’s solar project estimate tool. For a direct inquiry, you can also contact AMECO. These links are for requesting information; they do not represent an emergency dispatch service.
Ask AMECO about a non-emergency solar concern
How do you distinguish an urgent hazard from a service issue?
Use visible conditions to sort the next step, not a guess about the underlying cause. Smoke, fire, active sparking, a downed wire, or water contacting energized equipment points to immediate safety action: keep away and contact emergency services. A damaged-looking panel or loose object on the roof also calls for distance and professional assessment, even if no smoke or alert is present.
A monitoring alert without other danger signs is usually a service question rather than a reason to approach the equipment. A sudden drop in app data can also reflect a communications or reporting issue, so note the timestamp and compare it with what the inverter display shows from a safe place. These observations do not confirm the system is safe or identify a failed part; they simply help explain the report.
When calling for assistance, say plainly whether anyone is in danger, whether the issue is ongoing, and whether solar or battery equipment is involved. If a roof leak or storm damage is present, mention both the roof and electrical symptoms rather than assuming they are unrelated. If conditions worsen while you wait, move away and contact emergency services. Do not let the desire to restore production override a safety concern.
Think of the decision as a two-stage check. First, ask whether there is an immediate threat to a person or property: fire, smoke, active arcing, fallen wires, or water at electrical equipment means stop and get emergency help. If those signs are absent, ask whether the system is visibly damaged or persistently reporting an error. That generally points to a professional service inquiry rather than emergency services, while still calling for caution and a qualified assessment.
Ask AMECO about a non-emergency solar concern
Frequently asked questions
Can I turn off my solar system during an emergency?
Do not approach or operate equipment during smoke, fire, sparking, flooding, or another immediate hazard. Move away and call emergency services. In a non-emergency, follow only the system manufacturer’s instructions if you can do so safely; otherwise ask a qualified professional for guidance.
Is a flashing inverter light always an emergency?
No. A light or app alert can indicate different conditions, and its meaning depends on the equipment and message. Observe it from a safe location, record the exact status, and seek professional guidance if it persists or is accompanied by signs of damage or danger.
Should I climb onto the roof to inspect panels after a storm?
No. Roofs may be wet or unstable, and damaged panels, wiring, or mounting hardware can pose risks. Look from the ground, keep clear of any loose-looking equipment, and arrange a qualified assessment.
Can solar panels power my home during a utility outage?
Not necessarily. Backup operation depends on the system’s design and configuration, including whether it has suitable storage and backup equipment. Do not assume that panels alone will keep home circuits energized; check your system documentation or ask a qualified professional.
What if there is water leaking near the solar installation?
Stay away from water that has reached electrical equipment and do not open any enclosures. Document visible water from a safe, dry location and contact appropriate roof and solar professionals; call emergency services if there is an immediate hazard.
Ready to discuss a solar system concern?
For a non-emergency question or a property-specific estimate, contact AMECO Solar & Roofing with the symptoms you observed and any safe-to-take photos. If there is smoke, fire, sparking, exposed wiring, or immediate danger, stay clear and contact emergency services first.
10.7.2026
A roof replacement cost estimate California homeowners receive is shaped by far more than the home’s floor area. Roof geometry, selected material, removal and disposal, hidden damage, site access, local permit requirements, and any solar equipment all affect the work included in an estimate. The best way to compare proposals is to understand the scope behind each number—not to rely on a universal price or promised timeline.
Request a property-specific roof estimate
Two houses with similar interior square footage can have very different roofs. One may have a simple, walkable shape with one layer of roofing. Another may have several steep sections, skylights, aging decking, and solar panels that need to be removed and reinstalled. Those differences affect labor, materials, disposal, and coordination. This guide explains what to review before choosing a roofing proposal in California.
Why can two California roof replacement estimates differ?
A proposal is an estimate of a defined scope of work. If two contractors assume different materials, tear-off methods, repair allowances, or exclusions, their totals are not like-for-like—even when both call the job a roof replacement. Ask each bidder to describe the existing roof, the work planned, and what conditions could change the final scope.
It helps to treat the estimate as a set of assumptions to verify. The contractor is estimating quantities and labor based on visible conditions and the agreed work, while some concealed conditions remain uncertain. A useful proposal separates known work from items that may require a decision later. It should tell you how the contractor will notify you, show the condition, describe the repair, and obtain approval before extra work is performed, except when an urgent safety issue requires immediate attention.
California adds local considerations. Climate, roof design, the property's location, and local building requirements can influence material choices and permit steps. Requirements can differ by jurisdiction, so confirm the rules with the local building department and ask the contractor to identify who will obtain permits and arrange inspections. Do not assume that a proposal for one city applies unchanged elsewhere.
Before signing, read the proposal from the top down and mark each item as included, excluded, allowance-based, or still unconfirmed. For example, “replace roof covering” does not tell you whether underlayment, flashing, skylight details, gutters, disposal, or solar work are covered. Ask the contractor to put clarifications in a revised written scope rather than relying on a conversation alone. Keep the estimate, any drawings, product selections, and approved changes together so you can trace what the price represents as the project moves forward.
Which property details affect the roofing scope?
Roof area and shape
Roofing quantities are based on the roof surfaces, not simply the home’s living area. Overhangs, attached garages, additions, and multiple roof levels add surface area. The shape also matters: hips, valleys, dormers, ridges, and transitions take more layout and flashing work than a broad, uncomplicated plane.
Ask whether the contractor measured the roof or estimated it from a listing, satellite image, or approximate home dimensions. Remote measurements can help with an initial discussion, but a site visit can reveal conditions such as unusual transitions or access limitations. The proposal should make clear what roof areas are included and whether detached structures are excluded. Ask whether measurements reflect separate roof sections, such as a garage, porch, or later addition, and whether any surfaces with a different slope or covering are included. A site plan or marked-up roof sketch can help both sides discuss the same area. If the contractor finds an area that was not visible or measurable during the initial visit, ask how the revised scope will be explained before work proceeds.
Pitch and working conditions
Pitch describes how steep the roof is. Steeper surfaces can require additional fall protection, staging, and careful material handling. A roof with several steep sections may take more labor than a low-slope roof of similar area. Height, fragile surfaces, and limited places to stage equipment can also affect how crews work safely.
Ask how the estimate accounts for difficult roof sections and safety measures. A low bid that leaves these details unclear may not represent the same scope as a proposal that explicitly addresses them. Request the contractor's assumptions for each roof section, including how steep areas and transitions were measured. If there is a large variation between bids, ask whether it comes from different access plans, installation methods, or safety requirements. Do not compare the total alone when the proposals describe different working conditions.
Existing roof layers and tear-off
Replacing a roof can involve removing one or more existing layers, underlayment, flashing, and accessories before new materials go on. Tear-off adds labor, hauling, and disposal. The actual layers and condition may not be fully visible until work begins, so the estimate should state what removal is included and how additional layers or unexpected conditions will be handled.
Ask whether disposal fees and cleanup are included. Clarify what happens if the crew finds concealed damage after removing the old roofing. A written process for documenting the condition, explaining the recommended repair, and approving any added work helps avoid surprises.
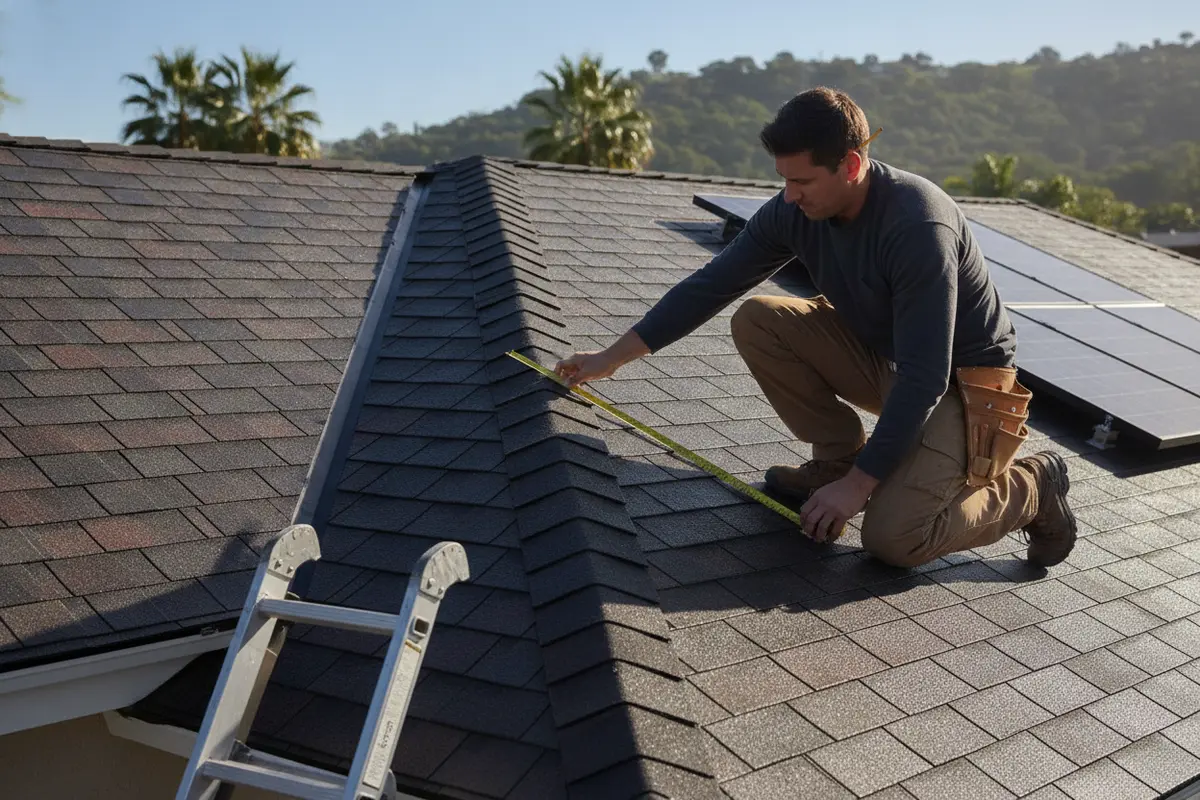
How do roofing materials change the estimate?
Material selection changes more than the visible finish. Products differ in weight, installation method, underlayment needs, flashing details, and compatibility with the existing roof structure. Availability and the skill or time required to install a particular system can also affect the proposal. Compare the full assembly and scope, rather than judging by the material name alone. Ask for product documentation and written details about installation requirements, maintenance guidance, and any applicable manufacturer or workmanship terms. Confirm which party handles product registration, if required, and what documents you will receive at completion. Warranty language can vary by product and installer, so read the actual terms rather than assuming that a familiar material name means identical coverage.
Start by asking which material is being proposed and why it suits the roof’s design and existing structure. If you prefer a particular look or product, ask whether the roof needs preparation or detail work that differs from the current assembly. A change in material can affect edge details, valleys, ridges, ventilation components, and how the new roof meets walls or skylights. Those are scope questions for the contractor to verify, not assumptions to resolve from a product label.
It can also help to separate required work from optional upgrades. Ask which components are being replaced as part of the roofing system, which existing items may remain, and whether choices such as upgraded ventilation or a different roof finish are included in the quoted amount. If you receive options, compare them with the same assumptions for removal, flashing, site protection, and cleanup. This makes it easier to understand what the added or changed scope actually covers.
When looking at two material options, ask for both proposals to identify the complete assembly: roof covering, underlayment, edge treatment, flashing, and ventilation details where applicable. Then compare how each option fits the existing roof structure and the home's design. For instance, if one proposal changes the covering type while another replaces the existing material, request an explanation of any preparation or transition work that differs. This is more useful than comparing a product name or color in isolation. Also confirm whether the quoted material selection is available and whether a substitution would require your approval and a revised scope.
| Estimate factor | What to confirm | Why it matters |
|---|---|---|
| Roof covering | Exact material type, product, color or profile, and included accessories | Materials have different installation details, weights, and costs. |
| Underlayment and flashing | Where each product will be installed and which penetrations are included | These layers help complete the roof system and protect transitions. |
| Tear-off and disposal | Number of layers assumed, haul-away, and disposal | Removal work and debris handling are part of the job scope. |
| Decking and structural repairs | Included repairs, unit or allowance method, and approval process | Hidden deterioration may only be visible after removal. |
| Permits and inspections | Who applies, pays applicable fees, and schedules inspections | Local requirements and responsibilities should be clear. |
| Solar coordination | Panel removal and reinstallation, electrical scope, and sequencing | Roofing and solar work need a defined handoff and schedule. |
For example, a lightweight covering and a heavier tile system may call for different installation practices and may not be interchangeable without checking structural and manufacturer requirements. If you are weighing roofing and solar together, AMECO’s overview of solar and roofing project coordination can help frame the questions to raise before work is scoped.
What can be found after the old roof comes off?
Some issues are concealed until removal exposes the roof deck and transitions. Possible findings include deteriorated sheathing, damage around penetrations, or framing concerns. An estimate cannot always identify hidden conditions in advance, but it can describe how the contractor will handle them if discovered.
- Ask what repair work is included in the base proposal, if any.
- Ask how additional decking or structural work will be measured and priced.
- Request photos and a written explanation before approving added work, when practical.
- Confirm who can authorize changes and how those changes will be documented.
Pay attention to the difference between a defined repair and a vague contingency. A clearly explained allowance or change-order process gives you a way to evaluate added work. Do not assume that all damaged decking is included just because the proposal says “roof replacement.”
Ask how any allowance works in practice. Is it a set quantity of decking, a dollar amount, or a per-unit rate if more material is needed? What documentation will show the condition, and will the contractor pause for approval before proceeding with non-urgent additional work? If you have a specific budget limit for unplanned repairs, discuss how to handle a finding that could exceed it. The written process should make clear how a change affects the scope and total, and whether the schedule needs to be adjusted. These questions do not predict that damage will be found; they clarify how decisions will be made if it is.
How do access and site conditions affect the proposal?
Crews need room to deliver materials, stage equipment, protect landscaping, and remove debris. Tight driveways, limited parking, landscaping close to the home, restricted work hours, or difficult access to the roof can change the setup. Multi-story homes and properties with neighboring structures close by may require additional planning.
Before comparing bids, walk the site with the contractor or point out constraints that might be missed during a quick inspection. Ask how the crew will protect gutters, windows, landscaping, and outdoor equipment, and where the dumpster or delivery vehicle will go. Public bid documents for a roof replacement can identify job-specific charges such as equipment rental and surcharges; that is a reminder to ask which access and equipment costs are included in a residential scope, not a basis for predicting your project's price. See the Mariposa County roof replacement bid book for that project-specific example.
Make a practical site checklist before the crew arrives: which areas should remain clear, where deliveries may be staged, whether outdoor furniture or vehicles need to be moved, and how the crew will reach the work area. Tell the contractor about gates, shared driveways, pets, or access restrictions that could affect the workday. Ask whether temporary protection is planned for nearby landscaping and exterior features, and who should be contacted if site conditions differ from what was discussed. Confirming these details early helps distinguish an actual access-related scope difference from an unexplained price gap.
Which permit and code questions should California homeowners ask?
Permit requirements depend on the jurisdiction and the work being performed. A straightforward covering replacement may be treated differently from work that changes structural elements or includes other upgrades. The property’s local rules govern, so ask the contractor to confirm applicable permits and inspections with the building department instead of assuming a statewide rule covers every project.
Get clear answers to these questions before signing:
- Does the quoted scope include preparing and submitting permit documents?
- Who pays permit fees, and are they listed separately or included?
- Who schedules required inspections and addresses any corrections?
- Does changing materials or repairing the deck affect the permit scope?
- Are solar-related permits or electrical work part of this proposal or handled separately?
AMECO provides both solar installation and roofing services, which can make it useful to discuss how the two scopes fit together. Learn more about its roofing services and residential solar solutions when planning work that touches both systems.
How should you plan roof replacement around solar panels?
If panels are already on the roof, ask whether the roofing estimate includes solar removal and reinstallation or whether that work requires a separate agreement. Clarify who is responsible for disconnecting and reconnecting equipment, coordinating electrical work, protecting components, and confirming system operation after reinstallation. The scope should identify whether the solar contractor or roofing contractor leads each step.
If you are planning a new solar system and a roof replacement, discuss the order of work before either proposal is finalized. The roof condition, remaining service life, roof penetrations, layout, and electrical plan can affect coordination. A combined conversation can help identify responsibilities, but it does not mean every task is automatically included in one quote. Review AMECO’s guide to replacing a roof before installing solar panels for additional planning questions.
For a roof-and-solar project, clarify in writing which contractor is responsible for each handoff, what is excluded, and how any schedule changes will be communicated. You can also review the company’s approach to consultation, design, installation, and support as you prepare questions for an estimate.
Discuss your roof and solar project
How can you compare roof replacement proposals fairly?
Put each proposal side by side and compare the work line by line. The lowest total may exclude removal, flashing, disposal, permit coordination, or solar work that another bidder includes. Conversely, a higher bid is not automatically better; look for a clear scope, appropriate materials, and a documented process for unforeseen conditions.
- Match the measured areas. Confirm which roof sections, garages, or additions are included.
- Compare the same materials. Check the product and all related components, not just the surface covering.
- Read removal and repair language. Confirm the assumed layers, disposal, decking treatment, and change-order method.
- Check responsibilities. Identify who handles permits, inspections, solar equipment, and site protection.
- Ask about documentation. Request a written proposal with exclusions and a process for approving scope changes.
Make a short list of unresolved questions and ask every bidder the same ones. If one proposal uses an allowance and another includes a defined quantity, ask each contractor to explain the difference. That makes it easier to see whether the price difference reflects a different scope, a different product, or another assumption. Then request any revision in writing so the updated proposal still identifies materials, included work, exclusions, and approval steps. If a contractor gives a verbal answer that changes the scope, ask for the written document to reflect it before you make a decision. Keeping the comparison worksheet with the proposals can also help you track which questions have been answered and which remain open.
For example, imagine one proposal includes removal of a single layer and disposal, while another leaves tear-off unspecified but includes a larger repair allowance. Do not treat either total as the better deal until the assumptions are reconciled. Ask both bidders to state the layers they observed, the removal and cleanup included, the quantity or method used for decking repairs, and how concealed conditions will be approved. Next, align material specifications and identify permit and solar responsibilities. The revised comparison may reveal that totals are close once the scopes match, or it may show a genuine difference in work or product. Either way, you will be deciding from clearer information rather than an unexplained headline number.
What should you gather before asking for an estimate?
A little preparation can make the first discussion more useful. You do not need to diagnose the roof yourself. Share what you know and ask the contractor to verify conditions during an inspection.
- Your property address and the roof areas you want included.
- Any known leaks, prior repairs, or roof replacement history.
- Photos of visible concerns, additions, skylights, or difficult access areas.
- Whether solar panels are installed now or being considered.
- Your preferred material or appearance, if you have one.
- Any timing constraints or access rules that could affect the work.
If you have prior invoices, product paperwork, inspection notes, or photos from a past repair, gather them for the discussion. These records may help explain which areas have been addressed, but they do not replace a current roof inspection. Also make a list of priorities: matching the existing appearance, coordinating solar work, understanding repair exposure, or meeting a particular project window. Share the priorities with each bidder so they can explain where they fit the scope and where tradeoffs may arise. You can then compare proposals against the same goals instead of trying to remember different conversations.
AMECO’s California project examples can help you think about the range of roof and solar situations to discuss. For project-specific questions, use the contact page to start a conversation; final scope and figures depend on the property and the work required.
Request an estimate for your property
Frequently asked questions
Can I estimate a roof replacement from my home’s square footage?
Not reliably. Living area does not show the actual roof surface, pitch, number of roof planes, overhangs, or access conditions. Use an on-site assessment and written scope for a property-specific estimate.
Should tear-off and disposal appear in the estimate?
The proposal should explain whether removal and disposal are included and what existing layers it assumes. If the number of layers or concealed conditions could change the scope, ask how any additional work will be documented and approved.
Will the contractor know about decking damage before work begins?
Not always. Some decking and structural conditions are concealed by the existing roof covering. Ask what repairs are included, how additional damage will be documented, and how you will approve changes.
Do solar panels need to be removed for a roof replacement?
Whether removal is needed depends on the roof and the equipment layout. If panels are present, confirm who will assess, remove, store, and reinstall them, and whether electrical work and system checks are included or separately scoped.
How long does a California roof replacement take?
There is no single timeline that applies to every home. Roof size and complexity, material, weather, access, repairs, permits, inspections, and solar coordination can all affect scheduling. Ask for a project-specific schedule and how the contractor will communicate changes.
Plan for a clear, property-specific estimate
A dependable comparison starts with a detailed scope: measured roof areas, materials, tear-off, repair terms, access planning, permit responsibilities, and solar coordination where relevant. California homeowners can use those details to ask better questions and compare proposals on the work included, rather than chasing a generic price or timeline. Request a property-specific estimate to discuss the roof and project details that matter for your home.
10.6.2026
Choosing among the best online solar consultation companies is not just a matter of finding a polished video call or a quick estimate. A useful remote review should help you understand how a system might fit your roof, electricity use, utility rules, and plans for the home, and make clear what still needs to be checked in person. This guide explains how to compare the process and the proposal without treating an early online estimate as a final design.
What should an online solar consultation include?
A remote consultation can be a practical first step. You share information about the property and household energy use, discuss priorities with a solar professional, and review a preliminary layout or proposal. The call should be a conversation about your project, not a one-size-fits-all presentation.
A strong process typically covers:
- Your goals: lowering grid purchases, planning for an electric vehicle, adding battery backup, coordinating solar with roof work, or some combination.
- Energy use: recent electricity bills or utility data, seasonal changes, and expected changes such as a heat pump or EV.
- Property details: roof shape, approximate age and condition, shading, electrical equipment, and any known constraints.
- System options: panel placement, inverter approach, battery choices if relevant, and the assumptions behind the proposed size.
- Next steps: what the remote team still needs to verify, who will verify it, and what would cause the design or estimate to change.
Some companies can offer a virtual-first process with screen sharing and digital proposals. AMECO Solar & Roofing works with California homeowners on solar installation, roofing, and battery storage, and can coordinate a conversation around those overlapping needs. The format matters less than whether the consultant explains assumptions and listens to the details of your home.
Pay attention to how the consultant handles unknowns. A responsible first meeting does not need to resolve every engineering detail; it should separate information already supported by your records from estimates that rely on imagery or assumptions. For example, the consultant might show a likely panel area while clearly noting that roof condition and final electrical requirements still need review. You should leave knowing which parts of the discussion are preliminary, what documentation supports them, and what would trigger a revised proposal.
How should you compare online solar consultation companies?
Compare the consultation method, not just how fast a company sends a number. Two proposals that look similar may use different assumptions about energy use, usable roof area, equipment, utility compensation, or work that is included. Ask each company to show how it got from your information to its recommendation.
The U.S. Department of Energy's Homeowner's Guide to Solar advises homeowners to thoroughly read reviews when choosing among solar companies. Use reviews as one input alongside a clear scope, project-specific answers, and a proposal you can examine. No single review or online estimate establishes that a system will perform as expected on your particular property.
Use a consistent checklist when you compare. For instance, note whether each company requests utility records, shows a roof layout, identifies equipment, describes what is provisional, and offers a clear route to site verification. If a proposal is based on limited information, ask the company to label it as preliminary rather than treating it as a final system plan.
It helps to compare process evidence rather than presentation polish. A screen-shared proposal should let you trace major choices: which usage period informed the design, which roof planes appear usable, whether storage is optional or part of the proposed system, and what work the estimate includes. If one company has not yet received utility data, mark the energy estimate as less verified instead of assuming it is equivalent to a proposal based on account records. You can also ask each representative to explain one significant assumption in plain language. Clear explanations make it easier to spot when two quotes differ because the homes are modeled differently, not simply because one company offers a lower figure.
What information should you prepare before the call?
A little preparation makes a remote meeting more useful. Gather what you have, but do not delay a first conversation just because one document is missing. Tell the consultant what is uncertain so the proposal can account for it instead of silently filling in gaps.
- Electricity bills or usage data: Recent bills help show how much electricity you use and how charges vary. If your utility account offers downloadable interval or annual data, ask how to share it securely.
- Utility and rate details: Have the utility name and rate plan available if you know them. If you are unsure, say so; the consultant should explain what information is needed to confirm the applicable rules.
- Roof photographs: Photos from the ground can show roof planes and visible shade. Do not climb onto the roof to take pictures. Aerial imagery can help with an early discussion but cannot verify every roof condition.
- Roof history: Share the approximate roof age, known repairs, leaks, or plans for replacement. If you have paperwork from prior roofing work, it may help establish what is known.
- Electrical information: A photo of the electrical panel label or equipment may be useful if it can be taken safely. Do not remove covers or touch wiring to gather details.
- Household plans: Mention likely changes in occupancy or major electric loads, such as an EV, pool equipment, or electrification project. A system sized only around past use may not reflect a planned change.
- Questions and priorities: Write down what you want to understand: upfront cost, payment arrangement, backup needs, roofing coordination, equipment choices, or long-term service.
For background before the appointment, AMECO's overview of its solar and roofing approach and its residential solar information can help you identify topics to raise. You can also review its plain-language explanation of a PV system if you want a quick refresher on common terms.
Before the meeting, make a short project brief that fits on one page or in a note. List your utility, approximate monthly or annual usage if available, any large upcoming changes, roof work you know is needed, and the top two goals for the system. Separate confirmed facts from guesses. For example, write "roof replaced around 2012, exact date unknown" rather than presenting an estimate as a record. Keep the latest bills handy so you can answer follow-up questions without relying on memory. If you are comparing multiple companies, send each the same basic information and ask them to identify any additional data they need. This makes the first proposals more comparable and reduces the chance that one estimate reflects a future EV while another ignores it.
Protect account details while sharing documents. Ask the company which secure method it prefers and whether a full account number is necessary for an initial review. You can often begin a discussion with usage information and the utility name, then provide more specific account records through the company's requested process if needed. Never send passwords or one-time login codes. During the call, confirm how the consultant will use the records and whether the design assumptions will be documented in the proposal.
How does a remote solar design use utility and roof data?
A preliminary design combines information about energy demand with an estimate of the roof area that may be suitable for solar. The consultant may review utility bills or usage data, an aerial view, roof orientation, visible obstructions, and the utility territory. These inputs help shape a conversation about system size and placement, but each has limits.
Usage data helps the designer understand when and how much electricity the home uses. An annual total is useful, but it does not tell the whole story if use changes by season or time of day. A planned EV or future electrical upgrade also matters. Ask whether the design reflects only the history you supplied or includes any future loads you discussed.
Roof imagery can show approximate dimensions and obvious obstructions. It may not show the condition of roofing materials, hidden damage, the exact location of vents, structural details, or every source of shade. A preliminary layout should therefore be treated as a planning tool. When the project advances, the company needs to confirm the property conditions that affect safe installation and final design.
Utility details matter as well. California homeowners should ask how the proposal accounts for the rules and rate plan that apply to their account, and whether those details have been verified or are still assumptions. AMECO's article on how net metering works offers background for a discussion, while its guide to an on-grid solar system explains the basic relationship between a home system and the grid. The effect on an individual bill depends on the specific utility rules and household use.
Ask the designer to walk through how the information appears in the proposal, not only how it was collected. Does the estimated annual production relate to the roof planes shown? Is the proposed system size tied to the usage history you provided? Are future loads displayed as a separate scenario or mixed into the base case? If a rate plan is unknown, is the bill analysis clearly marked as illustrative? These questions help you distinguish a useful model from a precise promise. A remote design can be valuable even when it is provisional, as long as the uncertainty is visible and the next verification step is clear.
What can an online consultation not verify?
A video meeting and digital roof model cannot replace every property inspection. Remote tools can narrow down questions and support an initial design, but a professional may still need to inspect the roof, electrical equipment, access, or other site conditions before confirming the system and scope.
Ask the consultant to identify exactly what remains unconfirmed. Depending on the home, that may include:
- Roof condition, remaining service life, and whether repairs or replacement should happen before panels are installed.
- Structural or attachment details that cannot be established from photos or aerial images alone.
- Electrical panel capacity, wiring, grounding, or other conditions that require a closer technical assessment.
- Obstructions or shade patterns that differ from the imagery, including trees that have grown or new nearby construction.
- Equipment placement, conduit routes, clearances, and practical access for installation and future service.
If the roof may need attention, ask how roofing and solar work will be sequenced and who is responsible for coordinating the scopes. For a broader overview, AMECO's guide to solar and roofing projects explains why homeowners may want to consider both together. You can also review the company's roofing services to prepare questions about a roof-related scope.
There are practical reasons a remote model can miss a detail. A tree may shade a roof differently in the afternoon than the image suggests; a vent or skylight may be hard to distinguish from above; and a photograph of an electrical panel does not establish the condition of wiring behind its cover. Even access around the home can change where equipment or conduit can reasonably go. If the consultant identifies a possible issue, ask whether it could affect system size, installation scope, schedule, or cost, and whether the answer requires a site visit or another record. A clear response is more useful than a broad assurance that everything can be handled later.
What should you ask about the proposal and equipment?
A remote consultation is a good time to ask for a clear explanation rather than simply accepting a system size or a projected outcome. Request a written proposal and ask the consultant to walk through it on screen. Keep notes about the assumptions and any items that are still subject to inspection or utility confirmation.
- System layout: Which roof planes are proposed for panels, and what conditions could change that layout?
- Energy assumptions: What usage period is the design based on? Does it include the changes you described?
- Equipment: Which panels, inverter, and optional battery are proposed? Why do those choices fit the design?
- Scope: What is included in the proposal, and what work could be an added scope after site assessment?
- Utility steps: Who handles the project paperwork and coordination, and what approvals or inspections are part of the process?
- Monitoring and service: How will you see system performance, whom do you contact with a service question, and what support is available after installation?
- Payment arrangement: If you are comparing purchase, lease, or other payment options, ask for the terms in writing and compare the obligations over the full agreement. Do not infer terms from a monthly figure alone.
- Changes and cancellation: Ask what happens if the site visit, engineering review, or utility confirmation changes the design or scope.
When battery backup is important, distinguish backup capability from general bill savings. Ask which circuits or loads may be supported, how the proposed battery system operates during an outage, and whether the design requires additional equipment. AMECO's guide to home solar batteries in California and its information about battery backup solutions can help you build a list of project-specific questions.
For homeowners considering an electric vehicle, ask how charging could affect the energy-use assumptions and whether the proposed design accounts for it. AMECO also provides information about a solar-powered EV charger, which can help frame that conversation. Do not assume a future charger or battery is included unless the written scope says so.
Request a version of the proposal that makes the decision points easy to compare. If storage is optional, ask for the solar-only and solar-plus-storage configurations separately, with the added equipment and scope called out. If roof work may be required, ask whether the proposal assumes the existing roof remains in place or includes a separate roofing scope. If the company offers a prepaid lease or another payment arrangement, do not rely on a verbal summary: review the written agreement and ask how ownership, maintenance responsibilities, and transfer conditions work. The right questions depend on your priorities, so be direct about whether you value backup, future electrification, roof coordination, or a particular payment structure most.
It is also useful to distinguish equipment names from system function. Ask what role the inverter plays, how monitoring will work, and whether the proposed battery can provide the specific backup behavior you expect. If the consultant mentions an equipment feature, ask where it appears in the written specifications and what conditions apply. This avoids choosing based on a product label alone. A proposal should explain how the components work as a system and whether each stated capability is included in the actual scope.
How do you compare remote consultations side by side?
Use a simple comparison table to separate the completeness of the consultation from the headline estimate. A company can be responsive and still leave important items unresolved. Record what is documented, what is an assumption, and what the company says it will verify next.
| Review area | Useful evidence in the consultation | Follow-up to request |
|---|---|---|
| Energy use | Proposal names the bills or usage period reviewed and reflects the changes you discussed. | Ask how the design changes if usage or planned loads differ. |
| Roof fit | Preliminary layout identifies roof planes and visible obstructions. | Ask what roof and structural conditions still need an on-site check. |
| Equipment | Written proposal identifies major components and explains their role. | Ask why the selected equipment fits your goals and what alternatives exist. |
| Utility assumptions | Proposal identifies the relevant utility information and marks any unverified details. | Ask who confirms the rate plan, interconnection requirements, and next steps. |
| Scope and estimate | Included work, exclusions, and estimate assumptions are visible in writing. | Ask what could change after site assessment and how revisions are handled. |
| Support | Proposal explains monitoring, contacts, and post-installation support. | Ask whom to contact if equipment or system performance needs attention. |
For every company, mark each item as documented, discussed but not documented, or not yet verified. That makes it easier to compare like with like. If a representative gives a confident answer but does not include it in the proposal, ask for clarification in writing before you rely on it.
AMECO's guide to why solar installation estimates vary is a useful prompt to ask about differences in equipment, property conditions, and scope. For a project-specific estimate, you can use the solar cost calculator as a starting point and confirm assumptions directly with the company.
Consider adding a confidence note to each row of your own comparison: "confirmed," "reasonable preliminary estimate," or "open question." For example, a roof layout drawn from imagery may be useful but not confirmed, while your usage history may be supported by utility bills. Keep the written proposals, follow-up answers, and versions together so you can see what changed after a site review. If an estimate is revised, ask the company to identify the specific new information behind the change. A documented revision is easier to assess than two unexplained totals. This scorecard is not about picking the longest proposal; it is a way to understand risk, completeness, and fit before you make a decision.
When should a remote review lead to an on-site visit?
A remote review is most valuable when it clearly points to the next verification step. An on-site assessment may be important when roof condition is uncertain, the electrical setup needs closer review, imagery is incomplete, or the system design depends on details that cannot be confirmed from documents. The right timing depends on the home and the company's process.
Before an on-site visit, ask what the visit covers and what information the assessor needs. If a roof replacement may be part of the project, discuss how the roofing scope and solar design will be coordinated. If the company revises the proposal afterward, request a written explanation of what changed and why.
There is no need to treat the remote and in-person stages as competing alternatives. The remote consultation can help you organize your questions, understand a preliminary option, and decide whether it is worth proceeding. The site assessment then helps establish actual conditions so the project can be finalized appropriately.
A practical handoff includes more than scheduling a visit. Ask what the assessor plans to inspect, whether anyone needs access to the roof or electrical area, and whether you should have utility records or roofing documents ready. Afterward, compare the findings with the preliminary model: Did the usable roof area change? Was a panel or wiring condition identified? Did the scope or equipment recommendation shift? The company should be able to connect any revision to a specific finding. If the assessment confirms the original assumptions, that is useful too; it means the next stage rests on better-verified information rather than on a remote estimate alone.
Get An Estimate for Your Solar and Roofing Project
Frequently asked questions
Can an online consultation provide a final solar design?
It can provide a preliminary design or proposal, but the company should tell you which details remain unverified. Roof condition, structural details, electrical equipment, and other property conditions may require further assessment before the design and scope are final.
What should I send before a virtual solar appointment?
Share recent electricity bills or usage data, the utility name if known, any roof information or safe ground-level photos, and details about planned changes such as an EV. Do not climb onto the roof or remove electrical covers to collect information. Ask how the company wants documents transferred.
Can an online solar estimate tell me exactly how much I will save?
No estimate should be treated as exact without verified household use, system design, applicable utility details, equipment, and project terms. Ask the company to state its assumptions and explain which factors could change the estimate.
Do I need a battery with a solar system?
That depends on your priorities, utility arrangement, and whether backup during outages is important to you. Ask for a separate explanation of the solar-only and solar-plus-battery options, including what backup loads the design could support and what each proposal includes.
How can I tell whether a remote solar company is a good fit?
Look for clear written assumptions, project-specific answers, a defined path to site verification, transparent scope, and understandable information about equipment and support. Check reviews as one part of your research, then compare the actual proposal and follow-up process.
Ready to discuss your home's solar options?
A useful consultation should leave you with a better understanding of what a system might look like, what remains to be checked, and which questions matter for your home. AMECO Solar & Roofing serves California homeowners with solar and roofing solutions and can discuss how your goals, roof, and energy use shape the next steps.
Compare written proposals carefully, and make sure each company explains what it has verified and what still depends on a closer property assessment.
10.6.2026
If you are considering adding a battery to an existing solar system, start with the system you already have—not with a battery model or a promised backup duration. The panels, inverter, electrical service, utility rules, and the circuits you want to keep running all affect what a retrofit can do. A qualified review can show whether your current setup can be adapted, which components may need to change, and whether the result fits your goals.
Request a solar and battery assessment
What does adding a battery to an existing solar system involve?
A solar battery stores electricity for later use. Depending on its configuration and controls, it may store energy produced by your panels, charge from the grid, or do both. It can then supply selected household loads when solar production is low or, if the system is designed and configured for it, during an outage.
Those functions are not automatic just because a battery is connected to solar equipment. The system must be able to manage power safely, isolate from the grid when required, and route energy to the circuits intended for backup. An existing solar array may remain in place, but the inverter, wiring, protection equipment, or electrical layout might need additions or changes.
There are two broad paths:
- AC-coupled retrofit: A battery system connects on the AC side of the existing solar inverter. This can be useful when the solar equipment is already installed and may allow the existing inverter to remain, subject to compatibility and the backup design.
- DC-coupled or hybrid-inverter design: Solar and battery power connect through compatible equipment that manages DC power. Depending on the current installation, this can involve replacing or reconfiguring the existing inverter rather than simply adding a battery.
These are design approaches, not guarantees of compatibility. The exact hardware, backup operation, and permitted configuration depend on the equipment already on site and the proposed battery. For a general overview of storage paired with solar, see the U.S. Department of Energy's solar energy and storage basics. AMECO also describes its battery backup solutions for homeowners exploring storage.
Can your current solar equipment work with a battery?
Compatibility is a system-level question. A panel model or battery name alone cannot answer it. An assessor needs to identify how the solar array is wired, what inverter converts its output, how the home connects to the utility, and how the proposed battery will control power. Installation records, equipment labels, and monitoring details can help establish what is already there.
Identify the inverter and system architecture
The inverter is central to a retrofit because it converts and controls energy moving between the panels, home, battery, and grid. Some solar systems use a central string inverter; others use microinverters at the panels or power optimizers with an inverter. Some installations were designed with storage in mind, while others were not. The nameplate, model number, and system diagram can help a professional determine which configurations are feasible.
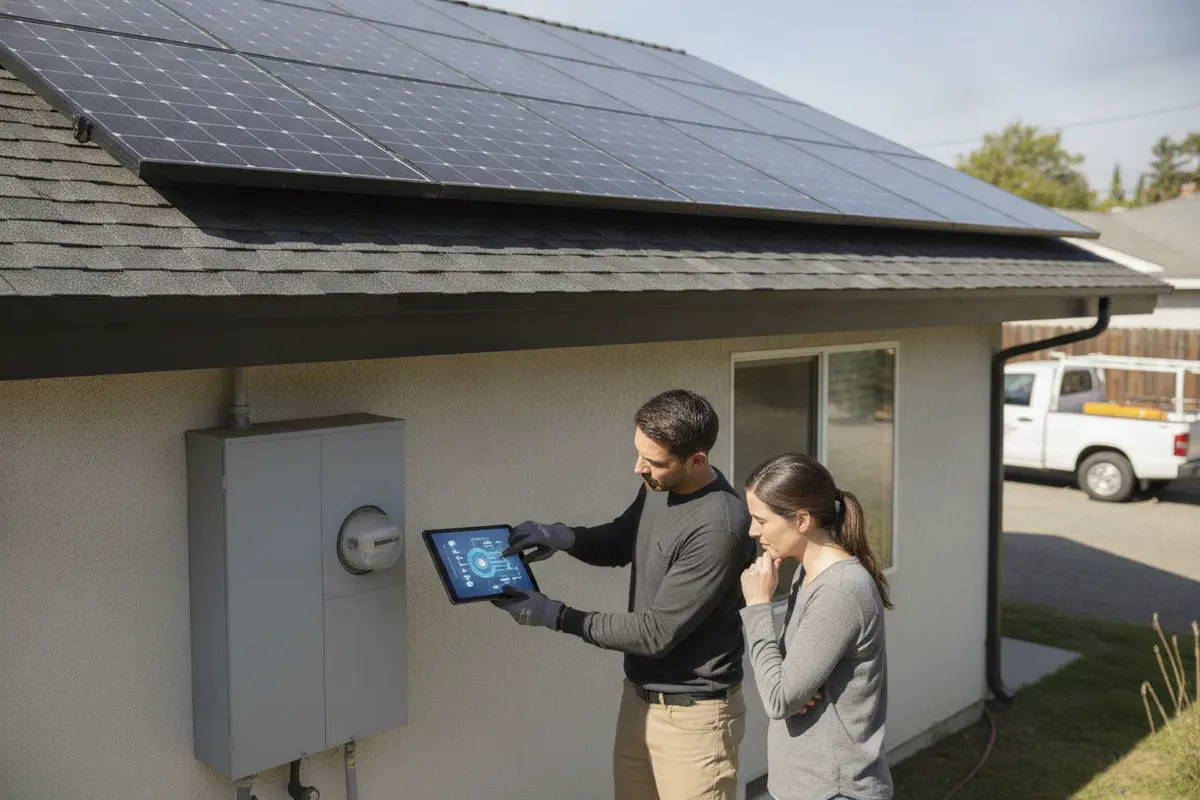
For an AC-coupled design, the battery typically uses its own power conversion equipment alongside the existing solar inverter. That may avoid replacing the solar inverter, but it does not automatically make the installation compatible or provide backup. A DC-coupled design may require a compatible hybrid inverter or changes to the equipment that currently manages the array. Ask whether the proposal keeps the existing inverter, adds equipment, or replaces any components—and why.
If you are unsure what type of system you own, AMECO's guide to what a solar inverter does and its explanation of a photovoltaic system offer useful starting points. Do not open electrical enclosures or remove covers to identify equipment. A licensed professional can inspect labels and wiring safely.
Check the age, condition, and documentation
Existing equipment condition can shape the design. If an inverter is nearing the end of its expected service life, it may be worth comparing a battery retrofit that preserves it with a coordinated upgrade. That does not mean replacement is always necessary. It means the proposal should account for the current equipment and explain how the battery controls will communicate with it.
Gather what you can before an assessment:
- Solar proposal, permit documents, and final inspection records, if available.
- Inverter and panel model information visible on equipment labels or in the monitoring app.
- Recent electric bills that show usage patterns and the utility account or rate plan.
- A list of appliances and circuits you want available during an outage.
- Any known roof work, electrical upgrades, or changes to the solar system since installation.
Missing documents do not necessarily prevent an assessment. A site visit can help verify the installed equipment and electrical conditions. AMECO's solar and roofing approach includes consultation and custom system design; a retrofit review should similarly begin by understanding the actual property and installed system.
What do you want the battery to do?
Choose the job before choosing the equipment. Homeowners may want backup for selected circuits, more use of their own solar production after sunset, or flexibility to manage electricity use. These goals can overlap, but they are not identical. A design intended mainly for bill management may not provide the same outage capability as a system configured to power designated loads when the grid is down.
Start with a practical list. Is backup for refrigeration, lighting, internet, and a few outlets enough? Do you also expect to run a well pump, air conditioning, or other large equipment? How long should those loads operate, and are you prepared to reduce consumption during an outage? The answers help determine the needed battery energy, power output, and circuit arrangement.
Battery capacity and power are different measures. Capacity describes how much energy can be stored and delivered over time. Power describes how much electricity the system can supply at once. A battery may have enough stored energy for a long period of light use but still be unable to start or operate multiple high-demand appliances together. Conversely, high output does not by itself mean long runtime.
Make a critical-load inventory with approximate running wattage where available, and note any appliance with a motor or compressor that may draw more power at startup. An installer can help verify those loads. It is also useful to distinguish between the circuits you want backed up and every circuit in the home; whole-home backup can have different equipment and design requirements.
| Retrofit question | Why it matters | What to verify |
|---|---|---|
| Which circuits need backup? | Backup may serve selected loads or a broader portion of the home. | Essential circuits, panel layout, and any loads with high starting demand. |
| How much energy should be stored? | Capacity affects how long supported loads can run between charges. | Typical and outage-time use, desired operating period, and recharge assumptions. |
| What equipment is already installed? | Inverter type and system architecture shape AC- or DC-coupled options. | Model numbers, system diagram, condition, and control compatibility. |
| What should happen during a grid outage? | Solar may not keep operating during an outage unless the system is designed to isolate and provide backup. | Transfer or isolation equipment, backed-up circuits, operating limits, and restart behavior. |
| How will the project be approved? | Utility interconnection, permits, and inspection requirements can affect the final design. | Applicable local authority and utility process for this specific property. |
Be cautious with estimates that promise a fixed number of backup hours without stating which loads are included and how much energy they use. Runtime changes with household demand, battery state of charge, weather, solar production, and equipment limits. A clear proposal should state its assumptions and show what the system is designed to support.
Will your solar panels charge the battery during a blackout?
Not necessarily. Many grid-tied solar systems shut down during an outage to avoid sending electricity to lines that utility crews may be working on. To operate safely while the grid is unavailable, the system needs equipment and controls that can separate the home from the utility and manage the available solar and battery power.
Ask the designer to explain how the proposed system behaves in several conditions: normal grid service, a grid outage in daylight, an outage overnight, and a prolonged outage with limited sunlight. The answer should identify which loads remain energized, whether solar can recharge the battery while islanded, and what happens if the battery becomes depleted or solar output changes. Exact behavior varies by equipment and configuration.
Solar production during an outage may also need to be managed to match what the home and battery can accept. This is another reason not to assume an existing array will simply continue operating unchanged after a battery is added. The installer should explain how the proposed controls balance solar generation, battery charging, and household demand under the conditions you care about.
For a plain-language overview, the Department of Energy explains that storage can be paired with a solar photovoltaic system in its solar integration and storage guide. New York State's energy agency also notes that home batteries may charge from the grid or from on-site solar in its home energy storage overview. Whether those options are available and suitable for your system depends on local rules and the chosen equipment.
Discuss battery backup for your existing system
What electrical and roof details can affect a retrofit?
The battery is only one part of the project. The electrical service and panel layout determine how equipment can connect and which circuits can be supported. The installation may need space for battery equipment, clear access, appropriate wiring routes, and protective devices. A professional should inspect the site rather than assume the existing panel has room or that a particular location is suitable.
Roof condition matters too, even when the battery is installed at ground level or in a garage. A battery retrofit may not require removing the solar panels, but planned roof work can affect the best sequence for electrical and solar work. If a roof replacement is coming soon, discuss whether to coordinate it with the storage project. AMECO provides both solar solutions and roofing services, which can help homeowners consider those scopes together.
Other site-specific considerations include manufacturer installation clearances, local building and fire requirements, and the route for conduit or wiring. These conditions can affect equipment placement and project scope. Do not choose a battery location based only on appearance or convenience; the design must satisfy the applicable safety and installation requirements.
How do utility rules and permits fit into the process?
A battery added to a grid-connected solar system can require utility coordination and local permits or inspections. The applicable steps depend on the utility territory, local authority, equipment, and whether the existing solar system or interconnection arrangement will change. California homeowners should ask who will confirm the requirements for their address and whether the proposed configuration needs an updated application or inspection.
Clarify whether the battery can charge from the grid, how it will be controlled, and whether the utility's rules or the homeowner's rate plan affect that operation. A plan that is technically possible is not automatically approved for every utility or property. Do not rely on a generic rebate or savings statement; any incentives and their eligibility should be verified for the specific project at the time of review.
For an existing solar system, also ask how the battery addition will be documented alongside the original installation. Keep the final plans, approvals, inspection records, operating instructions, and equipment information with your solar records. These documents are useful for future service or system changes.
How should you compare battery retrofit proposals?
Compare the design, scope, and assumptions—not just the battery's advertised capacity. Two proposals may use different backup boundaries, control equipment, or assumptions about which loads operate. Ask each installer to describe the same household goals in writing.
- Compatibility: Which existing components will remain, and which will be added, reconfigured, or replaced?
- Backup scope: Which circuits are backed up, and what power limits apply when multiple loads run?
- Solar during outages: Can the array recharge the battery when the grid is down, and under what conditions?
- Utility and permit scope: Who handles the required applications, permits, and inspections?
- Controls and monitoring: How can you see battery status, change operating settings, and identify an issue?
- Project assumptions: What household use, weather, and operating conditions are used in any performance or runtime estimate?
- Service after installation: Who handles questions about the integrated solar and storage equipment?
Request a written explanation of any limits. For example, a proposal should not imply that every appliance will run during an outage if only selected circuits are connected to backup. It should also identify any work excluded from the scope, such as panel changes or repairs that could be needed after inspection.
If your current setup is a grid-connected system, AMECO's guide to on-grid solar systems can help explain the grid relationship. Its blackout and solar FAQ is another useful starting point when preparing questions about existing equipment.
What happens during a professional battery assessment?
A useful assessment connects your goals to the actual site. It typically begins with a discussion of electricity use, outage priorities, and the existing solar equipment. The reviewer may examine the inverter, service panel, meter, potential battery locations, and available records. If the system's components or wiring are unclear, the proposal should state what needs to be verified before the design is final.
The next step is a design that explains the electrical configuration and operating behavior. It should identify the equipment being kept or changed, the loads intended for backup, how the battery charges, and what happens during an outage. It should also account for utility and permit requirements relevant to the address. Ask for project-specific figures rather than treating a typical system size or sample estimate as a recommendation for your home.
Before agreeing to work, review the scope, equipment, exclusions, and assumptions. Make sure you understand whether the project is designed for selected-load backup or a broader backup arrangement, and what coordination is included. If roof work is also planned, confirm how the schedules and responsibilities fit together. AMECO has served California homeowners with solar and roofing since 1974; an initial company overview provides more background on its integrated approach.
Frequently Asked Questions
Can I add a battery if my solar panels are already installed?
Often, an existing solar array can be part of a storage project, but compatibility depends on its inverter, controls, electrical layout, and the battery configuration. A site-specific review is needed to determine what can remain and what changes may be required.
Do I have to replace my solar inverter?
Not in every project. Some retrofit designs may work alongside an existing solar inverter, while other designs may require different or additional inverter equipment. The answer depends on the installed system and the desired backup functions, so ask the proposal to name the equipment that will stay and the equipment that will change.
Will a battery keep my whole home running during an outage?
That depends on the design, battery power and energy limits, and the home's loads. Some systems support selected circuits, while broader backup may require a different electrical arrangement. Have the installer list the supported circuits and explain limits for appliances with high running or startup demand.
Can my existing panels recharge a battery during a blackout?
Only if the system includes the equipment and controls needed to operate safely while disconnected from the grid. A standard grid-tied array may shut down during an outage. Ask how the specific proposed system isolates from the grid and whether solar can recharge the battery during backup operation.
What information should I prepare before requesting an estimate?
Collect solar and inverter details, recent utility bills, installation documents if available, and a list of the loads you want backed up. If you know about upcoming roof work or changes to your electrical service, mention those as well. The installer can identify any remaining details that require an on-site review.
Ready to evaluate your existing solar system?
Adding storage can be a practical next step, but the right design starts with compatibility, household priorities, and the way your system should operate in normal conditions and during an outage. AMECO Solar & Roofing can review your goals and the property-specific details before you decide which configuration makes sense.
Request a project-specific solar and battery estimate
With a clear assessment, you can compare retrofit options on their actual equipment, backup scope, and operating assumptions—not on a battery label alone.
10.5.2026
Commercial storage decisions begin with the electrical service, not the battery nameplate. A facility with three-phase loads, existing solar, and defined backup priorities needs an architecture that accounts for how power moves among the PV inverter, AC bus, battery inverter, utility meter, and critical equipment.
Get an estimate for your commercial project
3-phase ac coupled battery storage adds battery capacity on the AC side of a solar installation. It can be a potential fit for some operating commercial systems, but it requires careful review of phase configuration, inverter compatibility, controls, metering, and backup objectives.
That review should distinguish energy shifting from outage support, and retrofit convenience from the flexibility of a new-build design. Commercial systems are custom-sized for business power requirements, so the right path depends on the facility's loads, equipment, utility requirements, and engineered operating plan. First, it helps to establish what AC coupling means in a three-phase commercial system and where its architecture begins and ends.
What Is 3-Phase AC-Coupled Battery Storage?
3-phase AC-coupled battery storage is a commercial energy-storage architecture in which a battery connects to a building's alternating-current electrical system through its own battery inverter. The system is designed around three-phase service, where electrical power is delivered through three active supplies rather than a single phase. That distinction matters when a facility operates equipment that depends on coordinated three-phase power.
In an AC-coupled arrangement, solar panels first produce direct-current electricity. A solar inverter converts that DC electricity into AC electricity for the facility and grid, as explained by the U.S. Department of Energy. A separate battery inverter then converts AC to DC when charging the battery and converts stored DC back to AC when the building needs power. This approach can be useful when adding storage to an existing solar installation, but compatibility must be confirmed rather than assumed.
Three-phase service is not simply a larger battery connection. The design must account for how power moves across phases, which loads are connected to each phase, and whether the controls can maintain the required electrical relationships. Large HVAC equipment, machinery, pumps, and some EV charging equipment may have operating requirements that differ from ordinary single-phase loads.
It is also important to separate power from energy. Power, measured in kilowatts, describes how much electricity the system can deliver at a moment. Energy, measured in kilowatt-hours, describes how long the battery can sustain a load. A system with adequate stored energy may still be unable to start or operate a high-power load if its inverter and distribution equipment cannot deliver the required power.
NREL's commercial battery-storage model treats the battery pack, inverter, and installation balance-of-system equipment as parts of the complete system. Review the broader commercial solar system components before comparing equipment. Existing switchgear, metering, controls, critical loads, utility requirements, and outage objectives all belong in the engineering review.
How Does an AC-Coupled System Work With Existing 3-Phase Solar?
Short answer: Existing solar panels continue sending DC electricity to their PV inverter, which converts it to AC. That AC reaches the site's three-phase bus, where a separate battery inverter can direct surplus power into the battery and later return stored power to the loads. A properly engineered system also uses metering and islanding controls to coordinate the battery, building, and utility connection.
In normal operation, the existing PV inverter produces AC power when solar generation is available. The battery inverter monitors conditions at the electrical service, typically using utility and load measurements from approved metering equipment such as current transformers. If generation exceeds the building's immediate demand, the controls can command the battery inverter to charge, subject to the equipment design and operating limits. When demand rises or solar production falls, the battery inverter can discharge onto the AC bus to serve selected loads or the broader facility, depending on the design.
This arrangement adds storage on the AC side rather than requiring the existing PV inverter to be replaced. It can be useful when a commercial site already has operating solar equipment, but the existing inverter, switchgear, service configuration, controls, and utility requirements still need review. The system boundary includes more than the battery enclosure. NREL's commercial battery storage model accounts for the battery pack, inverter, and balance-of-system components needed for installation. See the related overview of commercial solar system components for broader context.
During an outage, an islanding controller must separate the facility's supported circuits from the utility so the system does not backfeed the grid. The battery inverter then establishes the local electrical reference and coordinates with the existing PV inverter. The Department of Energy explains that solar-plus-battery systems can operate without grid support during outages when they are designed for that function. Whether this works for a particular three-phase facility depends on phase coverage, critical loads, inverter coordination, and engineered protection settings. Battery energy storage can also help stabilize power flow during renewable-generation fluctuations and other disruptions, as described by the Department of Energy and EPA.
Should a Commercial Project Use a Retrofit or New-Build Design?
A retrofit starts with equipment that already exists. A new-build design starts with a blanker electrical and structural plan. Neither path is automatically better for 3-phase ac coupled battery storage. The decision depends on the condition and compatibility of the existing PV inverter, the service configuration. The loads that matter during an outage, and the controls required for the intended operating modes.
| Consideration | Retrofit | New build |
|---|---|---|
| Equipment | Review existing inverter, switchgear, metering, and available connection points. | Coordinate PV, battery inverter, switchgear, and service capacity from the outset. |
| Controls | Map the battery controls to existing protection, monitoring, and operating logic. | Plan metering, energy management, islanding, and commissioning requirements together. |
| Conversion path | AC coupling may add storage without replacing an operating PV array, if the equipment can be integrated. | Compare AC and DC coupling before selecting the final inverter arrangement. |
| Review needs | Expect a detailed audit of installed conditions, drawings, loads, and utility requirements. | Expect coordinated design, permitting, installation, and activation. |
Product literature can illustrate the range of possible approaches, but it cannot approve a particular commercial site. For example, Solis describes a three-phase storage inverter line that supports AC and DC coupling for retrofits and expansions. A Victron community discussion also describes a proposed AC-coupled addition to installed AC-coupled solar panels. These are examples of design concepts, not proof that a specific inverter, battery, or control scheme will work with every facility.
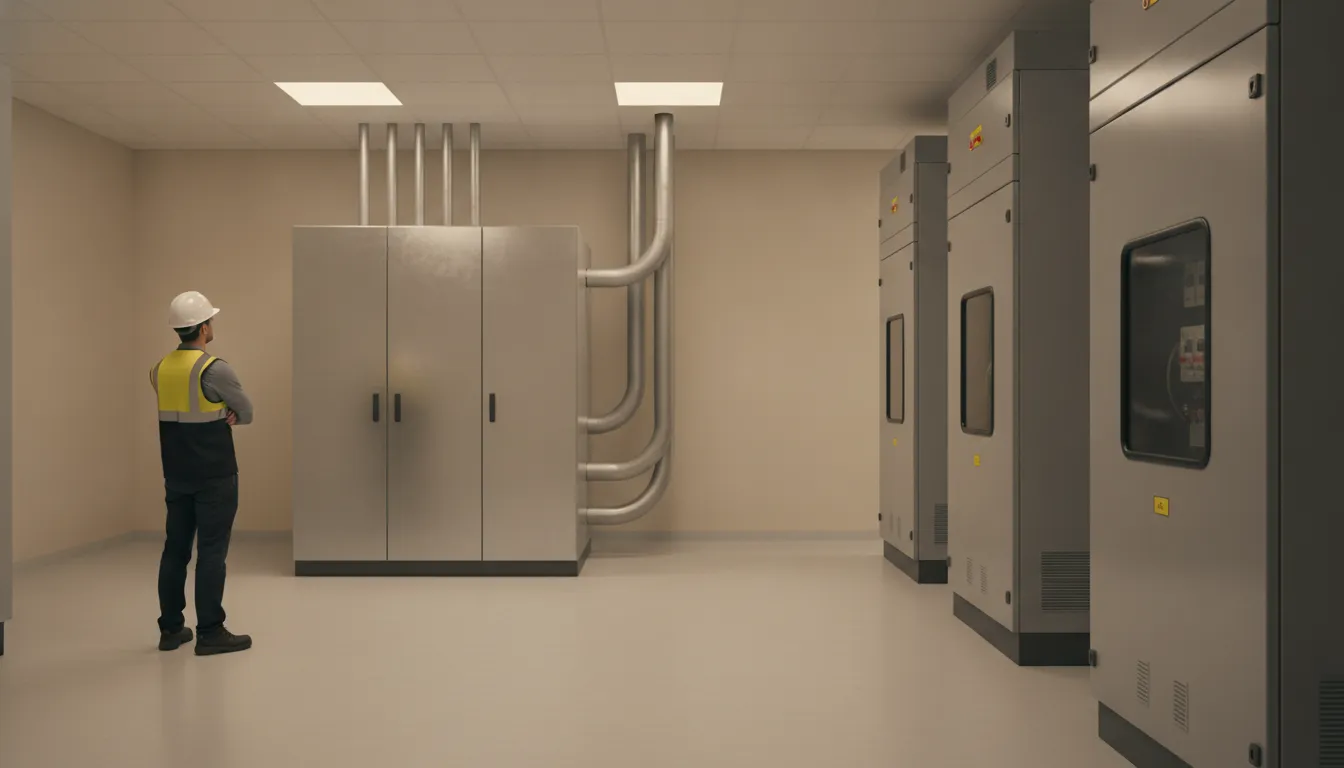
In a retrofit, the conversion path may preserve useful equipment, but it can also expose constraints that were not present in the original solar design. A new build may provide more flexibility, while requiring the project team to coordinate more decisions before construction. AMECO describes commercial installations as custom-sized for business power requirements and includes custom system design, permitting, installation, and activation in its commercial project services. Review the broader commercial solar solutions and commercial solar installation process before choosing a path.
How Should Three-Phase Loads and Backup Goals Shape the Design?
Backup planning starts with the loads that must remain operational, not with a battery nameplate. A commercial assessment should map critical circuits, their phase connections, starting current, operating schedules, and the consequences of an interruption. That list may include refrigeration, production controls, network equipment, life-safety systems, selected lighting, or charging infrastructure. Noncritical loads can remain outside the backed-up panel so available power is reserved for the functions the business actually needs.
Map phase requirements before selecting equipment
Three-phase service means that one, two, or three active supplies arrive from the utility, and the equipment connected to those supplies does not necessarily behave the same way. A single-phase battery cannot power a three-phase appliance. Large air-conditioning equipment, bakery machinery, industrial roller doors, and some EV chargers are examples of loads that may use all three supplies, according to SolarQuotes' three-phase battery guidance.
That makes phase balance part of the design rather than a commissioning detail. A system may have enough total stored energy yet still lack the instantaneous power or phase arrangement needed to start a motor. Run HVAC equipment, or support an EV charger. Motor inrush, compressor cycling, and simultaneous starts should be reviewed against the inverter's capabilities and the site's operating controls. The design may need load sequencing, selective backup, or a different distribution arrangement.
For a project-specific review of those constraints, get an estimate from AMECO based on the facility's equipment and operating priorities.
Design the islanding path around the real outage objective
Outage operation also depends on synchronization and controls. A three-phase solar inverter may need a synchronous three-phase supply before it can restart during an extended outage. The backup architecture therefore has to define how the battery inverter, solar inverter, switchgear, metering, and energy-management controls interact when the grid is unavailable. Advanced inverters can support operation without the grid when the solar-plus-battery system is designed for that function, but that capability is not automatic. See AMECO's guide to integrating solar panels with battery storage for broader system context.
Finally, backup scope changes the architecture, equipment review, and commissioning plan. A facility seeking short-duration support for selected controls has different requirements from one protecting three-phase production equipment or coordinating workplace EV charging. The load map, phase behavior, islanding sequence, and utility requirements should be validated by qualified designers before equipment is specified.
Which Controls, Metering, and Safety Checks Matter?
A commercial battery system is only as useful as the measurements and control logic behind it. The design team should begin with utility meter data, interval load information, and a clear map of the existing electrical equipment. Current transformers (CTs) can measure power flowing through selected conductors. Allowing the energy management system (EMS) to compare site demand, solar production, battery state, and grid import or export. The exact sensor locations and configuration must be determined from the site's one-line diagram and equipment.
Those inputs support operating priorities. A facility may want to absorb excess solar, limit demand during selected periods, preserve a reserve for outages, or charge and discharge according to utility rules. The EMS should define which objective takes precedence and how the system responds when conditions change. The U.S. Environmental Protection Agency notes that battery energy storage systems can help stabilize power flow during renewable-generation fluctuations and other disruptions. But that value depends on properly designed controls and integration. EPA's battery energy storage guidance provides useful context.
Commissioning is part of the design
Before operation, qualified professionals should verify metering accuracy, phase relationships, communications, charge and discharge limits, reserve settings, islanding behavior, and the coordination of protective devices. Accessible disconnects, labeled equipment, emergency procedures, and appropriate clearances also need review. Thermal management, ventilation, detection, and fire-response considerations should be evaluated for the selected equipment and installation environment, rather than assumed from a generic diagram.
Safety review should continue beyond permitting. The EPA specifically recommends consulting battery energy storage safety experts when considering and designing installations. For a commercial project, an experienced team can coordinate the battery, switchgear, solar equipment, building loads, and utility requirements through a documented solar system design and installation process. That review is especially important for 3-phase AC-coupled battery storage, where incorrect assumptions about measurement, phase coordination, or backup controls can undermine the intended operating strategy.
What Tradeoffs Matter Beyond the Nameplate?
A battery's nameplate capacity describes only part of its usefulness. A commercial system must move electricity through several conversion stages, including the battery pack, inverter, and installation balance-of-system components. NREL includes these elements in its commercial battery storage model, which is a useful reminder that the equipment list and site design matter alongside the battery itself: NREL's commercial BESS model.
In an AC-coupled arrangement, solar power and battery power may each pass through an inverter as they move between DC storage. The AC bus, building loads, and the grid. Each conversion introduces losses, so evaluating a system by battery capacity alone can obscure how much usable energy reaches the intended loads. The relevant question is not simply how much energy is stored, but how the complete system performs under the site's operating conditions.
Power and energy answer different questions
Energy, measured in kilowatt-hours, relates to how long the battery may support a load. Power, measured in kilowatts, relates to how much load it can serve at one time. A facility may need sustained energy for selected loads, high power for equipment startup, or both. Mapping those requirements helps prevent a large energy reserve from being paired with an inverter that cannot support the required instantaneous demand.
Duration, expansion, and operating priorities
Battery duration depends on the selected loads and their changing demand. A design intended for short interruptions may differ from one intended to shift solar energy, manage demand, or support longer outage periods. Expansion also requires planning. Additional battery capacity can affect inverter limits, controls, switchgear, space, ventilation, and utility review, so future growth should be considered before equipment is installed.
Lifecycle economics should remain conditional on the project. Commercial systems are custom-sized for business power requirements, and the value of storage depends on load patterns. Tariffs, operating priorities, equipment condition, and the cost of design, permitting, installation, and activation. A site-specific review of commercial solar solutions can compare those factors without treating one topology or operating strategy as universally best.
How Can a California Business Evaluate a Project?
A useful evaluation turns a storage concept into an engineered commercial project. Whether the site is a manufacturing, retail, office, or warehouse facility, the design should connect operating priorities with electrical conditions rather than begin with a battery nameplate. AMECO describes commercial work as custom-sized for business power requirements and includes design, permitting, installation, and activation in the project process. Review the broader commercial solar installation process alongside these storage-specific questions.
- Document the load profile. Gather interval utility data, demand patterns, operating schedules, seasonal changes, and critical versus deferrable loads. Identify starting currents and equipment that must remain available during an outage.
- Audit the equipment and roof. Confirm the service configuration, phase count, existing PV inverter, switchgear, meters, transformer constraints, and available interconnection points. Review roof condition and structural considerations before equipment locations are selected.
- Define backup objectives. Decide whether the priority is selected emergency loads, continuity for a defined operation, or broader site resilience. Those goals affect usable energy, discharge power, isolation equipment, and whether the architecture can support the intended three-phase loads.
- Design controls and interconnection. Coordinate battery inverters, current transformers or other metering, the energy management system, protection, and islanding controls. The design must account for utility requirements and how solar generation and storage behave together when grid power is unavailable.
- Complete permitting and utility review. Prepare electrical plans, equipment documentation, safety details, and interconnection materials for the authorities and utility involved. Requirements depend on the site and proposed equipment, so they should be confirmed project by project.
- Install and commission the system. Qualified installers should follow the approved plans, verify wiring and protection, configure controls, and test operating modes. Commissioning should include normal operation, charging and discharge behavior, shutdowns, and transitions where backup is part of the scope.
- Verify performance against the brief. Compare measured operation with the approved load and backup objectives. Record settings, test results, monitoring access, and any remaining limitations so facilities staff know what the system can and cannot support. See AMECO's solar system design and installation services for additional project context.
For a site-specific review of existing equipment, commercial loads, roof conditions, and backup objectives, get an estimate from AMECO.
Frequently Asked Questions
How does an AC-coupled battery inverter work with existing 3-phase solar?
The existing solar inverter continues converting panel DC into AC, while a separate battery inverter connects on the facility's AC bus. Controls and metering coordinate charging, discharging, grid interaction, and outage operation. During an outage, the equipment must be designed to form and maintain the required electrical reference, rather than assuming any battery inverter will keep the solar array operating. The U.S. Department of Energy explains that outage operation depends on advanced inverters and system design: energy.gov.
Do you need a 3-phase battery to back up a 3-phase system?
Not always, because the answer depends on the loads and the backup objective. A single-phase battery cannot power a three-phase appliance, such as some large air-conditioning equipment or EV chargers. If the goal is whole-facility backup, three-phase loads, phase synchronization, switchgear, and critical-load selection require specific engineering. A narrower backup plan may serve selected single-phase circuits instead. SolarQuotes describes the phase and synchronization constraints in more detail: solarquotes.com.au.
Is 3-phase AC-coupled battery storage a good retrofit for existing solar?
It can be a practical retrofit when the existing inverter, service configuration, switchgear, available space, controls, and utility requirements are compatible. AC coupling can avoid replacing a functioning PV inverter, but it adds another conversion stage and requires coordinated protection and commissioning. Product literature and field discussions show that AC-coupled additions are possible in some three-phase configurations, not that every existing system qualifies. An equipment audit should come before selecting a battery or inverter.
Is AC-coupled or DC-coupled storage more efficient?
Neither topology is universally more efficient for every commercial project. AC coupling may involve additional DC-to-AC and AC-to-DC conversion steps when solar energy charges the battery, while DC coupling can reduce some conversion steps but may require compatible hybrid equipment and more extensive design changes. Compare usable energy, power capacity, backup behavior, expansion plans, controls, and operating priorities rather than relying on a topology label or an assumed efficiency percentage.
Ready to Evaluate Your Commercial Storage Project?
A project-specific review can clarify how 3-phase AC-coupled battery storage fits your existing equipment, three-phase loads, roof, controls, interconnection requirements, and backup objectives. AMECO can assess those factors together so the design reflects your facility rather than a generic system. Request a commercial solar and battery storage evaluation to get started with a focused review of your project.
10.2.2026
When comparing commercial solar companies in California, look beyond a system size and a projected savings figure. A proposal is a map of who will design the project, procure equipment, manage approvals, protect the roof, and support the system after it begins operating. Comparing those responsibilities before you compare prices can reveal gaps that are easy to miss in a polished sales presentation.
The strongest way to evaluate commercial solar companies in california is to give each bidder the same project information. Then compare engineering assumptions, contracting entities, roof and electrical scope, equipment, utility responsibilities, service terms, and financial modeling side by side.
Start by confirming what each company actually means by its role. An EPC contractor typically handles engineering, procurement, and construction under one contract, but a project may also involve subcontractors. California work can involve C-46 solar and C-10 electrical classifications, while roof repair or replacement falls under separate roofing or general building work. Ask which legal entity is responsible for each obligation, then use that answer to build a proposal comparison that holds up under due diligence.
How Should You Compare Commercial Solar Companies in California?
A proposal deserves more scrutiny than a headline ranking. The right comparison asks whether each company has documented the engineering assumptions, legal responsibilities, roof scope, utility work, and long-term service obligations behind its offer. Two commercial solar companies in California may describe similar systems while assigning critical work to different entities or subcontractors.
Start by naming the delivery role
EPC means engineering, procurement, and construction. In an EPC arrangement, one party typically designs the system, procures equipment, and builds the project under one contract. That label alone does not tell you who will perform every task. Ask whether the bidder is the EPC, a project developer, a sales organization, or a general contractor coordinating separate trades.
Then identify the exact legal entity responsible for engineering, construction, warranties, and ongoing service. Those responsibilities may not sit with the same company. Your proposal and contract should name each party, explain any subcontracting, and state who handles a problem after commissioning. This is a more useful due-diligence question than relying on a ranking, badge, or broad claim about experience. For additional credential checks, see AMECO's guide to verify solar company credentials.
Verify California licenses and roofing scope
California solar and electrical work can involve CSLB C-46 Solar and C-10 Electrical classifications. Confirm the license information for the entity performing the physical work through the California Contractors State License Board. A rooftop solar contractor may act as the EPC or subcontractor, while roof repair or replacement is separate work under an applicable roofing or general building license.
That distinction matters when your facility needs roof maintenance, repair, replacement, or solar coordination. Ask which company owns the roof assessment, penetrations, waterproofing, and corrective work, and request exclusions in writing. AMECO's commercial solar services provide one example of how to evaluate solar scope alongside a building's broader needs. For a second perspective on experience and specialization, read how to evaluate a solar installer's experience.
Start With a Shared Project Brief and Clear Engineering Assumptions
Before asking commercial solar companies in California for proposals, give each one the same project information. A shared brief makes differences easier to evaluate because a larger system, higher production estimate, or lower apparent price may simply reflect different assumptions. Start with 12 months of interval energy data, the applicable tariff name, a current roof or site plan, electrical service size, and the ownership structure you want evaluated. This approach is especially useful when comparing commercial solar design and installation options.
Give Every Bidder the Same Starting Data
Your brief should identify the facility, operating schedule, planned changes in consumption, available roof or ground area, known shading, and any roof work already under consideration. Include utility bills and interval data in the same format for every bidder. If the building may add equipment or expand operations, state that clearly. AMECO describes custom system design around current energy use and forecasted consumption. So a proposal should explain how those inputs shape system sizing rather than treating a standard package as a final design.
- 12 months of utility bills and interval energy data
- Current roof or site plans, electrical service details, and shading information
- Operating schedules, planned load changes, and roof work under consideration
- Ownership or financing preferences to model consistently
Require Assumptions Alongside the Recommendation
Ask each company to show how it moved from your data to its proposed DC system size and annual energy estimate. Production should be accompanied by the assumptions behind it, including the site layout and any material constraints. You should also understand what is included in permitting, utility coordination, equipment procurement, construction, and post-installation service. A serious proposal names the contracting entity and lists equipment model numbers, permitting scope, interconnection responsibility, warranties, and a service plan.
Commercial solar bid inputs and required disclosures
| Bid area | Provide to every bidder | Require in every proposal | Why it matters |
|---|---|---|---|
| Energy and tariff. | Interval data, bills, tariff name, operating schedule. | Annual production and bill-model assumptions. | Shows whether estimates use comparable load and rate inputs. |
| Site and electrical. | Roof or site plan, service size, shading, planned changes. | DC system size, layout basis, and electrical scope. | Reveals design constraints and possible exclusions. |
| Commercial terms. | Ownership or financing preference. | Line-item scope, contracting entity, and disclosed price basis. | Separates unlike offers and identifies who is accountable. |
| Delivery and support. | Known permitting or roof conditions. | Permitting scope, interconnection owner, warranties, service plan. | Clarifies responsibilities after contract signing. |
Use the same discipline when reviewing commercial solar installation process details and solar options for California businesses. AMECO presents commercial systems as tailored to business power requirements. That makes the quality of the shared inputs, and the transparency of each proposal's assumptions, more important than comparing headline system size alone.
Does the Proposal Match Your Roof and Electrical Scope?
A commercial solar proposal is only as complete as its assumptions about the building beneath the array. Before comparing system size or production, confirm that the proposal addresses roof readiness, attachment details, structural review, electrical work, and the responsibilities that connect those pieces.
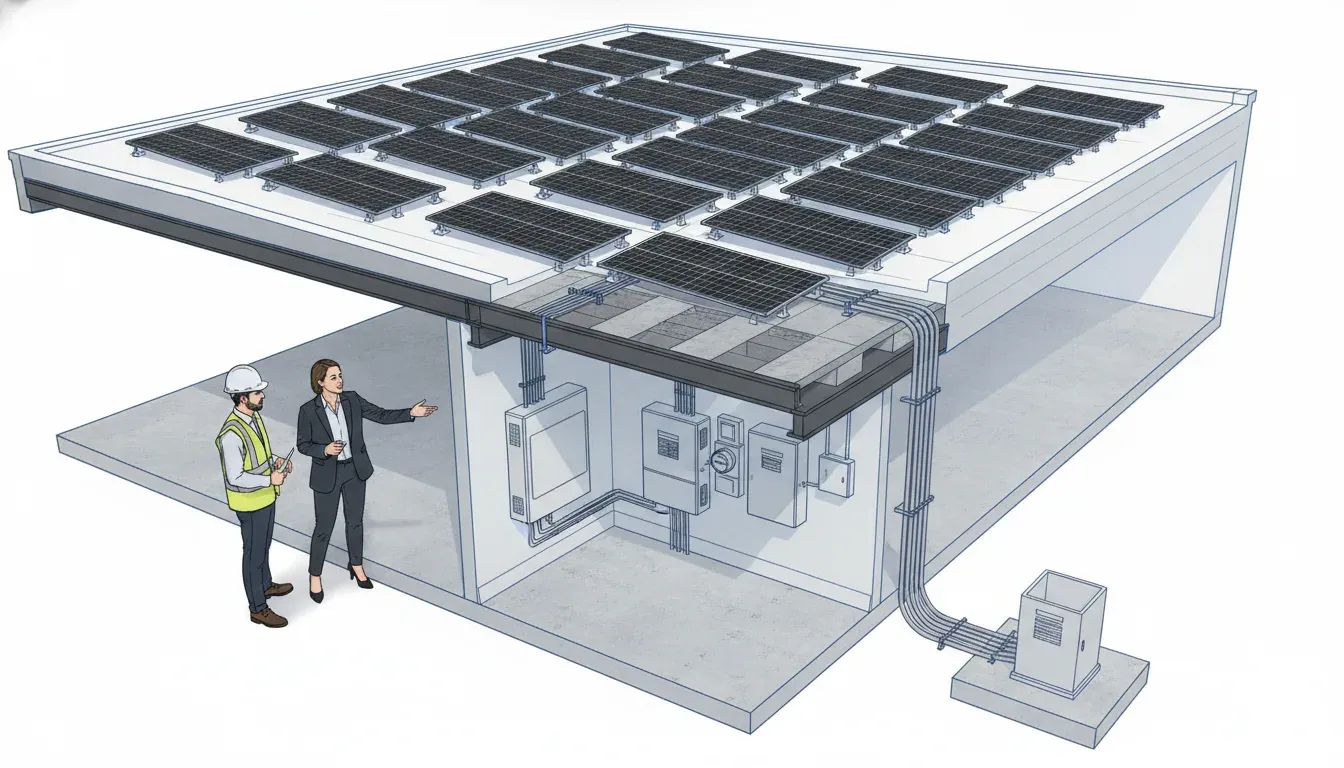
Check roof condition and attachment details
Ask whether the roof is expected to remain in service for the planned project and what inspection supports that conclusion. The proposal should identify the roof type, repair or replacement needs, mounting method, attachment locations, and responsibility for restoring affected surfaces. Roof-mounted supports should follow manufacturer instructions, while every penetration should be flashed with specified materials to create a weather-tight, leak-resistant assembly. These are not cosmetic details. They affect maintenance access, water management, and the risk of disputes after installation. NREL's roof-mounted equipment specification describes the expected result as watertight, safe, wind-resistant, and compliant work: review the underlying installation requirements.
If a proposal excludes roof repairs, membrane work, structural reinforcement, or removal and replacement, ask for a written allowance or a separate bid. AMECO's commercial roofing scope includes flat-roof maintenance, repair, replacement, and installation, which can be relevant when solar work must be coordinated with roof work. That company capability is not a reason to skip independent due diligence. It is a reason to ask exactly where roofing and solar responsibilities begin and end.
Separate electrical scope from installation shorthand
Look for the service voltage, main distribution equipment, point of interconnection, conduit routes, disconnects, metering changes, and any panel or transformer work. The proposal should state whether engineering, structural review, permits, inspections, and utility coordination are included or excluded. It should also identify who supplies and installs equipment, and where inverters and disconnects will be placed. They should be safe and accessible for operation and service.
Confirm sequencing and exclusions
Ask what happens first if the roof needs work, whether roof sign-off precedes mounting, and who documents penetrations before closeout. Request a line-item exclusions list covering crane access, roof restoration, electrical upgrades, trenching, hazardous materials, and site repairs where applicable. A clear sequence reduces change-order risk and makes it easier to compare commercial solar installation scope across proposals. The strongest proposals connect the roof, structure, electrical system, and closeout process rather than treating each as an unpriced assumption.
What Equipment, Interconnection, and Utility Work Is Included?
A proposal is easier to compare when it names the equipment and assigns responsibility for the work between your site, the local permitting authority, and the electric utility. Ask for model numbers for the modules, inverters, racking, monitoring equipment, disconnects, and any switchgear. The proposal should also state the system's design assumptions and identify who handles permitting, inspections, and utility coordination.
Are the equipment and placement details specific?
Look beyond a generic equipment brand. The inverter and disconnect locations affect access, safety, conduit routing, maintenance, and coordination with your existing electrical service. NREL guidance calls for inverters and disconnects to be installed in safe, accessible locations, with panels installed on their mounting structures according to manufacturer instructions. See the NREL installation specification for the underlying requirements.
Request a preliminary equipment layout or single-line diagram showing where major components connect. Confirm what is included at the point of interconnection, such as switchgear, protection equipment, utility-required metering, trenching, or service modifications. If the proposal excludes a needed upgrade, the headline price may not represent the complete project scope.
Who owns permitting and utility interconnection?
Local government approval and utility interconnection approval are separate processes. The U.S. Department of Energy explains that a solar installation needs local approval and separate utility approval before it can operate on the grid. California utilities may differ in when they require an interconnection application during local permit review. So a responsible bidder should identify the applicable utility process early rather than treating it as an afterthought. Utility inspections are also separate from local permitting inspections. Review the DOE solar permitting guidebook for this distinction.
Ask the proposal to name the party responsible for application preparation, utility correspondence, plan revisions, inspections, and permission to operate, or PTO. AMECO identifies permitting, inspection coordination, and utility interconnection among its solar project-delivery elements. Those responsibilities should still be confirmed in your contract and project documents, not assumed from a sales conversation. You can review the company's project approach and commercial solar design and installation scope as part of that evaluation.
Calculate Your Project with the site, utility, and scope details that shape a commercial proposal.
What happens if the utility requires upgrades?
Interconnection documents should identify the project site, parties, export terms, any caps or restrictions, required upgrades, and the conditions for PTO. Ask who pays for utility-directed work and how design changes are handled. Do not accept a universal PTO promise. The utility may require an application review, site inspection, or system modification before granting permission to operate, and the outcome depends on the specific service and utility requirements.
Who Owns Operations, Monitoring, and Warranties After PTO?
Permission to operate is a milestone, not the end of your vendor relationship. Before signing, identify who remains responsible for monitoring, service coordination, warranty claims, and documentation once the system is producing energy. A serious commercial proposal should state its service plan and warranties alongside equipment models, production assumptions, permitting scope, and the party handling interconnection. AMECO's project approach can help you see how responsibilities are organized before construction begins.
Name the responsible legal entity
Do not rely on a brand name alone. Ask which exact legal entity is responsible for engineering, construction, equipment warranties, workmanship, and ongoing service, and whether those responsibilities sit with one company or are divided among an EPC, subcontractors, manufacturers, and a separate operations provider. Those distinctions affect where you send a service request and who must respond when a problem crosses trade boundaries.
Put each party's role in the contract and handoff package. The contracting entity, installation contractor, roofing contractor, equipment manufacturers, and monitoring provider should be identifiable. If roofing work is part of the project, clarify whether roof workmanship and solar installation are covered separately. AMECO's California solar and roofing background provides useful company context, but your proposal should still define the obligations for your specific property.
Confirm monitoring access and service response
Request administrator-level monitoring access, the platform name, alert responsibilities, and the process for diagnosing underproduction or equipment faults. Ask who reviews alerts, how you open a ticket, what information is required, and whether the service plan includes periodic reporting. The system should also leave operations staff with practical access to inverters and disconnects. NREL guidance calls for these components to be installed in safe, accessible locations, supporting both routine inspection and emergency response: NREL rooftop PV installation specifications.
Document warranty boundaries and handoff records
Separate manufacturer equipment warranties from installer workmanship coverage, roof or waterproofing obligations, and exclusions. Ask what events can void coverage, who submits a claim, and whether labor, shipping, removal, or reinstallation is included. Do not accept a single undifferentiated warranty statement as a substitute for named terms.
At handoff, collect as-built drawings, equipment model and serial records, permits, inspection approvals, monitoring credentials, maintenance guidance, warranty certificates, and escalation contacts. For roof-mounted systems, confirm that the completed work is watertight, safe, wind-resistant, and compliant, consistent with the applicable installation specification. A complete record makes future service easier and protects continuity if a vendor or subcontractor changes.
How Can You Test the Financial Model Without Chasing a Low Quote?
A lower proposal is not necessarily a stronger investment case. Compare the assumptions behind each model before comparing the headline price. Project economics can change with the facility's load profile, utility rate structure, ownership arrangement, and financing terms. Ask each of the commercial solar companies in California you are evaluating to use the same inputs and identify every assumption that affects the result.
Start with the tariff and load data
Request the tariff name, the interval energy data used, and a clear explanation of how the proposal converts solar production into bill savings. A model based only on annual consumption may miss when the facility uses electricity and when it exports power. It should show self-consumption, expected exports, and the treatment of each under the applicable utility rules.
Demand charges deserve separate attention. For example, Southern California Edison describes facilities-related demand charges using the highest recorded demand in each billing month. Time-related demand charges can instead use the highest demand during on-peak or mid-peak hours. Your proposal should explain whether the model accounts for those peaks, and whether solar production is assumed to reduce them. See the utility's business rate information for the applicable tariff details.
Compare ownership and financing scenarios
Ask for comparable views of the project, such as a cash purchase and any proposed financing or third-party ownership structure. These are not interchangeable calculations. Review the parties responsible for payments, maintenance, insurance, tax treatment, equipment ownership, and end-of-term options. The model should separate project performance from financing assumptions so you can see what is driving the result.
For a broader review of budgeting variables, see these commercial solar project cost factors and the guide to commercial solar tax credit details. Treat any incentive or tax benefit as dependent on current rules and your project's eligibility, not as an automatic outcome.
Run sensitivity tests, not just one forecast
Have the bidder rerun the model under reasonable changes to production, utility rates, self-consumption, demand-charge reduction, financing costs, and future load. A transparent proposal should identify which inputs are measured, which are estimated, and which are controlled by contract. Request the underlying bill model and a line-item scope so proposals remain comparable. AMECO describes custom commercial system design around energy use and forecasted consumption, which is the type of project-specific approach to look for when reviewing a financial model.
Build a Vendor Scorecard Before You Choose a Proposal
A proposal comparison is easier when every vendor answers the same questions in the same format. Use a scorecard that separates technical scope, contracting responsibility, roof coordination, and ongoing service. This helps you compare commercial solar companies in California on execution risk, not just the most attractive headline estimate.
Request the same documents from every bidder
Send each bidder the same project brief, including interval energy data, tariff information, roof or site plans, electrical service details, and the ownership structure you want priced. Then request a line-item proposal showing the DC system size, production assumptions, bill model, equipment model numbers, permitting scope, interconnection responsibility, warranties, and service plan. These disclosures create a common basis for comparison rather than forcing you to interpret different sales presentations.
Score responsibilities, not promises
- Confirm the legal entity. Record the exact company responsible for engineering, construction, warranties, and ongoing service. If those duties are split among an EPC, subcontractor, financier, or service provider, name each party in the contract.
- Verify licensing and scope. Check the contractor's California license information, including whether the work is being performed under an applicable C-46 solar or C-10 electrical classification. If roof repair or replacement is included, confirm that the roofing work is separately licensed and clearly assigned. You can also verify solar company credentials and evaluate an installer's experience.
- Review the roof interface. Score the proposal on roof assessment, penetrations, flashing, structural assumptions, exclusions, and sequencing. A bidder that can coordinate commercial-grade flat-roof maintenance, repair, replacement, or installation may reduce handoff risk, but the exact scope still belongs in writing.
- Check delivery ownership. Identify who handles permits, inspections, utility interconnection, corrections, and permission to operate. AMECO's published commercial offering describes capacity tailored to commercial power requirements, while its solar delivery information includes permitting, inspection coordination, and utility interconnection. Treat those as items to verify in the proposal, not as a substitute for contract review.
- Mark red flags. Flag missing model numbers, unexplained production assumptions, unnamed subcontractors, vague warranty parties, unpriced roof exclusions, and promises without measurable responsibilities. Before selecting a vendor, ask for revised answers and preserve the final scope with the executed agreement.
Use the scorecard in a final review
Give each category a written status such as confirmed, requires clarification, or excluded. If the proposal remains difficult to compare after one clarification round, that is useful information about project communication. When you are ready for a project-specific review, Get An Estimate and bring the same documents so the evaluation starts with transparent assumptions.
Get An Estimate before the FAQ if you want a project-specific conversation about your commercial property.
Frequently Asked Questions
What should be included in a commercial solar proposal?
Look for the DC system size, equipment model numbers, annual energy estimate and assumptions, permitting scope, interconnection owner, warranties, service plan, contracting entity, and clear exclusions. Comparing the same fields across proposals makes differences in scope easier to identify.
Who owns permitting and utility interconnection?
Your contract should name the party responsible for local permits, the utility application, responses to utility questions, inspections, and permission to operate. Local approval and utility interconnection are separate processes, so ask for milestone ownership and documentation for both. The U.S. Department of Energy explains the distinction.
What license should a commercial solar contractor have in California?
Verify the exact contracting entity in the California Contractors State License Board lookup. Solar work may involve C-46 Solar or C-10 Electrical licensing, while roof repair or replacement is separate work that may require a roofing or general building license. Confirm that the proposal identifies who performs each scope.
How should a business compare solar financial models?
Give every bidder the same interval usage data, tariff, facility details, and ownership scenario. Then compare production assumptions, self-consumption, export treatment, demand charges, financing terms, and sensitivity cases. Payback and savings depend on the facility, utility rate, and financing, so a fixed result is not a reliable comparison.
What is a fast red flag when evaluating a commercial solar company?
A bidder that cannot clearly name the legal entity responsible for engineering, construction, warranties, service, or interconnection deserves additional scrutiny. Vague equipment descriptions, missing exclusions, and no documented handoff or monitoring plan are also reasons to pause before selecting a proposal.
Ready to Review Your Commercial Solar Proposal?
A careful proposal review can help you compare engineering assumptions, roof and electrical scope, utility responsibilities, and financial model details before choosing a path forward. Review your commercial solar project with AMECO and request a project-specific estimate so your next conversation starts with the details that matter to your property and business.
10.1.2026
For a California business, the financial case for solar is shaped by more than the panels on the roof. Federal tax treatment, depreciation, utility rules, storage programs, and property-tax treatment can each affect the project, but they do not all follow the same eligibility test.
California commercial solar incentives may include the federal Clean Electricity Investment Credit for qualifying facilities and storage placed in service after December 31, 2024, potential depreciation treatment, utility bill-credit structures, and California property-tax provisions. The details depend on ownership, project design, placed-in-service timing, utility territory, and current program rules. Review the IRS guidance and confirm project-specific treatment with qualified tax and utility professionals.
Review your commercial project with AMECO
Before evaluating a projected benefit, it helps to separate tax credits from deductions, utility tariffs, storage incentives, and assessment rules. That framework makes it easier to identify which opportunities may apply and which require additional verification.
What Do California Commercial Solar Incentives Cover?
California commercial solar incentives are not one rebate or tax line. They are a combination of federal tax treatment, utility rules, state programs, and property-tax provisions. The right mix depends on who owns the system, when it is placed in service, where the facility is located, how electricity is used, and whether the project includes storage.
At a high level, a commercial property owner may need to evaluate:
- Federal tax credits: The federal Clean Electricity Investment Credit under Section 48E can apply to qualifying facilities and energy storage placed in service after December 31, 2024. The IRS also describes elective pay and transferability options for certain eligible entities and taxpayers. Eligibility and filing requirements should be confirmed with a qualified tax professional. Review current IRS guidance on the Clean Electricity Investment Credit.
- Depreciation: Qualified clean-energy facilities, property, and storage may be treated as five-year MACRS property when placed in service after the applicable date. The deduction is generally claimed on Form 4562, subject to the taxpayer's facts and accounting treatment.
- Utility tariffs: Customer-generation tariffs can provide bill credits for surplus electricity exported to the utility. The California Public Utilities Commission says new interconnection applicants within the covered investor-owned utility territories use net billing, while existing NEM tariffs are closed to new enrollments. Territory and project configuration matter.
- Storage programs: California's Self-Generation Incentive Program, or SGIP, may support qualifying behind-the-meter technologies, including advanced storage and combined solar-and-storage systems. Commercial eligibility, funding, performance requirements, and administrator rules must be checked rather than assumed.
- Property-tax treatment: California treats the active solar incentive as a new-construction exclusion, not an exemption. The Board of Equalization says a qualifying installation does not increase or decrease the assessment of the existing property, subject to applicable rules.
These categories can affect a project's economics in different ways, so they should be modeled separately. For broader planning context, see AMECO's guide to commercial solar for businesses. Treat the list as a starting framework, then confirm current requirements with the IRS, the relevant utility, the program administrator, and your tax adviser.
How Does the Federal 48E Credit Work for Commercial Solar?
For qualifying commercial solar facilities and energy storage technology placed in service after December 31, 2024, Section 48E provides a federal investment tax credit based on qualified investment. The current IRS guidance on the Clean Electricity Investment Credit lists a 6% base amount. A project may qualify for a larger credit when it satisfies additional statutory requirements, but the percentage is not automatic for every commercial installation.
Base credit and potential increases
The credit can increase up to 30% when a facility meets prevailing-wage and registered-apprenticeship requirements. The IRS also identifies potential 10-percentage-point additions for certain domestic-content requirements and for locating a qualifying project in an energy community. These additions depend on detailed project facts, documentation, and applicable rules. A taxpayer also cannot claim both the investment credit and the production credit for the same facility.
- Base amount: 6% of the qualified investment under the cited IRS guidance.
- Labor requirements: The credit may increase up to 30% when prevailing-wage and registered-apprenticeship conditions are met.
- Potential additions: Domestic-content and energy-community requirements may each support a 10-percentage-point increase when applicable.
How a business claims and monetizes the credit
The taxpayer generally claims the credit by completing Form 3468 and filing it with the annual return for the first tax year in which the clean-energy investment credit is reported. The IRS describes additional options for organizations that may not use a traditional tax-credit structure. Under elective pay, certain applicable entities, including some tax-exempt and governmental organizations, may receive the value as a payment treated as an overpayment. Transferability may allow an eligible taxpayer that cannot use elective pay to transfer all or part of an eligible credit to a third-party buyer for cash. The buyer and seller negotiate the transaction terms.
Both elective pay and transfer elections require pre-filing registration with the IRS, and the registration number must be included on the tax return for the election to be effective. The IRS identifies 48E as a transferable credit in its transferability FAQ. These are general rules, not a project eligibility determination. The IRS does not provide personalized eligibility advice, so a business should review ownership, construction, labor, equipment, placed-in-service, and filing facts with a qualified tax advisor before relying on a projected credit.
How Does MACRS Depreciation Affect a Commercial Solar Project?
MACRS depreciation can affect how a business recovers the tax basis of qualifying clean-energy property over time, but it is not an automatic cash rebate or guaranteed project saving. The IRS says owners of qualified facilities, qualified property, and energy storage technology placed in service after December 31, 2024, may be eligible for five-year MACRS depreciation. The applicable property and taxpayer facts still need to be confirmed for the project.
For this purpose, the IRS identifies several property categories that may qualify, including a qualified facility, qualified property associated with a qualified investment, and energy storage technology. Those categories are treated as five-year property under Internal Revenue Code Section 168(e)(3)(B) and may be recoverable through the Modified Accelerated Cost Recovery System. See the IRS cost-recovery guidance for the current federal description.
What does Form 4562 have to do with the deduction?
The IRS states that the deduction is claimed on Form 4562, Depreciation and Amortization. A business should coordinate that filing with its tax return and accounting records rather than treating a proposal's estimated depreciation line as a final tax result. The timing of when the system is placed in service matters, as does the amount properly included in the project's depreciable basis.
Ownership and financing structure can also change the analysis. A building owner, tenant, partnership, tax-exempt organization, and third-party owner may not hold the same tax position or claim the same deductions. Review should address who owns the equipment, which costs belong in basis, whether the property qualifies, and how the project is placed in service. A tax professional should also evaluate interactions with other credits, elections, basis adjustments, and applicable accounting methods.
For a broader view of how incentives fit into project economics, review AMECO's business solar savings overview. Use any estimate as planning information, then have a qualified tax advisor confirm the treatment before relying on depreciation in a commercial investment decision.
Which California Utility and State Programs May Apply?
Utility treatment is territory-specific, so a commercial proposal should begin with the property's serving utility and interconnection path. California's CPUC customer-generation guidance covers retail transactions in PG&E, SCE, and SDG&E territories. It does not cover every California utility, wholesale transactions, avoided-cost energy sales, or non-export interconnections. Confirm the applicable tariff with the utility before relying on an export-credit assumption.
For the large investor-owned utilities covered by the CPUC guidance, existing net energy metering tariffs are closed to new enrollments. Customers applying for interconnection since April 15, 2023 generally use the newer net billing tariff, subject to the tariff's scope and project facts. Net billing can provide credits for exported energy, but its treatment is not the same as assuming a legacy NEM arrangement. Participation in a customer-generation tariff also does not, by itself, eliminate eligibility for another utility rebate, incentive, or credit.
| Category | What it may address | What to verify |
|---|---|---|
| Federal credit | Section 48E may apply to qualifying facilities and storage placed in service after December 31, 2024. The IRS lists a 6% base amount, with potential increases tied to specific requirements. | Taxpayer status, project qualification, labor and other bonus conditions, placed-in-service date, and filing requirements with a tax professional. Review current IRS guidance. |
| Utility tariff | Interconnection and the treatment of electricity exported to the serving utility, including the applicable customer-generation or net billing rules. | Utility territory, application date, export or non-export design, rate structure, and interconnection approval. Check CPUC customer-generation scope. |
| Property-tax treatment | California's active-solar provision is a new-construction exclusion, not a blanket exemption. A qualifying installation does not increase or decrease the assessment of the existing property under the cited guidance. | System type, ownership or lease structure, assessor process, and current law. The BOE page currently states a scheduled sunset of January 1, 2027, so do not promise future treatment. |
The California active-solar exclusion may apply whether a system is leased or owned, but ownership is not the only eligibility question. The California State Board of Equalization distinguishes active systems from excluded categories such as solar swimming-pool and hot-tub heaters. Review the current BOE guidance and local assessment process rather than treating the exclusion as automatic.
For a broader planning view, AMECO's commercial solar services can help organize the system, roof, utility, and documentation questions before tax or utility review.
Request a commercial project estimate and incentive-readiness discussion.
What Changes When a Project Includes Battery Storage?
Battery storage adds another layer to incentive planning because the equipment may be evaluated under both federal tax rules and California's separate storage programs. Under current IRS guidance, energy storage technology placed in service after December 31, 2024, can be included within the federal Clean Electricity Investment Credit framework when the project and taxpayer meet the applicable requirements. Qualified storage may also be eligible for five-year MACRS treatment, subject to the project's ownership, tax, and property facts. See the IRS guidance on the 48E credit and discuss the filing position with a qualified tax professional.
California's Self-Generation Incentive Program, or SGIP, is a different path. The CPUC describes SGIP as supporting qualifying distributed energy systems installed behind the customer's utility meter. Its listed technologies include advanced energy storage and combined solar-and-storage systems. That description does not mean every commercial battery qualifies, however. Eligibility can depend on the program administrator, available budget, sector rules, equipment requirements, performance obligations, and utility territory. SGIP funds and rules can change, so a business should confirm current availability before treating a potential rebate as part of its project economics.
For a useful starting point, review AMECO's guide to California battery incentive eligibility. Do not carry residential SGIP amounts or assumptions into a commercial proposal. The CPUC directs applicants to the SGIP Handbook and their utility's program administrator for current criteria and application details.
Review your solar-plus-storage project with AMECO
- Will the battery be owned, leased, or installed under another contract structure?
- Which utility territory and SGIP program administrator apply to the property?
- What operating, performance, demand-response, or metering requirements must the system meet?
- Are the federal credit and any California program being evaluated separately by the tax and project teams?
These checks help keep a storage incentive discussion grounded in the actual project rather than a generic residential example.
What Should a Business Verify Before Claiming an Incentive?
A preliminary incentive model is useful for comparing project options, but it is not a final eligibility determination. Before a California business includes an incentive in its budget, confirm the following items with a qualified tax professional, the serving utility, and the applicable program administrator.
- Confirm the taxpayer and ownership structure. Identify the entity that will own the solar facility, energy storage technology, or other qualified property. Review whether the project is owned, leased, or held through a partnership or other structure. The federal rules for claiming a credit, using elective pay, or transferring a credit can differ by entity type. The IRS says it does not make personalized determinations about whether a specific project qualifies, so the business should document this conclusion with its tax advisor. IRS guidance on elective pay and transferability explains the available pathways.
- Establish the placed-in-service date and eligible property basis. Confirm when each system is ready and available for its intended use, rather than relying only on the contract date or construction start. Separate eligible facility, storage, and related property costs, then have the tax professional determine the applicable basis. The IRS identifies qualified facilities, property, and storage placed in service after December 31, 2024 as potentially eligible for five-year MACRS treatment, claimed on Form 4562.
- Substantiate labor and bonus facts. If the model assumes the higher 48E amount, verify prevailing-wage and registered-apprenticeship compliance before work begins, and retain the required records. Separately substantiate any domestic-content or energy-community position. Do not treat a proposed equipment list or project address as proof that a bonus applies. The IRS Clean Electricity Investment Credit guidance describes these requirements and potential increases, but project-specific review remains necessary.
- Confirm the utility territory, tariff, and interconnection path. Identify whether the property is served by PG&E, SCE, SDG&E, or another utility, then confirm the current tariff and export treatment. CPUC guidance says existing NEM tariffs are closed to new enrollments and that many new interconnection applicants have used net billing since April 15, 2023. The utility must confirm the project's applicable tariff, interconnection requirements, and any assumptions about exported energy or non-export operation.
- Check property-tax treatment separately. Ask the county assessor or qualified tax advisor how California's active-solar new-construction exclusion applies to the specific property, equipment, ownership arrangement, and fixture classification. The California BOE describes the treatment as an exclusion rather than an exemption, and its current guidance lists a scheduled sunset of January 1, 2027. Do not assume the exclusion applies to every energy improvement or remains unchanged.
- Verify every filing and program deadline. Confirm which federal forms, registrations, elections, and supporting records are required. For 48E, the IRS identifies Form 3468 and, for elective pay or transferability, pre-filing registration before the return is filed. For storage incentives, ask the utility program administrator to confirm current SGIP eligibility, budget availability, performance requirements, and reservation deadlines. CPUC guidance directs applicants to the SGIP Handbook and the local administrator, so treat an incentive line in a proposal as conditional until those parties confirm it.
Once these points are documented, a business can review a proposal with clearer assumptions. Separate confirmed benefits from possibilities, and identify questions that need tax or utility approval before financial decisions are made.
How Can a Commercial Solar Proposal Show Incentive Readiness?
A proposal is incentive-ready when it gives the business and its tax and utility advisors enough project detail to test eligibility, rather than treating California commercial solar incentives as automatic. It should connect the physical site, system design, ownership structure, and approval path in one transparent record.
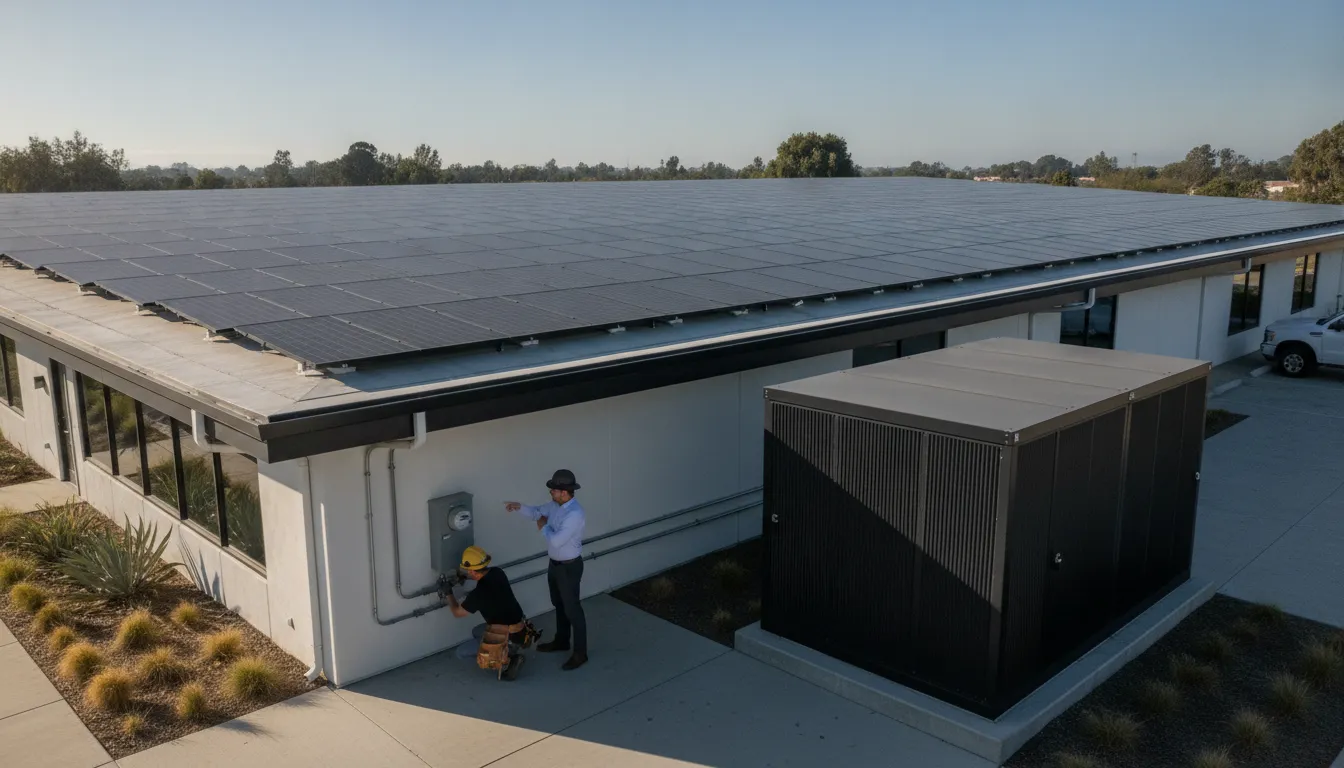
At minimum, ask the proposal to document:
- Site and roof condition: roof age, structural considerations, shading, usable area, and any repair or replacement work that could affect the installation sequence.
- System and load assumptions: proposed capacity, expected production approach, current and projected electricity use, service voltage, and the utility territory being evaluated.
- Interconnection path: the utility application responsibilities, export or non-export assumptions, required studies, and which party will coordinate communications and approvals.
- Equipment scope: modules, inverters, racking, monitoring, and any battery storage, including what is included now versus reserved for a later phase.
- Placed-in-service assumptions: the completion conditions and timing assumptions used for any tax or program analysis. The proposal should state that final treatment depends on the facts and rules in effect when the project is placed in service.
- Ownership and financing: whether the customer owns the system or uses another structure, who expects to claim available benefits, and which items require review by a qualified tax professional.
Coordination matters because roofing work, permitting, equipment procurement, construction, inspection, and utility approval can affect one another. AMECO is a California-owned solar and roofing contractor operating since 1974, with an integrated approach to commercial solar design, roofing coordination, installation, and interconnection support. Review AMECO's commercial solar services alongside the proposal so the scope and responsibilities are clear.
Request a commercial project review and discuss your proposal with AMECO.
Frequently Asked Questions
Can a California business receive a 30% federal solar tax credit?
Possibly. The federal 48E Clean Electricity Investment Credit starts at 6% of qualified investment and can increase to 30% when prevailing-wage and registered-apprenticeship requirements are met. Domestic-content and energy-community bonuses may also apply, but eligibility depends on the project, taxpayer, and current IRS rules. See the IRS 48E guidance and ask a qualified tax advisor to confirm the calculation.
Does battery storage qualify for the same federal credit as solar?
Qualified energy storage technology placed in service after December 31, 2024 may be eligible for 48E treatment. Storage may also be considered for California programs such as SGIP, but those programs have separate eligibility, budget, performance, and administrator requirements. Do not assume that adding a battery automatically qualifies a commercial project for a rebate.
Can a leased commercial solar system qualify for California property-tax treatment?
California's active solar property-tax incentive is a new-construction exclusion rather than an exemption. The California Board of Equalization says a qualifying system may be excluded whether it is leased or owned, subject to the applicable rules. The current BOE page states that the exclusion is scheduled to sunset on January 1, 2027, so verify timing with the local assessor and tax professionals.
Will a new commercial project use net metering in California?
Not necessarily. The California Public Utilities Commission says existing NEM tariffs are closed to new enrollments, and customers applying for interconnection since April 15, 2023 generally use the net billing tariff within the page's scope. The applicable tariff depends on the utility territory, project design, and interconnection circumstances. Confirm the treatment with the serving utility before modeling bill credits.
Who should verify eligibility before incentives are included in a project model?
Use a qualified tax advisor for 48E, MACRS depreciation, ownership, and filing questions, and consult the serving utility or program administrator for tariffs, interconnection, and storage incentives. The IRS does not make personalized determinations about whether a specific project qualifies, so a proposal should identify assumptions and the documents needed for final verification.
Get started with a commercial solar review
Incentive eligibility can depend on project design, ownership, utility territory, timing, and tax circumstances. A project review can help your team identify the questions to confirm with qualified tax and utility professionals before moving forward. Contact AMECO Solar & Roofing to review your commercial solar project and incentive questions.
9.30.2026
Learning how to pick a solar panel and battery backup system is less about finding one universally "best" brand and more about matching the equipment to your California home. Your roof, annual electricity use, inverter architecture, critical loads, outage expectations, monitoring needs, and plans for adding an EV or heat pump all affect the right design.
This guide gives you a practical buying framework before you compare proposals. It focuses on the decisions that shape a complete system, rather than repeating a battery-only brand comparison or a battery-sizing calculation.
Start with the job you want the system to do
Before comparing panel efficiency or battery capacity, define the job. A system intended to reduce grid purchases has a different design emphasis from one intended to keep refrigeration, medical equipment, internet service, or selected circuits operating through an outage. The best equipment list follows the outcome you need.
- Lower grid dependence: prioritize annual solar production, usable storage, and a control strategy that fits your utility rate plan.
- Outage protection: identify the circuits that must stay on and confirm the battery and transfer equipment can support their continuous and startup loads.
- Future electrification: account for an EV charger, heat pump, induction range, pool equipment, or other planned loads before the system is designed.
- Limited roof area: place more weight on panel output, efficiency, physical dimensions, and roof layout.
Write down your top two priorities and the loads you consider essential. This short exercise prevents a proposal from optimizing for a headline system size while missing the way your household actually uses energy.
How to pick a solar panel and battery backup system for your home?
Choosing a solar panel starts with the roof and your production goal, not with a product name. Panel wattage describes rated output under standard test conditions. It does not, by itself, predict how much electricity your roof will produce after accounting for orientation, shade, temperature, wiring, inverter limits, and seasonal conditions.
Compare output, efficiency, and physical fit
Use the proposal to compare the panel's nameplate output, efficiency, dimensions, temperature characteristics, degradation terms, and product warranty. Higher efficiency can be useful when roof space is constrained, while a physically larger panel may not fit well around vents, hips, valleys, skylights, or setbacks. Ask the installer to show the proposed layout, not only the total number of panels.
The U.S. Department of Energy's solar PV design overview explains that modules are only one part of a working system. Mounting, wiring, inverters, and the site's physical conditions all influence the finished design.
Review warranty language instead of relying on a headline
Ask what the panel warranty covers, who administers it, how a claim is handled, and whether the installer remains available after commissioning. A product warranty and a workmanship warranty are different documents. Your proposal should identify both, along with the process for service if a component underperforms.
Do not treat a longer stated term as proof that two panels are equal. Compare the conditions, exclusions, degradation language, labor coverage, and the companies standing behind the equipment. A reliable installer should explain those tradeoffs in plain language.
Check roof condition and solar placement together
Solar panels are a long-term roof attachment. If the roof needs replacement or significant repair, resolve that question before finalizing the array. An integrated solar and roofing contractor can evaluate the roof structure, covering, drainage, mounting method, and panel layout as one project. AMECO has operated in California since 1974 and later expanded into roofing, giving homeowners one company to coordinate the solar and roofing work.
For roof-specific planning, review AMECO's roofing solutions and the practical guidance in its article on solar panel battery backup. Those resources cover broader roof and storage considerations. This article's focus is the equipment-selection checklist that connects them.
Which inverter architecture fits your solar and battery plan?
The inverter is the system's traffic manager. Solar modules produce direct current (DC), while most household loads use alternating current (AC). The inverter converts and controls that energy, and the architecture you choose affects shading performance, battery compatibility, backup capability, monitoring, and expansion.
| Architecture | What to evaluate | Best question to ask |
|---|---|---|
| String inverter | Array layout, shade, string voltage, and future battery path | Will the array's roof planes perform well on shared strings? |
| Microinverters | Module-level conversion, shade variation, monitoring, and replacement access | Will module-level control improve this roof's design? |
| Hybrid inverter | Solar input, battery communication, backup output, and operating modes | Does this model support the battery and backup loads we intend to use? |
The DOE notes that PV systems may use a central inverter or microinverters at individual modules. When storage is included, the proposal should also explain whether the battery is AC-coupled or DC-coupled, which conversion stages are used, and what that means for a new installation or a retrofit.
Ask about compatibility at the system level
Do not approve a panel and battery as separate shopping-list items. Confirm that the modules, inverter, battery, backup interface, electrical panel, monitoring gateway, and control software are designed to operate together. The compatibility question includes more than a connector. It can involve voltage and current limits, firmware, communications, approved operating modes, transfer equipment, and utility requirements.
For an existing solar array, identify the current inverter model and ask whether the proposed battery can communicate with it. A retrofit may need different equipment from a new solar-plus-storage system. If the installer proposes replacing the inverter, ask what happens to existing monitoring, warranties, production data, and backup functionality.
AMECO's overview of solar solutions can help you understand the design and installation process. The right proposal should then translate that process into equipment-specific details for your property.
How should you size battery capacity and backup power?
Battery capacity and battery power answer different questions. Capacity, measured in kilowatt-hours (kWh), describes how much energy the battery can store. Power, measured in kilowatts (kW), describes how much energy it can deliver at one time. A battery can have enough stored energy for a long evening but still be unable to start or run several large loads simultaneously.
Separate energy duration from instantaneous demand
Start with a recent utility bill and a load list. Record which appliances run during the evening, which loads are essential during an outage, and which equipment has a high startup surge. Then ask the designer to show:
- nominal capacity and usable capacity;
- continuous charge and discharge power;
- short-duration or surge capability;
- estimated duration for the selected backup loads;
- minimum reserve state of charge and emergency settings;
- how the system recharges after an outage.
Usable capacity is more helpful than a nominal number because it reflects the portion of storage the operating controls make available. Runtime is not a fixed promise. It changes with weather, solar production, household demand, battery reserve settings, equipment condition, and the loads connected to the backup panel.
Choose whole-home or critical-load backup deliberately
Whole-home backup may require more power, more storage, electrical service changes, or load management than backing up a selected group of circuits. Critical-load backup can focus the system on refrigeration, lighting, communications, garage doors, and other priorities. Neither approach is automatically better. The correct choice depends on what you need to operate and what the electrical design can safely support.
Ask for a written backup-load diagram. It should identify the backed-up panel or circuits, the transfer or isolation equipment, the maximum supported load, and any appliances that must be managed manually. A solar array without properly configured islanding and backup equipment will not necessarily keep a home energized when the grid fails.
Review AMECO's Battery Backup Solutions
What outage priorities should shape the system?
California homeowners may be planning for short interruptions, longer outages, Public Safety Power Shutoffs, extreme weather, or simply more control over evening energy use. Those scenarios affect the required reserve, recharge strategy, backed-up circuits, and acceptable tradeoffs. State your outage priorities before the installer selects capacity.
- Short, occasional outages: prioritize automatic transfer, essential circuits, and enough power for the devices you cannot interrupt.
- Longer or repeated outages: ask how solar recharge works, how reserve settings affect runtime, and how the system behaves across multiple days.
- Medical or refrigeration needs: identify the equipment's continuous and startup requirements and discuss a dedicated backup plan with a qualified professional.
- Time-of-use management: ask how the controls schedule charging and discharge, and whether those settings can change as utility plans change.
The California Public Utilities Commission's Solar Consumer Protection Guide explains that batteries can store daytime solar for evening use and may provide limited backup power. It also advises homeowners to review rate-plan assumptions and the system's expected performance before signing.
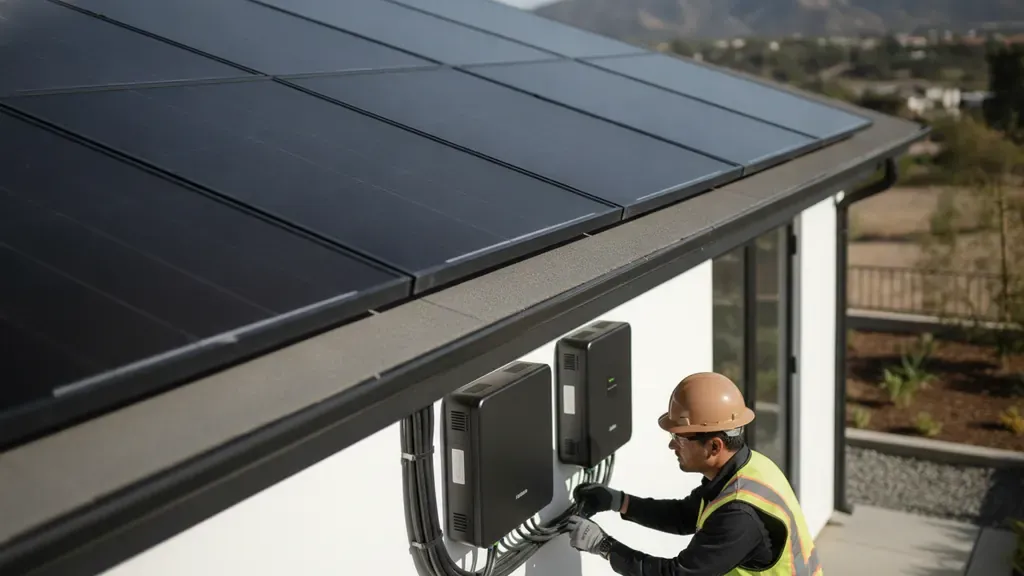
How important are monitoring and controls?
Monitoring should help you understand whether the system is producing, storing, and using energy as designed. It is not a substitute for good equipment selection, but it can make problems easier to identify and decisions easier to explain.
During a proposal review, ask whether the monitoring platform shows solar production, household consumption, battery state of charge, grid import and export, outage status, and alerts. Confirm which gateway, internet connection, app, or subscription is required. Also ask who can diagnose a problem remotely and what information the installer needs for service.
Controls matter because the battery is not simply an on-or-off reservoir. Operating modes may prioritize backup reserve, bill management, self-consumption, or scheduled charging. Ask the installer to explain the default mode, the settings you can change, and which changes require professional support. A useful system is one your household can understand without guessing what the app is reporting.
Should you plan for future expansion?
Future expansion is easiest when it is part of the initial design. A homeowner may add an EV, electrify a water heater, remodel a kitchen, finish an ADU, or decide that more outage loads should be protected. Those changes may affect solar production, inverter capacity, electrical service, battery modules, backup circuits, and monitoring.
Ask these questions before signing:
- Can the battery accept additional modules later?
- Must future modules match the original model, firmware, or age range?
- Can the inverter and backup interface support the planned final capacity?
- Is there room in the electrical equipment for additional circuits or protection?
- Will the roof layout leave practical space for future panels?
- What changes would require a new design, permit, or utility review?
Do not pay for an expansion promise that is not documented. A proposal should distinguish between equipment that is physically modular and a system that is actually approved for later expansion under the manufacturer's instructions and the home's electrical design.
What should you compare when you learn how to pick a solar panel and battery backup system?
Two proposals can use similar panel and battery names while offering very different system designs. Compare the assumptions and deliverables, not only the total panel count or battery kWh. A clear proposal makes it possible to see what is included, what is excluded, and what will happen if site conditions change.
| Proposal item | What a clear proposal should show | Why it matters |
|---|---|---|
| Solar array | Panel model, quantity, layout, orientation, shade assumptions, and estimated production | Shows how the roof supports the production goal |
| Storage | Usable kWh, continuous kW, surge output, reserve, and backed-up loads | Connects storage size to actual outage performance |
| Electrical design | Inverter, transfer equipment, panels, wiring, permits, and interconnection scope | Reveals compatibility and project responsibilities |
| Service and monitoring | Warranty documents, app access, alerts, support contact, and commissioning steps | Sets expectations after installation |
Be cautious when a proposal relies on universal savings, a guaranteed runtime, or a generic production estimate without showing the assumptions. Your final figures depend on the property, roof, energy use, utility territory, equipment, operating settings, and eligibility for any applicable incentive. Ask for a property-specific design rather than treating an online calculator or a sales estimate as a promise.
Solar panel and battery backup checklist
Use this checklist during an installer consultation. A strong proposal should answer each question in writing or identify the site visit, engineering review, or utility step needed to answer it.
- What are my two primary goals: energy use, outage protection, or both?
- Is my roof ready for solar, and does the layout account for shade, setbacks, vents, and future repairs?
- What panel output, efficiency, dimensions, and warranty fit my roof?
- Which inverter architecture best fits the roof's shade pattern and my storage plan?
- Are the inverter, battery, backup interface, monitoring system, and panels approved to work together?
- What are the battery's usable kWh, continuous kW, surge capability, and reserve settings?
- Which circuits will run during an outage, and what happens to high-startup loads?
- How will the battery recharge during a long outage or several cloudy days?
- Can I add an EV, heat pump, or more battery capacity later?
- Who handles design, permits, inspections, interconnection, commissioning, and service?
AMECO's solar battery storage pros and cons guide can help you weigh the broader tradeoffs. Its battery storage comparison guide addresses a different question: how battery options compare. Use this checklist to make sure the selected battery is part of a complete solar and electrical design.
Calculate Your Project with a Property-Specific Solar and Battery Design
Frequently asked questions
What is the most important factor when choosing a solar panel?
The most important factor is how the panel fits the complete system and your roof. Compare output, efficiency, dimensions, shade behavior, warranties, layout, and inverter compatibility. A panel with a strong headline specification may not be the right choice if it creates a poor roof layout or conflicts with the rest of the design.
How many solar panels do I need for battery backup?
There is no universal panel count. The design depends on your electricity use, roof conditions, panel output, utility rules, battery capacity, outage goals, and how quickly you want the battery to recharge. Ask for the production assumptions and the relationship between array size, battery capacity, and backed-up loads.
What is the difference between battery capacity and battery power?
Battery capacity is the amount of energy stored, measured in kWh. Battery power is the rate at which the system can deliver or absorb energy, measured in kW. Capacity affects how long a load can run, while power affects how much can run at once and whether high-startup appliances can operate.
Can solar panels power my home during a grid outage?
Not automatically. Standard grid-connected solar systems generally shut down when the grid fails for safety reasons. Outage operation requires a compatible battery or other approved backup design, isolation from the grid, and an electrical configuration that supports the circuits you want to run.
Can I add a battery to an existing solar panel system?
Often, but compatibility must be confirmed. The installer should review your existing panels, inverter, electrical service, monitoring, warranties, and available installation space. The best retrofit path may use AC-coupled storage, replace an inverter, or require other equipment so the battery can operate safely and communicate with the system.
Should I choose whole-home or critical-load backup?
Choose based on the loads you need during an outage and the electrical design your property can support. Critical-load backup focuses storage and power on selected circuits. Whole-home backup may require more equipment and careful management of large loads. Ask for a circuit-level plan before choosing either option.
Plan the system around your home, not a product label
The right solar panel and battery backup system balances production, storage, inverter compatibility, outage priorities, monitoring, roof condition, and future expansion. California homeowners should also review utility and consumer-protection requirements, then compare proposals that clearly explain assumptions and responsibilities.
AMECO Solar & Roofing brings solar and roofing under one California-owned company, with continuous operation since 1974. For a design based on your roof, household loads, utility territory, and backup priorities, use the Get An Estimate form to start a project-specific conversation.
9.29.2026
Choosing a solar installer in Sacramento involves more than comparing panel brands or the first proposal total. The right comparison considers how carefully each company evaluates your home, handles permits and utility coordination. Works with your roof, sizes battery storage, and supports the system after installation.
When comparing solar companies sacramento, homeowners should ask for clear evidence of design assumptions, licensing and insurance, equipment and workmanship coverage. Subcontractor responsibilities, permitting and interconnection support, battery options, and long-term monitoring or service.
A proposal is easier to evaluate when you know which questions reveal meaningful differences and which claims require project-specific confirmation. Start by examining the fundamentals of an installer relationship, from documented credentials to the details behind the quote.
Request an estimate for your Sacramento solar project
How Should Sacramento Homeowners Compare Solar Companies?
Start with the project behind the quote, not just the equipment list or monthly payment. Sacramento homeowners should compare how each company handles the address-specific details that affect design and installation: utility territory, roof condition, electrical capacity, permitting, battery goals, and future support.
Request an estimate for your Sacramento solar project
A useful comparison process also separates questions from endorsements. The Sacramento installer comparison guidance from EnergySage points homeowners toward equipment, warranties, experience, credentials, subcontracting, and customer feedback. Those are sensible areas to investigate, but the answers should be verified for your specific proposal and contract.
| Area to compare | Questions to ask | Evidence to request |
|---|---|---|
| Design and equipment | How was the system sized for my energy use, roof, shade, and future loads? Which equipment is proposed? | System design, assumptions, equipment specifications, and production estimates |
| Utility and permitting | Which utility serves this address? Who manages permits, inspections, interconnection, and corrections? | Written scope of responsibility and project documents |
| Roof and installation | Is the roof ready for solar? Who handles repairs, reroofing, mounting, flashing, and weatherproofing? | Roof assessment, crew model, and written workmanship coverage |
| Battery and support | Is backup for selected circuits or the whole home? How will monitoring, maintenance, and future service work? | Load assumptions, battery scope, warranty terms, monitoring access, and support contacts |
Make the comparison address-specific
Do not assume that every Sacramento property has the same utility requirements. Confirm the utility territory for the service address and ask how the installer will coordinate interconnection. A complete process may include bill analysis, custom system design, an on-site roof and electrical assessment, permit acquisition, utility coordination, commissioning, and customer handoff. The proposal should make clear which company owns each step and what happens if an inspection or utility review requires changes.
Use a short evidence checklist
- Confirm the company is appropriately licensed, insured, and certified for the proposed work.
- Ask whether installation is performed by company crews or subcontractors, and who supervises the work.
- Compare equipment, workmanship, roof-penetration, and manufacturer warranty language separately.
- Review customer feedback for patterns involving communication, installation quality, and post-installation service.
- Get battery capacity, backup priorities, monitoring, and ownership terms in writing if storage is included.
A Sacramento solar proposal is easier to evaluate when it explains assumptions instead of hiding them behind a single total. Compare the scope, responsibilities, documentation, and support plan side by side before deciding which option fits your home.
What Should a Solar Design Include for a Sacramento Home?
A useful residential solar design begins with your home, not a standard panel package. Sacramento has abundant sunshine, with the National Weather Service describing sunshine for about 78% of the year. But that context does not determine the right system for every address. Roof orientation, shade, electrical infrastructure, household habits, utility territory, and future plans all affect the design.
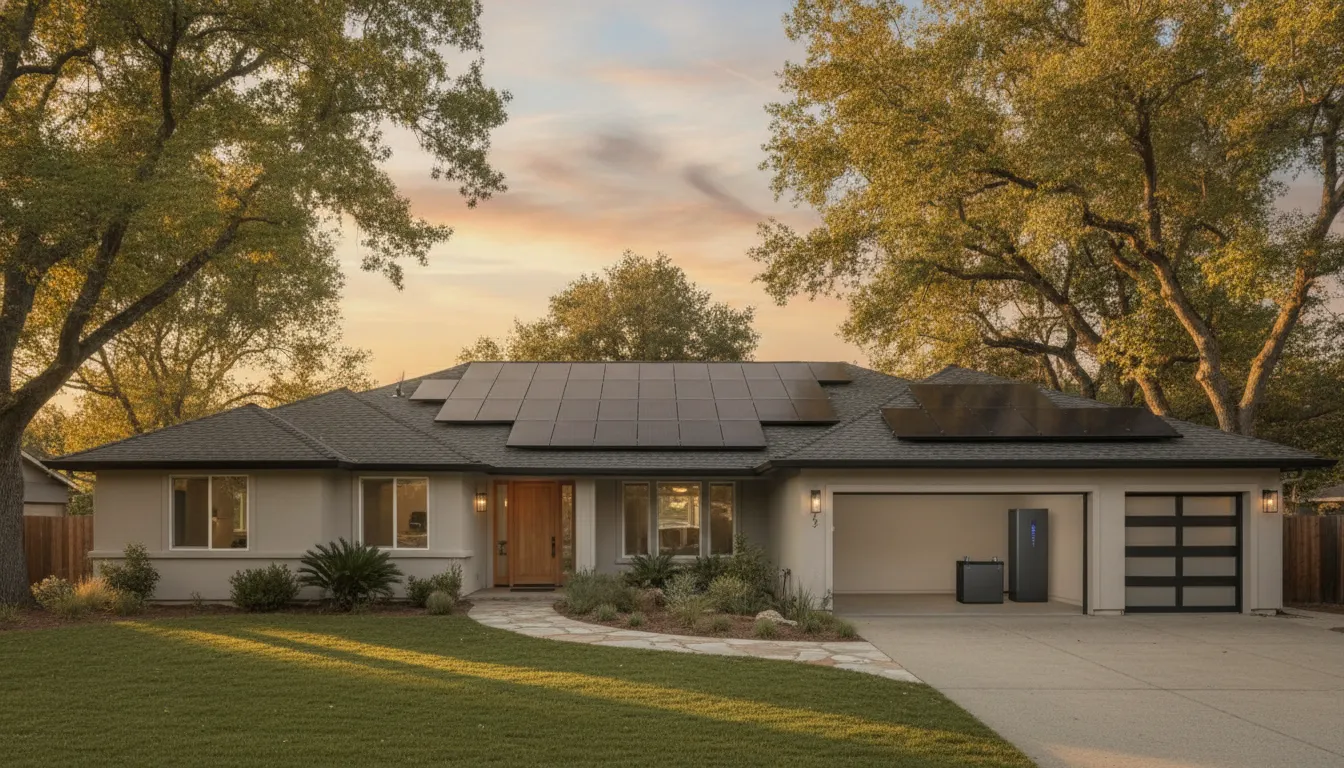
Ask whether the provider will start with a detailed utility-bill analysis and then explain the assumptions behind the proposed system. AMECO describes a process that moves from bill review and an initial design to custom equipment selection. An on-site roof and electrical assessment, permitting, utility coordination, installation, commissioning, and customer handoff. A custom solar system design should make those decisions understandable before you commit.
What should the site assessment examine?
The design review should account for roof condition, usable roof area, orientation, pitch, obstructions, and shade that changes throughout the day or year. It should also examine the main electrical panel, service capacity, equipment location, and any upgrades that may be needed. If the roof may need repair or replacement, resolve that question before finalizing the array and mounting approach. The designer should also confirm your utility and explain how interconnection requirements may affect the project.
How should system sizing be explained?
System size should be tied to documented energy use, budget, and forecast consumption rather than a generic production estimate. Discuss planned changes such as an electric vehicle, heat pump, pool equipment, remodel, or additional occupants. Those future loads may change panel quantity, inverter selection, electrical work, or the value of adding battery storage. Ask for the assumptions in writing, including the consumption history used, expected load changes, roof areas included, and what the design does not cover.
A complete proposal should also explain monitoring and commissioning. Monitoring can help you see whether the system is operating as designed, while commissioning confirms that equipment, communications, and project documentation are ready for handoff. Treat projected production and savings as estimates that depend on the property, equipment, weather, utility rules, and household use.
- Utility bills and consumption assumptions are documented.
- Roof, shade, electrical service, and equipment locations are assessed.
- Future loads and battery objectives are discussed before sizing.
- Permitting, interconnection, monitoring, and commissioning responsibilities are clear.
- Design exclusions, contingencies, and handoff materials are provided in writing.
Why Do Permitting and Utility Experience Matter in Sacramento?
A solar project is more than panels on a roof. Before a system can be activated, someone must assemble the permit package, respond to jurisdictional requirements. Coordinate inspections, submit interconnection materials, and confirm that the utility has accepted the project. Those responsibilities can affect how clearly the work progresses, even when the equipment and system design are otherwise sound.
Start by asking each installer who owns these steps. The answer should identify the responsible team, not simply say that permitting is included. Ask who prepares and submits the plans, who communicates with the permitting authority. Who schedules or responds to inspection requirements, and who manages utility interconnection from application through confirmation. A written scope should also explain what documentation you will receive and what decisions require your approval.
Utility territory and requirements vary by address, so do not assume that one Sacramento-area utility process applies to every home. Confirm which utility serves the property and ask how the proposal accounts for that utility's current interconnection requirements. The same address-specific review should clarify whether the project needs electrical or structural documentation, special plan details, or changes based on the existing service equipment.
AMECO describes a process that includes utility-bill analysis, system design, an on-site roof and electrical assessment, permit acquisition, utility coordination, installation, commissioning, and customer handoff. When comparing solar design and installation services, look for this kind of defined sequence rather than a proposal that ends at installation. Clear ownership helps keep design assumptions, permit documents, inspection findings, and final system information connected.
It is also worth asking how communication works when an inspector or utility requests clarification. A capable team should be able to explain what changed, whether the change affects equipment or cost, and what action is needed from the homeowner. For more context on the California solar permitting process, review the practical issues that can make this stage more involved than it first appears.
Get an estimate for a Sacramento solar project
Before signing, request a project-specific checklist covering permits, inspection coordination, interconnection, utility confirmation, and the final handoff. Also verify that the company is licensed, insured, and appropriately certified, questions EnergySage identifies as useful when comparing installers. The goal is not a blanket approval promise. It is a documented process with clear responsibility at each step.
How Does Roofing Coordination Protect the Project?
Solar installation depends on the roof beneath it. Before panels are mounted, a homeowner should know whether the existing roof is ready for the expected service life of the solar equipment. Or whether repair, replacement, or solar-ready preparation belongs in the project scope. Installing on a roof that needs immediate work can create avoidable disruption later, including the need to remove and reinstall panels.
A coordinated assessment should look beyond visible shingles or tiles. The installer and roofing team should review roof condition, penetrations, drainage, structural considerations, and the areas where mounting hardware will be installed. If reroofing is appropriate, the schedule and responsibilities should be clear before solar construction begins. AMECO describes its combined capability as including roof replacement and repair, solar-ready preparation, mounting, flashing, and weatherproofing. Learn more about its roofing services for solar projects.
Why do flashing and weatherproofing matter?
Mounting solar equipment requires carefully planned attachment points. Flashing and weatherproofing help manage water around roof penetrations, but their effectiveness depends on the roof assembly, installation method, materials, and workmanship. A proposal should explain how mounting locations will be sealed, how existing roofing materials will be handled, and who will inspect the finished work. These details matter more than a broad statement that the system is weatherproof.
It is also useful to separate equipment warranties from workmanship and roof-penetration coverage. EnergySage specifically recommends comparing an installer's warranty coverage, while some providers describe separate protections for equipment, workmanship, and roof penetrations. Those categories are not interchangeable. Ask for the actual terms, exclusions, claim process, and any conditions that apply to a reroof or future repair rather than assuming every provider offers the same protection.
Questions to put in writing
- What is the current roof condition, and what evidence supports the recommendation to install now or reroof first?
- Who performs roof repairs, replacement, flashing, and solar mounting?
- How will the roof be protected during installation and future service?
- Which party is responsible if water intrusion is found after installation?
- Are workmanship, equipment, and roof-penetration protections listed separately?
- Who coordinates panel removal and reinstallation if roofing work is needed later?
Written answers make it easier to compare solar companies in Sacramento on project coordination rather than headline promises. They also give the homeowner a clear record of scope, timing, and responsibility before work begins.
When Does Battery Backup Make Sense?
Battery storage becomes more useful when your priorities extend beyond producing solar energy during daylight hours. Homeowners may want to keep essential circuits operating during an outage, use more of their own solar power later in the day, or reduce exposure to time-of-use pricing. The right choice depends on your loads, utility territory, roof and electrical conditions, and how you want the system to operate.
Start with the loads you need to protect
Begin by identifying what must remain available if the grid goes down. A partial-backup design might prioritize a refrigerator, internet equipment, lighting, medical equipment, a garage door, or selected outlets. A whole-home configuration is intended to support a broader set of household circuits, but it still requires careful electrical planning. Large loads such as air conditioning, electric resistance heating, pool equipment, or vehicle charging can materially affect the battery capacity and controls required.
Ask each installer to document the backed-up circuits, expected operating conditions, and any loads that will be excluded. This makes proposals easier to compare and prevents the phrase "backup power" from being treated as a guarantee that every appliance will run indefinitely.
Consider resilience and time-of-use goals together
Battery storage can provide a reserve when grid service is interrupted. That concern is increasingly relevant as aging infrastructure and extreme weather raise questions about power disruptions, as described by the UCLA Institute of the Environment and Sustainability. The battery's usable energy, discharge rate, solar production, and household demand determine how long selected loads can operate. No battery can eliminate the need to prioritize consumption during a prolonged outage.
Some homeowners are less focused on outages and more interested in shifting energy use. A battery can store solar energy for later use and may support time-of-use optimization. AMECO's documented battery offerings include whole-home backup configurations and time-of-use optimization, with Enphase and Tesla Powerwall products named as available equipment options. Compatibility depends on the proposed inverter, electrical panel, controls, and existing solar equipment, so request a system-specific design rather than assuming every battery works with every installation.
Compare scope, incentives, and cost at the project level
Battery scope is only one part of the design. Panel quantity, additional equipment, electrical upgrades, equipment compatibility, and any incentive for which a particular project qualifies can all affect the final proposal. Incentive rules and eligibility are location- and project-dependent, and they can change. A responsible quote should show its assumptions, identify included equipment, and explain which figures are estimates rather than universal results. For more planning context, review these solar battery backup options before requesting proposals.
When comparing solar companies Sacramento homeowners are considering, ask who performs the load calculation, who confirms interconnection requirements, and who will commission and explain the system after installation. Those details matter as much as the battery brand.
Request an estimate for a battery-ready solar project
What Does Long-Term Solar Support Look Like?
A solar installation is a long-term equipment decision, so compare the support model as carefully as the proposal. A useful evaluation goes beyond the panels and inverter. Ask who monitors the system, who responds when production changes, how maintenance is handled, and what documentation you receive after commissioning.
Start by separating the warranty categories. Manufacturer coverage for panels, inverters, batteries, or other equipment is not the same as an installer's workmanship coverage. Roof-penetration protection may be addressed separately again. EnergySage specifically recommends asking how an installer's warranty compares with alternatives. Request the complete terms in writing, including exclusions, claim procedures, labor coverage, and whether coverage changes if the home is sold.
Competitor pages can show why the details matter, but their terms should not be treated as a market standard. For example, Sunrun's Sacramento page describes manufacturer equipment warranties, a 10-year workmanship guarantee, and a five-year roof-penetration warranty for purchased systems. It also describes system transfer options for a home sale. Those are Sunrun-reported terms to compare, not universal promises from every installer. Read the actual agreement for any provider you consider.
What happens after the system is turned on?
Ask whether monitoring is included, what alerts are reviewed, and who contacts you when an issue appears. Sunrun says its Solar Subscription customers receive 24/7 system monitoring, but monitoring arrangements vary by provider, ownership model, and equipment. Clarify whether you can access the monitoring portal yourself and what support is included when an alert indicates a communication, inverter, or production problem.
Also ask who performs the work. EnergySage recommends checking whether an installer uses subcontractors, along with verifying licensing, insurance, certifications, and customer feedback. A clear crew model helps you understand who is responsible for installation quality and who will return if a problem develops. Reviews can provide useful signals about communication and follow-through, but examine recent, project-specific feedback rather than relying on a single score.
What should the handoff include?
A complete handoff should cover system operation, monitoring access, equipment documentation, warranty contacts, inspection or interconnection status, and maintenance expectations. Commissioning is also an important checkpoint because it confirms that the installed system is configured and operating as intended. AMECO describes a process that includes installation, commissioning, and customer handoff. Its professional solar installation process can help you understand the stages to discuss with any Sacramento installer.
Before signing, ask for response procedures, expected points of contact, transfer requirements, and the exact documents you will keep. The strongest comparison is not the promise of indefinite support. It is a specific, written explanation of who owns each responsibility after installation.
Frequently Asked Questions
What should I ask solar companies in Sacramento before choosing one?
Ask how the company analyzes your electricity use, sizes the system, evaluates the roof and electrical service, handles permits and utility interconnection, and supports the project after commissioning. Also request written details about equipment, workmanship coverage, monitoring, crew structure, and who is responsible for each handoff.
Does my Sacramento utility affect the solar design and approval process?
Yes. Utility territory, interconnection rules, service-panel requirements, and project documentation can vary by address. Confirm which utility serves the property and ask the installer to explain its role in permit submission. Inspections, interconnection, and final activation rather than assuming every Sacramento project follows the same process.
Should I repair or replace my roof before installing solar?
That depends on the roof's condition, remaining service life, mounting areas, and the scope of the solar project. Have the installer document the roof assessment and explain whether repair, replacement, solar-ready preparation, flashing, and weatherproofing are included or coordinated separately. Put responsibility for roof work and penetrations in writing.
How do I compare battery backup options?
Start with the loads you want to operate during an outage, such as refrigeration, communications, or selected circuits. Then compare whole-home and partial-home configurations, usable capacity, equipment compatibility, control features, and how the battery interacts with your solar system. A project may also be designed around time-of-use energy use, but the right configuration depends on the property and goals.
What should long-term solar support include?
Look for a clear handoff after commissioning, system monitoring, a process for service requests, maintenance guidance, and separate explanations of equipment, workmanship, and roof-penetration coverage. If you may sell the home, ask how agreements and warranties transfer. A strong comparison focuses on documented responsibilities, not just a sales presentation.
Get started with a Sacramento solar comparison
A project-specific review can help you compare design assumptions, utility requirements, roofing needs, battery goals, and long-term support in one conversation. To compare Sacramento solar options and request an estimate tailored to your property, get started with AMECO.
9.28.2026
Choosing a commercial solar provider is not simply a matter of finding the closest company in a search result. A sound decision starts with confirming service-area coverage and commercial experience. It also depends on the provider's ability to evaluate your roof, electrical system, energy use, and utility requirements as one connected project.
When comparing commercial solar near me, look for a California provider that can document relevant commercial work. The provider should explain site-feasibility findings, coordinate permitting and interconnection, address roof conditions, and define monitoring and post-install support in writing. AMECO is California-owned and has operated since 1974, with solar, roofing, battery storage, and EV charging capabilities.
Before comparing proposals, request a project-specific review and gather the information a provider needs to assess your property. The right evaluation then moves from local fit to the questions that reveal whether a proposed system is practical for your business.
What should a California business look for in commercial solar near me?
For a business owner, CFO, or facilities manager, choosing commercial solar near me should mean evaluating project capability, not simply selecting the provider with the closest listing. Start by confirming that the company serves the property's California utility territory and can explain how local permitting and interconnection requirements affect the work. Coverage should be confirmed for the specific address, especially when a provider references multiple regions or utility territories.
Next, ask for evidence of comparable commercial work. A provider should be able to discuss projects involving facilities similar to yours, whether that means a warehouse, office, retail property, or manufacturing site. Request references, project scopes, and an explanation of who handled engineering, installation, inspections, and final system handoff. Experience should be demonstrated through process and documentation, not only through a project-size claim.
Evaluate the full project process
Commercial solar requires coordination across the roof, electrical system, utility, permitting authority, and the business's operating schedule. Ask how the provider will assess roof condition and structural capacity, review historical energy use, design around electrical constraints, and identify equipment locations. The proposal should make clear which party is responsible for engineering, permit submission, utility applications, inspections, commissioning, monitoring, and employee training.
California projects may also involve utility-specific interconnection procedures. The California Public Utilities Commission explains that Rule 21 covers interconnection, operating, and metering requirements for eligible generation facilities connected to investor-owned utility systems. Each utility administers the process in its own territory, so you can review the CPUC's Rule 21 guidance and ask which requirements apply. A qualified provider should explain the applicable process without presenting approval or timing as automatic.
- Which commercial properties and system types has the company completed?
- Who performs the engineering and manages permits and utility coordination?
- How will roof, structural, electrical, and operational constraints be documented?
- What support, monitoring, training, and escalation process follows commissioning?
AMECO's AMECO commercial solar services page provides a starting point for reviewing its commercial capabilities and project approach. Before selecting any provider, compare the answers, documentation, and site-specific assumptions in writing. When useful, request a site-specific estimate rather than treating a generic online result as a recommendation.
How does a provider evaluate your roof and electrical site?
A credible commercial solar assessment begins with the property, not a standard system size. The provider should review the building's roof condition, remaining service life, material, drainage, structural capacity, and any planned replacement. Rooftop equipment, parapets, trees, neighboring buildings, and other obstructions can affect the usable array area and shading profile. The U.S. Department of Energy's pre-audit checklist includes roof direction, pitch, structural soundness, roof-covering condition, and unobstructed areas among its screening considerations.
That roof review matters because installing solar on a roof that may soon need major work can create avoidable scope and coordination problems. Ask how the assessment accounts for roof repairs or replacement, attachment methods, access, and the relationship between roofing and solar warranties. AMECO's commercial solar roof assessment guide offers additional context on evaluating roof readiness before moving forward.
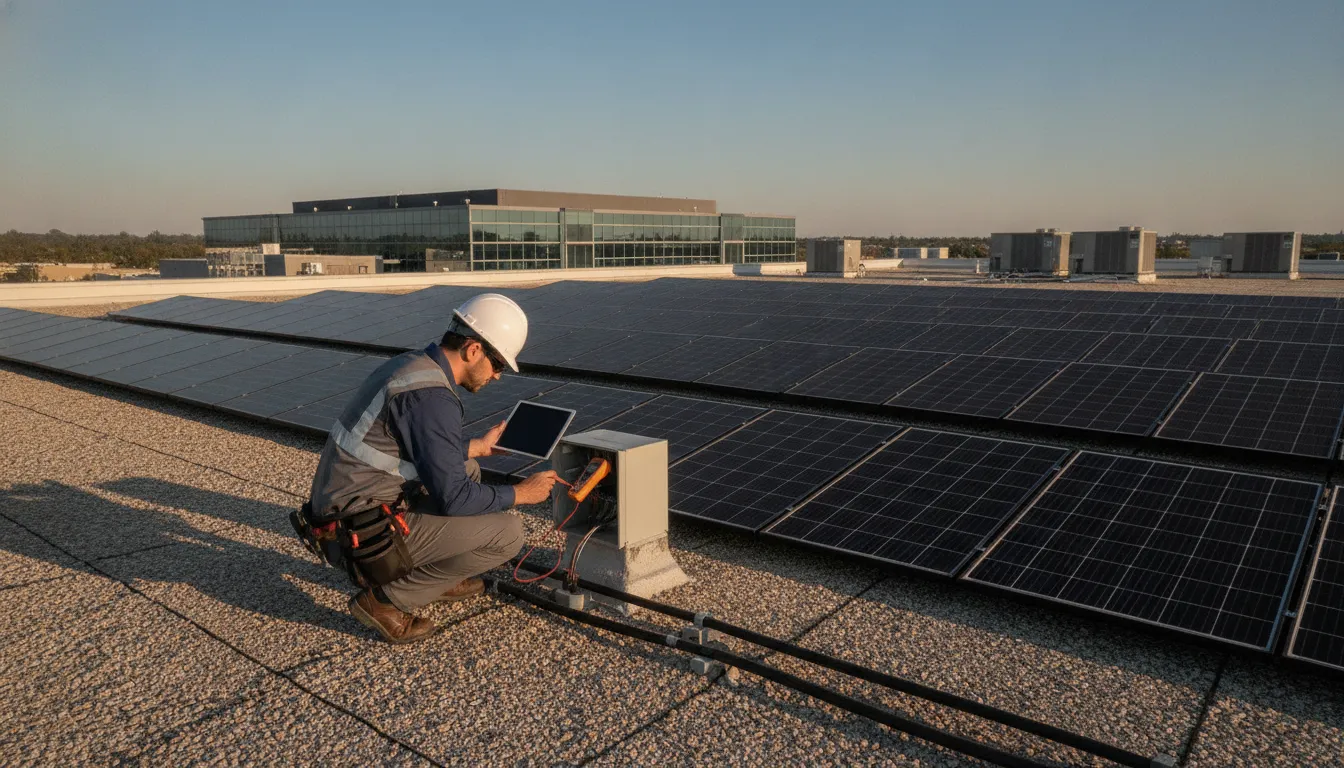
What should the electrical review cover?
The electrical assessment should connect the proposed array to the building's actual operations. A provider may review utility bills and energy-use patterns. The provider should then verify the service panel's location, amperage, available space, interconnection path, meter configuration, and room for related equipment. If battery storage is under consideration, the site review should also address an appropriate, well-ventilated location and the operational goals the system is expected to support.
How do shading and utility requirements affect feasibility?
Shade from trees, adjacent buildings, rooftop air handlers, and other equipment can change the layout and expected production profile. A thorough design documents these constraints instead of assuming every roof area is equally usable. The provider should also identify the property's utility territory and explain the applicable interconnection process. In California, requirements vary by utility. The California Public Utilities Commission explains that each investor-owned utility administers Rule 21 within its own service territory. The final design and approvals must therefore reflect the specific property and utility.
- Roof condition, material, structure, access, and planned replacement.
- Array area, orientation, pitch, shading, and rooftop obstructions.
- Energy use, operating schedule, electrical service, and equipment location.
- Utility territory, interconnection requirements, and permitting responsibilities.
Use the assessment to compare the quality of each provider's questions and documentation. A sourced feasibility review should make constraints visible before you compare system designs or project economics.
Which energy goals should shape a commercial solar design?
A commercial solar system should be designed around how a business uses electricity, not around a standard system size. Start with the load profile: when the facility consumes power, which operations create the largest demand, and how usage changes by season or production cycle. A warehouse with daytime refrigeration needs may have different priorities from an office that empties after business hours. Reviewing interval usage, utility bills, operating schedules, and planned changes helps the design reflect the property rather than a generic model.
Decision-makers should also clarify the primary objective. Is the project intended to increase on-site energy use, manage exposure to changing utility costs, support resilience during outages, or advance a documented sustainability plan? These goals can point to different equipment and operating strategies. In California, utility territory and interconnection requirements also matter. For investor-owned utilities, the California Public Utilities Commission explains that Rule 21 addresses interconnection, operation, and metering requirements, while each utility administers its own version of the tariff: review the applicable Rule 21 requirements.
Battery storage may be relevant when the business needs more control over when energy is available, has critical loads, or wants to evaluate backup capabilities. Storage should be assessed alongside the facility's electrical configuration, safety requirements, available space, ventilation, and operating priorities. It is not automatically the right fit for every site. A provider should explain what loads a proposed battery system is intended to support and what limitations apply.
Get An Estimate for a site-specific commercial solar review
Plan for the future as well. New production equipment, expanded operating hours, fleet electrification, building additions, or a second facility can change the load profile. Ownership goals matter, too. An owner-occupied property may be evaluated differently from a leased site, and a business may prioritize control, flexibility, or a defined procurement structure. Ask the provider to document its assumptions, identify which loads the design serves, and show how future expansion was considered.
For a broader overview of how grid dependence, energy management, and storage can relate to business planning, see our guide to commercial solar energy goals. The strongest proposal connects those goals to measured usage, site constraints, utility rules, and a support plan, rather than promising a universal result.
What financing and incentive questions belong in the proposal?
A commercial solar proposal should make the financial structure as clear as the system design. Ask the provider to show which party owns the equipment. Who is responsible for performance and maintenance obligations, and how the arrangement fits the property's ownership and operating plans. Common structures include direct ownership, a loan, a lease, and a power purchase agreement (PPA). Each can shift responsibility, tax treatment, cash requirements, and long-term flexibility in different ways.
How do the ownership options differ?
With direct ownership, the business or property owner purchases the system and retains control of the asset. A loan can spread payments while leaving ownership with the borrower, subject to the financing agreement. A lease generally involves a third party retaining ownership while the customer makes scheduled payments. Under a PPA, the customer typically purchases the electricity produced by a system owned by another party, under terms defined by the contract. For a closer look at the structure and tradeoffs, review this guide to commercial solar PPA financing.
Do not compare these options by monthly payment alone. Request the full term, escalation provisions if applicable, early-termination or transfer conditions, maintenance responsibilities. Insurance requirements, roof obligations, and what happens if the property is sold or the lease changes. The proposal should also identify whether battery storage, electrical upgrades, monitoring, permitting, and utility coordination are included or treated as separate scope.
Which assumptions should the proposal disclose?
Ask for the inputs behind every projection, including historical electricity use, operating schedules, utility rate assumptions. Expected system production, degradation treatment, battery dispatch assumptions, export treatment, and any planned changes to the facility. California projects can also be affected by utility territory and interconnection requirements. The California Public Utilities Commission explains that investor-owned utilities administer Rule 21 within their own territories and maintain their own versions of the rule. The proposal should identify the applicable utility process rather than relying on a generic statewide assumption: review California interconnection requirements.
What should you ask about incentives and tax treatment?
Ask the provider to list potentially relevant federal tax credits, accelerated depreciation, and utility incentives separately, along with the assumptions and eligibility conditions attached to each. Incentives can depend on current law, the project's structure, the utility territory, placed-in-service requirements, and the taxpayer's circumstances. A sales proposal should not present an incentive as guaranteed or treat a tax credit as a cash discount.
Use this resource for more focused commercial solar incentive questions, then have a qualified tax professional confirm eligibility and treatment for the business. Ask the installer to update the proposal if a utility rule, project structure, or tax assumption changes before contracts are signed.
How can you compare proposals without relying on a single quote?
A commercial solar proposal should give an owner, CFO, or facilities manager enough detail to evaluate project fit, not simply present an attractive figure. Request comparable documentation from each provider and examine what is included, what is assumed, and what remains your responsibility. In California, utility territory, permitting requirements, roof conditions, and interconnection details can materially affect the project plan.
Ask each provider to explain the design basis in plain language. The proposal should connect the system concept to your facility's energy use, operating schedule, roof and electrical conditions, and stated business goals. It should also identify who is responsible for engineering, permits, utility coordination, installation, commissioning, monitoring, and training. For background on the variables that shape a project, review this guide to commercial solar project costs, without treating any generalized discussion as a substitute for site-specific analysis.
| Proposal area | Questions to ask | Evidence to look for |
|---|---|---|
| Scope and design | What equipment, array layout, engineering, and production methodology are included? | Equipment schedule, site assumptions, design drawings, and clearly stated performance methodology. |
| Delivery and coordination | Who handles structural review, permits, utility interconnection, commissioning, and handoff? | Named responsibilities, process milestones, required customer decisions, and identified exclusions. |
| Support and contract | What monitoring, maintenance, warranty terms, escalation process, and contract obligations apply? | Written service terms, response process, ownership responsibilities, and conditions for changes. |
Read the exclusions as carefully as the included scope. Look for assumptions about roof repairs, electrical upgrades, access, equipment placement, trenching, utility requirements, taxes, and future changes to the property. If a proposal uses production or savings estimates, ask which utility data, load assumptions, shading conditions, degradation assumptions, and eligibility rules support them. These figures require project-specific review and should not be treated as guarantees.
Finally, compare the clarity of the process. A provider that explains tradeoffs, documents open questions. And welcomes technical or legal review may give your team a stronger basis for a responsible decision than a proposal that is difficult to audit. Confirm the service area for the property, then request revisions until the proposals describe genuinely comparable scopes.
Get An Estimate for a site-specific commercial solar review.
What should post-install support include?
A commercial solar project is not complete when the equipment is mounted. Before handoff, the provider should describe how the system will be commissioned, tested, monitored, and supported as your operations continue. Ask for a clear record of what was installed, what was tested, and who handles questions after the crew leaves.
Commissioning, monitoring, and training
Commissioning should confirm that the array, inverters, electrical equipment, controls, and any battery storage operate as designed. The handoff should include relevant test results, system documentation, monitoring access, and instructions for reviewing alerts or performance data. Facilities staff should know which conditions require an internal response and which should be escalated to the solar provider.
Training should be practical rather than limited to a product manual. Confirm who will receive it, whether building operations staff can access the monitoring platform. And how personnel should respond to system notifications, planned shutdowns, roof work, or changes to the facility. If the property is leased or managed by multiple parties, define access and responsibilities in writing.
Maintenance, warranty terms, and escalation
Request a maintenance plan that explains routine monitoring, inspection expectations, safety considerations, and the process for diagnosing an underperforming component. AMECO's commercial solar post-install support resource can help frame that discussion. The proposal or contract should state warranty terms exactly as they apply to the equipment, workmanship, roof interface, and any battery system. Avoid relying on a single general warranty label when different components may have different conditions, exclusions, or claim procedures.
Finally, identify the escalation path. Ask who receives a service request, how urgent electrical or safety concerns are handled, and which records the owner must retain. Support expectations should account for the property's utility territory, roof condition, equipment configuration, and operating needs. A provider that explains these details before signing gives a commercial buyer a stronger basis for evaluating long-term fit than a proposal focused only on installation day.
A practical commercial solar provider checklist
- Can the provider serve this property? Confirm the address, building type, utility territory, and project scope are within the provider's current California service area. Treat "near me" as a starting point for research, not proof that a particular site is covered.
- What commercial work can they document? Ask for relevant references from businesses with comparable roofs, operating schedules, system complexity, or energy demands. Confirm who performed the engineering, installation, permitting, and long-term support.
- Has the site been evaluated for feasibility? Require more than a satellite image. The review should consider roof condition and remaining service life, structural capacity, roof material, shading, obstructions, electrical equipment, available space, and any battery-storage requirements.
- How was the energy analysis prepared? Ask whether the proposal uses utility bills, interval data when available, operating schedules, seasonal loads, planned equipment changes, and future expansion plans. A design should reflect how the business actually uses electricity.
- Which assumptions drive the proposal? Request the system size, production estimate, degradation assumption, equipment specifications, roof work assumptions, exclusions, and treatment of storage or backup objectives. Each assumption should be visible enough for your team to compare proposals fairly.
- Who reviewed incentives and tax considerations? Ask which federal, state, and utility programs may apply, when eligibility is determined, and what remains subject to current rules and the project's ownership structure. Have qualified tax and finance professionals review implications rather than accepting a universal savings claim. You can also review these commercial solar incentive questions.
- What exactly does the contract include? Check equipment, design, roofing coordination, construction, permitting, interconnection, monitoring, commissioning, training, maintenance, change orders, insurance, warranties as written, and responsibility for unresolved issues.
- Who handles permitting and utility coordination? In California, requirements vary by utility territory. Ask who prepares interconnection documents, responds to utility requests, coordinates inspections, and communicates decisions to your team.
- How will commissioning and handoff work? Confirm that the provider will test the system, document the final configuration, explain monitoring access. Train the appropriate staff, and identify the process for reporting performance or equipment concerns.
- What support continues after installation? Clarify monitoring, maintenance, service response, escalation contacts, and the boundaries between the installer, equipment manufacturers, property owner, and utility. A clear support plan is as important as a persuasive proposal.
Once these questions are answered, the remaining comparison becomes more meaningful. The FAQs below address common questions about finding and evaluating commercial solar providers in California.
Frequently Asked Questions
What does commercial solar mean?
Commercial solar is a photovoltaic energy system designed for a business, commercial property, or other nonresidential facility. The design considers the property's electricity use, operating schedule, roof or ground area, electrical equipment, utility requirements, and future energy goals. A project may also include battery storage, roofing work, or electric vehicle charging when those needs fit the site and business plan.
How do I choose a commercial solar provider in California?
Look for documented commercial experience, a clear engineering and permitting process, utility coordination, site-specific design, and post-installation support. Ask how the provider evaluates roof condition, structural capacity, electrical compatibility, energy use, monitoring, commissioning, and maintenance. Confirm that the provider can serve the property's utility territory and location rather than relying only on the phrase "near me."
How much will a commercial solar project cost?
There is no reliable universal price for a commercial solar project. The proposal should reflect the property's energy use, system size, roof and structural work, electrical upgrades, equipment, interconnection requirements, storage, and project scope. Compare the assumptions behind each proposal, not just the headline figure, and ask how changes in site conditions could affect the final cost.
What incentives or financing options should a business evaluate?
Potential considerations may include federal tax credits, accelerated depreciation, utility incentives, direct ownership, a power purchase agreement, or another financing structure. Current rules, utility requirements, project ownership, tax status, and eligibility determine what applies. Ask each provider to state its assumptions in writing, then review tax and financing implications with the appropriate qualified advisors.
How can I confirm whether a provider is a good fit for my property?
Request a site-specific review that covers roof condition, structural and electrical feasibility, utility requirements, energy goals, permitting, installation responsibilities, commissioning, monitoring, training, and support after activation. A qualified provider should explain what is known, what still requires field verification, and which decisions depend on your property and business operations.
Take the Next Step With a Site-Specific Review
Every commercial property has different roof, electrical, energy-use, and utility considerations. A project-specific review can help your team identify the right questions, clarify feasibility, and compare next steps with greater confidence. To discuss your goals and request a site-specific commercial solar review and estimate, Get An Estimate from AMECO Solar & Roofing.
9.25.2026
Do not compare installers by system size alone. Ask each company to explain how its design fits your roof, electricity use, equipment, and utility requirements. A low headline figure or broad promise does not show what is included.
When comparing solar companies Fresno homeowners can consider, start with evidence. Confirm each provider serves your address. Request a site-specific design. Compare written details on permits, equipment, warranties, and support.
Use the same questions with each installer. Ask for unclear assumptions in writing. Check whether the proposal names equipment models and explains production assumptions. It should assign permit and utility coordination duties. If roofing work or a battery is included, clarify its scope and purpose.
Separate California-wide experience from verified local references and service availability. Confirm both directly. Commercial properties may need site-specific usage, roof, and engineering assessments. A residential package is not a substitute for a commercial review. Use the checklist below to compare providers.
Request a project-specific estimate
How Fresno Property Owners Can Compare Solar Companies
When evaluating solar companies Fresno property owners may encounter online, verify each proposal. Compare documented work, design assumptions, permit responsibilities, equipment, warranties, and support. A star rating or "best installer" label cannot show project fit.
Check whether each company serves your address and property type. A Fresno search result does not prove a provider can take your project. Ask for recent references or similar work. Confirm the company's license and insurance with current records.
Compare the same project scope in every proposal. Ask what happens if the roof needs repair. Find out how the installer chose system size. Check the equipment list and confirm who handles permits and utility steps. Ask who responds if monitoring or equipment needs attention. If a battery is included, ask which circuits it supports.
This guide focuses on Fresno County permits and other due-diligence questions. It does not rank providers or assume one installer fits every property. Roof, energy use, utility territory, equipment, and project needs shape the design. The U.S. Department of Energy recommends interviewing several installers. Compare their answers and written scope.
How Should Fresno-Area Owners Evaluate Roof and System Design?
A solar proposal should start with the building, not a preset panel count. Ask how roof condition, layout, and remaining life affect the project. If repairs may be needed soon, compare doing them before solar installation with revisiting the roof later. The proposal should name who handles roof work and how mounting details protect it.
Read how to evaluate your roof before solar. Ask which attachment method suits your roof. Find out how the installer will waterproof penetrations and who handles roof warranty questions. The proposal should address these details for your building. A general assurance that the installation is roof-safe is not enough.
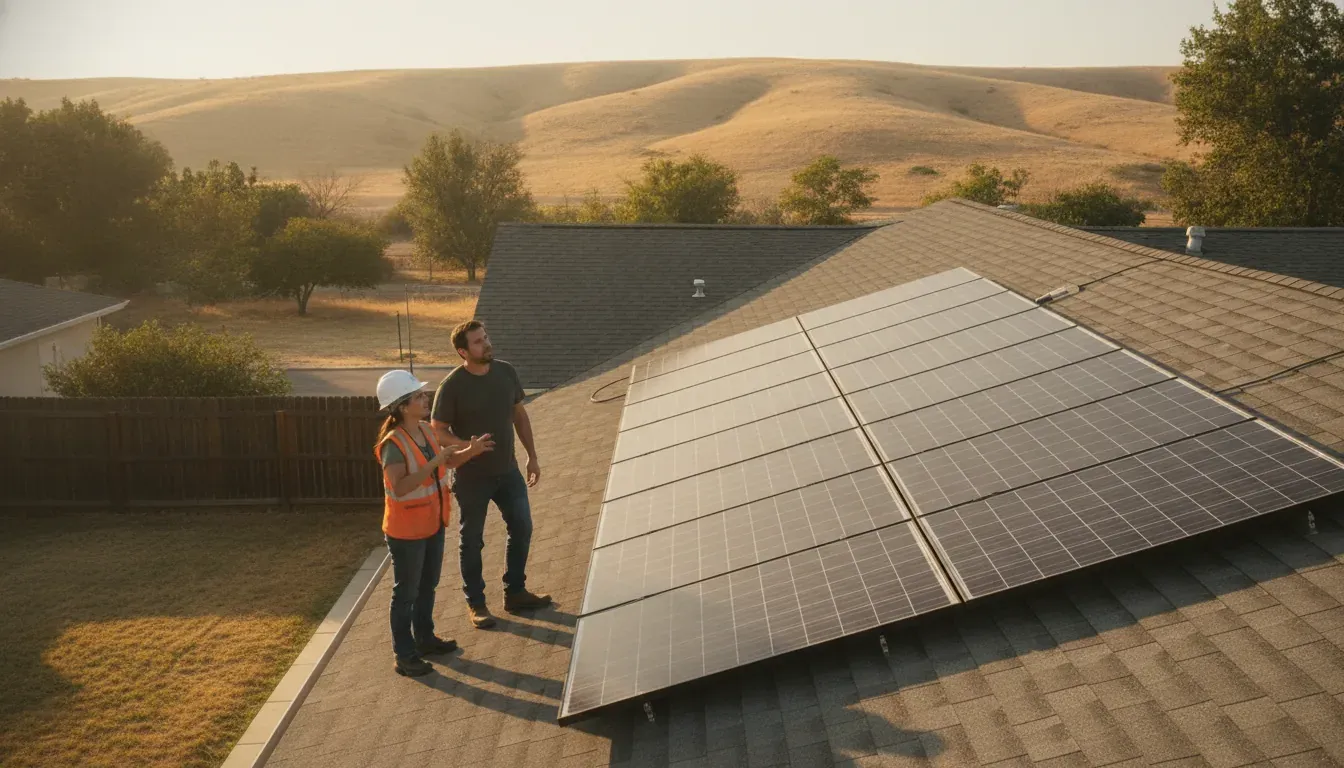
System sizing should reflect electricity use and the owner's goals. For a home, discuss current use, likely changes such as an electric vehicle, and backup needs. A business assessment may consider operating schedules, equipment loads, and demand patterns. Tie battery design to priority backup loads. Do not assume it will power every circuit.
Ask what was inspected and what still needs confirmation. Roof structure, electrical service, panel location, shade, and roof area can affect design. A remote review can inform an initial proposal. Ask if an on-site structural, roof, and electrical assessment is needed before final design. The solar system planning guide offers more questions on matching a system to use and roof conditions.
Commercial buildings can have different structural and engineering needs from homes. Roof construction, facility loads, and mounting methods may vary. Compare the assessment scope and ask who handles engineering and coordination. AMECO's commercial project information describes its offerings. Each property still needs its own evaluation.
Confirm that the installer currently serves your Fresno-area address. A California-wide presence alone does not establish local availability. The proposal should state assumptions, open site questions, roof responsibilities, and design decisions that may change after inspection.
What Should Installers Handle in Fresno Solar Permitting?
Before comparing proposals, identify the authority that reviews the property. Fresno County requirements do not apply to every address in the same way. A property inside a city may follow city rules. An unincorporated property may fall under county jurisdiction. Ask which authority serves your site and which permit applies. Avoid a vague claim that the contractor "handles permits."
Fresno County uses SolarAPP+ for eligible roof-mounted systems in its jurisdiction. Its confirmation is not the building permit. The permit application is still required. Other solar applications use a different permit subtype. Battery-only and panel-upgrade-only applications use a construction permit. See the County's SolarAPP+ permit details. Confirm requirements for your property with its authority.
Ask the installer to separate building permits, electrical or structural reviews, inspections, and utility interconnection. Interconnection is a utility approval, not a local permit. The U.S. Department of Energy's installer-selection guidance recommends comparing several installers.
Get responsibilities in writing. Ask each company:
| Compare | Ask the installer | What to verify |
|---|---|---|
| Site and roof | What roof, shade, and electrical checks are complete? | Written assumptions and any open inspections |
| Permits | Which authority serves the address, and who submits? | Permit application, inspection, and utility roles |
| Equipment | Which exact models and monitoring system are proposed? | Itemized equipment list and substitution process |
| Warranty and service | Who covers equipment, workmanship, and roof penetrations? | Written terms, exclusions, and support contact |
- Who confirms which city or county authority serves the address?
- Will your team submit and track permits, and provide the permit and inspection results?
- For a battery or panel upgrade, which permit pathway applies?
- Who submits utility interconnection and confirms permission to operate?
- Which approvals and inspections must be done before activation?
Compare actual answers, not broad promises. A clear proposal names who submits documents and handles revisions. Learn about the professional solar installation process. Compare each provider's scope with your property's needs.
How to Compare Solar Equipment and Proposals
A proposal should show what the system includes and how the estimate was built. Ask each installer to name every major component model. Avoid labels such as "premium panels" or "high-efficiency inverter." The equipment list should cover modules, inverters, monitoring, and any battery. Ask how substitutions are approved.
Compare system size and design assumptions. Consider capacity alongside electricity use and energy goals. Do not treat size alone as a measure of value. Check which usage data and time period the proposal uses. Ask how production was estimated. If proposals differ, ask which inputs explain the gap.
Site assumptions matter in Fresno. Ask whether design reflects roof direction, shade, usable area, and roof or electrical limits. The proposal should state its assumptions and explain what happens if a site visit changes them. If production estimates use degradation assumptions, ask for the source. Do not compare estimates based on different assumptions as equals.
Clarify monitoring before signing. Ask what the platform measures and how you access it. Find out whom to contact if data is missing or an alert appears. Confirm required hardware and software are included. Check for written support terms. Monitoring shows activity, but does not guarantee production or response times.
Compare written scope, not just equipment. Check whether design, permits, utility coordination, installation, inspections, activation, and handoff are included. Ask if roof work or electrical upgrades are excluded or need assessment. Find out who owns each task and how changes are handled. Warranty documents should name responsible parties and explain coverage for equipment, workmanship, and roof penetrations. Terms vary by project.
For a clearer starting point, use this guide to plan a solar system for your home. Then review AMECO solar installation services. An itemized proposal makes it easier to ask informed questions and compare options on the same basis.
How Do Warranties, Batteries, and Ongoing Support Compare?
A proposal can use "warranty" for several agreements. Ask for the documents. Compare who is responsible, what is covered, and how to request service. Terms depend on equipment, installation scope, and exclusions.
Separate equipment coverage from installation coverage
Manufacturer warranties cover specified equipment, such as modules, inverters, or batteries. Terms differ by model. Check the covered component, term, conditions, and claim process. Ask if the installer helps with manufacturer claims or if you contact the manufacturer directly.
Workmanship coverage differs from equipment coverage. It addresses the installer's work, not every equipment failure. Ask how the agreement handles roof penetrations and leaks. Roofing material, roofing workmanship, and solar installation coverage may be separate. Review roofing warranty types. Get the responsible party and claim process in writing.
Match battery design to the outage plan
Battery proposals should start with your outage needs. Name priority loads, such as refrigeration, lights, or key equipment. Ask which circuits the proposed system supports. Design depends on loads, electrical setup, battery, and goals. A battery does not automatically power the whole property.
Compare battery model and configuration. Ask what happens when stored energy runs out. Ask how the system works with solar during an outage. Review assumptions about energy use. Compare battery storage options by intended use, not package name.
Clarify monitoring and support ownership
Monitoring can show system status, but an app is not ongoing service. Ask who reviews alerts. Clarify whether you or the provider should notice a problem and start troubleshooting. Confirm whom to contact after installation. Ask if support helps diagnose production or battery issues, and which problems go to a manufacturer or utility. Get responsibilities, fees, and exclusions in writing. This is more useful than a broad promise to "be there" after the project is complete.
A Practical Way to Shortlist Solar Companies Fresno
Use the same request with each provider. Ask about local experience and distinguish evidence from marketing language. A company may serve a wide region without a nearby office or work on your roof type.
- Confirm project fit. Ask whether the company serves your address and handles projects like yours. Request references. Confirm licensing and insurance with current records. The DOE recommends checking installer credentials and experience.
- Request a site-specific design. Ask how size relates to your energy use, roof condition, shade, electrical setup, and future plans. For commercial properties, request the engineering assumptions.
- Make scope clear. Ask who inspects the roof, handles repairs, installs mounts, gets permits, arranges inspections, and coordinates utility interconnection. Ask what is excluded and what could change the scope.
- Compare equipment and documents. Request models for panels, inverters, monitoring, and batteries. Ask for warranty terms and who covers workmanship and roof penetrations.
- Clarify the handoff. Ask who activates the system, explains monitoring, responds to service requests, and describes battery limits. Get the support process in writing.
Use this quick checklist before signing:
- Are assumptions and exclusions stated in a proposal?
- Can the company document its license, insurance, and relevant references?
- Are permit and utility responsibilities assigned?
- Do warranty papers identify the covered component, term, and claim contact?
- Does the battery proposal name the priority loads rather than promise undefined whole-property backup?
AMECO outlines its history and services on its company background page. Confirm current service for your address. Review a project-specific scope rather than infer coverage from general company information.
Request a project-specific estimate
Frequently Asked Questions
Who is the most reputable solar company?
No single company is right for every property owner. Judge reputation with current, verifiable information. Check project experience, license and insurance, system design, permit duties, warranty documents, references, and support. Reviews can suggest questions, but do not replace checking the scope and terms.
Is solar still worth it in California?
Solar value depends on energy use, roof condition, utility rules, equipment, project cost, and incentive eligibility. Ask installers to show their assumptions. Verify utility and incentive details for your situation. Do not rely on a generic savings promise.
How much does it cost to put solar panels on a 2,000-square-foot house?
Floor area alone cannot determine system size or cost. Providers must consider electricity use, roof layout and condition, shading, electrical equipment, utility territory, design, and storage. Compare proposals based on the same usage data. Ask which items could change the scope.
What is the 20% rule for solar panels?
The phrase "20% rule" does not identify a universal solar requirement. Ask who uses it to name the code, utility rule, contract term, or design assumption. Request a source. Requirements depend on the project and jurisdiction. Confirm details with the permitting authority, utility, or qualified installer. Do not treat an unexplained percentage as a standard.
For local permitting, consult the applicable county or city building department and ask each installer to explain the process for your address.
Compare Your Project With Clear Scope and Assumptions
A sound solar decision starts with a clear picture of the roof, energy use, design, permits, and support. For a Fresno-area property, confirm an installer serves your address. Request a written assessment of its assumptions and responsibilities. AMECO Solar & Roofing has provided California solar and roofing services since 1974. Its approach can coordinate roof and solar work when appropriate. Confirm project fit and availability for your property.
Ask AMECO about a project-specific estimate and confirm service availability for your address.
9.21.2026
AMECO Solar & Roofing was named a 2026 Top Solar Contractor by Solar Power World. The annual list recognizes the most influential solar contractors in the United States based on the kilowatts each company installed the previous year, and AMECO's placement reflects more than five decades of consistent, high-quality work across California. For homeowners in Los Angeles, Orange County, Sacramento, and the Central Valley, that national recognition is a useful signal when you are comparing solar installers for your own project.
Get An Estimate - Talk with an AMECO solar consultant to see what a custom solar system looks like for your home.
What Is the Solar Power World Top Solar Contractors List?
Solar Power World is one of the solar industry's most widely read publications, covering installation technology, project development, and market news. Every year it publishes the Top Solar Contractors List, which ranks companies by the total kilowatts (DC) they were involved with installing in the United States during the prior year. The 2026 list ranks companies based on their 2025 installation volume, and it also publishes specialized sub-lists by market, service type, and state.
Being named to the list is not a paid award. It is earned through verifiable project volume, and each company submits installation records for review. That is why the list carries weight for homeowners: a contractor on it has demonstrated real, documented activity, not just a strong website or a busy marketing campaign. AMECO Solar & Roofing announced the recognition in a press release that outlines the milestone and what it reflects about the company's work across California.
AMECO on the 2026 Top Solar Contractors List
On the 2026 list, AMECO Solar & Roofing was ranked No. 227 among solar contractors nationwide, with 4,479 kilowatts of solar installed in California during 2025. The company also appears on the 2026 Top California Solar Contractors list, which highlights contractors doing meaningful installation work within the state.
The recognition builds on a track record that stretches back to 1974, when AMECO began helping California homeowners and businesses capture energy from the sun. Being ranked on a national list after 50 years of operation is a strong indicator of staying power in an industry where many companies do not last a decade.
What Does the Recognition Mean for California Homeowners?
A national ranking like this matters to you because solar is a long-term investment. Your system is expected to produce power for 25 years or more, so the company that designs and installs it needs to be around to honor warranties, service the equipment, and answer your questions. An installer named to the Solar Power World list has the scale, experience, and reputation to offer that kind of stability.
For California homeowners specifically, choosing an established local installer matters even more. California's solar market has gone through rapid change, from shifting net metering rules to updated building codes and evolving battery incentives. A contractor needs current knowledge of local utility requirements and permitting processes, which comes from doing the work consistently, year after year.
What Sets an Award-Ranked Solar Contractor Apart?
Installation volume is only part of the picture. A contractor that ranks nationally usually pairs that volume with verified technical credentials and a commitment to quality workmanship. In AMECO's case, the recognition aligns with manufacturer-backed designations that homeowners can verify directly:
- REC Certified Solar Professional, two years in a row. REC is a leading solar panel manufacturer, and its certification program recognizes installers that meet strict standards for training, quality, and customer service. AMECO's continued REC recognition, including its REC Gold Tier status for 2026, means factory-backed confidence in how REC panels are specified and installed.
- Tesla solar roof certified installer. Tesla authorizes a small group of installers for its solar roof system, which demands precise integration between roofing and solar components.
- Owens Corning Solar PROtect certification. This designation supports roofing systems engineered to hold solar installations securely over the life of the roof.
- Enphase silver installer status. Enphase microinverter and battery systems are some of the most common in California, and installer status reflects demonstrated familiarity with the equipment.
These credentials matter because they tie directly to the equipment on your roof. When an installer holds manufacturer certifications, the warranty chain stays intact, and the company has proven it knows how to install that specific hardware correctly.
Why Solar and Roofing Belong Together
AMECO's integrated approach sets it apart in another way that directly affects solar performance. Because the company handles solar installation and roofing under one roof, it can coordinate every layer of the project. That matters on tile and composition roofs, where the mounting system must integrate with the roofing material, and it matters when a roof is near the end of its life and should be replaced before panels go up.
Handling both trades in-house also makes the process simpler for you. One team handles the assessment, the design, the permits, the installation, and the follow-up, so there is a single accountable partner rather than multiple companies coordinating around your home. For a deeper look at why this matters, see our guide to why solar and roofing should be done together.
Calculate Your Project - Use AMECO's solar cost calculator to estimate what your system could produce and save.
How to Choose a Solar Installer You Can Trust
Recognition and credentials are strong starting points, but your final decision should also consider the practical details of your specific home:
- Roof condition comes first. If your roof is approaching the end of its service life, plan for roofing work before or alongside the solar installation. A tile roof in California has different mounting and waterproofing requirements than other surfaces.
- Ask about the equipment spec. A good installer explains exactly which panels, inverters, and battery components are included and why they fit your energy profile.
- Verify the contractors. Look for manufacturer certifications like the ones above, and confirm the company services what it installs.
- Consider the full energy picture. With California's evolving rate structures, the value of solar often improves when it is paired with battery storage that shifts your usage.
- Demand a custom design. Every roof, shade profile, and usage pattern is different. A top installer designs around your home rather than pushing a one-size-fits-all package.
AMECO's team has designed and installed custom systems for California homeowners for decades, and the same in-house staff that handles design and permitting also performs the installation. There are no third-party subcontractors on your roof, which keeps quality control and warranty responsibility in one place.
Frequently Asked Questions
How does Solar Power World rank Top Solar Contractors?
Solar Power World ranks contractors by the kilowatts (DC) of solar they were involved with installing in the United States during the prior year. The 2026 list uses 2025 installation data, and sub-lists break down results by market, service type, and state.
Is the Top Solar Contractors list a paid award?
No. Companies submit their installation records, and rankings are determined by verifiable project volume rather than sponsorship. That makes the list a useful, independent signal of a contractor's real activity.
Why does installer recognition matter for a residential solar project?
Solar systems carry 25-year warranties, so the stability and expertise of the installer matter for the life of the system. Manufacturer certifications and national rankings indicate a company with the training, scale, and track record to install and service your equipment properly.
Can AMECO handle both solar and roof replacement for my project?
Yes. AMECO Solar & Roofing is a single company that provides solar installation, roofing, battery storage, and EV charging. Coordinating both trades under one roof streamlines permitting, scheduling, and warranty responsibility for your project.
Ready to Start Your Solar Project?
Being named a 2026 Top Solar Contractor by Solar Power World is recognition of work AMECO has done for California families and businesses for over 50 years. If you are ready to see what a custom solar system could do for your home, the first step is a free consultation and custom design.
Schedule Now - Get a custom estimate from an award-recognized California solar and roofing installer.
9.16.2026
Installing solar in California is not just a matter of placing panels on a roof. The project connects your home, roof condition, electrical service, local permitting authority, and utility territory, so the right sequence matters from the first assessment through system activation.
A solar system installation guide should explain how homeowners evaluate electricity use and roof readiness, choose a project-specific design, complete permits and inspections, obtain utility approval, and begin monitoring the system. Requirements, costs, timelines, and incentive eligibility can vary by property, city, equipment, utility, and homeowner circumstances.
For California homeowners, preparation is especially important when a roof may need repair, when future electrical loads are changing, or when battery storage could support outage resilience. The process below breaks each decision into practical steps, starting with the scope a reliable guide should cover before any installation work begins.
What does a California solar system installation guide need to cover?
A useful guide should show the project as a sequence of decisions, not as a single installation appointment. The process generally starts with understanding the home's electricity use and evaluating the property. Then moves through roof and electrical review, system design, permitting, construction, inspection, utility interconnection, activation, and monitoring. The U.S. Department of Energy recommends reviewing previous electricity bills because annual and seasonal usage helps inform system sizing. It also recommends comparing installers and asking them to assess the roof. Read the DOE's homeowner solar guidance for additional questions.
California conditions make the order and details especially important. A roof's age, replacement history, condition, shade, orientation, and available space can affect the design. An installer, roofing expert, or structural engineer can help evaluate whether the roof is suitable. If repair or replacement is needed, coordinating that work with solar may prevent the need to remove and reinstall equipment later. Roof preparation can involve repairs, reinforced mounting points, integrated flashing, and weatherproofing, depending on the property.
What changes from one California home to another?
System sizing should reflect actual energy use, usable roof space, equipment choices, and expected future consumption rather than a standard size for every household. A site assessment may use satellite imagery and utility-bill analysis as an initial screen. But on-site measurements are important for confirming roof condition, structural capacity, electrical compatibility, and final dimensions. Shade and the home's position relative to the sun also affect the property's solar potential.
The local approval path varies as well. Local governments generally require a permit before rooftop panels are installed, and a professional inspection follows construction. The Department of Energy notes that permitting and inspection rules, details, and fees differ by jurisdiction. After approval, the utility connection process depends on the service territory. In California, Rule 21 describes interconnection, operating, and metering requirements, while each investor-owned utility administers its own version. Homeowners may be served by PG&E, SCE, SDG&E, LADWP, or another utility, so a guide should not promise one universal timeline or approval outcome.
What should homeowners track during the project?
- Roof condition, structural questions, and any repair or replacement scope.
- Electricity-use history, future loads, and the assumptions behind system sizing.
- Equipment, monitoring, battery options, permits, inspection responsibility, and utility paperwork.
- Which steps are complete before installation, permission to operate, and system handoff.
For California homeowners, an integrated team can help coordinate the solar and roofing portions of the work. AMECO's solar solutions process is designed to connect site evaluation, design, permitting, installation, activation, and support, while the final scope remains specific to the home and utility.
How do you prepare your home for solar installation?
Good preparation gives the installer a clearer picture of your home's energy needs and the conditions that will shape the design. Start by collecting about 12 months of electric bills, including seasonal usage changes if available. Reviewing bills helps estimate annual and seasonal electricity needs, while an energy audit can identify efficiency improvements worth addressing before the system is sized. Note planned changes too, such as an electric vehicle, heat pump, pool equipment, addition, or other large electrical load.
Next, look at the roof as part of the project rather than treating it as a separate detail. Record the approximate installation or replacement date, any history of leaks or repairs, and the roofing material. A site assessment should verify roof condition, structural capacity, electrical compatibility, and final dimensions. If the roof may need work, coordinate repairs or replacement before panels are installed. Solar-ready roofing can involve reinforced mounting points, integrated flashing, and weatherproofing. AMECO's guide to roofing for solar panels provides additional context on this decision.
Shade and roof layout also deserve a practical review. Notice trees, neighboring structures, chimneys, vents, and other features that could affect sunlight during the day. Orientation, available roof area, slope, and shading all influence the usable solar potential. Satellite tools and a 3D model can support an early review, but they do not replace an installer evaluation of the actual property. Take photos of each roof plane and note anything that may affect access, such as a narrow driveway, locked gate, steep terrain, or fragile landscaping.
- Gather recent electric bills and identify your typical and highest-use months.
- List future loads, including an EV charger, heat pump, pool, workshop, or home addition.
- Document roof age, material, leaks, repairs, skylights, vents, and attic concerns.
- Identify shade sources and note how they change from morning to afternoon.
- Locate the main electrical panel and note any visible capacity, damage, or prior upgrades.
- Confirm how an installation crew can reach the roof, electrical equipment, and staging area.
- Write down questions about equipment, battery storage, monitoring, maintenance, and who handles permits and utility coordination.
California projects also depend on the home's utility territory and local requirements. Homeowners in PG&E, SCE, SDG&E, or LADWP areas may encounter different application and interconnection steps, so ask which requirements apply to your address. You should not attempt electrical or structural work yourself. Instead, bring your goals and observations to the design appointment, then use the proposal to confirm assumptions about roof work, future loads, equipment, and responsibilities. Reviewing custom solar system design can help you prepare for that conversation.
What happens during solar system design?
Once the initial site review is complete, the design stage turns your home's conditions and energy goals into a system that can be evaluated before installation. A designer considers recent electricity use, roof area, orientation, shade, electrical service, future loads, and the local utility requirements. The goal is not to choose the largest possible array. It is to develop a practical configuration that fits the property and the way your household expects to use electricity.
How is the array layout and system size determined?
The proposed layout shows where panels could be placed and how roof sections affect the design. Solar potential depends on location, the home's position relative to the sun, shading. And the photovoltaic system selected, so a satellite-based estimate is useful but does not replace a detailed evaluation. The Department of Energy recommends speaking with an installer for that closer assessment. Reviewing previous electricity bills also helps establish annual and seasonal energy needs.
System sizing must balance energy use, available roof space, equipment, and forecast consumption. An on-site visit can verify roof condition, final dimensions, structural load capacity, and electrical compatibility. If the roof needs work, the design conversation should address repairs or replacement before panels are mounted. Solar-ready roofing may include reinforced mounting points, integrated flashing, and weatherproofing. AMECO's roofing solutions can be reviewed alongside the solar design when both scopes need to be coordinated.
Which equipment and battery options are reviewed?
The proposal should explain how the panels, racking, inverter, monitoring, and any battery fit together. Inverters convert the panels' output into electricity the home can use, while monitoring helps track system performance. AMECO lists REC panels and SolarEdge or Enphase inverter systems among its equipment options, but the appropriate selection remains project-specific. A battery is an option to evaluate when outage resilience, evening energy use, or a different approach to managing solar production matters to the homeowner. It should be assessed with the home's loads, electrical service, utility territory, and operating goals in mind.
What should you review in the proposal?
Before approving the project, look for the proposed panel locations, system capacity, inverter configuration. Battery scope if applicable, roof work, electrical path, monitoring access, and assumptions behind production estimates. Ask which figures depend on future utility rates, household consumption, shade, equipment, or eligibility rather than treating them as guarantees. AMECO's custom solar system design guide offers additional context on how these decisions are tailored.
A 3D model or 3D home visualizer can make the proposed array easier to understand from the ground. Use it to discuss panel placement, roof visibility, and design alternatives before permitting begins. For project-specific figures, the solar cost calculator can provide an initial planning reference, while the final proposal should reflect the verified property and utility conditions.
How do permits and utility approvals work in California?
Permitting and utility approval are separate parts of a California solar project. The local authority having jurisdiction, or AHJ, reviews whether the proposed work meets applicable building, electrical, fire, and structural requirements. The serving utility reviews how the system will connect to the electric grid. These steps protect the home, workers, utility equipment, and the broader distribution system.
For rooftop solar, the installer typically prepares a permit package with the site plan. Equipment specifications, electrical design, structural information, and other documents requested by the city or county. Local governments generally require approval before installation, and an inspection follows construction to verify that the array was installed safely. The U.S. Department of Energy notes that permitting and inspection rules, details, and fees can vary by jurisdiction. Administrative errors or local backlogs can also affect the review process.
California homeowners should also expect utility paperwork. Under California Rule 21, interconnection requirements address how generating facilities connect, operate, and use metering while protecting grid safety and reliability. The California Public Utilities Commission explains that PG&E, Southern California Edison, and San Diego Gas & Electric each administer Rule 21 in its own service territory. LADWP has its own utility procedures. In practice, application forms, technical requirements, review steps, and approval sequence can differ based on the utility serving the property.
| Review. | Primary reviewer. | What it covers. |
|---|---|---|
| Construction permit. | Local AHJ. | Plans, code compliance, and project approval. |
| Final inspection. | Local AHJ. | Installed equipment, wiring, mounting, and safety. |
| Interconnection. | Serving utility. | Grid connection, operating requirements, and authorization. |
Homeowners can make the process easier by providing accurate utility bills and confirming the serving utility. They should also disclose planned electrical upgrades and respond promptly when the installer needs signatures or access.
Ask who is responsible for submitting the permit and interconnection applications, tracking corrections, scheduling inspection, and requesting permission to operate. Do not assume that paying a deposit or completing roof work means the system can be switched on. The system should be energized only after the required inspections and utility authorization are complete.
There is no universal California approval timeline. City or county workload, project complexity, correction requests, utility territory, service-panel conditions, and whether storage is included can all change the sequence. The CPUC's Rule 21 guidance is a useful starting point, while AMECO's solar solutions page explains how site conditions and system design inform the project. A qualified installer should confirm current requirements for the specific property rather than promise a fixed approval date.
What happens on installation and inspection day?
Installation day is the point where the approved design becomes a working system. A professional crew should follow the permitted plans, protect the home while work is underway, and explain any field condition that requires a decision. Homeowners should not perform electrical or rooftop work themselves. The U.S. Department of Energy notes that permitting and inspection help confirm that a solar installation is safe and properly installed.
- Prepare and protect the work area. The crew reviews access points, stages equipment safely, and protects landscaping, walls, walkways, and roofing surfaces from unnecessary damage. Before work begins, confirm where materials will be placed and how the crew will keep debris contained.
- Verify the roof and mounting locations. Installers confirm the approved layout against the roof's actual condition. They identify rafters or other structural attachment points, account for setbacks and obstructions, and install flashing and weatherproofing around penetrations. If the roof needs repair or replacement, coordinate that work before mounting solar. AMECO's roofing for solar panels guidance explains why roof condition matters to the installation plan.
- Install the racking and modules. The crew secures the racking system, then attaches the solar modules according to the approved design. They check alignment, attachment points, clearances, and cable management as the array takes shape. The final module count and placement should match the documents submitted for permitting, unless a documented field change is approved.
- Mount inverter equipment and complete wiring. Inverters convert the electricity produced by the modules into usable household power. Depending on the design, the project may use string inverters, microinverters, or related equipment. Installers connect the array to the inverter and electrical equipment, label circuits, install required safety components, and keep conductors protected from weather and physical damage. See AMECO's overview of essential solar system components for a component-by-component explanation.
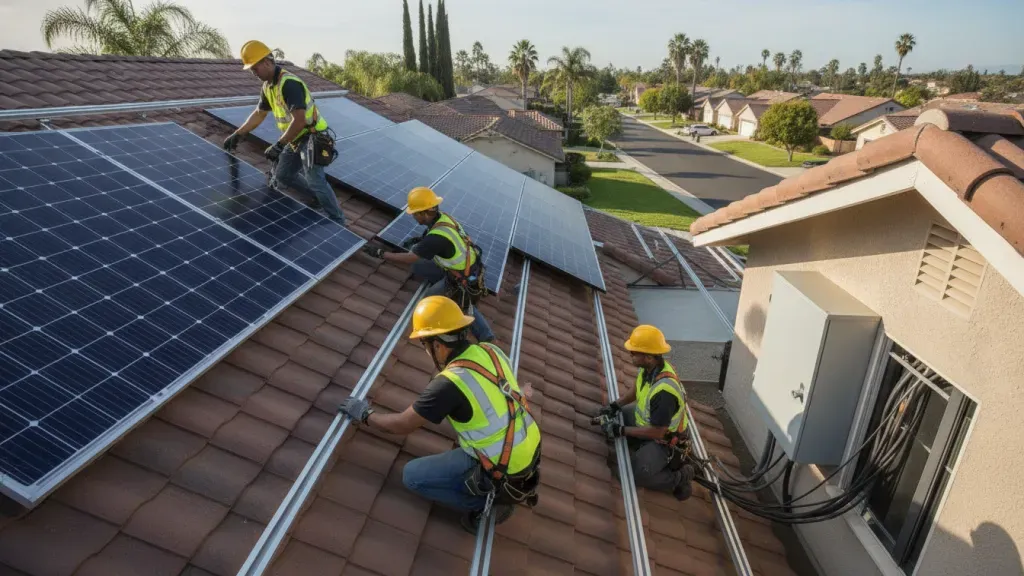
- Commission and test the system. After installation, the crew checks connections, verifies equipment communication, and performs commissioning tests. Monitoring equipment should be configured so production data can be viewed after activation. The installer should also review shutdown procedures, basic system operation, and any battery or backup features included in the design.
- Complete the local inspection. The permitting authority or its inspector reviews the completed array and related electrical work for compliance with the approved plans and applicable safety codes. California requirements vary by city, county, and project. The Department of Energy confirms that local governments have different permitting and inspection rules.
- Resolve corrections and preserve records. If the inspector identifies a correction, the installer addresses it and schedules a reinspection when required. Ask for copies of the final plans, inspection approval, equipment documentation, monitoring instructions, and records of any approved changes. Utility interconnection and permission to operate generally follow the permitting and inspection stage, so the system may not be ready for normal operation immediately after the crew leaves.
A careful handoff is as important as the physical installation. Before signing off, walk the site with the installer, note the location of shutoffs and equipment, and confirm who will coordinate remaining utility steps. The sequence and timing depend on the property, local authority, equipment, and utility territory, so treat any general installation timeline as an estimate rather than a promise.
How are interconnection, activation, and monitoring completed?
After the installation passes its required inspection, the project moves from construction into authorization and operation. The local authority having jurisdiction confirms that the installed array meets applicable safety requirements. The utility then reviews the interconnection materials and completes the steps required to connect the system to the grid. The U.S. Department of Energy describes this sequence plainly: utility connection follows permitting and inspection, after which the system can begin generating power. Requirements and responsibilities can vary by jurisdiction, property, and utility territory.
In California, the interconnection process is shaped by the utility serving the home. California Public Utilities Commission Rule 21 describes interconnection, operating, and metering requirements for certain generating facilities. While each investor-owned utility administers the rule in its own territory and maintains its own version. That means a homeowner in PG&E, Southern California Edison, or San Diego Gas & Electric territory may encounter different forms, technical requirements, or review steps. LADWP customers also need to follow that utility's applicable process. The installer should identify the responsible utility, submit the required documentation, and explain which actions, if any, remain with the homeowner.
What happens before the system is turned on?
Before activation, the project team confirms that inspection documentation is complete and that the utility has authorized operation. A meter change, meter reconfiguration, or other utility-side step may be necessary, depending on the existing service and the approved system design. Do not assume that energized equipment means the system is authorized to export electricity. The system should be operated according to the utility's approval and the installer's instructions.
A proper handoff also includes system records. Keep the final design or as-built information, inspection approval, interconnection authorization, equipment documentation, and monitoring login details in one place. These records can help when troubleshooting, transferring property information, requesting service, or evaluating future electrical work. They also make it easier to understand which equipment is producing power and which component may need attention if performance changes.
How does monitoring support the homeowner?
Monitoring equipment reports system activity through a gateway, inverter platform, or manufacturer application. During handoff, the installer should show you how to view production, recognize normal status indicators, and report an alert. Monitoring is a diagnostic aid, not a guarantee of a particular production level. Weather, shade, equipment settings, roof conditions, utility interruptions, and household electricity use can all affect what you see.
If outage resilience is a priority, ask how a battery changes the operating sequence. A battery may store available solar energy for later use, but backup coverage depends on the selected equipment, essential-load circuits, electrical configuration, and approved design. Review solar battery storage installation considerations before finalizing the equipment package, especially if your household relies on medical devices, home offices, or other critical loads.
Once authorization and handoff are complete, retain the records and use monitoring to spot unusual changes rather than to make assumptions from a single day's data.
What should homeowners ask before approving the project?
Before signing a solar agreement, make sure you understand what is included, who is responsible for each approval, and how the system will be supported after activation. A clear proposal should connect the design to your home's energy use, roof condition, electrical setup, equipment choices, and utility territory rather than relying on a one-size-fits-all package.
- What exactly is included in the scope? Ask whether the proposal covers site measurements, system design, equipment, racking, wiring, permitting, installation, inspection, utility interconnection, commissioning, monitoring setup, and homeowner training. Confirm which items are excluded or may require a change order.
- Is the roof ready for the project? Ask when the roof was installed or last replaced, whether its condition and structure have been evaluated. And how penetrations, flashing, weatherproofing, and future roof work will be handled. If repairs or replacement are needed, clarify whether the solar and roofing work will be coordinated. AMECO's guide to roofing for solar panels explains the issues worth reviewing.
- Why were these system components selected? Request the panel, inverter, racking, and monitoring specifications, along with an explanation of how they fit the property's energy needs and roof layout. If a battery is included or under consideration, ask what loads it is intended to support. How backup operation works, and what additional equipment or approvals may be required.
- Who handles permits, inspection, and utility paperwork? Local permitting and inspection requirements vary, and California utility procedures can differ by territory. Confirm who prepares and submits the permit package, responds to corrections, files the interconnection application, and tells you when the system is authorized to operate. Do not assume that installed means fully interconnected.
- What will I receive after commissioning? Ask how monitoring access will be set up, what normal production information you should review, and whom to contact if the system reports an issue. Request copies of the final design, equipment manuals, inspection approval, utility correspondence, monitoring instructions, and applicable service or warranty documents.
Also ask how future changes, such as a main-panel upgrade, electric vehicle, heat pump, or battery, could affect the design. Comparing these answers across proposals is more useful than comparing system size alone. For more context on the equipment itself, review the guide to essential solar system components.
Get An Estimate when you are ready to discuss a project-specific design and approval path.
Frequently Asked Questions
Can I install solar panels myself?
Homeowners can research equipment and prepare questions, but rooftop solar should not be treated as a do-it-yourself electrical project. A qualified installer must evaluate the roof, structural conditions, electrical service, safety requirements, permits, inspections, and utility interconnection. Professional installation also helps coordinate the solar array with roofing work when the roof needs repair or replacement.
How do I know whether my roof is ready for solar?
Review the roof's age, replacement history, condition, orientation, shade, and available area. A solar installer, roofing professional, or structural engineer can assess solar suitability, while an on-site evaluation can verify roof condition, dimensions, electrical compatibility, and structural capacity. If the roof is near the end of its serviceable life, resolve that question before mounting panels.
Who handles solar permits in California?
The installer commonly prepares and submits the permit package, but the authority having jurisdiction reviews the project under local requirements. California permitting and inspection rules, details, and fees vary by jurisdiction, so homeowners should confirm responsibilities with their installer and local building department. The U.S. Department of Energy permitting guidance explains that local governments generally require a permit before rooftop panels are installed.
When can my system be turned on?
After installation, the project typically needs a local inspection and utility interconnection approval before normal grid-connected operation. The exact sequence depends on the authority having jurisdiction and utility territory. In California, investor-owned utilities administer their own versions of Rule 21, so requirements can differ between PG&E, SCE, and SDG&E territories. The CPUC describes these interconnection requirements in its Rule 21 guidance.
Get started with a project-specific solar estimate
Every California solar project depends on the home, roof, energy use, equipment, utility territory, and any battery backup goals. A project-specific review can help you understand the right sequence, identify questions about roofing or electrical readiness, and plan the next step with clearer expectations. To request an estimate for solar, roofing, or battery backup planning, get an estimate from AMECO Solar & Roofing.
9.16.2026
For a California business owner. Solar panel installation commercial buildings projects are less about placing panels on an available roof and more about coordinating several technical decisions in the right order. The process typically begins with energy-use analysis and a preliminary review of the facility. It then moves through roof and structural assessment, electrical planning, system design, permitting, utility interconnection, construction, inspection, commissioning, and operational handoff.
The commercial solar process starts by confirming whether the building, roof, electrical infrastructure, operating schedule, and utility territory can support a practical project. A preliminary review may use satellite imagery and utility bills. But a qualified site assessment is important for validating roof condition, structural capacity, solar exposure, equipment locations, and available interconnection capacity. The U.S. Department of Energy notes that feasibility work should also account for utility policies, load profiles, tariffs, and project economics: DOE commercial solar feasibility guidance.
That sequence matters because a facility can have ample roof area yet face constraints involving aging roofing. Switchgear, tenant operations, fire access, or the requirements of PG&E, SCE, or SDG&E. An integrated solar and roofing review can surface those issues before engineering and permitting create avoidable revisions. AMECO Solar & Roofing evaluates the property, energy objectives, and project requirements together, with final design and financial considerations tailored to the building and utility territory. The first practical decision is therefore not how many panels to order, but what the commercial building must confirm before solar design begins.
Get An Estimate to begin a property-specific review.
What Should a Commercial Building Confirm Before Solar Design?
Feasibility work should answer a practical question before anyone finalizes equipment or array placement: can the building. Its electrical infrastructure, and its operating requirements support a well-designed solar project? A preliminary review may begin remotely with satellite imagery, utility-bill analysis, and an initial three-dimensional layout. However, a qualified site visit is typically needed to verify conditions that imagery and documents cannot show. The U.S. Department of Energy identifies roof and land-area review, renewable-resource verification, and electrical interconnection capacity as core feasibility considerations.
Start with the building's energy profile. Gather recent utility bills, account information, operating schedules, and any available interval or hourly load data. The goal is not simply to total annual consumption. A design team should understand when the facility uses electricity, whether production changes seasonally, and how the utility tariff treats demand and exported energy. The building's utility territory, such as PG&E, SCE, or SDG&E, can affect the questions that need to be answered during review.
What the initial review should document
- Energy use: utility bills, peak-demand patterns, operating hours, planned expansions, and major electrical loads.
- Solar access: roof dimensions, orientation, shading, usable roof areas, setbacks, obstructions, and likely sun exposure.
- Building readiness: roof age and condition, structural capacity, electrical panels, switchgear, service capacity, and potential interconnection points.
- Site constraints: access routes, crane or staging needs, fire-safety considerations, tenant operations, security requirements, and areas that must remain available.
- Decision ownership: the property owner, facilities team, finance stakeholders, utility account holder, and anyone responsible for permitting or operations.
Roof condition deserves an early decision, especially when the existing assembly may require repair or replacement before panels are installed. Structural review should account for the proposed mounting approach and site conditions rather than relying on roof area alone. Electrical compatibility also requires more than locating a service entrance. The design team needs to understand the relationship among the array, inverters, panels, switchgear, and available connection capacity.
These findings establish whether the project should proceed to detailed engineering, what additional inspections are needed, and which constraints must be resolved first. A coordinated provider can evaluate solar and roofing requirements together through its commercial solar solutions, helping stakeholders compare a workable design against the building's actual conditions. For broader California planning context, review solar design and installation services before requesting a project-specific assessment.
Why Does Roof Condition Matter Before Solar Panel Installation Commercial Buildings Projects?
A commercial solar array becomes part of the building's roof and electrical infrastructure, so roof condition should be reviewed before panel placement is finalized. A feasibility review can identify roof type, remaining service life, drainage concerns, access limitations, and areas that may need repair. Roof type and condition can be potential barriers in distributed-energy projects, making this an important decision gate rather than a late construction detail.
Structural review is equally important. The design team needs to understand how the roof assembly, framing, and attachment points will support the proposed equipment under local site conditions. The review may also consider wind exposure, module layout, walkways, rooftop equipment, penetrations, and maintenance access. These details affect where panels can be placed and which mounting approach is appropriate. Structural and site-related conditions, along with fasteners and other equipment, should be addressed during design, not after materials arrive.
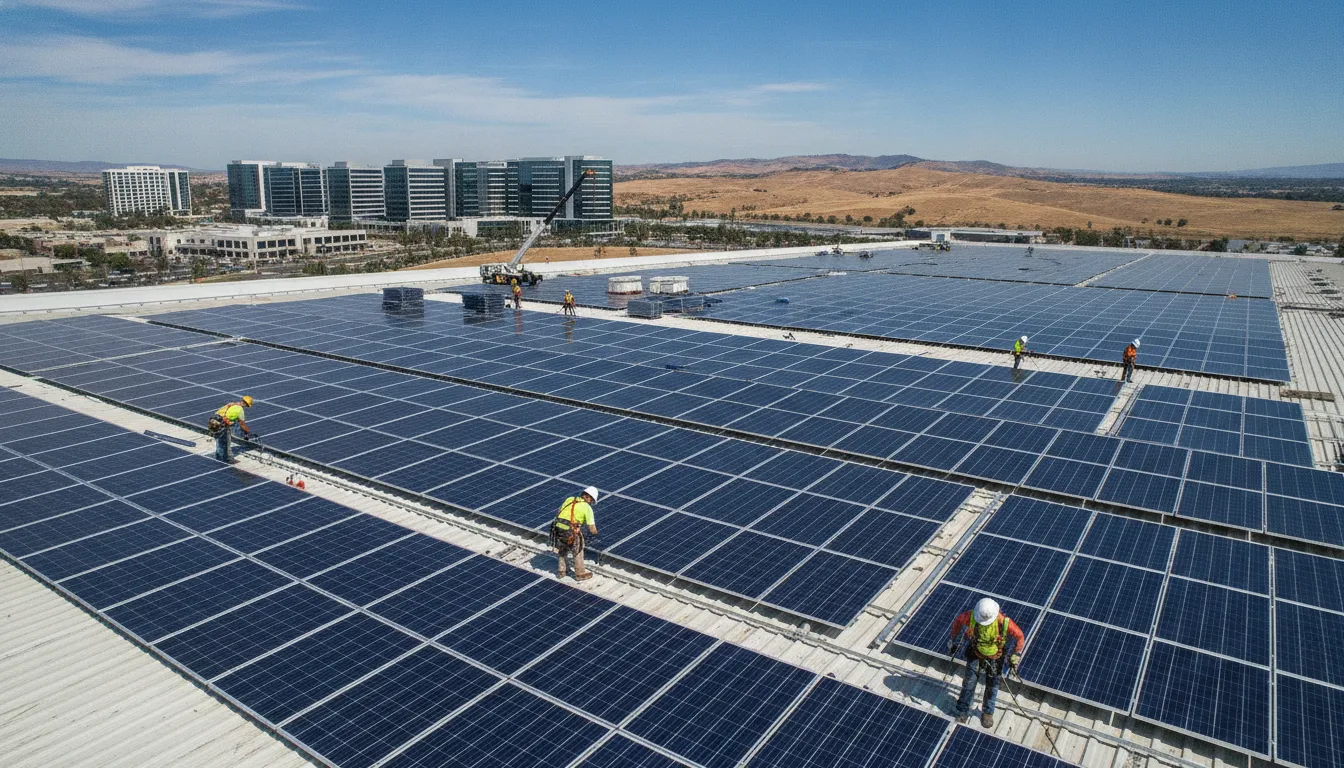
Roof life should be compared with the intended operating life of the solar equipment and the practical cost of future access. If a membrane, coating, or roofing assembly is already near the end of its useful service life. Repairing or replacing it before installing the array may avoid having to disturb panels later. The right decision depends on inspection findings, roof materials, structural conditions, drainage, building use, and the owner's capital plan. It should not be based on a universal rule or an assumed installation schedule.
Flashing and waterproofing deserve close attention wherever the project uses penetrations or attached supports. The installation plan should specify compatible components, sealing details, attachment locations, and how water will be directed away from vulnerable areas. A ballasted flat-roof system can reduce or avoid some roof penetrations, but it still requires engineering for weight distribution, wind resistance, roof capacity, drainage, and safe maintenance pathways. Ballasted does not mean that structural review or waterproofing coordination can be skipped.
For California facilities in Los Angeles, Orange County, Sacramento, and the Central Valley, coordinated solar and roofing expertise can simplify these decisions. AMECO evaluates roof condition, structural load capacity, electrical compatibility, and final measurements as part of its site verification process. When repairs, roof replacement, reinforced mounting points, integrated flashing, or solar-ready preparation are appropriate, the roofing scope can be considered alongside the array design. Review commercial roofing solutions to see how roof work can be coordinated with a broader solar project.
How Is a Solar System Designed for a Commercial Building?
Commercial system design begins with the building's operating profile, not a standard panel count. The design team reviews electricity use, hourly load patterns, roof area, structural capacity, and the electrical service before recommending an array size. A facility that operates during daylight may prioritize on-site production, while a warehouse with a different schedule may require a different production profile. The objective is a system that fits the property's energy needs and physical constraints without treating every building as interchangeable.
Roof area is only one part of available capacity. Designers also account for setbacks, access paths, rooftop equipment, fire-safety requirements, drainage, and areas affected by shade. Nearby structures, parapets, HVAC units, and changing sun angles can reduce usable production areas. On complex commercial roofs, an on-site review and final measurements help confirm whether the preliminary layout reflects actual conditions. The U.S. Department of Energy identifies roof condition, site layout, and electrical interconnection capacity as important feasibility considerations.
Equipment selection follows the site assessment. The design may include photovoltaic modules, inverters, engineered rail systems, flashing and weatherproofing, or a ballasted mounting approach for a suitable flat roof. Structural design should consider local conditions, wind exposure, module tilt, attachment points, and the roof assembly. Weather-conscious equipment selection can support durability, but the right choice depends on the building and the engineering review. If the roof requires repair or replacement, coordinating that work before array installation can help avoid removing a newly installed system later.
The electrical plan connects the array to the facility safely and in a way that supports operations. Designers evaluate panels, switchgear, service capacity, conduit routes, equipment clearances, and the proposed interconnection point. They also consider future needs, such as additional production, battery storage, electric vehicle charging, equipment upgrades, or building expansion. Addressing these possibilities early may reduce conflicts between today's layout and tomorrow's electrical work.
California utility territory adds another design consideration. Requirements and review processes can differ among PG&E, SCE, and SDG&E, so the interconnection approach should be checked against the property's utility and service configuration. AMECO's solar design and installation process coordinates site conditions, engineering, permitting, and activation. For another perspective on regional planning, review this guide to California solar system design.
What Happens During Permitting and Utility Interconnection?
Permitting and interconnection are the review stages that turn a commercial solar design into an approved, grid-connected project. They involve different parties, and each party evaluates a different risk. The local authority having jurisdiction reviews code compliance, the utility reviews the proposed electrical connection, and the project team coordinates documents, revisions, inspections, and responses. The sequence below is common, but California requirements vary by city, county, building type, and utility territory.
- Plans are prepared for review. After site verification and system design, the installer assembles plan sets covering the array layout, structural approach, equipment, wiring, disconnects, labels, and other project-specific details. A commercial building may require building, electrical, structural, fire, or other reviews depending on the property and local rules. The design should account for roof condition, mounting, switchgear, and the proposed point of interconnection rather than treating the panels as an isolated addition. AMECO's solar design and installation process is intended to connect these technical decisions before paperwork is submitted.
- Permit applications move through the local jurisdiction. The authority having jurisdiction, or AHJ, checks whether the plans meet applicable codes and local requirements. Review comments can require clarifications or revised drawings. The Department of Energy identifies roof conditions, electrical panels, switchgear, and legal or regulatory obligations as potential project barriers, so property records and accurate field information matter. An installer may prepare and manage submissions, while the building owner or facilities team still needs to provide access, ownership information, existing plans, and timely decisions.
- The utility evaluates interconnection. In parallel or in a coordinated sequence, the utility reviews how the system will connect to its network. The application can require electrical details, capacity information, equipment specifications, and agreements governing export or other operating conditions. California projects in PG&E, SCE, and SDG&E territories do not necessarily follow identical requirements. Utility policies for interconnection, excess-electricity treatment, and related programs should be confirmed for the specific account and service territory. The commercial solar solutions page provides the service context, but it cannot replace a project-specific utility review.
- Inspections and corrections close the approval loop. Once the permitted work is installed, the AHJ may inspect the construction and electrical work. The utility may also require its own verification, documentation, or permission before the system can operate in parallel with the grid. If an inspector or utility reviewer identifies a discrepancy, the responsible team documents the issue, corrects it, and resubmits the required evidence. Federal guidance describes permitting, inspection, and interconnection as separate stages involving installers, authorities, and utilities, and notes that review practices vary widely.
- Responsibilities are confirmed before activation. Before the system is energized, the owner should know who is responsible for permit responses, utility correspondence, inspection scheduling, change orders, as-built documents, and final operating instructions. Keep copies of approved plans, inspection results, interconnection documents, and equipment records. Permitting and utility review times depend on jurisdiction, project complexity, and territory. So a responsible installer should provide status updates and decision points rather than promise a universal approval date.
For a California business evaluating solar panel installation commercial buildings projects, this documentation trail is as important as the equipment selection. Clear ownership of each handoff helps protect the facility's schedule and reduces surprises when the design, AHJ, or utility review raises a project-specific question.
How Are Commercial Solar Systems Installed, Inspected, and Commissioned?
Once the design, permits, and utility requirements are aligned, construction can move from planning to the facility. For solar panel installation commercial buildings projects, the installation plan should account for roof access. Material staging, employee and customer traffic, equipment shutdowns, fall protection, and the building's operating schedule. A clear site logistics plan helps the crew work safely while limiting disruption to production, deliveries, tenants, or customers.
Professional installers begin by confirming the approved plans and marking array locations, pathways, equipment positions, and connection points. They install the selected racking or mounting system, weatherproof roof penetrations where applicable, place modules, and connect the electrical equipment. Commercial work may also require coordination around switchgear, service equipment, fire access, and other site-specific conditions. AMECO describes its commercial process as including permitting, utility coordination, professional installation, commissioning and testing, customer training, and handoff.
What happens during inspection and commissioning?
After construction, the project proceeds through inspection and system verification. The local authority having jurisdiction may review the completed work, while the utility follows its own interconnection process. These are separate stages involving installers, authorities, and utilities, and review requirements can vary by jurisdiction and service territory. In California, coordination may differ between PG&E, SCE, and SDG&E territories, so the project team should confirm the applicable requirements rather than assume one standard path.
Commissioning is the controlled process of confirming that the system operates as designed. The team checks wiring, equipment connections, protective devices, communications, monitoring, and system settings. Testing may include verifying that the array, inverters, disconnects, and other equipment respond correctly and that production data appears in the monitoring platform.
What does the business receive at handoff?
Before activation or final handoff, the customer should receive an explanation of system operation, monitoring access, routine responsibilities, safety considerations, and the process for reporting an issue. The installer can also review how solar production interacts with the facility's electrical demand. If resilience is a priority, storage may be evaluated alongside the array. A battery can store some solar-generated electricity for later use and may support power reliability during grid outages. But performance depends on system design, loads, controls, and operating conditions. AMECO's guide to solar battery storage installation provides related planning context.
AMECO states that a typical installation may take one to three days, with about two months from contract to activation as an average. These figures are not guarantees. Actual timing depends on the building, scope, inspections, utility process, equipment, and project-specific approvals.
What Should California Business Owners Ask Before Signing?
A proposal for solar panel installation commercial buildings should make responsibilities visible before anyone signs. The lowest-looking figure is not necessarily the clearest offer if roof work, utility coordination, monitoring, or change orders sit outside the stated scope. Ask each installer to explain what is included, what depends on site verification, and who owns each decision.
| question to ask | evidence to request | |
|---|---|---|
| Building and roof | Has the roof condition, structural capacity, mounting approach, and electrical infrastructure been reviewed? | Site-assessment findings, structural assumptions, and a clear list of excluded repairs or upgrades. |
| System and utility | Who handles design, permits, inspection, interconnection, and communication with the applicable California utility? | Equipment schedule, one-line diagram, approval responsibilities, and an escalation contact. |
| Economics and handoff | Which assumptions drive the financial model, and what happens after activation? | Load and tariff assumptions, incentive eligibility notes, change-order terms, monitoring plan, training, and closeout documents. |
Make roof and electrical responsibilities explicit
Roof readiness should not be treated as a footnote. Roof type and condition can create project barriers, while connections to panels and switchgear may require additional engineering or equipment review. Ask whether repairs, replacement, reinforcement, flashing, and weatherproofing are included, separately priced, or excluded. If the roof is not suitable for the planned array, resolve that question before construction rather than after materials arrive.
Also ask for the design basis: expected load profile, available roof area, shading assumptions, equipment locations, and the proposed interconnection point. A feasibility review should identify an electrical connection with sufficient capacity and confirm utility policies for interconnection, incentives, and exported electricity. In California, those details can differ by territory, including PG&E, SCE, and SDG&E. The commercial solar cost factors article can help your team understand why system size, site complexity, and added scope affect a proposal without relying on a universal price.
Clarify economics, operations, and change control
Request the assumptions behind projected production and economics, then have your accountant or financial adviser review current incentive eligibility. Avoid accepting a model that presents savings or payback as guaranteed. Ask how changes are approved, documented, and priced, especially when an inspection, utility review, or concealed roof condition changes the scope.
Finally, confirm who monitors performance, responds to service needs, supplies operating documentation, trains your facilities team, and closes out permits. A defined handoff matters as much as the installation itself. Review AMECO's commercial solar solutions with your facility details, then Get An Estimate for a project-specific evaluation.
Frequently Asked Questions
Can solar panels be installed on commercial buildings?
Yes, many commercial buildings can support a solar project, but suitability must be confirmed through a site and building assessment. The review typically considers usable roof or ground area, sun exposure, roof condition, structural capacity, electrical service, operating hours, and the facility's energy profile. A feasibility review can also identify shading, equipment placement, access, and safety constraints before design begins. In California, the project's utility territory and local permitting requirements also shape the path from design to interconnection.
How much does it cost to install solar panels on a commercial building?
There is no reliable universal price for commercial solar installation. The project cost depends on system size, roof or mounting conditions, electrical upgrades, equipment selections, engineering. Permitting, utility requirements, site logistics, and whether roofing work must occur before the array is installed. Energy use and the building's operating schedule also influence the appropriate design. A useful proposal should explain its assumptions, included work, exclusions, and likely change points rather than present a number without property-specific review.
Does my commercial property qualify for solar panels?
Qualification is determined through a property-specific assessment, not by building type alone. A warehouse, office, retail site, or manufacturing facility may be a candidate if it has suitable space. Adequate structural and electrical conditions, and an energy profile that supports the proposed system. The review should include roof age and warranty considerations, shading, service capacity, equipment locations, and site access. It should also account for the applicable California jurisdiction and utility process. If the existing roof needs repair or replacement, that work should be coordinated before final array installation.
Can solar panels power an entire commercial building?
Sometimes, but the answer depends on the relationship between the building's consumption and the system's practical production. Available roof area, orientation, shading, structural limits, operating hours, seasonal demand, and utility rules all affect the amount of energy a system can offset. Large loads or limited roof space may make whole-building offset impractical, while efficiency improvements, additional mounting areas, or battery storage may change the design discussion. A production model should be compared with interval usage data and the facility's actual operating requirements.
How will the solar system be maintained and monitored?
After commissioning, the owner and installer should agree on monitoring access, maintenance responsibilities, equipment support, inspection needs, and the process for handling alerts. Monitoring can help identify changes in production or equipment status, but it depends on functioning communications and accurate system configuration. Commercial operators should ask who reviews alerts, how service requests are opened, which site personnel receive training, and what documentation is delivered at handoff. These details help facilities teams manage the system alongside normal building operations.
Get Started With a Commercial Solar Project Review
A property-specific review can help your team understand how the building, roof condition, electrical system, operating needs, and utility territory may shape the next steps. It gives business owners and facilities decision-makers a clearer basis for discussing feasibility, system design, permitting, interconnection, and project responsibilities before moving forward. AMECO Solar & Roofing can review your California property and help identify the information needed for a practical project estimate. To discuss your building and request a commercial solar project review, get an estimate online. Share the property details you have available, and the project discussion can begin with the conditions that matter most to your facility.
9.14.2026
Choosing among solar roof types in California is less about naming one universally superior roof and more about coordinating several property decisions. The roof must be evaluated alongside usable sunlight, electrical service, energy goals, storage plans, utility territory, and the timing of any roofing work.
The right solar-roofing direction depends on the home's current roof condition, structure, layout, electrical needs, and the homeowner's priorities. Conventional photovoltaic panels can work with several roof assemblies when the mounting and weatherproofing plan fits the property. Solar shingles and coordinated roofing projects may suit different goals, but the recommendation should come from a property-specific review.
This article has a narrower purpose than a generic roof-material ranking. Existing AMECO guides cover broad comparisons of roof materials and solar readiness. This guide focuses on California planning questions that connect those topics, including utility territory. Storage goals, roofing and solar sequence, and the evidence a homeowner should expect in a proposal. Start with AMECO's guide to checking whether a roof is ready for solar energy when you need the broader condition review.
What Makes Solar Roof Types in California a Different Planning Question?
California homeowners often evaluate solar while also considering heat, shade, changing energy use, outage concerns, and the remaining life of the roof. A roof that is technically compatible with panels may still be a poor fit if its condition. Electrical service, or future remodeling plans are not included in the design.
The roof is part of the system boundary
The roof is not just a surface beneath the equipment. Its planes, slope, obstructions, penetrations, drainage, and structural members influence where equipment can go and how the array can be serviced later. The design conversation should also account for vents, skylights, shade patterns, and the roof areas that may be reserved for future work.
This does not mean every homeowner needs a new roof before solar. It means the installer should document the roof's condition and explain how that condition affects the proposed array. A sound existing roof may support a conventional panel plan. A roof with active issues may need a different sequence. The answer comes from inspection and design evidence, not from material labels alone.
California utility context belongs in the brief
A California project may fall within the service territory of SCE, PG&E, SDG&E, LADWP, or another provider. The utility name should be recorded in the proposal because it helps identify which assumptions need current verification. The homeowner should understand whether the design discussion accounts for interconnection steps, export assumptions, storage goals, and property-specific eligibility.
Utility context does not replace a roof inspection. It adds another planning layer. A proposal that explains both layers gives the homeowner a clearer basis for comparing options than a proposal that discusses module placement without describing the electrical or service assumptions.
Energy goals define the useful comparison
Some homeowners primarily want to offset daytime energy use. Others are planning around evening consumption, critical loads, future electric appliances, or greater resilience during outages. These goals can affect equipment placement, electrical review, battery planning, and the amount of usable roof area that matters.
For that reason, the useful question is not simply, "Which roof type is best?" Instead. Ask which roof and solar plan can support this home's goals without creating avoidable roofing or electrical work later.
How Should You Compare Solar Roof Types in California by Project Goal?
Project priorities create a more useful comparison than a simple list of asphalt, metal, tile, flat, or integrated roof products. The same roof assembly can be a reasonable candidate for one homeowner and a poor fit for another because the timing. Appearance, service access, or energy objective is different.
| Primary goal | Planning question | Evidence to request |
|---|---|---|
| Use the existing roof | Can the roof and structure support the proposed array? | Condition review, attachment plan, flashing approach, and service access |
| Coordinate roof work | Should roofing happen before solar? | Remaining service life, repair scope, array location, and work sequence |
| Plan for resilience | How should solar work with storage? | Electrical service, critical loads, equipment location, and utility assumptions |
| Prioritize appearance | Would an integrated surface change the design preference? | Product fit and roof scope. Maintenance plan and property-specific limitations. |
When preserving the existing roof is the priority
The proposal should explain where attachments will be made, how water will be managed, and how a technician will reach the equipment in the future. For tile or concrete roofs, the relevant issue is not a generic ranking. It is whether the installer has a roof-specific handling, attachment, flashing, and replacement plan.
For a detailed explanation of that specialized topic, see AMECO's guide to installing solar panels on tile roofs. This article treats the topic as one input to a larger California decision framework rather than repeating the installation guide.
When roof work is part of the project
If a homeowner is already considering repair or replacement, the roof scope and solar layout should be reviewed together. The key questions are which work happens first, whether the array location changes after roofing, and how the completed roof will be protected during solar installation.
Solar shingles and other integrated products may also be considered when appearance and roof replacement are central to the project. They are not merely conventional panels with a different finish, so product-specific installation, electrical design, maintenance, and roof scope need to be reviewed together. AMECO's comparison of solar shingles and solar panels is the better resource for that product-level discussion.
When resilience or future energy use is the priority
Storage planning can change which roof area, electrical equipment location, and service pathways matter most. A homeowner considering battery backup should identify critical loads and future electrical needs before the final design is selected. That discussion belongs alongside, not after, the roof and solar review. AMECO's battery backup information provides additional context for the storage portion of the conversation.
Does Utility Territory Change Solar Roof Planning in California?
Utility territory does not determine the roof material that a home can use, but it can change the assumptions that surround the solar and storage project. A good proposal identifies the serving utility and separates confirmed property facts from items that depend on current utility rules or eligibility.
Ask which assumptions are current
Homeowners should ask whether the proposal identifies the utility service, expected energy use, system location, storage objective, and any export or interconnection assumptions. They should also ask which parts of the proposal require confirmation during the utility process. Rules and program details can change, so a responsible contractor should avoid presenting an eligibility outcome as universal before the property and current requirements are reviewed.
Connect the utility discussion to the roof plan
The roof still determines usable array area, orientation, shade exposure, attachment locations, and access. Utility context helps determine how that usable area may support the energy objective. For example, a homeowner who expects more evening consumption may evaluate the roof and battery plan differently from someone focused only on daytime production.
The same principle applies to future electrification. If the homeowner expects to add an electric vehicle, heat pump, or other major load, that expectation should be discussed before the electrical design is finalized. The proposal does not need to promise a particular outcome. It should show that the future load was considered.
Do not treat a calculator as a final design
An online estimate can help a homeowner organize an initial conversation, but it cannot replace roof, electrical, equipment, utility, and energy-use review. AMECO's solar panels cost calculator is a starting point rather than a guaranteed project figure. Final recommendations depend on the property, equipment, roof, utility territory, and applicable eligibility requirements.
What Should a California Solar and Roofing Proposal Explain?
A useful proposal should let the homeowner understand how the recommendation was reached. It should not require the homeowner to infer the roof strategy from a module count or an equipment list.
Roof and site evidence
The proposal should identify the roof planes considered, major obstructions, shade assumptions, roof condition findings, and any limitations that affect the layout. Imagery review can support early planning, but on-site verification is important when roof condition, structure, flashing, or access may change the recommendation.
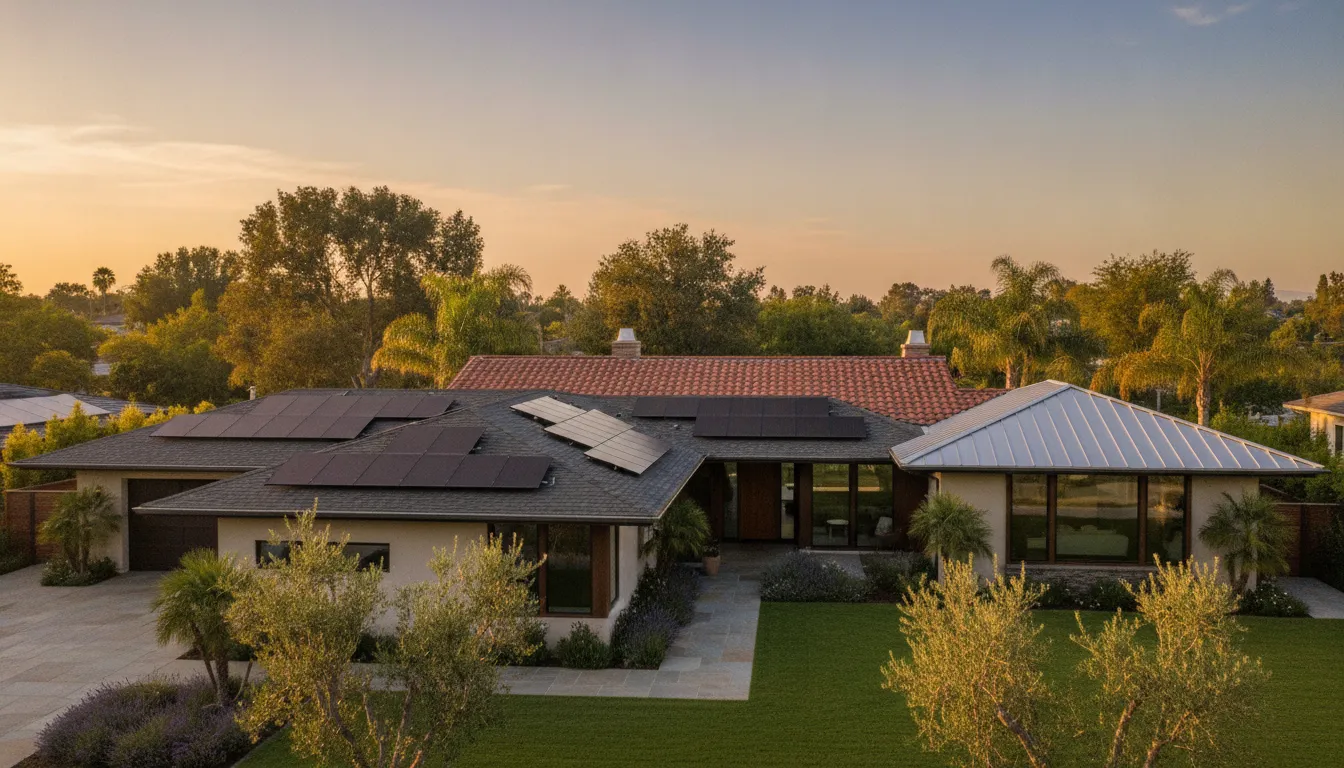
Mounting and weatherproofing logic
Homeowners should be able to see how the proposed attachment method fits the roof assembly, how penetrations will be protected, and how water will continue to drain. Broad claims that a roof is "solar ready" are less useful than a clear explanation of the proposed hardware, flashing, access, and service approach.
Material-specific details still matter, but they should answer a property question. Is the tile profile intact? Are replacement pieces available? Does the metal roof use a seam profile compatible with the proposed clamps? Does a flat roof require a particular approach to wind, drainage, or load distribution? These questions are more actionable than selecting a material from a national ranking.
Electrical and structural review
The design should identify the electrical service assumptions, equipment locations, battery objectives if applicable, and any structural questions that need resolution. A roof and solar contractor should explain what was reviewed and what remains subject to field verification.
AMECO's planning process may include imagery review, utility-bill analysis, modeling, on-site roof-condition verification, electrical checks, and structural assessment. Its approach to solar and roofing design illustrates why these questions are best considered together.
How Do You Sequence Roofing, Solar, and Battery Work?
Sequencing is one of the most important decisions in a combined roofing and solar project. The goal is to avoid installing equipment before a known roof issue is addressed or placing equipment where later work will make service unnecessarily difficult.
- Document the property. Review roof condition, structure, sunlight, obstructions, electrical service, energy use, and storage goals.
- Define the roof scope. Separate routine maintenance, localized repair, replacement, and solar-ready preparation. Do not assume the same scope applies to every roof.
- Coordinate the layout. Place the proposed array, electrical equipment, and battery in relation to the completed roof and future service paths.
- Confirm utility assumptions. Identify the serving utility and the project facts or eligibility items that require current confirmation.
- Complete work in a documented order. The contractor should explain when roofing, mounting, electrical work, inspection, and system activation occur.
This sequence is especially useful when a homeowner is comparing separate roofing and solar bids. The comparison should include who owns the interface between the two scopes, how weatherproofing is protected, and who handles corrections if the scopes do not align. AMECO's integrated model is designed to coordinate solar installation and roofing under one company, while the final scope remains property-specific.
How Can Homeowners Evaluate the Final Recommendation?
Before approving a solar-roofing plan, homeowners can use a short review to test whether the recommendation is specific enough.
- Does the proposal name the serving utility and state which assumptions need confirmation?
- Does it explain the roof condition and remaining service-life question without presenting a universal answer?
- Does the mounting and weatherproofing approach fit the actual roof assembly?
- Does it account for shade, obstructions, access, electrical service, and future energy use?
- Does it explain whether roofing, solar, and battery work are coordinated or separately owned?
- Does it identify what is confirmed now and what depends on field inspection or current eligibility?
These questions help homeowners compare the quality of the planning process rather than comparing equipment names alone. They also create a useful record of the decisions that matter if the project changes during site verification.
California homeowners who want a broader material comparison can review AMECO's guide to the best roof type for solar panels. That resource covers the general roof-material question. This guide's distinct focus is the California decision process that connects roof condition, utility territory, storage goals, and project sequence.
Frequently Asked Questions
Why is there no single best solar roof type for every California home?
Roof condition, structure, shade, electrical service, utility territory, energy use, storage goals, and appearance preferences differ from one property to another. A roof material that works well in one project may require a different design or sequence in another. A property-specific review is more reliable than a universal ranking.
What should I ask about my utility territory?
Ask the contractor to identify the serving utility, explain which design assumptions depend on current utility rules, and distinguish confirmed property facts from items that require later verification. If storage or future electrification matters, ask how those goals affect the electrical and roof plan.
Should roofing and solar be evaluated together?
They should be coordinated whenever roof condition, repair scope, replacement timing, mounting, or future service could affect the array. The homeowner should know who owns the interface between the roofing and solar scopes and what sequence protects the finished roof.
Can a solar roof plan include battery backup?
It can, when the property, electrical service, equipment location, energy goals, and utility assumptions support that design. The homeowner should identify critical loads and future energy needs early so storage is considered during planning rather than added as an afterthought.
Get started with a California solar-roofing plan
Solar roof types in California should be compared against the actual property and the homeowner's priorities. AMECO Solar & Roofing can help review roof condition, mounting compatibility, structural considerations, electrical needs, utility context, and the sequence for roofing, solar, and battery work. Get an estimate to begin a property-specific evaluation.
9.12.2026
AMECO Ranked Among Top Solar Companies in California
AMECO Solar & Roofing has been named one of the top solar companies in California for 2026 by ConsumerAffairs. The recognition names AMECO "Best for Solar-Roof Integrations," highlighting an approach that brings solar installation and roofing expertise together for California homeowners. For a homeowner planning both projects, the distinction is more than an award. It points to an important question: can one qualified team coordinate the roof, solar design, installation, and long-term support?
Get An Estimate to discuss your home's solar and roofing needs with AMECO.
The recognition was covered in a PV Magazine press release about AMECO's ConsumerAffairs recognition. ConsumerAffairs' 2026 California rankings considered factors such as customer ratings and reviews, equipment, warranties, local experience, and service coverage. AMECO's distinction focuses on the connection between the roof and the solar system, a relationship that deserves careful attention before installation begins.
What did ConsumerAffairs recognize about AMECO?
ConsumerAffairs recognized AMECO Solar & Roofing as "Best for Solar-Roof Integrations" in its 2026 list of leading solar companies in California. The recognition reflects AMECO's combined solar and roofing services, its California operating history since 1974, and its ability to help homeowners plan related work through one company rather than coordinating separate contractors.
Consumer recognition does not replace project-specific due diligence. Every home has different roof materials, structural conditions, energy use, electrical characteristics, utility requirements, and future plans. Instead, the award gives homeowners a useful starting point for evaluating whether an installer understands the complete project. You can also read AMECO's overview of solar awards, certifications, and media recognition for broader guidance on evaluating installer credentials.
For the source announcement and the recognition's stated context, read the full PV Magazine article. It identifies the honor as a 2026 ConsumerAffairs recognition and describes AMECO's role in serving California homeowners with solar, battery storage, and roofing services.
Why does solar-roof integration matter to California homeowners?
Solar panels are installed on a roof, so the roof's age, condition, material, layout, and weatherproofing details affect the project. A homeowner who replaces a roof shortly before installing solar may need to remove and reinstall the array later. A homeowner who installs panels on a roof that needs near-term work may face avoidable coordination, scheduling, and warranty questions.
Integrated planning helps bring those questions into the same conversation. A solar and roofing contractor can evaluate roof readiness, identify areas that need repair or replacement, coordinate mounting and flashing details, and design the solar system around the finished roof. This does not mean every homeowner needs a new roof before solar. It means roof condition should be considered before a proposal is accepted.
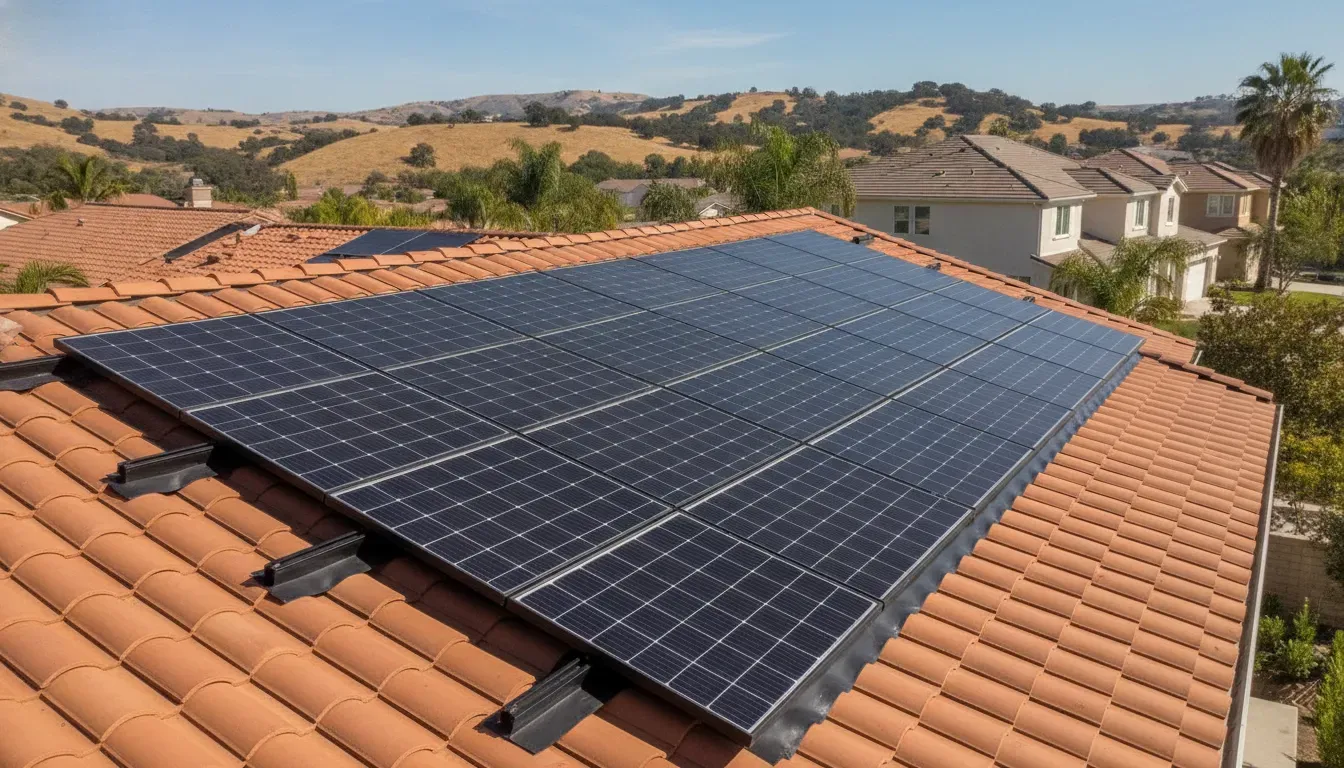
AMECO's roofing solutions and solar solutions pages provide additional information about the two sides of an integrated project. Homeowners can also review common solar panel and tile roof considerations before discussing a design.
What should you ask before combining roofing and solar work?
Before choosing among solar companies in California, ask questions that reveal how the company will manage the complete project. A low-friction experience depends on clear responsibilities, not only on equipment selection or the appearance of the proposal.
- Is the roof ready for the expected service life of the solar system? Ask how the team evaluates roof age, materials, penetrations, drainage, structural conditions, and areas that may need attention.
- Who coordinates the roofing and solar scopes? Confirm whether one company manages the sequence or whether you must coordinate separate contractors yourself.
- How will mounting and weatherproofing be handled? Ask what installation details are used for your roof type and how the work will protect against water intrusion.
- What happens if the roof requires work after the solar array is installed? Request a clear explanation of removal, reinstallation, scheduling, and warranty responsibilities.
- Which parts of the design are based on my home? A sound proposal should reflect roof orientation, shade, usable roof area, energy consumption, electrical service, and utility territory.
- Who handles permits, inspections, and utility coordination? Make sure the proposal identifies the steps included and any responsibilities that remain with the homeowner.
- What support is available after activation? Ask how system monitoring, service questions, and future roofing needs are handled.
These questions are useful whether you are planning a roof replacement, a solar installation, or both. AMECO's project approach can help homeowners understand the stages from consultation and design through installation and support.
Calculate Your Project with a property-specific conversation about roof readiness, energy use, and solar design.
How can a homeowner compare the top solar companies in California?
There is no single installer that is the right choice for every property. The best comparison looks at the company's fit for your roof, energy goals, utility territory, project complexity, and expectations for support. Independent recognition can be one input, but it should be considered alongside project-specific evidence.
Start by confirming that each company can explain your roof condition and show how the proposed array fits the usable roof area. Compare the equipment approach, design assumptions, permitting responsibilities, expected sequence, monitoring plan, and warranty terms. If a proposal gives a precise savings or timeline figure, ask which property data supports it and what could change the result.
AMECO's solar installation company comparison checklist covers practical questions about licenses, proposals, roof work, equipment, permits, warranties, and long-term support. That checklist is a useful companion to this recognition article, but the two pages serve different purposes. The checklist helps evaluate installers generally. This article explains why ConsumerAffairs highlighted AMECO's integrated solar-roofing model.
It is also important to distinguish third-party recognition from a guarantee of a particular outcome. ConsumerAffairs' ranking does not determine whether a specific roof is suitable, which equipment is best for a particular home, or what a project will cost. Those answers require a property assessment and a conversation about goals.
What does AMECO's California experience mean for a solar project?
AMECO has operated in California since 1974 and serves homeowners with solar installation, roofing, battery storage, and related energy solutions. That history matters because solar projects are shaped by local utility procedures, permitting expectations, roof conditions, weather, and homeowner priorities. California is not one uniform market, and a proposal should reflect the property's location and circumstances.
AMECO's California focus includes particular relevance to Los Angeles, Orange County, Sacramento, and the Central Valley. Homeowners should still confirm service availability and project scope for their address. A consultative process should identify the applicable utility territory, the home's electrical needs, roof condition, and whether battery storage or EV charging belongs in the plan now or later.
For homeowners considering storage, AMECO's battery backup information explains how battery planning can relate to outage resilience and energy use. For broader solar design context, the U.S. Department of Energy's solar photovoltaic system design basics resource describes factors that influence a PV system design.
What should you expect from an integrated solar and roofing consultation?
An effective consultation should connect the homeowner's goals to the home's physical conditions. The discussion may cover current and future energy use, electricity bills, roof age and material, shade, electrical service, storage goals, EV charging, utility requirements, and the order in which work should happen. The objective is not to force every service into one project. It is to identify the safest and most practical path.
A property-specific assessment can also make tradeoffs easier to understand. A homeowner may decide that the existing roof is ready for solar, that targeted repairs are appropriate, or that roof work should happen first. Another homeowner may prioritize backup power, a future EV, or a phased project. The right answer depends on the property and the homeowner's priorities.
AMECO's residential solar information provides more context for homeowners who are beginning their research. You can also review the solar cost calculator as a starting point, while remembering that an estimate depends on site conditions, energy use, equipment, utility territory, and eligibility for any applicable programs.
Frequently asked questions about AMECO's ConsumerAffairs recognition
What recognition did AMECO receive from ConsumerAffairs?
ConsumerAffairs named AMECO Solar & Roofing one of California's top solar companies for 2026 and recognized it as "Best for Solar-Roof Integrations." The distinction highlights AMECO's combined solar installation and roofing services.
Does the recognition mean every home needs roofing work before solar?
No. Roof condition varies by home. Some roofs may be ready for solar, while others may benefit from repairs or replacement first. A property-specific assessment should determine the appropriate sequence rather than applying one rule to every homeowner.
Why compare roofing and solar companies together?
Solar equipment is mounted on the roof, so roof age, material, condition, and weatherproofing affect the project. Comparing an integrated provider can help homeowners understand how the two scopes will be coordinated and who will handle future questions.
Can AMECO help with battery storage as well as solar and roofing?
AMECO provides solar installation, roofing, and battery storage solutions for California customers. The appropriate system and project sequence depend on the home's energy use, electrical characteristics, roof, utility territory, and backup goals.
Schedule Now to discuss a solar and roofing plan tailored to your California property.
A recognition that reinforces AMECO's integrated approach
ConsumerAffairs' 2026 recognition places AMECO among the top solar companies in California and identifies the company's solar-roof integration model as a notable strength. For homeowners, the most useful takeaway is practical: evaluate the roof and solar system together, ask who owns each step, and compare proposals using property-specific information.
AMECO's recognition is one reason to begin a conversation, not a substitute for one. A careful consultation can clarify whether your roof is ready, how solar could fit your energy goals, whether battery storage belongs in the plan, and what support you can expect after installation. With those questions answered, you can make a more informed decision about your home's next step.
9.10.2026
The journey of solar energy is a fascinating one. It starts 93 million miles away, travels to your roof, and ends at the light switch in your living room. This entire process happens silently and instantly, every single day. But what exactly happens between the moment a sunbeam hits a panel and the moment you turn on your air conditioner? Answering the question of how do home solar panels work reveals a simple and efficient system. We’ll trace the path of power from the sun, through your panels and inverter, and directly to your home’s appliances, showing you how seamless the transition to clean energy really is.
Key Takeaways
- Your system is more than just panels: A solar inverter is the brain of the operation, converting the raw energy captured by your panels into the standard electricity needed to power everything in your home.
- Every bit of solar power has a purpose: When your system generates more energy than you need, it's either sent to the grid for credit on your utility bill or stored in a home battery, ensuring you have power at night or during an outage.
- Smart design makes all the difference: The amount of energy you produce is directly affected by factors like your roof's direction, potential shade, and the type of panel used, which is why a professional assessment is crucial for peak performance.
What's in a Solar Panel System?
When you picture a home with solar power, you probably think of the sleek panels on the roof. While those are definitely the star of the show, a complete solar energy system is actually a team of components working together to power your home. Think of it less as a single product and more as a complete power plant, scaled down to fit your roof. It’s designed to seamlessly integrate with your home’s existing electrical setup, so you can flip a switch and use clean energy without a second thought. This integration is key; the goal is to make your transition to solar feel effortless.
The main players in this system are the solar panels, an inverter, and the racking that secures everything to your roof. Each part has a specific job, from capturing sunlight to converting it into usable electricity for your appliances. For homeowners looking for extra energy security, especially with California's grid instability, a battery backup can also be added to store power for use during an outage or at night. Understanding how these pieces fit together is the first step in seeing how you can generate your own power right from your rooftop. Our team designs comprehensive solar solutions tailored to your home's specific needs, ensuring every component works in perfect harmony.
The Cells That Capture Sunlight
Let's start with the panels. Each solar panel is made up of smaller units called photovoltaic cells, which are typically made from silicon. These cells are what do the heavy lifting. When sunlight, which is made of tiny energy particles called photons, strikes the solar cells, it excites the electrons within the silicon atoms and knocks them loose. This creates a flow of electrons, which is exactly what electricity is. The electricity generated at this stage is called Direct Current (DC) power. It’s the same type of power you get from a standard battery, but it's not quite ready to run your home just yet.
Other Essential Parts of Your System
The DC electricity from your panels isn't quite ready to power your TV or coffee maker. That’s where the inverter comes in. An inverter is a crucial device that acts as the brain of your system, converting the DC electricity from the panels into Alternating Current (AC) electricity. AC power is the standard form of electricity used in our homes. From the inverter, this usable AC power flows directly into your home’s main electrical panel (your breaker box), ready to power everything from your lights to your laundry machine. It's a smooth, automatic process that happens in the background, delivering clean power right where you need it.
How Do Solar Panels Actually Make Electricity?
It might seem like magic, but the process of turning sunlight into electricity is a fascinating and straightforward bit of science. Your solar panels aren't just sitting on your roof looking pretty; they're tiny power plants working hard every time the sun is out. The entire system is designed to capture solar energy and convert it into a form that your home can use to power everything from your coffee maker to your air conditioner.
This conversion happens in two main steps. First, the panels capture sunlight and create an electrical current. Then, another key piece of equipment changes that current into the type of electricity your home's appliances need. Let's break down exactly how your solar solutions make this happen.
Understanding the Photovoltaic Effect
At the heart of every solar panel are solar cells, which are typically made from silicon. Think of the sun as constantly sending out tiny packets of energy called photons. When these photons travel all the way to your roof and strike the solar cells, they transfer their energy, knocking electrons loose from the silicon atoms.
This is where the "photovoltaic effect" comes into play. The solar cell is designed to create an electric field, which acts like a slide, directing all those loose electrons to flow in one direction. This flow of electrons is what we call an electrical current. Specifically, it creates Direct Current (DC) electricity, which is the first step in powering your home with the sun.
Turning Sunlight into a Usable Current
The DC electricity generated by your panels isn't quite ready to power your home. Most household appliances and the electrical grid itself run on Alternating Current (AC) electricity. While DC electricity flows in a single, constant direction, AC electricity reverses direction periodically. To make the solar energy useful, it needs to be converted from DC to AC.
This is the job of a crucial component called an inverter. The DC electricity from your solar panels travels to the inverter, which transforms it into standard 120V/240V AC electricity. From there, the power is ready to be sent to your home's electrical panel and distributed to all your outlets and appliances, seamlessly powering your daily life.
What Does a Solar Inverter Do?
If solar panels are the heart of your system, the inverter is the brain. It’s a crucial piece of equipment that takes the raw energy your panels produce and transforms it into a format your home can actually use. Without an inverter, the electricity generated on your roof would be incompatible with your appliances, lights, and outlets. Think of it as a translator, converting the sun’s energy into a language your home understands.
This small but mighty box does more than just convert power. It also optimizes your energy production and includes critical safety features that protect both your home and the electrical grid. Understanding what your inverter does helps you appreciate how your entire solar solution works together to provide clean, reliable energy for your family.
Making Solar Power Safe for Your Home
Your solar panels generate direct current (DC) electricity, which flows in a single direction. However, every home in the U.S. runs on alternating current (AC) electricity, where the current changes direction many times per second. The primary job of a solar inverter is to perform this essential conversion from DC to AC.
This conversion process ensures that the power flowing from your panels is perfectly synchronized with the power from the utility grid. It makes the solar energy safe and usable for everything from your refrigerator to your phone charger. By managing the voltage and frequency, the inverter delivers a smooth, consistent stream of electricity, seamlessly integrating the sun’s power into your daily life.
Different Types of Inverters
Not all inverters are the same, and the right one for you depends on your home’s specific needs, like your roof layout and any potential shading. The most common options are string inverters, microinverters, and power optimizers. A string inverter connects a group (or “string”) of panels, converting their combined DC output into AC power.
Microinverters, on the other hand, are installed on each individual panel, converting the power right at the source. This is especially useful if some of your panels are partially shaded during the day, as it prevents one shaded panel from reducing the output of the entire string. Power optimizers offer a hybrid approach, pairing with a central inverter to optimize each panel’s output. Our team can help you determine the best fit during your personalized consultation.
How Inverters Keep Your System and the Grid Safe
Modern inverters are incredibly smart. Beyond converting electricity, they constantly monitor your solar panel system’s performance to maximize energy production. They track output and can even identify issues with specific panels, making maintenance easier.
Most importantly, inverters have a critical safety feature called "anti-islanding." If the public power grid goes down, the inverter automatically shuts off your solar system to prevent it from sending power back to the grid. This protects utility workers who are making repairs from unexpected electrical shocks. When paired with a battery backup, the inverter also manages how and when your stored energy is used, giving you a reliable power source during an outage.
How Does Solar Power Get to Your Appliances?
So, your panels are on the roof, the inverter is installed, and the system is ready to go. But how does the energy captured from the sun actually run your refrigerator or charge your phone? The journey from sunlight to socket is surprisingly direct. Once the inverter converts the solar energy into electricity your home can use, it’s sent straight to your appliances through your existing wiring. It’s a seamless process that happens in real-time, letting you power your home with clean energy the moment it’s generated.
Connecting to Your Home's Electrical Panel
Your solar panels produce a type of electricity called direct current (DC), but your home’s appliances run on alternating current (AC). The inverter acts as the crucial translator, converting that DC power into usable AC power. From the inverter, the electricity travels directly to your home's main electrical panel. Think of this panel as the command center for all the power in your house. It takes the clean energy from your solar system and distributes it to your outlets and appliances, just as it would with power from the utility grid. This simple connection is what makes solar a practical choice for homeowners looking to integrate renewable energy.
Using Power the Moment It's Made
One of the best parts about having a solar system is that you get to use the power as soon as it’s created. The moment sunlight hits your panels, you're generating electricity that can be used immediately. If the sun is shining while you're doing laundry or working on your computer, that power is coming directly from your roof, not the utility company. This instant access to your own clean energy is what helps you reduce your dependence on the grid. You’re essentially powering your daytime life with the sun, which is a fantastic way to lower your monthly electricity bills. This process of using solar power in real-time is the foundation of how you save money.
What Happens to the Extra Solar Power You Generate?
It’s a common question: what if my panels make more power than I can use? On bright, sunny days, it’s very likely they will. This isn't a waste; it's an opportunity. Your excess solar energy doesn't just disappear. Instead, you have two great options for putting it to work for you. You can either send it back to the utility grid for credit or save it in a home battery for later. Both paths help you get the most value out of your solar solutions and reduce your reliance on traditional power.
Sending Power Back to the Grid with Net Metering
Think of the utility grid as a giant, shared battery. When your solar panels produce more electricity than your home needs, that extra power flows back into the grid for others to use. In return, your utility company gives you credit for the energy you contribute. This system, known as net metering, helps you offset your electricity costs by allowing you to draw power from the grid at night or on cloudy days using the credits you’ve earned. It’s a smart system that ensures none of the clean energy you generate goes to waste.
Storing Power for Later with a Battery
If you want true energy independence, especially during blackouts, storing your own power is the way to go. A home battery backup system connects directly to your solar panels and saves the excess energy they generate. Instead of sending that power to the grid, you keep it right at home. According to Energy.gov, a solar battery can "store energy generated by your solar panels for use at night or during power outages." This means when the grid goes down, your lights, refrigerator, and essential devices can stay on. It gives you peace of mind and control over your own power supply, day or night.
How Can You Get the Most Out of Your Solar Panels?
Once your solar panels are installed, you want to make sure they’re working as hard as possible for you. Getting the most out of your system is what leads to lower electricity bills and greater energy independence. It’s not just about having panels on your roof; it’s about having them in the right place and keeping them in good shape. A few key factors can make a significant difference in your system’s daily energy production, and understanding them will help you maximize your investment for years to come.
Why Your Roof's Angle and Direction Matter
The placement of your solar panels is one of the most critical factors for energy production. Think of your panels as tiny sunbathers; they need to be in the best spot to soak up the most rays. In the Northern Hemisphere, a south-facing roof is the ideal location because it receives the most direct sunlight throughout the day. East- and west-facing roofs are also good candidates, as they capture strong morning or afternoon sun. The one direction to avoid is north, as it gets the least sun exposure. The tilt, or angle, of your panels also plays a role. A professional assessment is key to finding the sweet spot for your specific roof, which is a core part of our approach to designing every system.
How Weather, Shade, and Maintenance Affect Performance
Your solar panels are tough, but their output can be affected by their environment. They will naturally produce less energy on cloudy days or during the shorter days of winter, but they still generate power. A more significant factor to consider is shade. If a tree branch or chimney casts a shadow over even one panel, it can reduce the performance of the entire string of panels. We carefully map out your roof to avoid these problem areas. Finally, a little upkeep goes a long way. In California, dust, pollen, or ash can settle on your panels. A quick rinse with a hose once or twice a year is usually all it takes to keep them clean and operating efficiently. Our durable solar solutions are designed for long-term performance with minimal fuss.
Do Solar Panels Work When It's Cloudy or Dark?
One of the biggest questions people have about solar is what happens when the sun isn't shining. It’s a fair question, especially since we all want a reliable source of power. The short answer is yes, your home will still have power. While solar panels are most productive in direct sunlight, they don't just shut down completely on a cloudy day or after sunset.
Modern solar technology is designed to handle real-world conditions, not just perfect sunny days. Your system has ways to keep the lights on, whether it's by drawing from the grid or using stored energy. Let's break down how it all works.
Generating Power in Different Weather Conditions
Think of it like getting a sunburn on an overcast day. Even though you can't see the sun directly, its UV rays are still getting through the clouds. Solar panels work in a similar way. They capture photons from sunlight to create electricity, and photons still reach your panels on cloudy, foggy, or rainy days.
Of course, production will be lower than on a bright, clear day. The amount of energy generated depends on the thickness of the cloud cover. However, today’s high-quality solar solutions are incredibly efficient and can still produce a significant amount of power even in less-than-ideal weather. Your system is designed with these variations in mind, accounting for your local climate to ensure you have enough power year-round.
Why You Still Have Power at Night
At night, your panels aren't generating new electricity, but your home stays powered in one of two ways. The most common method is through a grid-tied system with net metering. During the day, your panels often produce more electricity than your home needs. This excess power is sent back to the utility grid, and you earn credits on your bill. At night, you simply draw power from the grid, using those credits to offset the cost.
For true energy independence, especially during power outages, a battery backup system is the answer. A solar battery stores the excess energy your panels generate during the day. When the sun goes down, your home automatically switches to using that stored, clean energy instead of pulling from the grid.
Are All Solar Panels Created Equal?
When you start looking at solar panels, you’ll quickly notice they don’t all look or cost the same. So, are they all created equal? The short answer is no. The main differences come down to how the solar cells inside them are manufactured, which directly impacts their efficiency, appearance, and price tag. Think of it like choosing an engine for a car; different types offer different levels of performance and fit different budgets. While all modern solar solutions are designed for durability and long-term power generation, the technology inside can vary significantly.
The two most common types of panels you’ll see on homes today are monocrystalline and polycrystalline. Each has its own set of strengths, and understanding them is the first step toward picking the perfect system for your home. One isn't universally "better" than the other, but one will likely be a better fit for your specific roof, energy goals, and financial plan. Knowing the distinction will help you have a more productive conversation with your solar installer and ensure you get a system that truly meets your needs for decades to come. Let's break down what sets them apart so you can feel confident in your choice.
Monocrystalline vs. Polycrystalline Panels
Monocrystalline panels are made from a single, pure crystal of silicon. This uniform structure gives them their signature sleek, black look and allows electrons to move more freely, making the panels highly efficient. They often have efficiency ratings over 20% and tend to perform better in low-light conditions. Because they can generate more power in a smaller footprint, they are a fantastic option if you have limited roof space.
Polycrystalline panels, on the other hand, are made by melting multiple silicon fragments together. This process is less expensive, but it results in a panel with a speckled, blueish appearance and slightly lower efficiency, typically in the 15-20% range. While they may require a bit more surface area to produce the same amount of power as their monocrystalline counterparts, they are a very reliable and budget-friendly choice.
Which Type Is Right for Your Home?
So, how do you choose? It really comes down to your specific situation. If you have a small roof but high energy needs, the higher efficiency of monocrystalline panels makes them the clear winner. You’ll get the power you need without covering every square inch of your roof.
However, if you have plenty of available roof space and are focused on the most cost-effective solution, polycrystalline panels are an excellent choice. They can help you achieve your energy independence goals with a lower upfront investment. The best way to decide is to get a professional assessment. Our customized approach involves analyzing your roof, energy usage, and budget to recommend the ideal panel type for your home.
What Is the Solar Installation Process Like?
Going solar is an exciting step, but it’s natural to wonder what the actual process involves. While the physical installation on your roof is relatively quick, the full journey from signing a contract to flipping the switch takes a bit longer. The total timeline can range from two to six months, with much of that time dedicated to planning, custom design, permitting with your city, and coordinating with your utility company. This might sound like a lot, but these steps ensure your system is safe, efficient, and built to last.
The good news is you don’t have to figure this out on your own. A professional team handles all the complex steps behind the scenes. The process starts with a thorough site assessment where we evaluate your roof’s condition, sun exposure, and your home’s energy usage. From there, we create a custom solar panel design tailored specifically to your needs. Once you approve the design, we handle all the engineering plans and submit the applications for permits from your local jurisdiction. We also manage the interconnection agreement with your utility company, which is a crucial step before your system can be connected to the grid. At AMECO, we manage the entire project, from the initial site assessment to the final inspection, to make your transition to solar power seamless. Understanding our approach can help you feel confident and informed from start to finish.
A Step-by-Step Look at Installation Day
When installation day arrives, our certified crew gets to work making your solar plans a reality. The first step is preparing your roof and setting up a secure mounting system that will hold your panels in place. Since the health of your roof is essential for a long-lasting solar installation, we always ensure it's in great shape before we begin. We then mount the solar panels onto the racking.
Next, we install the inverter, which is the device that converts the solar energy into usable electricity for your home. This is usually placed in a convenient but out-of-the-way spot like your garage or an exterior wall. Our electricians will connect the panels to the inverter and then link the inverter to your home’s main electrical panel. After everything is connected, we conduct a thorough inspection to ensure the system is installed to code and operating safely.
How to Monitor Your System's Performance
Once your system is installed and has passed its final inspection, you get access to one of the best parts: the monitoring system. This is usually a simple app on your phone or computer that gives you a real-time look at how much power your panels are producing. You can see your energy generation change throughout the day and track your home’s consumption. It’s a great way to understand your energy habits and see your investment at work.
Your system will also include a meter that measures all the electricity your panels generate. Any power you don’t use immediately can be sent back to the utility grid for credit on your bill, a process known as net metering. Alternatively, if you have a home battery, that excess energy gets stored for you to use later, like at night or during a power outage. Adding a battery backup is a fantastic way to achieve greater energy independence and keep your lights on no matter what.
Frequently Asked Questions
How long does the entire solar installation process take? While the physical installation on your roof usually only takes a day or two, the full journey from signing the paperwork to powering your home with the sun typically takes a few months. Most of that time is spent on custom system design, securing permits from your city, and coordinating with the utility company. Your solar partner handles all of these details, so you can relax while the behind-the-scenes work gets done.
Will my power stay on during a blackout? A standard solar system is designed to shut down during a grid outage for safety reasons. This protects utility workers who are making repairs. However, if your goal is to keep your lights on during a blackout, you can add a battery backup to your system. A battery stores the extra solar power you generate, creating your own personal energy reserve to use whenever you need it, day or night.
What kind of maintenance do solar panels require? Solar panels are incredibly durable and require very little upkeep. Rain usually takes care of most of the cleaning for you. Here in California, where we can get dust or ash buildup, a simple rinse with a garden hose once or twice a year is typically all that’s needed to keep your panels working efficiently.
What if my roof isn't in perfect condition? A healthy roof is the best foundation for a solar panel system that will last for decades. During our initial site assessment, we conduct a thorough evaluation of your roof's structure and condition. If we find any issues that need attention, we can address them before the solar installation begins, ensuring your home is fully prepared for a secure and long-lasting system.
How do I know if my home is a good fit for solar panels? The best homes for solar have a roof that gets several hours of direct, unobstructed sunlight each day. In California, a south-facing roof is ideal, but east- and west-facing roofs are also excellent candidates. The most important thing is to minimize shade from trees, chimneys, or nearby buildings. A professional site evaluation is the best way to get a clear answer, as we can analyze your specific property and energy needs.
9.10.2026
Your roof is your home’s first line of defense, and a solar panel system is a 25-year commitment that sits right on top of it. That’s why the health of your roof is one of the most critical factors in a successful solar installation. Working with a company that doesn’t specialize in roofing can put your home at risk. When you start looking at solar panels for home for sale, it’s essential to consider who will be installing them. As experts in both solar and roofing since 1974, we ensure your entire system is secure, from the shingles to the panels, protecting your most important investment.
Key Takeaways
- Start with your home's unique energy profile: Before looking at panels, understand your own needs. Review your past utility bills to see how much electricity you use, evaluate your roof's condition and sun exposure, and establish a clear budget.
- See solar as a long-term investment, not just an upfront cost: The initial price is only part of the story. Federal tax credits and local incentives significantly lower your final cost, while decades of savings on your electricity bill provide a powerful return on your investment.
- Prioritize quality installation and equipment for lasting results: The performance of your system depends on expert installation and reliable hardware. Partner with an experienced installer, choose panels with strong warranties, and consider a battery backup for true energy independence.
What Are My Solar Panel Options?
When you start looking into solar, you'll quickly see there isn't just one type of panel. The three main players on the market are monocrystalline, polycrystalline, and thin-film panels. Each has its own set of pros and cons related to efficiency, cost, and appearance. Understanding these differences is the first step in finding the perfect fit for your home's energy needs and your budget. Let's break down what makes each type unique so you can feel confident in your choice of solar solutions.
Monocrystalline Panels
Think of monocrystalline panels as the premium option in the solar world. They're made from a single, pure silicon crystal, which gives them their signature sleek, black look. This uniform structure makes them highly efficient at converting sunlight into electricity. Because they generate more power per square foot, they're a fantastic choice if you have limited roof space or simply want to get the most energy production possible. While they do come with a higher price tag, their superior performance and long lifespan often make them a worthwhile investment for homeowners focused on maximizing their energy output.
Polycrystalline Panels
Polycrystalline panels are a popular and more budget-friendly alternative. Instead of a single crystal, they're made by melting multiple silicon fragments together, which gives them a distinctive blue, speckled appearance. This manufacturing process is less expensive, and those savings are passed on to you. The trade-off is slightly lower efficiency compared to their monocrystalline cousins. However, if you have ample roof space and are looking for a reliable, cost-effective way to go solar, polycrystalline panels offer a great balance of performance and price. They get the job done without the premium cost.
Thin-Film Panels
Thin-film panels are a different technology altogether. They are made by placing a super-thin layer of photovoltaic material onto a solid surface, like glass. This makes them incredibly lightweight, flexible, and the most affordable option available. So, what's the catch? Their efficiency is significantly lower than crystalline panels, meaning you need a much larger area to produce the same amount of power. For this reason, you won't see them on many residential rooftops. They are better suited for large-scale commercial projects or unique applications where flexibility is more important than space efficiency.
How to Choose the Right Solar System
Picking the right solar system feels like a huge decision, but it doesn't have to be overwhelming. When you break it down into a few key steps, you can confidently find a solution that fits your home, energy goals, and budget. Think of it as creating a personalized energy plan. It starts with understanding what you use, evaluating your space, and then exploring the options that make the most sense for you. By looking at your needs first, you ensure the system you choose will serve you well for years to come.
Assess Your Energy Needs
Before you can figure out how many solar panels you need, you have to know how much electricity you use. The best way to do this is to grab your past utility bills. Look for your monthly and annual kilowatt-hour (kWh) usage. This number is the foundation for designing your solar system because it tells us exactly how much power your home consumes. Having this information ready will make your conversation with a solar consultant much more productive. You can also use an online estimate calculator to get a preliminary idea of what size system would offset your current energy use.
Evaluate Your Roof's Potential
Your roof is the most common spot for solar panels, so its condition and characteristics are really important. An ideal roof for solar is south-facing and gets plenty of direct sunlight without much shade from trees or nearby buildings. The age and structural integrity of your roof also matter; you want a solid foundation that will last as long as your panels. Since we specialize in both roofing solutions and solar, we always conduct a thorough assessment to make sure your roof is ready for an installation. This ensures your entire system, from the shingles up, is secure and efficient.
Set Your Budget and Timeline
The cost of a solar system depends on a few things: its size, the type and efficiency of the panels, and how complex the installation is. While it’s a significant investment, it’s one that pays for itself over time. Think about what you're comfortable spending and what financing options might work for you. Federal tax credits and local incentives can also make a big difference in the final price. Our personalized approach involves sitting down with you to design a system that meets your financial goals and provides a clear timeline for the project, so you know exactly what to expect.
Explore Alternative Installations
What if your roof isn't the perfect candidate for solar? Don't worry, you still have great options. If you have enough space on your property, a ground-mounted system can be an excellent alternative. These systems can be positioned at the perfect angle to capture maximum sunlight throughout the day. Another key consideration is whether to include a battery backup. For many California homeowners, having a battery is a game-changer. It stores the extra energy your panels produce so you can use it at night or, more importantly, keep your lights on during a power outage.
What's the Real Cost of Solar Panels?
Let's talk numbers. The price of a solar system is one of the first things people ask about, and for good reason. It’s a significant home upgrade, but thinking of it only as an expense misses the bigger picture. The real cost isn't just the number on the initial quote; it's the total investment balanced against decades of energy savings and valuable incentives. Understanding what goes into the price tag, from the hardware to the installation, helps you see how going solar is a powerful financial move for your home. We'll break down the costs and show you how to calculate the long-term value.
Breaking Down the Price Tag
The upfront cost of a solar system can feel like a big number, so let's put it in perspective. For an average 1,500-square-foot house, a typical solar system costs around $27,500 before any incentives. However, after applying the 30% federal tax credit, that price drops to about $19,250. Of course, this is just a starting point. The final price depends on your home’s size, how much electricity you use, and the specific equipment you choose. The best way to get a clear picture for your home is to use an estimate calculator to get a personalized projection based on your actual energy needs and roof space.
Factoring in Installation and Equipment
When you get a quote for a solar system, you're not just paying for the panels. A professional solar installation is a complete project that includes planning, permits, and inspections to ensure everything is safe and up to code. The total cost covers all the essential equipment, like inverters that convert solar energy into usable electricity, mounting hardware to secure the panels, and all the necessary wiring. It also includes the labor of our experienced team who handles the entire process. This comprehensive approach ensures your system is designed for optimal performance and longevity, giving you peace of mind from day one. You can learn more about our approach to see how we manage every detail.
Calculating Your Return on Investment
This is where going solar gets really exciting. While there's an initial investment, the return comes in multiple forms. First, government incentives like the federal tax credit significantly reduce your net cost right away. Then, the real savings begin. Every month, you'll see a lower electricity bill, and over the 25-plus-year lifespan of your system, those savings add up to a substantial amount. Your return on investment is the combination of these monthly savings and the initial incentives. Think of it as pre-paying for decades of electricity at a fixed, lower rate. Investing in solar solutions not only lowers your carbon footprint but also provides predictable energy costs for years to come.
How to Pay for Solar: Financing and Incentives
The price of a solar system can feel like a big hurdle, but it’s more manageable than you might think. A combination of government incentives, flexible financing, and utility programs can dramatically lower your initial investment. Think of it less as a one-time expense and more as a long-term investment in your home's future. Let's walk through the key options that make going solar in California an attainable goal.
Federal Tax Credits and California Programs
The biggest financial perk is the federal solar tax credit, which lets you deduct 30% of your installation cost from your federal taxes. This credit applies to the total system cost, including equipment, labor, and even a battery backup. On top of this, California has local rebates and programs that can lower your costs even more. We’ll help you identify every incentive you qualify for.
Solar Loans, Leases, and Power Purchase Agreements (PPAs)
If paying cash isn't your plan, you have options. A solar loan lets you borrow funds to purchase your system and pay it back over time, while still getting all the tax credits. Alternatively, with a solar lease or Power Purchase Agreement (PPA), a third party owns the system on your roof. You just pay a fixed monthly rate for the power, often less than your utility’s rate. Our team can explain the pros and cons as part of our approach.
Net Metering and Utility Rebates
Net metering is another way your system pays you back. When your panels produce more electricity than you use, the excess power goes to the grid, and your utility company gives you credits on your bill. These credits offset the cost of electricity you use at night or on cloudy days. It’s a simple system that ensures you get value from all the energy your panels produce. We can also help you find programs that lower the cost of your solar solutions.
Property Tax Exemptions
A solar panel system increases your home's value, but in California, it won't increase your property taxes. The state offers a property tax exemption for new solar energy systems. This means you can enjoy the added equity your system brings without worrying about an annual tax increase. It’s a powerful financial benefit that makes switching to solar even easier for homeowners across the state.
Key Factors to Consider Before You Buy
Okay, you’ve figured out your budget and explored the financing options. Now comes the exciting part: choosing the actual hardware for your home. Picking the right solar panels and installer is just as important as finding the right payment plan. The quality of your equipment and the expertise of the installation team will determine how much you save and how reliable your system is for years to come. Let’s walk through the four key areas you’ll want to focus on to make a confident decision.
Panel Efficiency and Warranties
When you start comparing panels, you’ll see the term “efficiency” pop up a lot. This is simply a measure of how well a panel converts sunlight into usable electricity. Most high-quality panels have efficiency ratings between 18% and 20%. It’s also good to know that all panels experience a slight, gradual decline in power output over their lifespan, typically losing about 10% to 20% over 25 years. This is completely normal, and it’s why a strong manufacturer’s warranty is so important. A good warranty guarantees your panels will perform at a certain level for decades, protecting your investment and ensuring you get the solar solutions you paid for.
Brand Reputation and Certifications
The solar industry has grown a lot, and with it, the number of brands on the market. Sticking with reputable, well-established manufacturers is always a smart move. Brands with a long history and positive reviews are more likely to produce reliable products and honor their warranties if you ever need them. You should also look for panels with industry-standard certifications, which confirm they’ve passed rigorous tests for safety, durability, and performance. A trustworthy solar partner will guide you through the options and explain why they stand by the brands they offer, which is a core part of our approach to every project.
Quality of Installation
You can buy the best solar panels in the world, but they won’t perform well if they’re installed incorrectly. The quality of the installation is critical to your system’s performance, safety, and longevity. A professional installation team ensures that every panel is securely mounted, correctly wired, and positioned for optimal sun exposure. Because solar installation is tied directly to your roof, working with a company that has deep expertise in both is a major advantage. This ensures your roof’s integrity is protected throughout the process, giving you peace of mind about your home’s most important assets. Great roofing solutions and solar installations go hand-in-hand.
Battery Storage and Backup Power
Living in California, we’re all familiar with power outages and fluctuating energy costs. This is where battery storage comes in. Adding a solar battery to your system allows you to store the excess energy your panels generate during the day instead of sending it all back to the grid. You can then use that stored power at night, during peak hours when electricity is most expensive, or during a blackout. A battery backup system gives you true energy independence and a reliable source of power when you need it most, making your home a self-sufficient sanctuary.
Finding the Best Solar Panels for Your California Home
With so many solar panel brands on the market, it’s easy to feel overwhelmed. How do you know which ones are truly the best for your home? The key is to focus on what really matters: efficiency, durability, and the manufacturer's long-term reliability. A solar panel system is a significant investment in your home’s future, so choosing high-quality components is essential for getting the best return.
At AMECO, we’ve spent decades vetting the industry's top manufacturers to ensure our customers get systems that perform exceptionally well for years to come. We look beyond the marketing claims to assess the real-world performance and longevity of the panels we install. Think of us as your expert guide, helping you select the right technology to meet your energy goals and fit your budget. Let’s walk through what you need to know about panel types and warranties to make a confident choice.
Our Premium Panel Selection
We believe that a great solar system starts with great panels. That’s why we only work with manufacturers known for their superior quality, high efficiency, and strong warranties. Our selection process focuses on finding panels that deliver maximum power output and can withstand the elements for decades. By choosing premium solar solutions, you can generate more electricity from your available roof space, leading to greater savings on your energy bills. We’ve done the research so you can feel confident that your system is built with reliable, top-tier components designed for long-term performance.
What to Know About Top Manufacturers
When you start looking at panels, you’ll likely see two main types: monocrystalline and polycrystalline. Monocrystalline panels are made from a single crystal structure, which makes them highly efficient and gives them their sleek, black appearance. They perform very well in low-light conditions, making them a great choice for maximizing energy production. Polycrystalline panels are made from multiple silicon fragments, which makes them less expensive to produce but also slightly less efficient. Our approach involves helping you decide which type is the best fit for your home’s specific needs, roof orientation, and budget.
How to Compare Warranties
A solar panel warranty is your protection for the life of the system, so it’s important to understand what it covers. Most top-tier panels come with a 25-year warranty that includes two parts: a product warranty and a performance warranty. The product warranty covers defects in materials or workmanship, while the performance warranty guarantees the panel will produce a certain percentage of its original output after 25 years. With an extremely low failure rate, solar panels are a very reliable technology. Pairing them with a battery backup system further secures your energy independence for decades.
Don't Let These Solar Myths Stop You
Making a big decision for your home can feel overwhelming, especially when there's so much conflicting information out there. When it comes to solar energy, a few persistent myths can cause homeowners to pause. Let's clear the air and look at the facts so you can feel confident about your choice to switch to solar. We'll walk through some of the most common concerns and separate the fiction from the reality.
Myth #1: "Solar is too expensive."
This is probably the most common hesitation I hear, and it’s completely understandable to be mindful of your budget. The great news is that the cost of solar has dropped dramatically over the past decade, making it a much more accessible investment for the average homeowner. When you factor in federal tax credits, local rebates, and the long-term savings on your utility bills, the numbers start to look very friendly. Instead of thinking of it as a huge expense, consider it an investment in your home’s value and your energy independence. You can even use an estimate calculator to get a personalized idea of the cost and potential savings for your specific home.
Myth #2: "The installation will damage my roof."
The thought of someone drilling holes into your roof is enough to make anyone nervous. But a professional installation is designed specifically to protect the integrity of your roof. Reputable installers use specialized mounting and flashing systems to ensure every connection is completely waterproof and secure. At AMECO, we take this a step further. Since we have over 50 years of combined expertise in both solar and roofing, we understand exactly how to work with your roof without compromising its structure or lifespan. Our integrated roofing solutions mean you can trust that your home is in the hands of experts who care about the whole system, not just the panels.
Myth #3: "Solar doesn't work when it's cloudy."
It’s true that solar panels are most productive in bright, direct sunlight, but they don’t just shut down when a cloud passes by. Panels can still generate a significant amount of electricity on overcast days by capturing diffused sunlight. Think of it like getting a sunburn on a cloudy day; UV rays are still getting through. Here in California, we get more than enough sunshine to make solar a fantastic investment. For any dips in production, or for power at night, pairing your system with a battery backup ensures you have a consistent, reliable supply of clean energy no matter what the weather is doing.
Myth #4: "The maintenance costs are too high."
Solar panels are surprisingly low-maintenance. They have no moving parts and are built to withstand the elements for decades. In fact, most panels come with a 25-year warranty and have an incredibly low failure rate. For the most part, your main task will be to keep them clean. An occasional rinse to clear off dust or pollen is usually all it takes to keep them working efficiently, and regular rainfall often handles that for you. Our approach focuses on using high-quality equipment and professional installation, which minimizes the chance of issues down the road. You can expect your solar system to be a quiet, hardworking addition to your home without demanding much attention or money.
Frequently Asked Questions
What's the real difference between the sleek black panels and the speckled blue ones? You're noticing the two most popular types of solar panels. The sleek, black ones are called monocrystalline panels. They are more efficient, meaning they produce more power in a smaller amount of space, which makes them perfect for homes with limited roof area. The speckled, blue panels are polycrystalline. They are a bit less efficient but also more budget-friendly, offering a great balance of performance and cost if you have plenty of roof space to work with.
How do I know if my roof is even a good candidate for solar panels? An ideal roof for solar is one that's in good condition, has plenty of direct sun exposure (preferably south-facing), and isn't heavily shaded by trees or other buildings. However, you don't have to figure this out alone. A professional assessment is the best way to know for sure. Since we are experts in both roofing and solar, we can evaluate your roof's structural integrity and its solar potential at the same time, ensuring you have a solid foundation for your system.
Will solar panels actually save me money, considering the initial cost? Yes, they are designed to be a long-term investment that pays for itself. While there is an upfront cost, government incentives like the 30% federal tax credit can significantly reduce that initial price. From there, you start saving money every month on your electricity bill. Over the 25-plus-year lifespan of your system, those monthly savings add up to a substantial return on your investment.
If the power goes out in my neighborhood, will my house stay on? A standard solar panel system that is connected to the grid is designed to shut down during a power outage for safety reasons. However, if you want to keep your lights on during a blackout, you can add a battery backup to your system. The battery stores the extra solar energy your panels produce, creating your own personal power reserve that you can use anytime, day or night, or during an outage.
Are solar panels a lot of work to maintain? Not at all. Solar panels are incredibly durable and have no moving parts, so they require very little upkeep. They are built to withstand the elements for decades. In most cases, seasonal rain is enough to wash away any dust or pollen that accumulates. An occasional rinse with a hose might be helpful if you live in a particularly dusty area, but for the most part, you can expect your system to work quietly and efficiently without much effort from you.
9.10.2026
Thinking about a new roof and a solar installation can feel like two massive projects on your to-do list. Many homeowners tackle them separately, often years apart, without realizing the benefits of addressing them together. Combining these projects isn’t just about convenience; it’s about being smart and efficient. When you hire one expert team, you streamline everything from permits and installation to warranties. A professional solar and roofing company handles both essential upgrades in a single, coordinated project, saving you time, money, and the headache of managing multiple contractors while ensuring a flawless result for your home.
Key Takeaways
- Combine solar and roofing to save time and money: Using one company for both projects streamlines the process, often reduces the overall cost, and gives you a single, comprehensive warranty that covers everything.
- Vet your installer thoroughly: Look for proper licenses (like NABCEP for solar), full insurance coverage, and a long history of local projects. Customer reviews will reveal their true level of service and reliability.
- Expect a full-service partnership: A great solar company handles more than just the installation. They manage the custom design, roof assessment, battery integration, and all the necessary permits, making the process straightforward for you.
What Can a Solar and Roofing Company Do for You?
When you decide to go solar, you’re not just buying panels; you’re investing in a long-term home upgrade. A great solar and roofing company acts as your expert partner, managing the entire project from the first sketch to the final connection. They offer a complete set of services to make your switch to clean energy simple and successful, ensuring both your roof and your new solar system are built to last.
Design and Install Your Solar System
A professional solar company doesn’t offer a one-size-fits-all solution. Instead, they create custom solar solutions designed specifically for your home’s architecture, energy consumption, and budget. They’ll analyze your property to determine the optimal placement and number of panels to maximize sun exposure. The goal is to build a system that significantly lowers your electric bill and gives you more control over your power. By handling the entire design and installation process, they ensure your system is efficient, safe, and ready to generate clean energy for decades.
Repair or Replace Your Roof
Placing solar panels on an old or damaged roof is a recipe for future headaches. That’s why a combined solar and roofing company will first assess the health of your roof. If it has leaks, damage, or is nearing the end of its lifespan (typically 10-15 years for asphalt), they’ll recommend repairs or a full replacement. Taking care of your roofing solutions before installing panels saves you from having to remove and reinstall the entire solar array later. It’s a smart, proactive step that protects your investment and your home.
Add a Battery Backup System
For true energy independence, especially with California’s frequent power outages, a battery is essential. Many solar and roofing companies can integrate a battery backup system with your solar panels. This allows you to store the excess energy your panels generate during the day and use it at night or during a grid failure. A battery system keeps your lights on, your appliances running, and your family safe when the power goes out. It also helps you save even more money by reducing your reliance on the utility company during peak-rate hours.
Maintain and Monitor Your System
A reputable company’s job isn’t done once the panels are on the roof. They manage all the complex steps that follow, from securing the right permits to connecting your system to the grid. According to our approach, excellent customer service is key. This includes providing you with monitoring tools to track your energy production and offering ongoing support to ensure your system performs at its best. They take care of the technical details so you can simply enjoy the benefits of your new solar installation without any of the stress.
How to Choose the Right Solar and Roofing Company
Choosing a company for your solar and roofing project is a big deal. You’re not just buying panels or shingles; you’re investing in your home’s future and partnering with a team for a major installation. The right partner makes the process feel seamless and ensures you get a high-quality system that lasts for decades. But with so many options out there, how do you find the best fit? It comes down to doing a little homework. By focusing on a few key areas, you can confidently select a company that will do the job right and give you peace of mind.
Check for Certifications and Licenses
Think of certifications and licenses as your first quality check. A reputable company will proudly display its credentials. For solar installers, the gold standard is the North American Board of Certified Energy Practitioners (NABCEP) certification. This tells you the technicians have passed rigorous exams and have proven experience. In California, you should also look for a C-10 electrical license for solar work and a C-39 roofing license for any roof-related projects. These qualifications ensure the team has the expertise to handle your installation safely and effectively, following all state and local codes. A company that invests in proper certification demonstrates a serious commitment to our approach and high-quality work. For example, AMECO Solar was recognized as a Gold Tier installer in the 2026 REC Certified Solar Professional Program{:target="_blank"} — a manufacturer-backed endorsement that reflects consistent installation quality and technical excellence.
Look for Local Experience
A company with deep roots in your community offers more than just convenience. Local installers understand California’s specific building codes, weather patterns, and unique utility company requirements. They know what it takes to design a system that performs optimally in our sunny climate and a roof that can handle both intense heat and winter rains. A long history of serving residential customers in your area is also a strong indicator of reliability and stability. They have a local reputation to uphold and are more accountable to their clients. Plus, if you ever need service or support down the road, they’re just a phone call away, not a faceless company in another state.
Verify Insurance and Read Reviews
Before anyone sets foot on your property, confirm the company has full insurance coverage, including general liability and worker's compensation. This is non-negotiable, as it protects you from any liability in the unlikely event of an accident during installation. Once you’ve covered that base, it’s time to see what past customers have to say. Go beyond the star ratings on their website and read detailed reviews on third-party sites like Google, Yelp, or the Better Business Bureau. Look for comments on their communication, professionalism, timeliness, and how they handled any issues that came up. This firsthand feedback gives you a clear picture of the customer experience you can expect.
Get Clear Quotes and Pricing
When it comes to pricing, transparency is everything. A trustworthy company will provide a detailed, itemized quote that breaks down all the costs, including equipment, labor, permits, and any other fees. Be wary of vague estimates or quotes that seem significantly lower than the competition, as this can be a red flag for subpar materials or hidden costs later on. The goal isn’t just to find the cheapest option but to get the best value for your investment. Using an online estimate calculator can give you a ballpark idea of costs before you even start collecting quotes, helping you feel more prepared for the conversation.
Why Hire One Company for Both Solar and Roofing?
When you decide to go solar, the condition of your roof becomes a critical part of the conversation. After all, your solar panels will be up there for 25 years or more. It just makes sense to handle both projects together, and hiring a single company that specializes in both solar and roofing can make the entire process smoother and more cost-effective. Think of it as a two-for-one home upgrade.
Choosing one expert team to manage your project from start to finish eliminates the hassle of coordinating between different contractors. You get a single point of contact, a unified plan, and the peace of mind that your roof and solar panels are designed to work together perfectly. This integrated approach not only simplifies logistics but also provides significant benefits in terms of cost, project management, and long-term warranties. Let’s look at why bundling these services is one of the smartest moves a homeowner can make.
Save Money by Bundling Services
Combining your roofing and solar projects is a great way to save money. When you hire one company for both jobs, they can often offer a package deal that’s more affordable than sourcing the work separately. This is because the company saves on administrative costs, labor, and project management, and they can pass those savings on to you. Many solar installers who partner with roofers provide a discounted roof replacement when you install solar panels. By bundling, you streamline the work and get a better price on a major home improvement that adds significant value to your property. You can even use our estimate calculator to get an idea of your potential costs and savings.
Enjoy a Simpler, Smoother Project
Managing a major home improvement project can be stressful, but it doesn’t have to be. When you work with a single solar and roofing company, you get a much simpler, more streamlined experience. Instead of juggling two different contractors, two timelines, and two sets of paperwork, you have one team handling everything. A dedicated project manager oversees the entire process, from the initial design and permitting to the final installation and grid connection. This means you have one point of contact for all your questions and updates. Our approach is designed to make the transition to solar and a new roof as seamless as possible for you.
Get One Warranty for Everything
One of the biggest advantages of hiring a single company is getting a single, comprehensive warranty for both your roof and your solar system. If you hire separate contractors, you could find yourself in a difficult situation if a problem like a roof leak occurs. The roofer might blame the solar installer, and the solar installer might blame the roofer, leaving you stuck in the middle. When one company is responsible for both, there’s no finger-pointing. You have one number to call, and that company is accountable for ensuring both the integrity of your roof and the performance of your solar panels. This unified warranty provides complete peace of mind for years to come.
Ensure Your Roof and Solar Work Together Perfectly
Your roof is the foundation for your solar energy system, so it’s essential that they are perfectly compatible. A company that specializes in both can properly assess your roof’s condition and determine if it can support a solar installation for the next 25-plus years. It’s often a smart move to replace an older roof before going solar, and an integrated team can handle this seamlessly. They ensure the roofing materials are ideal for a solar installation and that the panels are mounted in a way that protects your roof’s integrity. In fact, solar panels can even help shield your roof from the elements, extending its lifespan. This holistic approach guarantees that both systems work in harmony, protecting your home and your investment.
How Much Do Solar and Roofing Services Cost?
Thinking about the cost of a solar and roofing project can feel overwhelming, but it’s more straightforward than you might think. The price depends on your specific home, your energy needs, and the materials you choose. The great news is that combining these projects often leads to savings, and various incentives can make the investment much more manageable. Let's break down what goes into the cost and how you can plan for this exciting home upgrade.
What Affects Solar Installation Costs?
The final price tag for your solar solutions depends on a few key factors, including the size of your system, the type of panels you select, and the complexity of the installation. One of the most important considerations is the condition of your roof. Since solar panels are designed to last for 25 to 30 years, your roof needs to be in good enough shape to support them for that entire lifespan. If you install panels on an old roof and need a replacement later, you’ll face the extra cost of having the panels removed and reinstalled. That’s why addressing your roof’s health first is a smart financial move.
How Are Roofing Services Priced?
The cost of roofing services is influenced by the size of your roof, the materials you choose (like asphalt shingles or tile), and the pitch or steepness. For context, replacing an average-sized asphalt roof and installing a standard solar system can cost around $40,000 combined. While that’s a significant investment, bundling the two projects is almost always more cost-effective than doing them separately. Regular roof inspections can also help you catch minor issues before they turn into major, expensive repairs, keeping your home protected and ready for solar when the time is right.
Explore Financing and Incentives
You don’t have to pay for everything upfront. Many homeowners take advantage of the 30% Federal Tax Credit, which can significantly reduce the net cost of your solar installation. Beyond that, there are many flexible financing options available, including plans with no money down, designed to make the transition to solar energy accessible for different budgets. These programs help you start saving on your energy bills right away without a huge initial investment, making a new roof and solar system a practical reality for your family.
Calculate Your Long-Term Savings
While there's an initial cost, the long-term financial benefits are substantial. Over a 25-year period, most homeowners save an average of $60,000 on their electricity bills. These savings often more than cover the initial cost of the solar panels and even a new roof. By generating your own clean energy, you’re not just making a smart investment in your home’s value; you’re also protecting yourself from rising utility rates. You can calculate your potential savings to get a clearer picture of how much you could save based on your home and energy usage.
What Warranties and Guarantees Should You Look For?
When you invest in a new roof or solar panel system, you’re making a long-term commitment to your home. The warranties and guarantees that come with that investment are your safety net. They represent a company’s promise to stand behind its products and its work, giving you confidence that your system will perform as expected for years to come. A strong warranty isn't just a piece of paper; it's a sign of quality and reliability. Understanding what to look for will help you protect your home and your finances.
Solar Panel and Equipment Warranties
When you look at solar solutions, you'll generally find two types of warranties for the panels. The first is a product warranty, which covers any manufacturing defects or equipment failures. This typically lasts for 10 to 12 years, though some premium panels offer 25 years. The second, and arguably more important, is the performance warranty. This guarantees your panels will produce a certain percentage of their original output after a set number of years. The industry standard is a 25-year warranty that ensures at least 80% production, which is a great benchmark to look for. These solar panel warranties ensure your system keeps generating value for decades.
Roofing Material and Workmanship Guarantees
A new roof is a major project, and its warranties should reflect that. Similar to solar, you’ll want to see two types of coverage. A material warranty comes from the manufacturer and protects against defects in the roofing materials themselves, often lasting anywhere from 20 to 50 years. Just as important is the workmanship guarantee from your installer. This covers any issues that arise from the installation process. Without a solid workmanship guarantee, a mistake during installation could cause problems that the material warranty won’t cover. That’s why finding a company that provides comprehensive roofing solutions with strong dual coverage is key.
Installation and Performance Warranties
Beyond the manufacturer's promises, your installer should offer their own guarantees. An installation warranty covers the quality of the labor itself, typically for 5 to 10 years. This means if a problem arises because of how the solar panels or roofing materials were installed, the company will come back and fix it. For solar systems, a performance warranty from the installer guarantees the entire system will generate a specific amount of energy. This provides peace of mind that all the components, from the panels to the inverters and even the battery backup, are working together efficiently to meet your home's energy needs.
The Benefit of a Single, Coordinated Warranty
This is where hiring one company for both solar and roofing really shines. When you have a single, coordinated warranty, you have one point of contact for any issue. There’s no risk of the solar company blaming the roofer for a leak, or the roofer blaming the solar installer. One company takes full responsibility for the entire project, from the shingles on your roof to the panels on top of them. This integrated approach simplifies everything and ensures that both systems are designed to work together perfectly. It reflects a company’s commitment to quality and gives you a seamless, worry-free experience.
Ready to Start Your Solar and Roofing Project? Here's How.
Taking the first step toward a solar and roofing project can feel like a huge leap, but it’s actually a series of simple, manageable stages. When you work with an experienced team, the process is surprisingly straightforward. We handle the heavy lifting so you can focus on the excitement of upgrading your home and gaining energy independence. From the first conversation to the final installation, here’s a clear breakdown of what you can expect on your journey to a more sustainable and secure home.
Your First Consultation and Site Visit
It all starts with a conversation. Your initial consultation is a chance for us to understand your goals and for you to get all your questions answered. We’ll schedule a visit to your home to perform a comprehensive assessment. This isn’t just a quick look; we conduct a thorough roof check, analyze your past energy bills to understand your usage, and create a custom quote. We’ll walk you through a detailed savings estimate and explain all the available payment options and incentives. Our goal is to give you a complete picture of our approach so you can make an informed decision with confidence.
The Design and Permitting Phase
Once you decide to move forward, our team gets to work on the technical details. This is where we handle all the complex steps behind the scenes. We’ll design a custom solar system tailored to your home’s specific needs and your family’s energy consumption. We also manage the entire permitting process with your local municipality, which can often be a headache for homeowners. Our team ensures every piece of paperwork is filed correctly and that your new system is approved for a smooth connection to the grid. You can relax knowing all the logistical details are in expert hands.
What to Expect During Installation
This is the most exciting part, when your vision becomes a reality. Our professional crew will arrive on schedule to install your new roof or solar panels. If you’re bundling services, we can often complete your roofing and solar installation at the same time for maximum efficiency. We treat your property with care and work diligently to get the job done right. After the physical installation, we’ll handle the final inspections and connect your system to your home’s electricity. Then, it’s time to flip the switch and start enjoying the benefits of clean, reliable solar power.
Frequently Asked Questions
Do I have to replace my roof before installing solar panels? Not always, but it’s a smart question to ask. Solar panels are built to last for 25 years or more, so your roof needs to be in good enough shape to last just as long. If your roof is already 10 to 15 years old or showing signs of wear, replacing it first is the most cost-effective move. It saves you from the significant expense of removing and reinstalling your entire solar array down the road just to fix the roof underneath.
How long does the entire solar and roofing installation process take? The timeline can vary, but a good company will keep you informed every step of the way. After your initial consultation, the design and permitting phase typically takes a few weeks, as we work with your local city or county. The actual on-site installation of a new roof and solar system is surprisingly quick, often taking just a few days. The final step is getting approval from your utility company to connect to the grid, which can add a little more time.
What happens if there's a problem with my roof or panels after installation? This is exactly why choosing a single company for both jobs is so important. If an issue like a roof leak comes up, you make one phone call. There’s no back-and-forth between a roofer and a solar installer, because one team is responsible for the entire project. A comprehensive warranty that covers both workmanship and materials ensures that any problems will be addressed quickly and without any hassle for you.
I'm worried about the upfront cost. Are there ways to make it more affordable? Absolutely. While it's a significant home investment, you don't have to pay for it all at once. The 30% Federal Tax Credit is a huge help, as it directly reduces the total cost of your system. Beyond that, there are many flexible financing plans available, including options with no money down. These programs are designed to make solar accessible so you can start saving on your electricity bills right away.
How do I know if my home is a good candidate for solar energy? Most homes in California are great candidates for solar, but the best way to know for sure is with a professional assessment. During a free consultation, an expert will evaluate your roof’s condition, its orientation, and any potential shading from trees or other buildings. They will also analyze your past energy bills to design a system that is perfectly sized to meet your family’s needs and maximize your savings.
9.10.2026
Your home is likely your biggest investment, and every upgrade should add long-term value. A solar battery is a forward-thinking addition that prepares your home for the future. As more of our lives become electrified, from our cars to our appliances, having a personal energy reserve becomes increasingly valuable. It provides stability in an unpredictable world and adapts to your family’s changing needs. This article will explore the features and considerations that matter most, showing you how choosing the best solar battery backup system for home installation today is a smart way to future-proof your energy for years to come.
Key Takeaways
- Focus on Energy Independence First: While a solar battery can help lower your utility bills, its primary value is providing reliable backup power during an outage. Think of it as an investment in security and peace of mind, ensuring your home stays powered when the grid goes down.
- Size Your Battery for Your Lifestyle: The right battery isn't the biggest one; it's the one that matches your specific needs. Calculate which essential appliances you want to run, decide how long you need backup power, and consider future plans like an EV to find the perfect fit for your home.
- Always Use a Professional Installer: Installing a battery involves complex, high-voltage electrical work. A certified professional ensures your system is installed safely, complies with all local codes, and is optimized for performance, which protects your home, your warranty, and your investment.
Is a Solar Battery Backup System a Smart Investment?
If you’re considering solar panels, you’ve probably asked yourself this exact question. A solar battery is a significant purchase, and it’s fair to wonder if it’s truly worth the cost. The short answer is yes, for many California homeowners, a battery backup system is one of the smartest home upgrades you can make. Think of it less as an extra expense and more as a long-term investment in your home’s security and your financial freedom.
The most obvious benefit is having a reliable power source during blackouts. When the grid goes down, your lights stay on, your food stays cold, and your essential devices keep running. This peace of mind is invaluable, especially with the increasing frequency of power outages. But the real financial magic happens every single day. A solar battery backup allows you to store the excess energy your panels generate during the sunny afternoon. Then, when electricity rates spike in the evening, you can power your home with your own stored, low-cost energy instead of buying expensive power from the utility company.
Over time, these daily savings on your electricity bill can add up significantly, helping to offset the initial cost of the battery. You can get a clearer picture of your potential savings by using an estimate calculator to see how your energy use aligns with solar production. When you combine these savings with the security of having uninterrupted power, a solar battery transforms from a simple backup system into a powerful tool for energy independence. It’s a strategic choice that puts you in control of your power and your budget.
How Do Solar Battery Backups Work?
Think of a solar battery as a personal energy reserve for your home. It works by storing the excess electricity your solar panels generate during the sunniest parts of the day. Instead of sending all that extra power back to the grid, your system intelligently diverts it to your battery, charging it up for later. This simple process ensures you capture and keep every bit of clean energy your panels produce.
When the sun goes down or on a cloudy day, your home automatically starts drawing power from the battery instead of pulling it from the utility company. The transition is completely seamless. The real magic happens during a power outage. Your battery backup system can disconnect from the grid and kick in almost instantly, keeping your lights on, your refrigerator cold, and your essential devices running. This provides incredible peace of mind, especially when the grid is unreliable.
Modern battery systems also offer smart energy management. In California, electricity prices often change throughout the day, peaking in the late afternoon and evening. A smart battery can be programmed to power your home during these expensive "peak hours," helping you avoid high utility charges and maximize your savings. A solar battery doesn't just store power; it gives you control over how and when you use it, making it a powerful tool for energy independence.
Choosing the Right Home Solar Battery: What to Look For
Picking a solar battery isn't a one-size-fits-all decision. The best choice for your neighbor might not be the right fit for you. Your home's energy usage, your goals for energy independence, and your budget all play a role. Think of it as a long-term investment in your home’s security and comfort. To make a confident choice, you’ll want to understand a few key factors that separate one battery from another.
When you start comparing models, you'll see terms like "capacity," "power output," and "depth of discharge." While they might sound technical, they’re actually simple concepts that directly impact how your battery will perform when you need it most. Getting familiar with these details will help you select a battery backup system that perfectly matches your family’s needs, ensuring the lights stay on and your essential appliances keep running, no matter what’s happening with the grid.
Storage Capacity and Power Output
Think of storage capacity and power output as two sides of the same coin. Storage capacity, measured in kilowatt-hours (kWh), tells you how much energy the battery can hold. It’s like the size of a water tank. Power output, measured in kilowatts (kW), tells you how much electricity the battery can deliver at any given moment. This is like the size of the pipe coming out of the tank. You need enough capacity to last through an outage and enough power to run multiple appliances at once. A battery sized to your home’s needs will keep things running smoothly.
AC vs. DC Coupling
This one sounds a bit technical, but the concept is straightforward. Your solar panels produce direct current (DC) electricity, but your home and the grid use alternating current (AC). A solar inverter handles this conversion. A battery can be connected, or "coupled," on either the DC side or the AC side of this process. DC-coupled systems are often slightly more efficient if you’re installing solar panels and a battery at the same time. AC-coupled systems are perfect for adding a battery to an existing solar panel system, offering more flexibility.
Battery Chemistry and Technology
The vast majority of modern home solar batteries use lithium-ion chemistry, and for good reason. Unlike the older lead-acid batteries that required regular maintenance, lithium-ion batteries are a set-it-and-forget-it solution. They last much longer, are more compact, and are more efficient. Within the lithium-ion family, you’ll find different types, like Lithium Iron Phosphate (LFP), which is known for its exceptional safety and very long lifespan. When you work with a trusted installer, you can be sure you’re getting a battery with safe, reliable, and proven technology.
Warranty and Lifespan
A solar battery is a significant investment, so its warranty is a critical indicator of quality and durability. Most manufacturers offer warranties that cover a certain number of years or a specific number of charge-discharge cycles. A strong warranty usually guarantees that the battery will retain a certain percentage of its original capacity (for example, 70%) by the end of the warranty term. This gives you peace of mind and a clear picture of the battery's expected performance over time. Our approach to solar prioritizes high-quality products with robust warranties to protect your investment.
Efficiency and Depth of Discharge
Two final terms to know are round-trip efficiency and depth of discharge (DoD). Round-trip efficiency measures how much energy you get out of the battery for every unit of energy you put in. A higher percentage means less energy is lost during the charging and discharging process. Depth of Discharge refers to the percentage of the battery's total capacity that can be safely used. Modern lithium-ion batteries have a high DoD, often 90% or more, meaning you can use almost all the stored energy without harming the battery’s long-term health.
Our Top Picks for Solar Battery Backup Systems
With so many great options on the market, finding the right solar battery can feel overwhelming. The best choice for your neighbor might not be the best choice for you. Your ideal system depends on your home’s energy consumption, the size of your solar panel array, and what you want to power during an outage. To help you get started, we’ve put together a list of some of the most reliable and popular solar batteries available today.
This list covers a range of needs, from homeowners looking for whole-home backup to those who just want to keep the essentials running. As you read through the options, think about your specific goals. Are you preparing for frequent power outages, or are you more focused on maximizing your solar energy savings? Understanding your priorities is the first step. We’ll walk you through some top contenders known for their performance, reliability, and innovative features.
AMECO Solar Battery Solutions
At AMECO, we don’t believe in a one-size-fits-all approach. Instead of limiting you to a single brand, we help you find the perfect battery for your home’s unique needs. With over 50 years of combined solar and roofing experience, we know what works best for California homeowners. Our process starts with a personalized consultation to understand your energy goals and budget.
We then design a custom battery backup system, recommending top-tier products like those on this list that align with your needs. Our expertise ensures your battery is perfectly sized and seamlessly integrated with your solar panel system, giving you a reliable and efficient green energy solution. This commitment to customized solutions is a core part of our approach to every project.
Tesla Powerwall 3
The Tesla Powerwall 3 is often considered the gold standard in home energy storage, and for good reason. It packs a substantial 13.5 kWh of usable capacity, which is enough to power essential appliances for a full day. What really sets it apart is its high continuous power output of 11.5 kW. This means it can handle energy-hungry appliances like your HVAC system or well pump without breaking a sweat. If you’re looking for a powerful, all-in-one solution that can provide true whole-home backup, the Powerwall 3 is an excellent choice, recognized by many as one of the best solar batteries available.
Enphase IQ 5P
If reliability is your top priority, the Enphase IQ 5P is a fantastic option. This battery uses a distributed architecture with multiple microinverters, which means there’s no single point of failure. If one component has an issue, the rest of the system keeps running smoothly. Each unit has a 5 kWh capacity, and its modular design makes it easy to stack multiple batteries together to increase your storage. This makes the Enphase system incredibly versatile, allowing you to start with a smaller setup and expand it later as your energy needs grow. It’s a smart, dependable choice for long-term peace of mind.
FranklinWH aPower 2
For homeowners thinking about long-term value, the FranklinWH aPower 2 is a compelling choice. It offers a generous 13.6 kWh of storage capacity and comes with an impressive 15-year warranty, which is longer than many competitors. The system is also highly scalable, allowing you to combine up to 15 units for a massive 204 kWh of storage. This makes it a great fit for large homes or for those who plan to add an electric vehicle or other major electrical loads in the future. The FranklinWH system is built to last and adapt to your changing energy demands over time.
Anker SOLIX X1
Known for its high-tech consumer electronics, Anker brings its signature efficiency and user-friendly design to the home energy space with the SOLIX X1. This modular system is designed for tailored and expandable storage, so you can build the exact capacity you need. One of its standout features is its advanced technology, which includes smart app controls that give you detailed insights into your energy production and consumption. For homeowners who love having data at their fingertips and want a sleek, modern system, the Anker SOLIX X1 offers a great blend of performance and intelligent energy management.
Generac PWRcell
Generac has long been a trusted name in backup power, and its PWRcell solar battery lives up to that reputation. The system’s key strength is its modularity. You can start with a base capacity and easily add more battery units later to increase your storage. This flexibility is perfect for homeowners whose energy needs might evolve, whether due to a growing family or the purchase of an electric vehicle. The PWRcell integrates seamlessly with Generac’s other home energy products, offering a comprehensive and customizable solution for keeping your home powered through any outage.
EG4 12000XP
If you’re looking for a high-performance battery without the premium price tag, the EG4 12000XP is worth a look. It has become a popular choice in online solar communities for its impressive power and cost-effectiveness. While it’s often favored in DIY setups, its robust performance makes it a strong contender for any budget-conscious homeowner. To ensure safety, compliance, and warranty protection, we always recommend a professional installation. The EG4 proves that you don’t have to compromise on power to find an affordable and reliable home battery system.
How to Size Your Solar Battery System
Figuring out the right size for your solar battery isn't about picking the biggest one you can find. It’s about finding the perfect match for your home’s unique energy habits and your goals for energy independence. A system that’s too small won’t provide the backup power you need, while one that’s too large can be an unnecessary expense. The key is to strike a balance that covers your essentials without overspending.
Sizing your system correctly ensures you have reliable power when you need it most, whether you're trying to avoid peak utility rates or keep the lights on during a blackout. Think of it as creating a custom energy safety net for your home. To get started, you’ll want to look at three main factors: your daily power consumption, how long you need backup power to last, and what your future energy needs might look like. A personalized consultation can help you dial in the exact specifications, but understanding these elements will put you in a great position to make an informed choice.
Calculate Your Power Needs
First, you need to decide what you want to power during an outage. Do you want to run your entire home as if nothing happened, or are you okay with just keeping the essentials online? Most homeowners create a list of "critical loads," which typically includes the refrigerator, lights in key areas, Wi-Fi, and outlets for charging phones or powering medical devices. Choosing the right battery backup means matching its storage capacity and power output to the demands of these specific appliances. You can get a good idea of your usage by looking at your past utility bills, which show your average daily energy consumption in kilowatt-hours (kWh).
Decide on Your Backup Duration
Once you know what you want to power, the next question is for how long. Are you preparing for brief, hours-long outages or for multi-day events? A battery sized to cover your critical loads for a full day can keep everything running smoothly while the grid is being repaired. If you live in an area prone to longer outages, you might want a larger system that can last for two or three days, especially when paired with solar panels that can recharge it daily. Your desired backup duration directly impacts the amount of storage capacity you’ll need, which is a major factor in the overall cost.
Plan for Future Energy Use
A solar battery system is a long-term investment in your home’s energy security, so it’s smart to think about the future. Are you planning to buy an electric vehicle in the next few years? Thinking about adding a pool or a new air conditioning unit? These additions will increase your energy consumption, and it’s often more cost-effective to size your system for them now rather than trying to add more capacity later. Many modern batteries have modular designs, allowing you to expand your storage as your needs grow, giving you flexibility for whatever comes next.
Understanding the Cost of a Solar Battery System
A solar battery is a significant investment in your home’s energy independence, so it’s natural to have questions about the price. The total cost depends on the system's size, brand, and your specific installation needs. While the initial outlay can seem high, it’s helpful to think of it as a long-term investment that provides security during blackouts and more control over your energy bills. Plus, various incentives can make the final cost much more manageable. Let's break down what goes into the price of a home battery backup system.
Breaking Down Equipment and Installation Costs
When you get a quote for a solar battery, the price is split into two parts: the cost of the battery equipment and the labor for installation. A single home solar battery system usually costs between $12,000 and $20,000 or more. The installation involves integrating the battery with your home’s electrical panel and solar array, a complex job that requires certified professionals to ensure safety and compliance. For a personalized estimate based on your home's needs, you can use an online calculator to get a clearer picture.
Finding Tax Credits and Incentives
The good news is that you don’t have to cover the full cost on your own. The federal government offers a Residential Clean Energy Credit, which is a tax credit for 30% of the total cost of your battery storage system. For a typical installation, this credit can save you around $4,500. On top of that, many states and local utilities offer their own rebates and programs. Our team can help you identify all the incentives you qualify for as part of our approach to creating a custom solar solution.
Weighing Long-Term Savings Against the Initial Cost
So, is a solar battery worth the investment? The answer depends on your priorities. For many California homeowners, the main benefit is the peace of mind that comes with reliable backup power during grid outages and Public Safety Power Shutoffs. While a battery can help you save on electricity bills, especially if your utility has high peak-hour rates, it can take a while for those savings to offset the initial cost. The true value often lies in energy security and knowing your home will stay powered when you need it most.
Key Installation Factors to Consider
Choosing the right solar battery is a huge step, but the process doesn't end there. A successful installation is just as critical to ensuring your system performs safely and efficiently for years to come. It involves more than just mounting a box on the wall; it’s about seamlessly integrating a powerful electrical component into your home’s energy ecosystem. Let's walk through the key factors you’ll need to think about before installation day, from system compatibility to the importance of having a trusted professional handle the job.
Installing with New or Existing Solar Panels
Whether you’re adding a battery to an existing solar array or installing a brand-new system, the way it connects matters. The two main approaches are AC-coupled and DC-coupled systems. Think of it like this: your solar panels produce DC (direct current) power, but your home uses AC (alternating current) power. A DC-coupled system sends solar energy straight to your battery, making it a highly efficient choice for new solar solutions. An AC-coupled system is designed to be easily added to an existing solar setup, offering more flexibility. The right choice depends on your current equipment and energy goals, as it directly impacts how efficiently power flows between your panels, battery, and home.
Understanding Electrical Needs and Permits
Before any work begins, it’s essential to have a clear picture of your home's electrical landscape. A professional will assess your main service panel and typical energy consumption to ensure your new battery can handle the load. Choosing the right battery means matching its output and storage capacity to the demands of your appliances, especially the ones you want to keep running during an outage. This step ensures your system works as expected when you need it most. Additionally, installing a battery backup system requires local permits to ensure everything is up to code. A qualified installer will handle the entire permitting process, giving you one less thing to worry about.
Why Professional Installation Matters
While the DIY spirit is admirable, solar battery installation is a job for certified professionals. The process involves complex, high-voltage electrical work that connects directly to your home’s service panel and solar array. As installers will tell you, the total cost includes both the battery equipment and the specialized labor required for a safe and correct integration. Hiring an experienced team like AMECO ensures your system is installed safely, meets all local codes, and is optimized for performance. This investment in professional installation protects your home, your warranty, and the long-term reliability of your energy independence.
Common Myths About Solar Batteries, Busted
Solar batteries are a popular topic, and with that comes a lot of chatter. It can be tough to separate fact from fiction when you’re considering a big investment for your home. Let’s clear up a few common misunderstandings so you can feel confident about your decision. We'll look at what really happens during a blackout, how your utility's policies play a role, and what you can realistically expect from your battery's performance over the years. This way, you can see the full picture and decide if a battery is the right fit for your home and your peace of mind.
What to Expect During an Outage
One of the biggest myths is that having solar panels means you’ll have power during a blackout. The truth is, for safety reasons, standard grid-tied solar systems automatically shut down when the grid goes down. A solar battery is what gives you true energy independence. A properly sized battery stores the excess energy your panels generate during the day. When an outage occurs, your system safely disconnects from the grid, and the battery seamlessly kicks in to power your essential appliances. This provides crucial backup power to keep your refrigerator cold, your lights on, and your devices charged until the grid is restored.
How Net Metering Affects Your Battery's Value
You might hear that if your utility has a good net metering program, a battery is a waste of money. While it's true that net metering helps lower your electricity bill by crediting you for excess energy you send to the grid, a battery offers a different, equally important kind of value: energy security. For many California homeowners, the main reason for getting a battery isn't just about saving more money. It's about having reliable power during planned or unplanned outages and gaining independence from an unpredictable grid. Your solar solutions work hard all day, and a battery ensures you can use that clean power whenever you need it, day or night.
Real-World Maintenance and Performance
Some people believe solar batteries are a hassle to maintain, while others think they’ll work like new forever. The reality is somewhere in the middle. Modern solar batteries, especially lithium-ion models, require very little maintenance. They are designed to be hands-off, so you won’t need to do much more than occasionally check their status. It’s also important to have realistic expectations about lifespan. A quality battery typically lasts between 5 and 15 years. Like all batteries, they experience some degradation over time, losing a portion of their original storage capacity. Choosing a quality system is key, which is a core part of our approach to every installation.
Getting the Most from Your Battery: Advanced Features
Today’s solar batteries are much more than simple storage containers for energy. They’re sophisticated systems packed with features designed to give you more control, flexibility, and power. When you’re exploring your options, looking beyond basic capacity can help you find a system that truly fits your lifestyle. Think of it like choosing a new car; the engine size is important, but so are the features that make driving it a great experience.
Modern battery backup systems come with smart controls that let you manage your energy from anywhere, modular designs that grow with your needs, and the high power output required to run your most essential appliances. Understanding these advanced features will help you make a more informed decision and ensure your investment serves you well for years to come. Let’s look at what these features mean for you and your home.
Smart Controls and Mobile Apps
One of the most convenient advancements in battery technology is the ability to manage your system from your smartphone. Smart controls and dedicated mobile apps give you a real-time window into your home’s energy usage. You can see how much power your solar panels are generating, how much energy your home is consuming, and how much is stored in your battery. This level of insight allows you to make smarter decisions about your energy use. For example, you can prioritize saving energy for a potential outage or use it to avoid expensive peak-rate electricity from the grid. It’s a key part of our approach to providing customized, user-friendly energy solutions.
Modular Designs for Easy Upgrades
Your energy needs might change over time. Maybe you’ll buy an electric vehicle, add an extension to your home, or simply find your family using more power. A modular battery design gives you the flexibility to adapt without replacing your entire system. You can start with a capacity that fits your current budget and needs, then easily add more storage later. For instance, the Generac PWRcell allows you to slide in new battery modules to increase capacity. Some systems, like the FranklinWH aPower 2, can connect multiple units to create a massive reserve of power. This scalability makes a solar battery a future-proof investment for your home.
High Power Output for Demanding Appliances
It’s important to understand the difference between a battery’s storage capacity (measured in kilowatt-hours, or kWh) and its power output (measured in kilowatts, or kW). Capacity tells you how much energy the battery can hold, while power output tells you how much electricity it can deliver at one time. A high power output is essential for running large, power-hungry appliances like your air conditioner, well pump, or electric stove. The Tesla Powerwall 3, for example, provides 11.5 kW of continuous power, which is strong enough to start and run an HVAC system during an outage. This ensures your residential solar system can handle heavy loads, providing true whole-home backup when you need it most.
Frequently Asked Questions
Will my solar panels work during a blackout if I don’t have a battery? This is a common point of confusion, but for safety reasons, a standard solar panel system that is connected to the grid will automatically shut down during a power outage. This prevents your panels from sending electricity back into the grid while utility workers are trying to make repairs. A solar battery is the key component that allows you to disconnect from the grid and use your stored solar energy to keep your home powered.
How long can a solar battery actually power my home? The duration really depends on the size of your battery and which appliances you choose to run. A typical system is often sized to power essential items like your refrigerator, lights, and Wi-Fi for a full day. If you have a larger battery system or are mindful of your energy use, you could have power for several days, especially since your solar panels can recharge the battery each day when the sun is out.
Can I add a battery to the solar panel system I already have? Yes, you absolutely can. Many homeowners add energy storage to their existing solar arrays. This is typically done using a method called AC coupling, which allows a new battery to integrate smoothly with your current setup. It’s a flexible and popular way to gain the security of backup power without having to change your entire solar energy system.
What’s the real difference between battery capacity (kWh) and power output (kW)? It’s helpful to think of it like water in a tank. Capacity, measured in kilowatt-hours (kWh), is the total amount of energy the battery can store; it’s like the size of the water tank. Power output, measured in kilowatts (kW), is how much electricity the battery can deliver at any single moment; this is like the size of the pipe coming out of the tank. You need enough capacity to last through an outage and enough power to run several appliances at once.
Are there any incentives that make a solar battery more affordable? Yes, there are some great programs available that can significantly reduce the cost. The most notable is the federal Residential Clean Energy Credit, which allows you to claim a tax credit for 30% of the total cost of your battery system. Depending on where you live in California, there may also be additional state or local rebates available to make your investment even more affordable.
9.9.2026
Choosing among solar installation companies in California is about more than comparing the size of a proposed system or the number at the bottom of a quote. The right installer should be able to explain how the design fits your home, roof, utility territory, equipment preferences, and long-term plans. This guide gives California homeowners a practical way to compare companies before requesting proposals or signing a contract.
Get An Estimate from AMECO Solar & Roofing when you are ready to discuss a project designed for your property.
What should you verify before comparing solar installers?
Before comparing proposals, verify that each company is properly licensed for the work it offers, carries appropriate insurance, explains who will perform the installation, and has a track record you can evaluate. The California Contractors State License Board recommends checking a contractor's license status and hiring practices before work begins. A polished proposal cannot replace basic due diligence.
- Look up the contractor through the California Contractors State License Board license search.
- Ask whether the company handles solar, roofing, electrical, and battery work directly or uses subcontractors.
- Request current proof of general liability insurance and workers' compensation coverage where applicable.
- Ask for recent project examples in California homes with similar roof and electrical conditions.
- Confirm who will be your point of contact after the system is installed.
The U.S. Department of Energy also recommends comparing installer credentials, experience, equipment, and proposals rather than choosing on price alone. You can read its guidance on choosing a qualified solar installer as a second reference point.
How do you compare the installation company's service model?
Two companies can sell similar panels while delivering very different customer experiences. Compare who manages design, permitting, utility coordination, roof preparation, installation, inspections, monitoring, and service. A company that clearly owns the process can make accountability easier to understand than a sales organization that passes each stage to an unknown third party.
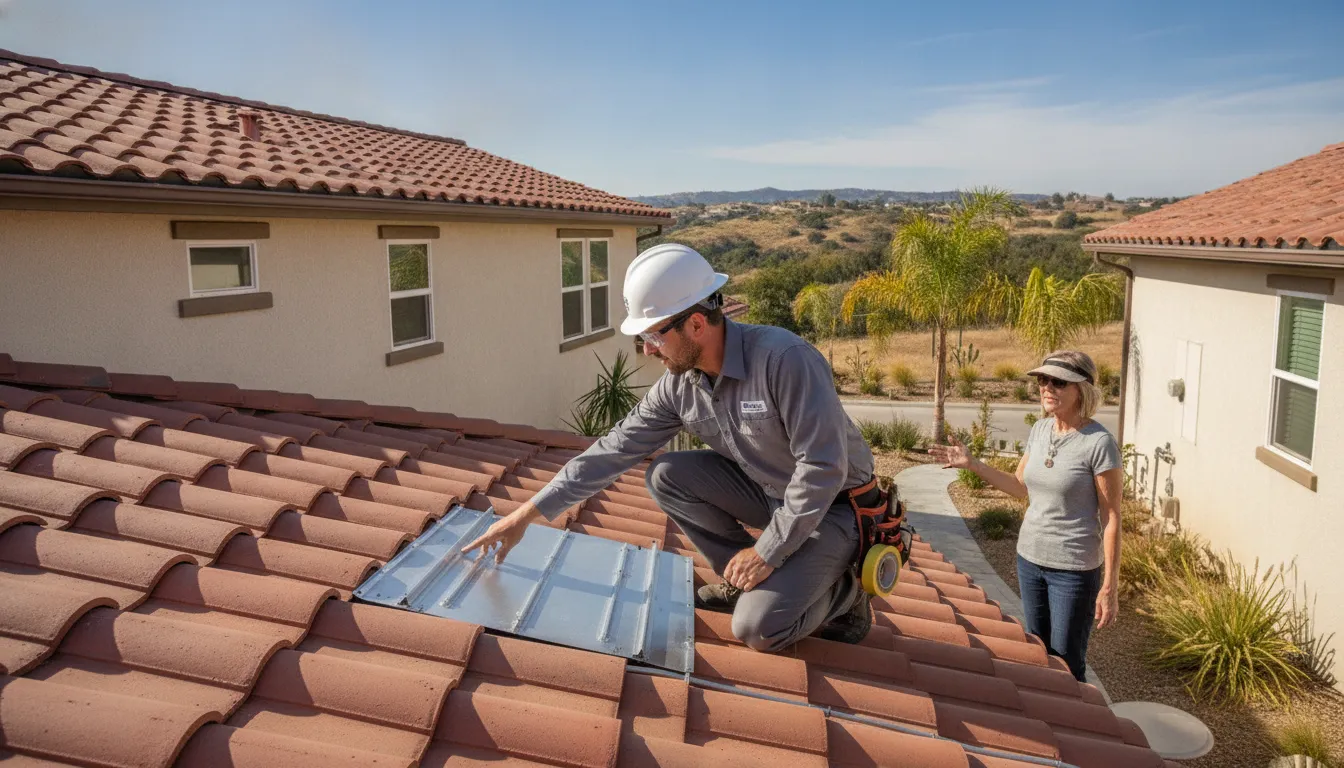
Ask each installer to describe the handoff from the first consultation to the finished system. Important questions include:
- Who performs the site assessment and final system design?
- Who obtains permits and coordinates inspections with the local authority?
- Who submits the interconnection application to the utility?
- Who installs the array, inverter, battery, and electrical equipment?
- Who answers service questions if production or monitoring does not work as expected?
AMECO Solar & Roofing combines solar installation with roofing, battery backup, and EV charging services for California homeowners and businesses. Its end-to-end approach is one example of a service model to evaluate. The important comparison is not simply whether a company offers many services. It is whether the company explains responsibility for each stage and gives you a clear path to support.
What should a California solar proposal include?
A useful proposal should let you understand the recommended system, the assumptions behind it, and the work included. It should identify the property-specific design, expected production methodology, equipment, electrical scope, roof conditions, permitting responsibilities, utility process, payment terms, and post-installation support. If an important assumption is missing, ask for it in writing before comparing totals.
| Proposal area | What to compare | Why it matters |
|---|---|---|
| System design | Panel layout, system size, shade assumptions, production estimate | Shows whether the recommendation reflects your home |
| Equipment | Panel, inverter, battery, monitoring, and electrical specifications | Clarifies what is included and how the system will operate |
| Project scope | Roof work, main-panel changes, permits, inspections, and utility coordination | Reduces the risk of unexpected responsibilities or exclusions |
| Support | Warranty documents, service contact, monitoring access, and escalation path | Defines what happens after installation |
Be cautious with proposals that make broad savings promises without explaining the utility rate assumptions, energy use, battery behavior, roof condition, or incentive eligibility behind them. Your final figures depend on the property, equipment, utility territory, energy consumption, and applicable programs. Use an online solar cost calculator for an initial estimate, then ask an installer to validate the assumptions for your home.
How should you compare solar equipment and battery options?
Equipment should be compared as part of a system, not as a list of brand names. Ask how panel output, inverter architecture, battery capacity, backup circuits, monitoring, roof orientation, and future electrical loads fit together. The best configuration depends on your goals, such as bill reduction, outage protection, EV charging, or planned home improvements.
For each proposal, record:
- The panel manufacturer and model, along with the system's proposed capacity.
- The inverter design and whether the system can support the battery configuration proposed.
- The battery's usable capacity, backup loads, operating mode, and monitoring method.
- How the design handles shade, roof orientation, electrical-panel limitations, and future loads.
- What equipment is included now and what would require a later change order.
Do not choose a battery solely because it has the largest stated capacity. A battery may be used for selected backup loads, rate-management strategies, or both. Ask the installer to explain which circuits it will support, how long backup may last under different loads, and what happens when the battery is depleted. AMECO's battery backup service is a useful reference for the kinds of questions homeowners should ask about storage.
Why does roof and electrical expertise matter?
Solar work changes a roof and connects new electrical equipment to the home. The installer should identify roof age, material, penetrations, structural considerations, attic access, electrical-panel capacity, and any needed upgrades before finalizing the scope. Addressing those details early can reduce avoidable delays, rework, and disagreements about what the proposal includes.
This is especially important for California homes with tile roofs, older electrical panels, recent additions, or a roof that may need replacement during the life of the solar system. Ask for a written explanation if the installer recommends roofing work, including whether the roof work is performed by the same company or a separate contractor. If solar and roofing are planned together, confirm how the teams coordinate flashing, waterproofing, panel removal, and reinstallation.
AMECO Solar & Roofing is positioned around the combined solar and roofing project. Its roofing services can be compared with any separate roofing scope in another proposal. The goal is not to assume that an integrated contractor is always the right choice. The goal is to make sure roof responsibility is explicit before you sign.
Calculate Your Project with a property-specific conversation before you compare proposals only by headline price.
What questions should you ask about permits and utility coordination?
Permitting and utility interconnection are essential parts of a solar project, not administrative details to leave unexplained. Ask which permits the installer will obtain, who schedules inspections, what documents you will receive, and who communicates with the utility. A responsible company should explain the sequence without promising a universal approval date because local requirements and utility conditions vary.
- Which permits are included in the proposal?
- Who responds if the building department requests a design revision?
- Who submits the interconnection application and tracks its status?
- What approvals must be completed before the system can operate?
- Which project milestones trigger customer decisions or payments?
Compare the clarity of the answers, not just the number of steps. A proposal that names the responsible party for each approval gives you a better way to monitor progress. Be wary of anyone who guarantees an approval date without reviewing your property and utility territory.
How can you compare warranties and long-term support?
Solar support has several parts, so do not treat the word warranty as a complete answer. Compare the equipment manufacturer's coverage, installation workmanship coverage, roof-related responsibilities, battery coverage, monitoring support, and the process for making a claim. Ask whether service is handled locally, by the manufacturer, or through a third-party provider.
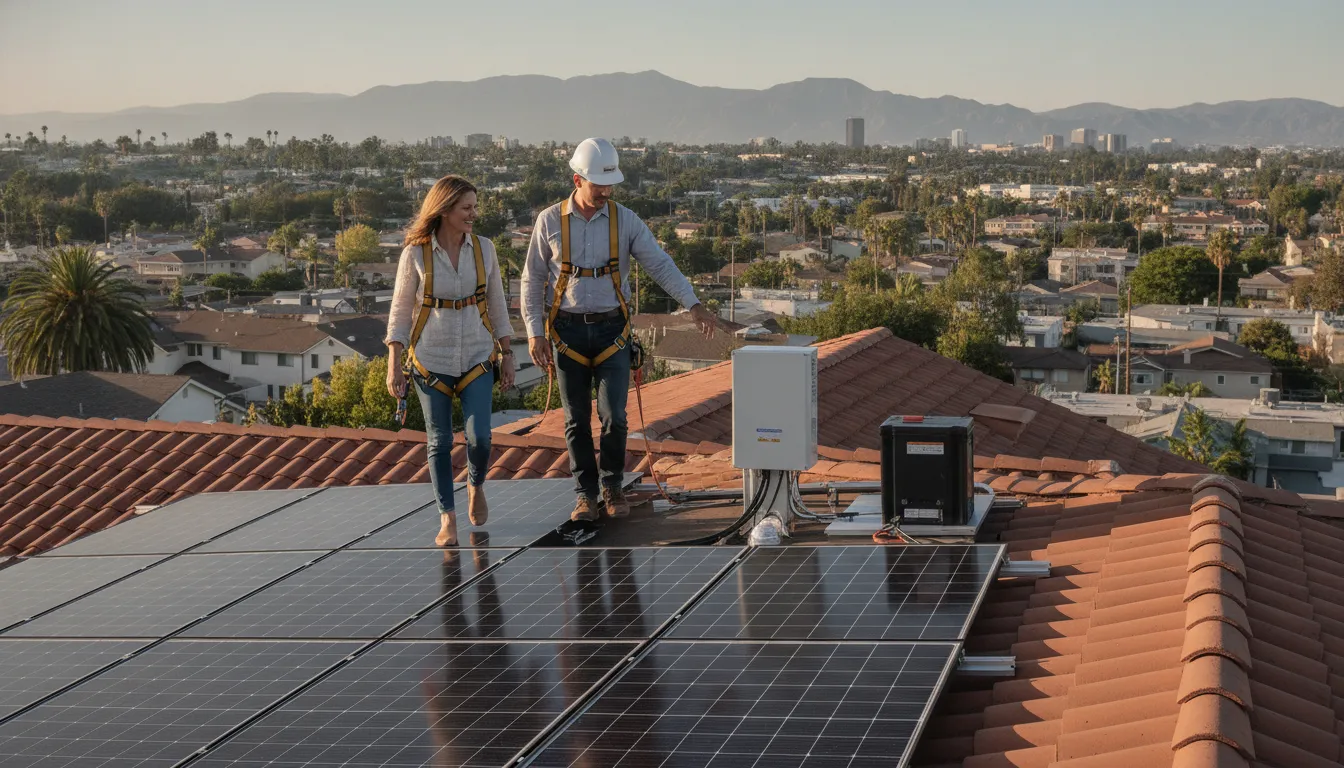
Keep copies of the proposal, equipment data sheets, contract, permits, inspection records, utility approval, and monitoring instructions. Ask these practical questions:
- Who do I contact if production appears lower than expected?
- Who handles a roof leak near a solar attachment point?
- What information is needed to start a warranty claim?
- How will I access monitoring after the project is complete?
- What happens if the installer changes ownership or stops serving my area?
Clear documentation and a named service path often matter more than a large warranty number that you cannot interpret. Ask each company to explain exclusions in plain language and compare the written terms, not only the sales presentation.
What are the red flags when comparing solar companies?
Red flags are usually visible in the process before they appear in the finished system. Slow or evasive answers, pressure to sign immediately, incomplete proposals, unexplained subcontracting, unsupported savings claims, and reluctance to discuss roof conditions all deserve closer review. A reputable installer should give you enough information to make a considered decision.
- The salesperson cannot identify the company responsible for installation.
- The proposal omits the roof, electrical, permit, or utility scope.
- The company uses guarantees that ignore property and utility variables.
- You are discouraged from checking the license, contract, or references.
- The proposal changes verbally but not in the written contract.
- The company says a battery will power the entire home without discussing load limits.
One concern is not automatically proof that a company is unsuitable. Use red flags as prompts for follow-up. If the answer is incomplete or changes from one conversation to the next, compare another installer before committing.
How do you make an apples-to-apples installer comparison?
After collecting proposals, place the answers in one worksheet. Compare the same categories in the same order, and separate confirmed scope from assumptions. This approach helps you see whether a lower headline figure reflects a smaller system, fewer included services, different equipment, or work that has been left for a later decision.
- Verify each company's license, insurance, experience, and installation responsibility.
- Normalize system size, panel layout, inverter approach, battery scope, and monitoring.
- List every roof, electrical, permit, inspection, and utility responsibility.
- Compare the written contract, payment milestones, cancellation terms, warranties, and service path.
- Ask each installer the same unanswered questions and save the written responses.
- Choose the company that offers the clearest fit for your property and priorities, not simply the most persuasive presentation.
For additional preparation, review AMECO's guide to questions to ask solar contractor firms. If you want to understand the design side of the decision, the California solar system design guide covers a different part of the planning process.
What should California homeowners ask before choosing a solar installer?
California homeowners should ask who will design and install the system, how the company will assess the roof and electrical service, which permits and utility steps are included, what equipment and battery assumptions drive the proposal, and how support works after installation. They should verify the license and compare complete written scopes from more than one qualified company.
Should I compare three solar installation companies?
Comparing multiple qualified companies can help you identify differences in design, scope, equipment, and support. The right number depends on your project and the quality of the proposals, but each company should receive the same basic information so the comparison is fair.
Is the lowest solar proposal the best choice?
Not necessarily. A lower proposal may reflect a different system size, excluded roof or electrical work, different equipment, or fewer support services. Compare the complete written scope and assumptions before deciding which proposal offers the best fit for your home.
What should a solar installer inspect?
A solar installer should evaluate roof condition and material, usable roof area, shade, structural and attachment considerations, electrical-panel capacity, service access, and the loads you want to support. The final review should also account for permitting and utility requirements.
Should I use a company that offers both roofing and solar?
An integrated solar and roofing company can simplify responsibility when the roof needs work before or during installation. It is still important to verify licenses, written scope, insurance, workmanship coverage, and the exact team performing each part of the project.
What is the next step after comparing solar companies?
Once you have verified the companies and normalized their proposals, choose the installer that can clearly explain the design, scope, roof and electrical plan, approvals, equipment, contract, and long-term support. AMECO Solar & Roofing serves California homeowners with solar, roofing, battery backup, and EV charging options. Project-specific recommendations should follow a property review rather than a generic promise.
Schedule Now to discuss your California solar and roofing project with AMECO Solar & Roofing.
9.7.2026
In California, a solar installation succeeds when the system fits the property, the household's energy needs, and the approvals required by the local jurisdiction. The panels matter, but so do the roof beneath them, the electrical design, storage goals, and the people responsible for moving the project from assessment to commissioning.
Get An Estimate for a property-specific California solar plan.
The best solar system projects in California begin with property-specific design, account for current and future electricity use, and coordinate roof review, equipment selection, permitting, utility requirements, and installation support. No single system size or equipment combination works for every California property.
That coordinated approach is especially important when a project involves an aging tile, shingle, or flat roof. It also matters when a battery is planned for backup or time-of-use planning, or when a commercial building needs different engineering. Start by looking at the practical standards that distinguish a well-planned system from a collection of components.
What Defines the Best Solar System Projects in California?
A successful solar project is more than a collection of panels on a roof. It is a system designed around the property, the household or business, and the conditions that shape energy use in that California location. The strongest projects balance four priorities: a good fit for the site, useful resilience, code-compliant execution, and coordinated delivery from design through handoff.
Fit starts with evidence rather than assumptions. A property-specific design considers energy usage, the roof, the utility territory, budget, and expected future consumption. A home in Los Angeles may have different load patterns and roof constraints from a home in Sacramento or the Central Valley. Commercial properties also require a different level of capacity planning and engineering than typical residential installations. Final system figures depend on the property, roof, energy use, equipment, utility territory, and eligibility.
Resilience should be defined before equipment is selected. Some California property owners primarily want to offset daytime consumption or manage time-of-use periods. Others need backup capability for selected circuits or the whole home. Those goals are related, but they are not interchangeable. Battery capacity, controls, and the electrical design should reflect the outcome the owner actually needs.
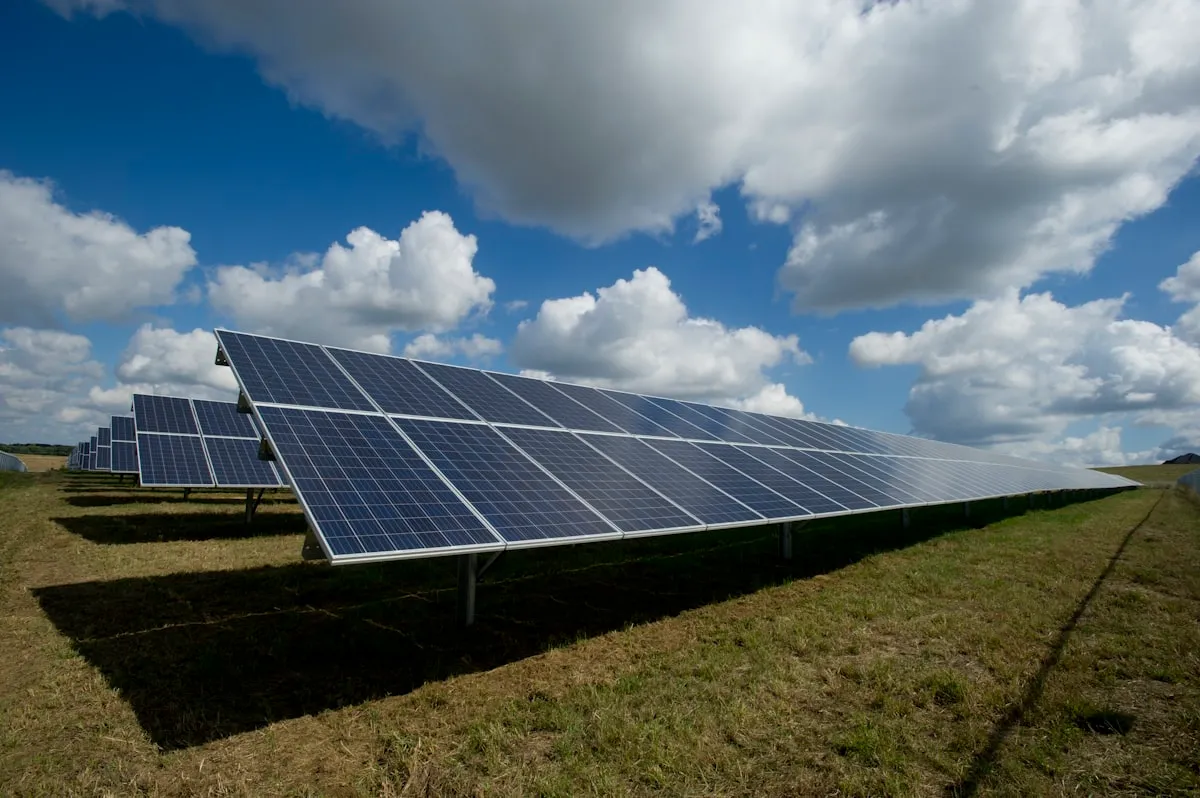
Compliance is part of project quality, not paperwork added at the end. The design and installation must account for structural considerations, local permitting, inspection, and utility interconnection. Requirements and review processes can vary by jurisdiction, so a responsible installer explains what applies to the specific project instead of presenting one universal timeline or approval path.
Coordination connects all of these pieces. A well-managed project may involve roof assessment, utility-bill analysis, 3D design, site measurements, structural review, equipment selection, permit acquisition, inspection coordination, utility interconnection, system testing, commissioning, and customer training. When solar, roofing, electrical, and permitting responsibilities are divided without clear ownership, delays and avoidable handoff problems become more likely. Ask who owns each step and how issues are communicated.
For a closer look at how these stages fit together, review AMECO's solar approach. If your property has different roof planes, future load changes, or backup goals, a project-specific assessment can clarify the next step.
How Should a California Solar System Be Sized and Designed?
A useful design starts with the property and the people using it, not with a preset panel count. The installer should review electricity consumption, the roof and site, the utility territory, and the household's plans before recommending system capacity. AMECO describes custom design as a process based on energy usage, budget, and forecasted consumption. This gives the project a practical starting point: determine what the property needs, then evaluate how solar can meet those needs.
Start with the load, roof, and site
Utility bills help reveal current demand, seasonal patterns, and changes that may affect the design. A homeowner who plans to add an electric vehicle, heat pump, pool equipment, or a home addition may need a different system than a household whose electricity use is unlikely to change. Future electricity use should be discussed early rather than treated as an afterthought.
Site conditions matter just as much. Roof orientation, pitch, usable area, shading, setbacks, and the condition of the electrical equipment can influence where panels fit and how the system is configured. A remote roof assessment can support early planning, but on-site measurements and structural review help confirm the design before installation. A coordinated process may also include:
- Review utility bills and expected future loads.
- Assess roof planes, shading, access, and mounting conditions.
- Check electrical and structural requirements.
- Use a 3D design to visualize panel placement and site constraints.
- Select equipment that fits the property's layout and project goals.
Why scale changes from one project to another
Residential and commercial projects are not simply larger or smaller versions of the same job. AMECO's reference range describes typical residential systems at roughly 4 kW to 15 kW, while commercial projects can reach 500 kW or more and require custom engineering. Those figures are examples of different project scales, not universal recommendations. A commercial design may need to account for operating schedules, multiple roof areas, larger electrical loads, site circulation, and resilience priorities. Homeowners may place more emphasis on household consumption, roof aesthetics, and future electrification.
Three-dimensional modeling can connect these inputs before construction by showing how panel placement responds to the actual roof and site. It also gives the customer a clearer basis for discussing tradeoffs. The right capacity is ultimately property-specific, since final project figures depend on the property, roof, energy use, equipment, utility territory, and eligibility. Readers comparing solar system design factors should look for that level of analysis rather than a generic system promise. For an initial project-specific starting point, AMECO's solar cost calculator can help frame the conversation, while a formal design requires a review of the site and expected use.
What California's roof-area benchmarks can tell you
California's 2025 Energy Code provides a useful design benchmark for qualifying homes with limited Solar Access Roof Area, although it is not a universal system recommendation. The California Energy Commission explains that the Solar Access Roof Area calculation uses 18 watts per square foot for steep-slope roofs and 14 watts per square foot for low-slope roofs. Under one exception, an individual roof area with less than 80 contiguous square feet does not require photovoltaic panels. The applicable code path, local enforcement, roof layout, and project design still determine what a specific property needs. See the California Energy Commission solar photovoltaic and battery storage code guidance for the source requirements.
Which Equipment Choices Matter Most for Performance?
There is no single panel, inverter, or battery configuration that is best for every California property. Equipment should follow the project's priorities, including available roof area, shade conditions, electrical design, monitoring needs, outage resilience, and utility rate structure. AMECO identifies REC panels, SolarEdge power optimizers, and Enphase microinverters with monitoring capabilities among the available equipment options. The right combination depends on the design rather than on a universal product ranking. Custom solar system design can connect those choices to actual energy use and property conditions.
Panel selection is only one part of the decision. The installer should explain how the proposed modules fit the roof layout and how the system will be wired and monitored. Inverter architecture also matters. A central or string inverter may suit some layouts, while module-level power electronics, such as optimizers or microinverters, may be considered when the design calls for more granular control or monitoring. These are design tradeoffs, not guarantees of a particular production outcome. Ask which option fits the roof, electrical plan, service equipment, and future maintenance approach.
| Goal | Design focus | Question |
|---|---|---|
| Use roof area | Layout, shading, and inverter fit | How does the equipment fit this roof? |
| Understand operation | Monitoring, alerts, and customer access | What can I see after commissioning? |
| Prepare for outages or rate changes | Battery capacity, backed-up loads, and controls | Is the goal backup, selected circuits, or time-of-use optimization? |
Battery storage deserves its own goal-setting conversation. Enphase systems and Tesla Powerwall are listed as options for configurations that can support whole-home backup or time-of-use optimization. Those objectives are related but not identical. Backup planning focuses on which loads should operate during an outage and for how long under expected conditions. Time-of-use planning focuses on when energy is stored and used. The final battery design depends on the home's loads, electrical service, utility territory, and customer priorities. Review California solar battery options before comparing proposals, and ask whether the design can accommodate future load changes.
Get An Estimate to compare system sizing, roof readiness, and storage options for your property.
Monitoring and handoff are practical parts of equipment value. A complete project should include commissioning, system testing, and customer training, so the homeowner understands normal operation and knows where to find system information. Compare the equipment list with the electrical drawings, backup scope, monitoring access, warranty terms, and support process. For project-specific inputs, use the solar cost calculator, then confirm the assumptions with a property-specific assessment.
Is the Roof Ready for Solar Installation?
A solar array is only as dependable as the roof and mounting system supporting it. Before equipment is selected, the roof should be evaluated for age, condition, drainage, material, attachment points, and any repairs it may need. A remote roof assessment can provide an early view of the property, but on-site measurements and structural review help confirm whether the planned array is appropriate. This roof-first approach can prevent a homeowner from installing panels over a roof that is nearing replacement.
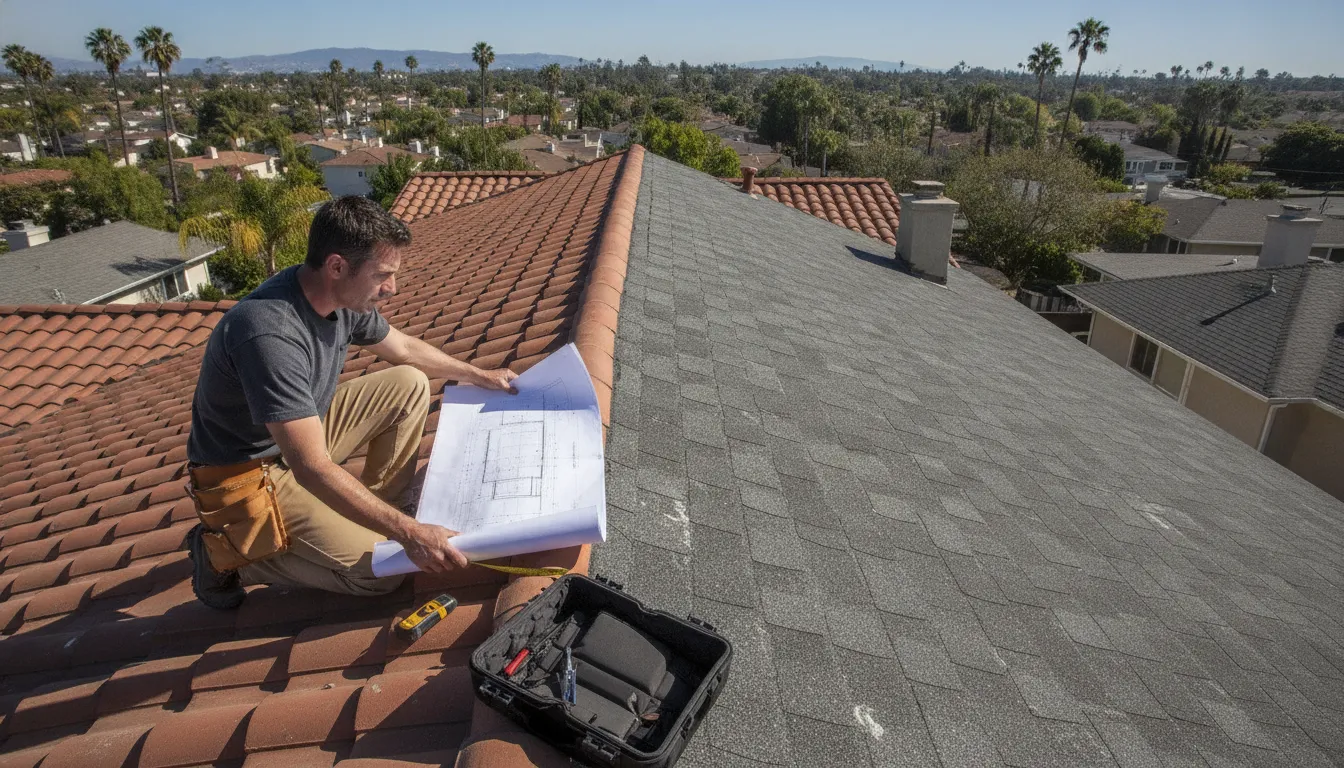
Roof material changes the installation plan
Solar mounting is not identical on every California home. Composite shingle roofs may require carefully located roof attachments and compatible flashing. Tile roofs call for a method that protects the tile and maintains a watertight connection around the mounting hardware. Flat roofs may use a different layout and attachment strategy, with attention to drainage, roof membrane protection, and equipment placement. The right approach depends on the roof assembly, slope, framing, and array design.
For homeowners planning solar on an older roof, the key question is not simply whether panels can be installed today. It is whether the roof is likely to remain serviceable for the expected life of the system. Re-roofing first may be the more practical choice when the roof has visible damage, recurring leaks, brittle materials, or limited remaining service life. In other cases, targeted repairs or solar-ready preparation may be sufficient. A qualified assessment should explain the tradeoffs rather than assume one solution fits every property.
Structural review and weatherproofing protect the project
California permitting guidance includes structural criteria for residential rooftop solar installations. That review helps evaluate how the roof framing and attachment plan will handle the array, including site-specific conditions. Reinforced mounting points may be appropriate when the existing structure or planned layout requires additional support. The design should also account for access, conduit routing, setbacks, and the relationship between roof work and electrical installation.
Flashing and weatherproofing are equally important. Each roof penetration needs a compatible, carefully installed method for directing water away from the attachment. On tile, shingle, and flat roofs, the details differ, but the objective is the same: secure the array without creating a new path for moisture. AMECO's solar-ready roofing services address roof preparation, reinforced mounting points, flashing, and weatherproofing as part of an integrated project review.
A roof assessment should therefore happen before the final system design, not after installation has been scheduled. That sequence allows the solar layout, roof work, structural needs, and long-term maintenance plan to be coordinated from the start.
What Permits and Utility Steps Does a California Project Need?
Solar installation is not complete when the equipment is mounted. A compliant California project also needs the right permit application, plan review, inspection, and utility approval. The exact sequence depends on the city or county, the electrical design, the utility territory, and whether battery storage is included. Reviewing these requirements early helps prevent a design that cannot be approved as submitted.
Permit application and plan review
The permitting authority typically reviews plans for the proposed solar energy system, including its electrical configuration and rooftop or structural details. California's solar permitting guidebook organizes the approval process around permit application and plan review, site inspection, and local utility approval for solar photovoltaic systems. The same guidebook includes structural criteria for residential rooftop solar installations, which is why roof condition and mounting details should be addressed before the permit package is finalized.
Some jurisdictions may accept standardized plans for qualifying designs. California law describes SolarAPP+ as a web-based portal developed by the National Renewable Energy Laboratory that can automate plan review, produce code-compliant approvals, and issue permits for eligible residential solar and paired residential storage systems. That does not mean every project qualifies. Local adoption, system characteristics, site conditions, and the authority having jurisdiction still matter.
Inspection and utility interconnection
After installation, the local authority generally needs to inspect the work. The inspection confirms that the installed system matches the approved plans and applicable code requirements. Passing inspection is an important project milestone, but it is separate from permission to operate on the utility grid.
Utility coordination handles the interconnection side of the project. California law defines a residential solar energy system in part by its single residential interconnection with the electric utility transmission or distribution network. The utility may review the application, confirm the interconnection requirements, and provide approval or permission to operate after the required steps are complete. Requirements can differ among territories such as PG&E, SCE, and SDG&E, so a process that worked in one California community should not be treated as universal.
How storage changes the permitting discussion
A battery adds more than a product choice to the project. It affects the electrical design, equipment locations, safety details, and utility coordination. California defines a residential energy storage system as technology behind the residential utility meter that can store and later discharge electricity for the host customer or export. The California Energy Commission also published a behind-the-meter energy storage permitting guidebook in January 2026, providing current guidance for this category of work. Plans should identify whether the battery is intended for outage backup, time-of-use optimization, or both.
Permitting and interconnection timelines vary by project and jurisdiction. Ask who owns each submission, who schedules inspection, and who confirms utility approval. For a coordinated process, see AMECO's California solar permitting guide.
How Can Homeowners Choose the Right Solar Installer?
The installer you choose affects more than the day panels are attached to the roof. A well-run project connects design, roofing, electrical work, permitting, utility coordination, commissioning, and customer handoff. That coordination helps prevent gaps between subcontractors or departments, especially when a roof condition changes the mounting plan or a utility requirement affects system design.
Start by confirming that the company and the people performing the work hold the licensing required for the project and location. California requirements and local procedures can change, so a responsible installer should be willing to identify the applicable contractor licensing and permitting requirements rather than treating every city or utility territory as identical. Ask who will prepare the plans, submit permits, respond to corrections, coordinate inspections, and manage interconnection with the utility.
Look for a clearly defined scope of work
A proposal should make the project boundaries easy to understand. It should explain whether the installer will assess the roof and electrical service, complete structural review, provide site measurements, select equipment, handle permits, and test the system before handoff. If roofing work is needed, ask whether the same coordinated team can complete it or how responsibility transfers between companies. AMECO describes a process that includes roof assessment, utility-bill analysis, 3D design, equipment selection, permitting, utility coordination, commissioning, and customer training. Learn about AMECO's project approach to compare that level of scope with other proposals.
Also ask how the system will be commissioned and monitored after installation. Monitoring should give homeowners a practical way to see system operation and identify an issue, but it is not a substitute for human support. Clarify who reviews alerts, what training is included, how workmanship concerns are handled, and which warranties apply to equipment, installation, and roofing work. These are separate responsibilities, and the written agreement should identify the party responsible for each one.
Finally, request a realistic explanation of timing without treating an estimate as a guarantee. Permitting, inspections, utility review, equipment availability, and local jurisdiction requirements can affect the schedule. Before choosing a contractor, compare answers to these questions and ask for project-specific assumptions.
What Can California Learn From Large Solar Projects?
Large solar projects show how much success depends on more than the panels themselves. California's Project Nexus is a pilot in the Central Valley. It places solar panels over canals to test whether one piece of infrastructure can support both renewable generation and water conservation. The project is designed to measure electricity production, evaporation reduction, water quality, maintenance costs, and vegetation growth. Its results will be more useful because the project defines several outcomes instead of judging performance by energy production alone. Read the California government's Project Nexus announcement.
Measure the outcome that matters
A California Energy Commission project proposal citing a 2021 UC Merced study estimates that solar canals deployed across the state's 4,000 miles of canals could generate up to 13 gigawatts of clean electricity, conserve 63 billion gallons of water annually, and preserve up to 50,000 acres of land. These are modeled statewide potential figures, not the measured result of one residential or commercial installation. For a homeowner, the relevant questions may instead include usable production, backup during outages, daytime versus evening consumption, or visibility into system performance. The scale changes, but the principle is the same: define the desired result before selecting equipment or judging a design. Review the California Energy Commission solar canal initiative proposal for the source and assumptions behind those estimates.
Coordinate every stakeholder
Project Nexus brings together the California Department of Water Resources, Turlock Irrigation District, SolarAquaGrid, and the University of California, Merced. That partnership reflects the complexity of building solar around existing infrastructure. Residential and commercial projects have fewer stakeholders, but they still require coordination among design, roofing, electrical, permitting, utility, and customer-handoff teams. Clear ownership helps prevent gaps between installation, inspection, interconnection, commissioning, and training.
Local conditions should shape the design. A canal environment, a Central Valley commercial property, and a home in Los Angeles or Sacramento create different structural, electrical, shading, access, and operating requirements. Project Nexus is not a template for a residential installation, and homeowners should not assume that a large infrastructure concept can be replicated on a roof. Instead, use its broader lesson: the best solar system projects in California are planned around measurable goals, site conditions, and coordinated execution.
Get An Estimate for a project-specific California solar and roofing review.
Frequently Asked Questions
How do I know whether my roof is ready for solar?
A roof should be reviewed for age, condition, structure, mounting, flashing, and weatherproofing before panels are installed. A remote roof assessment can guide early planning, but on-site measurements and structural review may still be needed. If the roof needs work, coordinating roofing and solar decisions first can help avoid removing and reinstalling equipment later. See AMECO's solar-ready roofing options for more detail.
Should I add a battery for backup or lower electricity costs?
Start with the outcome you want. A backup-focused system is designed to keep selected loads, or potentially the whole home, operating during an outage. A time-of-use strategy is intended to shift when stored energy is used based on the utility rate structure. Those goals can require different storage capacity and controls, so the battery should be sized as part of the overall design rather than selected separately.
Who handles permits and utility interconnection?
Clarify this responsibility before signing. A well-coordinated project may include permit acquisition, inspection coordination, utility interconnection, system testing, and customer handoff. California guidance describes a process that includes permit application and plan review, site inspection, and local utility approval for solar PV systems: California's solar permitting guidebook. Exact requirements vary by jurisdiction and utility territory.
What should I ask a solar installer before choosing one?
Ask who will assess the roof and electrical system, size the design, select compatible equipment, manage permits, coordinate the utility, monitor the system, and provide support after commissioning. Request a clear scope for workmanship and warranties, and ask how customer training is handled. Comparing these responsibilities can reveal whether an installer is prepared to manage the complete project instead of only the panel installation.
Get Started With Your California Solar Project
A property-specific review can help bring your energy goals, roof condition, equipment choices, storage needs, and permitting requirements into one practical plan. To request a solar and roofing estimate for your California project, Get An Estimate from AMECO Solar & Roofing. Share details about your property and priorities so the next conversation can focus on the decisions that matter for your project.
9.3.2026
When homeowners ask what roofs are not suitable for solar panels, they are usually trying to avoid a costly mistake: installing an array over a roof that needs repair, replacement, engineering review, or a specialized mounting plan first. In California, a roof may be unsuitable for solar today without being a permanent no. The key question is what condition or design limitation must be addressed before installation can proceed.
Get An Estimate for a roof and solar assessment
This guide focuses on the reasons a solar project may need to pause, not on a simple list of roof materials that can or cannot hold panels. Most common roofing materials can work when the roof is sound and the installation is designed for it. The decision depends on condition, remaining service life, shade, usable roof area, structural support, attachment details, and local permitting requirements.
What roofs are not suitable for solar panels right now?
Roofs are not suitable for solar panels right now when they have active leaks, widespread structural or material damage, too little remaining life, unsafe access, inadequate support, or a material that requires a mounting method the installer cannot properly execute. Heavy shade or complex geometry may limit the solar design without making the entire roof unusable.
"Not suitable" should be treated as a project decision, not a label applied from the sidewalk. A roof can fail a preliminary review because of one repairable issue, such as damaged flashing. Another roof may require a complete replacement because the deck is deteriorated or the covering is near the end of its service life.
| Condition | Why solar should pause | Typical next step |
|---|---|---|
| Active leaks or moisture damage | Attachments and equipment should not cover an unresolved water path. | Find the source, repair the roof, and confirm the area is sound. |
| Widespread cracked, missing, or failing materials | Access and mounting can worsen damage and complicate future repairs. | Consider reroofing or a documented repair plan before solar. |
| Roof near the end of its useful life | Panels may need removal and reinstallation when the roof is replaced. | Compare roof-first installation with a coordinated project. |
| Weak or deteriorated structure | Racking must transfer loads to sound structural members. | Obtain a qualified structural evaluation and address deficiencies. |
| Persistent, unmitigated shade | Shade can reduce the usable array area and expected production. | Model shade, trim where appropriate, or evaluate another roof plane. |
| Unsafe or inaccessible roof areas | Installation and future service must be performed safely. | Redesign the array or resolve access and safety constraints. |
| Specialized material without a suitable method | Improvised attachments can damage the covering or create leak risk. | Use an installer with the right material-specific experience. |
The table is a screening tool, not a substitute for an inspection. A qualified solar and roofing review should connect each finding to the proposed array location and attachment plan. The U.S. Department of Energy homeowner guide to solar also emphasizes that there is no single solar solution for every home.
Which roof problems should be repaired before solar panels?
Repair roof problems before solar panels when water is entering the building, decking is soft or deteriorated, flashing is failing, or shingles and tiles have broad damage. Isolated defects may be repairable, but the work should be completed and checked before panels cover the roof. Do not use solar equipment to conceal an unresolved roofing problem.
Active leaks and recurring water stains
A leak is a reason to pause, even if it appears small. Water may travel beneath the roof covering before showing up inside the home. A solar attachment placed near a damaged area can make diagnosis harder and may add another penetration to a roof that is already struggling to shed water.
Ask the contractor to identify the source, not merely the visible stain. Review flashing around vents, skylights, chimneys, valleys, roof edges, and previous repairs. If a repair is recommended, clarify whether the planned array will cover that area and how the finished work will be inspected before solar installation.
Soft decking, sagging, or structural deterioration
The roof covering is only one layer of the system. Beneath it are underlayment, sheathing or decking, framing, and the connections that transfer loads into the home. Soft spots, sagging, rot, or movement need attention because mounting hardware must connect to sound structure, not just the visible roof material.
Older homes deserve an especially careful review. Age does not automatically disqualify a roof, but original framing, past alterations, moisture exposure, and heavy roofing materials can change the structural picture. Where the design calls for it, a qualified professional should evaluate the structure before the array is finalized.
Widespread material failure
One cracked tile or a small group of worn shingles may be repairable. Widespread cracking, curling, missing materials, exposed underlayment, repeated patching, or brittle surfaces point to a larger question: will the roof remain serviceable for the planned solar system? The answer should be based on inspection findings rather than a generic age cutoff.
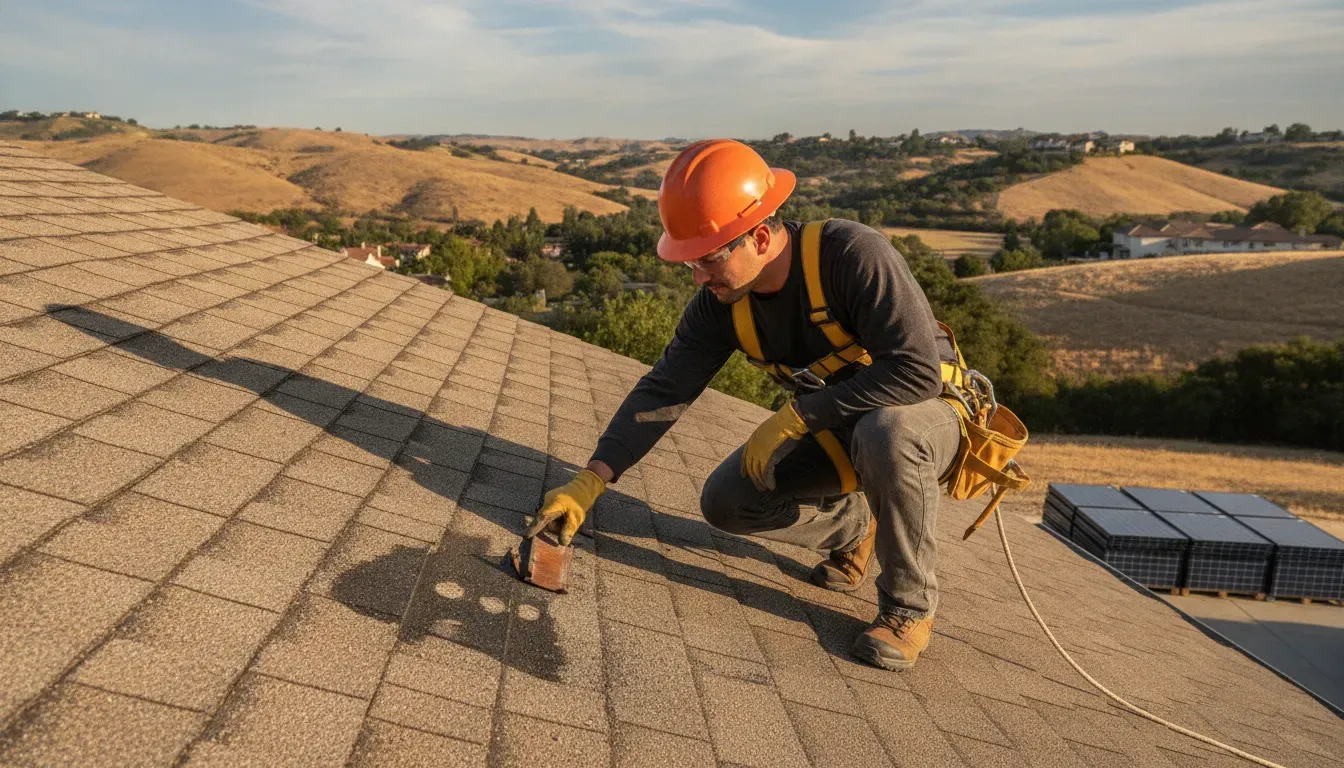
A roof with too little remaining life
Solar panels and racking are long-term equipment. If the roof is likely to need major work soon, installing solar first can create a remove-and-reinstall project later. That may affect the schedule, project scope, and the way warranties are coordinated. A roof replacement is not automatically required, but the remaining life should be compared with the intended solar investment.
Read AMECO's related guide to replacing a roof before solar panels for a closer look at roof-first decisions. The practical goal is to complete the right roof work before the array limits access, not to replace a roof simply because it is not new.
Can shading or roof layout make a roof unsuitable for solar?
Shading and roof layout can make a roof unsuitable for the planned solar array even when the roof is structurally sound. Tall trees, nearby buildings, dormers, vents, skylights, hips, and small roof planes can reduce usable area or complicate setbacks. A shade and layout model can show whether another roof plane or design is workable.
Heavy or persistent shade
Solar panels need access to sunlight, and shade changes over the day and across the year. A large tree, adjacent building, parapet, or upper roof plane can cast shadows across the proposed array. Shade does not necessarily mean the home cannot use solar, but it can reduce the number of panels that fit the design or change the best location.
Start with a site-specific production model rather than guessing from a single midday observation. If a tree is the source, homeowners should consider property goals, local rules, tree health, and the long-term change in shade before deciding whether trimming is appropriate. An alternate roof plane, a smaller array, or a different system design may be better than removing a healthy tree.
Complex geometry and limited usable area
Multiple roof planes are common in California homes. Dormers, hips, valleys, skylights, vents, chimneys, roof-to-wall transitions, and narrow sections can leave less continuous area for panels. Each obstruction can also affect fire access, attachment locations, conduit routing, and future service access.
A complex roof is not automatically unsuitable. It may simply require a more careful layout and realistic production expectations. The design should show where panels will go, which roof planes are excluded, how equipment will be reached, and whether the available area meets the home's energy objectives.
Orientation and pitch
Roof direction and slope influence solar production, but an imperfect orientation is not the same as an unusable roof. South-facing planes are often favorable in California, while east- and west-facing planes can also be useful when the design matches the home's energy use. A very steep or very shallow roof may need specialized racking and safer access planning.
For broader context on how orientation, mounting, inverters, and storage fit into a solar design, review the Department of Energy's solar photovoltaic system design basics. The right decision depends on the roof and the home's load profile together.
Are some roofing materials unsuitable for solar panels?
Some roofing materials require specialized solar installation methods, but few should be called universally unsuitable. Asphalt shingles and standing-seam metal are often straightforward when sound. Clay, concrete tile, slate, wood shake, and other specialty coverings require material-specific handling, attachments, flashing, and sometimes an alternate mounting plan.
Tile roofs need careful handling, not an automatic no
Clay and concrete tile are common across California and can support solar when the roof condition, structure, and mounting details are appropriate. The materials are not identical. Concrete tile is heavier and can absorb more moisture, while clay can be more brittle under concentrated foot traffic. Older, weathered tiles of either type deserve a close inspection.
On a tile roof, the solar mount must transfer loads to the structure below. It should not rely on simply placing hardware on top of the tiles. Depending on the profile and design, a crew may use a compression-style approach that carefully works with the overlapping tile pattern, or a tile-replacement method that accommodates the attachment at a specific location. Flashing and water-shedding details are central to the decision.
Homeowners should ask how the installer will protect surrounding tiles, handle broken pieces, source compatible replacements, and inspect the roof before the array is complete. AMECO's guide to solar panels on tile roof problems explains common risks such as cracked tiles, leaks around attachments, aging underlayment, and limited service access.
Slate and wood shake roofs
Slate and wood shake can be more challenging because the covering may be fragile, irregular, or subject to material-specific installation requirements. A crew that is comfortable with asphalt shingles is not automatically qualified to work on slate or wood shake. The roof may still be viable, but only if the installer can show an appropriate attachment and waterproofing method.
Do not accept a proposal that treats a specialty roof as a standard shingle roof. Ask who will handle the roofing work, whether the method preserves the roof's weather barrier, and how repairs or replacement pieces will be sourced. If the contractor cannot explain the method clearly, the roof is not ready for that contractor's solar installation.
Flat and low-slope roofs
Flat and low-slope roofs can use ballasted or attached racking approaches depending on the building, structure, wind conditions, roof covering, and local requirements. The design must manage water drainage and preserve access to drains, edges, equipment, and service areas. A layout that blocks drainage or creates unsafe pathways is not acceptable simply because panels fit on paper.
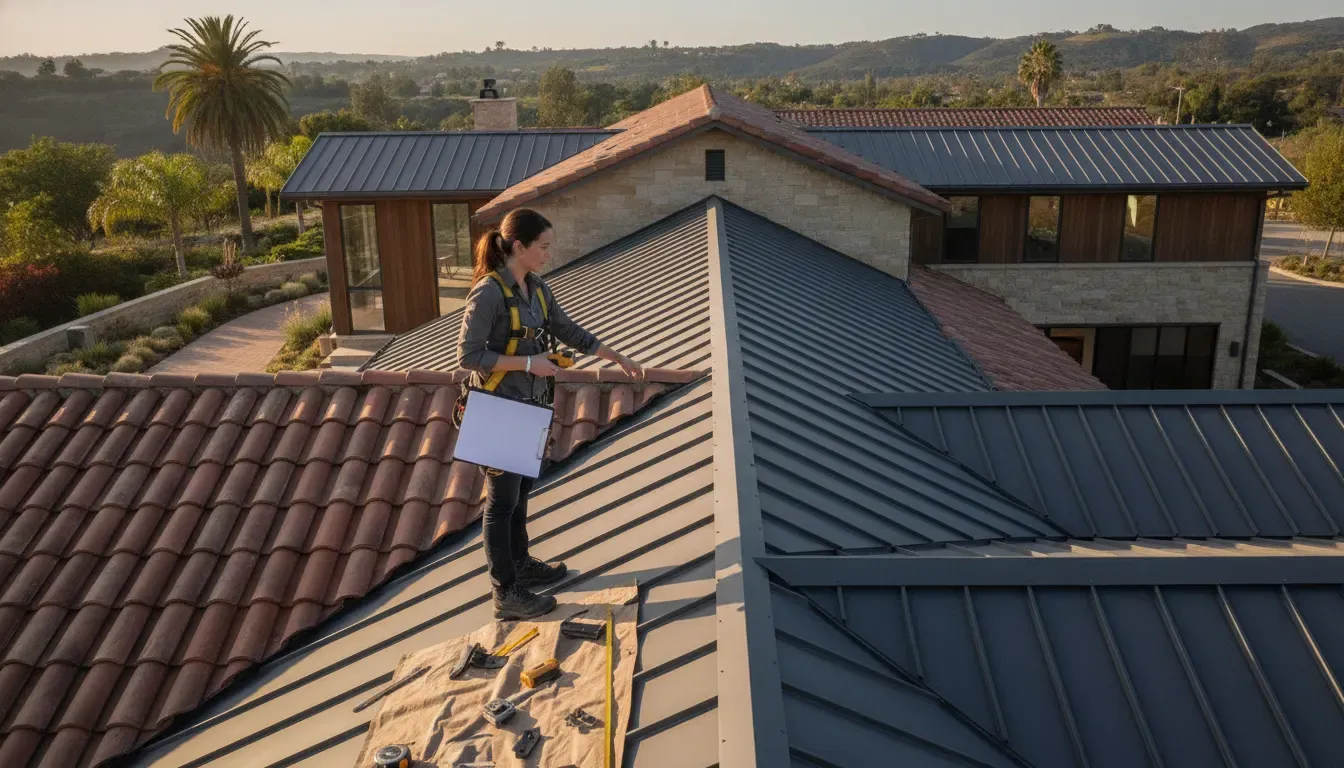
Thatched or highly unusual coverings
Some coverings may be unsuitable because there is no practical, code-compliant, or insurable mounting method for the specific building. Thatched roofs are a well-known example in markets where they are common. In California, the more useful takeaway is to identify unusual materials early and confirm the requirements with a qualified installer, building department, insurer, and the covering manufacturer when appropriate.
How do structural limitations affect what roofs are not suitable for solar panels?
A roof may not be suitable for solar panels until its structure can support the planned equipment and transfer loads safely into the building. The review should consider framing, roof condition, existing roofing weight, attachment locations, wind and seismic forces, and local requirements. Structural concerns require evaluation and resolution, not a guess based on roof appearance.
Solar equipment adds weight, but weight is only one part of the engineering question. The attachment must resist the forces created by wind and movement, and loads must reach the rafters, trusses, or other approved structural members. The condition of the deck and framing matters just as much as the panel and racking weight.
Pre-1970s homes, homes with substantial alterations, buildings with unusual framing, and roofs with a history of moisture damage may need additional review. A structural professional can determine whether reinforcement, different attachment locations, or a smaller array is appropriate. The assessment should be tied to the proposed design, because a roof may support one array layout but not another.
In California, the permitting process is part of responsible project planning. Ask who will prepare the structural and electrical documents, coordinate the permit, and respond to local requirements. A contractor who says a permit or structural review is unnecessary is giving a reason to stop and get a second opinion.
How do you evaluate what roofs are not suitable for solar panels?
Evaluate what roofs are not suitable for solar panels by reviewing the roof history, inspecting the covering and structure, modeling shade and usable area, selecting a material-appropriate mounting method, and checking local requirements. Then compare the roof's remaining life with the solar system plan. The result should explain what can proceed, what must change, and why.
- Gather the roof history. Note the installation date if known, repair records, leak history, prior solar or satellite equipment, and any roof warranty documents.
- Inspect from the exterior and accessible interior. Look for missing or cracked materials, failed flashing, moisture evidence, sagging, soft areas, ventilation concerns, and drainage problems.
- Map the proposed solar area. Mark shade sources, vents, skylights, chimneys, hips, valleys, setbacks, pathways, and locations where future service may be needed.
- Confirm the structural path. Determine where attachments will connect and whether the framing and roof deck are suitable for the proposed system.
- Choose a roof-specific method. The plan should explain attachment, flashing, waterproofing, material handling, replacement pieces, and protection of the surrounding roof.
- Compare roof life with solar life. If major roof work is likely soon, evaluate roof-first or coordinated installation rather than accepting avoidable future removal.
- Document the decision. A clear proposal should identify assumptions, exclusions, repairs, design alternatives, permits, and the conditions that must be met before installation.
This process is more useful than a universal list of "good" and "bad" roofs because it accounts for the actual house. It also gives homeowners questions to use when comparing proposals from different installers.
Why does a combined roofing and solar assessment reduce avoidable rework?
A combined roofing and solar assessment reduces rework by evaluating the roof condition, structural attachment, panel layout, flashing, drainage, and future service needs as one connected project. It can identify roof work before panels limit access, align both scopes, and give the homeowner one coordinated explanation of what must happen before installation.
When roofing and solar decisions are made separately, the project can develop avoidable gaps. A solar designer may place an array over an area that a roofer would have recommended repairing. A roofing crew may complete work without knowing where attachments and conduits will land. Coordinating the scopes early helps both teams design around the same facts.
AMECO Solar & Roofing is positioned to coordinate solar installation and roofing under one company for California homeowners. That integrated approach does not mean every roof needs replacement. It means the recommendation can distinguish between a targeted repair, a roof-first project, a specialized mounting method, and a roof plane that should be left out of the array.
Calculate Your Project with a coordinated roof and solar review
For a broader explanation of how roof work and solar planning can fit together, read AMECO's guide to roofing for solar panels. Homeowners can also review AMECO's installation approach to understand the consultation, design, and project coordination process.
What should California homeowners ask before approving a roof and solar plan?
Before approving a roof and solar plan, ask which roof areas are usable, what defects must be corrected, where attachments will connect, how shade affects production, how the crew will protect the covering, and what happens if the roof needs work later. Request these answers in the proposal so the project assumptions are clear.
- What specific roof conditions would make you pause the solar installation?
- How much useful life does the roof appear to have, and what evidence supports that estimate?
- Are there active leaks, damaged decking, failed flashing, or widespread material defects?
- Where will each attachment connect, and how will the roof be protected from water intrusion?
- How will shade, vents, skylights, hips, valleys, and required access paths affect the layout?
- What material-specific experience does the crew have with this roof covering?
- Who handles roofing repairs, tile or specialty-material replacement, structural review, and permits?
- If the roof needs replacement later, how will solar removal and reinstallation be coordinated?
Strong answers should be specific to the property, not copied from a generic proposal. If the recommendation changes after an on-site review, ask what new evidence changed the design and how the revised scope affects the project.
Can you install solar on a roof that is not suitable today?
Often, yes, if the issue is temporary or correctable. Repairs, reroofing, structural work, shade planning, layout changes, or a material-specific mounting method may make the project viable. A roof with unresolved structural failure, unsafe access, or no workable attachment and waterproofing method should not proceed until the underlying limitation is resolved.
The best next step is not to force a yes or no from an online checklist. It is to obtain a property-specific review that states the current condition, the proposed remedy, and the point at which solar can safely move forward. That sequence protects the roof and helps set realistic expectations for the system design.
California homeowners considering solar, roof work, or both can use AMECO's residential solar resources to begin their research. Project-specific energy goals, roof condition, utility territory, equipment selection, and eligibility all influence the final recommendation.
Schedule Now for a California roof and solar evaluation
Frequently asked questions about what roofs are not suitable for solar panels
The roofs most likely to pause solar are those with active leaks, major damage, inadequate structure, limited remaining life, unsafe access, persistent shade, or specialty materials without a proven mounting method. Many of these conditions can be addressed. The correct decision comes from a roof-specific inspection and solar design review.
What roofs can you not put solar panels on?
You should not install solar on a roof with unresolved structural failure, active water intrusion, unsafe access, or a covering that the installer cannot attach and waterproof correctly. Some specialty materials may be workable with the right expertise. Ask for a material-specific method rather than relying on a universal material ban.
Does an old roof mean you cannot get solar panels?
No. An old roof may still be sound, while a newer roof may have damage or installation defects. The important questions are condition, remaining service life, structure, and the proposed array location. If major roof work is likely soon, roof-first or coordinated installation may prevent later panel removal.
Can a shaded roof have solar panels?
Yes, but shade can reduce production and usable panel area. A site-specific model should account for trees, buildings, roof features, and seasonal changes. The result may be a different roof plane, a smaller array, shade management, or a decision that the current roof does not meet the home's energy goals.
Are tile roofs unsuitable for solar panels?
Tile roofs are not automatically unsuitable. Clay and concrete tile require careful access, material handling, structural attachments, and water-shedding details. The installer should explain whether compression or tile-replacement mounting fits the profile and how damaged or mismatched tiles will be handled.
Should I replace my roof before installing solar?
Consider roof replacement first when an inspection finds widespread damage, active leaks, deteriorated decking, or too little remaining life for the planned solar system. A sound roof with isolated issues may need only targeted repairs. The recommendation should be based on the roof's documented condition rather than age alone.
What is the safest way to decide whether my roof is ready for solar?
Use a combined roof and solar assessment that reviews condition, structure, shade, layout, material, mounting, waterproofing, drainage, access, and local requirements. Request a written scope showing what must be repaired or changed before installation and which assumptions the solar production estimate depends on.
Plan the roof before the panels
A roof does not need to be perfect or new to support solar, but it does need a defensible plan. Resolve water and structural problems, account for shade and geometry, choose a compatible mounting method, and match roof life to the solar project. That preparation is what turns a risky installation into a coordinated one.
AMECO Solar & Roofing helps California homeowners evaluate solar and roofing decisions together, with service relevance across Los Angeles, Orange County, Sacramento, and the Central Valley. The right recommendation may be immediate solar, roof work first, a redesigned array, or a documented reason to wait.
9.1.2026
A solar system can look fine from the ground. A production change, monitoring alert, or roof leak may signal a problem. Compare performance with your system's own history. Separate normal changes from faults. California sunlight, shade, weather, soiling, equipment, and roof conditions all affect what homeowners see.
The five most common problems with solar panels usually involve installation or roof issues, lower-than-expected production, inverter or electrical faults, monitoring interruptions, and maintenance concerns. Some are preventable through careful design, weatherproofing, commissioning, and routine observation. Others require a qualified professional, especially when wiring, mounting, roof penetrations, or damaged equipment is involved. For property-specific guidance, Get An Estimate.
Understanding how these categories appear in daily use makes troubleshooting more practical and helps you know what to check safely before scheduling service. We will start by looking at what each problem means and which warning signs should not be ignored.
What are the five most common problems with solar panels?
Solar panels are only one part of a working solar array. The roof, mounting hardware, wiring, inverter, and monitoring connection all affect whether the system performs as intended. That is why a change in energy production does not automatically mean a panel has failed. Sunlight, shade, cloud cover, weather, and surface dirt can cause normal variation. The useful question is whether the change is unusual for your home and whether it continues under comparable conditions.
For homeowners, the five most common problems with solar panels and related system equipment generally fall into these categories:
- Roof and mounting problems: Aging roofing, poor attachment points, damaged flashing, or inadequate weatherproofing can create leaks or allow movement. A roof that needs attention is not a panel fault, but it can affect the entire installation.
- Electrical and inverter faults: The inverter converts the panels' direct-current electricity into usable alternating-current electricity. An alert, shutdown, tripped protection device, or visible equipment damage may indicate an electrical issue that requires professional diagnosis.
- Lower-than-expected production: Shade, changing weather, soiling, obstructions, wiring issues, or damaged equipment can reduce output. A modest day-to-day change may be normal. A persistent drop compared with the system's own history deserves investigation.
- Monitoring and communication failures: A monitoring app may stop receiving data even while the array continues producing power. Conversely, a monitoring alert can point to a production or equipment problem. Check the system status and the timing of the last update before assuming the panels are offline.
- Surface dirt, debris, and physical damage: Dust, leaves, bird activity, nearby vegetation, hail, or other impacts can obstruct or damage panels. A homeowner can look from a safe location, but should not climb onto the roof, remove panels, or work near electrical equipment.
These categories can overlap. For example, a roof issue may affect mounting, while a communication issue can make a healthy system appear inactive. A qualified inspection should consider the roof, electrical compatibility, installation quality, equipment, and monitoring together. Treating one symptom in isolation can miss the underlying cause. AMECO's solar solutions include system design and installation for California properties, with equipment and monitoring selected around the home's circumstances.
| Problem area | What you may notice | Best first step |
|---|---|---|
| Roof and mounting. | Leaks, damaged flashing, or movement. | Observe from a safe location and arrange an inspection. |
| Production and equipment. | Persistent low output or an inverter alert. | Compare monitoring history and record the alert. |
| Maintenance and debris. | Visible buildup, shade, or storm debris. | Remove only safe ground-level obstructions and follow cleaning guidance. |
Start with safe observations. Compare current information with your normal production history. Note any alerts. Look for visible shade or obstruction from the ground. For routine care, review this solar panel maintenance checklist. If you see a roof leak, damaged equipment, exposed wiring, or a persistent unexplained decline, avoid DIY repairs and arrange qualified service. Get An Estimate for project-specific guidance on a new installation, system review, or solar-and-roofing needs.
How can installation and roof problems affect a solar array?
A solar array depends on more than the panels themselves. The roof, mounting hardware, flashing, electrical connections, inverter, and commissioning process all have to work together. If an aging roof is covered before its condition is checked, a problem can affect both energy equipment and the home beneath it. The same is true when mounting points are not properly sealed.
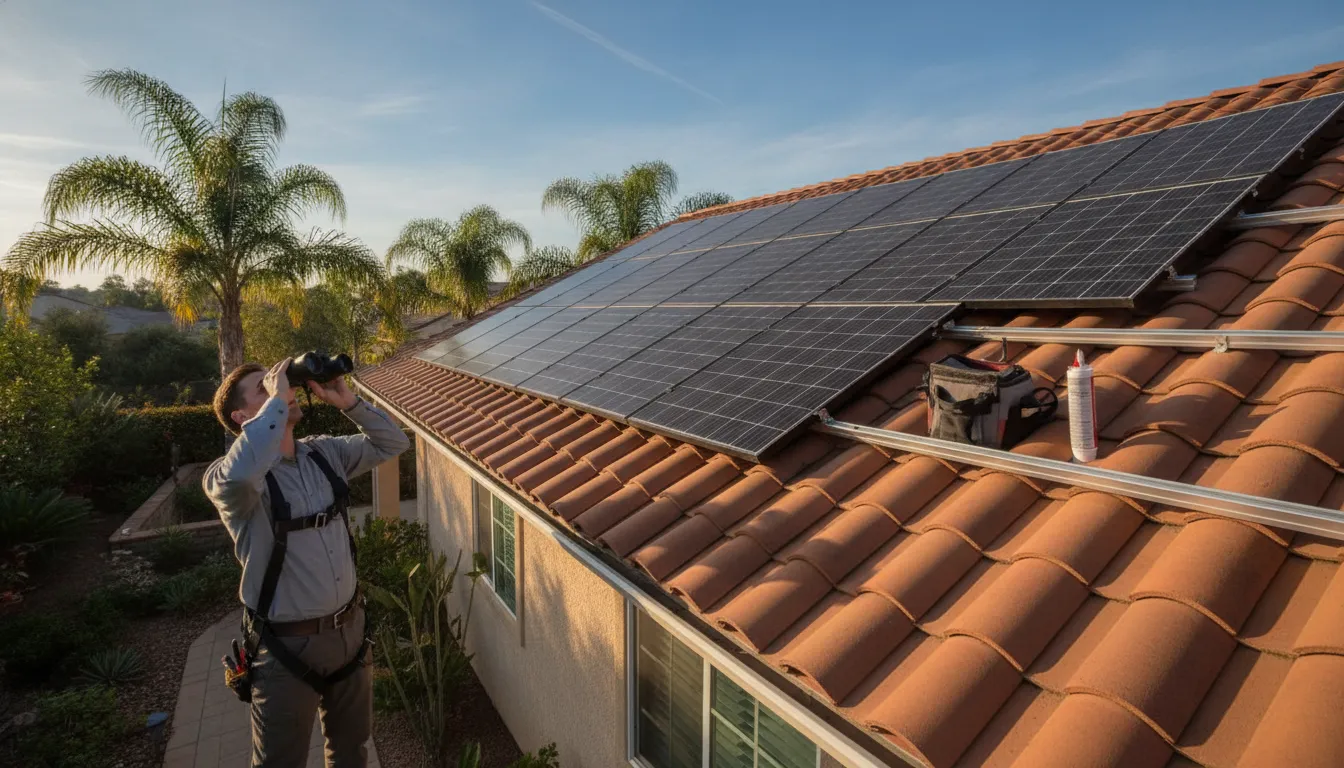
Roof condition comes first
Roof age, damaged shingles or tiles, weak decking, and areas with existing moisture can complicate an installation. Solar equipment may remain productive while a roof issue develops, which can make the source of a leak harder to identify later. A qualified installer should inspect the roof and discuss whether repairs or replacement should happen before the array is installed. AMECO's solar-ready roofing services can help homeowners evaluate the roof and solar work as one coordinated project.
Homeowners can safely observe ceiling stains, damp attic areas, lifted roofing materials, or water appearing after rain. Do not climb onto the roof, remove panels, or attempt to seal a mounting point yourself. Those actions can create fall, electrical, and additional water-intrusion risks.
Mounting and weatherproofing protect the structure
Mounting hardware must be attached to suitable structural points, and each penetration needs appropriate flashing and weatherproofing. Poorly installed or aging seals may allow water to enter around the attachment rather than through the panel surface. Wind, heavy rain, and temperature changes can also make installation quality important over time. A coordinated solar and roofing contractor can account for roof materials, reinforced mounting points, drainage, and access for future service.
During a visual check from the ground, look for displaced flashing, unusual debris near roof edges, visible sagging, or water marks inside the home. These observations are useful to report, but they do not establish the cause. A professional inspection is the safer next step, particularly after severe weather or when a roof leak appears near the array.
Wiring and commissioning influence system behavior
Electrical compatibility, conductor routing, inverter setup, and system commissioning affect whether an array starts and operates as intended. A proper process includes structural and electrical checks, permitting, testing, commissioning, customer training, and handoff. AMECO describes its installation approach around these stages, with system design based on the property's energy use and conditions.
After installation, a homeowner can check whether the monitoring portal reports normal communication and whether production follows the system's own history under similar sunlight and weather. An alert, unexplained production change, tripped equipment, exposed wiring, burning smell, or water intrusion should be reported to a qualified professional. For project-specific questions about roof coordination or solar solutions, homeowners can Get An Estimate.
Installation prevention steps
- Confirm the roof condition and structural suitability before equipment is installed.
- Ask how mounting points, flashing, wiring, and weatherproofing will be checked.
- Review commissioning, monitoring setup, testing, and homeowner handoff.
Why is my solar system producing less power than expected?
A lower production reading does not automatically mean a panel has failed. Solar output changes with available sunlight, shade, cloud cover, seasonal weather, surface dirt, and the condition of the equipment. The useful question is whether today's production is reasonable for the conditions and consistent with your system's own history.
Start with a historical comparison
Open your monitoring platform and compare similar days, weeks, or months rather than relying on a single day's total. Look for a change that persists under similar sunlight conditions. Also note an unexpected gap in the daily production curve or an alert affecting one panel, one string, or the entire array. Remote or panel-level monitoring can help distinguish a localized issue from a weather-related change. AMECO's guide to monitoring solar energy production explains how these tools can make production changes easier to identify.
Check common, visible causes first
- Shade: A tree, new construction, chimney, or other obstruction may block sunlight during part of the day. Seasonal changes can make a previously minor shadow more noticeable.
- Weather: Cloud cover, rain, smoke, and shorter winter daylight can reduce available sunlight. Compare the reading with local conditions before treating normal variation as a fault.
- Soiling: Dust, pollen, bird droppings, and nearby construction debris can cover the panel surface. Review AMECO's guidance on cleaning solar panels safely before attempting any maintenance.
- Visible damage: Cracked glass, impact marks, loose components, scorch marks, or signs of water intrusion require professional attention. Do not walk on panels or remove them to investigate.
- Wiring or equipment faults: A loose connection, damaged cable, inverter issue, or communication failure can affect reported or actual production. These components remain electrically hazardous, even when the system appears inactive.
Know when troubleshooting should stop
Safe homeowner checks include reviewing monitoring alerts, observing the array from the ground, noting recent shade or weather changes, and recording when the production change began. Do not open an inverter, reset unfamiliar electrical equipment, climb onto the roof, handle wiring, or bypass a warning. Contact a qualified solar technician if production remains unusually low, an alert persists, damage is visible, or the system stopped producing altogether. A professional can test the array, inverter, wiring, and roof-related conditions together instead of guessing from one symptom.
How do inverter, electrical, and monitoring failures show up?
Not every warning in a solar app means that a panel has failed. The monitoring system may be reporting a communication interruption, while the array itself continues producing power. Conversely, an inverter can show a normal-looking connection while production has changed for another reason. Start by comparing the alert with the system's recent production history and the conditions outside, rather than assuming the first message identifies the cause.
Common signs that deserve attention include:
- An inverter display or app reports a fault, alarm, or system shutdown.
- The monitoring portal stops receiving updates or shows no recent data.
- Production falls sharply compared with similar sunny days in the system's own history.
- A circuit breaker trips, an electrical odor is present, or equipment appears hot, damaged, or wet.
- The system repeatedly reconnects, disconnects, or reports that part of the array is offline.
Communication failure is not always production failure
A monitoring interruption can result from a network, gateway, or connection problem. In that situation, the app may be unable to display current information even though the panels and inverter are operating. A production fault is different: the inverter or system may be receiving sunlight but not converting or delivering energy as expected. Because the app alone may not distinguish these conditions, record the exact alert, its time, and any change in the production graph. This information gives a qualified technician a more useful starting point.
AMECO's guide to monitoring solar energy production explains how monitoring tools can reveal production changes and help identify potential system issues. AMECO's solar offerings can integrate REC panels with SolarEdge or Enphase inverter systems and remote or panel-level monitoring, depending on the system design.
What should you do if a breaker or inverter looks wrong?
Do not open the inverter, remove panel covers, disconnect wiring, or attempt to repair an alarm. Solar equipment can remain electrically hazardous even when the sun is not shining. If a breaker has tripped, do not repeatedly reset it, especially when there is an odor, visible damage, moisture, sparking, or unusual heat. Keep people away from the equipment and seek qualified service. A professional can evaluate the inverter, wiring, electrical compatibility, monitoring connection, and related equipment as one system.
For a broader explanation of warning signs and when assistance is appropriate, review AMECO's solar system servicing guidance. If the fault persists or production remains abnormal, its residential solar panel repair resource can help you understand the next step. The right diagnosis depends on the property, equipment, installation, and monitoring history, not just the message shown on a screen.
What maintenance prevents common solar panel problems?
Good maintenance is mostly about noticing changes early and keeping small issues from becoming safety, roof, or production concerns. Start with a visual check from the ground. Look for new shading, fallen branches, heavy debris, cracked glass, loose-looking components, water around roof penetrations, or visible damage after severe weather. Do not climb onto the roof or touch panels, wiring, or electrical equipment to investigate.
Keep observations simple and cleaning safe
Vegetation can gradually shade an array, while birds and other animals may leave debris around panels or mounting areas. Trim or remove nearby growth only when you can do so safely from the ground and without contacting the system. If branches are close to the array, ask a qualified professional for help rather than working around energized equipment.
Cleaning needs the same caution. Dust, pollen, leaves, and other soiling may affect production, but homeowners should follow the equipment and installer guidance for their property. Never use abrasive tools, harsh chemicals, or unsafe roof access. For practical boundaries, review this guide to cleaning solar panels safely. A professional can determine whether cleaning is appropriate and how to complete it without damaging the panels, roof, or mounting system.
Use monitoring and records to find changes
Check the monitoring system for alerts and compare current behavior with the system's own history. A change on a cloudy day may reflect weather, while a persistent or unexplained change deserves closer attention. Record the date, the alert or symptom, recent weather, visible obstructions, and any unusual roof activity. This information can help an installer distinguish soiling or shade from an inverter, wiring, communication, or panel problem. A solar panel maintenance checklist can help organize these observations without imposing a fixed schedule on every home.
Include the roof and call for professional maintenance
Solar equipment and the roof should be considered together. From a safe vantage point, watch for new ceiling stains, roof-area leaks, missing roofing materials, or changes near mounting points. Do not remove panels, loosen hardware, inspect wiring, reset unfamiliar equipment, or open an inverter. Those tasks can involve fall, electrical, and weatherproofing hazards.
Professional maintenance is especially appropriate after significant weather, when monitoring shows a continuing change, or when a roof concern appears near the array. A qualified solar and roofing team can inspect mounting, flashing, weatherproofing, electrical connections, equipment status, and monitoring together. That broader review helps identify the source of a symptom instead of treating only the visible panel surface.
When should a California homeowner call a solar professional?
Some solar concerns can begin with a safe visual check or a review of your monitoring app. A homeowner can note an alert, compare recent production with the system's normal history, and look for obvious shade, debris, or storm damage from the ground. Electrical work, roof access, panel removal, and inverter repair are different. Those tasks require a qualified professional who can assess the system without creating additional risk.
Contact a solar professional promptly if you notice any of the following:
- An active roof leak, water staining, or moisture near equipment, conduit, or an interior ceiling below the array.
- Exposed, loose, melted, or visibly damaged wiring, conduit, connectors, or electrical equipment.
- A burning smell, smoke, unusual heat, crackling, or signs of scorching around the inverter, disconnect, or other system components. Move away from the area and contact emergency services if there is an active fire or immediate danger.
- Repeated inverter or monitoring alerts that return after you follow the manufacturer's basic reset guidance, if provided.
- An unexplained production change that persists after accounting for normal differences in sunlight, shade, weather, and soiling.
- Loose-looking mounts, damaged flashing, lifted roofing materials, cracked tiles, or other concerns about how the array is attached to the roof.
Do not open an inverter, disconnect wiring, climb onto a roof, or attempt to tighten mounting hardware based only on an online tutorial. Solar equipment can remain energized in daylight, and a roof issue may involve concealed damage. If there is a burning smell, smoke, exposed electrical conductor, or active water intrusion near electrical equipment, treat it as an urgent safety matter rather than routine maintenance.
For less urgent concerns, gather useful information before the visit. Record the date an alert appeared, take photographs from a safe location, note recent storms or roof work, and save production data showing the change. This helps the technician distinguish a communications problem from a production fault and determine whether the roof, mounting, electrical system, inverter, or panels need attention together.
When roof condition or weatherproofing is part of the concern, an integrated provider can coordinate both sides of the evaluation. AMECO's solar solutions and solar-ready roofing resources explain how system design, mounting, flashing, and roof protection connect. If you want a property-specific review, Get An Estimate is a practical next step.
Ask any professional what they found, whether the issue is urgent, what evidence supports the diagnosis, and which work requires a licensed trade. Clear answers and a documented inspection are more useful than replacing a component before the underlying cause is understood.
Frequently Asked Questions
What are the signs of a faulty solar panel?
Watch for a sustained production drop compared with your system's normal history, visible cracks or damage, unusual discoloration, repeated monitoring alerts, or an inverter that reports a fault. A single cloudy day does not prove a panel problem because sunlight, shade, weather, and soiling all affect output. If the change persists, document the alert or production pattern and arrange a professional inspection.
How can I tell whether low output is caused by dirty panels?
Dirt, leaves, bird debris, and other soiling can reduce production. Look from the ground for obvious buildup, but do not climb onto the roof or use abrasive tools. Safe cleaning methods depend on the roof, panel access, and local conditions. If the array is difficult to reach, or cleaning does not explain the change, have a qualified technician evaluate the system.
What should I do if my solar inverter shows an error?
Record the exact alert, check whether your monitoring app shows a communications issue or a production fault, and follow the equipment manufacturer's basic instructions. Do not open the inverter, handle exposed wiring, or repeatedly reset breakers. An inverter alarm can reflect an electrical or equipment problem that requires testing by a qualified solar professional.
Can solar panels cause roof leaks?
A leak may involve flashing, mounting points, roof age, or a separate roofing condition rather than the panel itself. Document where and when water appears, then contact a professional promptly. A coordinated inspection should assess the roof, mounting, flashing, and weatherproofing together. Solar-integrated roofing may include reinforced mounting points, integrated flashing, and weatherproofing.
When should I call a solar professional?
Call promptly for water intrusion, exposed or damaged wiring, burning smells, arcing sounds, repeated inverter faults, storm damage, or a production decline that remains after basic visual checks. Homeowners can review monitoring and observe conditions from a safe location, but electrical, roof, mounting, and equipment work should be professionally evaluated.
Ready to get project-specific solar and roofing guidance?
When panel problems involve production changes, roof concerns, or electrical equipment, a property-specific review can help clarify the next step. To discuss your system or future project with AMECO Solar & Roofing, get an estimate through the online form. Share the details you have, and the team can use them to better understand your solar and roofing needs.
8.31.2026
California homeowners rarely add a battery for just one reason. A storage system may help keep selected essentials running during an outage and shift solar energy into evening hours. It can also give a household more control over when it draws electricity from the grid. But it adds equipment, installation requirements, capacity limits, and long-term planning decisions.
The pros and cons of solar battery storage depend on your goals, energy use, utility territory, and property. The potential benefits include outage resilience, time-of-use flexibility, and greater self-consumption. The tradeoffs can include upfront cost, limited usable capacity, battery degradation, maintenance, and the need for compatible backup controls. There is no single right system for every California home.
A useful decision starts by separating the value you want from the hardware required to deliver it. Before you Get An Estimate, consider which loads must operate during an outage. Review how your home uses energy throughout the day and what your roof and electrical system can support. Those factors frame the benefits and limitations that follow.
What Are the Pros and Cons of Solar Battery Storage?
The right question is not whether a battery is universally good or bad. It is whether its benefits match your household's priorities closely enough to justify the added equipment and investment. For one California homeowner, outage resilience may be the deciding factor. For another, limited storage capacity or the need to prioritize specific circuits may make a battery less attractive.
Solar-plus-storage can provide backup power during an electric-grid outage, but the result depends on the system design and the loads you want to support. The U.S. Department of Energy explains that solar and storage systems can provide backup power during outages. The agency also notes that resilient systems must operate independently from the grid when the grid is unavailable. In practice, that makes the electrical design as important as the battery itself.
| Potential advantage | Potential limitation | Decision question |
|---|---|---|
| Can provide backup power during an outage when the system is designed for that purpose. Read the DOE resilience analysis. | A battery has limited storage capacity, so it may not support every load or a large amount of energy use at once. | Which appliances and circuits must remain available during an outage? |
| Can give a household more control over when stored energy is used. | Adding storage increases the solar system's initial cost and upfront investment. | Is resilience or greater control important enough to justify the added investment? |
| Can be part of a customized energy plan rather than a one-size-fits-all purchase. | Household energy needs and potential savings vary with home size, occupants, electricity use, and provider. | Has the design been based on your load profile, utility territory, and property? |
Capacity is a central tradeoff. A system sized for selected essentials may fit a household's priorities, while a home seeking broader backup may need a different design. That does not make either approach inherently better. It changes the equipment requirements and the outcome during an outage.
The financial case also requires a property-specific review. The DOE notes that there is no universal solar solution for every homeowner, and household savings cannot be reduced to one average figure. A battery decision should therefore account for your electricity use, utility provider, outage concerns, and desired backup configuration rather than relying on a generic promise.
For a broader explanation of how storage supports household energy needs, see this guide to home solar battery backup. Use that background to clarify your goals, then compare proposals by the loads supported, usable capacity, system design, and total project scope. Those details will tell you more than a battery's nameplate capacity or a broad claim about savings.
How Do the Pros and Cons of Solar Battery Storage Affect Outage Planning?
A solar battery can change how a home uses electricity, but it does not make the property automatically independent from the grid. During sunny hours, the battery can store excess solar generation for use at night or when solar production is low. That stored energy may also support selected appliances during an outage. The practical benefit is greater control over when electricity is available, not a guarantee that every circuit will remain energized.
Solar-plus-storage systems can provide backup power during grid outages, according to the U.S. Department of Energy. However, a resilient system must disconnect from the utility and operate independently while the grid is down. This process is called islanding. Without the right inverter settings, transfer equipment, and controls. A typical grid-tied solar array will shut down during an outage rather than continue sending power into the home's electrical system. The Department of Energy's resilience guidance explains why islanding is central to safe backup operation.
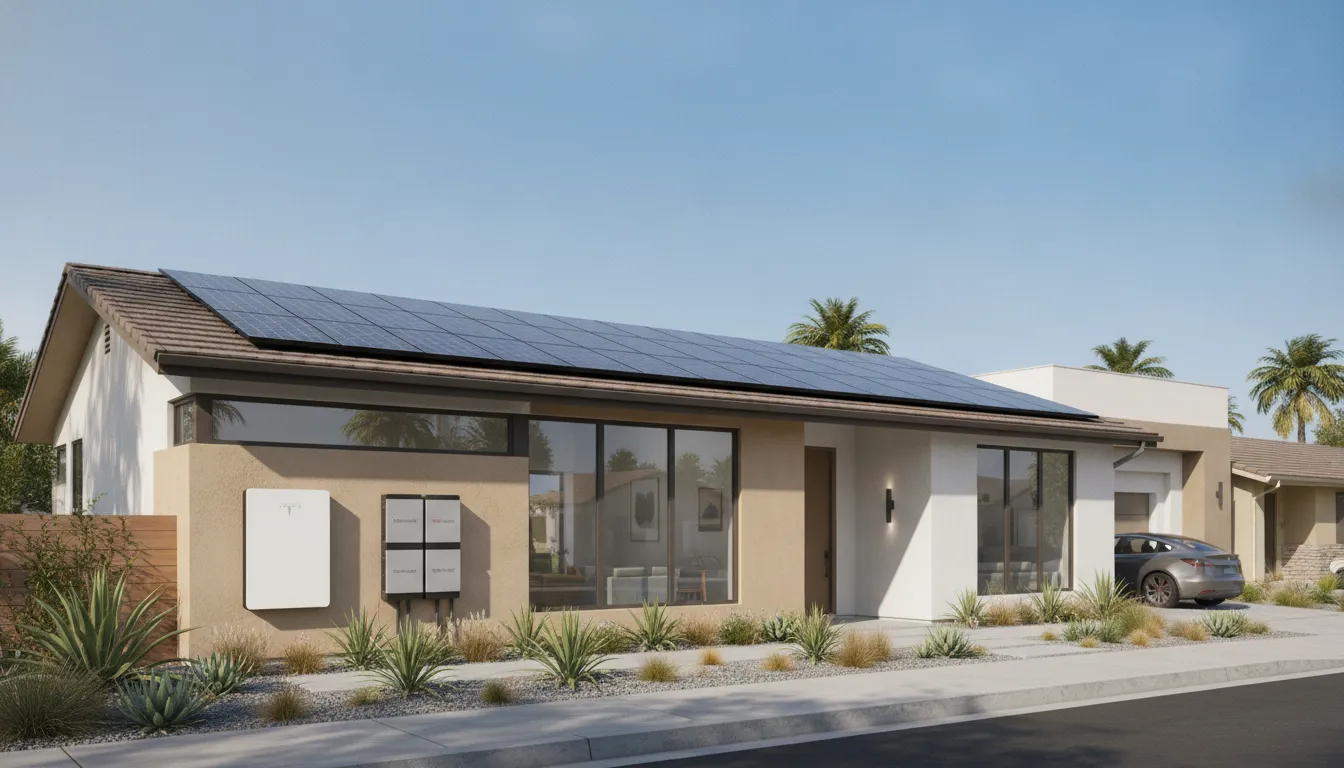
What can a battery power during an outage?
Most backup designs begin with critical loads. A critical-load panel or similar control setup can direct stored energy to essentials such as lights, a refrigerator, internet equipment, or selected medical devices. Transfer switches, critical-load panels, and appropriate controls can allow a solar-storage system to function as a small, self-sufficient microgrid while utility service is unavailable. The exact circuits depend on the home's wiring, the battery's output, and the system design.
That distinction matters when comparing the solar batteries for California outages. A battery sized for essential circuits may not support central air conditioning, electric resistance heating, pool equipment, large water heaters, or several high-demand appliances at the same time. Whole-home backup may require additional equipment or multiple battery units, and even then, available energy and power output remain finite. Ask an installer to identify the circuits covered, the battery's continuous and peak power, and how the system handles motor starting loads.
How does storage support energy independence?
Storage lets a household use more of its own solar generation after sunset instead of relying on the grid at every hour. It can also reduce dependence on fossil-fuel-generated electricity when excess solar energy is stored and used later. Those advantages are meaningful for California homeowners managing outages or seeking more control over their energy use. Still, independence is relative. Weather, household demand, battery capacity, equipment limits, and utility conditions all affect the result. There is no universal solar solution, so the design should reflect the home's actual load profile and the homeowner's priorities.
When Do Time-of-Use Rates Make Storage More Useful?
A battery becomes more useful for load shifting when your household produces much of its solar electricity during daylight but uses more power later. Solar panels generate only when light is available, while many homes use electricity in the late afternoon and evening. Storage can bridge that mismatch by charging from solar during the day and supplying some household demand after solar production declines.
A simple example is a system that charges from daytime solar production, then helps power the home later in the day. The exact operating window should not be treated as a universal schedule. Battery controls may be programmed around your household load profile, solar production, utility rules, and the equipment installed at the property.
Why does the utility territory matter?
California homeowners do not all receive the same treatment for electricity exported to the grid. The utility's compensation rules differ, and time-of-use schedules can vary by provider and rate plan. A battery may have greater value when exported solar receives less favorable treatment than the electricity a household later purchases, but that conclusion requires a property-specific review. Do not assume that a battery will produce the same result for a home in PG&E, SCE, SDG&E, or LADWP territory.
Start by reviewing average monthly electricity use on your utility bills. That information helps identify when your home consumes energy and whether the battery would regularly charge and discharge in a useful pattern. A home with significant evening demand may have a different storage case from a home that uses most of its electricity during sunny hours.
What are the limits of time-of-use shifting?
Load shifting is not the same as eliminating an electric bill or guaranteeing savings. A battery has limited usable capacity, and its performance depends on solar production, household demand, system controls, and utility compensation. If the battery fills before the home needs the energy, or if evening demand exceeds the stored supply, some electricity may still come from the grid.
For that reason, compare the utility's current schedule and export rules with your actual usage before choosing storage. A qualified installer can model those inputs rather than relying on a generic example. The Department of Energy notes that there is no universal solar solution. And the same principle applies when deciding whether storage is a practical fit for a California home.
Explore custom solar system design with your home's load profile, equipment, and utility territory in mind.
What Are the Main Equipment, Installation, and Capacity Tradeoffs?
A battery proposal is more than a storage box attached to solar panels. It is an integrated electrical system, and the equipment choices determine how energy moves, which circuits can operate, and how the system responds when the grid fails. A complete design may include an inverter, smart meters, energy-management equipment, transfer equipment, and controls. These components must work together rather than being evaluated separately. The solar battery installation process should therefore include both equipment planning and a site-specific electrical review.
Nameplate capacity is not the same as usable capacity
Battery capacity is commonly described in kilowatt-hours, but the nameplate figure is not necessarily the amount of energy a homeowner can use in normal operation. Usable capacity accounts for operating limits and the system's reserve requirements. It is the more meaningful figure when comparing how much stored energy is available for selected loads. Usable storage can also change over time as the battery degrades. So a proposal should explain both the initial usable capacity and the capacity expected later in the system's service life. Limited storage capacity can be a disadvantage for a household seeking extended backup or trying to run many large loads.
Capacity is only half of the question. Continuous power describes how much demand the system can support steadily. Peak power describes the higher, short-term output available for starting or handling certain loads. A system with adequate kilowatt-hours may still be a poor fit if its continuous or peak power does not match the home's appliances. Ask the installer to evaluate starting surges from equipment such as pumps, compressors, or heating and cooling systems instead of sizing the system from energy capacity alone.
Critical-load and whole-home designs have different tradeoffs
Many systems are configured to keep selected essentials operating during an outage. A critical-load panel may prioritize refrigeration, lighting, internet equipment, medical devices, or other circuits the household identifies in advance. This approach can reduce the amount of storage and power equipment required, but nonessential or high-demand circuits remain unavailable during an outage. Whole-home backup aims at broader coverage, yet it may require additional batteries, larger power electronics, more complex controls, and a closer review of the home's electrical service. The right choice depends on the loads that matter most, the property's conditions, and the homeowner's resilience goals.
Installation quality and site conditions affect the decision
Battery safety depends on proper installation, protection from damage, and suitable ventilation. The site assessment should review roof condition when solar work is included, electrical compatibility, and structural load capacity. It should also address equipment location, clearances, wiring, shutoff provisions, permitting, and utility coordination. These details can add complexity, but they reduce the risk of designing a system that cannot be safely installed or commissioned.
For a California home, a responsible process includes custom design, on-site measurements, permitting and utility coordination, installation, commissioning, and customer training. Because there is no universal solar solution, compare proposals by asking what is included, which circuits are backed up. How usable and continuous capacity are calculated, and how the inverter, meters, and controls operate together. Final suitability depends on energy use, equipment selection, utility territory, and the home's roof, electrical, and structural conditions.
How Should Homeowners Think About Maintenance and Replacement Planning?
A battery is a long-term electrical asset, not a set-and-forget appliance. Planning should account for how the system will be monitored, serviced, expanded, and eventually replaced. The amount of usable storage can decline over time as the battery degrades, so the capacity available several years after installation may not match the original nameplate rating. That distinction matters when you are planning for evening use or backup loads. Battery degradation affects usable energy storage over time, and it should be part of the design conversation from the beginning.
Monitoring and connectivity deserve practical attention. Ask whether the system includes an app or portal, what information it reports, and whether an internet connection is required for remote monitoring, software functions, or warranty support. Also ask who reviews alerts and what happens when communication fails. A monitoring screen is useful only when someone understands the alert and has a defined process for responding to it.
What should the warranty actually cover?
Warranty language varies by manufacturer and proposal, so do not treat any current term as universal or assume that the warranty covers every service need. As general industry context, one source describes many home battery warranties as lasting around 10 to 15 years. While solar panels often have an expected service life of 25 to 30 years. Those figures are not AMECO guarantees, and the specific equipment, operating conditions, installation, and contract control the actual terms. Battery and panel service-life figures can differ.
Before signing, request clear answers about guaranteed capacity at a stated point in time, cycle limits, parts and labor coverage, response procedures, and exclusions. A warranty that describes the battery but not the labor needed to diagnose or replace it may leave an important cost assumption unanswered. Connectivity requirements should be written down as well, especially if maintaining an internet connection affects support eligibility. A proposal should also explain whether expansion is supported, whether added units must match the original equipment, and how future changes could affect controls or capacity.
How can replacement planning avoid surprises?
Think beyond the first installation. Solar panels and batteries may reach replacement decisions at different times, and a future battery may not integrate with the original inverter, transfer equipment, or energy-management controls. Ask whether the design leaves a practical path for expansion, what components are likely to require coordinated replacement, and how service access will be handled. The right plan depends on your energy use, equipment, property conditions, and utility territory rather than a universal lifespan or maintenance schedule.
What Questions Should You Ask a Solar Battery Installer?
A proposal is easier to evaluate when it answers practical questions about your home, not just names a battery. The U.S. Department of Energy notes that there is no universal solar solution and advises homeowners to talk with certified installers before buying. Ask the following questions, then compare the answers across proposals.
- How did you audit my home's loads? Ask the installer to explain which appliances and circuits were reviewed. How your utility-bill history and expected future use affect the design, and whether the analysis reflects your actual load profile. A battery decision should be based on energy use, equipment, property conditions, and utility territory rather than a one-size-fits-all package. The Department of Energy's homeowner guide is a useful starting point for the evaluation.
- What is the battery's usable capacity, rather than only its nameplate capacity? Ask how much stored energy is available for the operating strategy you are considering, and how that figure may change over time. Also ask about guaranteed capacity, cycle limits, labor coverage, and any connectivity requirements tied to service or warranty support. These terms can materially affect how you compare proposals.
- What are the continuous and peak power ratings? Capacity describes stored energy, while power describes how much equipment the system can serve at a given moment. Ask whether the proposed continuous output can support the loads you care about and whether peak power can handle startup demands from equipment such as pumps or compressors. Request the assumptions in writing.
- Will the system back up critical loads or the whole home? Have the installer identify the circuits included in an outage and explain what would be excluded. Critical-load backup may prioritize selected essentials, while whole-home backup can require different equipment or additional battery units. Ask what happens if several large loads operate at once, and do not assume that a battery provides unlimited backup.
- What transfer equipment and controls are included? Ask whether the design uses a transfer switch, critical-load panel, smart meter, inverter, or energy-management equipment, and how those components work together. A backup system must be able to operate independently from the grid during an outage. The transfer equipment and controls should be part of the documented design, not an afterthought.
- What round-trip efficiency should I expect under this design? Ask how much energy is lost while charging and discharging, and whether the stated efficiency applies to the complete installed system or only a component. This helps you understand the difference between energy sent into storage and energy available to your home.
- How will I monitor, maintain, and troubleshoot the system? Ask what the monitoring app shows, whether internet connectivity is required, who receives alerts, and what maintenance the homeowner or installer handles. Confirm how support works if communications fail, and ask what training is provided after commissioning.
- Can the system be expanded or replaced later? Ask whether additional batteries can be integrated with the proposed equipment, what limits apply, and whether future expansion could require changes to the inverter, controls, or electrical equipment. Discuss degradation and replacement planning separately from initial installation. Do not treat warranty duration or service coverage as universal without reviewing the actual terms.
- What roof, electrical, and structural checks are needed? Ask who will assess roof condition, electrical compatibility, and structural load capacity, especially when solar and storage are planned together. These conditions can affect equipment placement and project planning. A coordinated solar battery installation process should make those checks clear before work begins.
- Who handles permitting and utility coordination? Ask which party manages permits, utility requirements, inspections, commissioning, and customer training. Requirements can differ by utility territory, so request a written explanation of what applies to your property and what remains your responsibility.
- Which incentives and program rules are current for my property? Ask the installer to verify current requirements with the relevant utility and authority instead of assuming that a general incentive applies to every project. Final figures depend on system size, load profile, utility rules, equipment, property conditions, and current incentive requirements. A qualified proposal should identify its assumptions and explain what must be confirmed before you commit.
Use the answers to compare fit, not just equipment labels. The right design depends on your priorities, electrical setup, roof conditions, utility territory, and the balance you want between resilience, capacity, complexity, and future flexibility. Review AMECO's home battery backup solutions alongside a project-specific assessment.
Frequently Asked Questions
What are the disadvantages of solar batteries?
The main tradeoffs are added equipment and installation complexity, limited usable capacity, and gradual degradation over time. A battery also may not support every appliance during an outage. Proper design, ventilation, controls, and maintenance matter, so compare the complete system rather than the battery alone.
Is it worth having battery storage with solar panels?
It can be worthwhile when outage resilience, evening energy use, or greater control over solar generation are important priorities. The answer depends on your load profile, utility territory, equipment, property conditions, and goals. There is no universal solution, so review a site-specific design instead of relying on a general payback claim.
What appliances cannot be used with solar power?
During an outage, the limiting factor is usually the backup configuration, usable capacity, and the system's continuous and peak power, not a simple list of appliances. High-demand loads may need to be excluded from a critical-load panel. Ask which circuits are covered and how startup surges are handled.
How well does a solar battery perform during an outage?
A battery can supply selected essential loads when the system includes the hardware and controls needed to operate independently from the grid. Backup performance varies with stored energy, solar conditions, household demand, and system design. Ask whether the proposal covers critical loads or whole-home backup, and what happens as energy is depleted.
What should I ask a solar battery installer?
Ask about usable capacity, continuous and peak power, transfer equipment, monitoring, maintenance, connectivity, expansion, guaranteed capacity, cycle limits, and labor coverage. Also confirm that the assessment considers your roof, electrical system, structural conditions, utility territory, and expected energy use before you approve the design.
Get started with a property-specific battery plan
The right storage setup depends on your energy use, outage priorities, electrical conditions, and utility territory. A property-specific review can help you compare usable capacity, critical-load coverage, installation requirements, and future service considerations before choosing equipment. To discuss your goals and request a tailored recommendation and estimate, Get An Estimate from AMECO Solar & Roofing.
8.28.2026
Solar is not just a panel installation. For a California homeowner, the project can involve roof condition, electrical capacity, utility requirements, permitting, equipment choices, and plans for future energy use.
Get An Estimate for Your Turnkey Solar Project
Turnkey solar solutions bring those moving parts under one coordinated process, typically covering consultation, site assessment, custom design, permitting, installation, activation, utility interconnection, and ongoing support. Depending on the property and goals, the same planning conversation may also include roofing, battery storage, and EV charging.
The value of this approach is accountability: instead of coordinating separate specialists and guessing how one scope affects another, you can evaluate the project as a connected system. The right starting point is a clear definition of what turnkey service includes and where your provider's responsibility begins and ends.
What Are Turnkey Solar Solutions? A Clear Definition
Turnkey solar solutions are an end-to-end way to plan and complete a solar project. Instead of asking the homeowner to manage separate stages and vendors, one provider coordinates the work from the initial consultation through system design, permitting, installation, activation, and utility interconnection. The goal is not simply to install panels. It is to give the homeowner one accountable point of contact for the decisions and handoffs that make a project function as a whole.
That scope can include an initial remote estimate, custom engineering, site measurements, equipment planning, permit applications, installation, inspections, commissioning, and the steps required to connect the system with the local utility. The exact scope depends on the property, roof, electrical service, energy goals, utility territory, and any additional work the project requires. A reputable provider should explain those boundaries before work begins, rather than treating every home as the same.
How is turnkey different from hiring several contractors?
With a fragmented approach, a homeowner may need to coordinate a roofer, solar installer, electrician, permit contact, and utility paperwork independently. Each company may have its own schedule, contract, assumptions, and preferred method of communication. If the roof needs attention before an array is installed, the homeowner also becomes responsible for deciding who works first and confirming that the completed roof is ready for the mounting system.
A turnkey provider brings those project conversations together. The team can identify dependencies earlier, clarify who owns each step, and keep design decisions connected to the property's physical conditions. This does not remove the homeowner's need to make informed choices. It changes the coordination burden and makes accountability clearer when questions arise. In practice, the value is a coordinated process, not a promise that every project will follow one fixed timeline or produce the same result.
What does integrated solar and roofing mean?
For a homeowner considering both services, an integrated contractor can evaluate the solar plan and roofing scope together. That helps the project address roof readiness, mounting considerations, and sequencing before installation. AMECO Solar & Roofing brings California roots and has provided solar and roofing solutions since 1974. Homeowners can review AMECO's approach to solar projects and learn more about AMECO's California roots when comparing providers.
Turnkey does not mean that every homeowner needs every available service. It means the provider can assess the complete picture and explain which scopes are relevant.
Get An Estimate for a Coordinated Solar Plan
What Happens During a Turnkey Solar Assessment?
A useful assessment turns a broad interest in solar into a property-specific plan. It is more than estimating how many panels might fit on a roof. The team reviews how the home uses electricity, what the roof and electrical system can support, and which future goals matter to the homeowner. For a turnkey project, this early review also helps coordinate design, roofing, storage, and other electrical work before installation decisions are finalized.
- Discuss goals and energy use. The assessment starts with the household's priorities. Some homeowners are focused on managing electricity costs, while others care more about outage resilience, energy independence, or preparing for an electric vehicle. Recent utility bills, available usage data, occupancy patterns, and planned changes to the home can help shape the system design. The objective is not to promise a specific result, but to understand the loads the system may need to serve.
- Review the roof and structure. The evaluator considers the roof's age, material, condition, layout, and available installation areas. Structural questions also matter because the mounting approach must be appropriate for the property. If the roof may need work in the near future. Coordinating that scope before or alongside solar can help avoid placing a new array on a roof that is not ready for it. AMECO's solar solutions and system design can be evaluated alongside roofing needs when the property calls for both.
- Analyze shade and site conditions. Trees, neighboring structures, roof angles, and other obstructions can affect where equipment is placed and how the design is modeled. The review should account for conditions at the actual home rather than relying only on a broad satellite estimate. This is especially important when roof planes face different directions or have uneven exposure.
- Check electrical service and future loads. The team examines the existing electrical service, panel capacity, equipment location, and practical routing for wiring. If battery storage or EV charging is part of the homeowner's plan, those needs should be discussed at this stage. Planning them together may influence system sizing, service considerations, and the layout of the equipment.
- Take on-site measurements. A remote estimate and custom design provide an initial direction, but on-site measurements confirm the details. The visit may document roof dimensions, mounting areas, obstructions, equipment clearances, electrical components, and access conditions. Those observations support a more accurate design and help identify questions that need resolution before permitting and installation.
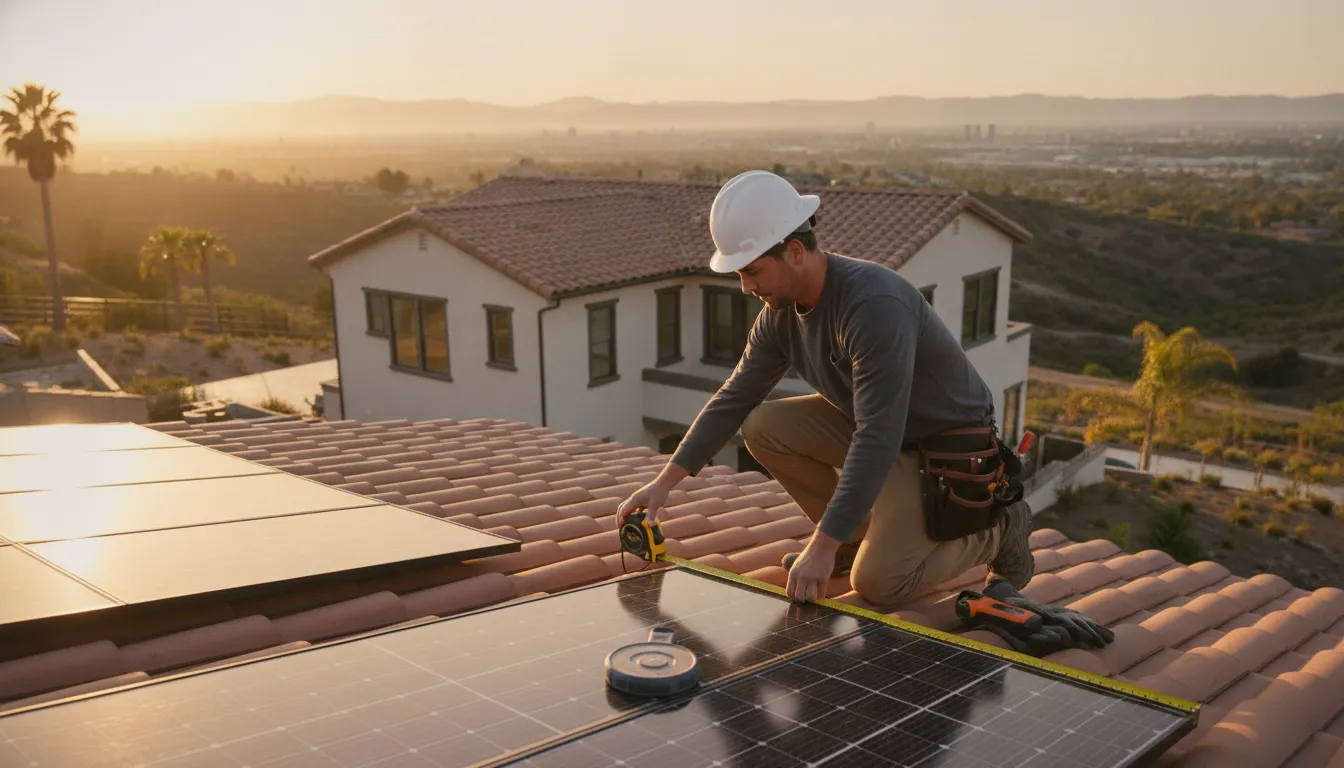
After these steps, the homeowner should have a clearer view of the project's scope, relevant tradeoffs, and open decisions. Ask what the assessment found, which assumptions shaped the design, and how the proposed equipment will work with the home's roof and electrical service. That transparency is central to comparing turnkey solar solutions on more than an equipment list.
How Do Turnkey Solar Solutions Move From Design to Interconnection?
Once the project goals and property conditions are understood, the next stage turns a concept into a system that can be permitted, inspected, and connected to the grid. A custom design should reflect the home rather than rely on a standard package. Roof orientation and condition, shade, structural considerations, electrical service, expected energy use, and the requirements of the local utility can all influence the final plan.
Custom design starts with the property
AMECO's process includes an initial remote estimate, custom design, and on-site measurements. Those steps help clarify where equipment can be placed, how the array can work with the roof, and whether related electrical or roofing questions need attention before installation. Equipment selection is also property-dependent. Panels, inverters, mounting hardware, and optional storage should be evaluated in relation to the roof layout, service equipment, energy goals, and future loads, rather than presented as universally appropriate choices.
Design is also the point to identify coordination issues early. For example, a roof that may need work in the near future could affect array placement or project sequencing. A homeowner considering battery storage or an electric vehicle should raise those goals before the design is finalized, because future electrical demand can influence planning.
If you want to understand how these decisions apply to your property, Get An Estimate and discuss the project scope with a qualified solar and roofing team.
Permitting and utility review follow the design
After the system design is prepared, the project moves into permitting and utility interconnection. The permitting package documents the proposed installation for the relevant authority having jurisdiction. The utility application addresses how the system will connect to the local grid and what requirements must be satisfied before operation. A turnkey provider coordinates these administrative steps, but the exact process can vary by jurisdiction, utility territory, system configuration, and property conditions.
California has established a state framework intended to streamline residential solar permitting. The California Energy Commission explains the Residential Solar Permit Reporting Program under SB 379: California's residential solar permitting program. The governing statutory language is available in California Government Code Section 65850.5. These rules do not mean every project has the same requirements or approval experience. So homeowners should avoid treating a general permitting framework as a guarantee of eligibility or timing.
Inspection and activation complete the handoff
Installation is followed by required inspection and the remaining utility steps. The system should not be treated as fully operational simply because the equipment is mounted. Inspection confirms that the installed work corresponds with the approved plans, while interconnection approval establishes the conditions for operating with the grid. Activation and commissioning then provide the transition into normal use, monitoring, and ongoing support.
The value of an end-to-end process is accountability across these handoffs. Instead of asking the homeowner to coordinate designers, installers, permitting contacts, and utility paperwork independently, one provider can keep the project information connected from design through activation. The homeowner still makes important decisions, but the responsibilities and next steps are easier to see.
Why Coordinate Solar and Roofing in One Project?
Solar panels are attached to the roof, so the roof's condition should be part of the solar decision from the beginning. If shingles, tiles, flashing, or other roofing components are nearing the end of their service life, installing an array first may create avoidable planning challenges later. A coordinated review helps determine whether the roof is ready, needs targeted work, or should be replaced before the array is installed.
This is not simply a matter of putting two line items on the same proposal. The project team should consider roof layout, structural capacity, mounting locations, penetrations, flashing, drainage, and the sequence of trades. A structural assessment helps confirm that the roof and mounting system are appropriate for the planned array. Shade, roof planes, electrical service, and future equipment can also influence where the system belongs.
When roofing work is needed, completing it before solar installation can avoid removing and reinstalling panels later. The U.S. Department of Energy notes that combining roof replacement with solar can help avoid redundant labor and structural issues. The right sequence still depends on the property's condition and the scope of work, so the recommendation should follow an inspection rather than a universal rule.
What should the team verify before mounting panels?
- Whether the roof covering, underlayment, flashing, and drainage details are suitable for the expected project life.
- Whether the structure can accommodate the array and mounting hardware, subject to the applicable design and inspection requirements.
- Where attachment points and penetrations can be placed while maintaining a durable waterproofing strategy.
- Whether roof repairs, replacement, solar, storage, or future electrical work should be sequenced together.
| Situation | Focus | Approach |
|---|---|---|
| Roof ready. | Structure and waterproofing. | Coordinate solar on the existing roof. |
| Roof work soon. | Roof scope and array placement. | Complete roofing before solar. |
| Separate providers. | Responsibilities and records. | Confirm readiness and handoffs. |
Working with one integrated provider can simplify communication between roofing and solar teams. This is especially useful when attachment details or sequencing require decisions across both scopes. AMECO's integrated roofing solutions can be considered alongside solar planning. Separate providers may still be appropriate when a trusted roofer is already engaged. The teams should agree on roof readiness, mounting locations, waterproofing responsibilities, and inspection requirements before work begins.
Should You Add Battery Storage or EV Charging?
Solar planning should account for how your household uses electricity today and how that pattern may change. Battery storage and EV charging are not automatic additions to every system. They are design decisions that depend on your outage goals, daily load profile, electrical service, available panel capacity, and anticipated future loads.
Start with your energy priorities
If keeping selected appliances operating during a utility outage is a priority, ask which circuits matter most and how long they may need support. A battery can store excess solar energy for use at night or during some outage scenarios. That capability may improve household resilience when the system and backup configuration are designed for that purpose. The amount of usable energy, the circuits included, and the system's operating behavior all need to be evaluated for the property rather than assumed.
Review your recent electricity use and identify large or time-sensitive loads. Air conditioning, electric water heating, pool equipment, refrigeration, and home offices can affect the design conversation. Your installer should also discuss whether the existing electrical panel has enough capacity for the planned solar equipment, battery equipment, and any future electrical upgrades.
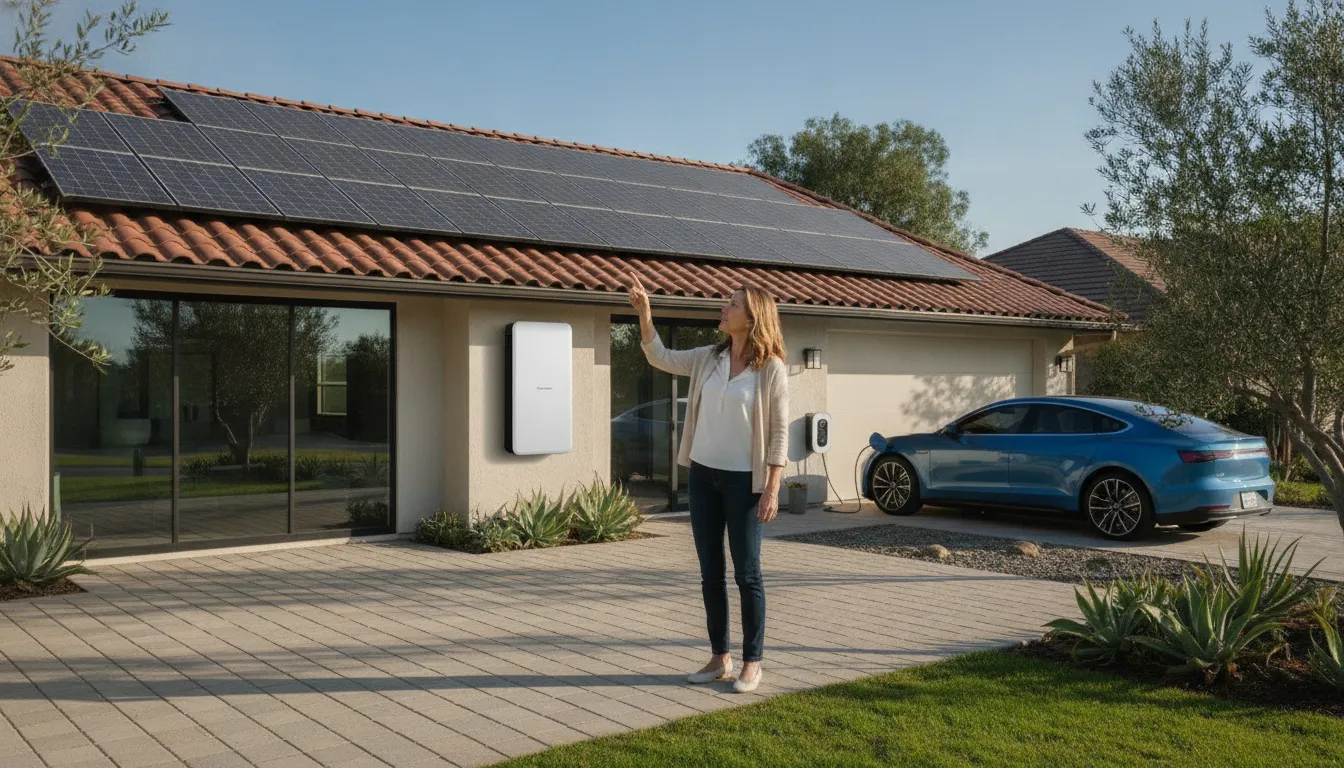
Plan EV charging before the final design
An electric vehicle can add a substantial new load to a home's electrical schedule. Even if you do not own an EV yet, mention a possible purchase during the consultation. The team can then review charging location, service capacity, panel space, wiring routes, and how charging may fit alongside other household demand. A solar system should not be sized around an assumed driving pattern or promised financial outcome. Instead, the design should reflect the vehicle, charging habits, utility requirements, and equipment compatibility you actually expect.
Compatibility matters across the complete system. Solar modules, inverters, batteries, backup controls, EV chargers, and the electrical panel must work together within their technical limits. Future-proofing may involve reserving capacity, selecting compatible equipment, or planning a later installation, but the right choice depends on the home's current infrastructure and project goals.
For a closer look at how batteries may fit into an outage-readiness plan, review battery backup options. Then Calculate Your Project with your current electrical use, outage priorities, and possible EV plans in mind before moving to the final questions.
What Should Homeowners Expect After Installation?
Installation is not the point where a turnkey solar project becomes someone else's problem. The final phase should give you a clear handoff, usable system information, and a practical way to understand how the equipment is performing. Requirements can vary by project and utility territory. Your provider should explain which steps remain, who is responsible for them, and what confirmation indicates that the system is ready for normal operation.
A strong handoff also connects the physical work to the digital side of the system. Monitoring can help you review solar production and household consumption, while also making unusual activity easier to identify. The goal is not to watch a dashboard constantly. It is to understand the normal pattern for your home and know what information to provide if a question develops.
What should be included in the handoff?
Before considering the project complete, ask for documentation that matches the equipment and work installed at your property. The exact contents will depend on the system, but a useful handoff commonly addresses:
- Inspection and utility-interconnection status, including any remaining homeowner action.
- System equipment, operating instructions, and access to the monitoring platform.
- Basic guidance for reading production and consumption data.
- Records related to permits, final approvals, and the installed design, when available.
- Instructions for reporting a concern and identifying the appropriate support contact.
- Answers to maintenance questions, such as what homeowners should observe, clean, or leave to a qualified professional.
Monitoring data is useful evidence, but it should be interpreted in context. Seasonal sunlight, weather, household demand, shading, utility settings, and equipment configuration can all affect what you see. A single lower-production day does not automatically indicate a system fault. Conversely, a persistent or unexplained change deserves attention and a documented review.
Accountability is easiest to evaluate when responsibilities are specific. Ask who coordinates post-installation questions, how the provider distinguishes an equipment issue from a utility or home-electrical issue, and which records should be retained. A provider's approach to solar projects should make those handoffs understandable rather than leaving you to coordinate separate parties. You can also review AMECO's California roots and integrated service model when comparing providers.
For homeowners considering turnkey solar solutions, the best outcome is not simply panels on the roof. It is a documented transition into ownership, with clear information, realistic expectations, and a defined path for questions after activation.
Get An Estimate Before You Choose a Solar Provider
Frequently Asked Questions
What does a turnkey solar project include?
It typically covers the connected stages of a project, including consultation, site assessment, custom design, permitting, utility interconnection, installation, activation, monitoring, and ongoing support. Confirm exactly which responsibilities are included, who coordinates inspections, and what documentation you will receive at handoff.
Does my roof need to be replaced before solar panels are installed?
Not always. The assessment should consider the roof's condition, structure, age, and expected service life. If roofing work is likely to be needed soon, coordinating it with solar can help avoid removing and reinstalling an array later. A qualified provider should explain whether repair, replacement, or no roofing work is appropriate for your property.
Will a turnkey provider handle permits and utility interconnection?
That is normally a core part of the turnkey scope, but homeowners should verify it in the proposal. The provider may prepare permit documents, coordinate inspections, submit the utility interconnection application, and manage required corrections. California law requires cities and counties to create a streamlined, expedited residential solar permitting process under SB 379, but local requirements and utility procedures still affect the project. Learn more from the California Energy Commission.
Should I plan for a battery or EV charger at the same time?
Discuss both during the initial design, even if you do not install them immediately. A battery may store excess solar energy for nighttime use or some outage scenarios. An EV charger can add future electrical demand, so reviewing service capacity, charging needs, and load growth early may help create a more adaptable design.
Ready to Plan Your Turnkey Solar Project?
A coordinated review can help you consider solar, roofing, battery storage, and EV charging together, based on your home and future energy needs.
8.27.2026
When a California outage lasts longer than expected, the best backup is not simply the unit with the largest advertised capacity. It must safely support the loads you need, recharge in realistic conditions, and fit the way your home's electrical system is designed.
Get An Estimate for a backup power plan
The best battery powered generator for home backup depends on your essential loads and outage plan. A portable power station fits temporary, limited needs, such as lights, communications equipment, or selected small appliances. An integrated solar-plus-storage system is better suited to dependable, recurring backup with panel-connected circuits, automatic transfer, and solar recharging. Start with capacity, power output, recharge options, and the portion of your home you expect to operate.
This guide compares those two categories without treating one product type as right for every household. It also explains sizing, transfer equipment, recharge planning, and California-specific questions to resolve before buying. The goal is a safer decision based on the job your backup system must perform.
What Is the Best Battery Powered Generator for Home Backup?
The best battery powered generator for home backup is the option that matches your essential loads, required runtime, and connection method. For many shoppers, the phrase refers to a portable power station with a rechargeable battery, inverter, outlets, and sometimes solar input. It can provide temporary electricity without gasoline or combustion exhaust.
A portable unit can be useful for charging phones, powering lights, running a refrigerator for limited periods, or keeping networking equipment available. Its portability is the central benefit. You can move it where needed, but you must manage the connected devices, remaining charge, and recharge timing.
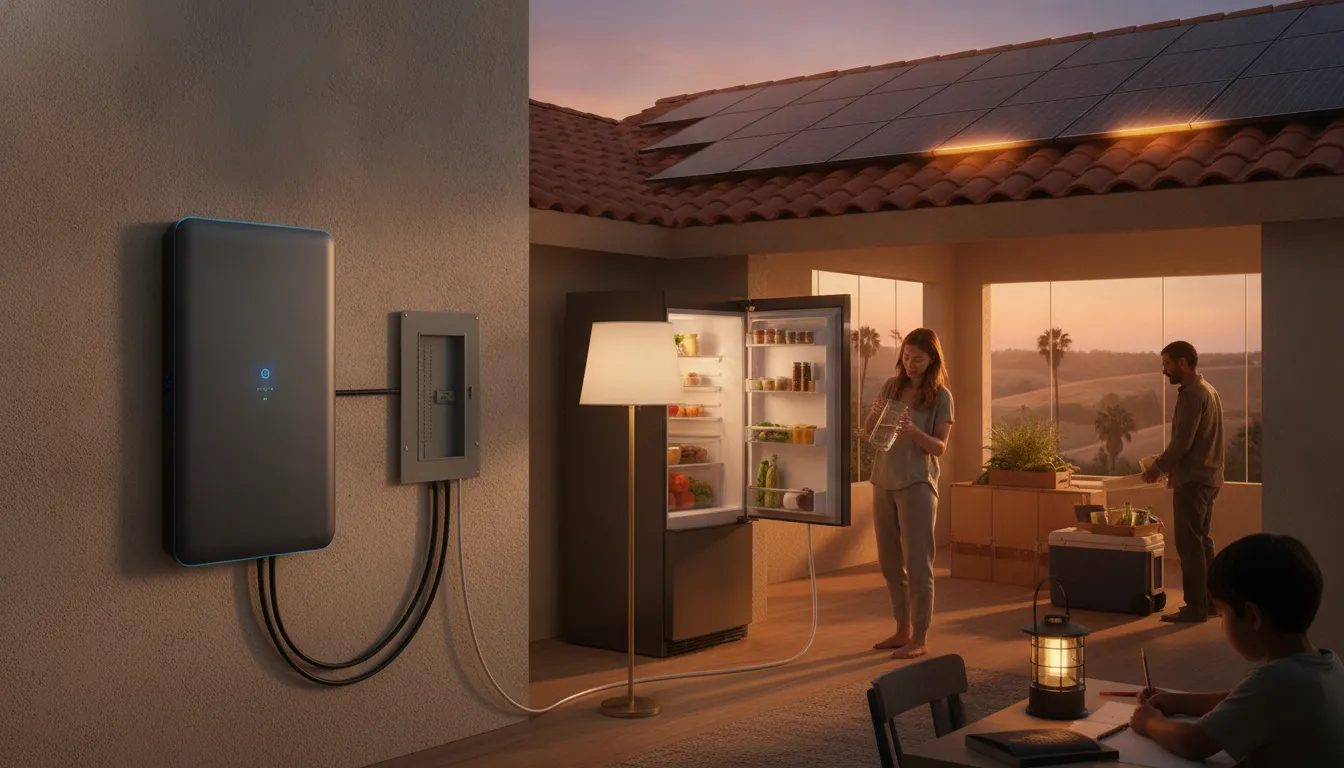
Portable power station or integrated battery system?
An integrated solar-plus-storage system belongs to a different category. A battery, inverter, controls, and transfer equipment are planned with the home's electrical panel and selected circuits. The system can store solar energy for use at night or during an outage, subject to its design and operating limits.
Choose a portable power station when mobility, limited device-level backup, and manual control are your priorities. Consider integrated solar-plus-storage when you want a permanent system for recurring outages, automatic operation, panel-connected backup, or solar-supported recharge. The latter requires project-specific design and professional installation rather than a simple equipment purchase.
Fuel generators are another comparison point, but they introduce combustion and carbon monoxide concerns. Battery equipment does not create combustion exhaust during normal operation. It still needs appropriate placement, wiring, charging practices, and protection from damage. No backup category eliminates the need to follow manufacturer instructions and local electrical requirements.
How Should You Size the Best Battery Powered Generator for Home?
Size the best battery powered generator for home use by separating two questions: how much power must it deliver at one moment. And how much energy must it store over the outage. Watts describe instantaneous demand. Watt-hours describe stored energy over time. A unit needs enough of both to perform as expected.
Starting demand is important. Refrigerators, pumps, compressors, and other motor-driven appliances may briefly draw more power when they start than they use while running. Check the appliance label or manual for running and surge requirements. When the information is unclear, ask a qualified professional to measure or evaluate the load rather than sizing from a guess.
Build an essential-load inventory
Write down the devices and circuits that matter during an outage. Include their running demand, possible startup demand, and the number of hours each should operate. This inventory helps you compare a portable unit's usable capacity and output with the demands of a panel-connected system.
- List safety and communication needs first, including medical equipment, phones, internet equipment, and selected lighting.
- Add food preservation loads such as a refrigerator, then note how often its compressor cycles.
- Separate continuous loads from occasional loads such as a coffee maker or microwave.
- Identify high-demand equipment, including air conditioning, electric water heating, ranges, dryers, pumps, and vehicle charging.
- Estimate the desired runtime and compare total watt-hours with the battery's usable capacity, not only its headline rating.
- Check continuous output and surge capability before deciding that a unit can start every listed appliance.
Think in circuits, not just appliances
A permanent backup plan may use an essential-load panel so selected circuits remain powered while larger loads stay disconnected. That approach makes the plan more predictable, but it requires electrical design. A solar-plus-storage system must coordinate the battery, inverter, grid controls, transfer equipment, and home panel.
AMECO's solar installation solutions can be evaluated alongside your home's energy use and outage priorities. The U.S. Department of Energy's solar photovoltaic system design guidance also emphasizes that system design depends on site and equipment conditions. The practical conclusion is simple: choose based on your load profile, not the most impressive product label.
What Transfer and Safety Features Matter During an Outage?
The most important safety question is how backup power reaches the circuits you intend to use while remaining isolated from utility lines. A permanent system uses transfer equipment and grid controls to separate the home from the grid before backup power supplies the planned loads. The exact equipment depends on the home's panel, inverter, battery, and local requirements.
Transfer equipment prevents unsafe backfeed
A portable power station is normally used by connecting approved devices directly to its outlets. It is not automatically a panel-connected backup system. Never connect a portable unit to household wiring through an improvised cord, a wall outlet, or an unapproved transfer method. Backfeeding can put utility workers and occupants at risk.
For a permanent solar-plus-storage installation, a qualified professional can evaluate the panel, backup circuits, disconnects, inverter controls, and required permits. AMECO's battery backup options provide a starting point for comparing an integrated approach with temporary portable power. Equipment selection should follow the electrical design, not the other way around.
Battery safety is different from fuel-generator safety
Battery systems do not burn fuel during operation, but they still require careful installation and use. Follow the manufacturer's instructions for location, charging, moisture protection, storage, inspection, and shutdown. Do not modify wiring or connect equipment that the unit was not designed to support.
Fuel generators create an additional hazard. The CDC generator safety guidance warns that portable generators can produce carbon monoxide, an odorless and colorless poison gas. Operate fuel generators outdoors and away from doors, windows, and vents. Never use one in a home, garage, or other enclosed or partially enclosed space.
- Use equipment that is compatible with the intended loads and connection method.
- Keep batteries, cables, and transfer equipment protected from moisture and physical damage.
- Have permanent panel connections and grid-isolation functions evaluated by a qualified professional.
- Keep a written list of essential circuits and the devices connected to portable equipment.
- Review charging, storage, and shutdown steps before an outage occurs.
Plan safe, properly sized backup with AMECO
How Can You Recharge a Battery Generator During a Long Outage?
A battery backup plan is only as resilient as its recharge strategy. A portable unit may cover a short interruption, but a multiday outage changes the question from how much energy is stored to how often energy can be restored. Estimate the outage duration you want to cover, then identify which charging methods will remain available.
Compare available charging paths
Wall charging is usually the simplest preparation method. Start with a full state of charge before a forecasted outage, while remembering that a wall outlet may not be available after the grid fails. Vehicle charging can offer another path, but speed and compatibility vary by the vehicle, cable, and power station. Confirm those details in the product documentation.
Some portable units accept solar input. That can extend limited capacity during daylight, but results depend on panel configuration, weather, shading, orientation, and the unit's accepted input. Solar input should be treated as part of a documented operating plan, not a promise that a small battery can run a home indefinitely.
Match recharge planning to the outage
For a brief interruption, a fully charged portable battery and conservative essential loads may be sufficient. For recurring California outages or Public Safety Power Shutoff events, consider whether you need overnight storage, daytime solar recharge, or automatic energy management. A connected solar-plus-storage system evaluates generation, storage, loads, and controls as one design.
Read the Department of Energy's homeowner's guide to going solar for general planning context, then evaluate your property and equipment requirements. AMECO's roofing solutions can also matter when a solar-plus-storage project includes roof condition questions. Recharge planning should account for the roof, electrical infrastructure, household demand, and the time you need to remain independent.
Portable Battery Unit or Integrated Solar-Plus-Storage?
| Consideration. | Portable battery unit. | Integrated solar-plus-storage. |
|---|---|---|
| Best fit. | Temporary power for selected devices. | Planned backup for essential home circuits. |
| Connection. | Direct connection to approved outlets. | Home electrical system with transfer equipment. |
| Recharge. | Wall, vehicle, or compatible solar input. | Connected solar plus coordinated energy management. |
| Homeowner role. | Move, connect, monitor, and recharge. | Use a professionally designed permanent system. |
Portable equipment is generally the better fit when you need movable, limited backup for a few priority devices. It can be practical for renters, short interruptions, or households that do not need panel-connected power. Its limits are manual operation, finite usable capacity, and output that may not support large appliances.
Integrated solar-plus-storage is generally the better fit when outage resilience, automatic transfer, quiet operation, and coordinated household backup matter more than portability. The system remains in place and can be planned around essential circuits. It requires an assessment of the property, electrical system, roof condition, solar production, utility connection, and expected loads.
AMECO's solar battery versus generator comparison can help frame the tradeoffs. Avoid choosing from a generic list before confirming what you want the system to do. A smaller portable unit can be the right tool for device-level backup, while a permanent system can be the right tool for a broader outage plan.
What Should California Homeowners Plan Before Buying?
California homeowners should account for utility territory, outage history, rate structure, electrical service, roof condition, and local permitting. A system designed for one property may not be the right fit for another. Final equipment, capacity, installation method, incentives, and timeline depend on the site and current program rules.
Start with the outage you are trying to manage
Decide whether you are preparing for brief interruptions, overnight outages, recurring wildfire-related shutoffs, or a longer loss of grid service. Then decide which loads must remain available. This turns an abstract search for the best generator into a measurable backup objective.
Check the roof and electrical system
If solar recharge is part of the plan, the roof and array layout deserve attention. Roof age, material, condition, shading, orientation, and available space can affect the design. The electrical panel and service capacity also determine how equipment can connect. Combining roofing and solar planning can reduce the risk of designing one system without considering the other.
Confirm permits and project-dependent details
Battery systems should be sized and installed by qualified professionals so inverters, controls, wiring, and other components align with the property and applicable California requirements. Permit steps and equipment requirements can vary by jurisdiction and system design. Ask for a clear explanation of the essential loads, backup duration, recharge assumptions, transfer method, and maintenance expectations.
Do not treat an online product specification as a property-specific recommendation. A consultation can identify whether a portable unit is adequate or whether a solar-plus-storage design better matches the home.
A Practical Battery Backup Decision Checklist
Use this checklist before purchasing equipment or requesting a system proposal:
- Write down the devices and circuits that must operate during an outage.
- Record running watts, possible startup watts, and desired runtime for each priority load.
- Separate device-level backup from panel-connected whole-home or essential-circuit backup.
- Compare usable watt-hours, continuous output, surge capability, and recharge inputs.
- Decide how the battery will recharge if the grid remains offline overnight or for several days.
- Confirm that the proposed transfer method prevents unsafe backfeed and follows applicable requirements.
- Review roof condition, solar production assumptions, panel capacity, and utility considerations.
- Ask which figures are equipment specifications and which depend on a site assessment.
Calculate Your Project with a California backup assessment
Frequently Asked Questions
Can a battery-powered generator run a house?
It depends on the unit's usable capacity, continuous output, surge capability, connection method, and the home's loads. A portable unit may support selected devices for a limited time. An integrated system can be designed around essential circuits or broader household backup, but it must be evaluated and installed for the specific property.
What size portable generator do I need to run my entire house?
There is no universal size. Add the running and startup demand of the loads you expect to use, then compare those totals with the unit's continuous output and usable capacity. Large loads such as air conditioning, electric water heating, ranges, dryers, pumps, and vehicle charging can change the result quickly. A qualified professional can help evaluate panel-connected backup.
Are battery-powered generators safer than gas generators?
Battery-powered equipment does not create combustion exhaust during normal operation, so it avoids the carbon monoxide hazard associated with fuel combustion. It still requires safe placement, compatible loads, correct charging, and appropriate electrical installation. Fuel generators must be operated outdoors and away from openings, following CDC guidance.
How long do battery-powered generators last during an outage?
Runtime depends on usable capacity and the loads connected to the unit. A refrigerator, heater, pump, or other motor-driven device may use more energy than small electronics and lights. Runtime can also change with temperature, battery age, inverter efficiency, and recharge conditions. Use an essential-load inventory instead of relying on a single advertised runtime.
What is the difference between a portable power station and a solar generator?
The terms are often used for overlapping products. A portable power station usually describes a rechargeable battery, inverter, and outlets in a movable enclosure. Solar generator may describe that same type of product when it accepts solar input, or it may be used informally for an integrated solar-plus-storage system. Check the connection method, usable capacity, output, recharge inputs, and transfer equipment before comparing names.
Get started with a backup power plan
The right backup choice depends on the loads you need, the outage duration you are planning for, and how much hands-on operation you want. Portable battery units can solve limited, temporary needs. Integrated solar-plus-storage can provide a more coordinated approach for recurring outages and panel-connected essential circuits.
AMECO Solar & Roofing has provided solar and roofing services in California since 1974. Schedule Now for a project-specific backup assessment and discuss the capacity, recharge, roof, and electrical considerations that apply to your home.
8.26.2026
Choosing how to pay for solar affects more than the first monthly bill. It can shape who owns the equipment, who handles repairs, what happens when the roof needs work, and how a future home sale is managed.
Solar system leases let a third party own the panels while the homeowner pays to use the system, often with maintenance included. Ownership through cash or a loan can provide more control and may preserve access to applicable incentives, while a lease may reduce upfront cost. The right fit depends on the property, utility territory, contract terms, equipment, and eligibility.
Before comparing payment amounts, clarify what the agreement actually transfers to you and what remains the provider's responsibility. The first step is to examine how the lease structure works in California.
What are solar system leases, and how do they work in California?
Short answer: Solar system leases let a third party own the equipment while the homeowner pays for its use under a long-term agreement.
Solar system leases are agreements in which a third-party company owns the solar equipment installed on a homeowner's property. Instead of purchasing the panels, the homeowner pays the leasing company for use of the system through a scheduled monthly payment. This arrangement separates equipment ownership from the benefits and responsibilities of having solar at the home.
Lease agreements commonly run for 20 to 25 years, so the contract can extend across a substantial portion of a system's operating life. Some leases may require little or no upfront payment for installation, but that does not mean the system is free. The homeowner should evaluate the full payment schedule, contract length, transfer rules, and end-of-term options before signing. The exact terms depend on the provider, system design, property, and agreement.
How does the monthly payment work?
A lease payment is generally based on the use of the equipment rather than a purchase price. The contract should state the starting payment, due date, payment adjustments, and any charges that could apply during the term. Many solar leases include an escalator, a clause that increases the monthly payment by a fixed percentage each year. Even a modest annual adjustment can change the payment profile over a long contract. So homeowners should compare the complete schedule rather than focusing only on the first-year amount. Reviewing different financing options for your solar system can help put the lease structure in context.
Who owns and maintains the equipment?
Under a lease, the leasing company retains ownership of the panels and related equipment. The U.S. Department of Energy explains that the leasing company is generally responsible for maintenance and system performance. The contract controls what is actually covered and how service requests are handled. Confirm who monitors production, responds to equipment problems, covers repairs, and coordinates access to the property. Coverage for maintenance does not eliminate the need to understand exclusions, response procedures, and responsibilities related to the roof or other homeowner-owned property.
California conditions also matter. Utility territory, interconnection rules, the property's electrical needs, and current policy can affect how a proposed system is designed and evaluated. A lease may also look different from a Power Purchase Agreement, where payment is commonly tied to the electricity the system produces rather than a fixed equipment rental. Learn more about understanding solar Power Purchase Agreements before treating the two structures as interchangeable.
For a fair comparison, read the agreement's payment, maintenance, production, insurance, roof-work, transfer, buyout, and end-of-term provisions together. The lowest initial payment is not necessarily the best fit for every California homeowner.
How do solar system leases compare with owning the system?
Short answer: A lease keeps equipment ownership with a third party, while cash purchases and solar loans give the homeowner ownership and more direct control.
The central difference is who owns the equipment and therefore who carries more of the long-term responsibility. With a lease, a third-party company owns the system while you pay for its use. With a cash purchase or solar loan, you own the system. A power purchase agreement, or PPA, generally charges for the electricity the system produces rather than a fixed rental payment. The U.S. Department of Energy outlines these as distinct financing structures, but the details vary by provider and contract.
Use this table as a starting point, then review the actual agreement for payment terms, maintenance obligations, incentive eligibility, and sale requirements. For a broader look at financing options for your solar system, compare the assumptions behind each proposal rather than focusing on one monthly figure.
| Consideration | Lease | Cash purchase | Solar loan | PPA |
|---|---|---|---|---|
| Ownership | Third-party provider owns the equipment. | Homeowner owns the equipment immediately. | Homeowner owns the equipment while repaying the loan. | Third-party provider generally owns the equipment. |
| Upfront payment | Often structured to limit upfront installation costs, subject to contract terms. | Requires the homeowner to pay the agreed project cost upfront. | Usually spreads repayment over time, with approval and terms varying by lender. | Payment is typically tied to electricity produced, with contract terms varying. |
| Maintenance | Leasing company commonly handles maintenance and repairs. | Homeowner coordinates maintenance, subject to applicable equipment coverage. | Homeowner coordinates maintenance, subject to applicable equipment coverage. | Provider responsibilities depend on the PPA agreement. |
| Incentive access | Homeowner generally does not claim incentives tied to ownership. | Owner may qualify for applicable incentives under current rules. | Owner may qualify for applicable incentives under current rules. | Provider generally claims ownership-related incentives, subject to eligibility. |
| Control | Equipment and contract terms limit some decisions. | Homeowner has the greatest control over the owned system. | Homeowner controls the system, subject to loan obligations. | Production, rate, and equipment terms are governed by the agreement. |
| Home sale | Lease transfer, buyout, or other requirements may add complexity. | Owned equipment can simplify the financing aspect of a sale. | Loan payoff or transfer details must be addressed before closing. | Agreement transfer or payoff requirements may apply. |
Ownership can provide access to applicable federal or state incentives, but eligibility depends on current rules and your circumstances. Leases can shift maintenance responsibility away from the homeowner, yet a long agreement may include an escalator that raises payments by a fixed percentage each year. A PPA deserves its own review of production assumptions and rate terms; see understanding solar Power Purchase Agreements before comparing proposals.
Finally, consider the property itself. Roof condition, utility territory, interconnection rules, equipment selection, and your expected time in the home can change which option is practical. The right comparison is not simply lease versus purchase. It is the total responsibility, control, and flexibility each contract creates for your household.
Who handles maintenance, roof work, and equipment decisions?
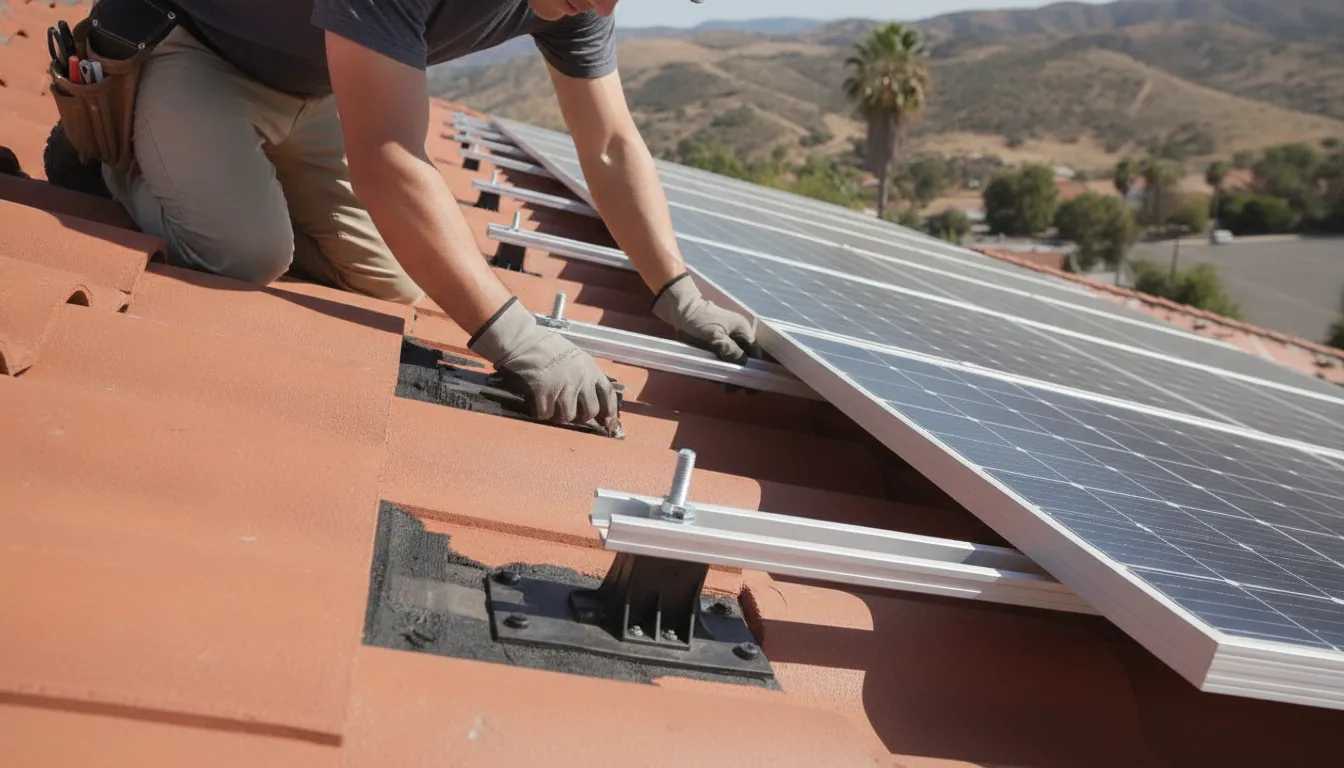
Short answer: The lease provider generally handles equipment maintenance, while the contract determines roof-work costs, service procedures, and who controls replacement decisions.
Responsibility depends first on who owns the equipment. With a solar lease, a third-party leasing company owns the panels and is generally responsible for system maintenance and performance. The contract should explain how service requests are submitted, what repairs are covered, and whether the homeowner has access to production monitoring. Some lease agreements may not provide real-time monitoring, so confirm how you will identify an outage or performance issue. The U.S. Department of Energy's financing guide provides a useful overview of lease and ownership responsibilities.
If you own the system through a cash purchase or solar loan, you have more direct control over equipment choices, monitoring access, and future upgrades. You also take on more responsibility for coordinating service, even when manufacturer or installer warranties may apply. Review exactly who responds to inverter faults, damaged panels, wiring problems, or monitoring alerts. Avoid assuming that a warranty covers labor, roof work, or every component in the system.
How does the roof affect a leased solar system?
Roof condition should be evaluated before signing any agreement, not after panels are installed. A structurally sound roof must support the added equipment, and its remaining service life matters when comparing a long-term contract with a planned roof replacement. If the roof needs work later, ask who pays to remove and reinstall the array. How long the process may take, and whether roof damage caused during the work is addressed. The U.S. Treasury's consumer guide to solar leases specifically recommends reviewing removal and reinstallation provisions.
This coordination is especially important for California homes with tile or aging roofing materials. AMECO combines solar and roofing services, so homeowners can discuss roof health and solar design in the same project conversation. Explore AMECO's roofing solutions to understand how roof work can be considered alongside an energy project, rather than treated as an unrelated repair.
Who chooses batteries and replacement equipment?
Equipment decisions may be limited by the lease contract. Ask whether the leasing company selects the panels, inverter, and monitoring platform, and whether you can add a battery later. Battery compatibility, available space, utility requirements, and the home's backup goals all affect the design. California utility territory and interconnection rules can also influence which configuration makes sense. Compare the contract's process for replacing failed equipment or upgrading the system with the level of control you would have as the owner. If outage resilience is a priority, review AMECO's battery backup options as part of the broader property plan.
What should California homeowners check before signing a solar lease?
Short answer: Before signing, verify payment changes, production assumptions, maintenance, roof work, batteries, utility approval, transfer rules, buyout terms, and end-of-term obligations.
Read the entire agreement, not only the projected monthly payment. Solar leases commonly run for 20 to 25 years, and the leasing company generally owns the equipment while you pay for its use. That makes the details important if your energy needs, roof, utility rules, or plans for the property change. Use this checklist to identify questions that should be answered in writing.
- How does the payment change? Look for an escalator, which raises the payment by a fixed percentage at set intervals. Ask for the starting payment, every scheduled increase, the total payment schedule, and whether any fees apply for late payment, early termination, or contract changes. Do not compare offers using the first monthly figure alone. Review an explanation of solar lease escalators alongside the actual contract.
- What production assumptions support the proposal? Ask how the installer estimated annual production, including roof orientation, tilt, shading, system size, and equipment. Confirm whether the agreement guarantees energy production, what happens if output falls short, and how performance is measured. A lease payment and a production-based promise are different terms, so request the remedy, exclusions, and reporting method for each.
- Who handles maintenance, repairs, insurance, and monitoring? The U.S. Department of Energy explains that the leasing company generally remains responsible for system maintenance and performance, but your contract controls the scope. Ask who pays for failed equipment, labor, roof penetrations, storm damage, and property damage. Confirm whether the lessor carries equipment insurance, whether your homeowner policy must be updated, and whether you receive real-time production monitoring or only periodic reports.
- What happens if the roof needs work? Ask who decides whether panels must be removed and reinstalled, who coordinates the work, how long it may take, and who pays every related cost. Clarify whether roof repairs, replacement, flashing, and damage caused during removal are included or excluded. The U.S. Treasury's consumer guide specifically recommends checking these provisions before signing. Also verify that the roof is structurally ready for the equipment before installation.
- Are batteries included, optional, or separately contracted? If backup power matters, identify the battery model, ownership, usable capacity, warranty responsibility, monitoring access, replacement terms, and what loads the system can support during an outage. Ask whether adding storage later requires a new agreement. Battery performance and value depend on the home, equipment, utility territory, and current interconnection policies, so avoid relying on a generic savings illustration.
- How will utility approval and interconnection be handled? Confirm who submits applications, secures permission to operate, responds to utility requests, and pays unexpected interconnection or upgrade charges. Ask which utility rate assumptions were used and how changes to export-credit rules affect the proposal. Approval requirements and project economics can differ across California utility territories.
- What are the transfer, buyout, and end-of-term options? Ask whether a buyer must qualify for the lease, what documents and fees apply to a transfer, and whether you may purchase the system before the term ends. Some leases include a buyout option, but its timing and price are contract-specific. At the end, determine whether you can renew, buy, remove, or require the lessor to remove the equipment, and who restores the roof. A lease may need to be transferred during a home sale, which can add complexity.
How do solar system leases affect a home sale or future plans?
Short answer: A lease can add transfer, buyer-qualification, payoff, and roof-work questions to a future sale, so review those terms before signing.
A solar lease can become part of the home-sale process because the equipment is typically owned by a third-party leasing company rather than by the homeowner. When you sell, the buyer may need to assume the remaining agreement, subject to the leasing company's requirements. The U.S. Department of the Treasury cautions that transferring a solar lease to a new homeowner can add complexity to a sale. Review the Treasury's consumer guide and your own contract before listing the property.
Start by asking the leasing company for its transfer procedure and the documents a prospective buyer must provide. Buyer qualification may involve an application, credit review, income documentation, or other criteria defined by the contract. A buyer who does not qualify may require a different path, such as a negotiated payoff or buyout, if that option is available. Neither transfer nor early payoff should be assumed. Request the current terms in writing, including any fees, timing requirements, purchase price calculation, and whether the agreement changes when ownership of the property changes.
Refinancing can raise similar questions. A lender, title company, or underwriter may need to understand the lease, payment obligation, and any recorded documents associated with the solar system. Ask for a complete copy of the agreement, amendments, payment history, equipment information, production or monitoring records, and contact details for the lease servicer. Keeping these materials organized can reduce avoidable delays during underwriting and escrow, although the lender and leasing company make their own determinations.
Roof work deserves separate attention. If the roof needs repair or replacement before or after a sale, the panels may need to be removed and reinstalled. The Treasury specifically recommends checking the lease for roof-repair provisions and possible removal and reinstallation costs. Confirm who selects the roofing contractor, who coordinates the solar work, how long the process may take, and whether the lease company must approve the work. An integrated contractor such as AMECO can help coordinate solar and roofing considerations, but the lease owner still controls obligations established in the agreement.
Before choosing a lease, compare its long-term obligations with the total cost of a solar system and your expected time in the property. If a move, refinance, roof project, or change in household plans is likely. Make those scenarios part of the contract review rather than treating the lease as a simple monthly payment.
Which solar financing path fits your property and goals?
Short answer: The best financing path depends on ownership preference, cash flow, roof condition, utility territory, expected time in the home, and backup-power goals.
The right financing structure depends less on a universal ranking and more on how you expect to use the property. Start by deciding whether long-term ownership matters to you. A cash purchase gives you ownership without a loan payment, while a solar loan lets you own the system while paying over time. Owners may be eligible for applicable federal or state incentives, subject to current rules and individual eligibility. A lease keeps equipment ownership with a third party. A Power Purchase Agreement (PPA) generally charges for the electricity the system produces rather than renting the equipment itself.
Review AMECO's financing options for your solar system and compare the full structure, not just the first monthly figure. Ask how payments can change, who handles maintenance, what happens if equipment needs service, and whether the agreement includes a purchase or buyout path. For a deeper explanation of the electricity-based model, see understanding solar Power Purchase Agreements.
Match the structure to your cash flow and time horizon
If minimizing upfront cash is your primary concern, a lease or PPA may appear attractive, but read the complete contract. Check for an annual escalator, which can increase payments by a fixed percentage, and understand the agreement's duration. If you plan to remain in the home for many years, ownership may offer more control over the system and its long-term financial treatment. If you may move sooner, examine transfer requirements, buyer qualification, early termination provisions, and any payoff or buyout calculation before signing.
Ownership also means taking a more active role in decisions about monitoring, repairs, insurance, and future equipment. A lease may shift much of the equipment maintenance responsibility to the leasing company, but the contract controls the actual obligations. Compare the total cost of a solar system using property-specific assumptions rather than relying on a generic estimate.
Account for the roof, utility territory, and resilience goals
Roof condition should be resolved before panels are installed. A roof that may need substantial work can change the timing and total scope of a project, especially if removal and reinstallation responsibilities differ by financing model. AMECO's integrated solar and roofing approach helps coordinate those decisions from design through installation.
Finally, evaluate your utility territory, interconnection requirements, roof orientation, shade, and interest in outage protection. Battery storage can affect both equipment selection and the financing comparison, so review battery backup options alongside your solar plan. Use the solar cost calculator for an initial framework, then discuss your property's details and current eligibility with AMECO through Get An Estimate.
Frequently Asked Questions
Is leasing a solar system a good idea?
It can be a reasonable choice when minimizing upfront costs and delegating equipment maintenance matter more than owning the system. A lease usually places equipment ownership and maintenance with a third party, while your payment structure, contract term, and long-term control depend on the agreement. Compare the lease with cash purchase, a solar loan, and a PPA against your expected time in the home, tax eligibility, utility territory, roof condition, and backup-power goals.
What is the downside of a solar lease?
The main tradeoffs are that you do not own the equipment, may not receive ownership-related tax benefits directly, and could face added complexity when selling the home. Many agreements also include an escalator that raises the payment by a fixed percentage each year. Review the actual contract for payment changes, maintenance responsibilities, buyout terms, early termination provisions, and roof-removal costs. The U.S. Department of Energy compares these financing structures.
What is the average cost of a solar lease?
There is no reliable universal average for a California homeowner. The payment can vary with system size, equipment, roof and electrical work, utility rates, contract terms, and eligibility factors. Ask for the total payment schedule, any escalator, expected utility charges, and end-of-term obligations rather than evaluating only the initial monthly amount. Comparing multiple written proposals can reveal meaningful differences in structure.
Can I sell my home with a solar lease?
Usually, the lease must be addressed during the sale through an approved transfer, payoff, or other contract option. Buyer qualification requirements and the process can affect timing and negotiations, so request the transfer rules and current payoff or buyout information before listing. A U.S. Treasury consumer guide notes that transferring a solar lease can be complex. Also confirm how roof replacement or refinancing would be handled.
Ready to review your solar options?
Choosing between a lease, ownership, or another financing path depends on your property, roof condition, utility territory, goals, and eligibility. A project-specific review can help you compare payment structure, responsibilities, equipment considerations, and future plans before committing. To review your California property and financing options with AMECO Solar & Roofing, request a project estimate.
8.25.2026
Solar Panels for Commercial Buildings Cost: What to Budget
Commercial solar budgeting starts with more than the panels on the roof. A useful estimate must account for system size, electrical infrastructure, mounting, roof condition, equipment, utility requirements, and the way the project will be financed. Those variables can make two buildings with similar footprints require very different investments.
AMECO Solar & Roofing explains that solar panels for commercial buildings cost depends on the property's energy use, roof and electrical conditions, system design, utility territory, equipment, and incentive eligibility. A per-watt figure can provide early market context. It is not a quote or a reliable forecast of total project cost.
For California property owners, the right process is to separate the project into clear cost categories. Identify assumptions, and test how each financing or incentive scenario affects cash flow. A site-specific assessment can also reveal whether roofing work should be coordinated with installation. Start by looking at the budget range in the context of the complete system scope, then request a project assessment based on your building's actual conditions.
What Does Solar Panels for Commercial Buildings Cost Include?
AMECO Solar & Roofing approaches commercial planning as a coordinated solar and roofing project. That means the budget should show both the energy system and the building work needed to install it responsibly.
Budgeting for solar panels for commercial buildings cost starts with a project range, not a single price. The useful first estimate should account for the building's electricity demand, roof and site conditions, system size, equipment, utility requirements, permitting, and construction scope. A proposal becomes more reliable as those inputs are measured and verified.
Per-watt pricing can provide market context during early planning. One AMECO commercial solar resource cites a broad pre-incentive range of $1.10 to $2.50 per watt installed. That range is not a quote, price guarantee, or prediction for a particular property. It may not include every project expense. The final cost can vary by building type, system design, location, interconnection requirements, and the condition of the existing electrical and roofing systems. Use it to frame an initial conversation, then replace it with a site-specific estimate.
Installed cost is only one part of the budget
A commercial solar budget should separate the photovoltaic system from the wider project scope. A complete PV system includes modules, mounting structures, inverters, and other supporting technologies, as described by the U.S. Department of Energy. The budget may also need to account for:
- Engineering, design, permits, and inspections.
- Roof repairs, replacement, or structural work.
- Electrical upgrades, monitoring, and interconnection.
- Construction access, labor, and project management.
- Optional battery storage and controls.
This distinction matters when comparing proposals. Two bids with similar panel capacity may represent different scopes if one includes roof coordination, electrical upgrades, or utility work and the other does not. A commercial property owner should ask for a clear line-item scope, assumptions, exclusions, and allowances for conditions that cannot be confirmed until assessment or construction.
It is also helpful to compare the proposed design with recognized market planning scenarios rather than treating one number as certain. NREL's commercial PV analysis uses conservative, moderate, and advanced technology scenarios for cost projections, reinforcing that equipment and technical assumptions influence the result.
For a coordinated review of your building, energy use, roof, and electrical needs, explore AMECO's commercial solar solutions. You can also compare this budgeting framework with AMECO's commercial solar installation cost guide.
What Makes Solar Panels for Commercial Buildings Cost More or Less?
The answer to solar panels for commercial buildings cost depends on more than the number of panels. A useful budget accounts for the building, the electrical system, the installation environment, and the requirements of the serving utility. Two properties with similar floor areas can need very different designs because their energy demand, roof condition, service capacity, and operating schedules differ.
Annual energy use is the starting point. Utility bills and interval load data help establish how much electricity the system should offset, while demand charges and future changes to occupancy may influence the design. A larger system is not automatically the better investment if the building cannot use or receive fair credit for all of its production. The final layout also depends on available roof area, shading, setbacks, and the desired level of energy independence.
| Category | Scope | Variables |
|---|---|---|
| Building | Roof review and mounting | Age, material, structure, access |
| Electrical | Inverters, wiring, and service work | Capacity and interconnection |
| Delivery | Engineering, permits, and logistics | Utility and site complexity |
Price these categories separately. Each can change the total scope, construction sequence, or utility review.
Mounting choice can materially change the scope. A roof mount may use existing space but require a structural assessment, repairs, or coordinated reroofing. A ground mount may improve access and orientation, yet add foundations, trenching, grading, fencing, and land-use considerations. Electrical service is another frequent variable. Older switchgear, long conduit runs, limited capacity, or a transformer requirement can add engineering and construction work beyond the module array.
Equipment decisions also matter. The modules, inverter architecture, racking, monitoring, and controls should fit the building's load profile and operating needs. The U.S. Department of Energy describes a complete photovoltaic system as more than modules, including mounting structures, inverters, and related technologies: review the DOE's PV system design basics. Site access, crane or lift requirements, tenant coordination, working-hour limits, and safety planning can affect labor and scheduling as well.
Engineering, permitting, inspections, and utility interconnection should be treated as core project scope, not afterthoughts. Battery storage adds another design layer when backup power, peak-demand management, or resilience is a priority. To evaluate the full building context, compare commercial solar solutions with coordinated solar and roofing services. A site-specific assessment can then separate essential work from optional improvements without presenting a quote or guaranteed range.
How Do Incentives and Financing Affect the Budget?
The way a business pays for a solar project can change its upfront budget, monthly cash flow, accounting treatment, and long-term control of the system. A cash purchase may offer the clearest ownership structure, while a loan can spread payments over time. A lease or power purchase agreement (PPA) may reduce the need for an upfront capital outlay. But the provider typically owns the system and the contract governs the payment terms. These options should be compared against the building's energy use, available capital, tax position, and investment horizon.
Cash and commercial loans
With a cash purchase, the business pays the project cost directly and owns the equipment. That can make the financial model easier to evaluate, but it also commits capital that might otherwise support operations, expansion, or building improvements. A commercial loan preserves more cash at the start, although interest, fees, loan term, security requirements, and repayment timing become part of the project budget. Compare the payment schedule with expected utility costs rather than evaluating the loan rate in isolation.
Tax incentives can also affect the ownership analysis. The IRS Clean Electricity Investment Credit guidance explains that qualified facilities and energy storage technology placed in service after December 31, 2024 may qualify, subject to applicable rules. Eligibility is not automatic. The result can depend on who owns the system, when it is placed in service, the property's tax appetite, labor or prevailing-wage requirements, domestic-content requirements, and the project's specific facts. A tax professional should confirm how any credit or other incentive applies to the business.
Request a project assessment to compare your commercial solar budget options.
Leases and power purchase agreements
In a lease, the business generally makes scheduled payments for use of the system. In a PPA, payments are typically tied to the electricity the system produces under the contract. These structures can be useful when preserving capital is a priority. They require careful review of escalators, contract length, production assumptions, maintenance responsibilities, insurance, roof access, transfer provisions, and what happens if the property is sold or the tenant changes.
A responsible comparison should model more than the first-year payment. Ask how each option treats incentives, maintenance, system performance, roof work, battery storage, utility changes, and end-of-term ownership. California utility rules and export arrangements can also influence the value of generated electricity, so the same financing structure may produce different results at different properties. Build a site-specific comparison with verified project assumptions instead of relying on a universal credit percentage, savings estimate, or payback period.
Is Solar Worth It for a Commercial Building?
Solar can be worthwhile for a commercial building, but the answer depends on how the property uses electricity and how the project fits the owner's operating horizon. A simple payback estimate is not enough. The evaluation should compare the system's installed cost with the electricity it can offset. It should also account for the value of exported power, financing costs, maintenance assumptions, and the financial impact of keeping or replacing the roof.
Start with the building's load profile, which shows how much electricity the property uses and when it uses it. A facility with daytime demand, such as a warehouse, office, retail site, or manufacturing operation, may consume more solar power directly. That self-consumption can be more valuable than exporting excess generation, depending on the utility's rate structure and export rules. Review both energy charges, measured in kilowatt-hours, and demand charges, which are based on the highest rate of electricity use during a billing period.
Test the project against more than one operating scenario
A responsible financial model should not assume that today's conditions will remain unchanged. Model conservative, expected, and favorable cases using the building's actual utility bills, operating schedule, proposed system size, equipment assumptions, and applicable utility requirements. NREL uses conservative, moderate, and advanced scenarios when benchmarking commercial photovoltaic projections, which illustrates why a range is more useful than a single forecast. You can review the methodology in its commercial PV analysis.
- Compare daytime electricity use with expected solar production.
- Separate energy-charge savings from any demand-charge effect.
- Model export compensation under the property's specific utility tariff.
- Test changes in occupancy, production schedules, utility rates, and system output.
- Include financing payments, insurance, maintenance, inverter replacement assumptions, and roof work.
- Confirm that the owner expects to hold the property long enough for the project to provide value.
Include resilience and long-term property plans
Solar may also support business continuity, even when resilience is not captured fully in a basic payback calculation. If outages could interrupt refrigeration, communications, security, production, or other critical operations, evaluate whether battery backup belongs in the design. Storage adds cost and its value depends on the loads being protected, outage exposure, utility rules, and control strategy.
Roof tenure matters as well. Installing solar shortly before a major reroof can create avoidable removal and reinstallation costs. Coordinating the roof, electrical infrastructure, utility requirements, and solar design at the assessment stage creates a more reliable comparison. The right conclusion may be to proceed now, phase the project, improve the roof first, or defer it until the load profile changes. A site-specific assessment is the only sound way to determine which choice fits the building.
How Does the Roof Affect Solar Cost and Scope?
For a commercial property, the roof is part of the solar project rather than a separate background condition. Its age, remaining service life, structure, surface material, and access can all change the work included in a proposal for solar panels for commercial buildings cost. A roof assessment helps determine whether the building is ready for installation, needs repairs first, or would benefit from coordinated reroofing.
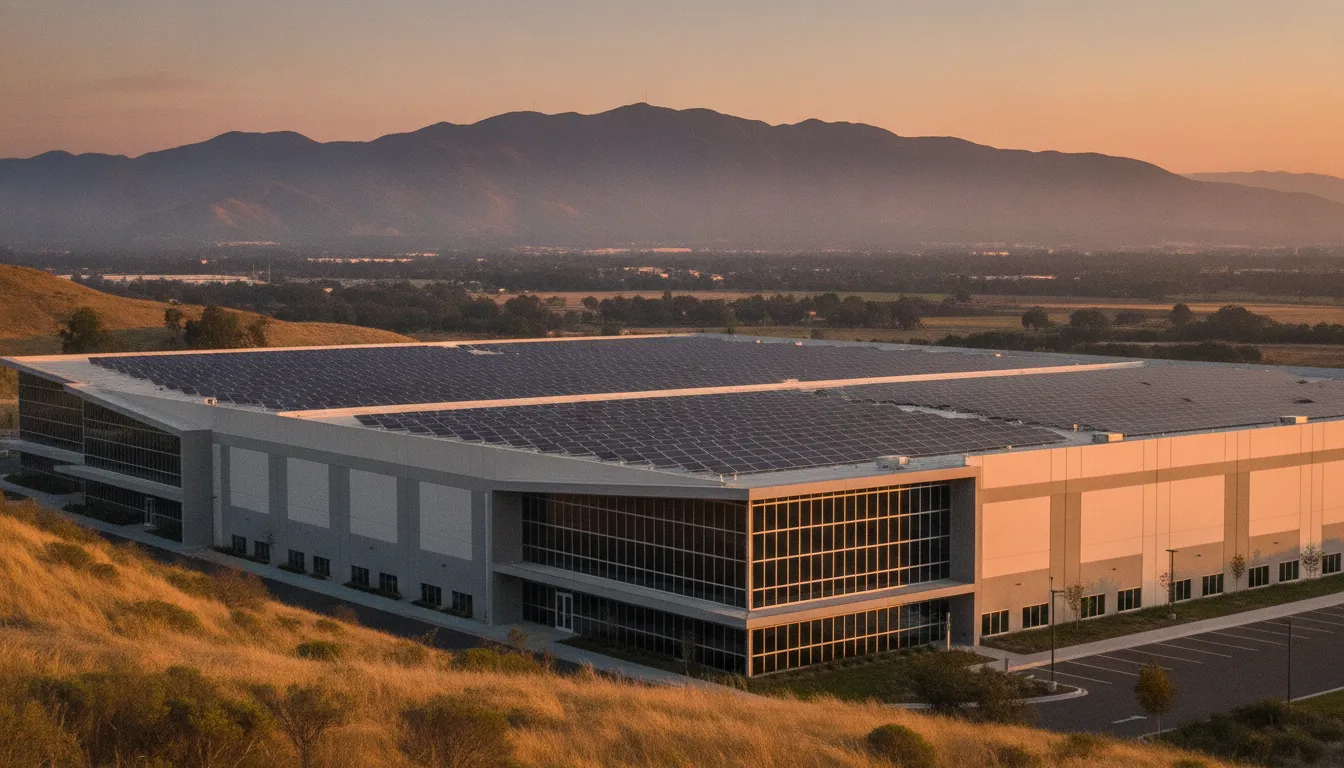
Roof age and remaining service life
Installing a solar array on a roof that may need replacement soon can create avoidable project complexity. Removing and reinstalling panels later adds labor, scheduling, and coordination considerations. If the membrane, tiles, or roofing assemblies show damage, deterioration, or previous leak repairs, those conditions should be evaluated before the array is designed. A proposal may therefore include roof repairs, a replacement plan, or a recommendation to complete reroofing before solar work begins.
Structure, penetrations, and roof material
Commercial solar equipment adds panels, racking, attachments, wiring, and related electrical components. A structural review can confirm that the roof framing and attachment points are appropriate for the proposed design, including local wind and seismic requirements. The roof covering also affects installation methods. Membrane roofs require carefully detailed penetrations and flashing. Tile roofs require skilled handling and a mounting approach that protects the water-shedding layers. Every penetration should be properly flashed and sealed, not treated as a shortcut with surface sealant alone.
Roof layout also affects access. Setbacks, pathways, equipment placement, parapets, drains, skylights, mechanical units, and future maintenance zones can reduce the usable area for panels. These constraints may influence system size and electrical routing even when the roof appears large from the ground.
Why trade coordination belongs in the budget
Roofing and solar work can involve different scopes, crews, permits, inspections, and warranties. When separate contractors are involved, the property owner or general contractor may need to coordinate sequencing and resolve questions about responsibility at roof attachments. One integrated provider can simplify project management by evaluating the roof and solar design together. This approach keeps sequencing and communication with one team.
AMECO Solar & Roofing has operated in California since 1974 and combines solar installation with roofing services. Learn more about AMECO's California experience, then request a site-specific assessment that accounts for the roof, electrical system, property use, and utility requirements.
What Should a California Commercial Solar Assessment Include?
A useful assessment turns a broad budgeting question into a project-specific scope. Online calculators can provide an initial orientation, but they cannot inspect a roof, interpret a facility's load profile, confirm utility requirements, or identify permitting and construction conditions. Those details can materially change the equipment, labor, and project structure.
A California commercial assessment should work through these stages:
- Review the facility and roof. Document the building's use, operating schedule, available roof or ground area, roof age and condition, shading, access, and structural considerations. If reroofing may be needed, coordinate that scope before finalizing the solar layout. Combining commercial solar solutions with related building work can help keep responsibilities visible across the project.
- Analyze electricity bills and the load profile. Review sufficient utility bills to understand energy consumption, seasonal variation, rate structure, demand charges, and unusual operating patterns. Monthly kWh alone is not enough. Hourly or interval load data can help show when electricity is used and how a proposed system may align with that demand.
- Identify the utility territory and interconnection path. The serving utility, tariff, export rules, meter configuration, and available electrical capacity all affect design and project scope. The assessment should identify the required interconnection process rather than assume that every California property follows the same requirements.
- Develop the system design and equipment scope. Translate site conditions and energy needs into a preliminary system size, module layout, inverter approach, mounting method, electrical upgrades, monitoring, and any battery-storage or backup considerations. A complete PV system includes more than modules. Mounting structures, inverters, and related technologies are part of the design scope.
- Review incentives and ownership options. Compare the implications of direct ownership, financing, a lease, or a power purchase arrangement. Potential incentives depend on current rules, project details, ownership, placed-in-service requirements, and eligibility, so they should be confirmed for the specific property rather than treated as guaranteed.
- Define permitting and construction responsibilities. Clarify engineering, utility coordination, permits, roof work, structural or electrical upgrades, equipment delivery, site access, safety requirements, commissioning, and ongoing service. A clear responsibility matrix reduces the risk of leaving important costs outside the initial budget.
- Build a decision-ready financial model. Present project cost categories, ownership assumptions, utility-rate inputs, incentive scenarios, financing terms, operating considerations, and sensitivity cases. The model should show which assumptions drive the outcome, not promise a universal savings figure, payback period, or ROI.
This article is a budgeting framework for planning a commercial project. Cost-per-square-foot guides address a narrower question and can be useful for comparison, but they do not replace a site-specific assessment. To move from a preliminary framework to property-specific inputs, request a project assessment.
Frequently Asked Questions
How much do commercial solar panels cost?
AMECO Solar & Roofing recommends treating a commercial solar budget as a property-specific question. System size, roof conditions, electrical work, equipment, permitting, and utility requirements all matter. A broad market reference is $1.10 to $2.50 per watt before incentives, but that range is not a quote and may not reflect your building. A site-specific design and financial review is needed to estimate the full project scope.
Are solar panels worth it for commercial buildings?
AMECO Solar & Roofing evaluates this question using the facility's energy use, utility rate structure, demand charges, available roof or site area, operating horizon, and financing choice. Compare multiple scenarios rather than relying on a generic payback claim. A useful analysis should show project costs, expected energy production, utility assumptions, incentives, maintenance considerations, and sensitivity to changes in those inputs.
How many solar panels are needed to power a commercial building?
AMECO Solar & Roofing sizes each commercial array from the property's actual conditions. There is no standard panel count for every commercial property. The required quantity depends on annual electricity consumption, available sunlight, panel wattage, roof orientation and shading, desired offset, and whether the system includes storage. Designers typically review utility bills or interval load data, then size the system around the building's load profile and site constraints.
Can a commercial solar project qualify for a tax credit?
AMECO Solar & Roofing cannot confirm eligibility from a general article. Potentially, the IRS states that qualified facilities and energy storage technology placed in service after December 31, 2024 may qualify for the Clean Electricity Investment Credit, subject to applicable rules. Eligibility and the amount available depend on project details and the taxpayer's circumstances. Confirm current requirements with a qualified tax professional before including an incentive in your budget. Review the IRS guidance.
Ready to Build a Commercial Solar Budget?
A site-specific assessment can help your team understand how the building, roof, energy use, equipment, and utility requirements shape the project scope. AMECO Solar & Roofing can help you organize the information needed for a more informed planning conversation. To get started, request a commercial solar assessment and budget for your property.
8.25.2026
Installing an electric vehicle charger at home is an electrical project, not simply an appliance upgrade. The work can affect your service panel, require a dedicated circuit, involve local permits, and influence how safely your vehicle charges every day. For California homeowners, a licensed electrician for EV charger installation can evaluate the property before equipment is selected or wiring begins.
Short answer: A licensed electrician checks the home's available electrical capacity, designs the circuit and protective equipment. Installs the charger according to applicable requirements, and coordinates permits or inspections when required. Professional planning is especially important for hardwired Level 2 chargers because EV charging is a sustained electrical load.
AMECO Solar & Roofing helps California homeowners consider EV charging as part of a broader home energy plan. That can include solar, roofing, battery backup, and electrical planning when those services fit the property. Start with AMECO's home EV charging station installation guide for a related overview, then use the sections below to understand the professional work behind a safe installation.
Why Do You Need a Licensed Electrician for EV Charger Installation?
A home charger connects to the electrical system that also serves air conditioning, heating, cooking equipment, water heating, solar equipment, and other major loads. A licensed professional evaluates those existing demands instead of assuming that an open breaker space means the service can support a charger. The electrician then matches the charger, circuit, wire, overcurrent protection, grounding, and mounting location to the home's actual conditions.
The U.S. Department of Energy's Alternative Fuels Data Center explains that electric vehicle charging is a continuous load. That means the circuit must be designed for sustained operation, not treated like an occasional plug-in device. Read the Department of Energy home charging guidance for additional context.
Safety starts with the electrical design
Electrical problems are not always visible when a charger is first switched on. A loose termination, undersized conductor, incorrect breaker, poor grounding connection, or unsuitable receptacle can become a reliability or safety issue over repeated charging cycles. A licensed electrician can inspect the service equipment, confirm the proposed circuit, protect wiring from physical damage, and test the completed installation.
Code compliance creates a documented path
Electrical work may need to satisfy state requirements and the rules of the local authority having jurisdiction. A professional can identify which requirements apply, prepare the installation for inspection, and explain what documentation the homeowner should retain. The U.S. Fire Administration identifies qualified electrical installation and appropriate permitting as important safety steps for EV charging equipment. Its electric vehicle safety information provides useful background.
- Capacity: The service and panel must be evaluated alongside the home's existing loads.
- Protection: Breakers, grounding, wiring, and required protective devices must match the design.
- Placement: The charger and cable route should be practical, protected, and appropriate for the location.
- Documentation: Permits, inspection records, equipment information, and installation details should be retained.
What Does a Licensed Electrician for EV Charger Installation Check First?
Before installation, the electrician typically reviews the home's service rating, panel condition, available capacity, existing major loads, charger location, circuit route, and local permitting requirements. This evaluation determines whether a standard circuit installation is appropriate or whether the project needs additional electrical work.
The assessment should happen before a homeowner commits to a specific charger output. A unit with more power is not automatically the best choice. The useful design is the one that fits the vehicle, driving routine, parking location, electrical service, and future plans without creating unnecessary work.
Service rating and panel condition
The electrician examines the service equipment and panel, including its rating, condition, breaker arrangement, available spaces, and the age of major components. Older equipment may need closer review. A crowded panel or limited service does not automatically rule out EV charging, but it does make a load calculation and design review more important.
Distance, route, and mounting location
The distance between the panel and charger affects the conductor route, conduit, labor, and installation details. The professional also considers whether the charger will be installed in a garage, carport, exterior wall, or another location. Outdoor equipment needs protection appropriate for weather exposure. Cable placement should reduce trip hazards and avoid unnecessary stress on the connector.
Homeowners can make the evaluation more useful by sharing the vehicle model, typical daily driving distance, preferred parking position. Photos of the panel and proposed mounting area, and any plans for solar or a second EV. These details help the electrician compare practical options instead of designing around incomplete information.
For California homeowners planning solar and charging together, AMECO's solar solutions page explains the broader system-planning conversation. The final design still depends on the property, equipment, utility territory, and electrical assessment.
Which EV Charger Level Fits Your California Home?
The charger level describes the electrical service and charging capability, but it does not guarantee a particular range increase. Actual results vary by the vehicle, battery state, temperature, charger output, and the home's available power. A professional can help determine whether the equipment fits the electrical system.
| Charger level. | Typical connection. | Common home use. |
|---|---|---|
| Level 1. | 120-volt household outlet. | Lower daily driving and long overnight parking. |
| Level 2. | Dedicated 240-volt circuit. | Routine home charging when the panel supports it. |
| Level 3 DC fast charging. | High-power commercial equipment. | Public and commercial locations, not typical homes. |
Level 1 for lower daily demand
Level 1 charging uses a standard household outlet and may work for a short daily commute when the vehicle remains parked for long periods. It may not require the same dedicated-circuit work as a Level 2 installation, but the outlet and circuit still need to be suitable. A homeowner should not use an extension cord or an outlet with signs of heat, damage, looseness, or overloading.
Level 2 for routine home charging
Level 2 equipment commonly operates on a dedicated 240-volt circuit. It can be a practical choice for drivers who want more charging capacity during overnight parking, but the circuit must be designed for sustained operation. The right amperage depends on the equipment, vehicle, panel, wiring, and installation instructions. A hardwired charger can offer a permanent connection, while a plug-in unit may fit a properly installed receptacle. The choice should follow the electrical design, not appearance alone.
Level 3 is generally a commercial and public application
Level 3 direct-current fast charging uses substantially higher-power equipment and is generally associated with public or commercial charging locations. It is not the normal solution for a California residence. If a homeowner sees unusually high output claims, the first question should be whether the equipment is intended for a home and whether the property can support it.
- Start with the vehicle's charging capability and daily driving pattern.
- Review the home's service and panel before choosing a circuit size.
- Compare the charger location, cable route, equipment rating, and future needs.
- Confirm permits, inspections, and manufacturer requirements before work begins.
How Does Panel Capacity Affect EV Charger Installation?
Panel capacity affects whether the home can support the proposed charger while serving its other loads. A load calculation considers the service rating, existing demand, charger draw, and future electrical plans. If capacity is limited, the electrician can discuss alternatives such as a lower-output charger, load management, additional electrical work, or a service upgrade when appropriate.
A breaker space is only one part of the analysis. The panel can have an open position while the service lacks enough capacity for another sustained load. Conversely, a panel that looks crowded may still support a well-designed project after a professional calculation. The answer depends on measured and documented conditions.
Existing loads matter
California homes may have electric heat pumps, air conditioning, induction cooking, electric water heating, pool equipment, solar inverters, batteries, and other equipment operating on the same service. The electrician considers how those loads interact with EV charging. This is also why a generic online amperage example should not replace an evaluation of the actual property.
Panel upgrades are not automatic
A service or panel upgrade may be appropriate in some homes, but it is not a universal requirement. The professional should explain why additional work is needed, what alternatives were considered, and how the proposed design affects the project. In some situations, equipment settings or managed charging may help align charging with the home's available capacity. Those options must be reviewed for compatibility with the charger, vehicle, and electrical system.
If you want a property-specific discussion, Get An Estimate for a coordinated review of your EV charging and home energy needs.
Do You Need a Permit for an EV Charger in California?
Permit requirements depend on the location and scope of work, but a new circuit, hardwired charger, panel modification, or service change commonly requires local review. California jurisdictions administer permits and inspections through local building departments, so the exact process can vary by city or county. A licensed electrical contractor can help identify the authority having jurisdiction and the steps that apply.
Permits and inspections are part of the project
A permit gives the local authority an opportunity to review the work and an inspection confirms that the installed system matches the approved plan. The requirements may address circuit protection, conductor sizing, grounding, equipment location, disconnecting means, and other details. The U.S. Department of Energy notes that local and state requirements apply to home charging installations, which is why homeowners should not rely on a one-size-fits-all assumption.
Keep the project record
Homeowners should retain the permit, inspection result, equipment information, and any electrical documentation provided by the contractor. These records can help explain what was installed during future electrical work or a property transaction. They also give the homeowner a clearer basis for discussing repairs or changes later.
AMECO's approach to solar and energy projects emphasizes planning around the property rather than promising the same outcome for every home. Project-specific electrical and permitting requirements should be confirmed before installation.
Can You Install a Home EV Charger Yourself?
Some homeowners can handle non-electrical preparation, such as clearing the mounting area, comparing equipment features, and deciding where the vehicle will park. The circuit, panel connection, grounding, and other electrical work are different. For a hardwired Level 2 charger, using a qualified professional is the safer approach and may be required by local rules or the equipment instructions.
Why DIY mistakes can be difficult to spot
A charger may appear to work even when the circuit or connection is not properly designed. Heat at a connection, nuisance tripping, inconsistent charging, and damaged equipment can develop over time. Unpermitted work can also complicate a later inspection, sale, remodel, or insurance conversation. Insurance terms vary, so homeowners should confirm policy questions with their insurer instead of assuming an outcome.
What homeowners should ask the electrician
- What electrical capacity does the home have for the proposed charger?
- Will the installation use a dedicated circuit, and why is that design appropriate?
- Which permits and inspections apply in this city or county?
- How will the wiring be routed and protected?
- What records will be provided after the installation?
California's Department of Industrial Relations explains electrician certification requirements for people working for licensed electrical contractors. Review the California electrician certification information when comparing professionals. A license or certification does not remove the need to discuss scope, permits, equipment, and inspection, but it is an important part of a responsible selection process.
How Can Solar and EV Charging Work Together?
Solar and EV charging can be considered together when the homeowner wants to use more of the property's energy production for transportation. Daytime solar production may create an opportunity to charge while the system is producing. But the practical result depends on production, driving schedule, vehicle needs, utility rules, electrical capacity, and equipment controls. It is not accurate to promise the same savings or charging schedule for every home.
Coordinate the electrical plan
When solar, battery storage, and EV charging are planned separately, equipment locations and conduit routes may conflict. A coordinated review can consider the service panel, inverter, battery, charger, roof work, and future loads in one sequence. This does not guarantee that every component will fit every property, but it helps identify constraints earlier.
Battery backup changes the conversation
A battery may support selected home loads during an outage, but backup capability and EV charging capability depend on system design and equipment. Homeowners should ask which loads are backed up, whether the charger is included, and how charging behaves when the grid is unavailable. AMECO's battery backup information can help start that discussion. A professional must confirm the final configuration for the property.
Before the FAQ, Get An Estimate to discuss a charger plan that accounts for your home's electrical system and any solar, roofing, or battery goals.
Frequently Asked Questions
Why do I need a licensed electrician for EV charger installation?
A licensed electrician can evaluate service capacity, design the circuit, connect the equipment, and help coordinate local requirements. EV charging is a sustained electrical load, so a professional review is especially important for a hardwired Level 2 charger.
How much electrical capacity does a home EV charger need?
There is no single capacity answer for every home. The requirement depends on charger output, vehicle limits, existing loads, service rating, wiring distance, and equipment instructions. A load calculation determines what the property can support and whether alternatives should be considered.
Do I need a permit for EV charger installation in California?
Permit requirements vary by jurisdiction and by the work involved. New circuits, hardwired equipment, panel changes, and service work commonly require local review. Confirm the requirements with the local building department or have a qualified electrical contractor manage the permitting process.
Can I install a Level 2 charger myself?
Homeowners can compare products and prepare the space, but the electrical connection should be handled by a qualified professional. Incorrect circuit sizing, grounding, wiring, or panel work can create reliability and safety concerns. The installer should also explain inspection and documentation requirements.
Plan Your EV Charger Installation with AMECO
The right home charging project begins with the property, not a generic equipment recommendation. A professional review can clarify charger level, electrical capacity, circuit routing, permitting, and how EV charging may interact with solar, roofing, or battery plans. Final recommendations and costs depend on the home, vehicle, equipment, utility territory, and local requirements.
AMECO Solar & Roofing is a California-owned company that has operated since 1974. Its integrated solar and roofing experience allows homeowners to discuss related energy and building considerations with one contractor. Learn more about roofing solutions if roof condition or future roof work is part of the planning conversation.
8.25.2026
Solar Panels on Tile Roof Problems: California Guide
Tile roofs can support a solar project, but the roof interface needs careful planning. Clay and concrete tiles can crack during access or removal. Poorly detailed attachments can create leak paths. Roof condition, structural connections, waterproofing, and local California requirements all need to work together.
Schedule a Tile-Roof Solar Review
Use this short checklist when comparing a tile-roof solar proposal:
- Confirm the tile profile and current roof condition.
- Review the structural attachment and flashing plan.
- Ask how the crew will protect, document, and replace tiles.
This guide explains the common failure points, ways to reduce avoidable risk, and questions California homeowners can ask before approving a tile-roof solar design.
What Are the Most Common Solar Panels on Tile Roof Problems?
Most solar panels on tile roof problems occur at the roof interface. Cracked tiles, leaks around attachments, aging underlayment, poor tile matching, and limited future service access can affect a project. A roof-specific assessment helps identify these risks before panels cover the work area.
Solar modules are not usually the part that creates the most concern on a tile roof. The vulnerable points are the places where people access the roof, where tiles are moved, and where racking connects through the roof covering to the structure below. A roof may look sound from the driveway while still having brittle tiles, prior repairs, loose pieces, or aging underlayment.
Cracked or broken tiles
Tile damage can happen during staging, foot traffic, removal, storage, or reinstallation. Clay is often more brittle than concrete, but older or weathered concrete tiles can also break under concentrated pressure. A roof-specific work plan should identify safe access routes and account for the shape and condition of each tile. Existing cracks should be recorded before work begins so later concerns can be evaluated fairly.
Leaks around attachments
Any roof attachment can create a path for water if flashing is incomplete or sealant is treated as the primary defense. Water can travel below the roof surface before it appears inside the home. Proper overlap, compatible materials, secure structural fasteners, and an inspection before the array conceals the work area matter more than a bead of surface caulk.
Roof age and future repairs
Solar equipment is intended for long-term use, so a roof nearing major repair deserves an honest review before the array is designed. Installing panels over a roof that soon needs substantial work can add the cost and disruption of removal and reinstallation. Targeted repairs may be reasonable for one home, while another may be better served by roofing work first.
Appearance and service access
Mismatched replacement tiles, exposed conduit, uneven panel spacing, or hardware that does not suit the roof can affect curb appeal. The design should also consider how a technician will reach the array, roof penetrations, and electrical equipment later. These details support a durable project and are not merely cosmetic preferences.
For broader design context, review the U.S. Department of Energy's solar PV system design guidance. On a tile roof, those design considerations include the building interface and the roof's ability to remain weather-resistant.
How Can You Prevent Solar Panels on Tile Roof Problems During Installation?
Prevention starts with a roof-specific plan. The installer should identify the tile profile, control roof access, connect racking to the structure, protect surrounding tiles, and inspect flashing and drainage before the array is complete. Documentation before and after the work helps catch issues early.
The installer should know whether the roof uses Spanish barrel, mission, S-shaped, flat, or another profile. Tile shape affects where a crew can safely work, how water drains, which flashing details are practical, and whether a replacement piece will sit correctly. A generic method copied from another roof may not fit the actual tile or framing.
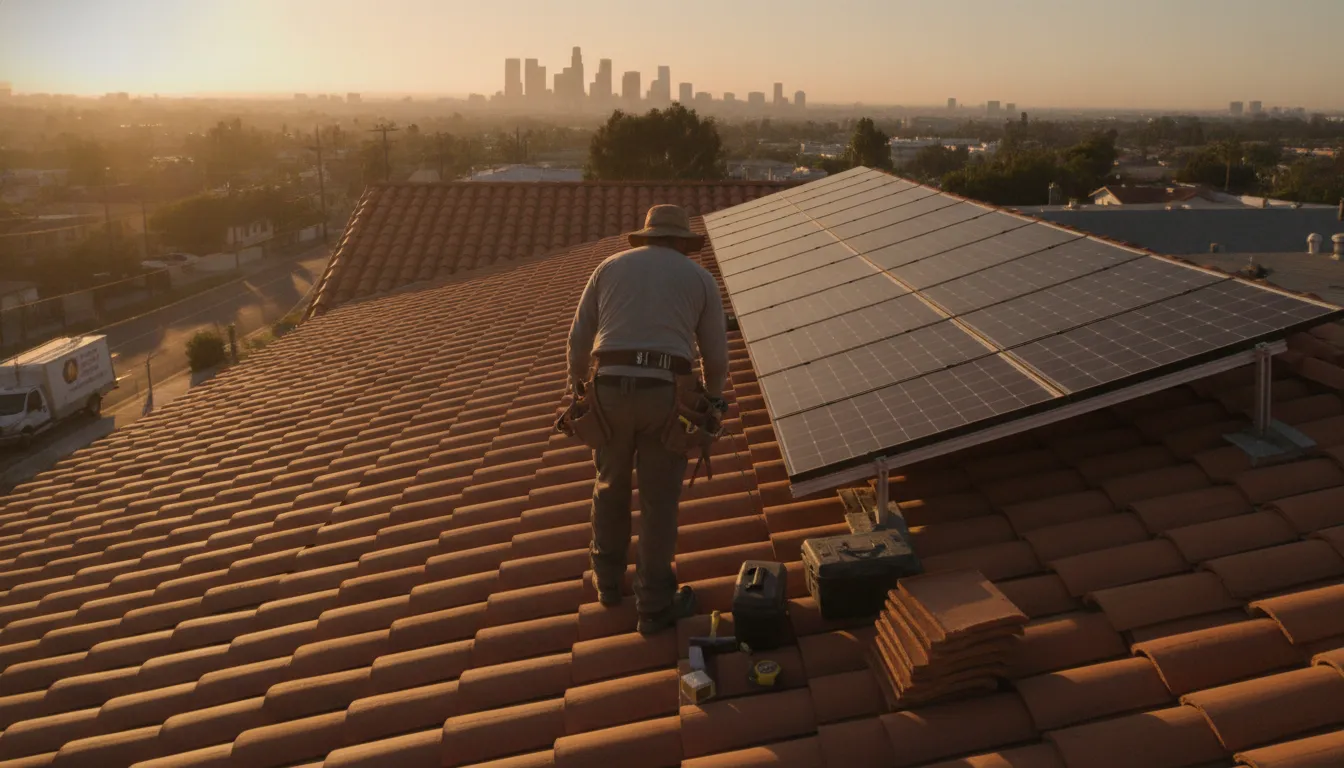
The National Renewable Energy Laboratory discusses professional tile removal, mounting, and reinstallation as part of preserving roof integrity. The same principle applies to preparation and cleanup. The goal is not simply to move enough tiles to reach an attachment. The goal is to leave the worked area secure, aligned, and able to shed water.
Use controlled access and careful tile handling
Tiles are not designed to carry concentrated foot traffic everywhere. Crews should use appropriate access methods, distribute movement, keep tools from striking the tile field, and avoid placing heavy equipment where it can cause stress. Removed tiles should be set down safely and inspected before they return to the roof.
Document the roof before and after the work
Photos taken before installation can record existing cracks, loose pieces, prior patches, and areas of weathering. During the work, photographs can show attachment locations and flashing. A final review should look for chips, displaced tiles, gaps, and debris. This record gives the homeowner a clearer basis for discussing any later concern.
- Identify the roof: Confirm the tile material and profile before selecting the mounting detail.
- Plan access: Protect the surrounding tile field and control where people and equipment move.
- Connect to structure: Attach racking to an appropriate structural member rather than relying on the tile.
- Prepare replacements: Source compatible tiles before removing pieces that may be difficult to match.
- Inspect the finish: Check flashing, tile alignment, and drainage paths before the array is completed.
These measures cannot make an aging tile roof risk-free. They can reduce avoidable breakage and make problems easier to find while the crew can still correct them.
How Do Installers Prevent Leaks Around Tile Roof Mounts?
Leak prevention depends on both the structural connection and the waterproofing detail. Racking should transfer loads into the roof structure. Flashing should work with the tile profile and drainage pattern. Sealant can be supplemental, but it should not replace proper overlap, mechanical fastening, and inspection.
A mounting foot should transfer panel and wind forces into an appropriate rafter, truss, or other engineered structural member. The tile is a weather-shedding surface, not the component that should carry the array. The proposal should explain where the attachment lands and how the load reaches the framing.
Flashing then needs to work with the roof's drainage pattern. In a typical arrangement, the flashing base extends beneath tiles on the upslope side and directs water over the tiles below. A compatible cover or counter-flashing protects the upper edge and fastener area. Sealant may provide supplemental protection, but surface caulk should not replace overlap and mechanical detailing.
Why tile profile changes the waterproofing detail
A flat concrete tile and a Spanish barrel tile do not create the same channels for water. A flashing detail that fits one profile may sit unevenly or interrupt drainage on another. The installer should explain how the proposed hardware and flashing fit the actual roof, including what happens where tiles meet the mount.
What should be checked before the work is closed up?
Homeowners can ask for photographs of the attachment and flashing areas before panels conceal them. The final review should confirm secure structural attachments, continuous overlap, intact surrounding tiles, clear drainage paths, and appropriate use of sealant. It should also identify who is responsible for the roof penetrations if a concern develops after installation.
- Structural path: Confirm every attachment is designed for the roof structure, not supported by the tile.
- Water path: Verify that flashing extends under upslope tiles and sheds water over downslope tiles.
- Tile fit: Check that surrounding tiles are intact and seated correctly.
- Project record: Keep a record of removed, replaced, or repaired tiles.
- Future responsibility: Ask how post-installation roof concerns will be handled.
AMECO provides both solar and professional roofing services in California. Homeowners can use the project discussion to clarify how those scopes will be coordinated. The final recommendation still needs to reflect the specific roof and site.
Calculate Your Project with a Tile-Roof Solar Review
Which Mounting Method Is Best for Solar Panels on Tile Roofs?
No mounting method is best for every tile roof. The choice depends on tile profile, roof condition, framing, wind and seismic requirements, appearance goals, and future access. Ask the installer to show how the attachment reaches the structure and how water will move around it.
Mounting decisions should be based on the actual roof rather than a sales shortcut. The installer should explain the proposed attachment, how much tile removal it requires, how replacement pieces will fit, and how the design handles future solar or roofing service.
| Method | How it works | Tradeoffs |
|---|---|---|
| Compression mounting | Flashing slides beneath overlapping tiles above the attachment and sheds water over tiles below. | May limit tile removal, but it depends on precise flashing and a sound structural connection. |
| Tile replacement | The mounting-location tile is removed and replaced with a fitted or modified tile. | Can create a clean appearance, but removal may cause breakage and matching aged tile can be difficult. |
| Tile hooks | A hook passes beneath a tile and connects to a batten or rafter in limited applications. | Not suitable for every roof, load condition, or jurisdiction without project-specific engineering. |
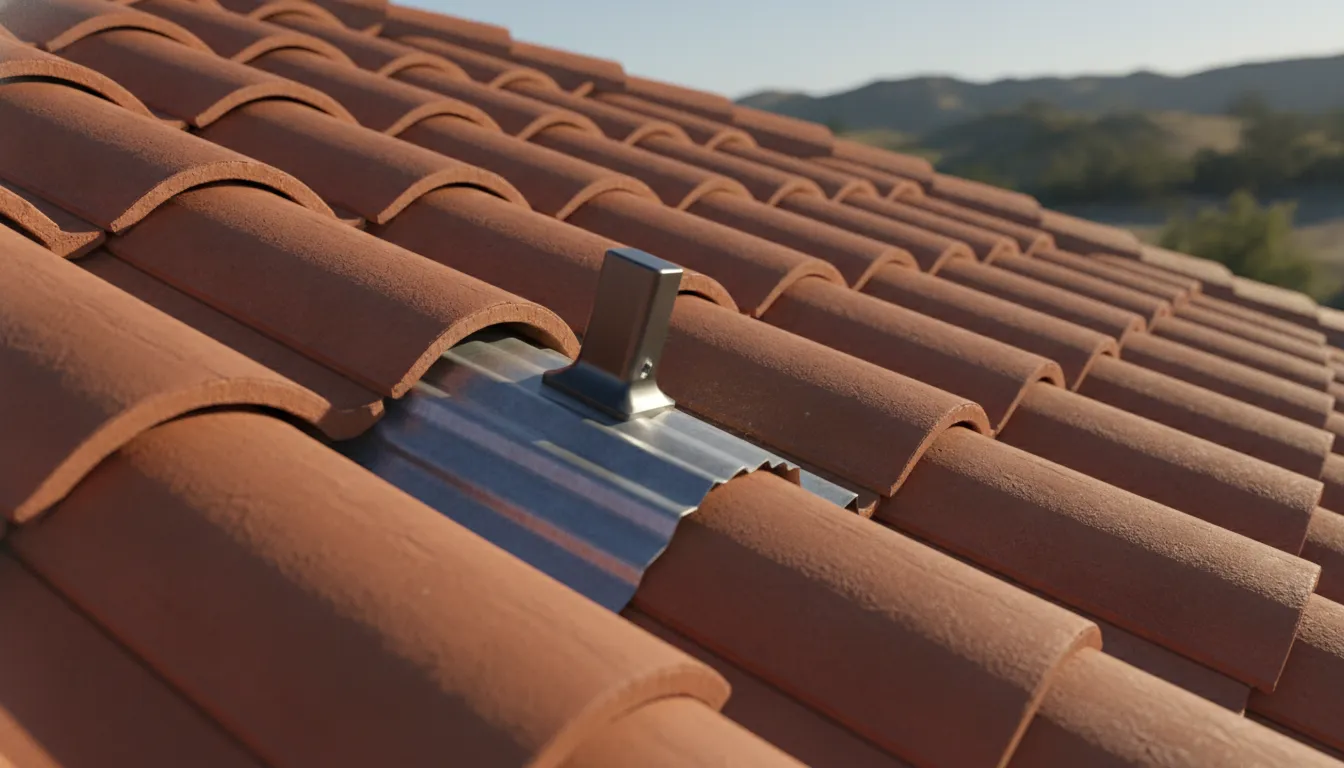
Compression mounting can reduce the amount of tile removal when the roof and flashing detail allow it. Tile replacement may be preferable where a particular profile, layout, or appearance makes a fitted replacement more practical. Hooks can sound attractive because they avoid some visible changes, but their structural connection and code suitability must be demonstrated for the property.
For another homeowner-focused overview, see AMECO's guide to solar on tile roofs in California. That guide introduces the project, while this article focuses on failure points and prevention.
Should You Repair or Replace a Tile Roof Before Solar?
Not every old tile roof needs replacement before solar. The decision should account for active leaks, broken or displaced tiles, underlayment, water damage, framing, and remaining service life. Targeted repairs may be enough when the roof is sound. Major work may be more practical before panels are installed.
The roof assessment should happen before the panel layout is finalized. Look for active leaks, cracked or displaced tiles, underlayment concerns, water damage, uncertain framing, and the roof's remaining service life. A roof that needs only targeted repairs may not require replacement, while a roof near the end of its service life can create future removal and reinstallation costs.
Tile material and profile matter. Clay, concrete, Spanish barrel, mission, S-shaped, and flat profiles do not respond identically to handling or flashing. Color and weathering can also make replacement pieces difficult to match. Ask how the installer will identify the roof, protect the existing field, source compatible tiles, and document the condition before work begins.
Future roof work should be part of today's conversation. The project record should show attachment locations and explain who coordinates panel removal if a later roofing repair requires access. A coordinated solar and roofing discussion can reduce handoff confusion, but it does not remove the need for a property-specific inspection.
AMECO's professional roofing services page is a useful starting point for homeowners comparing an integrated roof and solar approach. Recommendations should remain specific to the condition of the home rather than based on a universal roof-age rule.
What California Checks Matter for Tile-Roof Solar?
California tile-roof solar projects should account for the home, roof, electrical system, local authority, and applicable requirements. Ask whether the design includes structural and electrical review, required permits, inspection steps, roof-access planning, and a process for addressing corrections. Requirements vary by jurisdiction and site conditions.
California projects need a design and permit process that accounts for the home, roof, electrical system, local authority, and applicable code requirements. Structural review should consider added equipment, attachment locations, roof framing, wind forces, and seismic forces. The exact requirements vary by jurisdiction and site conditions.
Ask whether the project includes a structural load review, an electrical plan, a panel layout, and the permits required by the authority having jurisdiction. Also ask how the design preserves required roof access and how the installer will handle any correction requested during inspection. A generic plan copied from another roof is not a substitute for site-specific design.
Battery storage may also be part of the discussion for homeowners who want backup power or who are evaluating how solar energy is used during the day and evening. It is a separate design decision that depends on energy use, utility territory, equipment, budget, and eligibility. Do not assume every home needs the same battery or that an incentive applies universally.
Get An Estimate and Review Your Tile-Roof Solar Options
What Questions Should You Ask a Tile-Roof Solar Installer?
Compare proposals by asking how each installer will assess the tile profile and protect the roof. Ask how the team will connect racking to the structure, detail flashing, handle permits, document the work, and support future service. Specific answers reveal more than a panel count or a broad promise that the roof will be fine.
Good questions help you compare proposals on more than panel count or headline price. Ask for clear explanations in plain language, and request project-specific answers instead of broad assurances.
- Roof assessment: How will you identify the tile profile and assess the roof before designing the array?
- Structural connection: Where will the attachments connect to the roof structure?
- Mounting choice: Which method are you proposing, and why does it fit this roof?
- Waterproofing: How will the flashing direct water around each attachment?
- Tile protection: How will you protect, document, and replace tiles during the work?
- Replacement supply: Can you source a compatible replacement if an existing tile is discontinued?
- Roof timing: Does the roof need repairs or replacement before the panels are installed?
- Permitting: What permits, structural checks, and local inspection steps apply?
- Responsibility: Who is responsible for the roof penetrations if a leak concern appears later?
- Future access: How will the design allow access for future solar or roofing service?
For California homeowners, the strongest proposal is not necessarily the one with the lowest initial number. It is the one that makes the roof interface, structural path, waterproofing plan, permitting scope, and future responsibilities understandable.
Frequently Asked Questions About Solar Panels on Tile Roof Problems
Can solar panels damage a tile roof?
They can if tiles are handled poorly, attachments are placed incorrectly, or flashing does not integrate with the roof's drainage pattern. A roof-specific inspection, careful access, structural attachments, compatible flashing, and a final review reduce avoidable risk. Existing roof age and condition also matter.
Do solar panels have to be mounted on top of tile?
No. Racking should connect to the roof structure, while tile and flashing continue to shed water around the attachment. Depending on the roof, an installer may discuss compression mounting, tile replacement, or another engineered approach. The right choice is specific to the tile profile and site.
Is compression mounting better than tile replacement?
Neither method is best for every roof. Compression mounting may reduce tile removal when the roof and flashing detail support it. Tile replacement may provide a clean fitted result or work better for a particular profile. Compare the structural connection, waterproofing, tile condition, appearance, and future access before choosing.
Should an old tile roof be replaced before solar?
Not automatically. An assessment should consider leaks, underlayment, broken tiles, framing, and remaining service life. Targeted repairs may be reasonable when the roof is otherwise sound. Replacement may make more sense when major work is already due. Solar installed first may need later reinstallation.
8.20.2026
A solar array can run quietly for years, but quiet operation is not the same as a system that is performing at its best. California dust, pollen, roof debris, inverter alerts, and small changes around mounting points can affect production or create problems that are easier to address early.
A solar panel maintenance service can combine performance monitoring, equipment checks, safe cleaning guidance, and an inspection of the panels, racking, and roof interface. Regular precipitation often keeps panels clean, while a production-monitoring app can help identify when the system is not generating as expected. The U.S. Department of Energy also recommends following operation and maintenance best practices for safe, efficient performance.
Get An Estimate to talk with a California solar and roofing team about a maintenance plan matched to your array and roof.
Because a roof-mounted system has few moving parts, maintenance is usually preventive rather than constant. Understanding what that prevention protects, from energy output to roof integrity, makes it easier to see which checks belong in a routine. Routine care also clarifies when professional support is the safer choice.
Why Your Solar Array Needs Regular Maintenance
A roof-mounted solar array is designed to operate quietly for years, but "low maintenance" does not mean "no attention." The U.S. Department of Energy explains that these systems have no moving parts, which keeps routine maintenance requirements minimal. Even so, inspections and preventive care help identify issues that are not visible from the ground. Panels, wiring, mounting hardware, and roof surfaces all work together as one system.
Regular maintenance supports performance as well as safety. The Department of Energy recommends following operation and maintenance best practices to help photovoltaic and energy storage systems perform safely and efficiently, including preventive and pre-storm maintenance. That guidance is especially relevant in California, where dust, pollen, heat, wind, and seasonal weather can affect an array and its surrounding roof. A professional review can confirm that the equipment is operating as intended and that small concerns are addressed before they become more disruptive or expensive. If you add battery backup, a coordinated maintenance plan keeps storage and panels performing together.
Minimal maintenance still protects long-term performance
Solar panels can continue producing energy without moving components, but the system still depends on electrical connections, inverters, racking, and roof attachments. A maintenance visit may include checking for visible damage, examining mounting points, reviewing inverter or monitoring information, and looking for conditions that could affect production. The goal is not to create unnecessary service work. It is to keep the system within its intended operating conditions and give the homeowner a reliable record of its condition.
This matters when a system's production changes gradually. An issue may not stop the array entirely, yet a fault, damaged connection, shading change, or roof-related problem can reduce performance over time. Reviewing system data alongside an on-site inspection gives a clearer picture than relying on a single day's output or waiting for a complete failure.
Maintenance can support warranty protection
Major solar components have long expected service lives. According to the Department of Energy, panels, inverters, and racking systems commonly carry warranties lasting about 25 years. Warranty terms vary by manufacturer and product, so homeowners should review their specific documents. Keeping maintenance records and addressing problems through qualified professionals can help document responsible care. It also makes it easier to determine whether a covered repair may apply. AMECO's California solar and roofing specialists can keep that documentation organized.
For California homeowners, a solar panel maintenance service can also provide coordinated attention to the roof beneath the array. This is valuable when roof penetrations, flashing, or tile areas need review. Professional upkeep is a practical way to protect both energy performance and the larger home investment. It does not treat routine maintenance as a reason to replace equipment that is working properly. Learn more about photovoltaic operation and maintenance best practices from the Department of Energy.
What Are the Signs Your Solar Panels Need Professional Maintenance?
Solar panels are designed to operate with relatively little routine attention, but changes in system performance or condition deserve a closer look. A professional inspection can help distinguish normal seasonal variation from an issue affecting production, electrical equipment, or the roof-mounted array.
Your energy production drops unexpectedly
Start with the monitoring app provided with your system. The U.S. Department of Energy explains that homeowners should have access to detailed, real-time production data and should contact their installer if the system is not producing power as expected. Compare current output with your system's usual pattern while accounting for weather, shade, and seasonal sunlight. A significant or persistent drop is a reason to request a solar panel maintenance service rather than assuming the panels simply need cleaning.
Low production can have several causes, including soiling, an inverter issue, a damaged connection, or a problem affecting part of the array. A qualified technician can test the system and identify the source before you make changes that could affect equipment or warranties. Learn more about solar production monitoring from the Department of Energy.
Debris is collecting on the panels
Visible dust, pollen, leaves, bird droppings, or other grime can reduce the sunlight reaching the panel surface. This is especially worth noting after extended dry weather, nearby construction, agricultural activity, or a storm. A light layer may be handled by normal precipitation, but heavy or persistent buildup can justify professional cleaning. Particularly when the array is difficult or unsafe to access from the roof.
The inverter shows a warning
Warning lights, error codes, or status alerts on the inverter or monitoring platform should not be ignored. Turn to the system documentation for the meaning of the alert, but avoid opening electrical equipment or attempting a repair yourself. An installer or qualified solar technician can review the diagnostic information and determine whether the issue involves the inverter, wiring, communications, or another system component.
You see physical wear or damage
During a ground-level visual check, look for cracked glass, damaged frames, loose-looking hardware, exposed wiring, lifted components, or signs that mounts and flashing may have shifted. Do not walk on panels or climb onto the roof to investigate. For California homes with tile roofing, panel and mounting concerns can also overlap with roof integrity. Prompt professional attention can help protect both the solar equipment and the roof beneath it.
What a Professional Solar Panel Maintenance Service Includes
A professional solar panel maintenance service should look beyond the glass surface. The goal is to confirm that the array is producing as expected, that its supporting hardware remains secure, and that the roof continues to protect the home. A thorough visit typically combines visual inspection, electrical testing, equipment diagnostics, cleaning, and roof-integrity review.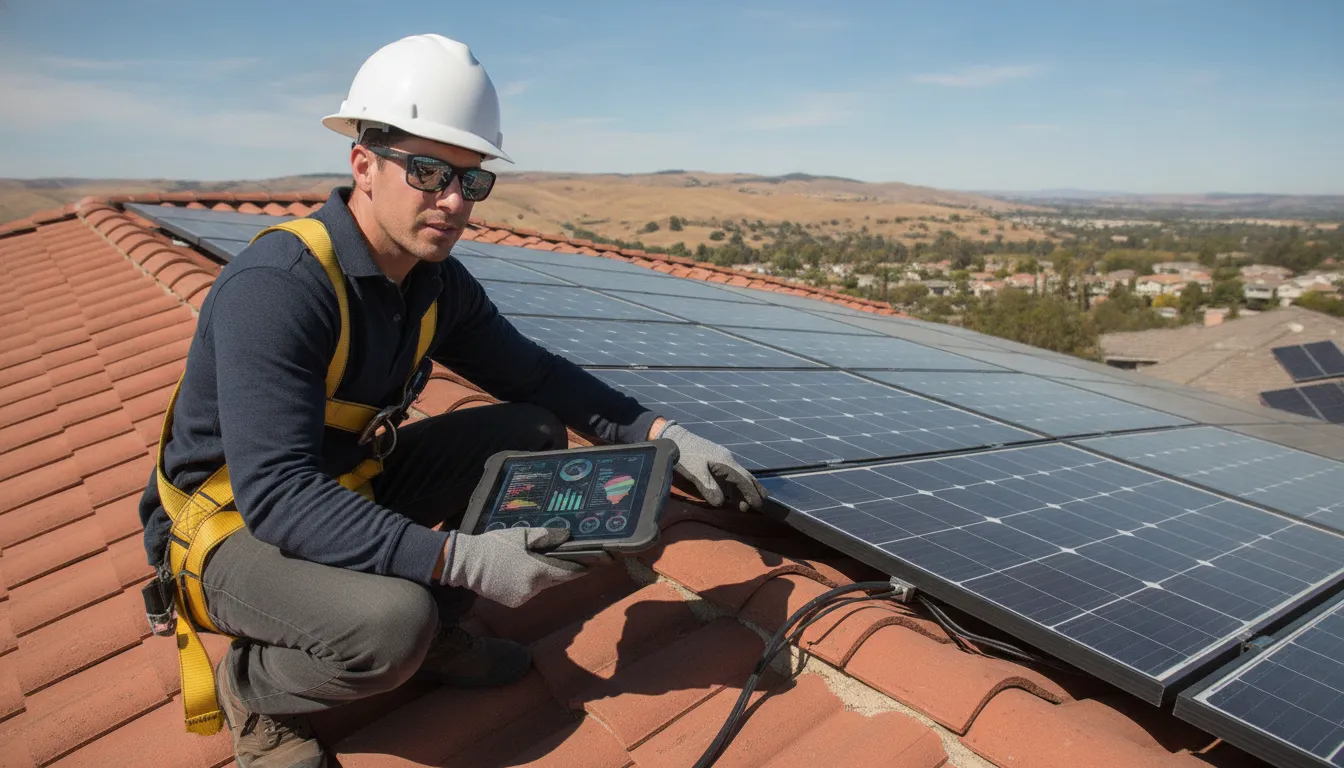
- Visual inspection of panels, racking, clamps, rails, and mounting hardware.
- Electrical and inverter performance testing with diagnostic review.
- Safe cleaning of dust, pollen, ash, and bird debris from the panel surface.
- Roof-penetration, flashing, and waterproofing review around the array.
- A written record of findings, tests, and recommended next steps.
Visual inspection of panels, racking, and mounts
The technician first examines the panels for cracks, chips, discoloration, loose wiring, and other visible damage. They also inspect the racking, clamps, rails, and mounts for movement, corrosion, or signs that weather has affected the assembly. Small changes in hardware can become more serious when an array is exposed to wind. Heat, and seasonal weather, so the inspection should document anything that needs monitoring or repair.
Electrical and inverter performance testing
Production data provides an important starting point, but an onsite service can investigate why output has changed. Electrical performance testing may check connections, voltage, current, grounding, and other system conditions, according to the equipment and the technician's safety procedures. The technician can also review inverter diagnostics and error history. Because the inverter converts the array's direct-current electricity into the alternating current used by the home. Its alerts can help identify an equipment or system issue before it becomes a prolonged production loss.
The U.S. Department of Energy explains that homeowners should have access to real-time production data and contact the installer when a system is not producing as expected. A maintenance visit can pair that monitoring history with physical and electrical checks. See the professional solar panel maintenance service options available for your system and property.
Cleaning dust, pollen, and grime
Panels are often cleaned by regular precipitation, but California's dry conditions, airborne dust, agricultural pollen, and bird debris can leave a coating on the surface. Industry sources cited in maintenance research report that accumulated dust, pollen, and grime can reduce efficiency by up to 25 percent in some conditions. That figure is not a guarantee for every array, since the effect depends on local weather, tilt, shade, and the type of soiling. Professional cleaning removes buildup safely and can help restore output that was being lost to a dirty surface.
Get An Estimate to schedule professional inspection and maintenance service for your solar array.
Roof penetrations and waterproofing
A solar service should also include a review of the areas where the array interacts with the roof. The technician looks for signs of water intrusion, failed sealant, damaged flashing, or other concerns around roof penetrations and mounting points. This is especially important when panels are installed over tile or another roof material that requires specialized access and handling. Coordinating solar and roofing expertise helps protect both the equipment and the building envelope, rather than treating them as separate systems.
How Often Should You Schedule Solar Panel Maintenance?
There is no single maintenance calendar that fits every California solar array. A system in a dry, dusty part of the Central Valley may need attention sooner than one near the coast that receives more regular rainfall. Roof pitch, tree cover, pollen, nearby construction, wildfire ash, and the ease of safely reaching the array can all change the right cadence.
For many California properties, panel cleaning may fall roughly every six months to a year, but that is a planning range, not a universal rule. Rain often removes ordinary surface dust, while extended dry weather can allow pollen, grime, or ash to accumulate. After a dusty season, nearby wildfire, or prolonged period without meaningful rain, a visual check can help determine whether the panels need more attention.
Use the property and weather to set a cleaning interval
Watch for conditions that can reduce the amount of sunlight reaching the panel surface. Overhanging trees, bird activity, agricultural dust, road dust, and seasonal pollen may justify more frequent inspection or cleaning. By contrast, a relatively clear array with regular rainfall may not need scheduled washing as often. The goal is not to clean on an arbitrary date. It is to keep the system reasonably clear while avoiding unnecessary roof access or work that could damage equipment.
Homeowners can review the array from the ground when conditions are safe, but roof access deserves caution. Do not walk on panels, disturb wiring, or use abrasive tools. If the roof is steep, fragile, difficult to access, or affected by ash and debris, a qualified provider can recommend a safe approach.
Schedule service when inspection and testing are due
Cleaning is only one part of professional maintenance. A service visit may be appropriate when production is lower than expected. An inverter displays an alert, the monitoring app shows unusual behavior, or the array has visible damage. It can also make sense after severe weather, construction nearby, or a roofing project. The appropriate service frequency depends on the system's age and equipment, roof condition, exposure, and prior maintenance history.
Rather than choosing a generic annual plan without reviewing the property, ask a professional solar panel maintenance service to assess the array. The team can explain what to check, how often, and why. A provider familiar with both solar equipment and the roof can help coordinate maintenance without treating panel cleaning as a standalone task.
DIY vs. Professional Maintenance: What to Leave to the Experts
Some solar maintenance is appropriate for a homeowner, especially when it can be completed from the ground without touching the equipment. A quick look at the array, a review of the monitoring app, and an occasional gentle rinse may help you notice changes early. The boundary is safety: do not climb onto the roof, move panels or tiles, open electrical equipment, or troubleshoot energized components yourself.
The U.S. Department of Energy says solar panels are typically cleaned by regular precipitation. During a prolonged dry spell, a directed stream of water from a hose may be sufficient if the panels appear particularly dirty. That guidance does not make roof access or electrical work a do-it-yourself project. A professional solar panel maintenance service can inspect the system without turning a simple cleaning task into a fall, roof, equipment, or warranty problem.
| Task | What a homeowner can do | When to call a professional |
|---|---|---|
| Basic visual check | From the ground, look for obvious shading, heavy debris, cracked glass, or visible changes. Do not touch damaged equipment. | Arrange an inspection for cracks, loose components, water intrusion, wiring damage, or anything that cannot be safely assessed from ground level. |
| Hose rinse | During a dry spell, use a directed stream of water from a safe location when the panels are only lightly soiled. Never climb onto the roof. | Use a professional cleaner when roof access is required, deposits do not rinse away, or the array is installed over delicate tile. |
| Monitoring app review | Review real-time production data and note a meaningful change from the system's normal pattern. | Contact the installer or a qualified technician when production is not as expected. The technician can test the system rather than relying on app data alone. |
| Inverter diagnostics | Check the app or display for an alert and record the message, without opening the inverter. | Leave diagnostic testing, fault investigation, and corrective work to a qualified solar professional. |
| Electrical testing | Do not test wiring, disconnects, or other electrical components yourself. | A qualified technician should perform electrical testing and de-energize equipment using the appropriate safety procedures. |
| Roof access and tile handling | Keep inspections at ground level. Do not step on, lift, or remove roof tiles around the array. | Use a provider experienced with both roofing and solar when access, tile removal, flashing, or roof-penetration work is necessary. |
| Warranty-required inspections | Keep installation records, monitoring alerts, and service documentation together. | Review manufacturer and installer terms before work begins, then use the required qualified service provider and retain inspection records. |
For California homes, professional involvement is especially important when panels sit above tile or when a production change may involve the inverter, wiring, roof, or array structure. The right division of responsibility is simple: homeowners monitor and report, while trained technicians diagnose, test, and access the system safely.
Tile Roofs and Panel Integrity: Why Experience Matters
Solar maintenance on a tile roof requires more than checking the panels from the ground. The array, mounting hardware, flashing, and roofing materials function as one system. When a technician needs to access the equipment, even a small mistake can crack a tile, disturb a seal, or create a path for water. That is why homeowners should consider both solar expertise and roofing experience when choosing a professional solar panel maintenance service.
Tile requires a careful approach
Clay and concrete tiles are durable, but they can be damaged by concentrated weight, improper foot placement, or careless movement around the array. A qualified technician should understand how to access the roof safely, protect surrounding tiles, and identify damage that may not be visible from the ground. Maintenance should not solve one problem while creating another.
This matters especially when a service visit involves removing or working around panels. A technician who understands only the electrical side may overlook a cracked tile beneath the array. A roofing-only contractor may not be equipped to evaluate production, wiring, connectors, or inverter behavior. Coordinating both disciplines helps keep the inspection focused on the complete installation.
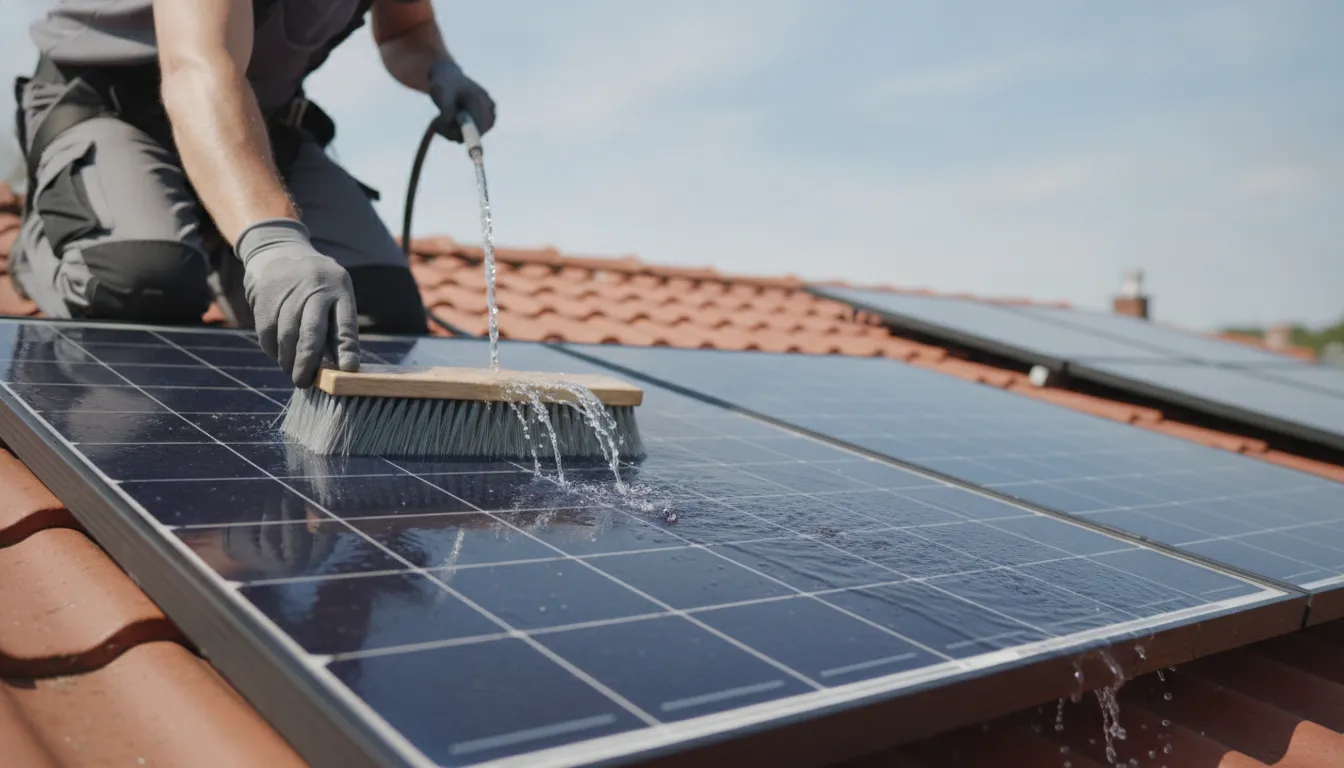
Watertight penetrations protect the home
Solar mounting points create roof penetrations that must remain properly flashed and sealed over time. Weather, thermal movement, roof age, and previous repairs can all affect these areas. During professional maintenance, the team should look for signs of disturbed flashing, failed sealant, exposed components, or moisture intrusion, then distinguish a roofing repair from a solar-equipment issue.
Roofing work can also affect the array. If tiles need replacement or a roof section needs repair, panels may need to be handled carefully so the work does not damage the modules or mounting system. Planning the sequence with both trades in mind can reduce unnecessary handling and help preserve the roof warranty and equipment protections that apply to the property.
Integrated expertise simplifies long-term care
AMECO Solar & Roofing provides integrated solar and roofing services for California homeowners. That combination gives the homeowner one team that can evaluate panel performance while considering the roof beneath it. AMECO's professional inspections are designed to help equipment operate efficiently and keep roof penetrations watertight over time.
For homes with tile roofing, choosing a provider that can coordinate both needs is a practical way to protect panel performance and roof integrity together. Learn more about AMECO's roofing services for tile-roof integrity and how they fit with solar maintenance planning.
How Do You Choose the Right Solar Panel Maintenance Service?
The right provider should do more than rinse the panels. Solar maintenance can involve roof access, electrical testing, inverter diagnostics, equipment records, and decisions that affect manufacturer warranties. When comparing companies in California, look for a team that can evaluate the complete system and explain its findings clearly.
Verify licensing, insurance, and relevant experience
Ask whether the company uses appropriately licensed and insured professionals for the work being proposed. Confirm that the team has experience with residential solar systems similar to yours, including your panel, inverter, monitoring, and mounting brands. A provider familiar with the equipment can interpret alerts and performance data more accurately than a general cleaning service.
It is also reasonable to ask who will perform the inspection, what testing is included, and whether you will receive a written report. Clear answers before the appointment make it easier to compare service scope rather than choosing on price alone.
Look for solar and roofing knowledge
Your array is part of a larger building system. The provider should know how to inspect flashing, attachments, roof penetrations, drainage paths, and visible roof wear without creating new damage. Tile roofs deserve particular attention because tiles can crack or shift when accessed incorrectly. Specialized handling helps protect both the roofing material and the solar equipment.
An integrated solar and roofing contractor can coordinate these concerns under one company. That is especially useful when an inspection identifies a roof issue beneath or near the array. Instead of treating the panels and roof as unrelated projects, the team can explain the order of work and the implications for both systems. AMECO Solar has provided integrated solar and roofing services in California since 1974, including maintenance support for its installations. Learn more about a professional solar panel maintenance service.
Choose documentation and warranty-conscious work
Before work begins, ask the provider to review available equipment and workmanship warranty terms. The service should follow manufacturer guidance and avoid unnecessary adjustments that could complicate a future claim. Request documentation showing the inspection date, system condition, tests performed, observed issues, photos when useful, and recommended next steps.
Keep those records with your installation documents. They create a useful maintenance history and give another technician a clearer starting point if an inverter alert, production change, roof concern, or warranty question arises later.
Assess the provider's broader capabilities
A strong maintenance partner should be able to identify when an issue falls outside routine service and connect it to the right solution. That solution may involve roof repair, monitoring support, electrical troubleshooting, or equipment replacement. Ask how findings are handled and whether the company can manage related solar and roofing needs. The goal is not to buy every service at once. It is to work with a provider that can give you an accurate, coordinated path when the system needs more than cleaning.
Get An Estimate to have a professional review your array and recommend a maintenance schedule that protects both performance and your roof.
Frequently Asked Questions
Do solar panels need regular maintenance?
Solar panels have no moving parts, so they usually need less maintenance than many home systems. However, periodic visual checks, production monitoring, cleaning when conditions warrant it, and inspection of the roof and electrical equipment can help identify issues before they affect performance.
How often should I have my solar panels cleaned?
There is no universal cleaning schedule for every California home. Local dust, pollen, wildfire residue, nearby trees, roof pitch, and rainfall all affect how quickly debris accumulates. Monitor production and arrange cleaning when buildup is visible or output changes unexpectedly. A professional can recommend an interval based on your property.
What is included in a professional solar panel maintenance service?
A professional service may include a visual inspection for panel, racking, wiring, and roof damage; production and electrical performance testing; inverter diagnostics; and removal of debris. On a tile roof, the technician should also use safe access methods and check that maintenance has not compromised the roof or mounting area.
Can I perform solar panel maintenance myself?
Homeowners can monitor system production, look for visible debris from the ground, and follow the equipment manufacturer's guidance for simple care. Avoid climbing onto the roof, handling electrical components, or using abrasive tools. Call a qualified professional when the array is difficult to access, production drops, damage is visible, or the inverter reports a fault.
Keep Your Solar Investment Performing at Its Best
Routine care protects the energy your system produces and the roof beneath it. The right maintenance approach depends on your property, your roof, and how your array is exposed to the elements. A professional assessment starts with a clear look at your specific system.
AMECO Solar and Roofing has served California homeowners since 1974 as an integrated solar and roofing contractor. That combination matters on maintenance day, because the same team that understands your panels and inverter also protects the roof those panels mount to. Get An Estimate to discuss a maintenance plan tailored to your home and your solar array.
8.19.2026
A solar project should begin with more than a panel count. For a California home, the design team first connects your roof, energy use, electrical equipment, and long-term goals into one buildable plan. Off-the-shelf packages rarely account for the shade from a mature oak, the slope of a clay tile roof, or the size of a future electric vehicle purchase. A custom solar system design treats your property as a set of real conditions to engineer around, not a checkbox to fill.
A custom solar system design is built by reviewing 12 months of energy use, evaluating the roof and structure. Analyzing shade, planning panel placement, sizing the inverter and battery, and preparing drawings for local permits. The final plan depends on your home's roof, energy needs, utility territory, and selected equipment, so no two designs come out identical.
That process turns a general interest in solar into decisions an installer and permitting authority can evaluate. It is also where the value of an experienced, California-based contractor shows up. AMECO Solar & Roofing has coordinated solar and roofing work under one company since 1974. So the design is checked against the roof that actually covers your home and the energy picture you actually live with. Because the engineering is matched to your property. A small change in placement or equipment can meaningfully affect how much power the system produces and how well it stands up to the weather in your region.
The steps that follow walk through how a home solar design is put together, from the first site visit through the final approval. Each stage shapes the next. Which is why a thoughtful design up front usually leads to a smoother installation and a system that fits the way your household uses energy.
What Determines a Custom Solar System Design for Your Home?
A thoughtful solar system design starts with your home, not a preselected package. The roof, household energy use, budget, shading, utility rate plan, and future goals all shape the final system. The design should fit how your property works today while allowing room for changes ahead.
The first input is your roof. Designers review its age, material, slope, orientation, and structural capacity. Roof condition matters because solar equipment is intended to remain in service for many years. If roofing work may be needed, coordinating both scopes can help avoid installing solar over a roof that needs attention.
Roof shape also affects the available panel area. Setbacks, vents, chimneys, skylights, and roof planes can limit placement. Tile roofs may require specialized mounting hardware and careful waterproofing. These details are part of the design, not afterthoughts added during installation.
Energy use provides the second major input. Reviewing approximately 12 months of utility history helps show how much electricity the home uses and how demand changes by season. The analysis can also identify efficiency opportunities before equipment is sized. The U.S. Department of Energy recommends investigating energy use and potential efficiency upgrades before starting a home solar project.
The goal is not necessarily to cover an arbitrary percentage of consumption. A system can be designed to offset electricity you would otherwise buy from your utility, as the Department of Energy explains. The appropriate target depends on your property, equipment choices, utility territory, rate structure, and project priorities.
- Budget and priorities: The design can balance available roof space, equipment selection, storage goals, and the desired level of energy independence.
- Utility rate plan: Rates and export rules influence when electricity has the most value and whether battery storage belongs in the initial design.
- Shading: Trees, nearby buildings, chimneys, and other obstructions affect production estimates and may influence module-level electronics.
- Future needs: An electric vehicle, home addition, heat pump, changing occupancy, or backup-power goal can affect system and battery planning.
Sunlight at the site and the installed system size also influence generation potential. The Department of Energy identifies both factors as central to expected production. A professional assessment brings these inputs together through remote planning, custom energy-solution design, on-site measurements, and installation.
AMECO is a California-owned, integrated solar and roofing contractor operating continuously since 1974. Its end-to-end approach keeps roof conditions, solar equipment, battery backup, and future energy needs in the same conversation. That consultative process helps turn a preliminary estimate into a design built for the specific home, guided by AMECO's solar solutions.
How Does a Site Assessment Set the Foundation for Your Solar Design?
A site assessment confirms whether your home and roof are ready for a reliable solar installation. A qualified contractor evaluates the roof's age, material, slope, orientation, and structural load-bearing capacity before finalizing the system.
The assessment also reviews electrical conditions and potential shading from trees, chimneys, nearby buildings, or roof features. The U.S. Department of Energy recommends professional site assessments to evaluate structural, electrical, and shading factors that influence a solar system.
What roof conditions affect the design?
Roof age is one of the first practical questions. If shingles, tiles, or underlayment are near the end of their useful life, replacing or repairing the roof before installation may prevent future disruption. A bad roof should be addressed first, rather than placing new equipment over an existing problem.
Roof material and slope affect the mounting approach, waterproofing details, access, and panel layout. Orientation helps designers identify the roof planes with the best solar exposure. The final design must also account for required setbacks and safe pathways around the array.
How are California tile roofs evaluated?
Tile roofs are common across California and require mounting methods that protect the roof assembly. In many cases, installers use compression mounting. The flashing slides beneath existing tiles, so the tiles do not need to be removed across the entire array.
Another approach is tile replacement, where selected tiles are replaced with compatible mounting components. The correct method depends on the roof construction, tile type, condition, and installation location. A qualified roofing and solar team should inspect these details instead of assuming one method fits every home.
Can the roof support solar panels and racking?
Solar panels and racking typically add about 3 to 4 pounds per square foot. That load is less than a layer of replacement composition shingles. As a result, most modern California homes are well within normal structural tolerance for a properly engineered installation.
Older homes and roofs with signs of deterioration require closer review. The contractor may recommend additional documentation or an engineer sign-off when the roof framing, materials, or condition warrants it. This step helps confirm that the proposed array is appropriate for the structure.
AMECO coordinates roofing and solar work under one company, which can simplify decisions when repairs or replacement are needed. The assessment findings then guide the equipment layout, mounting details, and permitting documents. That coordination helps turn the initial concept into a solar design suited to the actual property.
How Do Designers Size a System to Your Energy Use?
The right system begins with how your household uses electricity, not with a preset package. Designers review about 12 months of utility history to understand total kilowatt-hour consumption, seasonal patterns, and the rate plan affecting your electricity costs.
That history shows more than an annual total. It helps identify when demand rises and which household activities drive it. In California, summer cooling can significantly change usage. Electric vehicle charging, a swimming pool, electric water heating, and other large loads may also shape the design. A system that fits a mild month may not address the home's highest-demand periods.
Why efficiency comes before system size
Before adding generation, a designer may look for ways to reduce unnecessary consumption. The U.S. Department of Energy recommends investigating current energy use and considering efficiency upgrades before planning a home solar system. Those steps can include an energy audit, more efficient appliances, or improved insulation. Read the Department of Energy's solar planning guidance for this approach.
Efficiency improvements can change the amount of electricity the home needs over time. Addressing them early can help prevent a homeowner from sizing a system around avoidable demand. It also gives the designer a clearer baseline for comparing future production with expected household consumption.
How future needs affect the design
Designers also ask what may change after installation. A homeowner might plan to purchase an electric vehicle, replace a gas appliance with an electric model, add a heat pump, or expand a pool's equipment. These possibilities do not automatically require a larger system. They do give the design team important context for planning panel capacity, electrical equipment, and possible storage.
The goal is to balance expected energy use with the home's available roof area, site conditions, and project priorities. Solar generation depends on both the sunlight reaching the property and the size of the installed system, as the Department of Energy explains in its home solar system planning resource. Designers therefore compare consumption data with production estimates for the actual site, rather than treating every roof or household as equivalent.
This process answers the common question, "How do solar system designers determine the right size for a home?" They combine historical usage. Rate-plan information, efficiency opportunities, seasonal loads, future plans, and site-specific production potential. The result is a design matched to the home's needs, with assumptions that can be reviewed before installation.
Where Do Solar Panels Go? Orientation and Panel Placement
Panel placement balances sunlight, roof geometry, structural conditions, and local safety requirements. The goal is not to cover every open surface. It is to create an array that performs reliably and fits the property.
In the Northern Hemisphere, south-facing roof planes are generally ideal because they receive strong exposure across the day. However, east- and west-facing planes can also be useful when the roof layout, household energy use, or shading makes them a better fit. A professional solar system design evaluates the whole site instead of relying on direction alone.
Choosing the right roof plane
Designers compare each roof plane's orientation, tilt, usable area, and shading. They also consider chimneys, vents, skylights, dormers, and roof sections that cannot safely support equipment. The final layout may combine more than one roof plane when that produces a practical design.
Tilt affects how sunlight reaches the modules. The best angle depends on the roof and the location, so designers work with the existing roof geometry when appropriate. They may also account for seasonal sun paths and nearby objects that cast shadows.
Allowing room for safety and service
Panels cannot be placed edge to edge across the roof. Building codes can require setbacks from roof edges, ridges, and other features. Fire-access pathways may also need to remain clear so emergency personnel can reach and work around the array.
These requirements reduce the roof area available for modules. They also help create space for inspections, maintenance, and safe movement. On tile roofs, mounting methods must protect the roofing system while securing the array. Roof condition and mounting details should be reviewed before installation.
Roof-mounted versus ground-mounted placement
| Placement | Pros | Considerations |
|---|---|---|
| Roof-mounted | Uses existing roof space and keeps the array close to the home. | Limited by roof orientation, usable area, setbacks, condition, and structural capacity. |
| Ground-mounted | Can offer more control over orientation, tilt, and layout when suitable land is available. | Requires appropriate ground space, structural support, access, and local approval. |
Sizing the array to the available area
After accounting for setbacks and obstructions, designers compare usable roof area with the home's energy needs. The array size also depends on module dimensions, equipment choices, and the site's solar resource. The U.S. Department of Energy notes that generation depends on both available sunlight and system size: planning a home solar electric system requires considering both.
A larger roof does not automatically mean a larger system. The design must fit the property's energy profile and the space that can be used safely. Measurements, roof evaluation, and energy analysis turn a preliminary layout into a buildable plan.
How Do Designers Size the Inverter and Battery?
Inverter and battery choices connect the solar array to your home's electrical system. Designers match each component to your production goals, backup priorities, roof conditions, and available electrical capacity.
How is the inverter matched to the solar array?
The inverter converts the panels' direct-current output into alternating current used by household appliances. Its size must coordinate with the array's module DC output and the home's electrical design.
A string inverter connects multiple modules to one central unit. It can be a practical fit when panels share similar sunlight conditions. Microinverters attach at the module level, which can help manage varied roof orientations or shading. A hybrid inverter can coordinate solar generation, battery storage, and household loads in one system.
These choices are not interchangeable upgrades. Roof layout, shading, system expansion plans, and backup requirements influence which architecture makes sense. A professional assessment should evaluate structural, electrical, and shading factors before equipment is selected. The U.S. Department of Energy recommends obtaining contractor bids and site assessments when planning a home solar system.
How is battery capacity tied to backup loads?
Battery sizing begins with the loads you want to operate during an outage. Essential circuits might include refrigeration, lighting, communications equipment, or selected heating and cooling equipment. A homeowner seeking broader backup will have different requirements from someone prioritizing only critical circuits.
Designers therefore review expected power demand, how long backup should last, and whether the battery must recharge from solar during an extended outage. There is no universal battery size that fits every home. The right capacity depends on energy use, equipment, outage goals, and the selected inverter.
California's NEM 3.0 took effect in April 2023. Because exported solar electricity generally receives less favorable credits than before, design strategy often places more emphasis on storing energy for later household use. The specific outcome depends on the utility territory, rate structure, equipment, and household consumption. The Department of Energy notes that combining solar with battery storage can significantly reduce reliance on the grid. Learn more about solar and energy storage from the Department of Energy.
What happens when the home also needs EV charging?
Battery storage and EV charging should be considered during the same electrical review, rather than added as unrelated equipment later. Designers check whether the service and panel can support the expected loads, then evaluate circuit placement, inverter compatibility, and backup priorities.
If the panel has limited capacity, the design may require load management, a service upgrade, or a different backup strategy. These decisions affect permitting and installation planning. AMECO's battery backup options can be evaluated alongside solar production and future electrical needs.
How Does Shading Analysis Shape Your Solar Design?
Shading analysis examines how sunlight reaches each potential panel location throughout the year. It is a key part of answering which factors impact custom solar system design. Because a roof that looks sunny at midday may receive less usable light during other hours or seasons.
Trees are often the most changeable source of shade. Their height, canopy, and future growth can affect a roof differently in winter and summer. Designers also account for neighboring buildings, rooflines, chimneys, vents, and other obstructions. Each can cast a moving shadow across one or more modules.
Solar photovoltaic panels can use both direct and scattered sunlight, so partial cloud cover does not automatically make a site unsuitable. However, the amount of sunlight reaching a specific location and the system size both affect its generation potential, according to the U.S. Department of Energy.
Why seasonal sun paths matter
The sun follows a different path across the sky as the seasons change. A chimney may shade a panel for only a short period in summer, then affect it for longer during a lower winter sun path. A nearby tree can produce a similar shift as its branches and leaves change.
A professional analysis considers these patterns instead of relying on one visual inspection. The result helps the designer compare roof sections, adjust the panel layout, and set realistic expectations for production. It can also reveal whether trimming or removing vegetation would materially improve a proposed array. Tree work should be evaluated carefully, especially where mature landscaping provides privacy or other property benefits.
How shading influences equipment choices
When shade affects only part of an array, the electrical design may need to limit the impact on other modules. Power optimizers and microinverters support per-module optimization, allowing panels to be managed more independently than they would be with a single centralized operating point.
That does not make shade irrelevant, and equipment choices should not be made from a generic rule. The right approach depends on the shade pattern, roof layout, equipment compatibility, electrical design, and project goals. A designer may also recommend placing panels on less affected roof planes rather than adding complexity to a shaded section.
For homeowners, the practical takeaway is simple: share information about trees, planned construction, and nearby structures during the assessment. Accurate shading inputs help turn a preliminary concept into a solar system design that reflects the property as it exists today and may change over time.
What Permits and Approvals Does Your Solar Design Need in California?
Permitting turns a solar concept into a project that can be reviewed, inspected, and connected safely. California requirements vary by city, county, utility territory, roof type, and project scope.
A complete application gives reviewers enough information to evaluate structural safety, electrical standards, fire access, and local code compliance. It also helps identify approval issues before installation begins. These are the typical steps in solar system planning:
- Document the existing property. The design team reviews the roof's material, slope, orientation, condition, and structural load-bearing capacity. Tile roofs may require specialized mounting hardware and waterproofing details that protect the roof assembly.
- Prepare structural calculations. The plans show how the array and racking attach to the structure. Depending on the jurisdiction and project conditions, structural load calculations may need review or a stamp from a qualified engineer.
- Create the electrical design. The permit set typically includes an electrical diagram showing modules, inverters, disconnects, service equipment, conductors, grounding, and other relevant components. The design must demonstrate compliance with applicable electrical standards.
- Draw the site and panel layout. A site plan identifies the building, roof sections, panel locations, equipment, access routes, and required setbacks. Designers also account for fire-access pathway clearances and other local placement rules.
- Submit plans to the local jurisdiction. The city or county reviews the documents for building-code compliance, structural safety, fire access, and electrical requirements. Corrections may be requested before the permit is issued.
- Coordinate utility and interconnection approvals. California's net energy metering rules changed with NEM 3.0, which took effect in April 2023. The design and application path should reflect the property's utility, current interconnection requirements, and how the homeowner intends to use energy or storage.
- Check HOA requirements. If a home is subject to an architectural review process, the project may need HOA coordination in addition to public permits. HOA documents do not replace city, county, fire, or utility approvals.
AMECO coordinates solar and roofing under one company, which is useful when roof condition, attachment details, and electrical design must be considered together. Its integrated end-to-end service includes permitting coordination alongside consultation, custom design, installation, and support.
For homeowners, the goal is not simply to obtain a permit. It is to make sure the approved design fits the roof, meets safety requirements, and supports the property's energy plan. A qualified contractor can identify which approvals apply before construction starts.
Frequently Asked Questions
How do designers determine the right size for a home?
Designers review your energy use, typically starting with 12 months of utility history. They compare consumption and rate structure with roof space, shading, panel orientation, and equipment options. The result is a system sized for your home rather than a standard package.
Does solar system design differ for tile roofs?
Yes. Tile roofs require mounting hardware and waterproofing methods selected for the roof assembly. The assessment also considers roof age, material, slope, and structural capacity. These details help protect the roof while creating a secure attachment for the solar array.
How are battery storage and EV charging included in the design?
Battery storage is sized around the loads you want supported during an outage, along with the system's inverter and electrical configuration. EV charging is evaluated as part of the home's expected demand. Planning both early helps the designer account for equipment compatibility and available electrical capacity.
Is a permit required for my solar system design?
Solar projects generally require review and approval by the local jurisdiction. The submitted design must address applicable building, structural, and electrical requirements. The permitting path depends on the property location and the final system configuration, so the project team confirms local requirements during design.
Ready to Get an Estimate for Your Solar System Design?
A project-specific review can connect your energy goals, roof conditions, and equipment choices into a practical plan for your California home. When you are ready to discuss the next step, Get An Estimate from AMECO Solar & Roofing. Share the details of your property and energy needs so the design conversation can focus on options that fit your home.
8.18.2026
For many California homeowners, solar is not about leaving the utility network behind. It is about producing more of your own electricity while keeping grid power available when your panels are not generating enough. That balance matters as utility rates and concerns about grid reliability shape household energy decisions.
Get Your On-Grid Solar Estimate Today
An on grid solar system connects your home to the local utility grid, supplies solar electricity first. Sends excess production to the grid, and may provide bill credits through the applicable net-billing or net-energy-metering arrangement. You can draw utility power when production falls short. But a standard grid-tied system typically shuts down during an outage unless battery storage and appropriate backup equipment are included.
That balance matters for more than monthly bills. California utilities serve a large share of homes under time-varying rate plans. And many homeowners want solar to soften exposure to those rising rates while keeping the reliability of the existing network. An on-grid design leans on that connection rather than replacing it, which is one reason it is a common starting point in the state.
Understanding that basic exchange makes it easier to evaluate the practical tradeoffs, including interconnection requirements, billing rules, outage protection, and the differences between grid-tied, off-grid, and hybrid designs. First, it helps to define what an on-grid system includes and how its connection to the utility shapes its day-to-day operation.
What Is an On Grid Solar System?
An on grid solar system, also called a grid-tied system, produces electricity for a home while remaining connected to the local utility network. It does not require a home to operate independently from the utility. Instead, the system works alongside utility service, giving homeowners another source of electricity during the day and a way to send unused production back to the grid.
The U.S. Department of Energy explains that grid-connected systems allow a home to use utility power when solar production is insufficient and export excess electricity when production is greater than on-site demand. That two-way relationship is the defining feature of an on grid solar system. It also means the system must be designed and approved for safe interaction with the local utility.
The main components
Most residential grid-tied systems include four core elements:
- Solar panels: Photovoltaic panels convert sunlight into direct-current electricity.
- Inverter: The inverter converts that electricity into alternating-current power that household appliances can use. It also manages the connection between the solar array, the home, and the utility system.
- Utility meter: A compatible meter measures electricity moving between the home and the grid. Depending on the home's production and consumption, electricity may flow in either direction.
- Grid connection: The home's electrical service remains connected to the utility network, allowing the property to draw electricity when solar output does not meet demand.
During a sunny period, the panels may produce more electricity than the home is using. The excess can be exported to the utility grid, subject to the applicable billing arrangement and utility rules. When the panels are not producing enough, the home can pull electricity from the grid. The details of how exported power is credited depend on the homeowner's utility territory and approved program. So projected savings should be evaluated for the specific property rather than assumed universally.
Why interconnection matters
Connecting solar to the utility is not simply a matter of installing panels and turning them on. Interconnection requires specific equipment, safety measures, an application, and compliance with the utility's standards. The U.S. Department of Energy describes interconnection as the process of connecting a distributed energy system to the utility network while meeting technical and regulatory requirements. Requirements can vary by utility and project characteristics, so the installer should coordinate the process and confirm what applies before installation.
Homeowners comparing the cost of an on grid solar system should consider more than panel quantity. Roof condition, electrical service, equipment selection, utility requirements, household energy use, and local eligibility can all affect the final design and project economics.
How a Grid-Tied Solar System Works for Your California Home
An on-grid solar system works with your home's existing connection to the utility network. During daylight hours, the equipment produces electricity for your property first. When production is lower than your demand, you draw the difference from the utility. When production exceeds your immediate needs, the extra electricity can flow back to the grid, subject to your utility's interconnection and billing rules.
1. Solar panels produce electricity
Solar panels convert sunlight into direct current, or DC, electricity. The amount produced changes throughout the day and depends on factors such as roof orientation, shading, weather, system design, and household demand. California homeowners often explore solar as utility rates continue to put pressure on household electricity budgets. However, a system should be designed around the property's actual conditions rather than a universal production estimate.
2. An inverter converts DC power to usable AC power
Most household appliances use alternating current, or AC. An inverter converts the panels' DC electricity into AC power that can be used by the home's electrical system. Depending on the design, the system may use one central inverter or multiple microinverters. The inverter also helps manage the flow of electricity between the panels, the home, and the utility connection.
3. Your home uses solar power first
When the panels are producing electricity, the home typically uses that power before importing electricity from the grid. For example, daytime production may serve appliances, cooling equipment, pool equipment, or other active loads. If the home needs more electricity than the panels are producing, the system automatically supplements solar power with electricity from the utility. You generally do not need to manually switch between these sources.
4. Excess electricity flows to the grid
If the panels produce more electricity than the home is using at that moment, the excess is exported through the home's approved utility connection. A bidirectional meter records electricity moving into and out of the property. The U.S. Department of Energy explains that grid-connected systems can send excess power to the local utility grid when production exceeds on-site use. California billing treatment varies by utility program and customer eligibility, so PG&E, SCE, and SDG&E customers should confirm current requirements before making financial assumptions. See how grid-tied solar systems work for additional installation context.
5. The grid supplies power when solar production is low
At night, the panels are not producing electricity, so the home's meter draws power from the utility network. The same can happen during cloudy periods or whenever household demand exceeds solar output. This ongoing connection is one reason an on-grid system differs from a fully off-grid setup: the utility remains part of the home's energy system.
Before installation, the solar contractor and utility must complete an interconnection process. That process confirms the system meets applicable technical, safety, and equipment requirements for connecting to the network. A professional solar installation should also begin with a roof assessment. AMECO emphasizes that a healthy, durable roof is the foundation for a long-term solar installation. Coordinating roofing and solar work through one company can help address roof conditions before panels are installed, rather than treating the roof as an afterthought.
For California homeowners, the most important question is not simply whether panels can generate electricity. It is how the system, roof, household usage, and utility interconnection fit together as one project.
Net Metering and Billing: Earning Credits for Excess Power
An on-grid solar system can produce more electricity than your home needs at certain times, especially during bright daytime hours when household demand is relatively low. Instead of losing that extra production, the system sends it through the utility connection to the electric grid. Your meter tracks the exchange, including electricity flowing from your home to the grid and power flowing back when your home needs more than the panels are producing.
California's net energy metering, commonly called NEM. Is a billing arrangement that allows solar owners to receive credits on their utility bills for excess electricity exported to the grid. The California Public Utilities Commission explains NEM and net billing, including the rules and program structures that apply to customer-generated electricity.
How credits and electricity use work together
When your panels produce less electricity than your home is using, you draw power from the grid as usual. When production exceeds immediate demand, the surplus is exported and recorded by the meter. Over the course of a billing period, those imports and exports are reflected in the utility's billing calculation. In practical terms, daytime production can offset some of the electricity your household uses at other times, subject to the terms of your utility program.
This arrangement is different from receiving a universal cash payment for every kilowatt-hour your panels generate. The value of exported electricity, the way credits are calculated, and how remaining charges are handled depend on your utility territory and the specific NEM or net-billing program. California homeowners should review the current rules for their provider, such as Southern California Edison, and compare rate plans for solar households. Pacific Gas and Electric, or San Diego Gas & Electric, rather than relying on a general savings estimate.
What determines your actual bill impact?
Your results depend on more than the size of the solar array. Household electricity use, the timing of that use, roof orientation and shading, system production, utility rates, and the applicable export-credit structure all affect the outcome. A home that uses more power during the day may consume more solar electricity directly. While a home with higher evening demand may send more production to the grid before drawing power later.
For that reason, projected credits and savings should be based on your property, energy profile, and utility account. A qualified evaluation can also confirm that the proposed system meets interconnection requirements and is sized appropriately for the home. Net metering can be an important part of the financial picture, but it should be considered alongside equipment choices. Roof condition, rate structure, and whether battery storage would better match your energy use.
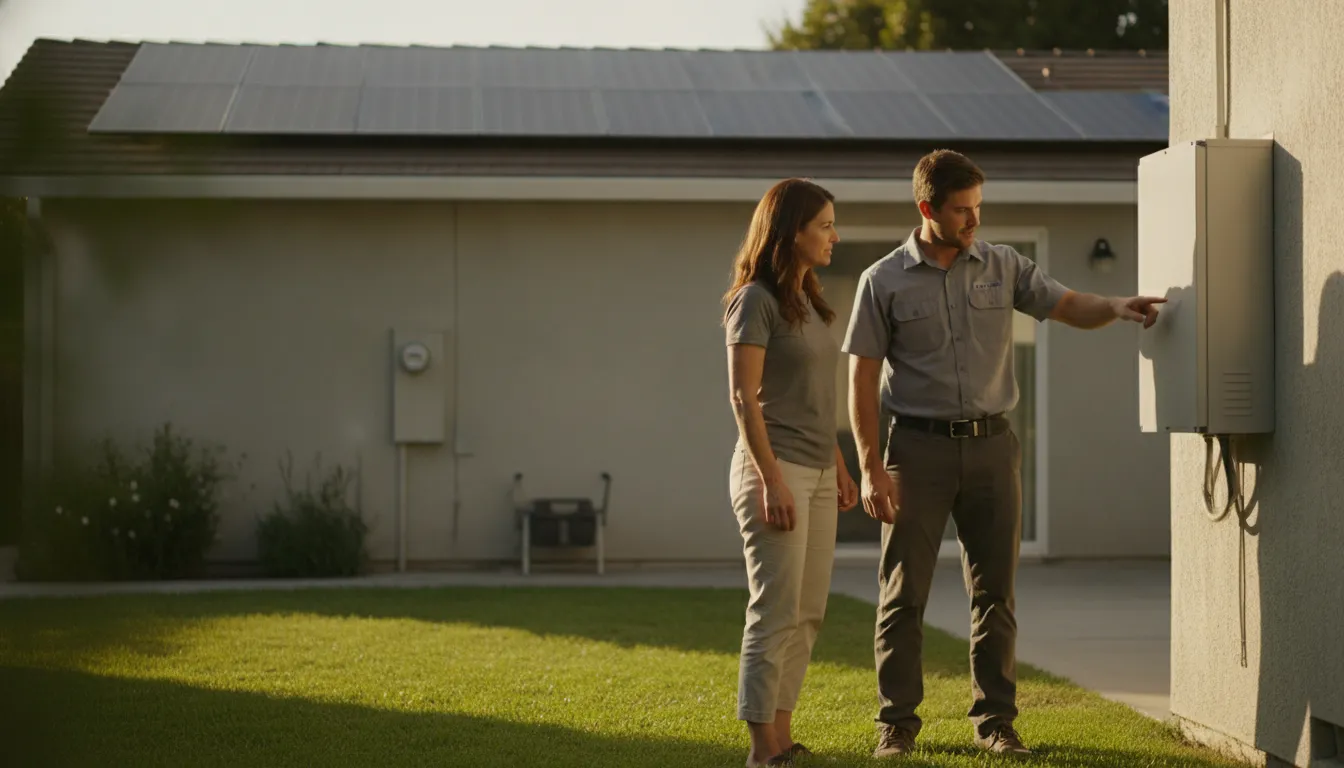
Compare Your Solar Design Options
Grid-Tied vs. Off-Grid vs. Hybrid: Choosing the Right System
California homeowners generally choose among three solar configurations: grid-tied, off-grid, and hybrid. The right fit depends less on a simple preference for independence and more on how your home uses electricity. How often outages affect you, and whether you want to invest in battery storage. Your utility territory, roof, energy demand, and project goals also shape the decision.
A grid-tied system, also called an on-grid solar system, remains connected to the local utility network. When the panels produce more electricity than the home needs, the excess can flow to the grid. When production is low, the home can draw electricity from the utility. The California Public Utilities Commission describes this two-way relationship between solar customers and the utility grid under its net-energy-metering framework: the grid supplies power when solar production is insufficient, while excess production is exported.
| System type | Grid connection | Battery backup | Outage behavior | Independence | Typical cost and complexity |
|---|---|---|---|---|---|
| Grid-tied | Connected to the utility grid. | Usually none. | Standard systems shut down during an outage for safety. | Reduced reliance on utility energy, but still grid-dependent. | Usually the simplest configuration, with lower cost and complexity than systems that add batteries. |
| Off-grid | Not connected to the utility grid. | Required to store energy for night, cloudy periods, and changing demand. | Can continue operating if the system and stored energy are properly sized. | Highest independence from the utility. | Higher cost and design complexity because generation and storage must support the entire load. |
| Hybrid | Connected to the utility grid. | Included for backup and energy management. | Selected circuits or the home can remain powered when configured correctly. | Balances grid access with greater resilience and independence. | More equipment, planning, and cost than basic grid-tied solar. |
When grid-tied solar fits
Grid-tied solar is often the practical starting point for a home that has reliable utility access and wants to generate electricity without adding battery storage immediately. It can lower the amount of electricity purchased from the utility during solar production hours, while the grid remains available when the panels are not producing enough. In California, billing treatment for exported electricity depends on the applicable utility program and enrollment terms. So credits and savings should be evaluated for the specific property rather than assumed.
Distributed solar can also provide value beyond one household. Research from the National Renewable Energy Laboratory identifies benefits such as deferred distribution-system investments and enhanced resilience. That does not eliminate the need for a properly designed interconnection, but it helps explain why connected systems are part of a broader energy network: NREL outlines potential distribution-grid benefits of distributed solar.
When off-grid or hybrid makes more sense
Off-grid solar may fit a remote property where utility service is unavailable, impractical, or not worth extending. It requires careful load planning, adequate battery capacity, and a strategy for long stretches of unfavorable weather. Because the system must meet the home's needs without utility support, the design is typically more involved and the investment is often higher.
Hybrid solar is the middle path for homeowners who want grid access but also want backup capability. Batteries can store excess production and help support designated loads during an outage, subject to the system design and available stored energy. If outage protection is a priority, ask an installer to define exactly which circuits will be backed up. How long the batteries may support them, and how the system is intended to operate during extended outages.
What Happens During a Power Outage with an On-Grid System?
When California utilities shut off power during a planned safety event, or when severe weather damages local equipment. A standard grid-tied solar system usually does not keep the home powered. The panels may still receive sunlight, but the system is designed to stop producing electricity for the home and the utility lines until grid service is restored.
Why does an on-grid system shut down?
A standard on-grid solar system is connected to the utility network. During normal operation, its inverter synchronizes with the grid and converts the panels' electricity into usable household power. If the utility connection suddenly loses voltage, the inverter detects the outage and automatically shuts down.
This shutdown is a safety requirement. It prevents the solar system from sending electricity back into lines that utility crews may believe are de-energized. That unintended flow, known as backfeeding, could create a serious hazard for workers repairing the network. Grid-connected systems therefore shut down during an outage unless they are specifically configured with battery storage and the equipment needed to operate independently. Learn more about California's customer-generation and interconnection requirements from the California Public Utilities Commission: net-energy-metering and interconnection guidance.
What can you use during the outage?
Without battery backup, solar panels connected to a conventional grid-tied inverter will not power the refrigerator, lights, HVAC equipment, or other circuits during the outage. Your home may remain without electricity even if the panels are in full sun. Once utility service is restored and the system completes its normal restart sequence, solar production can resume.
This distinction matters in California, where outages can result from planned utility shutoffs, equipment problems, heat, wind, wildfires, or other weather-related conditions. An on-grid system can help manage electricity use and utility bills during normal service. But it should not be treated as an emergency power source unless backup capability is part of the design.
How battery storage changes the setup
A hybrid solar system pairs solar with battery storage and backup controls. When the grid goes down, the system can isolate selected household circuits from the utility network and use stored energy, with solar replenishing the battery when conditions allow. The specific circuits supported, backup duration, and operating behavior depend on the battery capacity, system design, household demand, and the outage itself.
If outage protection is a priority, discuss it before choosing equipment. AMECO can evaluate whether a battery-equipped design fits your home, roof, energy use, and utility requirements. Explore AMECO's solar installation services to compare an on-grid system with a hybrid configuration, and see how solar battery storage works if backup power matters to you.
Is an On-Grid Solar System Right for Your Home?
For many California homeowners, an on-grid solar system is a practical way to produce electricity while remaining connected to the utility network. The right choice, however, depends on more than available sunlight. Your roof condition, household energy use, utility territory, outage priorities, and eligibility for available incentives all deserve attention before installation.
Start with the roof, not the panels
A healthy, durable roof is the foundation for a long-lived solar installation. If the roof needs replacement soon, installing panels first can create avoidable costs and disruption when those panels later need to be removed and reinstalled. A roof evaluation should consider age, material, structural condition, drainage, and any repairs that may affect the installation plan.
This is one reason an integrated solar and roofing approach can be valuable. AMECO Solar & Roofing can evaluate how the roof and solar project fit together instead of treating them as unrelated jobs. That coordination may help a homeowner make a more informed sequence and system-design decision. For broader preparation, see this guide to planning your on grid solar system.
Consider how utility rates affect your goals
California utility rates are an important part of the decision. Homeowners often explore solar as they look for ways to manage electricity bills and reduce exposure to changing utility costs. The potential value of an on-grid system depends on factors such as when your household uses energy. How much electricity the system can produce, the applicable utility rules, and how excess production is credited or valued.
That means a generic savings promise is not a useful basis for choosing equipment. A professional evaluation should use your actual usage history, roof layout, shading, utility territory, and planned changes such as an electric vehicle, heat pump, or home addition. It should also explain what happens when your panels produce less than your home needs, since the utility connection remains part of the system.
Review incentives carefully
Incentives, including the federal solar tax credit, may be part of the financial case for a solar project. Eligibility and the value of any incentive depend on the homeowner's circumstances, project details, tax situation, and rules in effect when the system is installed. Treat online estimates as starting points, not guaranteed outcomes, and confirm current requirements with a qualified tax professional or the relevant government source.
An on-grid system may be a strong fit when your roof is ready. You want to offset utility electricity with your own generation, and you are comfortable remaining connected to the grid. If outage backup is a primary goal. Ask whether a battery or hybrid configuration should be included rather than assuming a standard grid-tied system will keep operating during an outage. AMECO's solar installation services can help connect these considerations to a design suited to your property.
Request Your Free Estimate for an On-Grid Solar System
Frequently Asked Questions
What is an on grid solar system?
An on grid solar system, also called a grid-tied system, connects your home's solar panels to the local utility network. Your home uses solar electricity when it is available, draws utility power when production is insufficient, and sends excess electricity to the grid. This basic arrangement is described in the California Public Utilities Commission's net-energy-metering guidance.
Which is better, off-grid or on-grid solar?
Neither option is universally better. On-grid solar is usually the simpler fit for a home that already has utility service and wants to offset electricity purchases while retaining grid access. Off-grid solar offers greater independence but requires enough generation and storage to serve the home through changing weather and demand. Your goals, property, utility territory, and backup-power needs should guide the comparison.
What are the disadvantages of an on-grid solar system?
An on-grid system depends on the utility connection, so it does not provide complete energy independence. It also requires an interconnection process, including utility-approved equipment and compliance with applicable safety standards. Because billing treatment and export value can vary by utility program, review the current rules for your service territory before choosing a system.
What is the difference between on-grid and hybrid solar?
Both systems can connect solar to the utility grid, but a hybrid system adds battery storage and controls designed to keep selected loads operating during an outage. A standard on-grid system generally does not include battery backup. The Department of Energy notes that conventional grid-tied systems shut down during an outage for safety unless they are configured with appropriate storage and backup equipment.
Does an on-grid solar system work during a power outage?
Typically, no. A standard grid-tied system automatically shuts down during an outage so it does not send electricity onto lines that utility crews may be repairing. Solar panels alone therefore should not be treated as emergency backup. If outage protection is a priority, ask an installer to evaluate a battery-based hybrid design for your home and critical loads.
Ready to Explore an On-Grid Solar System for Your Home?
Every California property is different, and the right solar setup depends on your roof, your energy use, and your utility territory. A grid-tied (on-grid) system is a common starting point for homeowners who want to lower their bills and put the sun to work. While a hybrid option adds battery backup for extra resilience.
AMECO Solar & Roofing has served California homeowners since 1974 and pairs solar design with expert roofing under one roof. Get a custom estimate that reflects your home and goals, or explore the full range of solar installation services we offer.
- Get an estimate for an on-grid solar system designed for your home.
- Review our solar installation services to see how we handle the full project.
Request an estimate today to see whether an on-grid solar system is the right fit for your California home.
8.17.2026
A solar array can produce abundant electricity in the afternoon. Yet your home may still draw power from the grid after sunset or lose essential circuits during an outage. A battery changes how that energy is used, storing surplus production for later and giving you more control over when your home relies on utility power.
The best batteries for solar power storage depend on your home's energy use, backup priorities, roof and solar-system compatibility, utility rate structure, and budget. A properly designed system can support critical loads during a grid outage when configured to operate safely while disconnected, while also improving self-consumption when solar production exceeds daytime demand. Battery chemistry, usable capacity, power output, lifespan, and installation requirements all matter more than choosing a familiar brand alone.
For California homeowners, the decision often starts with a practical question: how much protection and flexibility do you need when the grid is unavailable or electricity is most expensive? The answer becomes clearer when you look at outage exposure, daily energy patterns, and the battery technologies available for residential use.
Why California Homeowners Need Batteries for Solar Power Storage
Solar panels produce the most electricity during the day, but many California households use more power in the evening, when the sun is no longer available. A battery helps close that timing gap by storing surplus solar energy and making it available later. That can make a solar investment more useful in daily life, particularly for homeowners comparing solar panel battery storage options for a home in a high-cost utility territory.
Protection when the grid is unavailable
California homeowners also face a grid that can be disrupted by wildfire conditions, severe weather, equipment failures, and public-safety power shutoffs. A properly designed battery system can keep selected circuits operating when the utility connection is interrupted. During an outage, the system disconnects from the grid and supplies power to the loads it was designed to support. This distinction matters: a battery does not automatically keep every appliance running, and backup performance depends on system configuration, battery capacity, and the loads selected.
Many homeowners prioritize essential circuits such as refrigeration, lighting, internet equipment, medical devices, and a heating or cooling system. Others may want broader coverage. Energy storage can sustain critical loads during a grid outage when it is configured to operate while disconnected from the grid, a resilience benefit described in the research behind modern solar-plus-storage planning. Battery chemistry and system design both influence how that backup strategy performs.
More control over utility costs
Electricity rates and rate structures vary by utility and can change over time. Customers served by PG&E, SDG&E, or Southern California Edison may use time-of-use plans that make the timing of consumption important. Instead of sending all daytime production to the grid and purchasing electricity later, a battery can hold some excess energy for evening use. It can also reduce reliance on the grid during periods when electricity is more expensive, although the value of that strategy depends on the home's rate plan, usage pattern, system design, and applicable program rules.
This is why projected savings should be evaluated for the individual property rather than treated as a universal promise. A meaningful assessment considers the home's annual consumption, solar production, utility territory, rate schedule, and desired backup level. EnergySage identifies energy independence, outage backup, and potentially lower electricity bills as key reasons homeowners consider solar batteries, while noting that the right choice depends on the household's needs. Review the storage benefits and battery options before comparing equipment.
Using more of the solar energy you produce
Without storage, excess daytime generation may be exported to the grid under the terms of the home's utility program. A battery gives homeowners another option: use more of that energy on-site after sunset. This can improve self-consumption and support a greater sense of energy independence, especially when paired with efficient appliances and thoughtful load management.
The best system is not simply the largest battery available. It should match the home's solar installation, electrical equipment, daily habits, and backup priorities. An integrated evaluation can also account for roof condition and future electrical needs, helping homeowners choose storage that supports both resilience and long-term solar performance.
What Are the Best Batteries for Solar Power Storage Technologies?
The best batteries for solar power storage depend on how you use electricity, how much backup you need, and how your battery will work with your solar equipment. At a basic level, a solar battery stores excess energy produced during the day so your home can use it when the sun is not shining. The main technologies available for homes include lithium-ion, lithium iron phosphate (LFP), lead-acid, and flow batteries.
Lithium-ion: the mainstream residential choice
Lithium-ion batteries are the most popular choice for residential solar storage systems. They use electrochemical cells to store energy and release it when your home needs power. Their relatively compact design, strong energy density, and ability to support repeated daily cycling make them a practical fit where space is limited or where homeowners want to store daytime solar production for evening use.
Lithium-ion is a broad category rather than one single battery chemistry. Different products can vary in usable capacity, power rating, depth of discharge, efficiency, controls, and compatibility with the existing solar system. That is why comparing the battery label alone is not enough. Aurora Solar identifies lithium-ion, lead-acid, and flow batteries as common storage types, with lithium-ion leading residential use. Learn more about how to choose a solar battery based on the full system design.
Lithium iron phosphate offers a widely used chemistry
Lithium iron phosphate, usually called LFP or LiFePO4, is a lithium-ion chemistry used in many newer home energy storage systems. Its chemistry has a comparatively stable thermal profile and is associated with a long cycle life, which can be important for a battery expected to charge and discharge regularly. LFP systems can also be attractive for homeowners who place a high level of value on long-term daily use and a conservative approach to battery safety.
LFP is not automatically the right answer for every home. The complete product still matters, including its enclosure, thermal management, controls, installation location, warranty terms, and integration with the inverter. Enphase's overview of solar battery chemistries explains how chemistry affects the way a storage system performs and should be evaluated alongside the home's energy needs: compare common solar battery chemistries.
Where lead-acid and flow batteries fit
Lead-acid batteries are an established storage technology. They may still appear in certain specialty, off-grid, or budget-sensitive designs, but they are less common in modern residential solar installations than lithium-based systems. Their suitability depends on the available space, operating pattern, maintenance expectations, and the design requirements of the property.
Flow batteries store energy in liquid electrolytes held in external tanks. Their architecture can make them relevant for some larger or specialized applications, particularly when the design priorities differ from a typical home battery. However, their equipment footprint and system complexity may make them less practical for an average California residence.
For most homeowners, lithium-ion, often using LFP chemistry, is the starting point because it balances residential scale, daily cycling, and system integration. The final choice should also account for capacity, power rating, chemistry, lifespan, and compatibility with the existing solar system, rather than relying on a single technology ranking.
How Does Battery Chemistry Affect Performance and Safety?
Battery chemistry influences how a storage system handles heat, how much energy it can deliver, and how well it holds up through repeated charging and discharging. For residential solar, lithium-ion batteries are the most common choice, with lithium iron phosphate (LFP) and nickel-based lithium chemistries representing two important design approaches. The right fit depends on your home's energy demands, available installation space, backup goals, and the equipment used in the rest of the system.
LFP emphasizes thermal stability and cycle life
Lithium iron phosphate, commonly called LFP or LiFePO4, is widely used in home energy storage because of its stable thermal profile. That stability can provide an added safety margin during normal operation and under demanding charge and discharge conditions, although every battery still requires an appropriate installation, ventilation strategy, controls, and safety equipment. LFP is also associated with a long cycle life, making it a practical option for homeowners who expect to use their battery regularly for solar self-consumption, time-of-use energy management, or backup.
Enphase identifies LFP as the dominant lithium battery chemistry and highlights its safety and performance characteristics. The chemistry is one reason many current residential systems favor LFP when long-term, repeated cycling is more important than achieving the smallest possible equipment footprint. However, chemistry alone does not determine the quality or safety of a complete system. The battery management system, inverter, installation design, permitting, and operating environment also matter. Enphase explains the major solar battery chemistries and their tradeoffs in more detail.
Nickel-based lithium batteries prioritize energy density
Nickel-based lithium chemistries can offer higher energy density, which means they may store more energy in a comparatively compact enclosure. That characteristic can be useful where wall space or equipment footprint is limited. The tradeoff is that chemistry-specific thermal behavior and system controls deserve careful attention. A higher energy density does not automatically make one battery better for every home, because usable capacity, power output, installation requirements, and backup configuration still determine how the system performs in practice.
Depth of discharge affects usable capacity and longevity
Depth of discharge, or DoD, describes the portion of a battery's rated capacity that can be used during a cycle. A battery with 10 kilowatt-hours of nominal capacity does not necessarily provide 10 kilowatt-hours for everyday loads, because the system may reserve some energy to protect the cells and maintain operating limits. Usable capacity should therefore be compared alongside the battery's power rating, round-trip efficiency, and control settings, not viewed as a standalone number.
Lithium batteries commonly provide roughly 10 or more years of service and thousands of cycles, but actual lifespan varies with chemistry, temperature, cycling frequency, discharge depth, maintenance, and system design. Manufacturer specifications and warranty terms should be reviewed for the specific model rather than treated as universal promises. A qualified design can balance daily cycling with outage reserve so the battery supports your priorities without being unnecessarily oversized or aggressively operated.
Sizing Your Solar Battery: Capacity, Power, and Energy Use
A properly sized battery is not simply the largest unit that fits beside your home. It should match how much energy your household uses, which appliances you want to run, and how long you want backup to last. The core evaluation includes usable capacity, power rating, chemistry, expected lifespan, and compatibility with the existing solar system, as Aurora Solar explains in its guide to choosing a solar battery.
Capacity measures stored energy
Battery capacity is measured in kilowatt-hours (kWh). It describes how much energy the battery can store and, more practically, how much energy is available for your home after accounting for the system's usable capacity and operating limits. A home that uses more energy overnight or during an outage generally needs more usable kWh than a home backing up only a few essential circuits.
Start with actual household data rather than a generic battery-size recommendation. Review utility bills, interval-use data when available, and the appliances that operate during the hours when solar production is low. Then separate normal daily consumption from outage priorities. Refrigeration, lighting, internet equipment, medical devices, a gas furnace blower, or selected outlets may form a critical-load plan. A whole-home design may also include larger loads such as air conditioning, a heat pump, an electric water heater, or an EV charger, but those choices can materially change the required storage capacity.
Power determines what can run at once
Power rating is measured in kilowatts (kW). Unlike capacity, which describes the amount of energy stored over time, power describes how much electricity the battery can deliver at a given moment. This distinction matters when appliances start or operate simultaneously. A battery may have enough kWh to cover a household's overnight needs but still lack the kW output to start a large motor or support several high-demand appliances together.
Designers therefore examine both continuous power and surge requirements. They may place selected circuits on a backed-up loads panel, use load controls, or configure the system around the home's inverter and electrical service. The objective is dependable operation, not just a favorable capacity number on a product sheet.
Plan for efficiency before adding storage
Reducing the home's energy demand can improve the value and performance of a battery system. Weatherizing the home and improving heating and cooling efficiency reduces the amount of electricity the solar system needs to produce for the property. That planning principle can affect battery sizing too: better insulation, efficient equipment, and sensible load management may reduce the storage needed to cover priority loads.
Finally, define the outage goal. A system intended to bridge evening consumption has a different design from one intended to support critical circuits through an extended outage, especially when cloudy weather limits solar recharge. The best batteries for solar power storage are the ones whose usable kWh, kW output, operating chemistry, controls, and solar compatibility align with those priorities. A site-specific assessment can compare daily use, solar production, backed-up loads, and desired resilience before equipment is selected.
Leading Battery Options for California Homes
There is no single best battery for every California home. The right choice depends on your existing solar equipment, available space, critical loads, utility rate structure, and whether you want limited outage protection or broader whole-home backup. Capacity figures below are approximate product-class references, not promises of usable energy. Actual performance varies with installation design, temperature, battery settings, household demand, and the amount of energy reserved for backup.
For a useful starting point, EnergySage frequently places Tesla Powerwall 3 at or near the top of its home battery rankings. Enphase is a widely used option for homeowners who want close integration with Enphase solar equipment. These independent reviews can help narrow the field, but a site-specific design review should determine the final recommendation.
| Battery option | Approximate capacity | Chemistry or platform | What it is known for |
|---|---|---|---|
| Tesla Powerwall 3 | About 13 to 14 kWh per unit | Lithium-ion, LFP-based platform | Integrated design, strong backup capabilities, and frequent top placement in home battery comparisons |
| Enphase IQ Battery | About 5 kWh per modular unit | Lithium-ion, LFP chemistry | Modular expansion and straightforward integration with Enphase microinverter systems |
| LG home battery systems | Roughly 10 kWh class, depending on model | Lithium-ion | A familiar residential storage platform with model-specific capacity and compatibility considerations |
| FranklinWH aPower | About 13 to 14 kWh per unit | Lithium iron phosphate, or LFP | High-capacity residential storage and an energy management approach designed for backup control |
How to use this comparison
Capacity, measured in kilowatt-hours, describes how much energy a battery can store. Power rating, measured in kilowatts, describes how much electricity it can deliver at one time. A battery with substantial capacity may still need careful load planning if your home has large starting loads, such as an air conditioner or well pump. Usable capacity, depth of discharge, round-trip efficiency, and reserve settings also affect what your household experiences during an outage.
Chemistry matters as well. Lithium-ion is the dominant residential storage category, and LFP chemistry is increasingly common because of its performance and thermal characteristics. Enphase explains the differences among common battery chemistries in its homeowner guide: types of solar batteries and chemistry. EnergySage provides a broader product comparison, including its assessment of the Tesla Powerwall 3: best home batteries.
Before choosing equipment, confirm inverter compatibility, electrical-panel requirements, warranty terms, expansion limits, and the loads you want backed up. A qualified installer can model those details against your solar production and household usage instead of selecting a battery by brand name or advertised capacity alone.
How Batteries Integrate With Solar and Backup for Your Home
A battery becomes most useful when it is designed as part of the home's complete energy system, rather than treated as a separate appliance. During the day, solar panels can serve the home first, while excess generation charges the battery. The stored energy can then be used after sunset, during periods of high utility rates, or when the grid loses power. This arrangement helps a homeowner use more of the energy their system produces instead of sending all excess generation to the grid. EnergySage explains that batteries can support energy independence and outage protection, although the actual result depends on system design, household usage, and utility rules.
Whole-home and essential-load backup
There are two common approaches to backup planning. Whole-home backup is designed to support most or all of the home's electrical loads, including larger equipment such as heating and cooling systems when the battery system has enough power capacity. This approach can provide a more seamless experience, but it may require additional battery capacity, electrical work, or load management.
Essential-load, sometimes called critical-load, backup focuses on selected circuits. These may include refrigeration, lighting, internet equipment, medical devices, garage doors, or a well pump. The circuits are grouped in a backed-up panel or managed through the system's controls. Limiting the backup scope can make it easier to keep priority devices operating for a longer period, particularly when an outage lasts beyond the first evening. The battery must be configured to operate safely while disconnected from the grid, because a standard grid-connected solar system normally shuts down during an outage.
What happens during an outage?
When the system detects a grid interruption, its backup equipment isolates the home from utility lines. This prevents power from flowing back onto the grid while utility crews work. The battery can then supply the selected loads, and the solar array may recharge the battery when sunlight is available, subject to the system's equipment, operating limits, and weather. Backup performance is not unlimited. How long it lasts depends on battery capacity, the appliances running, solar production, and whether the system is configured for whole-home or essential-load coverage.
How software coordinates solar and storage
Energy management software continuously monitors solar production, household demand, battery state of charge, and grid conditions. It can prioritize solar energy for immediate home use, direct surplus energy into the battery, and discharge stored energy when the home needs it. Depending on the utility rate structure and the homeowner's priorities, the controls may also reserve capacity for outage protection or shift some usage away from expensive peak periods. Smart energy management can optimize battery operation around electricity pricing and household needs, as described by EnergySage.
Integration also involves choosing how the battery connects electrically. AC-coupled systems can work alongside an existing solar installation, while DC-coupled systems connect more directly with the solar array and may share inverter equipment. The right configuration depends on the existing system, equipment compatibility, expansion plans, and the desired backup strategy.
Roof and electrical decisions should be coordinated from the beginning. AMECO can manage the solar installation, roofing considerations, and battery backup through one integrated process. That coordination helps account for roof condition, attachment methods, waterproofing, structural integrity, wiring, and equipment placement together, rather than leaving separate contractors to resolve conflicts after installation begins.
Factors That Determine the Right Battery Fit for Your Home
The right battery is not simply the one with the largest capacity or the most familiar brand name. It should match how your household uses electricity, how your utility prices power, what you want to spend, and which appliances must keep running during an outage. A careful evaluation also considers capacity, power rating, chemistry, lifespan, and compatibility with your existing solar system, rather than treating any figure as universal.
Start with your household's energy use
Review when your home consumes electricity, not only how much it uses over an entire day. A household that runs air conditioning, pool equipment, heat-pump appliances, or an electric vehicle in the evening may need a different storage plan than a home with modest nighttime demand. Your recent utility bills, interval energy data, and a list of major loads can help identify the amount of energy you want to shift or reserve.
Battery capacity is measured in kilowatt-hours, or kWh, and describes how much energy the battery can store. Power rating, measured in kilowatts, indicates how much electricity it can discharge at one time. Those are different considerations. A battery may hold enough energy for several hours but still require load management if multiple high-demand appliances start together. Usable capacity, depth of discharge, and round-trip efficiency also affect the energy available to your home.
Compare the battery with your utility rate structure
Time-of-use rates can make storage valuable for a different reason than outage protection. If electricity costs more during certain evening or peak-demand periods, a battery can store solar energy generated earlier and discharge it when grid power is more expensive. This strategy can help reduce reliance on the utility during peak hours, but the potential value depends on your utility territory, rate plan, solar production, energy habits, and battery settings. A system designed for one rate structure may not be the best choice after a rate-plan change.
Net metering arrangements and export compensation also matter. If sending excess solar energy to the grid provides less value than using it at home, storage may support greater self-consumption. Your installer should evaluate current utility rules and model the system around your actual property instead of promising a universal savings result.
Define your budget and backup priorities
Budget affects more than the battery brand. It may influence usable capacity, inverter configuration, electrical work, monitoring, and whether you install enough storage for selected circuits or a broader set of home loads. Final project figures depend on the property, existing equipment, installation requirements, utility, and eligibility for any available incentives. Ask for a project-specific comparison rather than relying on a general online price.
Then decide what an outage plan should accomplish. Do you need to keep a refrigerator, lights, internet equipment, medical devices, and a garage door operating for a limited period, or do you want to support larger loads for longer? Energy storage can sustain critical loads during an outage when the system is configured to operate safely while disconnected from the grid. That does not mean every appliance will run indefinitely. Backup duration depends on stored energy, active loads, solar conditions, and operating settings.
For more background before comparing equipment, review our guide to choosing a solar battery.
When you are ready to apply these factors to your home, an AMECO consultant can help you size a battery around your energy use, utility plan, budget, and backup goals.
Frequently Asked Questions
How long do home solar batteries last?
Battery life depends on chemistry, cycling frequency, operating conditions, and the manufacturer warranty. Many lithium-ion batteries are commonly estimated to last about 10 to 15 years, although usable capacity gradually decreases as the battery cycles (EnergySage). Review both the warranty terms and expected capacity retention when comparing options.
How much do solar batteries cost?
There is no single price that applies to every home. The total depends on storage capacity, power output, battery model, electrical work, backup configuration, and site conditions. A property-specific assessment should also account for your energy use, roof and electrical setup, utility territory, and any incentive eligibility. Compare the complete installed system rather than the battery unit alone.
Do solar batteries work for off-grid homes?
Yes. A solar-plus-storage system can be designed for off-grid operation, but it must be sized and configured to supply the home's expected loads when solar production is low. That planning may require additional storage, backup generation, energy-efficiency improvements, or careful load management. Off-grid design is different from adding a battery for occasional outage backup.
What are the main types of solar batteries?
Common residential options include lithium-ion, lead-acid, and flow batteries. Lithium-ion is the most popular choice for residential storage. Lithium iron phosphate, or LFP, is a widely used lithium chemistry with a safety and performance profile suited to many home applications (Aurora Solar; Enphase). The right type depends on capacity, power rating, lifespan, compatibility, and your backup goals.
Get started with a battery consultation
The right battery depends on your home's energy use, backup priorities, solar system, and utility needs. No single storage product fits every property, so the most useful next step is a site-specific review of your energy patterns, roof, and existing solar equipment.
An AMECO Solar consultant can help you compare practical battery options, estimate the capacity and backup coverage that makes sense for your household, and explain how storage fits into your broader solar and home plan. That conversation is grounded in your property and your goals rather than a generic recommendation.
To discuss your project and get a tailored estimate, Get An Estimate and talk with the team at AMECO Solar.
8.10.2026
Choosing a solar roof in California is not only a question of how much electricity your home can produce. Your roof's condition, available space, appearance, budget, and plans for backup power all influence which technology makes sense.
When comparing solar shingles vs solar panels, shingles combine roofing and energy generation in one integrated surface, while panels mount above the existing roof on a racking system. Panels typically deliver more power from a given roof area and often cost less per watt. While shingles can provide a cleaner roofline and may be appealing when a roof replacement is already part of the project. The better choice depends on your home, utility territory, energy use, and design priorities.
Understanding how each system functions makes the tradeoffs easier to evaluate. The distinction starts with whether your solar equipment sits on top of the roof or becomes part of the roof itself.
What Are Solar Shingles vs Solar Panels in Plain Terms
The basic difference is where the solar technology sits and what job the roof materials perform. Solar panels are separate modules mounted above an existing roof with a racking system. Solar shingles replace some or all of the roofing material, creating a surface that both protects the home and converts sunlight into electricity. In either case, the right choice depends on the roof's condition, usable area, energy goals, budget, and California utility territory.
| Factor | Solar shingles | Solar panels |
|---|---|---|
| Efficiency | Typically lower per unit, so more roof area may be needed for the same output. | Typically higher per-panel efficiency, which can produce the same output with less roof area. |
| Cost per watt | Generally higher because the product and installation are newer and more involved. | Often lower, although the total project cost varies with the roof, equipment, labor, and utility requirements. |
| Aesthetics | Designed to blend into the roofline with a low-profile appearance. | Visible modules sit above the roof on a frame and racking system. |
| Installation complexity | Requires roofing and electrical work because the shingles become part of the roof system. | Uses a separate solar installation above the existing roof, provided the roof is suitable. |
| Expected lifespan | Both technologies have an average lifespan of approximately 20 to 25 years. | Both technologies have an average lifespan of approximately 20 to 25 years. |
| Roof coverage | Can cover a larger roof surface while functioning as the protective top layer, though only active shingles generate electricity. | Panels cover selected roof areas, while the existing roof remains the weatherproofing layer. |
These differences matter most when a California homeowner is already considering roof replacement. A panel system may be the practical path when the existing roof is sound. Solar shingles may be worth evaluating when appearance and an integrated roof-and-energy system are priorities. AMECO combines solar, roofing, battery backup, and EV charging under one roof, and is a Tesla solar roof certified installer. Explore its residential solar and roofing solutions to compare the project requirements rather than relying on a universal price or output estimate.
Sources: solar shingles and panels comparison.
Efficiency and Output: How Much Power Does Each Produce
When comparing roof-integrated solar shingles with traditional panels, efficiency is an important practical distinction. Traditional panels typically provide higher per-panel conversion efficiency than solar shingles, so they may require less usable roof area to produce a similar amount of electricity. That does not make shingles unsuitable for California homes, but it does make roof dimensions, orientation, shading, and household electricity use especially important during system design. Residential solar should be sized around the property rather than selected from a technology label alone.
How panel efficiency is measured
Photovoltaic efficiency describes the percentage of sunlight reaching a solar cell that is converted into usable electricity. The result is affected by how much light the cell reflects, how efficiently electrical charges move through the material, and how the cell performs as its temperature changes. The U.S. Department of Energy explains that untreated silicon can reflect more than 30% of incoming light, which limits the energy available for conversion. Manufacturers use cell and module design improvements to reduce losses, but no solar device converts all incoming sunlight into electricity.
This distinction helps explain why two roofs with the same number of installed units can produce different results. A panel array may use fewer roof sections to reach a design goal. While shingles can provide generation across more of the roof surface but with lower output per active area. The final comparison depends on the usable roof area and the system configuration, not on efficiency in isolation.
How California's climate affects output
California's strong sunlight can support productive solar generation, but bright conditions do not eliminate the effects of heat or reflection. As solar cells become hotter, voltage generally decreases more than current increases. Extreme temperatures can also stress cell and module materials. Roof-integrated shingles and rack-mounted panels both need a design that accounts for local conditions, including roof orientation, tilt, shade, ventilation, and seasonal weather. Their physical installation differs, so the way each system manages heat and available surface area should be evaluated for the specific roof.
In practical terms, expected output depends on the solar resource at the property and the overall size of the system array. A professional assessment should model those factors alongside the home's energy consumption. That is more reliable than assuming every California roof will produce the same amount of power or that one technology will always outperform the other.
Source: U.S. Department of Energy, solar photovoltaic performance and efficiency basics. Source: U.S. Department of Energy, planning a home solar electric system.
Cost per Watt and Long-Term Value for California Homes
Upfront cost is one of the clearest differences between solar shingles and traditional panels, but it is not the only measure of value. Solar shingles generally carry a higher cost per watt because the product and installation process are newer and more involved. They also serve as roofing material, which can change the scope of a project when a roof is due for replacement. Traditional panels may offer a lower equipment and installation cost, especially when the existing roof is in good condition. The right comparison depends on the home's roof, energy use, design goals, and utility territory rather than on a universal price.
Why cost varies by home and utility
A meaningful estimate starts with the property itself. Roof size, slope, orientation, shading, structural condition, and the amount of usable roof area all affect system design. Local utility rules, rate structures, interconnection requirements, and available incentives can also change the economics. A system designed for a home in Los Angeles may not have the same production profile or project requirements as one in Sacramento or the Central Valley.
Solar shingles can be especially difficult to compare on a simple cost-per-watt basis because part of the investment may replace a roofing project. If the roof already needs substantial work, an integrated roofing and solar solution may reduce the need to coordinate separate contractors. If the roof is relatively new, removing or replacing sound roofing solely to install shingles may make traditional panels more financially practical. Ask for an itemized proposal that separates roofing, solar generation, electrical work, permitting, and any storage equipment.
Before sizing either system, consider a home energy audit. The U.S. Department of Energy explains that an audit can identify where a home is losing energy and which efficiency improvements can reduce total electricity needs. Sealing air leaks, improving insulation, or addressing inefficient equipment may lower the amount of solar capacity needed. That can improve the long-term value of the project without assuming a particular savings figure.
Battery storage is a separate choice from the roof technology. It can help a California household maintain selected loads during an outage and use more of its own generated electricity, which may matter in areas affected by high rates or service interruptions. However, battery backup typically adds about $8,000 to $15,000 to a residential solar project's cost, depending on the system and installation requirements. Review storage capacity, backup priorities, and load management rather than treating a battery as an automatic add-on. See the battery backup options and ask how they fit the home's goals.
For a property-specific starting point, use the solar cost calculator. It can help frame the questions to bring to a professional review, but a final design and estimate still require site-specific information. Compare the expected service life, roof work, energy production, and backup goals together so the lowest initial price does not become the only factor guiding a long-term decision.
Durability, Warranty, and Installation Complexity
Durability is less about choosing a universally stronger product and more about matching the solar system to the roof, installation method, and long-term maintenance plan. Solar shingles and traditional panels have comparable average life spans of approximately 20 to 25 years. Although product warranties and coverage terms vary by manufacturer and should be reviewed before signing a contract. AMECO's roofing solutions can help homeowners evaluate the roof and solar work together rather than treating them as unrelated projects.
How the roof and installation method affect durability
Traditional panels are installed above the roof surface on a racking system. The roof remains the weatherproof layer, while the racking, flashing, and attachments must be designed and installed correctly. Solar shingles replace roofing material and become part of the roof itself, combining weather protection with electricity production. These differences matter when assessing an older roof, planning a reroof, or deciding how much of the roof should be disturbed. Solar shingles and panels use different installation approaches.
Roof type also narrows the practical choices. Composite shingle roofs may accommodate either approach, depending on roof condition and product availability. Tile roofs require careful attention to tile removal, flashing, and waterproofing. Metal roofs need compatible attachments and careful water management, while flat roofs may require an engineered racking design to establish the right orientation and tilt. A site assessment should confirm the roof's structure, age, drainage, and remaining service life before equipment is selected.
An integrated system such as Tesla Solar Roof can make sense when a homeowner wants a new roof and prefers the solar surface to blend into the roofline. It is not automatically the best fit for every home. Adding panels may be more practical when the existing roof is in good condition, the homeowner wants flexibility in system sizing, or future component replacement is a priority. The decision should account for roof geometry, energy goals, appearance, budget, and the availability of qualified installers.
Repair and replacement considerations
With panels, a problem may involve an individual module, inverter, wiring connection, or racking component. A qualified technician can often isolate and replace the affected equipment without replacing the rest of the roof. Solar shingle repairs can be more integrated because a failed shingle is also part of the weatherproof roof surface. Replacement may require a technician familiar with that specific product and its roofing details, and the pool of qualified installers may be smaller than for conventional panel systems.
That coordination issue is especially important when solar work overlaps with reroofing. AMECO provides integrated solar, roofing, battery backup, and EV charging services for residential and commercial customers across California. Having one experienced team evaluate the roof and energy system can reduce the risk of conflicting scopes, missed flashing details, or unclear responsibility after installation. Ask for the exact product warranty, workmanship coverage, maintenance expectations, and repair process for the roof and solar components separately before choosing.
How Do Solar Shingles and Panels Compare on Aesthetics, Roof Coverage, and Curb Appeal?
For many California homeowners, the appearance of the finished roof matters nearly as much as its electrical output. Solar shingles are designed to blend into the roofline. They replace some roofing materials while generating electricity, so the result can look more integrated and low profile. Traditional solar panels sit above the roof on racking and remain visibly distinct from the surrounding shingles or tiles.
That difference can influence how a home looks from the street, especially on neighborhoods with tightly spaced homes, prominent rooflines, or design expectations set by a homeowners association. An HOA may have its own review process or published rules for visible roof equipment. Requirements vary by community, so homeowners should confirm the current approval process before choosing an equipment type. A design preference alone should not outweigh whether the system can provide the needed energy for the available roof area.
Roof coverage is not the same as energy output
Solar shingles can cover portions of the roof with a unified roofing-and-generation surface, but not every shingle is necessarily an electricity-producing cell. Traditional panels generally concentrate power-producing cells into a dedicated array, which can allow more of the selected roof area to be used for generation. Panels also typically offer higher efficiency than shingles, meaning they may produce more power from a given active area.
In practice, the best layout depends on roof shape, orientation, shading, setbacks, and the amount of usable surface. A large, simple roof may accommodate a panel array without creating a visual concern. A roof with multiple planes, complex geometry, or an upcoming replacement may make an integrated shingle design more appealing. These are site-specific tradeoffs, not universal advantages for one technology.
Curb appeal and future plans
Some buyers may prefer a less visible solar installation, while others may value the established appearance and familiar service model of conventional panels. Neither choice guarantees a particular resale outcome. If you are planning a remodel, roof replacement, or future battery addition, consider how the solar equipment will fit that larger plan. Reviewing both the roof design and electrical goals with an experienced residential solar contractor can help you compare appearance, usable coverage, and long-term practicality together.
Choosing the Right System for Your California Roof in 5 Steps
Solar shingles and solar panels can both support a California home's energy goals. But the better fit depends on the roof, the household, and the priorities behind the project. Use these five steps to compare the options before requesting a design.
- Start with a home energy audit. Review how much electricity your household uses and where energy is being lost before sizing either system. The U.S. Department of Energy recommends an audit to identify efficiency improvements that may reduce total electricity needs before solar is planned. Review the Department of Energy's solar planning guidance for more context.
- Assess your roof's age and condition. Solar panels attach above the roof with a racking system, while solar shingles replace roofing material and become part of the roof itself. If a roof is nearing replacement, coordinating roofing and solar may affect which installation path makes practical sense.
- Clarify whether output or appearance leads. If your priority is maximum production from limited roof area, traditional panels are often the stronger starting point because they typically provide higher per-panel efficiency. If curb appeal and a more integrated roofline matter most, solar shingles may be worth considering. Even though the final design still depends on available roof area, orientation, shading, and other site conditions.
- Weigh the budget and backup goals. Solar shingles generally cost more per watt than traditional panels because their products and installation are newer and more involved. But final figures vary by roof and utility territory. If outage protection and greater energy independence are priorities, ask whether a battery system belongs in the design. Battery backup can add approximately $8,000 to $15,000 to a residential solar project, depending on the equipment and project details. Use the solar cost calculator to begin framing the project budget, not as a substitute for a site-specific proposal.
- Get a property-specific consultation. A system's actual output depends on the solar resource at the property and the size of the array, so online comparisons cannot determine the right system by themselves. Contact AMECO to discuss your roof, energy use, utility territory, and whether panels, solar shingles, or a combined roofing and energy plan best fits the home.
Contact AMECO for a property-specific estimate
Frequently Asked Questions
Are solar shingles better than solar panels?
Neither option is universally better. Solar shingles create a cleaner, more integrated roofline and can serve as both roofing and energy-producing material. Traditional panels typically provide higher conversion efficiency and may produce the required electricity with less roof area. While the right choice depends on your roof condition, energy goals, design priorities, and budget. Learn more about the comparison.
Can solar shingles power a house?
Yes, solar shingles can generate electricity for a home. Actual production depends on the sunlight available at the property and the total size and configuration of the system. A roof with limited usable area, shading, or an orientation that receives less sun may need a careful design review to determine whether the available shingles can meet household demand. The Department of Energy explains site-specific solar production.
What are the disadvantages of solar shingles?
The main tradeoffs are typically lower efficiency, a higher cost per watt, and more involved installation or repairs. Because shingles are part of the roof surface, replacing a damaged section can require coordinating roofing and electrical work. They can still be a practical fit when appearance, roof integration, or a planned roof replacement carries significant weight in the decision.
How much do solar shingles cost compared with solar panels?
Solar shingles generally have a higher cost per watt than traditional panels. But the final estimate varies with roof size and condition, system design, local utility requirements, and the installation scope. Request a property-specific comparison rather than relying on a universal price. If you are also considering backup power, a battery is a separate project component and can materially change the total cost.
Get a Solar Estimate That Fits Your Roof
Whether you lean toward traditional solar panels or the integrated look of solar shingles, the right choice depends on your specific roof, energy use, and budget. AMECO Solar & Roofing has served California since 1974 as an integrated solar and roofing contractor and is a Tesla solar roof certified installer. So we can design, quote, and install either option under one account.
Our team evaluates your roof condition, available sunlight, electricity goals, and backup-power needs to recommend the system that fits your property. Start with a no-pressure estimate today to see what solar shingles vs solar panels would look like for your California home.
Get an Estimate and take the next step toward greater energy independence.
8.7.2026
The Costly Mistake Many California Homeowners Make
Ask most homeowners who installed solar on an aging roof and you will hear the same story. A few years in, the shingles wear out, the roof leaks, and the entire array has to be taken down, repaired or replaced, and reinstalled. Removing and reinstalling a solar system can cost thousands of dollars on top of the roofing bill, and it can stretch the project timeline by weeks.
The better path is to plan solar and roofing together. When a roof replacement and a solar installation are coordinated as one project, homeowners avoid the removal-and-reinstall cycle, protect their warranty, and often save on permits and labor. For California homeowners already facing high energy costs and rooftop solar decisions, that coordination is one of the smartest moves you can make.
Below, we explain why roofing and solar should be planned together, what sets a true integrated contractor apart, and how to pick the right team for the job, whether it is a simple roof-and-solar project or part of a larger home renovation.
Why Roofing and Solar Should Be Planned Together
A solar array is designed to last 25 years or more, and so is a quality roof. If the two systems are not on the same schedule, the math works against you. Here is what changes when you plan them together.
Structural Load and Roof Condition
Solar panels add weight to the roof, and they are mounted with fasteners that penetrate the surface. That only works reliably on a roof that is structurally sound and has enough life left to support a 25-year renewable energy investment. Installing solar on a roof that is near the end of its life means the panels are the first thing removed when the roof fails.
Waterproofing and Leak Protection
Every solar mount point is a potential entry point for water. A combined roof-and-solar installation lets one team coordinate waterproofing, flashing, and panel mounting so the roof system and the solar system work as one sealed unit. When separate contractors work at different times, gaps can appear in that waterproofing responsibility.
Warranty Alignment
A new roof and a new solar system each carry guarantees. Done together under one accountable contractor, the work is easier to warranty as a single system. Done years apart, a homeowner can be caught between a roofer and a solar installer pointing at each other when a leak appears.
Permit and Labor Savings
Coordinating the work means one construction phase instead of two. Because crews and equipment are on site together, homeowners can reduce mobilization costs and overlapping permit work. Some municipalities also make it simpler to bundle the approvals for a roof-and-solar project into one effort rather than revisiting the process years later.
Timing Around NEM 3.0 and the Federal Tax Credit
California's net energy metering rules and the federal solar investment tax credit give homeowners financial reasons to move with purpose. Planning your roof and solar on one timeline means you are not waiting years to lock in the economics, and you are not caught redoing solar work after your roof fails and the incentives have changed.
What Makes AMECO Different
AMECO Solar & Roofing has served California homeowners since 1974, and it has built its business around a simple advantage: it handles both solar design and installation and professional roofing under one company. For nearly fifty years, that means there is no hand-off between a separate roofer and a separate solar contractor, no finger-pointing about who owns the flashing, and no scheduling gaps that leave a home exposed to the weather.
Because a single accountable team manages the roof and the array together, homeowners get one consultation, one design, and one installation plan. The team assesses the roof, prepares it for solar, and installs a system sized for the way the family actually uses energy. That end-to-end coordination is why homeowners choose AMECO over juggling multiple contractors, whether they are starting with a roof replacement or planning a full solar project from scratch. To learn more about AMECO's roofing capabilities, visit the roofing solutions page, or explore how the company designs and installs solar on the solar solutions page.
The Role of the General Contractor When Solar Is Part of a Larger Project
Not every solar-and-roof project happens in isolation. Many California homeowners pair the work with a broader home improvement, such as a room addition, an accessory dwelling unit (ADU), a kitchen remodel, or a backyard renovation. When the scope grows beyond the roof and the array, the project often needs a general contractor to coordinate the larger build while the solar and roofing specialists handle their systems.
For homeowners undertaking a larger renovation, say, a room addition or kitchen remodel, coordinating with a licensed general contractor like LevelWorks, which specializes in home remodeling across Los Angeles, can help ensure the broader project timeline does not conflict with solar permitting and installation schedules. The idea is not to add layers, but to make sure the roof-and-solar work fits cleanly into the overall construction calendar instead of colliding with it.
Whether your project is roof-and-solar only or part of a bigger renovation, the same principle applies: the sooner the solar and roofing team is involved in the planning, the smoother the whole build goes.
What the AMECO Process Looks Like
A coordinated roof-and-solar project with AMECO follows a clear, homeowner-friendly path.
- Consultation. The team starts with a conversation about your home, your energy use, and your goals, so the design reflects real needs rather than a one-size-fits-all proposal.
- Roof assessment. Before any solar work begins, an expert inspects the roof to confirm it is ready to support a system for the long term, or to plan a replacement as part of the same project.
- System design. The in-house design team builds a custom layout matched to the roof structure and your electricity use.
- Permitting. AMECO handles the local permitting and utility paperwork so the project moves forward without the homeowner chasing approvals.
- Installation. Professional crews install the roof and solar system as one coordinated effort, protecting every waterproofing detail.
- Battery backup option. For homeowners who want backup power during outages, AMECO can pair the system with battery storage. See the battery backup page for details.
You can read more about the full approach on the AMECO approach page.
California-Specific Considerations
California brings its own set of rules and realities to a roof-and-solar project, and an experienced local contractor keeps them all straight.
Utility Interconnection
Depending on where you live, the project has to coordinate with your utility, whether that is PG&E, Southern California Edison, San Diego Gas & Electric, or a local utility like LADWP. Interconnection approval is part of the permitting flow a good contractor manages.
Building Codes and Title 24
California's energy code sets requirements for new roofs and building envelope improvements. Doing the roof and solar together means the work is designed to be code-compliant as one project rather than retrofitted years apart.
Local Permits
Roofing and solar each require permits in most California jurisdictions. An integrated contractor bundles that paperwork, so the homeowner does not juggle multiple inspectors or schedules.
Fire Setbacks
California building codes require specific clearances between rooftop solar and the roof edge and ridge for firefighter access. A team that installs solar regularly knows these rules and lays out the array accordingly, protecting both safety and system size.
Get a Free Estimate From AMECO
If you are planning a roof replacement, weighing solar, or doing both at once, the smartest first step is a careful assessment of your home. A coordinated plan protects your roof, your solar investment, and your wallet, and it starts with clear numbers. California homeowners can use the AMECO solar cost calculator to get a project estimate and start planning the work on one timeline.
Doing solar and roofing together is one of the highest-value home upgrades a California homeowner can make. With a single contractor who owns both systems, that value is protected from the day the work begins.
8.7.2026
For a California farm, electricity is tied directly to production. Irrigation pumps, refrigeration, lighting, and processing equipment may need dependable power through demanding operating seasons, while utility costs and outage risks can complicate planning. Because agriculture is vital to California's economy and global food supply, energy resilience is more than a facilities concern.
Get a free farm solar estimate to see how solar for irrigation, cold storage, and processing could fit your operation.
Solar for farms California can help power irrigation, cold storage, barns, and processing facilities while reducing reliance on grid electricity. The right system depends on the property's load profile, roof or ground space, utility territory, storage needs, and incentive eligibility, so project-specific engineering matters.
California's Renewable Energy for Agriculture Program notes that onsite renewable energy can reduce greenhouse gas emissions and increase energy reliability. Those benefits become clearer when solar is evaluated around the equipment and operations that keep a farm running, starting with its daily irrigation and production demands.
Why California Farms Are Turning to Solar for Irrigation and Operations
California agriculture depends on reliable energy as much as it depends on water, equipment, and skilled labor. The state's agricultural production is important to the California economy and global food security, so interruptions to essential systems can affect more than a single property. On-site solar gives farm owners another way to produce electricity where it is used, while potentially reducing demand for grid power.
The California Energy Commission explains that renewable energy projects can help agricultural operations reduce greenhouse gas emissions and increase energy reliability. The value is practical: a properly designed system can support the loads that keep crops moving from field to market.
Irrigation pumps
Irrigation is one of the clearest applications for agricultural solar. Pumps may operate on a regular schedule or need to respond to crop conditions, water availability, and seasonal demand. Solar can help supply electricity for pumping during daylight production hours, when arrays are generating power. The right design depends on pump size, operating schedules, well characteristics, storage tanks, and the property's electrical service.
That assessment matters because a farm's energy profile is rarely uniform. An operation may need substantial power during irrigation season, then shift toward refrigeration, lighting, or processing at other times. Reviewing those patterns before equipment is selected helps align the system with actual use rather than relying on a generic array size.
Cold storage and refrigeration
Perishable crops and other agricultural products require controlled temperatures after harvest. Cold rooms, refrigeration equipment, and ventilation can create steady electrical demand, particularly when outside temperatures rise. Solar generation can offset a portion of that demand, while battery storage may provide an additional layer of resilience for critical equipment during grid outages. Storage capacity and backup loads should be evaluated separately, since not every operation needs to keep every electrical load running.
Barns and processing
Barns, packing areas, workshops, and processing facilities can add lighting, motors, fans, pumps, and control systems to a farm's load profile. A coordinated plan can account for these uses alongside irrigation and refrigeration. For properties with aging agricultural buildings, it is also important to review roof condition and structural considerations before installation. AMECO's commercial solar installation for agricultural operations approach connects site assessment, system design, and installation planning so the project supports the property as a whole.
What Agricultural Solar Can Power on Your Property
The most useful farm solar systems are designed around the loads that keep production moving. Rather than treating solar as a separate energy project, California operators can evaluate it alongside irrigation schedules. Harvest cycles, refrigeration needs, and the electrical demands of barns or processing areas. The California Energy Commission identifies irrigation pumps, cold storage facilities, and processing equipment as examples of essential agricultural infrastructure that can use onsite renewable energy.
Irrigation pumps and water management
Irrigation can be one of the clearest places to begin a load assessment. Solar electricity may support pumps that move water from wells, reservoirs, or holding tanks to fields, orchards, and greenhouse systems. The right design depends on pump horsepower, operating hours, seasonal water demand, controls, and the available electrical service. A system may be sized to serve daytime pumping directly, while batteries or other controls can help coordinate energy use when pumping must continue beyond solar production hours.
Water management equipment can also include pressure systems, filtration, fertigation controls, and monitoring devices. These smaller loads should be considered with the primary pumps rather than overlooked during early planning. Mapping when each load runs helps identify where solar production, storage, and utility power can work together.
Cold storage and refrigeration
Cold rooms, pack-house refrigeration, freezers, and ventilation equipment can draw power throughout the harvest and distribution process. Solar can help offset the electricity used to cool produce after picking and maintain the conditions required before shipment. Because refrigeration loads may cycle at different times of day, an energy review should examine both peak demand and total daily consumption.
Roof condition matters here, particularly when panels are considered for a packing or cold-storage building. Reviewing the roof and electrical infrastructure together can reduce the risk of installing a long-lived solar array on a surface that needs near-term work. For a planning framework, review solar project costs for farms, remembering that project figures depend on the building, equipment, utility territory, and site conditions.
Processing, barns, and day-to-day operations
Farm processing may include washing, sorting, conveyors, milling, drying, or other electrically powered steps. Solar can also be evaluated for barn lighting, ventilation, fans, controls, security systems, and workshop equipment. These loads often have different operating patterns, so combining them into one property-wide profile gives a more useful picture than sizing around a single machine.
A qualified solar assessment should document the equipment, service capacity, roof or ground-mount options, and future expansion plans before recommending system size. That practical approach helps align the project with how the farm actually operates.
USDA REAP Grants and Federal Tax Credits for Farm Solar
Federal incentives can materially affect how a California agricultural operation evaluates a solar project. Treat them as planning inputs rather than guaranteed savings. Two programs often enter the conversation: the U.S. Department of Agriculture's Rural Energy for America Program (REAP) and the federal clean energy investment tax credit.
How REAP can support an agricultural solar project
REAP provides guaranteed loan financing and grant funding to agricultural producers and qualifying rural small businesses for renewable energy systems and energy-efficiency improvements. For eligible solar projects, USDA program materials describe grants of up to 50% of eligible project costs and loan guarantees of up to 75%. When financing and grant support are combined, the total assistance may reach up to 75% of eligible costs, subject to the program's rules, application requirements, and available funding.
That assistance is not an automatic discount on every installation. Eligibility can depend on the applicant's business structure, rural location, project scope, technical documentation, and timing. A farm may need to provide financial information, energy-use details, equipment specifications, and evidence that the proposed system meets current program requirements. Review the current USDA REAP guidance before relying on any percentage or planning an application. Program availability, funding levels, deadlines, and eligible-cost definitions can change.
Layering REAP with the federal clean electricity credit
A qualifying solar installation may also be evaluated for the federal investment tax credit, now addressed through the clean electricity credit provisions of the Internal Revenue Code. The credit's value and eligibility depend on the project, taxpayer, placed-in-service timing, labor requirements, domestic-content or energy-community provisions, and other current rules. The credit is generally considered separately from a grant. So a tax professional should determine how the proposed REAP assistance and federal tax treatment interact for the farm's specific ownership and financing structure.
For that reason, an estimate for commercial solar installation for agricultural operations should be paired with financial and tax review. The right analysis accounts for the farm's load profile, utility territory, roof or ground-mount conditions, storage needs, and eligibility for each incentive. Searching for a "USDA REAP solar grant California" opportunity is a useful starting point, but it is not a substitute for confirming current USDA and IRS requirements.
Before committing to equipment or an application deadline, confirm the latest program status directly with USDA Rural Development and a qualified tax professional. Incentives can improve project feasibility, but the final result depends on the property's characteristics. The farm's finances, and the rules in effect when the project is submitted and placed in service.
Net Metering and Battery Storage for Agricultural Customers
How a farm uses its electricity can matter as much as how much it generates. Irrigation, refrigeration, processing, and other agricultural loads may operate on different schedules, so the value of exported power depends on the farm's utility, rate structure, and load profile. California's net energy metering and net billing rules can provide credits for electricity exported to the grid, but the credit is not automatically equal to the retail rate. The California Public Utilities Commission explains that the Net Billing Tariff, in effect for new customers since April 15. 2023, uses energy export credits that can vary by time and market conditions. In some high-value periods, including late-summer evenings, export credits may exceed retail value. Review the CPUC's current net energy metering guidance before modeling a project.
| Factor | Solar only | Solar + battery storage | No solar |
|---|---|---|---|
| Monthly bill impact | May reduce grid purchases when generation aligns with on-site use; results depend on the utility rate and farm load. | May shift more solar energy to later use and reduce selected peak-period purchases; battery controls and tariffs affect the result. | Electricity is purchased from the utility under the applicable rate, with no on-site generation or export credits. |
| Outage backup | Typically does not provide power during an outage unless the system includes approved backup equipment. | Can provide backup power for selected loads during grid outages when designed with the appropriate controls and capacity. | No solar-based backup; resilience depends on utility restoration or a separate generator or storage system. |
| Export credit value | Excess generation may receive credits under the applicable NEM or Net Billing rules, with value varying by time and utility. | Can store some excess generation for on-site use, while remaining exports are subject to the applicable credit rules. | No solar generation to export and no related export credits. |
| Upfront cost | Solar equipment, engineering, interconnection, and installation costs apply. | Includes solar costs plus battery equipment, controls, engineering, and installation. | No solar project cost, though ongoing utility purchases remain. |
Storage can be particularly relevant when a farm needs continuity for essential equipment. California agricultural solar installations can often be paired with batteries for backup power during grid outages, as described by California Climate Investments. The system still needs to be sized around the loads that matter most. Such as controls, refrigeration, communications, or water systems, rather than assuming every building will remain energized.
Incentives can also change the comparison. California has offered storage incentives, and SCE or PG&E customers with qualifying interconnections before the end of 2027 may be eligible for an export adder. Eligibility, program terms, and utility requirements can change, so an agricultural project should be evaluated using current information and the property's actual interval load data. AMECO can help compare solar-only and solar-plus-storage designs around the farm's operating schedule, resilience priorities, roof conditions, and utility territory.
Request an agricultural solar consultation and let AMECO compare solar-only and solar-plus-storage options for your property.
Agrivoltaics: Combining Crops and Livestock with Solar Panels
California agriculture depends on productive land, reliable energy, and careful water management. Agrivoltaics offers a way to address those needs together by co-locating solar panels with agricultural production. Instead of treating a solar array and a farm as competing land uses. A properly designed project can provide electricity while creating useful shade and preserving the underlying agricultural function. The U.S. Department of Energy defines agrivoltaics as this combination of solar energy and agricultural production, including arrangements that shade crops while generating power.
The approach is especially relevant in the Central Valley. The region uses less than 1% of U.S. farmland yet supplies about one-quarter of the nation's food. At the same time, a 2022 USDA survey found that roughly 117,000 U.S. farm operations had some type of solar device. Those figures point to a practical opportunity: expand on-site energy production without automatically converting productive farmland into a conventional solar site.
Using shade where it can support production
Panel height, row spacing, orientation, and crop selection all influence whether an agrivoltaic project fits a particular operation. In some settings, partial shade can help moderate heat and reduce direct exposure for suitable crops. The result is not universal, however. Agronomic conditions, equipment access, harvest methods, water needs, and seasonal sunlight must be evaluated before a design is selected.
Grazing sheep beneath elevated arrays
Livestock grazing is another established dual-use concept. Sheep can manage vegetation beneath and around elevated panels, reducing the need for mechanical mowing in appropriate areas while keeping the land in agricultural use. The array must be designed around animal movement, fencing, maintenance access, and electrical safety. A farm operator should view grazing compatibility as a site-specific management plan, not an automatic benefit of any solar installation.
A forward-looking strategy for California growers
For growers and agricultural property owners, the value of agrivoltaics extends beyond electricity production. Co-location can reduce land-use conflict, support farm continuity, and create a more flexible path toward energy resilience. California's agricultural sector is vital to the state economy and global food security, so energy improvements should be planned around the operation rather than imposed on it. A solar professional familiar with agricultural load profiles can assess whether shade structures, elevated arrays, or other configurations make sense for the property. For background on commercial applications, see our commercial solar installation for agricultural operations resource.
Working with AMECO for Farm Solar and Roofing
A farm solar project has to work with the buildings, equipment, and operating demands already in place. AMECO Solar & Roofing takes a consultative approach, reviewing the property, roof conditions, electrical loads, and long-term goals before recommending a system. As a California-owned contractor operating continuously since 1974, AMECO supports commercial and agricultural clients through the project from design through installation. Its AMECO's commercial solar capabilities are designed for the practical demands of working properties, not a one-size-fits-all residential installation.
One contractor for the roof and solar system
Barns, equipment sheds, cold-storage buildings, processing facilities, and shop roofs all need to remain watertight while supporting a productive operation. Coordinating roofing and solar through one contractor can help reduce handoff problems between separate teams. If a roof needs repair, replacement, or additional evaluation before panels are installed. That work can be considered as part of the overall design rather than discovered after installation.
AMECO's integrated solar and roofing approach keeps roof integrity and solar performance in the same conversation. That matters for agricultural owners planning a long-term infrastructure investment, especially when roof access, mounting methods, drainage, and future maintenance all affect the installation.
Design around agricultural operations
Farm energy use is shaped by schedules and equipment. Irrigation pumps may create substantial seasonal demand, while refrigeration and cold storage require dependable power beyond a single harvest window. Processing equipment, lighting, ventilation, and shop loads add further variables. AMECO can evaluate these needs as part of a commercial design process and consider whether battery storage or other system features fit the property's goals.
The right next step is a property-specific assessment. Roof age, structural conditions, utility territory, equipment loads, available space, and eligibility for incentives can all affect the recommended approach. A qualified consultation helps an owner compare options without relying on universal pricing, savings, or installation-time promises.
Start today with a property-specific farm solar review from AMECO's commercial solar team.
Frequently Asked Questions
What is the USDA Renewable Energy for America Program?
The USDA Renewable Energy for America Program, or REAP. Provides guaranteed loan financing and grant funding to eligible agricultural producers and rural small businesses for renewable energy systems and energy-efficiency improvements. Eligibility, funding availability, and application requirements can change, so confirm current details with the USDA REAP program before planning your project.
Can farm solar power irrigation pumps and cold storage?
Yes. A properly engineered system can support major agricultural loads such as irrigation pumps, refrigeration and cold storage, processing equipment, barn lighting, and other facility operations. The design should begin with interval energy data, equipment ratings, operating schedules, and the farm's utility service, rather than with panel count alone.
How does net metering work for agricultural solar customers?
Under California's net energy metering rules, eligible solar owners can receive credits for electricity exported to the utility grid. The applicable tariff, export value, interconnection requirements, and treatment of batteries depend on the utility, system configuration, and customer eligibility. Review current guidance from the California Public Utilities Commission before estimating project economics.
What is agrivoltaics, and can it work on California farmland?
Agrivoltaics co-locates solar panels with agricultural production, allowing a property to generate electricity while continuing selected crop or livestock activities. Panel height, row spacing, shade patterns, access for equipment, water management, and the specific crop or grazing plan all affect feasibility. A site study should address both agricultural productivity and electrical performance.
Should a farm add battery storage to its solar system?
Battery storage can help provide backup power during grid outages and may improve how a farm uses on-site solar. It can be especially relevant where refrigeration, controls, communications, or water systems must remain available. The right battery size depends on critical loads, outage goals, utility rules, interconnection limits, and the property's electrical profile, so storage should be evaluated alongside the solar design.
Get started with a farm solar estimate
Every agricultural property has different energy loads, roof conditions, utility requirements, and project considerations. A property-specific review can help you evaluate how solar may support irrigation, storage, processing, or other operations while identifying the right next steps. To discuss your goals with AMECO's commercial solar team, get an estimate.
8.6.2026
Adding solar in California involves more than choosing panels and scheduling an installation. Your project must pass local building review, site and safety inspections, and a separate utility interconnection process before the system can operate.
A solar permit California project typically requires approved structural and electrical plans, a local building permit before installation, inspections after the work is complete, and utility approval for grid connection. The exact steps and timing depend on your property, roof, system design, utility, and jurisdiction.
California law also directs qualifying jurisdictions to use online automated permitting platforms that verify code compliance and can issue permits in real time, although availability varies locally. AMECO Solar & Roofing manages permitting and utility coordination on the homeowner's behalf, including plan revisions when officials request changes. Understanding why the permit comes first clarifies how the rest of the process protects your home and investment.
Why You Need a Solar Permit in California Before Panels Go Up
A building permit is not paperwork added after the real work is done. It is the local government's review that confirms a proposed solar installation can be placed on the home safely and legally. California's Solar Permitting Guidebook explains that a permit is required before photovoltaic installation work begins. So the authority having jurisdiction can verify structural capacity, electrical safety, and compliance with local regulations. The review also helps confirm that the array design preserves required roof access for emergency responders.
What the permit review protects
Solar equipment adds weight and attachment points to a roof, while the electrical equipment connects the array to the home's service panel and, eventually, the utility grid. The permit process evaluates both sides of that design. A structural review can account for the roof framing, attachment method, array layout, and applicable loads. The electrical review checks the planned conductors, disconnects, inverter, service equipment, and protection against hazards under the applicable electrical code.
A typical residential submittal includes structural calculations, a roof layout, and an electrical single-line diagram. These documents give the building department a common technical picture of the project before installation begins. The exact submittal requirements, fees, and review steps can vary by city or county, so a plan accepted in one jurisdiction may need different details in another.
California law also requires compliant jurisdictions to provide an online, automated permitting platform for qualifying residential solar and storage projects. Under Government Code Section 65850.52, residential solar systems no larger than 38.4 kW AC are within the streamlined eligibility framework, subject to the law and local implementation. An automated platform can verify code compliance and issue a permit in real time. But streamlined processing does not eliminate the need for an approved permit or safe installation.
After installation, the local building department still conducts the required electrical inspection against the approved plans and applicable national electrical codes. If you are comparing the practical steps involved, the solar permitting process is easier to navigate when the design, documentation, and jurisdiction requirements are addressed together from the start.
California's Streamlined Solar Permits: What the Solar Permit California Process Includes
California has been moving residential solar permitting toward online systems that check code requirements and can issue qualifying permits in real time. The goal is not to remove safety review. It is to make that review more consistent and reduce avoidable administrative delays when a project fits the applicable rules.
Senate Bill 379 requires covered cities and counties to implement an online, automated permitting platform for qualifying residential solar and storage projects. The law describes a platform that verifies code compliance and issues permits in real time. See the California Government Code requirements for the statutory language.
| Permit pathway | Time and issuance | Cost considerations | Process complexity |
|---|---|---|---|
| Traditional manual permit | Plans are reviewed by the local building department. Timing depends on the jurisdiction, its workload, and whether revisions are requested. | Fees are set locally and may vary by system capacity, project valuation, or administrative rules. | Typically involves plan preparation, submittal, staff review, possible corrections, resubmittal, and final approval. |
| Automated or streamlined permit, such as SolarAPP+ | An eligible application can be checked against programmed requirements and may receive real-time approval. This is not a guarantee for every property or jurisdiction. | For residential solar permits, AB 1124 establishes a fee cap of $450 plus $15 per kilowatt, subject to the law and the project classification. Confirm the applicable amount with the permitting authority. See California Building Officials guidance. | Eligibility screening and complete, code-compliant inputs are essential. Projects that do not qualify may need the standard pathway. |
Who may use the automated pathway?
Under SB 379, the mandate generally applies to cities with populations of at least 5,000 and counties with populations of at least 150,000, with statutory exemptions that can affect individual jurisdictions. The law identifies residential solar systems up to 38.4 kW AC as part of the qualifying framework. Local implementation still matters, so a system's size, equipment, roof conditions, battery configuration, and jurisdiction determine whether an automated application is available.
Where CalAPP fits
The California Automated Permit Processing Program, or CalAPP, supports local governments as they adopt platforms such as SolarAPP+, Symbium, or equivalent tools. It is a state support program, not a substitute for the local permit itself. The California Energy Commission's CalAPP information explains how jurisdictions can implement these systems.
For a homeowner, the practical question is whether the local authority accepts the project's specific design through an automated platform. If not, the traditional review process remains the route to approval. A qualified installer can identify the correct pathway, prepare the required plans, and coordinate any revisions without assuming that a streamlined label means every project receives the same treatment.
What Solar Inspections in California Check: Structural and Electrical
In short, a California solar inspection verifies that the installed system matches the approved plans. Inspectors check roof attachments and mounting, fire-access paths and setbacks, and the electrical installation from conduit and disconnects to grounding and service equipment. Any correction identified by the inspector is resolved through follow-up inspection before final approval.
After a solar permit application is approved and the installation is complete, the local building department verifies that the built system matches the approved design. The inspection is not simply a visual check of the panels. It covers the roof attachment, structural conditions, electrical equipment, safety clearances, and compliance with applicable code. The exact process varies by jurisdiction, but the sequence generally follows these steps.
From roof structure to electrical service
- Confirm the approved plans and site conditions. The inspector begins with the permitted roof layout, equipment locations, structural details, and electrical plans. A typical submittal includes structural calculations, a roof layout, and an electrical single-line diagram. If the installation differs materially from the approved plans, the jurisdiction may require corrections or revised documents before approval. California's Solar Permitting Guidebook describes the relationship between the permit documents and the completed installation.
- Review roof attachments and mounting. The structural portion checks that racking and roof attachments are installed where the plans indicate and that the roof can support the array and associated loads. The reviewer may look at attachment placement, flashing, mounting hardware, and any visible conditions that could affect weather protection or structural stability. AMECO's engineering team verifies roof integrity during design, before submission, so roof-related requirements can be addressed before the inspection rather than discovered after installation. This is especially important when an older roof or a roof replacement may need to be coordinated with solar work.
- Check fire-access paths and setbacks. Solar arrays must preserve the roof access paths and clearances required by fire-safety rules. These paths and setbacks give emergency responders room to reach the roof and move around the array. The inspector checks that the installed modules, racking, and related equipment do not obstruct those designated routes. Requirements can differ by local authority, roof design, and system layout, so the approved plans control the final review.
- Inspect the electrical installation. After installation, the local building department conducts an electrical inspection to confirm the system matches the approved plans and complies with the National Electrical Code. The review can include conduit routing, disconnects, grounding, labeling, inverter and battery connections, wire management, and the connection to the home's service equipment. A main service panel upgrade becomes necessary when the existing panel is outdated or lacks enough capacity for the new solar system under applicable electrical requirements. That need should be identified during design, but the completed work still has to be inspected.
- Resolve corrections and document approval. If an inspector identifies a missing label, installation detail, clearance issue, or plan discrepancy, the contractor corrects it and schedules the required follow-up. AMECO coordinates the permitting and inspection process and can manage plan revisions or resubmissions when the building department requests additional information. Passing the local inspection is an important milestone, but it is separate from utility interconnection approval and permission to operate.
Planning for both structural and electrical review helps prevent avoidable delays. It also gives homeowners a clearer picture of why a careful design review matters before panels reach the roof.
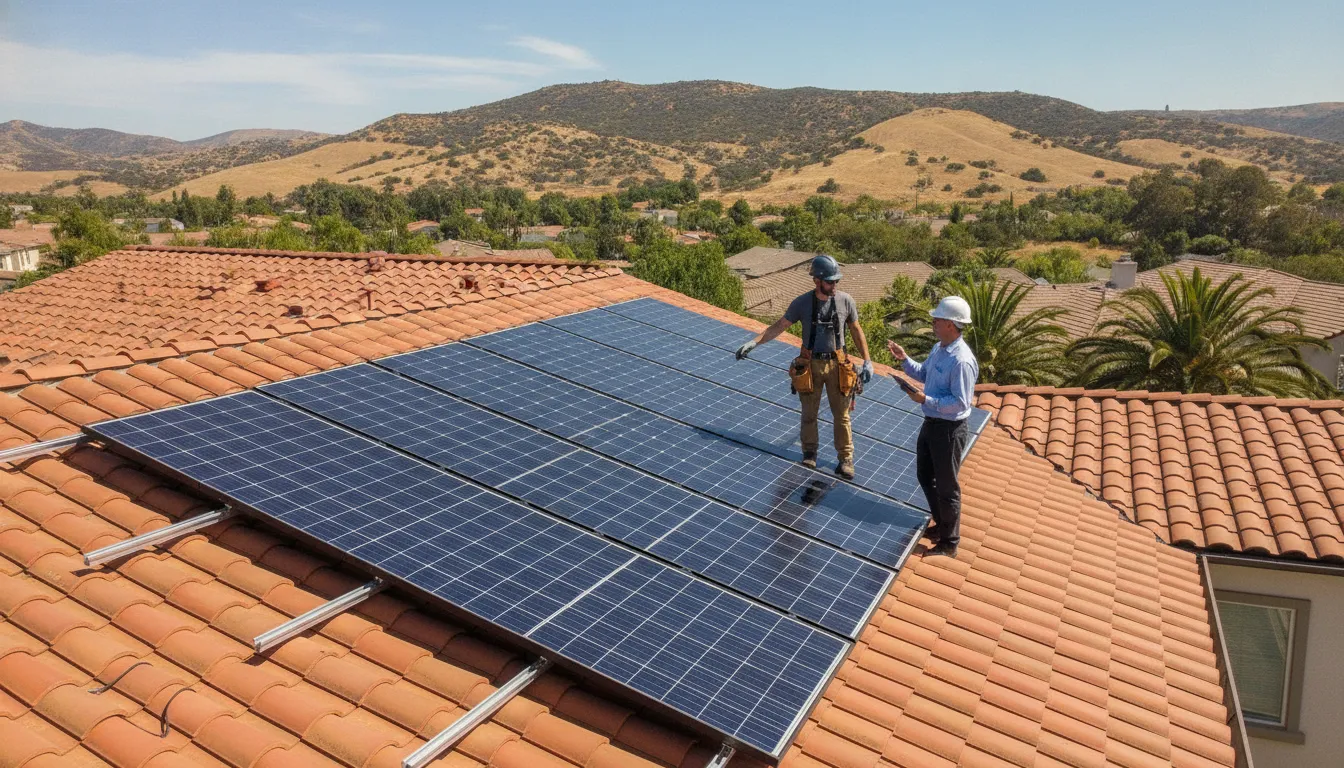
Solar Interconnection in California: The Utility Half of the Process
Receiving a local building permit does not by itself authorize a new solar system to operate in parallel with the electric grid. Interconnection is a separate approval process handled with the utility that serves your property. Under California's current net billing framework, often called NEM 3.0, that review addresses how the system connects to the grid and how exported electricity is handled. The California Public Utilities Commission's net energy metering information provides the state's regulatory context.
What utilities review
The utility application typically identifies the proposed equipment, system capacity, electrical design, service information, and the property's account details. Utility requirements and submission timing can vary by provider, so the interconnection paperwork needs to match the approved project design. If the system includes a battery, its operating configuration and connection to the electrical service may also be part of the review.
This is why the utility process should be coordinated with, rather than confused with, the local building permit homeowners receive from a city or county. The building department focuses on code compliance at the property, including structural and electrical requirements. The utility focuses on safe grid connection and export. Approval from one does not replace approval from the other.
For homeowners comparing options, how NEM 3.0 works can help explain the relationship between on-site energy use, storage, and electricity sent back to the grid. The right design depends on the home's load profile, utility territory, equipment, and project goals.
After installation, the local building department must complete the required inspections. The utility can then finalize the interconnection review. Permission to Operate, or PTO, is granted by the utility only after the project has passed the applicable local inspections and secured interconnection approval. Until PTO is issued, the system should not be switched on for normal grid-connected operation.
AMECO coordinates the utility application as part of its end-to-end process, alongside local permitting and inspection support. That helps keep the submitted design, installed equipment, inspection results, and utility records aligned. Requirements still depend on the property and utility, but homeowners have one experienced team managing the handoffs instead of navigating each approval separately.
How Long Does Solar Permitting Take in California?
In short, solar permitting in California can take a few days or several weeks, depending on the jurisdiction and review method. AMECO's average project reaches activation in about two months from contract, including permitting, installation, and interconnection.
There is no single statewide answer to how long the solar permitting process takes in California. The schedule depends on the authority having jurisdiction, the completeness of the submitted plans, and the system design. It also depends on whether the local building department uses an automated approval platform or a manual review process. For many residential projects, permitting may take a few weeks, but that range is not a promise for every property or city.
Automated platforms can shorten the administrative portion of the process for qualifying systems by checking code requirements and issuing permits in real time. Manual reviews generally require department staff to examine the plan set, request revisions when needed, and schedule the next review after corrections are submitted. Local workload, holidays, inspection availability, roof conditions, and electrical changes can all affect the actual timeline.
What can speed up or slow down approval?
A complete, property-specific application is one of the most useful ways to avoid preventable delays. Structural calculations, roof layouts, electrical diagrams, equipment information, and required fire-access details need to agree with one another. If the building department identifies an incomplete plan, a structural concern, or a need for a main service panel upgrade, the project may require extra engineering and revisions. It may also need additional inspections or utility coordination.
California's automated permitting requirements are intended to make eligible residential approvals more efficient, but availability and implementation still vary by jurisdiction. A platform may reduce review time without eliminating the broader project steps. Solar installation also involves local inspections and a separate utility interconnection process before permission to operate is issued.
As a practical benchmark, AMECO's average project takes about two months from contract to activation, including permitting, installation, and interconnection. That is an average for AMECO projects, not a universal permitting estimate. The permitting portion may be shorter or longer depending on the local agency and the home's requirements. For a broader view of the complete schedule, see how long solar installation takes.
AMECO coordinates the permit process, responds to plan comments, and helps manage the steps through final inspection. Asking for a project-specific schedule is more useful than relying on a statewide average. Especially when a roof replacement, panel upgrade, battery, or unusual site condition is part of the design.
Common Solar Permit Hurdles and How AMECO Handles Them
Even a straightforward solar project can encounter questions during California's permit review. Local building departments compare the submitted design with structural, electrical, and fire-safety requirements, while the utility manages a separate interconnection process. That is why an application that looks complete to a homeowner may still need technical clarification before work can proceed.
Incomplete plans and local review comments
Missing site details, inconsistent dimensions, or incomplete electrical information can delay approval. A typical residential submittal may include structural calculations, a roof layout, and electrical single-line diagrams. If the building department requests additional information or changes, AMECO prepares the revisions and resubmits the plans on the customer's behalf. The team manages the permit process from initial submission through final inspection, rather than leaving the homeowner to interpret agency comments or track separate deadlines.
This end-to-end approach matters because requirements can vary among jurisdictions. California's automated permitting rules may streamline qualifying projects, but the applicable process still depends on the local authority, system design, and property. For a closer look at why permitting can become a sticking point, read the solar permitting process.
Structural deficiencies and roof conditions
A permit review can uncover concerns about roof integrity, mounting locations, structural capacity, or required emergency access paths. AMECO's engineering team reviews the roof during the design phase before plans are submitted. That early review helps identify conditions that may require repair, reinforcement, or a different array layout. Because AMECO combines solar and roofing services, customers can coordinate related work through one integrated contractor instead of managing disconnected teams.
Main service panel upgrade requirements
An existing electrical panel may be outdated or lack enough capacity for the planned solar system. In that situation, a main service panel upgrade may be required by electrical code. AMECO evaluates the service equipment during design, documents the appropriate solution, and incorporates the electrical work into the permit and installation plan. This avoids treating a panel issue as an unexpected problem at the end of the project.
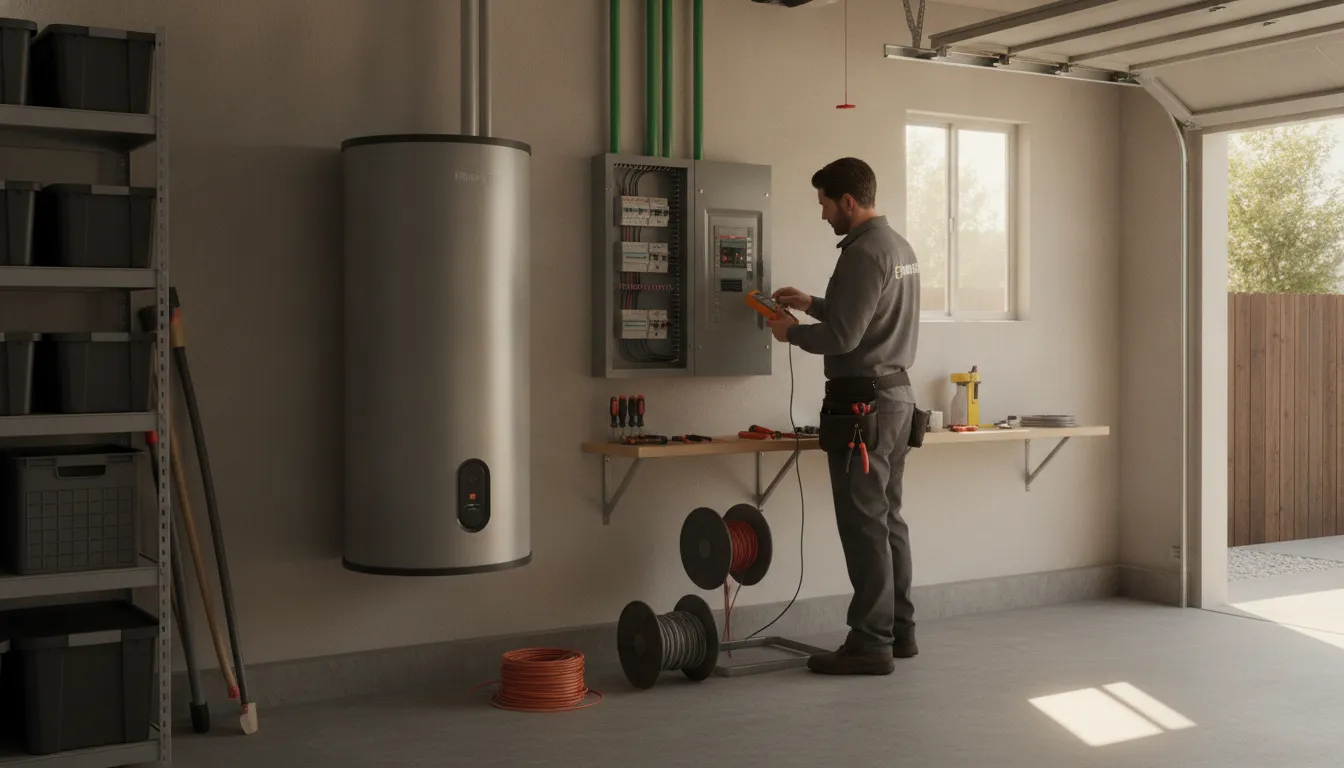
AMECO also coordinates inspection scheduling and utility requirements after installation. Its vertically integrated crews support continuity from design through field work, and the company operates under California Solar Contractor License #483280. Homeowners can review the broader process in AMECO's professional solar installation guide.
Frequently Asked Questions
Do I need a permit to install solar panels in California?
Yes. A local building permit generally must be approved before solar installation work begins. The permit review checks structural capacity, electrical safety, roof access, and compliance with local requirements. Typical submittals include structural calculations, a roof layout, and electrical diagrams. Requirements can differ by city or county, so the applicable building department and approved plans determine what your project needs. California's Solar Permitting Guidebook explains the permitting and inspection framework.
Does a building permit include utility interconnection and NEM 3.0 approval?
No. The building permit and utility interconnection are separate parts of the process. Your utility reviews the interconnection application and, after the local inspections and other requirements are satisfied, grants permission to operate. NEM 3.0, also called the Net Billing tariff, affects how the utility handles exported energy, but it does not replace the local building permit. See the California Public Utilities Commission's NEM information for tariff details.
What happens if my electrical panel cannot support the new system?
The design and permitting review may identify a need for a main service panel upgrade. This can happen when an existing panel is outdated or does not have enough capacity for the proposed solar and storage equipment. The upgrade, if required, should be included in the plans and completed in accordance with applicable electrical requirements before final approval.
How long does the solar permitting process take in California?
There is no universal timeline. The duration depends on the local jurisdiction, plan complexity, utility requirements, inspection availability, and whether the area uses automated permitting. AMECO coordinates permit submissions, revisions, inspections, and utility steps for its customers, while keeping the homeowner informed as the project moves forward.
Ready to Get An Estimate?
Understanding permits, inspections, and utility interconnection can make planning a solar project clearer. AMECO can help coordinate the process based on your property, roof, local jurisdiction, and utility requirements. To discuss your project and next steps, Get An Estimate from AMECO Solar & Roofing.
8.5.2026
Solar panels are designed for decades of service, but their useful life does not end the moment production declines. In California, the first large wave of residential systems is now approaching that point, creating practical questions about removal, reuse, recycling, and disposal.
Get a free consultation for your solar panel recycling and end-of-life plan.
Solar panel recycling California programs can route aging modules to qualified handlers that recover useful materials and reduce landfill waste. But the right process depends on the panel, its condition, and applicable state requirements.
Most panels have a typical 25-to-30-year life cycle, and more than 1.3 million California rooftops received solar after incentive programs expanded in 2006, according to the Los Angeles Times. Understanding the rules before removal helps homeowners avoid unsafe handling and make a better long-term plan for their energy system.
California's approach treats end-of-life panels as a regulated material stream, with specific responsibilities for businesses that manage them. Here is what homeowners should know about those requirements and the decisions that follow.
California's Solar Panel Recycling Regulations
California has more than 49 gigawatts of installed solar capacity as of the end of 2024, according to SOLARCYCLE. As the state's early installations reach retirement, knowing the rules for handling photovoltaic modules matters for homeowners, installers, businesses, and waste handlers.
Solar panels are regulated as universal waste
Since January 1, 2021, California has allowed waste photovoltaic modules to be managed under the state's Universal Waste Program. The framework is intended to simplify end-of-life handling while supporting safe collection, transport, storage, and recycling. California's Title 22, Division 4.5, Chapter 23 defines universal waste and establishes management requirements for these materials.
This classification does not mean an old panel can be placed in a household recycling bin or discarded with ordinary trash. A module should be evaluated and directed through an appropriate collection or recycling channel. The California Department of Toxic Substances Control (DTSC) provides the governing guidance and regulatory details.
DTSC notification and reporting requirements
California businesses that intend to manage waste PV modules as universal waste must notify DTSC of their universal waste management activities. Additional reporting requirements apply at specified volumes. A universal waste handler must submit an annual written report by February 1 of the following year if it accepts more than 100 kilograms (or 200 pounds) of PV modules from any off-site source. The same reporting requirement applies to a handler that generates 5,000 kilograms, or 10,000 pounds, or more of PV modules during a calendar year.
These thresholds are especially relevant to contractors, warehouses, collection sites, and other commercial operations handling multiple systems. Homeowners generally will not manage enough material to trigger these business reporting obligations. But they should still use a qualified installer, hauler, or recycler rather than arranging informal disposal.
Why the rules may continue to evolve
California Senate Bill 489 authorized DTSC to adopt regulations designating certain end-of-life PV modules identified as hazardous waste as universal waste. Federal policy may also change. The U.S. Environmental Protection Agency is expected to move photovoltaic modules toward a Universal Waste framework in 2026. Although the timing and final requirements should be confirmed as federal rulemaking develops.
For a quick comparison of how California's approach differs from the current federal baseline and expected future changes:
| Aspect | California (Current) | Federal RCRA (Other States) | Expected EPA Change |
|---|---|---|---|
| Waste classification | Universal waste. | May require hazardous waste determination. | Universal waste (proposed). |
| Handler notification | Required for businesses. | Depends on waste classification. | Streamlined notification. |
| Interstate transport | Hazardous waste determination required when shipping out of state. | Hazardous waste rules apply. | Simplified interstate logistics. |
For the current California requirements, consult DTSC guidance before transporting or managing panels, particularly across state lines.
Get a solar panel replacement and recycling estimate.
How Solar Panel Recycling Works in California
Solar panel recycling is a controlled materials-recovery process, not simply a matter of placing an old module in a standard recycling bin. The goal is to separate the panel into usable components, manage potentially regulated materials safely, and reduce the amount sent to a landfill. Silicon modules represent about 95% of the solar panel market. For these modules, current recycling systems achieve roughly 10% to 15% circularity by weight, while the remaining material may be downcycled or landfilled. Recovery performance varies by facility and technology, so ask what a recycler actually recovers and where each material goes.
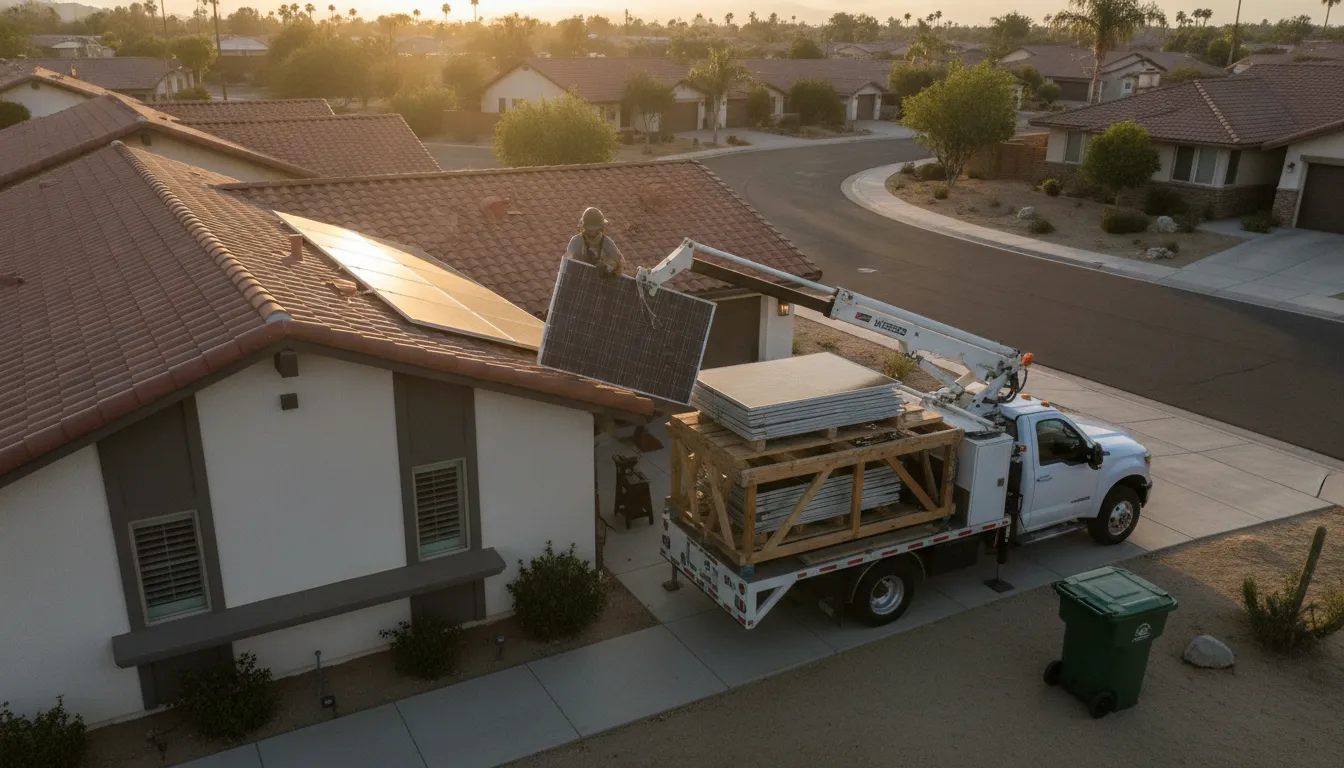
- Collection and transport. A homeowner, installer, or property manager arranges removal and transports the modules through an appropriate waste or recycling channel. Panels should be handled to limit breakage, especially when glass is cracked. California regulates waste PV modules under its universal waste program, so businesses managing them should use properly qualified handlers and follow applicable requirements.
- Disassembly. At the facility, workers or processing equipment remove the aluminum frame, junction box, copper wiring, and other attached components. Aluminum and copper can usually enter established metal-recycling streams. This first separation also makes the laminated glass-and-cell portion easier to process.
- Glass separation. Glass is typically the largest component by weight. Recyclers separate it from the encapsulant and solar cells using mechanical or thermal methods, then prepare it for reuse or a secondary glass application. Recovering this material can substantially reduce the volume of panel waste sent to landfills.
- Silicon cell recovery. The cell layer is separated and processed to recover silicon and, where economically practical, silver and other valuable materials. These materials may be refined for manufacturing or downcycled into other products. Understanding the cell layer helps explain why solar panel component recovery depends on more than removing the visible frame.
- Material refining and verification. Recovered streams are sorted, cleaned, and refined so they meet the specifications of their next use. R2v3-certified recyclers can provide stronger chain-of-custody and recovery documentation, and some facilities report recovery of all useful materials from the modules they process. Before selecting a provider, request details about certification, downstream buyers, landfill diversion, and the treatment of materials that cannot be reused.
This sequence allows solar panel recycling in California to recover glass, aluminum, silicon, and silver while reducing disposal risks. The right end-of-life route depends on the module type, condition, quantity, and the recycler's capabilities. Homeowners can also explore solar carport installations as a way to integrate new panels without removing older roof-mounted systems entirely.
The Environmental Risks of Improper Solar Panel Disposal
Solar panels are built for a long service life, but they do not disappear when their useful output declines. California's early rooftop-solar expansion created a large future waste stream. The Los Angeles Times reported that more than 1.3 million rooftops received panels after state incentives began in 2006. But at that time California did not yet have a comprehensive disposal plan. Many homeowners and installers were left without clear end-of-life guidance. Read the Los Angeles Times report.
Heavy metals can become an environmental concern
Solar modules contain valuable recoverable materials, including glass, aluminum, silicon, and silver. Some solar components can also contain heavy metals and other substances that require careful handling. When panels are broken, dumped, or sent to an unsuitable landfill, those materials can create contamination risks for soil and water. Proper recycling keeps more material in controlled processing channels and reduces the amount of panel waste entering landfills.
Why TCLP testing matters
Not every used panel is automatically treated the same way under waste regulations. The Toxicity Characteristic Leaching Procedure, commonly called TCLP. Evaluates whether contaminants can leach from a waste material at levels that would trigger classification as hazardous waste under the federal Resource Conservation and Recovery Act, or RCRA. The result can depend on the panel design, its condition, and the specific waste-handling circumstances.
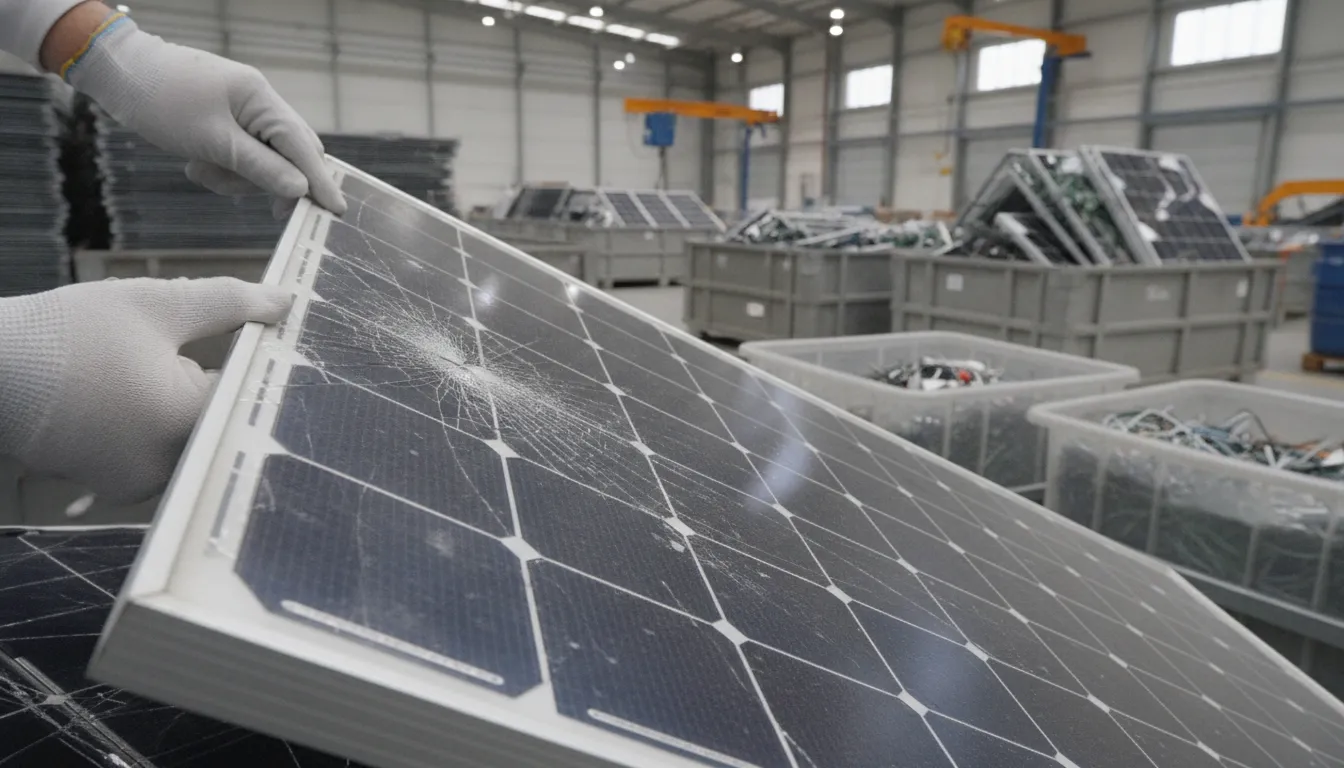
That determination matters because hazardous-waste requirements affect transportation, storage, documentation, and the facility permitted to receive the material. A panel that is simply placed in a waste stream without the appropriate evaluation may expose handlers and the environment to avoidable risk. Working with qualified recyclers and following California requirements helps ensure that testing and classification decisions are made before shipment or disposal.
The waste stream will continue to grow
As more first-generation systems age out, end-of-life panels will arrive alongside newer modules replaced after storm damage, equipment upgrades, or roof work. Recycling infrastructure and responsible disposal practices therefore matter beyond any single homeowner's project. Planning ahead can keep usable materials circulating, reduce landfill volume, and support a safer approach to solar panel recycling California homeowners can rely on.
What California Homeowners Should Plan for Today
End-of-life planning is easier when it starts before panels stop producing useful energy. Solar modules are designed to last about 25 to 30 years, but the right next step depends on the equipment, roof condition, system design, and local handling options. A certified solar installer can review those details and help you choose between continued operation, replacement, decommissioning, or recycling.
Check the manufacturer and installer options
Start by gathering the original system records, including module and inverter model numbers, installation documents, warranty information, and any service history. Ask the manufacturer whether it offers a take-back or recycling program, and ask your installer whether it has an established process for removing and routing retired equipment. Programs can change, so confirm current requirements rather than assuming that an old warranty includes removal or transportation.
It is also worth researching certified recyclers before you need one. Ask how the recycler handles photovoltaic modules, whether it accepts your equipment type, where materials are processed, and how it documents the transfer. A reputable provider should be able to explain its chain of custody and distinguish recycling from general disposal. California regulates waste PV modules under its Universal Waste Program. And commercial handlers may have notification or reporting obligations, so homeowners should use professionals familiar with the applicable rules. Review California DTSC guidance when evaluating a proposed provider.
Budget for removal, transport, and the roof
Set aside a decommissioning budget that accounts for more than recycling alone. Potential costs include electrical disconnection, labor, safe removal from the roof, packaging, transportation, recycling fees, and replacement or repair of roofing materials. If the roof will need work at the same time. Coordinating the solar and roofing scopes can reduce duplicated labor and help clarify responsibility for flashing, attachments, and reinstalling equipment. Pairing solar panel recycling with roofing services from a qualified contractor simplifies project coordination when both the roof and the panels need attention.
For broader guidance, AMECO's solar system end-of-life management resources can help you organize the system's final service stage. Its maintenance guidance also explains why planning for proper solar panel disposal belongs in a long-term maintenance record. And if you are considering a system refresh, solar pool heating California is one example of how new solar installations can serve different household needs.
Leave a clear record for the next owner
Keep a digital and printed system file with equipment details, permits, service invoices, roof work, monitoring access, and your preferred recycling contacts. Include notes about any removed components and the date they were transferred. This documentation helps future owners understand what remains on the property and prevents usable equipment from being treated as unidentified waste.
Working with an integrated solar and roofing contractor can simplify decisions when the panels, mounting system, and roof reach different stages of their useful lives. The installer can assess the full property instead of treating panel removal as an isolated task. Contact AMECO Solar and Roofing to discuss your system's long-term options.
Frequently Asked Questions
How do you dispose of solar panels in California?
Start by contacting the installer or a qualified solar service provider to assess whether the panels can be repaired, reused, or should be recycled. If recycling is appropriate, use a facility or hauler that accepts photovoltaic modules and follows California handling requirements. Do not place panels in household trash or leave them at the curb. A professional can also coordinate removal, packaging, transportation, and documentation for the specific system.
How much does it cost to recycle solar panels in California?
There is no single statewide recycling price. The total depends on the number and type of panels, their condition, removal and roof-access requirements, transportation distance, and the recycler's processing fees. Ask for an itemized estimate that separates system removal, freight, recycling, and any replacement work. A solar professional can help compare recycling with repair, reuse, or a larger system upgrade.
Are solar panels considered hazardous waste in California?
California manages waste photovoltaic modules under its Universal Waste Program, which provides specific end-of-life handling requirements. The California Department of Toxic Substances Control explains that the PV-module rules took effect January 1, 2021: DTSC PV module regulations. Classification and requirements can differ when modules are shipped outside California, so use a qualified handler rather than assuming ordinary disposal rules apply.
Why are solar panels reaching the end of their life cycle in California?
Most panels are designed to last about 25 to 30 years, although they may continue operating beyond that period with declining output. California's earlier waves of residential and commercial installations mean more systems are now approaching decisions about repair, replacement, reuse, or recycling. An installer can evaluate production data and physical condition before recommending removal.
How can homeowners reduce landfill waste when replacing panels?
Ask the installer where removed modules will go and whether the receiving facility documents material recovery. Recycling can reclaim materials such as silicon, silver, aluminum, and glass for future manufacturing, while reducing the volume sent to landfills. Keep records of the panel model and removal date, and request confirmation of the final recycling or disposal route.
Ready to plan your solar system's next phase? Schedule a free consultation.
8.4.2026
Tile roofs are a familiar part of California home design. But adding solar to clay or concrete tile calls for more than attaching panels to an existing roof surface. The installation must account for fragile tiles, structural load, specialized mounting hardware, and the roof's weatherproofing.
Yes, solar on tile roof projects is possible, but the work requires tile-specific mounting methods, careful flashing, and a contractor who understands both roofing and solar installation.
That combination matters because the right approach protects the roof while creating a sound foundation for your solar system. A qualified installer should be prepared to inspect the roof, plan around its tile profile, and address repairs or reinforcement before work begins. Understanding why tile roofs require a different installation approach is the first step toward evaluating your options and choosing the right solar panel installation partner.
Get a free estimate for your tile roof solar project and learn how AMECO can design a system that protects your roof while maximizing energy production. A site-specific assessment is the best way to understand your options.
What Makes Tile Roof Solar Installation Different From Other Roof Types?
Solar on tile roof installation differs from composition shingle roofs because clay and concrete tiles are fragile, shaped differently, and require specialized mounting hardware that preserves the roof's weather barrier while transferring panel weight to the structure beneath.
Solar installation on a composition shingle roof and solar installation on a tile roof are not interchangeable jobs. Clay, concrete, Spanish, and S-mission tiles are shaped, layered, and supported differently, so the installation plan must account for both the roof covering and the system's mounting points. Tile roofs are also more vulnerable to damage from concentrated pressure. As a result, solar on tile roof projects require specialized mounting hardware and careful handling to protect the roof's integrity.
Tile can crack under concentrated pressure
Clay and concrete tiles can crack under point loads, including pressure from foot traffic, equipment, or a worker's weight in the wrong location. A cracked tile may not cause an immediate interior leak, but it can weaken the roof's weather barrier and create a repair issue after the solar crew leaves. Tile roofs are fragile enough that even routine movement across the roof requires more planning than it would on many composition shingle systems.
Experienced installers prepare the work area before carrying equipment onto the roof. They plan access and staging points, distribute weight where possible, and use proper tile-lifting techniques rather than treating the tile surface like a walkable deck. When walking on a tile roof is necessary, the installer should step on the headlap. The stronger overlapping area where one tile is supported by the tile beneath it, instead of placing weight on the exposed center or lower edge. The exact approach depends on the tile profile, roof condition, and access plan, but the goal is consistent: avoid unnecessary point loads and handle each tile deliberately.
Mounting hardware must work with the roof profile
Solar racking cannot simply be fastened through a tile wherever a convenient attachment point appears. The mounting method must accommodate the tile profile, preserve drainage, and create a durable connection to the roof structure beneath it. Specialized systems may bridge over tiles, while other approaches involve carefully removing tiles and replacing them around properly installed flashing and mounts. In either case, the hardware and installation details need to prevent pressure from being transferred directly to a fragile tile.
These details are why it helps to evaluate the compatibility of roofing materials with solar before choosing an installation approach. AMECO Solar & Roofing brings solar and roofing expertise together, so the project can be evaluated as one roof-and-energy system rather than as separate scopes of work. That integrated perspective helps identify vulnerable tiles, access constraints, and mounting requirements before installation begins.
Compression Mounts vs. Tile Replacement: How Solar Panels Are Secured
Solar on tile roof projects typically use one of two approaches. The right choice depends on the tile profile, roof condition, mounting layout, underlayment, and the installer's ability to protect the roof envelope. A site assessment should come before selecting hardware, since a method that works well on one clay or concrete tile roof may not suit another.
| Consideration | Compression mounts or tile hooks | Tile replacement or comp-out |
|---|---|---|
| How it works | Hooks or compression hardware sit on top of, or between, selected tiles and bridge over the tile surface. The rail and panel load is transferred through the mounting assembly rather than requiring every tile to be removed. | Selected tiles are removed and replaced with composite shingle sections or another engineered roofing piece. Integrated flashing is installed at the attachment point, creating a planned transition around the mount. |
| Cost considerations | May reduce tile handling and replacement work, which can make it an efficient option when the existing tiles and roof layers are in suitable condition. Final cost still varies with access, roof geometry, equipment, and attachment count. | Usually involves more materials and roofing labor at each attachment. The additional preparation can increase project cost, but it may be appropriate when a cleaner, more integrated detail is important. |
| Labor intensity | Often requires careful tile lifting, alignment, and load distribution. Installers must work around the existing profile without placing damaging point loads on fragile clay or concrete tiles. | Requires coordinated removal, flashing installation, replacement material, and sealing. A U.S. Department of Energy study found that flashings and PV installation took around 2.4 worker-hours per kW on average for the roofing-integrated systems it evaluated: review the study methodology. |
| Waterproofing | Water management depends on correct placement and compatible flashing around the hook. The tile must remain properly seated so the roof can continue directing water away from penetrations. | Specialized flashing kits and replacement tiles can integrate with the roof profile and help maintain the waterproofing barrier. Every transition still needs to be installed according to the roof and hardware specifications. |
| Aesthetics and durability | Preserves more of the visible tile field, though hardware may affect the profile around the array. Long-term performance depends on secure attachments, sound roof materials, and periodic inspection. | Can create a more deliberate, low-profile attachment detail because the selected tiles are replaced rather than cut around a mount. Durability depends on the replacement material, flashing, fasteners, and workmanship. |
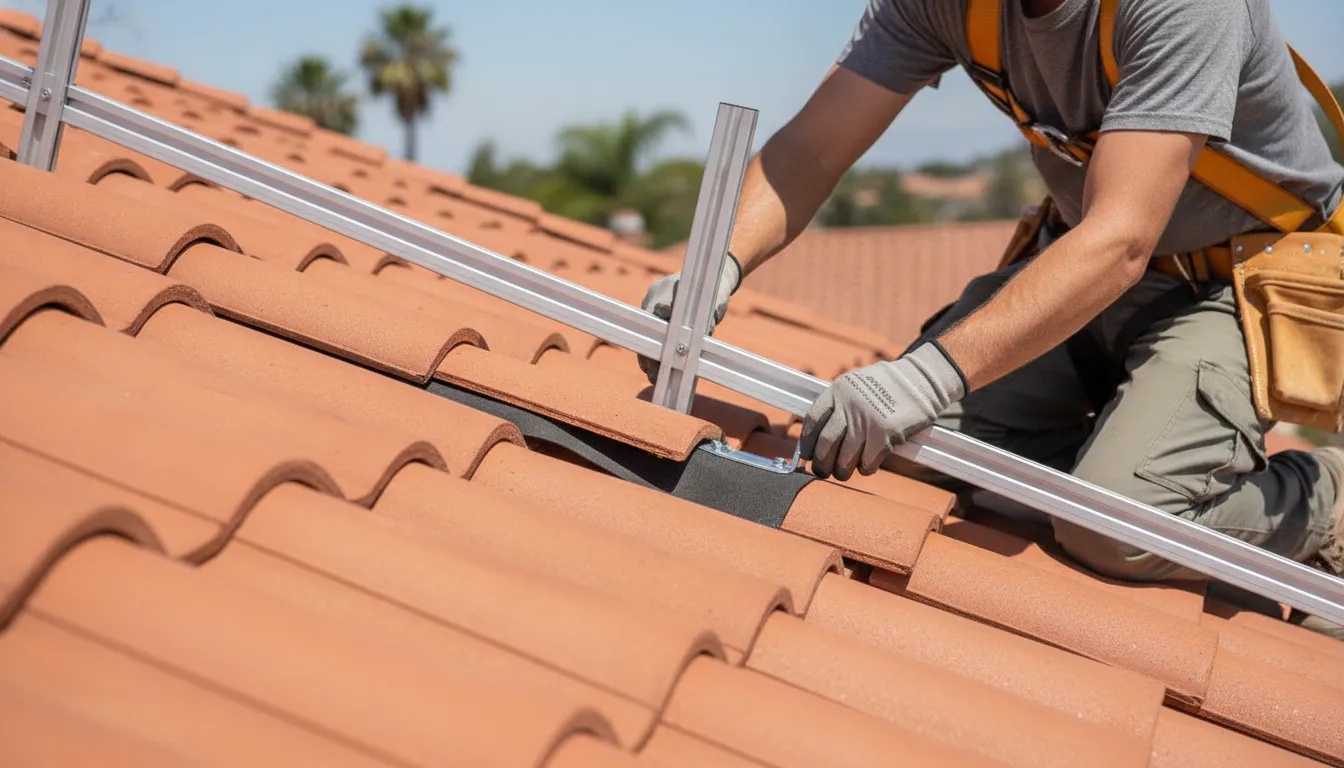
Before choosing between these methods, review preparing your roof for solar energy. A roofing and solar assessment can identify broken tiles, aging underlayment, structural concerns, and access limitations early. Helping your installer recommend a mounting detail that protects both the array and the roof.
How Do Installers Keep Tile Roofs Watertight After Solar Installation?
Installers keep tile roofs watertight by using integrated flashing kits at every penetration point, inspecting and replacing the underlayment where needed, and coordinating roofing and solar work in the correct sequence to preserve the roof's layered weather barrier.
A solar installation changes the roof envelope wherever mounting hardware passes through or sits above the tile surface. The goal is not simply to secure the racking. It is to preserve the layered system that keeps wind-driven rain away from the roof deck, framing, insulation, and interior of the home.
Flashing is the leak-prevention detail
Every roof penetration needs a deliberate path for water to shed around it. On a tile roof, that typically means using flashing kits designed to integrate with the profile of the existing clay or concrete tile. Along with carefully fitted replacement tiles where needed. Specialized flashing is essential because a generic sealant patch may deteriorate, shift, or leave water trapped beneath the tile. The mounting penetration is only as reliable as the flashing and drainage details around it.
Installation also requires controlled staging and roof preparation before panels or rails are carried into place. That preparation can include identifying the rafter locations, protecting walk paths, lifting tiles without point-loading them, and setting aside tiles that need to be replaced. A DOE-hosted time-and-motion study found that flashing and PV installation averaged about 2.4 worker-hours per kilowatt in the systems studied. Illustrating why this portion of the work deserves more than a quick seal-and-go approach. Review the study details for additional context.
Underlayment is part of the weatherproofing system
Tiles are the visible outer layer, but the underlayment beneath them provides an important secondary water-shedding surface. Building-code expectations changed during the mid-1980s, and the age and jurisdiction of a roof can affect what underlayment is present and what repairs require today. Before installing solar, a contractor should inspect the accessible roof assembly and determine whether the underlayment is intact, appropriately installed, and suitable for the planned mounting work. If the roof has deteriorated under the tiles, adding panels without addressing that condition can make future leak repairs more disruptive.
Choose roofing expertise, not solar experience alone
Leak prevention depends on coordinating roofing and electrical work in the right sequence. A contractor who understands both disciplines can evaluate the roof before attachment points are finalized, use the correct flashing and tile-handling methods. And identify weatherproofing concerns that may be missed by an installer focused only on the array. AMECO's professional roofing services support that integrated evaluation. For a broader planning checklist, see our guide to roofing considerations for solar panel installations.
With solar on a tile roof, waterproofing is not an afterthought. It is part of the design, preparation, mounting, and final inspection process.
Why an Integrated Solar and Roofing Contractor Matters for Tile Roofs
An integrated solar and roofing contractor simplifies tile roof projects by managing roof condition, mounting design, waterproofing, and electrical work as one coordinated scope, eliminating coordination gaps between separate crews.
Choosing a contractor who understands both roofing and solar can simplify a tile roof project before installation begins. When separate companies handle the work, the homeowner often becomes the project manager. The roofing crew may need to repair or replace tiles before the solar crew arrives, while the solar installer may identify roof conditions that change the original plan. Scheduling conflicts, unclear handoffs, and questions about who is responsible for a damaged tile or leak can quickly turn a straightforward project into a coordination problem.
With an integrated contractor, roof condition, mounting design, waterproofing, and electrical installation can be evaluated as one project. AMECO Solar & Roofing has operated continuously since 1974, combining solar and roofing services under one California-based company. That experience matters on tile roofs, where careful tile handling and tile-specific flashing are as important as panel layout and electrical design. AMECO provides tile roof repair and replacement services, along with solar panel installation, so roofing work does not have to be managed through a disconnected contractor relationship.
One team means clearer responsibility
If a tile cracks during installation or a leak appears after the work is complete. Separate contractors may disagree about whether the cause was the roof, the mounting hardware, or the solar installation. An integrated team can inspect the complete assembly and address the issue within a single scope of work. This does not eliminate the need for careful documentation or a property-specific assessment. But it gives the homeowner a clearer path for questions about workmanship, repairs, and warranty coverage.
California requirements are part of the design
Local requirements can affect how a tile roof solar system is designed and approved. Some California cities require architectural review for solar projects, with guidelines intended to evaluate architectural appropriateness and neighborhood compatibility. Santa Barbara's solar design guidelines illustrate how architectural review may apply to certain projects. A contractor familiar with California permitting and local expectations can identify these considerations early instead of treating them as a late-stage surprise.
AMECO holds California contractor license #483280 and is an Owens Corning preferred contractor. Its broader roofing and solar capabilities are supported by a 40-year equipment warranty and more than 3,780 installations. For a tile roof, the strongest choice is not simply the company that can place panels on a roof. It is the team that can assess the roof, plan the attachment method, coordinate any repair or replacement, and remain accountable for the finished system.
Frequently Asked Questions
Can you put solar panels on a tile roof?
Yes. Solar can be installed on clay or concrete tile roofs when the contractor uses a tile-appropriate mounting system and plans each attachment around the roof structure. The right approach depends on the tile profile, roof condition, rafter layout, and local permitting requirements.
Does solar panel installation damage tile roofs?
It should not when the work is performed with proper tile-handling techniques. Tile is vulnerable to cracking from point loads, so experienced crews protect walking paths. Remove tiles carefully when needed, and use specialized flashing or replacement tiles around roof attachments. A pre-installation inspection also helps identify brittle or damaged areas before work begins.
Is solar more expensive to install on a tile roof?
It can be, because tile roofs may require additional preparation, careful handling, specialized hardware, and more labor than simpler roof surfaces. Your project cost depends on the roof design, access, tile condition, array layout, electrical work, equipment, and any repairs or replacement recommended after inspection. A site-specific estimate is more useful than a universal price.
Should I replace my tile roof before installing solar?
Not necessarily. If the roof is structurally sound and has substantial service life remaining, solar may be installed without a full replacement. If tiles, underlayment, or flashing are already near the end of their useful life. Completing roof work first can reduce the chance of removing and reinstalling the array later. Have the roof and solar plan evaluated together before deciding.
Ready to explore solar for your tile roof?
A project-specific review can help you understand how your roof, energy needs, and installation requirements fit together before you move forward. AMECO's integrated solar and roofing experience supports a coordinated approach for California homeowners. When you are ready, get an estimate for your tile roof solar project and take the next step toward a plan tailored to your home.
7.31.2026
In California, a solar carport can do more than produce electricity. It can shade vehicles, create a more comfortable area around the home, and make practical use of space that a conventional rooftop array cannot reach.
A solar carport California homeowner chooses can combine a weather-protective structure with photovoltaic panels, allowing the property to generate power while supporting future EV charging and, when designed for it, battery storage. The U.S. Department of Energy describes solar canopies as dual-use photovoltaic structures and notes benefits such as vehicle shade and EV charging integration: Energy.gov explains the dual-use approach.
The right design depends on available space, the home's electrical needs, permitting requirements, and whether the structure will support charging or backup power. Understanding how the canopy is positioned and connected is the first step toward comparing it with rooftop solar.
How a Solar Carport in California Works
A solar carport combines a structural canopy with a photovoltaic system, allowing the same footprint to produce electricity and serve as covered parking. Unlike a conventional rooftop array, it does not depend on having a suitable, unobstructed roof surface. Parking areas, driveways, and other parts of a property that may not qualify for traditional rooftop solar can become productive energy-generating space.
The U.S. Department of Energy classifies solar carports and parking shade structures as a commonly recognized form of building-integrated photovoltaics (BIPV). In this dual-use approach, solar materials replace part of the conventional roofing material while the structure continues to provide a practical function. The result is more than an array mounted above a parking area. It is an engineered shade structure designed around electrical production, drainage, clearance, safety, and everyday vehicle access.
The main components of a solar carport
Most systems include three connected elements:
- Solar panels: Photovoltaic modules capture sunlight and convert it into direct-current electricity.
- Racking and canopy structure: Engineered steel or aluminum supports hold the modules at an appropriate angle and provide the clearance needed for vehicles, pedestrians, and maintenance.
- Inverter and electrical equipment: The inverter converts the panels' electricity into alternating current for use in the home or business, with additional equipment connecting the system to the property's electrical service.
Design details depend on the site. A qualified installer evaluates the available parking area, sun exposure, structural requirements, utility connection, permitting needs, and future electrical loads. If electric vehicle charging is part of the plan, it is worth considering conduit, electrical capacity, and charger-ready infrastructure during the initial design. The Department of Energy notes that preparing for chargers during construction can reduce the cost and disruption of a later retrofit.
Energy generation and vehicle shade in one structure
Everyday benefits extend beyond electricity production. A well-designed canopy shades vehicles from direct sun, can make parked cars more comfortable, and may help reduce localized heat island effects. It can also create a logical location for EV charging, especially when paired with battery storage or other load-management equipment.
For California property owners comparing solar options, the right design balances energy goals with how the site is actually used. AMECO's experience and its REC Gold Tier recognition for 2026 support a careful, equipment-aware approach, but final system design still depends on the property, electrical use, and utility territory.
Solar Carport vs Rooftop Solar: Key Differences for California Homeowners
Both options can produce meaningful electricity in California, but they solve different property and design problems. Rooftop solar uses an existing structure, while a carport creates a new one over parking or another open area. The better choice depends on roof condition, available space, electrical needs, and whether covered parking or EV charging is part of the project.
| Consideration | Rooftop solar | Solar carport |
|---|---|---|
| Typical cost comparison | Case study estimates place rooftop systems at about $1.80 to $2.20 per watt. | Case study estimates place carports at about $2.60 to $3.20 per watt. A residential project may total $15,000 to $30,000 before incentives, depending on scope. |
| Structural requirement | The roof already provides the mounting structure, so the structure itself is effectively included. | An engineered structure can add roughly $5,000 to $12,000. Site conditions, permitting, drainage, and foundation requirements affect the final figure. |
| Use of space | Uses otherwise available roof area, provided the roof has suitable condition, orientation, and usable space. | Uses parking or other open areas that may not be eligible for traditional rooftop solar. The U.S. Department of Energy identifies carports and parking shade structures as dual-use photovoltaic applications: Energy.gov guidance on solar-shaded canopies. |
| Array capacity | Limited by roof dimensions, setbacks, roof penetrations, shading, and structural capacity. | May accommodate a larger array when the site has sufficient parking or open area. A SurgePV case study compared approximately 280 kWp of rooftop capacity with about 500 kWp of carport capacity at a commercial site; residential results will vary. |
| Everyday benefits | Generates electricity without changing how the property is used below the panels. | Can provide covered parking, vehicle shade, and a planned location for EV charging. Planning charging during construction can reduce the disruption and cost of a later retrofit, according to the Department of Energy guidance above. |
California receives roughly 5.5 to 6.5 peak sun hours per day, so either system can have strong production potential when properly oriented and designed. The OhmSnap estimates and SurgePV case study figures are planning references, not universal quotes. A solar carport California project should be evaluated against the home's energy use, roof condition, parking layout, utility requirements, and future EV or battery plans.
Solar Carport Cost and Incentives for California Homeowners
The cost of a residential solar carport in California commonly falls in the range of $15,000 to $30,000 before incentives, but that figure is only a planning range. Your final estimate depends on the structure, engineering, foundation work, panel capacity, electrical upgrades, permitting, site conditions, and whether you add battery storage or EV charging. Unlike rooftop solar, a carport includes the cost of building or reinforcing the shade structure itself.
What makes up the project cost?
The solar equipment is only one part of the investment. A contractor may need to evaluate the driveway or parking area, confirm setbacks. Design for local wind and seismic requirements, and connect the system to the home's electrical service. The orientation and available space also affect how many panels fit and how much electricity the array can produce.
California's relatively high electricity prices, often estimated at $0.25 to $0.30 per kilowatt-hour, can improve the value of generating power on-site. As a planning example, a 6 kW system may produce approximately 8,400 to 10,000 kWh per year in suitable California conditions. The resulting value could be roughly $2,000 to $3,000 annually, but actual savings depend on utility rates. Household consumption, shading, system performance, and how much energy is used when the system is producing.
Federal and California incentives to review
The 30% Federal Investment Tax Credit may apply to a residential solar carport when the solar equipment is connected to the home's electrical system. Eligibility and tax treatment depend on the project and the homeowner's circumstances, so confirm current requirements with a qualified tax professional. The federal credit is not a substitute for a project-specific incentive review.
California's NEM 3.0 framework also changes how exported electricity is valued. Excess solar sent to the grid is generally credited at an avoided-cost rate, often around $0.04 to $0.10 per kWh, rather than at the retail electricity rate. That makes self-consumption important. Running appliances during daylight hours or pairing the carport with a battery can help a household use more of its own generation instead of exporting it.
Homeowners considering battery storage should also ask whether the project qualifies for the Self-Generation Incentive Program, or SGIP. Funding, eligibility, and program availability can change, and qualification is not automatic. Reviewing the carport, electrical service, battery, and household load together creates a more realistic picture than evaluating the panel array alone. For additional context on household energy economics, see AMECO's guide to solar panel savings for your home.
Integrating EV Charging and Battery Storage With Your Solar Carport
A solar carport can do more than produce electricity above a parked vehicle. With the electrical design planned as one system, the structure can support EV charging and battery storage without treating either upgrade as an afterthought. That coordination matters in California, where self-consumption can be more valuable than exporting excess power to the grid.
Charging Your EV With Solar Energy
Solar panels generate power during the day, when many vehicles are parked at homes, workplaces, and commercial properties. A properly designed carport can route that production to an EV charger. Allowing the vehicle to use more on-site solar energy instead of drawing as much electricity from the grid. The charger, service equipment, wiring, and future load requirements should be reviewed during the initial design.
The U.S. Department of Energy recommends an "EV Charger Ready" approach, which allows chargers to be added later with less cost and site disturbance than a retrofit. That can mean reserving conduit pathways, sizing electrical equipment appropriately, and planning the location of the charger before the concrete and structural work are complete. See the Department of Energy guidance on solar-shaded canopies and EV charging integration for the planning principle.
Pairing Battery Storage With Your Carport
Battery storage gives a carport more flexibility when solar production and energy demand occur at different times. The battery can store daytime generation for evening vehicle charging, household loads, or selected commercial equipment. It can also provide backup power for eligible circuits, subject to the system design and utility requirements.
Under California's NEM 3.0 framework, exported solar power may receive a relatively low avoided-cost value, often cited in the range of $0.04 to $0.10 per kilowatt-hour. Using more of the energy on site can therefore improve the practical value of a carport system. Although the right battery size depends on load patterns, utility territory, equipment, and eligibility. For commercial properties, battery energy storage systems may reduce peak demand charges by up to 40% in suitable applications, but actual results require an engineering and billing analysis.
AMECO Solar & Roofing designs solar, batteries, and EV charging as connected parts of a California energy system. The company is an Enphase silver installer and a Tesla Powerwall certified installer. Learn more about solar battery backup and how storage could fit your property.
Why AMECO Solar Is the Right Choice for Your Solar Carport
Choosing a solar carport installer involves more than mounting panels above a parking area. The structure must work with your electrical system, property layout, future energy needs, and, if applicable, an EV charger or battery. AMECO Solar brings that broader perspective to solar carport projects throughout California.
AMECO is California-owned and has operated continuously since 1974. With more than 3,000 installations, the company has experience designing and installing complete energy systems for California homeowners and commercial property owners. Its integrated approach also brings solar, roofing, battery storage, and EV charging expertise under one roof. That can simplify coordination when a carport project needs to connect with an existing roof or broader property upgrade.
AMECO's credentials provide additional context for evaluating an installer. The company received REC Gold Tier recognition for 2026, as reported in PV Magazine. AMECO is also a Tesla solar roof certified installer, an Owens Corning Solar PROtect contractor, and an Enphase silver installer. These designations do not replace a project-specific evaluation, but they can help demonstrate familiarity with established equipment and installation standards.
AMECO also offers equipment backed by a 40-year warranty, subject to the applicable product terms. The company's customer results include an average utility-bill savings figure of $568 per month, but actual savings vary with system design, electricity use, utility territory, financing, and eligibility. A consultation can put those variables into context instead of treating a typical result as a promise.
For a solar carport California homeowners can plan with confidence, the next step is a property-specific review. Get an estimate to discuss the structure, energy goals, and the right combination of solar, storage, and charging options.
Frequently Asked Questions
Can solar panels be used as a carport in California?
Yes. A solar carport uses a freestanding canopy to support photovoltaic panels above a parking area. It can generate electricity while keeping vehicles shaded, making productive use of space when the roof is unsuitable, already full, or not the preferred location for an array.
What are the benefits of solar carports for California homes?
They combine onsite energy production with covered parking. A well-designed structure can provide shade, create a convenient location for EV charging, and preserve the roof for another use. It may also help a property use more of its own solar generation when paired with appropriately sized electrical equipment.
How do solar carport structures handle wind and other loads?
The structure should be designed around the property, panel layout, foundation conditions, and local requirements. An installer evaluates wind exposure, attachment details, drainage, clearances, and the loads transferred to the foundation before finalizing the design. These details are important for safety and long-term performance.
What determines a residential solar carport's energy production?
Production depends on the available canopy area, panel orientation and tilt, shading, equipment selection, and the home's electricity use. Trees, nearby buildings, and the height or shape of the structure can affect output. A site-specific design is more useful than relying on a generic system-size estimate.
Are solar carports suitable for both homes and businesses?
Yes. Residential designs can cover a driveway or detached parking area, while commercial systems can serve larger parking areas and support workplace or fleet charging. The appropriate size, structure, electrical design, and permitting path depend on the site and how the energy will be used.
Ready to Plan Your Solar Carport?
A solar carport can help you evaluate a practical way to add renewable energy while making better use of your property. Because the right design depends on your available space, electrical needs, roof conditions, and future plans, a project-specific review is the best next step. Get an estimate for your solar carport project and talk with AMECO about an approach suited to your California home.
7.30.2026
California's long swimming season makes pool heating useful, but the right system depends on more than available sunshine. Pool size, roof or ground space, local temperatures, desired swim months, existing plumbing, and whether you want supplemental or primary heat all affect feasibility and cost.
Solar pool heating California homeowners choose can provide cost-competitive heat with very low annual operating costs. Although the best design depends on the property, pool, climate, and preferred system type. Solar collectors circulate pool water through sun-heated panels, and in hot conditions they can also help cool the pool when operated at night, according to the U.S. Department of Energy.
Understanding the equipment and water-flow path makes it easier to compare unglazed and glazed collectors, evaluate installation needs, and decide whether solar thermal heating fits your pool.
Solar Pool Heating in California: How It Works
A solar pool heating system uses the sun's energy to raise pool-water temperature without burning fuel. During normal operation, pool water moves through a solar collector, absorbs heat, and returns to the pool. A properly designed system works alongside the pool's existing circulation equipment, while controls determine when water should flow through the collectors and when it should bypass them.
Choosing between unglazed and glazed collectors
For much of California, unglazed collectors are a practical option. They are typically made from heavy-duty rubber or plastic treated with an ultraviolet-light inhibitor, rather than enclosed behind glass. Because they are intended for above-freezing conditions, they can provide effective seasonal pool heating in many California climates with a relatively straightforward design. The right configuration still depends on the pool, roof or mounting area, local weather, desired swim season, and available sunlight.
Glazed collectors use a more protected construction, generally copper tubing mounted on an aluminum plate beneath a tempered-glass covering. The glazing helps these systems capture heat more efficiently during cooler weather. They may be a better fit for a property that needs more consistent performance through colder conditions or wants to pursue a longer operating season. Their construction can also make them more expensive than unglazed collectors, so the choice should reflect the property's goals rather than collector type alone.
The four core components
Most solar pool heating systems rely on four basic components:
- Solar collector: The surface through which pool water circulates and gains heat from sunlight.
- Filter: Removes debris before water enters the collector.
- Pump: Moves water through the filter and collector, then sends it back to the pool.
- Flow control valve: Automatic or manual control that directs water through the collector when heating is useful, or bypasses it when it is not.
These components allow the system to integrate with regular pool circulation. A qualified design should account for hydraulic flow, collector placement, roof condition, shading, and the pool's volume so the equipment operates reliably.
Cooling can be part of the design
In hot California conditions, the collectors can serve a second purpose. If pool water is circulated through them at night. The exposed collector surfaces can release heat into the cooler night air, helping lower the pool temperature during peak summer periods. This approach is especially useful when daytime sun has made the water warmer than swimmers prefer.
For a closer look at the circulation process and equipment, read more about how solar pool heaters work.
Solar Thermal Collectors vs. Solar-Powered Heat Pumps
California homeowners evaluating solar pool heating have two fundamentally different paths. Solar thermal collectors transfer sunlight directly into circulating pool water. A solar-powered heat pump, by contrast, uses electricity, potentially supplied by a rooftop photovoltaic array, to move heat from the surrounding air into the pool. Both can reduce reliance on gas or conventional electric heating, but they suit different properties and priorities.
| Feature | Solar Thermal | Solar-Powered Heat Pump |
|---|---|---|
| How it heats | Pool water circulates through sun-heated collectors and returns to the pool. | Electricity powers a compressor that extracts heat from ambient air and transfers it to the pool. |
| Best fit | Sunny California locations where straightforward pool heating is the priority. | Properties that already have, or plan to install, rooftop solar panels and want one electrical energy strategy. |
| Installation and cost | Usually simpler and lower cost for a pool-focused system, subject to roof area, plumbing, and site conditions. | Typically more equipment-intensive and more expensive upfront, with electrical capacity and PV production affecting the design. |
| Operating considerations | Uses the sun directly and has no burner or compressor. Unglazed rubber or plastic collectors are suited to above-freezing climates. | Can operate when sunlight is limited, but its energy use depends on outdoor conditions and available electricity. |
| Durability | EPDM thermal panels can offer long service life. Suntrek, a solar pool heating provider, cites more than 20 years for its EPDM system, though actual life depends on product, installation, and maintenance. | Service life depends on the heat pump, controls, installation quality, and maintenance of its mechanical components. |
When direct solar heat is the simpler choice
For many California pools, thermal collectors are the practical starting point. The system can be designed around the pool's surface area, available roof or ground-mount space, desired swim season, and local weather. The U.S. Department of Energy notes that solar pool heaters have very low annual operating costs and can be cost-competitive with gas and heat pump alternatives. In hot climates, collectors may also cool the pool when water is circulated through them at night.
When a heat pump may make sense
A heat pump can be attractive when you already have a well-sized photovoltaic array and prefer to consolidate pool heating around your electrical system. It may also provide more flexibility during periods when direct solar gain is lower. However, the total design should account for heat-pump demand, PV production, pool-cover use, and utility rates rather than assuming that existing panels will cover every operating condition.
An installer can compare both approaches alongside your broader solar panel installation plans and recommend a system based on the property, pool, and energy goals.
How Much Does Solar Pool Heating Cost in California?
The cost of solar pool heating in California depends less on a single equipment price than on how the system fits your pool, roof, and existing circulation equipment. A smaller pool with a suitable south-facing roof may need a different collector layout and installation approach than a large pool with limited roof area. For that reason, a published price range should be treated as a starting point, not a universal quote.
What affects the cost of a solar pool heater?
Pool size is one of the first considerations. A larger water volume generally requires more collector area to deliver useful heat. The desired swimming season matters as well. A homeowner who wants comfortable water during mild spring and fall weather may have different design needs from someone seeking the longest practical season in a cooler inland location.
Roof orientation and available surface area also influence the design. Collectors need adequate exposure to sunlight, and the installer must account for roof layout, shading, mounting conditions, and the distance between the pool equipment and collectors. These site details can affect labor, piping, controls, and whether the existing pump can circulate water through the system effectively.
Pump size is another variable. A typical solar pool heating system includes a collector, filter, pump, and flow control valve. The pump and valve need to work together so water can move through the collectors without compromising normal pool filtration. The U.S. Department of Energy explains the role of these components in its guide to solar swimming pool heaters.
How operating costs compare with gas and electric heat
Installation cost is only one part of the comparison. MagenEco reports that gas and electric pool heaters average about $1,321 per year in operating costs, although actual utility expenses vary by equipment, usage, fuel rates, and climate. Solar pool heaters, by contrast, have very low annual operating costs because the primary heat source is sunlight, according to the U.S. Department of Energy. The system may still use electricity for circulation and controls, so "low operating cost" does not mean zero ongoing energy use.
The best way to evaluate your potential investment is to assess the pool dimensions, roof conditions, orientation, shading, pump capacity, and heating goals together. AMECO can review those factors and prepare a property-specific recommendation. Visit Get An Estimate to request personalized guidance rather than relying on a generic system price.
California Title 24 and Solar Pool Heating Requirements
California homeowners planning a new pool or replacing an existing pool heater need to account for a significant change in the state building code. The 2025 California Energy Code, commonly called Title 24, Part 6, is scheduled to take effect on January 1, 2026. The updated requirements address pool-heating system design and energy use.
Under the new rule. Pool heaters installed for residential and commercial pools must use an onsite renewable energy source equal to at least 60% of the pool's annual heating demand. SunEarth's overview of the California requirements describes the 60% threshold and the 2026 effective date. Suntrek's discussion of solar pool heating in California provides additional context on how solar thermal systems fit the state's sunny climate.
In practical terms, solar pool heating California homeowners choose may become the foundation of a compliant pool-heating design rather than an optional upgrade. The exact system depends on the pool's size, location, desired water temperature, roof or mounting area, shade, and expected season of use. A site-specific design is important because the renewable system must cover a defined share of annual demand, not simply provide occasional supplemental heat.
Why the backup heater may be smaller
Solar collectors can supply most of the annual heating load when properly sized and operated. The conventional backup heater then handles cloudy periods, unusually cool weather, or temperature increases when the pool needs to warm quickly. Because it does not need to meet the entire load on its own, the backup unit can be smaller than a system designed for 100% conventional heating. SunEarth specifically notes this potential benefit in its Title 24 guidance, although equipment selection still requires a qualified calculation.
For homeowners already considering a replacement, installing solar now can future-proof the pool against the 2026 standard and reduce the risk of designing around an oversized conventional heater. It also creates an opportunity to coordinate the collector layout, plumbing, controls, and backup equipment as one system. AMECO can evaluate the pool and property together, then recommend a configuration that fits the home's available solar resource and heating needs.
Seasonal Savings: Extending Your California Pool Season
For many California homeowners, the value of pool heating is not simply reaching a comfortable temperature on a summer afternoon. It is being able to use the pool earlier in spring and later in fall, without treating every extra swim day as a major fuel or electricity expense. AMECO's solar pool heating systems can extend the swimming season by approximately four to six months, depending on the pool, location, system design, and weather conditions.
More usable months without the same heating burden
California's climate provides a strong foundation for solar pool heating. Many areas receive more than 280 sunny days per year, giving solar collectors frequent opportunities to add heat during the shoulder seasons. The exact results still depend on factors such as pool size, shade, wind exposure. Desired water temperature, and whether a pool cover is used when the pool is not occupied.
That additional season can change how a pool fits into daily life. A homeowner may be able to swim comfortably during cooler spring mornings, continue using the pool after summer ends. Or schedule more outdoor gatherings without relying on a conventional heater for every temperature adjustment. The best design is based on the property's solar exposure and the household's preferred swimming schedule, rather than on a universal collector size or temperature promise.
Lower operating costs than gas or electric heating
Gas and electric pool heaters can provide controllable heat, but their operating costs continue whenever the equipment runs. One industry comparison estimates average gas or electric pool-heating costs at about $1,321 per year. Although actual costs vary with fuel rates, pool temperature, usage, weather, and equipment efficiency. Solar pool heating requires an upfront installation, but the solar energy used to warm circulating pool water has near-zero operating cost after installation. The pump and other pool equipment still use electricity, and maintenance remains part of ownership.
The U.S. Department of Energy describes solar pool heaters as having very low annual operating costs and notes that solar collectors can sometimes cool a pool during peak summer months. In hot weather, circulating pool water through the collectors at night releases heat to the cooler air. This can be useful when the pool becomes warmer than desired, particularly during extended California heat.
For a closer look at the seasonal value of California solar pool heating, consider how many additional months you want to swim and how often your current heater operates. A site-specific evaluation can compare roof or ground-mount space, pool conditions, circulation requirements, and the operating pattern that best fits your property.
Choosing the Right Solar Pool Heating System for Your California Home
Sizing a pool heating system is not a matter of choosing the largest available collector. The right design balances the pool's surface area, available sunlight, circulation equipment, and how you plan to use the pool. Follow these steps to create a practical starting point for solar pool heating California homeowners can use when comparing options.
- Measure the pool surface area. Record the length and width of each section of the pool, then calculate the surface area in square feet. For irregular shapes, divide the pool into simpler rectangles or estimate the total area with help from a pool professional. Surface area matters because heat loss occurs across the water's exposed surface, not just at the deepest point.
- Determine the collector area. A common planning range is collector area equal to roughly 50% to 100% of the pool's surface area. The appropriate percentage depends on the desired swim season, local climate, wind, shading, and whether you use a pool cover. A larger collector field may be useful when the pool is shaded or when you want to extend swimming into cooler months. But the final recommendation should reflect the site's actual conditions.
- Assess roof orientation and sun exposure. Identify roof sections or other mounting areas that receive consistent sunlight and note seasonal shading from trees, chimneys, neighboring buildings, or roof features. Collector area alone does not determine performance. Sun exposure, orientation, tilt, and nighttime heat loss all affect how efficiently the system warms the pool. A cover can help retain heat and reduce evaporation when the pool is not in use.
- Evaluate the existing pump and filter capacity. A typical system includes a solar collector, filter, pump, and flow control valve. The filter removes debris, the pump moves water through the system, and the valve diverts water through the collector before returning it to the pool. The equipment must be able to support the required flow without compromising normal filtration or creating unnecessary strain.
- Get a professional site evaluation. A qualified installer can verify measurements, inspect the roof or mounting surface, review plumbing and controls, and account for local weather and pool-use goals. AMECO can also discuss how pool heating fits alongside solar panel installation or battery storage, when those systems are part of a broader home energy plan. Request a site-specific recommendation rather than relying on a generic collector-size estimate.
For component guidance, the U.S. Department of Energy explains the role of the collector, filter, pump, and flow control valve in a solar pool heating system: solar swimming pool heaters.
Frequently Asked Questions
How does solar pool heating work in California?
Pool water is circulated through solar collectors, where sunlight warms it before it returns to the pool. A filter, pump, and flow-control valve help manage circulation. In hot parts of California, the collectors can also cool the pool when water runs through them at night. The U.S. Department of Energy explains the basic system design and operation.
How much does solar pool heating cost in California?
There is no universal installed price. Your estimate depends on pool size, desired water temperature, collector area, roof or ground-mount conditions, plumbing, controls, and whether additional equipment is needed. Solar heaters generally have low annual operating costs, but the right comparison should include installation, maintenance, and the cost of alternatives for your property.
Do I need a pool cover with solar heating?
A cover is strongly recommended because it reduces heat loss, particularly overnight and during cooler weather. Better heat retention can help the system maintain a comfortable temperature with less run time. Your installer can evaluate the cover, collector placement, and circulation settings together rather than sizing the system from pool surface area alone.
Will my California HOA allow solar pool heating?
California law generally limits an HOA's ability to prohibit qualifying solar energy systems, but design rules, placement requirements, and review procedures may still apply. Before installation, check the governing documents and submit the required plans. A qualified installer can help identify roof, equipment, and appearance details that may affect approval.
Can one system heat both my pool and domestic water?
Usually, pool heating and domestic hot-water systems should be designed as separate applications. They operate with different temperature requirements, water volumes, plumbing arrangements, and safety controls. An integrated evaluation can determine whether separate solar thermal equipment, photovoltaic panels, or another configuration best fits your home.
Ready to Get an Estimate for Solar Pool Heating?
A project-specific review can help you compare system options, understand installation considerations, and determine whether solar pool heating fits your California property. To get a free estimate, get started with AMECO Solar & Roofing.
7.29.2026
In California, tile roofs are a familiar part of the landscape, from Spanish-style clay tile to concrete S-shaped and flat profiles. Their durability and appearance make them popular, but the same tiles can be fragile during installation. That means adding solar is not simply a matter of attaching panels to the roof surface.
Yes, you can install solar panels on tile roof systems, but the work requires a carefully planned mounting method. Temporary tile removal or cutting, reliable flashing, and technicians who understand both roofing and solar construction.
The right approach protects the roof structure, limits breakage, and creates secure mounting points without compromising water-tight integrity. It also gives you a clearer path when tiles need to be replaced or the roof requires attention before installation. Before comparing mounting techniques, it helps to understand why tile roofs demand a more specialized solar installation approach than standard composite shingles.
Why Tile Roofs Require a Specialized Solar Installation Approach
Tile roofs are a defining feature of California housing. Especially in warmer areas where Spanish-style and S-shape clay tiles, along with flat concrete tiles, complement the architecture and climate. Tile roofs are common across the Western and Southwestern United States because of their durability and appearance, according to published guidance on installing solar panels on tile roofs. That prevalence means many California homeowners ask whether their existing roof can support solar.
The short answer is yes. Solar panels can be installed on a tile roof when the system is designed around the roof's structure, tile profile, condition, and weatherproofing requirements. The installation is not a standard shingle-roof job, however. The roof needs a plan that protects the tiles while creating secure mounting points below them.
Tile is durable, but not built for careless foot traffic
Clay and lightweight concrete tiles can crack when stepped on or handled improperly. A crack may be obvious immediately, or it may create a pathway for water that becomes a larger roof problem later. Installers must plan where they walk, use appropriate equipment, and remove or protect tiles carefully while accessing the roof structure. The goal is not simply to attach panels. It is to preserve the roof's existing performance throughout the work.
Before installation, an experienced team should also look for brittle, displaced, or previously damaged tiles. Those conditions can affect the safest mounting method and may require roof work before solar construction begins. Working with a contractor that offers professional tile roof services helps keep those decisions connected rather than treating roofing concerns as an afterthought.
Tile installations involve more labor and planning
Compared with composite shingle roofs, solar installations on clay tile generally require more labor and careful handling, which can make them more complex and expensive. The exact scope depends on the roof design, tile type, panel layout, attachment method, structural conditions, and local requirements. Any estimate should account for the property instead of presenting a universal tile-roof premium.
This added complexity does not mean tile roofs cannot support solar. It means the project requires specialized knowledge. A qualified installer must coordinate tile removal or cutting, mounting hardware, roof penetrations, flashing, and tile replacement so the finished system is both secure and weather-resistant. Choosing expertise at the design stage can reduce avoidable breakage, clarify the work involved, and help protect the roof that supports the solar investment. An experienced team accounts for the roof's particular conditions before determining the best plan.
3 Proven Methods for Installing Solar Panels on Tile Roofs
Solar panels on tile roof installations are not one-size-fits-all. The right mounting approach depends on the tile type, roof condition, panel layout, access to the underlying structure, and the level of tile removal needed. Each method can work when designed and installed correctly, but the tradeoffs are different.
| Method | How it works | Relative cost | Complexity | Water-tightness considerations | Best use case |
|---|---|---|---|---|---|
| Inset or comp-out | Tiles are removed from the panel footprint and replaced with composite shingles. The solar mounting system is then installed over the prepared area. This is also called an inset installation. See the described inset or comp-out approach. | Often higher than a straightforward tile-hook installation because it adds roofing work and materials. Exact pricing depends on the roof and array. | High. The crew must remove tiles carefully, prepare the roof surface, and coordinate roofing with structural mounting. | Can provide a clean, serviceable mounting area when the replacement roofing, penetrations, and flashing are properly integrated. The tile removal process still requires careful planning. | A roof with fragile or aging tiles, or a project where creating a dedicated solar-ready surface makes sense. |
| Tile hook with double flashing | Specialized brackets are positioned beneath or around existing tiles, with flashing used to protect each roof penetration. Some tiles may need temporary removal or careful cutting to reach secure attachment points. | Potentially moderate, but labor varies with tile shape, roof pitch, access, and the number of attachment points. A site assessment is necessary. | Moderate to high. The installer must avoid cracking tiles while locating and securing the roof structure below. | Double flashing can add a second layer of protection around mounting points, but workmanship remains critical. SolarReviews identifies flashing and tile handling as central considerations for clay tile installations: review the installation guidance. | A sound tile roof where preserving most existing tiles is practical and the mounting points can be accessed securely. |
| Full tile replacement in the array area | Tiles across the planned panel area are removed and replaced with new composite roofing before the array is mounted. | Usually the most material-intensive option of the three, although the final scope depends on the roof's condition and array size. | High. It combines a larger roofing scope with solar layout, structural attachment, and flashing work. | A new, continuous roofing surface can simplify the interface between the roof and mounting system. It still requires correct underlayment, penetrations, and flashing. | A larger array area, widespread tile wear, or a roof that needs a planned roofing upgrade before solar installation. |
In every method, tiles may need temporary removal or cutting to expose the roof structure and create secure mounting points. A qualified contractor should evaluate the roof before recommending a method, rather than choosing based on a generic installation template. AMECO can provide custom solar panel design and installation alongside roofing expertise, helping align the array layout with the roof's condition and construction.
Flashing and Weatherproofing: Protecting Your Tile Roof After Solar Installation
For homeowners considering solar panels on tile roof systems, keeping water out is the first priority. A solar array can produce clean energy for decades. But a poorly sealed roof penetration can create damage that is difficult to see until moisture reaches the roof deck, insulation, or interior finishes. Proper flashing is essential to preserve the roof's water-tight integrity when mounting solar through tile.
Why flashing matters around every penetration
Mounting hardware must connect securely to the roof structure below the tiles. That process may require carefully lifting, removing, or cutting tiles to reach the attachment point. Each location then needs a weatherproof transition between the mounting hardware and the roof covering. Flashing should direct water around the penetration rather than allowing it to collect beside the mount or flow beneath the underlayment.
A robust installation commonly uses a double-flashing approach. The lower layer integrates with the roof's existing water-shedding path, while the upper layer protects the mounting point and guides runoff over the surrounding tile. The exact configuration depends on the tile profile, roof slope, underlayment, and mounting hardware. The goal is not simply to apply sealant, but to create a durable drainage system that remains effective through sun, wind, and seasonal rain.
The risk of a solar-only approach
Tile roofs are durable, but clay and lightweight cement tiles can crack under foot traffic. They also respond differently to movement, overlapping courses, and drainage than composite shingles. An installer who treats tile as a cosmetic layer over a standard shingle roof may damage tiles. Disrupt the water-shedding pattern, or leave a penetration inadequately integrated with the roofing system. Leaks may not appear immediately, which makes installation quality and documentation especially important.
Coordinated protection from one team
An integrated solar and roofing contractor can coordinate the mounting plan, tile handling, flashing, and roof repairs as one scope of work. AMECO's vertically integrated approach is designed to minimize damage and leak risk by keeping these responsibilities together. It also gives homeowners one point of accountability for the roofing and solar work, with coordinated warranty protection rather than separate contractors disputing responsibility later. Learn more about California's trusted solar and roofing company since 1974.
Why an Integrated Solar and Roofing Contractor Matters for Tile Roofs
Installing solar panels on a tile roof is not only a solar project. It is also a roofing project, because the mounting system must work with the roof's tiles, underlayment, flashing, and structural components. That distinction matters when the installation requires tile removal, cutting, or replacement. A solar-only company may understand electrical design and panel layout, but may not have the roofing expertise needed to protect the roof envelope throughout the work.
One team can coordinate both trades
An integrated contractor manages the solar and roofing scopes under one company. AMECO operates as a vertically integrated solar and roofing contractor in California, coordinating the mounting work with the roofing details instead of treating them as separate jobs. This can reduce handoff problems around flashing, roof penetrations, tile placement, and final inspection. Properly installed flashing is essential to maintain the roof's watertight integrity when solar is mounted through tile. So the roofing portion deserves the same level of planning as the electrical portion. Learn more about AMECO's roofing and solar integration.
The practical benefit is a clearer installation plan. The team can determine how tiles will be accessed, where mounting points should be placed, and how the finished array will transition back into the existing roof. It can also coordinate workmanship responsibilities and warranty support through one company, rather than leaving the homeowner to resolve disagreements between a solar installer and a separate roofer.
Tile damage can be addressed immediately
Clay and lightweight cement tiles can crack under foot traffic during installation. Even when a crew uses careful access methods, some tiles may need to be removed or may break during the work. AMECO's integrated model means broken tiles can be repaired or replaced as part of the installation process. Rather than waiting for a separate roofing contractor to assess the issue. Addressing damage promptly helps prevent a small defect from becoming a larger moisture problem.
AMECO has served California homeowners since 1974 and brings solar and roofing experience together in one project. Its current credentials include Owens Corning Solar PROtect certification, REC certification, and Enphase silver installer status. For homeowners comparing proposals, the key question is not simply who can place panels on the roof. It is who will remain accountable for the panels, the penetrations, and the tile roof beneath them.
The Tile Roof Solar Assessment: What California Homeowners Can Expect
A careful assessment turns a tile-roof project from a one-size-fits-all installation into a plan built around your roof, energy use, and property. AMECO's process is designed to identify structural and roofing considerations early, then verify the details in person before installation begins.
1. Start with a remote property and energy review
The first review can use satellite imagery to evaluate the roof's size, shape, orientation, shading, and likely usable areas. AMECO also reviews your utility bill to understand electricity consumption and develop a preliminary system size. This virtual-first step helps identify questions before an estimator visits the property, while recognizing that satellite images cannot replace an on-site roof inspection.
2. Build a custom design around the tile roof
Using the initial property and energy information, the design team develops an array layout and evaluates how the equipment will connect to the roof structure. Tile roofs require careful planning because installers may need to temporarily remove or cut tiles to reach secure mounting points. The design also includes a structural load assessment. California's Solar Permitting Guidebook provides structural criteria for safe, code-compliant residential rooftop solar installations, including tile-roof applications.
3. Verify roof condition on site
At the property, a professional checks the tile condition, roof surfaces, access points, and areas where mounting and flashing will be installed. This inspection can reveal cracked, loose, aging, or otherwise damaged tiles that need attention before the array is placed. It also confirms whether the remote design reflects actual conditions. Resolving these details before installation is especially important because clay and lightweight cement tiles can be damaged by foot traffic or improper handling.
4. Install the system with coordinated tile and flashing work
Once the design and roof condition are confirmed, trained crews install the mounting system while handling tiles deliberately and protecting the roof surface. Flashing is installed around roof penetrations to help preserve the roof's watertight integrity. AMECO's combined solar and roofing expertise allows the same company to address tile repairs or replacements when needed, rather than leaving roof-related work to a separate contractor.
For a typical residential project, AMECO's customer materials describe an average timeline of about two months from contract to activation. The actual schedule can vary with design requirements, permitting, utility review, roof condition, and project-specific scope. To begin, schedule your free tile roof solar assessment.
Frequently Asked Questions
Can solar panels be installed on a tile roof?
Yes. A qualified installer can mount panels on clay, concrete, and other tile roofs by carefully accessing the roof structure. Protecting the tiles, and selecting a mounting method suited to the roof design. The best approach depends on tile type, roof age, condition, framing, and the planned array layout.
Will installing solar damage my tile roof?
It should not when the work is planned and performed correctly, but tile can crack under foot traffic or during removal. Installers may temporarily remove or cut tiles to reach secure mounting points. Broken tiles should be replaced promptly, and penetrations must receive proper flashing so the roof remains watertight. See AMECO's roofing and solar integration guidance.
Does solar cost more on a tile roof?
It can. Tile-roof installations are typically more labor-intensive than installations on composite shingles because the crew must handle the tile carefully and may need additional flashing. Replacement materials, or an inset installation. The final estimate depends on the roof condition, array size, equipment, access, and local requirements, so a universal price would be misleading.
What is the safest way to install solar panels on tile?
There is no single method for every roof. Options may include tile hooks with flashing, carefully replacing tiles around mounting points, or an inset installation that uses composite shingles beneath the array. A professional assessment should also confirm structural capacity and code compliance. California's Solar Permitting Guidebook provides structural criteria for residential rooftop solar.
Should I replace my tile roof before adding solar?
Not automatically. If the roof is sound and has sufficient remaining service life, panels may be installed without a full replacement. If tiles, underlayment, flashing, or roof framing need attention, completing that work first can avoid removing and reinstalling the array later. A combined solar and roofing assessment can identify the practical sequence for your property.
Schedule Your Tile Roof Solar Assessment
A professional assessment can help clarify how your tile roof, electrical needs, and solar design fit together before installation begins. Schedule a free tile roof solar assessment with AMECO Solar & Roofing to discuss your property and next steps. Get an estimate and move forward with a plan tailored to your California home.
7.27.2026
Choosing a utility rate plan is one of the most important decisions for a California homeowner considering solar. The plan affects when your home draws power from the grid, how much value excess solar can deliver, and whether a battery can improve your overall energy strategy.
For many California homeowners, the best rate plan for solar panels California depends on when the household uses electricity, whether solar energy is stored, and the utility territory. Under California's Net Billing Tariff, or NEM 3.0, exported solar energy is generally credited below the retail rate. So using or storing more of your own production can matter as much as generating it.
California's Solar Billing Plan became the standard for new interconnections on April 15, 2023, according to the California Public Utilities Commission. That makes rate-plan selection a practical question of matching your utility's rules to your daily energy habits. Start by comparing how tiered and time-of-use plans charge for electricity, then consider how your solar production and storage would work with each option.
Best Rate Plan For Solar Panels California: Tiered Rates vs Time-of-Use: What's the Difference?
California utilities generally structure residential electricity plans in one of two ways: tiered rates charge more as your total usage rises. While time-of-use (TOU) rates change according to when you use electricity. For a solar homeowner, the distinction matters because your panels may produce most of their energy during the day. While your household may consume the most power in the evening.
How tiered plans work
A tiered plan starts with a baseline allowance. Usage within that allowance is billed at a lower rate, and consumption above it moves into progressively more expensive tiers. This structure can suit a household with modest, consistent electricity use, especially when daytime and evening consumption are similar. However, high usage from air conditioning, pool equipment, electric vehicles, or electrification upgrades can push part of the bill into higher tiers.
How TOU plans work
TOU plans separate the day into pricing periods. Electricity is typically less expensive during some daytime or overnight hours and more expensive during designated peak periods. Although the exact schedule and prices depend on the utility and plan. Solar production can reduce the electricity you buy during daylight hours. A battery can store some of that production for evening use, when prices may be higher.
| Dimension | Tiered rate plan | Time-of-use rate plan |
|---|---|---|
| How rates change | Price rises as total usage moves beyond baseline allowances. | Price changes by time of day and, on some plans, season. |
| Typical beneficiary | Small energy users with predictable consumption. | Homeowners who can shift usage, particularly solar and battery owners. |
| Solar interaction | Solar reduces net usage, which can help limit exposure to higher tiers. | Solar offsets daytime purchases, while storage can help avoid expensive peak purchases. |
| Main decision factor | Whether your household stays near its baseline allowance. | Whether your production, storage, and usage align with lower-cost periods. |
There is no universal answer to the question of the best rate plan for solar panels California homeowners can choose. Your utility territory, load profile, roof production, and storage capacity all matter. For context, EnergySage estimates an average California homeowner may need an 8.61-kilowatt system. With an estimated cost of about $21,704 before incentives; actual system size and cost vary by property and project. With electricity prices historically rising about 4.1% annually, comparing the rate structure before finalizing a solar design can help you evaluate long-term exposure more realistically.
Review your utility's current plan details and recent bills rather than relying on a generic rule. AMECO's guide to time-of-use rate plan strategies can provide additional planning context.
How NEM 3.0 Changed the Rate Plan Equation
California's Net Billing Tariff (NBT), commonly called the Solar Billing Plan by investor-owned utilities, became the standard for new solar interconnection applications on April 15, 2023. That change affects more than how much electricity your panels produce. It also changes when you use energy, when you export it, and how you choose a utility rate plan.
Under the earlier net energy metering structure, exporting excess solar could earn credits close to the retail electricity rate. Under NBT, excess generation is generally credited at a lower rate that reflects the value of that electricity to the grid. The California Public Utilities Commission explains the NBT export-credit structure, including how it differs from NEM 2.0. For a broader explanation, see this NEM 3.0 billing structure overview.
Why timing matters more than ever
Rate-plan selection is now closely tied to your household's load profile. A system that sends substantial electricity to the grid during lower-value daytime hours. Then draws electricity back in the evening when rates are higher, may leave value on the table. This is why asking for the best rate plan for solar panels California homeowners can use requires more than comparing a single per-kilowatt-hour price. Your utility territory, appliance schedule, electric vehicle charging, heating and cooling needs, and battery capacity all matter.
Storage turns exports into a strategic choice
Battery storage can capture some midday solar production for use after sunset, reducing reliance on grid electricity during expensive evening periods. The market's adoption pattern shows how important this strategy has become: nearly 70% of new NBT customers had paired batteries with solar by the end of 2024. According to the CPUC.
Export credits are not always low. They can sometimes rise above retail rates during late-summer evenings, when demand is especially high. That creates a potential arbitrage opportunity for battery owners who can store solar energy and export it during valuable periods. Subject to the utility's rules and the system's operating settings. A careful rate-plan analysis should therefore evaluate both self-consumption and strategically timed exports, rather than treating all exported electricity as equal.
Rate Plan Options by Utility: PG&E, SCE, SDG&E, and LADWP
There is no single statewide answer to the best rate plan for solar panels California homeowners can choose. Your utility territory determines which plans are available, how solar exports are credited, and when electricity costs the most. The right comparison starts with your household's usage pattern, then accounts for whether solar production is consumed immediately, stored in a battery, or sent to the grid.
PG&E
PG&E serves about 16 million people across roughly 70,000 square miles in Northern and Central California. New solar customers generally enter the Solar Billing Plan, California's Net Billing Tariff, with time-of-use options such as E-TOU-C and E-TOU-D. These plans make the timing of consumption important, particularly for households that use electricity in the evening after solar production falls.
For context, SolarReviews reports that an average single-family customer on PG&E's standard E-1 residential plan pays about $400 per month. That figure is an estimate, not a universal bill, and actual costs depend on usage, household size, territory, and rate changes. A battery can help shift daytime production into higher-value evening use instead of relying only on export credits. Review PG&E rate and solar billing details before comparing proposals.
SCE
Southern California Edison also places new solar customers under the Solar Billing Plan and uses time-of-use billing. Common residential choices include TOU-D-4-9PM and TOU-D-5-8PM. The more suitable window depends on when your home imports power, whether occupants are home during the afternoon, and whether storage can cover the evening peak. Compare your interval usage data rather than choosing a plan based only on the number of peak hours.
SDG&E
San Diego Gas & Electric similarly implements the Solar Billing Plan for new solar customers. Because SDG&E schedules and rate structures can change, confirm the current time-of-use options and peak periods directly with the utility before signing up. Homes with electric vehicles, heat pumps, or heavy evening demand may need a different solar-and-storage design than homes with flexible daytime loads.
LADWP
Los Angeles Department of Water and Power is a municipal utility, so it operates under different rules from PG&E. SCE, and SDG&E and is not regulated by the California Public Utilities Commission in the same way. Do not assume an LADWP customer can use an investor-owned-utility plan or receive identical export treatment. Verify the current LADWP solar and rate requirements for your address.
Across the three major investor-owned utilities, new solar customers generally need to evaluate TOU billing under the Solar Billing Plan. The practical choice is the plan that best matches your load profile, solar production, and storage strategy. To compare those factors for your property, calculate your project with site-specific usage and utility information.
Does Battery Storage Influence Your Rate Plan Choice?
Yes. Under California's Net Billing Tariff, the value of your solar energy depends heavily on when you produce it and when your household needs it. Solar panels generate most of their electricity during the day, while household demand and utility rates often rise later in the afternoon and evening. A battery helps close that timing gap, making a time-of-use (TOU) plan much more favorable for many solar homeowners.
Store daytime production for higher-value evening use
Without storage, excess midday generation is exported to the grid. Under NEM 3.0, export compensation is generally lower than the retail rate. So sending energy away and buying electricity back during expensive evening hours can reduce the value of a solar system. With a battery, surplus solar can be stored during lower-price daytime periods and discharged when your home would otherwise draw power at peak rates. This is the core TOU arbitrage opportunity: use more of your own energy when electricity costs more, rather than relying on the grid at the least favorable time.
The California Public Utilities Commission reports that nearly 70% of NBT customers had paired batteries with solar by the end of 2024. That adoption reflects how closely storage and rate-plan selection are now connected. A battery does not make every utility plan identical, and the best choice still depends on your utility territory, rate schedule, household load, and battery controls. However, it can reduce your exposure to the timing mismatch that makes daytime solar exports less valuable.
Low daytime rates can support electrification
NBT rate designs also include lower daytime prices that can support charging an electric vehicle or running a heat pump when solar production is available. A battery gives you another option: direct daytime solar to those loads, store the remainder, and reserve stored energy for later. That flexibility can matter more than simply choosing the rate plan with the lowest advertised price.
Storage may add cost and can extend the estimated payback period modestly. One SolarReviews estimate places payback at about seven years without a battery and about 7.5 years with one, though actual results vary by property and utility. For a closer look at capacity, load patterns, and evening usage, review AMECO's NEM 3.0 battery sizing guide before comparing plans.
How to Choose the Best Rate Plan for Your Solar Panels
Choosing the best rate plan for solar panels in California means matching your utility's rules to the way your household actually produces and uses electricity. Use these steps before changing plans or finalizing a system design.
- Identify your utility and available schedules. Confirm whether your home is served by PG&E, SCE, SDG&E, LADWP, or another provider. Then review the rate schedules available to your account. Eligibility can depend on service territory, meter configuration, solar status, and whether you have a battery.
- Map your household's energy pattern. Review several months of bills, hourly usage data, or your utility dashboard. Note when major loads run. A home that uses more electricity during sunny hours may have a different fit than one that relies on air conditioning. Cooking, laundry, or electric-vehicle charging in the evening.
- Estimate your solar production and exports. Ask how much electricity the proposed system should generate by hour and season, then compare that profile with your consumption. The key question is not simply annual production. It is how much energy you will use directly, store, or send to the grid when your plan's rates are favorable.
- Decide whether battery storage supports your goals. If backup power, energy independence, or greater control over exports matters, model a battery with the solar system. With storage, a time-of-use plan is almost always the starting point because the battery can charge during lower-cost periods and serve the home during expensive peak windows. Confirm the result with an account-specific analysis rather than treating it as universal.
- Compare peak and off-peak windows with your routine. Read the exact TOU schedule for your utility. Peak periods vary, and a plan only works well when your household can shift flexible loads or use stored energy outside those windows. For a deeper look at the decision, review these time-of-use rate plan basics.
- Use your utility's comparison tools. PG&E offers a Rate Comparison Tool, and SCE provides Rate Plan Comparison resources. Enter your actual usage where possible, and compare estimated annual costs under multiple schedules. California electricity prices have risen substantially, including a reported 56% increase since 2020, so revisit the comparison when rates or household loads change.
- Have a solar professional model the scenarios. Request side-by-side projections for tiered, TOU, and battery-supported options. The broader California market demonstrates the scale of solar adoption, with enough installed capacity to power more than 14.6 million homes in 2025, according to the Solar Energy Industries Association. Your best choice, however, depends on your utility, equipment, roof, usage, and goals. A professional can connect those variables before you select a plan.
Frequently Asked Questions
How does a time-of-use plan affect solar savings in California?
A time-of-use plan charges different rates based on when electricity is used. Solar can offset daytime consumption, while a battery can store excess generation for evening periods when household demand and grid prices may be higher. The best fit depends on your utility, daily schedule, appliances, and whether you have storage. Review your actual hourly usage instead of assuming every TOU plan will produce the same result.
What is the difference between tiered and time-of-use rates for solar customers?
Tiered plans generally charge more as your total monthly consumption passes defined usage thresholds. TOU plans charge according to the time of day, so the price can change even when your total monthly usage stays the same. A tiered plan may be easier to manage if your usage is steady and modest. TOU may be more useful when you can shift flexible loads, such as vehicle charging or laundry, to lower-cost periods.
How does NEM 3.0 affect my rate plan decision?
California's Net Billing Tariff, commonly called the Solar Billing Plan, became the standard for new interconnections on April 15, 2023. Under this structure, exported solar energy is generally credited below the retail rate. Although export credits can vary by time and may rise above retail during some late-summer evening periods. Source: California Public Utilities Commission.
Do I need a battery to get the most from my solar system?
You do not automatically need a battery, but storage can improve how much of your solar energy you use on-site instead of exporting it for a lower credit. It can also provide backup power during an outage, subject to system design and local requirements. The CPUC reported that nearly 70 percent of NBT customers had paired batteries with solar by the end of 2024. Source: California Public Utilities Commission.
Ready to Calculate Your Project?
Your best rate plan depends on how your household uses energy, when solar production is available, and whether battery storage fits your goals. A project-specific review can help connect those factors before you decide between tiered and time-of-use billing. Calculate Your Project with AMECO Solar & Roofing to take the next step.
7.24.2026
Most California homeowners face high power bills but lack the cash to buy solar panels upfront. Several flexible financing paths make it possible to start saving without a large payment today.
Get An Estimate today to see which solar financing option fits your home and budget.
Finding the right solar panel financing California homeowners can qualify for depends on credit scores, roof conditions, and energy goals. According to a homeowner guide from Energy.gov, you can pay for your system through solar loans, leases, or Power Purchase Agreements. With a solar loan, you own the system and can claim the federal tax credit. Under a lease or PPA, a third party owns the panels, and you pay a flat monthly fee or pay for the power they produce. Since final terms and rebate eligibility vary by location and utility, comparing these paths is essential before signing any contract.
This guide breaks down each solar panel financing option available to California homeowners covering loans, PACE assessments, federal tax credits, leases, and PPAs. You can determine which path aligns with your financial goals and housing plans.
AMECO Solar, California's integrated solar and roofing company since 1974, provides the insights below to help you navigate these choices with confidence.
Solar Panel Financing California: Solar Loans for Homeowners
If you want to own your solar system, a solar loan is a common path. The U.S. Department of Energy states that solar loans let you own your system and qualify for federal tax credits.
Solar loans let California homeowners purchase their solar energy system through monthly payments over 5 to 20 years. Because you own the system, you qualify for the 30% federal tax credit. Secured loans use your home as collateral for lower rates, while unsecured loans have no collateral requirement but carry higher interest rates, typically 8% to 12%.
Key advantages of solar loans include eligibility for solar tax credits and incentives, no third-party ownership fees, and the ability to transfer or sell your home with the system included. AMECO Solar backs every system it installs with a 40-year equipment warranty, which adds lasting value to a loan-financed purchase.
- Secured loans use your home as collateral, offer lower interest rates, and feature terms up to 20 years. Default risks include losing your collateral.
- Unsecured loans require no collateral, have higher rates (8% to 12% in California), and offer shorter terms. Approval depends primarily on credit score.
- In-house vs. outside lenders: Some solar companies offer convenience with in-house financing. Comparing these offers against third-party lenders like Mosaic, Dividend, and Sunlight Financial often yields better rates.
Your final loan terms depend on your credit score, location, and project size. AMECO's team can help you evaluate lender options during your consultation.
What Is PACE Financing and How Does It Work in California?
Homeowners exploring solar panel financing California options often encounter PACE. Property Assessed Clean Energy financing lets you install solar without upfront cash by attaching the cost to your property tax bill instead of a traditional bank loan.
PACE financing allows California homeowners to fund solar installations through an assessment on their property tax bill with no money down and no credit score minimum. Eligibility is based on home equity rather than personal credit. However, PACE places a tax lien on your property that takes priority over your mortgage, which can complicate selling or refinancing your home.
How PACE assessments work
Through the Property Assessed Clean Energy (PACE) financing program, a private company funded by local government provides the capital for your project. You repay the amount once or twice per year as a special charge on your property tax bill. To qualify, you must be current on property taxes, have no active bankruptcies, and own sufficient home equity.
Drawbacks and real estate risks
PACE interest rates are often higher than standard solar loans. The program places a tax lien on your property that takes first priority over your mortgage. Most mortgage lenders will not allow a buyer to assume a property with an outstanding PACE lien. If you want to sell, you must pay off the full PACE debt first. Many homeowners explore California zero-down solar programs as alternatives that avoid these property lien risks.
GoGreen Home as a state-backed alternative
California's GoGreen Home Energy Financing program (formerly REEL) offers low-interest loans for energy upgrades without placing a lien on your property. Unlike PACE, GoGreen Home is a state-supported loan program administered through partner credit unions and banks. You can fund solar panels, battery storage, and up to 30% of the loan for other improvements like roofing. Since AMECO handles both solar and roofing, this bundled approach streamlines a complete home energy upgrade under one project. Eligibility requires service from a major utility such as PG&E or Southern California Edison.
How the Federal Solar Tax Credit Affects Your Financing in 2026
When planning your solar panel financing strategy, the federal tax credit represents the single largest financial benefit available. The Inflation Reduction Act locked the Residential Clean Energy Credit at 30% through 2032, letting you deduct nearly a third of your total system cost from your federal income taxes.
The 30% federal solar tax credit applies to solar systems purchased with cash or a loan, because the homeowner must own the system to claim it. Leases and PPAs transfer the credit to the third-party owner. California also exempts added home value from solar installations from property tax reassessment. Battery storage qualifies for both the federal credit and state SGIP rebates.
Ownership rules and tax planning
To claim the 30% credit, you must own the solar system. Cash purchases and solar loans both satisfy this requirement, making them popular choices. Lenders often structure solar loans with lower initial payments for 12 to 18 months, expecting you to apply your tax refund toward the principal when you receive it. If you do not make that lump-sum payment, your rate or monthly payment may adjust upward. Planning for this timing is important when choosing a loan structure. For complete details, see our guide on federal solar tax credits and incentives.
California property tax exclusion
Adding solar panels increases your home's market value, but California law prevents that added value from triggering a property tax reassessment. The solar energy system is excluded from property tax calculations, keeping your annual tax bill stable. This benefit applies only when you own the system.
Battery storage incentives
California's Self-Generation Incentive Program (SGIP) offers cash rebates for energy storage systems. When you pair solar panels with battery backup, you can combine SGIP rebates with the federal 30% tax credit for maximum savings. AMECO is a certified installer for both Tesla Powerwall and Enphase battery systems, which means customers get expert guidance on qualifying for these stacked incentives. Each utility territory has different rebate amounts, so checking with a local installer is essential. See our SGIP rebate guide for current amounts.
Solar Leases and PPAs: Lower Upfront Costs With Key Tradeoffs
For homeowners who want to lower their electric bills without upfront cash, solar leases and Power Purchase Agreements provide no-money-down options. California's high utility rates make these paths attractive despite certain long-term tradeoffs.
Solar leases charge a fixed monthly fee regardless of energy production, while PPAs charge only for the electricity the system generates at a rate below the utility's. Both involve third-party ownership, meaning the homeowner does not qualify for the federal tax credit. Price escalation clauses of 1% to 3% per year and transfer complexities when selling the home are key drawbacks.
How third-party ownership works
In a lease or PPA, a solar company owns and maintains the equipment on your roof. The installer handles design, permitting, and long-term upkeep. This is the structure behind many California zero-down solar programs. Because you do not own the system, you cannot claim the federal tax credit. For a detailed comparison, read our article on solar leasing pros and cons.
- Solar lease: Pay a fixed monthly fee to use the panels. Your payment stays the same regardless of weather or production levels.
- PPA (Power Purchase Agreement): Pay only for the electricity the system produces at a rate below your utility's standard rate. Savings scale with production.
- Escalation clauses: Most agreements include 1% to 3% annual rate increases, meaning your payment rises over time.
- Home sale transfer: The agreement must transfer to the new buyer, which can delay or complicate a sale. Some buyers are unwilling to assume a solar lease.
Leases and PPAs work well for homeowners who prioritize zero upfront cost and want to avoid maintenance responsibility. However, the total lifetime savings are lower than owning the system through a cash purchase or loan.
Which Solar Financing Option Fits Your Home and Budget?
Choosing among the available solar panel financing California programs depends on your specific financial situation, home condition, and long-term plans. No single option is right for every homeowner.
The best solar financing choice depends on three factors: your credit score (loans need good credit, PACE uses home equity). Your roof condition (old roofs should be replaced before solar), and how long you plan to stay (ownership adds home value, leases complicate sales). AMECO's team can evaluate all three factors during a free consultation.
Financing comparison table
| Option | Upfront Cost | Ownership | ITC Eligible | Monthly Payment | Term | Best For |
|---|---|---|---|---|---|---|
| Cash Purchase | High | Yes | Yes | None | None | Maximum long-term savings |
| Secured Loan | None | Yes | Yes | Low, fixed | 10-20 yr | Homeowners with equity seeking low rates |
| Unsecured Loan | None | Yes | Yes | Medium, fixed | 5-15 yr | Ownership without collateral |
| PACE | None | Yes | Yes | Via tax bill | 10-20 yr | Lower credit but sufficient equity |
| Solar Lease | None | No | No | Fixed fee | 15-25 yr | Zero upkeep responsibility |
| PPA | None | No | No | Per kWh | 15-25 yr | Pay less for clean power |
Three factors to evaluate
- Credit score. Solar loans require good credit for the best rates. If your score is lower, PACE financing may work because it uses home equity instead of credit history.
- Roof condition. If your roof is nearing the end of its lifespan, replacing it before solar installation avoids costly panel removal later. AMECO's integrated solar and roofing team handles both under one project.
- Planned home tenure. If you plan to stay 7 years or more, owning through a loan or cash purchase delivers the highest return. For shorter time frames, consider how lease transfer or PACE lien repayment could affect your sale.
AMECO Solar, operating since 1974, has helped over 3,000 California homeowners navigate these decisions. Our team can evaluate your credit profile, roof condition, and energy goals to recommend the right path. Learn more about our AMECO approach and warranties or explore our solar installation services.
Frequently Asked Questions About Solar Panel Financing in California
Can I get the federal tax credit if I lease solar panels in California?
No. You must own your solar system to claim the 30% federal tax credit. If you choose a lease or PPA, the third-party company owns the system and receives the credit. According to the U.S. Department of Energy, solar loans allow you to maintain system ownership so you can claim this credit.
What credit score do I need for solar panel financing in California?
Requirements vary by financing type. Solar loans typically need good credit for the best rates, while PACE programs use home equity instead of credit scores for approval. Final terms depend on your credit score, utility territory, and property location.
How can I bundle solar and roofing into one financing package?
Yes, many lenders offer financing for combined solar and roofing projects. California's GoGreen Home program allows up to 30% of the loan to cover other home improvements. AMECO handles both solar and roofing under one company, making it straightforward to design and finance a complete home energy upgrade.
Will financing solar panels increase my property taxes in California?
No. California law excludes the added home value from solar installations from property tax assessments. Whether you purchase with cash or finance with a loan, your property tax bill will not increase from the solar system itself.
Does California offer any programs for low-income solar financing?
Yes. The GoGreen Home Energy Financing program offers accessible loan options without a property lien. Some utility territories also offer income-qualified incentives through the Self-Generation Incentive Program (SGIP) for battery storage. Eligibility varies by utility and income level.
Ready to Explore Your Solar Financing Options?
Every month you delay going solar in California is another billing cycle spent paying some of the highest electricity rates in the country. The 30% federal tax credit is locked through 2032, but local incentives like SGIP rebates have limited funding that changes annually. Starting your project now secures these benefits while they are available.
Get An Estimate with AMECO Solar today for a free consultation. As California's integrated solar and roofing company since 1974, we will help you compare financing options, evaluate your roof, and design a system that maximizes your savings. Get An Estimate to get started.
7.23.2026
Roofing Services for Los Angeles County Homeowners
Your roof is your home's first line of defense against the elements. In Los Angeles County, that means protecting against sun exposure, seasonal rain, seismic activity, and the growing threat of wildfire. Whether you need a repair, a full replacement, or are considering a solar roof, choosing the right roofing contractor matters for the long-term performance and value of your home.
Schedule a free roofing consultation →
AMECO Solar & Roofing has served California homeowners since 1974. From our headquarters in Valley Village, we provide roofing services across Los Angeles County, combining decades of experience with the latest materials and techniques to deliver lasting results.
LA County Roofing Challenges and Solutions
Los Angeles County's climate and geography create specific roofing challenges that differ from other parts of the country. Understanding these challenges helps you make informed decisions about materials, maintenance, and when to replace your roof.
Seismic Considerations
Southern California is earthquake country. Your roof system needs to be securely fastened to the structure to withstand seismic activity. Proper attachment methods, including adequate nailing patterns and structural connections, are essential. A qualified local roofing contractor understands the building codes and best practices for seismic resilience in LA County.
Wildfire Resilience
Wildfire risk is a growing concern for many Los Angeles County communities, particularly those in the hillsides and canyon areas. California Building Code Chapter 7A requires certain roofing materials and installation methods in high-fire-risk zones. Class A fire-rated roofing materials, including composition shingles, tile, and metal roofing, provide the highest level of protection against ember ignition.
Solar Readiness
If you are considering solar panels now or in the future, your roof needs to be in good condition to support them. Solar panels have a 25 to 30 year lifespan, so installing on a roof that needs replacement in the next decade means additional expense for removal and reinstallation. AMECO handles both roofing and solar, so we can assess your roof's condition and coordinate both projects under one contract.
Explore AMECO's roofing solutions →
Cool Roof Coatings for Southern California
Cool roof coatings are a smart investment for Los Angeles County homeowners. These reflective coatings are applied over existing roofing materials to reduce heat absorption, keeping your home cooler and lowering air conditioning costs during the hot summer months.
The benefits of cool roof coatings in LA County include:
- Lower energy bills: Reflective coatings reduce rooftop temperatures by up to 50 degrees Fahrenheit, decreasing cooling costs by 10 to 15 percent.
- Extended roof life: Lower surface temperatures reduce thermal stress on roofing materials, potentially extending the life of your roof.
- Environmental benefits: Cool roofs reduce the urban heat island effect, which is a significant concern in densely populated areas of Los Angeles County.
- Compliance: California's Building Energy Efficiency Standards (Title 24) increasingly favor reflective roofing materials for new construction and replacements.
AMECO's cool roof coating solutions can be applied to many existing roof types, including composition shingles, tile, and flat roofs, providing an affordable upgrade without a full replacement.
Tile Roof Restoration and Repair
Spanish and Mission-style tile roofs are an iconic feature of Los Angeles County architecture, particularly in areas like Highland Park, San Pedro, and Santa Monica. While durable, tile roofs require specialized maintenance and repair knowledge that general roofers may not have.
Common tile roof issues in LA County include cracked or broken tiles from foot traffic or debris, deteriorating underlayment beneath the tiles, leaking flashings around chimneys and vents, and moss or algae growth in shaded areas. Tile roof restoration typically involves replacing damaged tiles, installing new underlayment, and applying a protective coating to extend the roof's service life.
AMECO's team has extensive experience working with clay and concrete tile roofing, ensuring repairs blend with the existing roof and maintain the aesthetic character of your home.
Composite Shingle and Solar Roof Options
Composite asphalt shingles remain the most popular roofing material in Los Angeles County due to their affordability, durability, and wide range of styles and colors. Owens Corning shingles, available through AMECO as an Owens Corning Platinum Preferred Contractor, offer excellent warranty coverage and impact resistance.
For homeowners interested in combining roofing and energy generation, Tesla solar roofs offer an integrated solution where solar tiles replace traditional roofing materials entirely. AMECO is a Tesla solar roof certified installer, meaning we can design and install a solar roof system that generates electricity while providing full roof protection.
Learn more about AMECO's solar roofing options →
Signs It Is Time to Replace Your Roof
Knowing when to replace your roof can prevent costly interior damage and energy waste. Watch for these indicators:
- Age: Most asphalt shingle roofs last 20 to 25 years. Tile and metal roofs can last 50 years or more with proper maintenance.
- Curling or missing shingles: Shingles that are curling at the edges, cracking, or completely missing indicate end-of-life wear.
- Granule loss: Excessive granules in your gutters mean your shingles are losing their protective surface layer.
- Leaks and water stains: Ceiling stains, peeling paint, or visible water intrusion during rain are urgent signs that your roof needs attention.
- Daylight through roof boards: Visible light coming through your attic roof deck means the roof covering has deteriorated.
Get a free roof inspection and estimate →
Why Choose AMECO as Your Roofing Contractor in LA County?
Owens Corning Platinum Preferred Contractor
AMECO is an Owens Corning Platinum Preferred Contractor, the highest level of recognition in the Owens Corning contractor network. This designation means we meet rigorous standards for quality, customer satisfaction, and business practices, and we can offer enhanced warranty coverage on Owens Corning roofing products.
Solar and Roofing Integration
Our unique combination of roofing and solar expertise means we can manage every aspect of your home's energy envelope. From roof replacement through solar installation and battery backup, one team coordinates the entire project.
Local Since 1974
We have been serving California homeowners for over 50 years from our Valley Village headquarters. We understand LA County's building codes, climate considerations, and community needs because we live and work here.
Schedule your free consultation →
Frequently Asked Questions About Roofing in Los Angeles County
How much does a roof replacement cost in LA County?
Roof replacement costs vary significantly based on the size and pitch of your roof, the materials chosen, the complexity of the installation, and whether any structural repairs are needed. AMECO provides a detailed, no-obligation estimate after a thorough inspection of your property.
How long does a roof replacement take?
Most residential roof replacements in LA County take two to five days, depending on the size of the roof, the materials being installed, and weather conditions. Tile and solar roof installations may take longer due to the specialized nature of the work.
Does AMECO offer financing for roofing projects?
AMECO works with financing partners to offer flexible payment options for qualifying homeowners. Contact us during your consultation to discuss available financing solutions for your project.
What areas of Los Angeles County does AMECO serve?
AMECO provides roofing services throughout Los Angeles County, including Valley Village, North Hollywood, Burbank, Glendale, Santa Monica, Long Beach, and the San Fernando Valley. Contact us to confirm service availability for your specific location.
7.23.2026
Go Solar with LA's Trusted Installer Since 1974
If you own a home in Los Angeles County and you have been researching solar energy, you already know the big-picture benefits: lower electricity bills, protection from rate hikes, and a smaller carbon footprint. But LA homeowners face a unique solar landscape that sets them apart from the rest of California. With two major utility territories, city-specific permitting, and a climate that makes solar a strong year-round investment, getting the right local guidance matters.
Get a custom solar estimate for your Los Angeles home →
AMECO Solar & Roofing has served California homeowners since 1974. With our headquarters in Valley Village and over 3,780 installations across the state, we know what it takes to design and install a solar system that performs in Southern California's unique environment.
Los Angeles Solar by the Numbers
Los Angeles County is one of the strongest solar markets in the United States. The region averages 284 sunny days per year, well above the national average of 205. Combined with California's net energy metering policies and federal tax incentives, LA homeowners can reduce their electricity costs substantially over the life of a solar installation.
AMECO Solar alone has helped California homeowners save a combined $24.8 million on energy costs while installing over 90 megawatts of solar capacity. Those numbers come from real installations on homes like yours across Los Angeles County, from the San Fernando Valley to the South Bay.
Understanding Your Utility: SCE vs LADWP
One of the most important decisions in your solar journey depends on which utility serves your home. Los Angeles County is split between two very different power providers, and your solar savings strategy changes depending on which one you are under.
Southern California Edison (SCE) Territory
SCE serves most of Los Angeles County outside of city limits, including the San Fernando Valley, Santa Clarita, Long Beach, and many unincorporated areas. SCE customers pay some of the highest residential electricity rates in the continental United States, with tiered pricing that pushes costs even higher during peak summer months.
For SCE customers, solar provides a faster payback period because every kilowatt-hour of solar generation offsets a higher retail rate. Under California's net billing tariff (NEM 3.0), SCE customers benefit most from pairing solar with battery storage to maximize self-consumption during peak rate periods.
Los Angeles Department of Water and Power (LADWP) Territory
LADWP serves Los Angeles city residents and offers some of the lowest electricity rates in California. While that is good news for your monthly bill, it means the financial calculus for solar is different. Lower retail rates mean a longer payback period for solar alone, making battery storage a more important part of the equation to maximize savings through time-of-use rate optimization.
LADWP also offers its own solar incentive program, the LADWP Solar Incentive Program, which provides additional rebates on top of the federal tax credit. These incentives can help close the gap created by the utility's lower base rates.
Learn more about AMECO's solar solutions for LA homeowners →
LA-Specific Solar Permitting and Installation
Every city and county in California has its own permitting requirements for solar installations. In Los Angeles County, you may need to work with the LA Department of Building and Safety (LADBS) or your local city building department. This is where working with an experienced local installer makes a real difference.
AMECO handles the entire permitting process for every installation, from application through final inspection. We know the specific requirements in Valley Village, North Hollywood, Burbank, Glendale, Santa Monica, Long Beach, and every other jurisdiction we serve in LA County. The right permits protect your investment and ensure your system meets all code requirements for safety and performance.
Does My Roof Need Attention Before Solar?
Solar panels have a lifespan of 25 to 30 years or more. If your roof is nearing the end of its service life, installing solar on top of an aging roof means you may need to remove and reinstall the panels when it is time to replace the roof. That adds cost and complexity down the road.
AMECO is both a solar installer and a roofing contractor, which gives us a major advantage. We can assess your roof's condition during your consultation and recommend the best path forward. Whether that means replacing the roof first, installing solar on a roof that still has years of life, or coordinating both projects at the same time, we handle everything under one contract.
Explore AMECO's roofing services in Los Angeles County →
How Battery Backup Complements Your LA Solar System
California's NEM 3.0 policy, which went into effect in April 2023, changed the solar landscape significantly. Under NEM 3.0, exported solar energy is credited at a lower rate than imported energy. The most effective way to maximize your savings under this structure is to store your solar energy in a battery and use it during peak rate periods when electricity is most expensive.
Battery backup also provides peace of mind during Public Safety Power Shutoffs (PSPS), which have become more common in California during high-wind fire season. With a battery system, your critical appliances stay powered even when the grid goes down.
Learn more about AMECO's battery backup solutions →
Solar Incentives and Tax Credits Available to LA Homeowners
Several financial incentives make solar more accessible for Los Angeles homeowners in 2026:
- Federal Solar Investment Tax Credit (ITC): 30% of your total system cost, claimed on your federal taxes. This incentive is available through 2032.
- LADWP Solar Incentive Program: Additional rebates for LADWP customers installing solar systems. Amounts vary based on system size and eligibility.
- Property Tax Exclusion: California law (Section 73) excludes the added value of a solar system from property tax assessments, so your property taxes do not increase when you go solar.
- Net Billing (NEM 3.0): Credits for excess solar energy exported to the grid, optimized when paired with battery storage.
Eligibility for these incentives depends on your specific property, utility territory, and system configuration. AMECO provides a full breakdown of available incentives during your consultation so you know exactly what to expect.
Why Choose AMECO for Solar Installation in Los Angeles?
Local Since 1974
AMECO Solar & Roofing has been serving California homeowners for over 50 years. We are not a national company with a local office. We are a California-owned business with roots in the communities we serve, including our Valley Village headquarters in the heart of Los Angeles County.
Award-Winning Service
AMECO has earned REC Gold Tier recognition for two consecutive years and maintains certifications as a Tesla solar roof certified installer, an Owens Corning Solar Protect partner, and an Enphase silver installer. These credentials reflect our commitment to quality and our standing in the solar industry.
Solar and Roofing Under One Roof
Our integrated solar and roofing capability means we can handle your entire home energy project without subcontractors or coordination headaches. Whether you need a roof replacement, solar installation, battery backup, or a combination of all three, one team manages the entire process.
Schedule your free Los Angeles solar consultation →
Frequently Asked Questions About Solar in Los Angeles
How much does solar cost in Los Angeles?
The cost of a solar installation in Los Angeles depends on your home's energy usage, roof characteristics, system size, and equipment choices. AMECO provides a personalized estimate after a thorough site evaluation and energy audit. Contact us for a quote specific to your property.
How long does a solar installation take in LA County?
Most residential solar installations are completed within one to three days after permits are approved. The permitting process itself varies by jurisdiction and typically takes two to six weeks. AMECO manages the entire timeline from permit application through final inspection.
Do I need a battery with my solar system?
Under NEM 3.0, battery storage significantly improves your solar savings by allowing you to store energy for use during peak rate periods. While solar alone still provides savings, a battery maximizes your return on investment and provides backup power during grid outages.
Does AMECO service my area in Los Angeles County?
AMECO serves homeowners throughout Los Angeles County, including Valley Village, North Hollywood, Burbank, Glendale, Santa Monica, Long Beach, the San Fernando Valley, and surrounding communities. Contact us to confirm service availability for your specific address.
7.23.2026
Seventy-five percent drops in solar export credits permanently changed how Californians save on electricity. Homeowners can no longer rely on simple solar arrays without battery storage to eliminate their utility bills.
NEM 3.0 vs NEM 2.0 California marks a massive shift from net metering to a net billing tariff that slashes export rates by seventy-five percent. Under older NEM 2.0 rules, utilities gave homeowners full retail credits for excess power, allowing systems to pay for themselves in about six years.
The newer NEM 3.0 structure pays much less for solar exports, which extends the payback period of a solar-only system to about nine years. Adding a home battery solves this problem by storing excess solar energy during the day to power your home during expensive evening hours. This self-consumption strategy restores your monthly savings, protects your home from grid outages, and makes your clean energy system save you the most money.
To make the best decision for your home, you must first understand the differences between these two utility programs. In the section below, we explain how each system works and what it means for your solar future.
Nem 3.0 Vs Nem 2.0 California: What Are NEM 2.0 and NEM 3.0?
Evolution of net metering in California
Net energy metering connects your home to the local power grid. When your panels make more power than you need, you send that extra power back to the grid. In return, you get credit on your bill. The California Public Utilities Commission first set up these rules in 1996 as NEM 1.0.
The state updated the program in 2016 to create NEM 2.0. Under this plan, the power company paid you a full retail rate for your extra solar energy. If you paid thirty cents for grid power, you got thirty cents for each unit of power you sent back. This direct one-to-one swap made solar a great way to save money.
How NEM 3.0 shifted to net billing
The state approved a new policy on December 15, 2022. It is called NEM 3.0, and it took effect in April 2023. This update brings a major shift in how the state handles home solar, moving California to a new net billing tariff.
The new program does not offer a simple one-to-one retail credit. Instead of paying you the retail rate for your extra power, the system uses what we call avoided-cost rates. The main goal of this billing change is to push people to use battery storage.
When you have a battery, you do not have to send power to the grid when rates are low. Instead, you can store your clean energy and use it when power rates go up. This helps balance the grid and keeps more money in your pocket.
How solar credits work under each tariff
The big change between the two systems is how the power company tracks your energy. NEM 2.0 used a method called monthly netting. With monthly netting, the power company looked at your total usage at the end of each month.
They took the power you made away from the power you used, and you only paid for the net amount. Under the new rules of NEM 3.0 California, the tracking is instant. The system uses split-second netting to check your energy flow.
If you do not use power the exact second your panels make it, that power goes to the grid. Because the grid credits under the new system are much lower, sending power to the grid is no longer a good deal. Without a battery, you lose a lot of the value your system makes. This makes adding a battery the smart path for new solar projects in the state.
Export Rates: How Compensation Differs
The rate cut for solar owners under NEM 3.0
The main gap when checking NEM 3.0 vs NEM 2.0 California is the value of your extra power. Under the older rules, power firms paid you a high rate for each unit of solar power you sent to the grid. Home owners got full retail rates, which came to about thirty cents per kilowatt-hour. This high pay rate made it easy to pay off your solar system quickly.
The new rules cut these export rates by up to 75 percent. Under the new net billing tariff, the state uses a complex system to set your credits. The California Public Utilities Commission now uses an avoided-cost model to value your power. This means your extra solar power is now worth only about five to eight cents per kilowatt-hour on average.
How netting rules changed from NEM 2.0 to NEM 3.0
The way power firms track your power has also seen a big shift. The old rules used monthly netting to figure your bill. With monthly netting, the power firm balanced your grid usage against your extra solar power over a thirty-day cycle. You only paid for the net power you used at the end of the month. This simple plan made solar-only systems a great deal.
The new billing program uses split-second tracking instead. This means the power firm tracks your home power use in real time. If your panels make extra power and you do not use it that exact second, it goes to the grid at the low five-cent rate. This real-time shift makes maximizing solar savings with battery storage highly helpful. Storing your own power lets you avoid these low export rates.
Timing your grid exports for maximum value
Because credits are now so low, timing is key. Midday is the worst time to send power to the grid. This is when solar panels across the state make the most power, so the power firms value it least. If you export energy at noon, you will get very low credits. Sending power to the grid during these hours is a waste of clean energy.
The best time to export power is from four to nine at night. This is when grid demand is high and rates go up. Home owners with battery systems can store their midday solar power and use or sell it during these peak hours. This smart plan helps you get the most value from your clean energy. It shifts the savings back in your favor.
| Key Rule | NEM 2.0 Plan | NEM 3.0 Plan |
|---|---|---|
| Rate Type | Full retail rate | Avoided cost rate |
| Netting Method | Monthly netting | Instant netting |
| Typical Credit Value | About $0.30 per kWh | About $0.05 to $0.08 per kWh |
| Best Time to Export | Any time of day | Peak hours (4 PM to 9 PM) |
| Worst Time to Export | None (flat rates) | Midday (10 AM to 3 PM) |
Financial Impact: Payback Periods and Savings
The financial math of home solar changed when California moved to the new billing rules. Solar owners now face different payback times and savings when they choose a solar-only setup. This section reviews the bill math of NEM 3.0 vs NEM 2.0 California to help you find your payback time.
Solar savings under each tariff
Under the old NEM 2.0 rules, a solar-only system had a short payback path of five to six years. Solar owners enjoyed high monthly bill cuts of about $150 to $200. These plans were popular because of their steady returns.
But the new NEM 3.0 California rules changed those numbers. A solar-only setup now has a payback time of about nine years, based on a CPUC estimate. Monthly bill savings drop to about $100. This means a 60 percent cut in lifetime solar savings if you do not add a battery.
How solar payback is calculated
To see these changes, you can check the math yourself. Payback math is simple once you know which numbers to look for. This five-step guide explains how to find the payback time for a home system.
- Find your total system cost. You must look at the price of panels, parts, and labor, then take away any federal tax credits. This gives you the net price of your solar setup.
- Check your yearly power bill savings. Add up how much money your solar system saves you on power bills over twelve months. You can find this by looking at your old power bills.
- Subtract the monthly grid fees under NEM 3.0. Under the new rules, solar owners pay about $8 per kilowatt each month. This grid charge is a new cost that NEM 2.0 owners do not have to pay.
- Subtract the 75 percent export credit cut. Since selling power back to the grid now pays less, you must reduce your yearly savings total. This cut is the main reason why payback times are longer now.
- Divide your net system cost by your yearly savings. This number shows the exact years it takes to pay off the system. A lower payback time means you start making a profit sooner.
Legal decisions and NEM 3.0 grid charges
The path to these rules was not simple. In May 2023, three green groups filed a lawsuit to block the CPUC ruling. They argued that the state did not value home solar enough.
But after oral hearings, judges of the First District Court of Appeal upheld the CPUC decision in December 2023. This court choice kept the monthly grid charge in place. For a six-kilowatt home solar setup, this charge adds about $48 every month and slows your payback speed. Knowing these court results helps you plan your solar path with care.
Why Battery Storage Is Essential Under NEM 3.0
Under the new solar rules in California, having solar panels without a battery is no longer the best path. The shift from NEM 2.0 to NEM 3.0 has changed how homeowners save money. With the older plan, you could send excess power to the grid and get a full credit for it. Now, the state wants you to keep and use your own solar power. Adding a home battery is now a vital step for any new solar project.
Shift in solar rules under net billing
The new Net Billing Tariff cuts the value of the energy you send back to the power grid by about 75 percent. This means selling power to the utility is no longer a smart financial choice. The California Public Utilities Commission set up these rules to push people to add batteries. Under the new system, storing your own power is the only way to protect your solar savings. This change highlights the core difference of NEM 3.0 vs NEM 2.0 California.
Time-shifting to beat peak utility rates
Midday is when your solar panels produce the most power, but it is also when grid electricity is cheapest. In contrast, grid rates spike in the evening between 4 PM and 9 PM, right when solar production drops to zero. A home battery lets you store cheap midday power to use during those expensive peak hours. This practice of time-shifting is the key to maximizing solar savings with battery storage. By avoiding the grid during peak hours, you keep more money in your pocket.
Storing your own power also protects your home from sudden blackouts. California grids face growing strain from heat waves and wildfires, leading to more power outages. With a home battery, your lights and vital appliances stay on when the grid goes down. This backup support gives your family peace of mind and makes your home energy independent. You do not have to worry about blackouts when you have a solid storage system.
Lower payback years for solar and battery
Without a battery, a new solar system under NEM 3.0 has a long payback period of about nine years. But when you add battery storage, the system payback drops to about six to eight years. This faster payback brings your solar returns close to the old NEM 2.0 solar-only levels. Investing in a battery is the only way to make the numbers work in your favor. Over time, the savings from your battery will easily pay for the extra upfront cost.
As a leader in California solar for 50 years, AMECO Solar & Roofing has made battery storage our core focus. We use top brands like Tesla and Enphase to build solid systems that last. Our team can manage both your roof and solar needs under one company. This approach ensures your system works at its best to give you the highest possible savings. We are here to help you navigate these new rules with confidence.
Grandfathering Rules and What They Mean for You
When looking at NEM 3.0 vs NEM 2.0 California homeowners often ask about transition rules. The transition rules depend on when you hooked up your solar panels to the grid. The California Public Utilities Commission (CPUC) approved the new policy in late 2022. This shift changed how the state rewards home solar.
The 20-Year Grandfathering Window
If you set up your solar power system under the old rules, you have some safety. The state allows current customers to stay on their first plan for a set time. This policy gives homeowners peace of mind. Under the rules, customers who joined before April 14, 2023, keep their old rates.
They keep those rates for 20 years from their first hookup date. This means your billing will not change for two decades. The rule ensures that early solar buyers get the value they hoped for. You can track this timeline by checking your utility hookup date.
Three Common Solar Scenarios
How do these rules affect you today? The answer depends on your own needs. Most people fit into one of three groups when looking at their utility bills:
- Current NEM 2.0 Owners: If your system was running before the April 2023 deadline, you are safe. Your rates stay the same for 20 years. You do not need to make any quick changes.
- New Solar Buyers: If you buy solar panels now, you fall under the new billing rules. This means you will get lower credit for the power you send back to the grid. Adding a battery is the best way to save money now.
- Grandfathered Owners Near the End: When your 20-year period ends, you will move to the new rules. Your billing will shift to the lower export rates. Plan for this shift by adding a battery before your time runs out.
Each group has its own path to take. Knowing your group helps you plan your energy future. You can select the right setup for your home.
Legal Challenges and Policy Enforcement
The change in billing rules caused a lot of debate. In May 2023, groups filed a lawsuit to stop the new policy. They argued that the CPUC did not look at the full good of home solar. But the courts did not agree.
In December 2023, the state Court of Appeal upheld the CPUC decision. You can read the real rules on the CPUC Net Billing page. This court ruling means the current rules are here to stay. Homeowners must now use the new system.
The ruling also shows why solar and battery storage must work as one to cut your utility bills. AMECO Solar & Roofing can help you find the best setup. Our team makes sure you get the most out of your green energy.
NEM 2.0 vs NEM 3.0: Which Should You Choose?
Choosing a billing plan for home solar is a key step to save money on power. The choice of NEM 3.0 vs NEM 2.0 California homeowners must make depends on when they bought their system. If you want to put solar on your roof today, you cannot sign up for the old rate plan.
But you can still get big savings by matching your new solar panels with a home battery. This pairing helps you make your own power and use it when grid rates go up.
| Metric | NEM 2.0 | NEM 3.0 |
|---|---|---|
| Yearly savings | High savings with solar alone | Lower savings unless you add a battery |
| Payback time | About five to six years | About nine years in most cases |
| Battery need | Not needed to get full value | Highly needed to store excess power |
| Best for | Older systems set up before April 2023 | New solar systems with battery storage |
| Export credit value | Full retail rate of about thirty cents per kWh | Avoided cost rate of five to eight cents per kWh |
The old solar-only path
Under the old rules, you could install solar panels alone and still save a lot of money. The power grid gave you full credit for the energy you sent back. This meant you did not need to buy a battery to make your system pay for itself.
But this older plan is no longer open to new systems in California. If you did not apply before April 2023, you must use the new rules. Existing homes with solar keep their old rates for twenty years from their start date.
Why pairing solar and storage works
Based on rules from the California Public Utilities Commission, the new net billing tariff is built for self-consumption. Under this plan, the credits you get for sending power to the grid are cut by up to seventy-five percent. This makes solar-only setups much less helpful for your bills.
But if you add a battery, you can store your own clean power to use when rates are high. This choice lets you keep your savings high and protects you from blackouts. Storing energy on site is now the best way to lower your power bills.
Key details to check
When you plan your home solar system, you must think about a few key facts. You should check the age of your roof and your home energy use first. An electric car or a heat pump can raise the amount of power you need.
The team at AMECO Solar & Roofing can help you design a system that fits your home. We will look at your bills to find the best solar and battery options. This step helps you save the most money over time. A custom plan ensures your setup fits both your roof and your daily power budget.
Frequently Asked Questions
Is NEM 3.0 retroactive for existing California solar owners?
No, NEM 3.0 is not retroactive. If your solar panels were hooked up under NEM 2.0, you keep that plan for 20 years from your start date. The state grandfathered those systems. According to the Clean Energy Alliance, only new solar setups sent in after April 14, 2023, must follow the new net billing rules.
Do I need a battery with NEM 3.0 to get a good ROI?
Yes, pairing your solar panels with a battery is the best way to get a fast payback under NEM 3.0. Without a battery, you must sell your extra power to the grid at low rates. Adding a battery lets you save that power for your own use. You can read more about maximizing solar savings with battery storage to see how this works.
How are export rates calculated in NEM 3.0 compared to NEM 2.0?
Under NEM 2.0, California homes get a near 1-to-1 rate credit for sending power back to the grid. NEM 3.0 uses a net billing tariff with rates that change throughout the day. As detailed by Solar Optimum, this cut the export rates by about 75 percent. To avoid these low rates, you should store your own power.
How does NEM 3.0 affect the payback period for solar panels?
Under NEM 2.0, a standard solar setup has a payback time of five to six years. Without a battery, the payback time under NEM 3.0 grows to about nine years. According to Solar.com, the lower export credits are the main cause for this shift. Pairing solar with battery storage helps bring that payback time back down.
Ready To Calculate Your Solar Savings?
Understanding the difference between NEM 2.0 and NEM 3.0 is the first step. The next step is finding out what solar plus battery storage could save on your specific home. Every property is different, and the right system depends on your roof, your energy use, and your utility rate plan.
AMECO Solar & Roofing has helped California homeowners go solar since 1974. Our team designs custom solar and battery systems that work with today's net billing rules. Click below for a personalized project estimate based on your home and energy needs.
7.22.2026
The SGIP rebate California solar battery program offers a state-backed financial incentive to help California homeowners install home energy storage systems that provide backup power. Administered by the California Public Utilities Commission, this program provides tiered rebate payments based on your utility company, household income level, and fire risks. General market residential systems typically receive about $150 per kilowatt-hour of storage capacity, which covers a solid portion of your upfront battery equipment costs. For qualifying lower-income households or families living in high fire-threat areas, the equity resiliency tiers can cover up to the entire cost of the battery. Homeowners can stack these valuable state-level savings with the thirty percent federal investment tax credit to maximize their overall home solar and battery storage savings.
Sgip Rebate California Solar Battery: What Is the SGIP Rebate for Solar Batteries in California?
The SGIP rebate California solar battery program is a state plan to help homes and businesses buy energy storage. Under the Self-Generation Incentive Program, California offers cash rebates for installing solar batteries. These battery systems store extra power from your solar panels. This helps homes stay powered when the main grid goes down.
Why California created the battery rebate
California has faced major power issues in recent years. Hot summers and wildfires often cause planned blackouts that leave families in the dark. To help with this crisis, state leaders set aside more than 1 billion dollars through 2024 to support battery storage. This funding helps build a stronger and more steady power grid.
A big part of the program is keeping homes safe during public safety power shutoffs. Power companies turn off the power during high winds to prevent fires. These planned outages can last for days, which is a major risk for people who rely on critical medical gear. A home battery keeps critical gear running and protects your family during these events.
The program puts certain groups at the front of the line. The highest rebates go to areas at risk of fires and homes with medically vulnerable people. Low-income homes also get extra help to buy a backup system. This focus ensures that the people who need power the most get it first.
How a home battery works for you
A home battery does more than give backup power during a blackout. It also helps you save money on your electric bills. Net metering rules in California mean that power costs the most in the late afternoon and evening. Your solar panels can charge your battery during the day when rates are low.
You can then use that stored energy to power your home when rates go up. This plan helps you avoid paying high peak prices to your power company. If you want to cut your energy bills, finding incentives for solar batteries is a great first step. Adding storage is a smart way to get the most value from your solar setup.
The future of California clean energy
The SGIP program has changed over time to meet the state's clean energy goals. In the past, the program helped many types of power projects. Now, California mostly funds battery systems to help the power grid stay steady. As more homes add batteries, the entire state becomes safer from power outages.
This shift to battery storage helps everyone. When thousands of homes use stored power at night, it lowers the demand on the main grid. This means the state does not have to run dirty gas plants to keep up with peak demand. Your choice to add a battery helps clean the air while keeping your home safe.
SGIP Rebate Levels: How Much Can You Save on a Solar Battery?
You can use California solar battery rebates from the state to lower your setup costs. The Self-Generation Incentive Program offers other refund levels based on your income and your city. If you fit the rules, this program can pay for a small part or even the whole cost of your home storage setup. The state of California sets these rates to help homes stay safe from power cuts, as shown on the CPUC portal.
General market rebates
The general market tier is open to all home power customers in California. It has the lowest payout of the three main levels. These rebate rates start around $0.15 to $0.50 per watt-hour, which is about $150 to $500 per kilowatt-hour.
For a standard 13.5 kilowatt-hour home battery, this tier gives you back about $2,025. This amount covers roughly 15% to 20% of your total install price. It is a solid way to save if you do not fit the rules for the higher tiers.
This tier uses a step-down process to hand out cash. As more people apply and the fund pools run low, the rebate rate drops. It is wise to file your forms early to lock in the highest rate.
Once a step closes, the state moves to the next step with a lower payout. This means that waiting to buy a battery will cost you more money. Homes that install their systems sooner get much better terms.
Equity and resiliency incentives
The state offers much larger payouts to help homes in need. The Equity tier helps low-income homes get storage. Based on the CPUC equity fact sheet, this tier pays up to $1,100 per kilowatt-hour for storage, plus $3,100 per kilowatt for solar panels.
For a standard 13.5 kilowatt-hour battery, that is about $14,850. This amount can cover the full cost of a normal setup, which often runs between $10,000 and $15,000.
The Equity Resiliency tier pays $1,000 per kilowatt-hour, or about $13,500 for a standard battery. This tier is for homes in high fire-threat zones or areas with frequent blackouts. It also helps sick people keep their health gear running. These two tiers make home batteries low-cost for the people who need backup power the most.
Funding status and waitlists
You must track the active funding status of each tier. As of December 31, 2025, all RSSE AB 209 funding is fully reserved. This means new requests for this tier will go onto a waitlist.
These waitlist spots are funded only when older projects drop out of the queue. You can still join the list to use the SGIP rebate California solar battery program. A local expert can help you check your current status.
You can look at the table below to see how these options compare. It shows the rate and the usual savings for each group.
| Category | Rebate Rate | Typical Savings (13.5kWh) |
|---|---|---|
| General Market | $0.15 to $0.50 per Wh ($150 to $500 per kWh) | About $2,025 |
| Equity Resiliency | $1.00 per Wh ($1,000 per kWh) | About $13,500 |
| Equity (RSSE) | $1,100 per kWh storage + $3,100 per kW solar | About $14,850 (storage only) |
Can You Combine the SGIP Rebate With the Federal Solar Tax Credit?
Yes, you can combine these two clean energy programs. Homeowners can stack the 30% federal tax credit with the SGIP rebate for a California solar battery. This is known as stacking incentives. It is one of the best ways to lower the price of your backup system.
There is another key detail about how these savings combine. The SGIP rebate is not taxed as income by California or the federal state. But you must use the federal tax credit on the net cost of your system. This means you take away the state rebate first, then take 30% off the rest.
How stacking incentives works in California
Let's look at how the math works for a common home setup. A standard battery system might cost about $13,000 to set up. If you qualify for the general market SGIP tier, you might get a $2,000 rebate. This rebate cuts the starting price of your battery from $13,000 down to a net cost of $11,000.
Next, you use the 30% federal tax credit on that net cost. The federal government allows a 30% credit for clean energy systems under the Residential Clean Energy Credit guidelines. In this example, 30% of $11,000 is $3,300 in tax savings. Your tax credit is figured from the net cost after taking away your state rebate.
When you combine both programs, your total savings are $5,300. This brings your final out-of-pocket cost for the system down to just $7,700. Working with a trusted partner is key to finding all available California solar battery rebates. This helps make backup power a smart choice for your home.
Maximizing NEM 3.0 returns with battery storage
Under California's NEM 3.0 rules, battery systems are more needed than ever. The new rules cut the export rate for solar power sent to the grid by about 75%. You get much less credit for extra solar energy. Saving that power in home battery storage lets you avoid high peak rates.
By storing your own solar power, you can use it when utility rates are highest. This protects your home from high night rates and grid outages. When you combine daily bill savings with your rebate and tax credit, the total savings are clear. Stacking all these benefits helps you gain real power freedom.
Who Qualifies for the SGIP Solar Battery Rebate?
To get the California solar battery rebates, you must be a customer of a utility that takes part. This includes PG&E, SCE, SDG&E, SoCalGas, or LADWP zones. Both homeowners and non-residential property owners can apply. Your chosen solar battery must also be on the approved equipment list.
Utility and equipment requirements
First, you must have an active account with one of California's main power firms. This program is open to both residential and commercial clients. If you own a small business, a farm, or a non-profit, you can still apply for the rebate. Homeowners who want to secure their power supply during a grid outage are also welcome to join.
Your equipment must also meet specific rules. The state keeps a main list of approved solar batteries that can get the rebate. If you buy a battery that is not on this list, you will not get any cash back. AMECO can help you choose a battery that fits your needs and meets all state rules.
Low-income and equity tiers
The state divides the program into clear levels to help those who need it most. The SGIP rebate California solar battery program puts households first that are low-income, medically vulnerable, or in high fire-threat areas. To enter the Equity tier, your household income must fall below 80% of your county's median level. You can also qualify if you live in a disadvantaged community as mapped by state tools.
But you must act fast. As of December 31, 2025, all funding for the residential equity budget is reserved. New claims for this tier now go to a waitlist. These waitlisted projects will only get funded if older projects drop out of the queue. If you want to claim your rebate, getting on the list early is key.
Equity resiliency and general market criteria
The Equity Resiliency tier has even stricter rules. It is meant for customers who live in high fire-risk areas or have faced many power shutoffs. You may also qualify if you rely on medical equipment that needs constant power. This tier is designed to keep critical homes running during blackouts.
If you do not meet these low-income or fire-threat rules, you can still apply for the General Market tier. This tier is open to all California utility customers who install home battery storage. While the rebate amount is lower, it still helps reduce the upfront cost of your clean energy system.
How AMECO Solar & Roofing Helps You Navigate the SGIP Rebate Process
Getting a state rebate can feel hard because the rules are complex. There are many steps, forms, and setup details to manage. Since 1974, AMECO Solar & Roofing has helped local homeowners protect their power. With our 50-year California history, we make the path simple and easy.
According to the California Public Utilities Commission, the best way to start is to contact a skilled installer. Our team handles every part of the application for you. We check if you qualify, file the forms, and make sure your system is in line with state rules. This means you can focus on the power and savings of your new system.
The value of local solar and battery experts
When you choose to add energy storage, you need a team that knows the state grid. Our deep local roots mean we know how local utilities work. We work with major providers like PG&E, SCE, and SDG&E daily. Our goal is to pair solar energy systems with the right backup power to boost your savings.
Working with an expert helps you avoid common mistakes. A small error on a form can delay your funding for months. We manage your file from start to finish so that you get your funds fast. Here is how we guide you through each stage of the process.
Our step-by-step support path
- Schedule a free consultation: We check your home, current utility bills, and daily energy needs to find the best setup.
- Custom battery system design: Our team handles the technical proposal and chooses the best battery for your property.
- SGIP eligibility verification: We check your income, local fire risk, and outage history to find which rebate tier applies to you.
- Application submission: We prepare and file all needed SGIP papers to the state program to secure your spot.
- Installation and compliance: We install your battery and coordinate the post-install inspection with local officials.
- Rebate disbursement: We track your file to make sure your rebate check reaches you as fast as possible.
Benefits of hassle-free installation
Adding our battery storage solutions protects your home from sudden blackouts. It also helps you avoid high peak-hour rates under California's net billing rules. Our team makes sure your system meets all local building and safety codes.
We believe that switching to clean energy should be simple. By handling the complex paperwork, we save you time and stress. Contact AMECO today to start your project.
Frequently Asked Questions
Can I get an SGIP rebate if I already have solar panels?
Yes, you can get an SGIP rebate if you already own solar panels. The state program helps you add storage to an existing system, providing great incentives for solar batteries. However, the battery must be new, and your system must remain connected to the power grid.
How long does it take to get the SGIP rebate?
It usually takes several months to get your SGIP rebate check. The process has a few steps, including pre-approval, battery setup, utility checks, and final review. Working with an experienced contractor ensures that you file your paperwork right, which helps prevent long delays with the state.
Does the SGIP rebate cover the full cost of a solar battery?
For some homeowners, the rebate can cover the full cost. Under the CPUC rules, the Equity and Equity Resiliency tiers provide higher incentives that can pay for almost all or all of your installation. For the general market, California solar battery rebates are lower and usually cover about 15% to 20% of your total costs.
Is SGIP rebate funding still available in California?
Yes, but availability depends on your rebate category and utility. While some popular funds for low-income households are reserved, new applications can still join a waitlist. General market funds are also open. You can check the current status on the CPUC fact sheet or talk to an installer to find out where your project fits.
Ready to Secure Your California Solar Battery Rebate Today?
Waiting to add battery backup means paying high utility rates and risking sudden blackouts during grid outages. State program funding levels drop as more people sign up, so starting your project today ensures you get the highest possible rebate. Our local team handles all the complex paperwork for your new California battery storage solutions.
Ready to get a free consultation and find out how much you can save? Our local team is standing by to help. We are ready to design your custom system. We make the whole process very simple for you. Please call (562) 633-4400 today to talk with us and get an estimate for a custom battery storage installation.
7.21.2026
A single hot summer afternoon can drive California household energy bills to record highs. Homeowners are finding that piecemeal upgrades cannot keep pace with rising utility rates and grid blackouts. True energy security takes a complete shift in how we power our homes.
For California residents, whole home electrification California upgrades combine solar panels, battery backup storage, heat pump HVAC, heat pump water heaters, induction stoves, and EV chargers. This single system shifts your home from costly fossil fuels to clean power, using solar energy during the day and stored battery power at night. By pairing solar with these clean appliances, a whole-building plan cuts home energy use and lowers monthly bills far more than single upgrades. These clean changes also protect families against rising utility rates and sudden power outages while lowering your home carbon footprint. The California Energy Commission suggests working with a qualified contractor to check your electrical panel, design your system, and find available rebates.
But how does this transition work, and what systems do you need first? To help you plan your project, we will look at What Does Whole Home Electrification Include? and show you how these components work as a team. The path begins with
Whole Home Electrification California: What Does Whole Home Electrification Include?
Transitioning to a fully electric home means moving away from gas and fossil fuels. In a whole home electrification California project, you swap gas-powered systems for clean, electric options. Rather than doing this in a piecemeal way, a smart approach looks at the home as one complete system.
Power supply and storage systems
The base of any modern electric home sits on the roof. Solar panels make clean power from the sun to run your home systems. To get the most out of your solar panels, you can learn about the different solar panel system components to see how they work together.
A solar array works best when paired with battery backup. A home battery stores the extra power your panels make during the day. This stored energy is ready for you to use at night or when power rates spike. Adding a battery to your solar array sets up robust whole home energy backup systems to protect your family from grid outages.
Electric appliances for the home
Once your home has a clean energy source, you can swap out gas appliances. Standard heaters use a lot of fuel, but heat pump HVAC systems use power to move heat rather than create it. They keep your home cool in the summer and warm in the winter. This dual system replaces both your furnace and cooling unit. A heat pump water heater works the same way and uses far less energy than a standard gas tank.
In the kitchen, induction cooktops replace old gas stoves. These stoves use magnetic fields to heat your pans. They cook food faster, stay cool to the touch, and keep your indoor air clean. Last, a level two EV charger in your garage completes the setup. This lets you charge your electric car right at home using your own clean solar power.
Why a unified plan works best
Taking a whole-building approach to electrification is more helpful than swapping old units one by one. When you pair appliance upgrades with solar power, batteries, and weatherization, you boost your energy savings. A report by the City of Sacramento shows that these combined steps reduce total energy use and lower long-term costs. Doing everything together ensures your systems are sized right for your home.
Planning these upgrades together also helps you manage your home's power load. When you add high-draw devices like heat pumps and car chargers, you may need a new service panel or a sub-panel. Upgrading your panel at the start ensures your home's wiring can handle the new load. Working with a single team prevents you from paying for the same wiring work twice.
Solar and Battery Storage: The Energy Foundation
Generating clean power
To start a plan for whole home electrification California homes need a strong source of clean power. Solar panels form this base. They absorb sunlight and convert it directly into clean electricity. This power runs your lights, appliances, and heating systems during the day. By using solar energy, you reduce your need for fossil fuels and the utility grid. Generating power on your own roof gives you control over your home's energy source.
Storing power for later
Sunlight is only there during the day, but your home needs power around the clock. This is where battery storage becomes vital. A home battery backup system saves the extra power your solar panels make during peak hours. Instead of sending that clean power back to the grid, you store it for nighttime use or during a power outage. This keeps your home safe and ready for any blackout.
Pairing solar with whole home energy backup systems keeps your house running when the local grid goes down. This backup power is crucial for homes in areas prone to seasonal storms or rolling blackouts. It ensures that your heat pumps, fridges, and medical devices keep working without a pause. You will not have to worry about food spoiling or losing heat during a storm.
Lowering utility costs
Pairing solar panels and battery storage with electric appliances is the smartest way to lower your utility bills. A whole-building approach to electrification helps you manage your energy use. According to a building report by the City of Sacramento, pairing electric appliance upgrades with solar arrays and battery storage reduces overall energy use. Adding weatherization upgrades to this system helps you save even more. It stops drafts and keeps your home cozy without wasting power.
When you install these systems together, you avoid buying power from the grid during high-rate peak hours. You can research integrated battery storage costs to see how this choice fits your budget. Over time, making and storing your own power provides stable energy costs and shields you from utility rate hikes. This smart plan helps you achieve true energy freedom.
Smart energy use
These linked systems work together using a smart home monitor. The monitor directs solar power to where your home needs it most. It can charge your battery or run your appliances when electricity rates are high. This smart control takes the guesswork out of managing your power use daily. It helps you get the most value out of every watt of power you make.
Heat Pumps for HVAC and Water Heating
To achieve whole home electrification California homeowners must change how they heat their space and water. Heat pumps are the best way to do this because they do not create heat. Instead, they move heat from one place to another. This shift saves a lot of energy and lowers your bills.
Heating and cooling your home
A heat pump HVAC system works as both a heater and an air conditioner. It pumps hot air out in summer to keep your home cool. When winter comes, the system pulls heat from the outdoor air to warm your rooms. This clean process does not burn fossil fuels.
You can choose between ducted systems that use your current vents or ductless mini-splits for single rooms. Both options save a lot of power, allowing homeowners who switch from gas to save about $596 each year. These savings are based on studies by the National Renewable Energy Laboratory. The systems last for years and keep your home cozy.
Saving power on hot water
Water heating is often a home's second largest energy drain. Standard electric and gas tanks burn a lot of fuel to keep water hot. In contrast, a heat pump water heater uses up to 70% less energy than standard models. It works by pulling warmth from the surrounding air and moving it into the tank.
This high rate of energy savings helps homeowners cut down their bills quickly. You can save about $118 each year just by switching from a gas water heater. When you combine both HVAC and water heating upgrades, your total savings can reach $714 per year. If you want to see how these upgrades apply to your house, you can Get An Estimate from a local team.
Electrical panel needs
Switching to electric systems increases the amount of power your home draws. Old power panels may not have enough space or room for these new loads. To handle the extra load, you might need to upgrade your panel or add a sub-panel. This step ensures your power system remains safe and works without stopping.
According to the City of Sacramento, these panel changes are common when you add big units. A skilled installer can check your panel first. They will map out your home's total power load to make sure everything runs smoothly. Planning ahead helps avoid sudden blackouts and keeps your new heat pumps working at their best.
Induction Cooking and EV Charging
Switching your stove and car charger to electric are two key parts of a clean home. You can take a big step with whole home electrification California. These stove and charger upgrades bring clear health and safety perks to your family. By moving away from gas, you make your home safer and ready for a self-powered future.
Clean indoor air and fast cooking
Induction cooktops use magnets to heat pans. This makes cooking much faster and safer than using old gas stoves. Because there is no open flame, you will not burn your hands on the glass. This tool also keeps your home air clean. Gas stoves release bad gases like nitrogen dioxide into your kitchen. In fact, CDC research shows that gas stove emissions can raise indoor gas levels, which worsens child asthma. Switching to induction gives you a cool cooktop, fast meals, and clean air.
A new cooktop is a smart kitchen upgrade. You can power the stove with clean solar energy from your roof. Gas stoves burn fossil fuels. Induction stoves run on clean electricity. This change cuts out gas bills and lowers your home emissions.
Fueling your drive with clean home energy
The next step is adding a Level 2 car charger to your home. Charging an electric car with a standard wall plug takes too long. A Level 2 charger is fast. It can fill your battery up to seven times faster than a regular plug. This means your car is ready to go in just a few hours. Plug in at night and wake up to a full charge.
You can link your charger to your solar panels and battery storage. This setup lets you fuel your car with free power from the sun. During a power outage, your car and home can still run if you have whole home energy backup systems in place. Using these tools creates a complete clean energy system. You will save money on gas and help build a greener California.
California Incentives for Whole Home Electrification
Going all-electric can seem like it costs a lot. But state and federal programs help lower your total costs. By stacking these programs, you can save money on each step of your project. If you plan a whole home electrification California project, these credits and rebates can make clean energy much more affordable.
Federal tax credits for energy upgrades
The federal government gives tax credits to help you switch to clean power. The first big option is the federal solar tax credit. This program pays for thirty percent of your solar panel and battery system costs, with no cap on the savings. This credit can save you thousands of dollars on a new home energy system.
You can also get tax credits for high-efficiency home systems. The federal heat pump tax credit gives you up to two thousand dollars back per year for a new heating and cooling system. You can also use this credit for a heat pump water heater. Since these credits reset every year, you can space out your upgrades to save the most money.
State rebates and local programs
California has its own programs to help you electrify your home. One major program is the High-Efficiency Electric Home Rebate Act, or HEEHRA, which offers up to eight thousand dollars for a heat pump heating system. State reports from the California Energy Commission show that single-family rebates are now fully reserved statewide. This change went into effect on February 24, 2026.
Even with those funds paused, you can still get other state rebates. The TECH Clean California program offers cash back for heat pumps and smart water heaters. These rebates stack with federal tax credits to help lower your upfront costs. Homeowners can find lists of active tax credits on the state Homeowner Energy Resource Hub to plan their budget.
The role of licensed contractors
A full home energy upgrade is a big job. You often need to check your electric panel to see if it can handle the new load. A licensed contractor can run these safety checks before you start your project. They can also help you find and apply for all active local rebates.
When you look for California solar installation services, pick a team that knows both solar power and home heating upgrades. Our team at AMECO can help you check your home. You can request to Get An Estimate today to begin your home upgrade.
Is Whole Home Electrification Worth It in California?
Lower utility bills and long-term savings
Many people ask if whole home electrification California is truly worth the investment. California families pay very high energy bills. Switching to electric options can help you lower those monthly costs. Data from the National Renewable Energy Laboratory shows that heat pumps can save you $714 a year. These bill savings add up fast and help offset the upfront cost of your new systems.
| Upgrade | Gas/Standard Annual Cost | Electric/Heat Pump Annual Cost | Estimated Yearly Savings |
|---|---|---|---|
| Space heating and cooling | ~$3,500 | ~$2,786 | ~$714 |
| Water heating | ~$420 | ~$302 | ~$118 |
| Cooking (stove/oven) | ~$180 | ~$90 | ~$90 |
| Vehicle fuel (gas vs solar EV) | ~$1,600 | ~$500 | ~$1,100 |
Gas rates in California are rising fast. You pay high monthly fees just to stay tied to the gas grid. Swapping to a fully electric home lets you cut that link. This helps you save by ending your monthly gas bill.
Solar panels and electric upgrades can increase home resale values. Many buyers in California search for homes that are ready for the future. An all-electric home with modern systems appeals to these buyers. They like knowing they will not have to swap out gas lines or old appliances.
Energy independence and grid protection
Power outages are a growing problem in California. Power firms often shut off the grid on windy days to stop fires. When you pair solar panels with whole home energy backup systems, you protect your home from blackouts. Your battery stores solar power to keep your lights on when the grid goes down.
This setup also protects you from rising power rates. California electric rates have gone up fast over the last few years. By making your own power and storing it, you rely less on the grid. This lets you control your own bills. You will not have to worry as much about price jumps.
Using solar power to run your heat pumps during peak hours saves you the most money. California rates are highest in the late afternoon and evening. Your battery can power your home during these high-cost hours so you do not buy power from the grid.
Green benefits of a clean grid
Electrifying your home is a powerful way to reduce your carbon footprint. When you swap gas appliances for electric ones, you stop burning fossil fuels. This change reduces greenhouse gas emissions, according to a report by the City of Sacramento. Our state grid gets cleaner each year, making electric homes even greener.
California aims to have a fully carbon-neutral electric grid by 2045. When you electrify your home now, you prepare for this clean future. Your home will run on solar, wind, and other clean power sources as the grid shifts. This makes your investment a lasting choice for the planet.
Why Choose AMECO for Your Electrification Project
Planning a whole home electrification California project can feel hard because of all the moving parts. You must join solar, batteries, heat pumps, and car chargers. State advice from the California Energy Commission suggests that owners work with a licensed team to check their house. The right team helps you find state rebates, tax credits, and local financing to keep your costs low.
Fifty years of local experience
AMECO has served California owners since 1974. With over fifty years of local work, we know how to design and build power systems that last. We know local grid rules, weather patterns, and city codes across the state. Our long past means you get a partner who will be here to support your home for many years.
Unified solar, battery, and electrical setup
Many firms only do one part of the job. A roofing crew cannot install solar, and a solar shop cannot upgrade your main electric panel. AMECO is unique. We handle your entire project from start to finish.
We join solar installation, roofing work, and electric upgrades into a single plan. Our team manages every step from the first talk and custom design to setup and support. Whether you need solar panels, battery storage, or a home car charger, we do it all. This full approach fits well for residential electrification projects.
Unified warranty and ongoing support
When you hire different crews, they often blame each other if a leak or power issue happens. A solar company might blame the roofer, and the roofer might blame the solar company. With AMECO, you avoid this stress. We give you one point of contact and a single warranty.
Our deep skill in solar, batteries, roofing, and car chargers means we stand behind everything we build. We are proud to rank among the top California solar installation services because we put quality first. We manage your entire system to make sure it works as one. You do not have to guess about final savings because we design each setup to match your home's energy use.
Frequently Asked Questions
Are there California incentives for home electrification?
Yes, several programs help reduce your upfront costs. You can get federal tax credits of up to 30 percent for solar panels and battery storage. State and local programs also offer rebates for heat pumps and smart appliances. To see which programs you can use, the California Energy Commission suggests working with a local contractor. An expert can check your home to find all active tax credits, rebates, and financing options.
Does whole home electrification need a panel upgrade?
In many cases, yes. Adding heat pumps, EV chargers, and solar power adds to your household electrical load. According to the City of Sacramento, you may need to upgrade your main panel or add a sub-panel to handle the extra power. An expert can check your current panel to see if it can support your new electric systems.
Can I combine solar panels with home electrification?
Yes, combining solar panels and home batteries with new electric appliances is the most cost-effective approach. According to the City of Sacramento, pairing appliance upgrades with solar panels, batteries, and weatherization cuts overall energy use and utility costs. This single approach provides much higher savings than upgrading your home one piece at a time.
Are gas stoves bad for indoor air quality?
Yes. Gas stoves can release harmful fumes inside your home. According to the CDC, higher indoor gas levels from cooking can lead to more asthma symptoms in children. Switching to an induction stove removes these fumes and makes your indoor air much safer to breathe.
Ready to Electrify Your California Home with Solar?
Waiting to update your California home with modern electric systems means you will keep paying rising utility rates and remain vulnerable to sudden grid blackouts. Setting up your solar panels, battery storage, and heat pump HVAC today lets you lock in valuable California rebates before they expire this year. You will get a clean, highly efficient home that protects your own family from power outages and lowers your monthly energy bills from day one.
Ready to take control of your monthly power bills and protect your family from local utility grid power outages? Call (562) 633-4400 to talk to a local home energy expert and schedule your own whole home electrification consultation today.
7.20.2026
Choosing between ground mount vs roof mount solar depends on your home roof condition, yard space, and energy goals. Roof-mounted solar systems are the most common installation method because they utilize existing structures and do not require extra land, according to the U.S. Department of Energy. However, ground-mounted systems offer a viable alternative if your roof is shaded, has limited space, or cannot support the structural weight of the solar panels. Ground setups also let you set the perfect angle for maximum sun exposure and allow easy access for maintenance. Though they usually have higher upfront costs due to trenching and additional rack materials.
Ground Mount vs Roof Mount Solar: Key Differences
Choosing the right way to set up your solar panels is a key step toward energy independence. Most property owners look at two main choices: placing panels on the ground or on top of a home. Both options have unique traits that affect setup costs, energy output, and space usage.
Understanding the Two Setup Options
A roof setup is the most common method because it is robust, versatile, and easy to construct. It utilizes the existing building structure, which means you do not need to use any extra land on your property. This makes it an ideal fit for homes with clear, unshaded roof space.
In contrast, a ground setup is a great choice when your roof is too small, has too much shade, or cannot support a heavy load. These systems stand on metal frames set in the ground. While they require dedicated land, they let you place your panels in the best spot to catch the sun.
Main Points of Comparison
Each mounting style has clear differences in how they work, what they cost, and how you care for them. For example, roof arrays are typically fixed at an angle determined by your roof shape and local latitude. Ground arrays can use manual or automatic tools to shift panels, which helps them make more power. To learn how all these parts work together, you can read our solar power system components guide.
Below is a direct comparison of the key traits for both options:
| Feature | Roof Mount Solar | Ground Mount Solar |
|---|---|---|
| Standard Setup | Uses existing roof shape and structure | Requires dedicated open land area |
| Install Cost | Lower cost because structure exists | Higher cost due to trenching and framing |
| Space Needed | Zero yard space, uses empty roof | Requires open, flat ground area |
| Tilt and Angle | Fixed by roof pitch and direction | Fully flexible for optimal tilt angle |
| System Care | Harder to reach for cleaning and repairs | Easy to access safely from ground level |
How Location Affects Your Choice
The layout of your land and local weather play a big role in your choice. If you live in a hot area, ground panels often perform better because air flows freely under them, keeping them cool. But if you have a small yard, a roof mount keeps your outdoor space open. Assessing these factors helps you find the best balance of cost and power output for your property.
Cost Comparison: Ground Mount vs Roof Mount Solar
When you plan a home power project, setup costs are a key detail to check. Roof setups are usually the most budget-friendly choice because they attach directly to your existing home structure. Ground setups generally cost more upfront because they need extra materials, concrete bases, trenching, and long wire runs to connect to your electrical panel.
Racking and Structural Costs
Roof-mounted systems use your existing roof structure as support, which keeps labor and material costs low. Ground-mounted options require heavy steel or aluminum racks anchored in concrete piers. If your property needs a solar layout for solar panel installation, ground racks must be constructed from scratch, which adds to the overall project cost. These structural additions mean ground setups require more steps and hours to build than standard roof racks.
System Size and Scale
Most residential solar systems typically range from 4kW to 15kW, as noted by AMECO Solar & Roofing. For a standard home layout, a roof-mounted system of this size is highly cost-effective because it fits onto the existing roof face. If you choose a ground setup of the same size, the need for land clearing and trenching makes the cost per watt higher. However, ground setups allow you to scale up easily if you have the open space, while roof systems are strictly limited by your roof size.
Tracking Systems and Long-Term Value
If you build on the ground, you can choose tracking systems that automatically move panels to follow the sun. According to the U.S. Department of Energy, tracking mechanisms involve higher upfront costs and require more maintenance. However, the cost-benefit analysis increasingly favors tracking for ground-mounted systems due to technological improvements. The extra energy you get from a tracker can help offset the higher starting cost over time.
The exact price for your project will always depend on your specific home, land, and power needs. AMECO Solar & Roofing offers both types of installations and can help you compare options for your property. To find the best setup for your home, you can get an estimate from our team today.
When Should You Choose a Ground-Mounted Solar System?
Rooftop solar is the standard choice for most homes, but it is not the only option. A ground-mounted solar system offers a strong alternative when your roof is not ideal. Choosing between ground mount vs roof mount solar depends on your property layout, your roof condition, and your energy goals. As a full-service contractor, AMECO Solar & Roofing can evaluate your property to find the best fit.
Your Roof Has Shading or Space Limits
Many roofs have barriers that block the sun. Large trees, nearby buildings, or chimneys can cast shadows that lower your energy output. Rooftop setups are also limited by the size and shape of your roof. A ground-mounted system offers a great way to overcome shading challenges because you can place the panels in an open, sunny area. If your roof is too small, too old, or faces the wrong way, placing panels on the ground ensures you can still generate clean power.
You Want to Maximize Solar Energy Production
Ground systems let you set the exact angle of your panels. On a roof, the slope of the roof determines the tilt of your solar panels. With a ground mount, you can set the ideal tilt angle for your local latitude to get the most annual energy. You can also make seasonal adjustments to the tilt of your ground panels as the path of the sun changes. For even more power, ground mounts can use tracking mechanisms that automatically move panels to follow the sun from east to west.
You Have Extra Land or a Commercial Property
If you own a large lot or a commercial property, you have the space to use land instead of your roof. Commercial buildings often use ground setups when their roofs are not suitable or when their energy needs are very high. Ground systems also keep your panels cool. The air flows freely under ground-mounted panels, which keeps them from getting too hot. This extra cooling help panels work with better efficiency in hot climates. Finally, ground panels are much easier to reach for regular cleaning and maintenance.
What Are the Advantages of Roof-Mounted Solar Panels?
Rooftop solar remains the most common installation path for good reason. Choosing a rooftop setup is often the simplest way to go solar because it saves space and reduces setup costs. When evaluating the choice between ground mount vs roof mount solar, several key benefits make the roof the standard pick for California property owners.
Space Efficiency and Lower Costs
The primary benefit of rooftop solar is that it uses your existing building structure. Since the panels sit on your roof, you do not have to give up any valuable yard space or open land. This is why roof-mounted systems are the standard for most residential and business applications. Utilizing this existing footprint also means you avoid the high costs of land clearing, trenching, and complex racking that ground arrays need.
Simplified Setup and Permitting
Rooftop arrays are generally faster to install because they use robust and versatile racking systems. Industry standards from the U.S. Department of Energy show that rack mounting is the most common method because it is robust, versatile, and easy to construct. This simplicity often translates to fewer zoning issues and faster permit approvals from local California cities. The panels are typically fixed at a stable angle based on your local latitude to catch steady sunlight throughout the year.
Structural and Safety Assessments
Before installing any panels, you must ensure your home is ready for the project. Solar panels must sit on a stable, durable structure that can support their weight and withstand high winds or heavy rain over many decades. Standard systems also require careful planning to mitigate safety hazards for installers, which guidance from the Occupational Safety and Health Administration shows can be reduced during the initial design phase. Because roof health is so critical, AMECO evaluates your entire roof structure first. If your roof needs a roof repair or replacement, we can coordinate both services under one team to ensure a safe, long-lasting installation.
Maintenance and Longevity: Ground Mount vs Roof Mount Solar
Keeping your solar panels clean and in top shape is key to getting the most power from your system over time. When you compare ground mount vs roof mount solar setups, the way you maintain each system is very different. Both options require basic upkeep, but physical access and design choices play a big role in how easy it is to handle these tasks over their long lifespans.
How Physical Access Impacts Your Maintenance Routine
Physical access is the biggest difference when looking at upkeep tasks. Ground-mounted solar panels are much more accessible for regular maintenance and cleaning compared to rooftop setups. You can stand on the ground and use simple tools to wash away dirt or dust without extra risk. This easy access makes regular upkeep fast and simple.
By contrast, roof-mounted solar installations face unique safety hazards that make routine tasks harder. Working on a steep roof requires extra care and special safety gear to prevent falls. According to guidelines on workplace safety from OSHA, these risks can be lessened if teams use smart design choices before setting up the array. Because of these safety concerns, many homeowners hire professionals to handle roof-level work, which can increase lifetime costs.
Mechanical Parts and Long-Term System Wear
The type of mounting system you choose also changes the mechanical wear your system will face over decades of use. Most roof-mounted solar systems use simple, fixed racks with no moving parts. This means there are fewer pieces that can break down or wear out over time. It makes the physical structure of a roof array highly durable and very low-maintenance.
Ground-mounted systems can use these same fixed racks, but they also allow for tracking mechanisms that automatically move panels to follow the sun. While these tracking systems can boost energy production, they involve more sophisticated technology and higher upfront costs. They also require increased maintenance over time because motors and moving parts wear out. If you choose a fixed ground system, however, you get the benefits of easy ground access without the extra wear of mechanical parts.
General Upkeep and AMECO End-to-End Support
No matter which mounting style you choose, all solar systems need basic upkeep. You will need to clean your panels, check your solar inverter, and use a monitoring system to track your power output. Working with an experienced partner like AMECO Solar and Roofing helps ensure your system stays in top shape over its entire lifespan. AMECO provides complete support for both ground and roof systems across California. If you are ready to explore your options, you can consult with experts to plan a custom solar panel installation that fits your property and your long-term goals.
How to Decide Between Ground Mount and Roof Mount Solar
Choosing the best solar setup for your home is a key step toward energy independence. The choice between ground mount vs roof mount solar depends heavily on your specific energy needs and the physical limits of your property. To find the right fit, you must evaluate multiple factors from structural health to local rules.
Check Your Roof and Land
The first steps focus on your home's structure and layout:
- Check your roof health: Your roof condition is a primary factor in determining if a roof-mounted system is suitable. An array must be placed on a stable, durable structure that can support the weight for decades. AMECO offers integrated solar and roofing services to evaluate your roof structure before we recommend a system. If your home needs a roof repair or replacement, we handle both projects together.
- Assess your available space: Look at your property to see where panels can fit. Roof mounts use existing structure space without taking up land. Ground mounts offer a viable option when your roof space is limited or cannot hold the structural load, but they require dedicated land area.
- Review sun exposure: Check for trees or nearby buildings that cast shadows. Ground-mounted systems can overcome shading challenges that might make roof-mounted solar less effective because they can be placed in open areas.
- Define your energy goals: Consider your budget and power needs. Roof-mounted solar arrays are the standard for most homes. But ground mounts can optimize energy production by allowing for ideal tilt angles that may not be available on a fixed roof.
- Review local permit rules: Local building departments have specific rules for both options. Ground-mounted units often need more property line offsets and soils testing than roof systems.
- Get a professional assessment: Work with an expert team to design your system. AMECO provides end-to-end support to ensure you get the best solution for your California home.
Consult with Local Experts
Working with a contractor who understands both roofing and solar makes the path simple. You can find more details about how these setups differ in our guide on benefits of ground-mounted solar arrays. A professional team will verify your property limits and help you choose the option that maximizes your long-term savings.
Frequently Asked Questions
Is it better to install solar panels on the ground or roof?
The right choice depends on your property layout and roof health. Roof-mounted systems are standard and use your existing building footprint without using up land. However, ground-mounted solar is a great alternative if your roof is too small, shaded by trees, or cannot support the structural weight of the panels.
Is ground mount solar cheaper than roof mount?
Roof installations are usually cheaper upfront. They use your existing structure, which keeps labor and building costs low. Ground systems need extra trenching, concrete footings, and metal racking. However, U.S. Department of Energy research shows ground systems can yield more power over time by letting you set the perfect angle.
Are ground-mounted solar panels easier to clean?
Yes. Ground arrays sit close to the dirt and are much easier to reach for regular cleaning and maintenance. You can wash them safely from the ground without climbing a ladder. Rooftop solar panels are harder to reach and present unique fall safety hazards for workers, according to guidelines from the Occupational Safety and Health Administration.
Why would a solar company not do ground mounts?
Ground systems need specialized land preparation, trenching, and complex zoning permits. Many standard solar firms do not have the equipment or civil engineering skills needed to clear land or install deep ground footings. AMECO manages these setups end-to-end because we are licensed in both solar and general roofing construction.
Get an Estimate for Your Solar Installation
Delaying your solar project keeps you vulnerable to rising utility rates and high energy costs. Setting up your clean energy system now locks in stable power and provides immediate peace of mind. Our experienced team manages every detail of your design and installation to ensure your home gets the best setup possible.
Ready to get an estimate for your ideal solar setup? Get an estimate for your ideal solar setup to start saving today.
7.17.2026
Solar panel degradation over time refers to the slow, predictable drop in power output that happens as solar cells age and face years of sun, heat, and weather exposure. According to research cited by the National Renewable Energy Laboratory (NREL), most solar panels lose about 0.5 percent of their power each year through these normal aging processes. Over a 25-year period, this means a well-built system still delivers 85 to 90 percent of its original generating capacity. Premium panels from top-tier manufacturers like REC degrade even more slowly, retaining over 90 percent of their output through decades of California sun. Understanding degradation helps homeowners choose the right equipment, evaluate warranty terms, and plan for the long-term financial returns of their solar investment.
If you are reading a home solar panel installation guide, you likely want to know how your system will perform over its entire lifetime. To understand how your clean energy investment holds up over decades, the first step is learning exactly what solar panel degradation is and how it works.
Solar Panel Degradation Over Time: What Is Solar Panel Degradation?
Solar panel degradation is the slow loss of a panel's power over its life. It is a natural part of the aging process for all solar tech. As panels stay out in the sun, wind, and rain, the parts that make up the cells wear down. This means they cannot turn as much light into power as they did on day one. But this does not mean the panels stop working. Instead, they just produce a bit less power each year.
The first year and LID
Most panels see their biggest drop in power right after you set them up. This is known as Light-Induced Degradation, or LID. It happens when silicon cells first meet sunlight. LID often causes a 1% to 3% drop in power within the first 1,000 hours of use. After this first dip, the rate of loss usually slows down and becomes much more steady. For more tips on picking a system that lasts, you can read our home solar panel installation guide.
Yearly loss and long-term use
Once the first year ends, most panels settle into a steady pace. On average, a standard solar panel loses about 0.5% of its power each year. This means that after 25 years, a typical system will still produce about 85% to 90% of its first power level. Research from the National Renewable Energy Laboratory (NREL) shows that many systems do better than their warranties claim. Many real-world panels lose power at a rate of only 0.4% per year. This helps people see strong gains for many years.
Microcracks and cell stress
Solar panel performance changes over time due to a process known as degradation. This is a natural part of the aging process. As panels stay out in the sun, wind, and rain, the internal components gradually wear down. One specific mechanism involves microcracks -- tiny fissures in the silicon cells that form from thermal cycling and physical stress. These microcracks disrupt electrical pathways and reduce power output over time. Choosing high-quality panels helps minimize this risk and keeps your system producing reliably for decades.
How Much Do Solar Panels Degrade Per Year?
Solar panels lose a small amount of their power production each year. Most modern panels lose between 0.5% and 0.8% of their capacity annually. This means your system stays efficient for many decades. While the loss is slow, it is helpful to know what to expect as your system ages.
The first year of operation
Most solar systems see a slightly higher drop in the first few days of use. This is called light-induced degradation (LID). It happens when solar cells first meet sunlight. Research shows that LID can cause a 1% to 3% loss in the first 1,000 hours. After this initial phase, the rate of loss slows down and stays steady for the rest of its life.
Long term power production
After the first year, high quality panels lose power very slowly. For example, some premium panels like the REC panels used by AMECO lose only 0.25% of their power each year. Over 25 years, these systems still produce about 91% of their original output. Standard panels often retain 80% to 90% of their power after 25 years. If you want to find the best solar panels for home, look for those with low annual loss rates.
Comparing annual loss scenarios
The rate of loss depends on the panel quality. Better parts and build quality mean more power over time. Even a small difference in the yearly rate adds up. A panel that loses 0.25% each year will give you much more energy than one that loses 0.75%. Below is a look at how three common rates affect power over 25 years. Each scenario includes a 3% loss in the first year.
| Panel Quality | Annual Rate | Power at Year 25 |
|---|---|---|
| Premium (e.g., REC) | 0.25% | 91% |
| Standard Tier-1 | 0.50% | 85% |
| Budget Option | 0.75% | 79% |
Why panel quality matters
Choosing a low rate is key for long term savings. A premium panel keeps more of its value as utility costs rise. High quality brands use better silicon and stronger seals to protect against the weather. This helps them resist heat and wind. Homeowners should check the power warranty to see the exact rate the maker promises for the future.
What Causes Solar Panel Degradation?
Solar panel degradation is not caused by any single factor. Instead, it results from several physical and chemical processes that gradually reduce a panel's ability to convert sunlight into electricity. Understanding these causes helps homeowners make informed choices about equipment and installation quality.
Light-Induced Degradation (LID)
The most immediate form of degradation occurs when solar panels are first exposed to sunlight. During the initial days of operation, the interaction between the crystalline silicon cells and oxygen within the panel causes a drop in efficiency of 1% to 3%. This process, called Light-Induced Degradation (LID), stabilizes after approximately the first 1,000 hours of operation. It is a normal, one-time adjustment and not a sign of poor panel quality.
Thermal Cycling and Microcracks
Every day, solar panels heat up in the sun and cool down at night. This repeated expansion and contraction puts physical stress on the solar cells. Over time, microscopic cracks can form in the silicon wafers. These microcracks disrupt the electrical pathways within the cell, reducing the panel's power output. High-quality panels from Tier 1 manufacturers like REC use stronger cell bonding techniques and thicker frames to resist thermal cycling damage.
UV Exposure and Encapsulant Degradation
The ultraviolet component of sunlight slowly breaks down the polymer encapsulant materials that protect the solar cells. As the encapsulant yellows or becomes brittle, less light reaches the cells, and the panel's output gradually declines. Premium panels use UV-resistant encapsulants and anti-reflective glass coatings that slow this process significantly.
Potential-Induced Degradation (PID)
PID occurs when voltage differences between the solar cells and the panel frame cause small electrical currents to leak. This leakage reduces the panel's ability to send power to the inverter. While not all solar panels experience PID, the risk is higher in systems operating at higher voltages or in humid environments. Quality inverters and properly grounded systems help prevent PID.
Hot Spots and Shading
When a portion of a solar panel is shaded or damaged, that area can heat up significantly while the rest of the panel continues generating power. These hot spots accelerate local degradation and can cause permanent damage to the affected cells. Professional installation that accounts for roof layout, nearby trees, and potential shading patterns is essential for preventing hot spots.
Weather and Environmental Stress
California's varied climate means solar panels face everything from intense summer heat in the Central Valley to coastal moisture and occasional winter storms. Hail, wind-driven debris, and heavy snow loads can cause physical damage. Panels certified for high wind and snow loads, installed by experienced professionals, are better equipped to withstand these conditions over decades of service.
Choosing the right solar panels means understanding how they perform years and decades after installation. Premium Tier 1 panels like REC maintain significantly more generating capacity over their lifetime compared to standard or budget options. This difference directly affects your long-term energy savings and return on investment.
Premium vs Standard Panels: Degradation Comparison
How panel quality affects long-term power output
Standard solar panels degrade at approximately 0.5% to 0.8% per year. Premium panels like REC degrade at just 0.25% annually, roughly half the rate of standard panels. While this difference may seem small on a yearly basis, it compounds significantly over a 25-year system lifespan. A premium panel that starts at 400 watts may still produce 368 watts in year 25. While a budget panel starting at the same rating may produce only 320 watts or less.
The quality of materials matters enormously. Premium panels use higher-grade monocrystalline silicon, stronger encapsulants that resist UV yellowing, and thicker frames that withstand thermal cycling without developing microcracks. These engineering choices directly translate to slower degradation and more energy produced over the life of the system. For a deeper look at top panel brands, read our best solar panels for home guide.
Degradation comparison: Premium vs standard vs budget
The table below shows how panel quality tier affects annual degradation, expected 25-year output, and warranty protection:
| Panel Type | Annual Degradation | Output at Year 25 | Performance Warranty |
|---|---|---|---|
| Premium Tier 1 (REC) | 0.25% | ~92% | 25 years (linear) |
| Standard Tier 1 | 0.50% | ~85% | 25 years |
| Budget Panels | 0.70% to 1.0% | Less than 80% | 10 to 15 years |
Why degradation rates matter for your bottom line
Over 25 years, the difference between a 0.25% and 0.75% degradation rate can mean thousands of dollars in lost energy production. For a typical California home with a 7 kW system generating approximately 10,500 kWh per year. That 5% to 10% difference in retained capacity represents roughly 13,000 to 26,000 kWh of lost generation over the system's life. At California's electricity rates, which consistently rise year over year, that lost energy carries a significant financial impact.
Performance warranties back these degradation claims. Premium panels guarantee specific output levels for the full warranty term, giving homeowners predictable energy production. Budget panels often use weaker warranty terms that allow more performance drop before triggering coverage. For more details on evaluating panel options, see our solar panel buying guide.
The AMECO and REC advantage
AMECO Solar & Roofing is a certified REC installer, choosing these premium panels specifically for their industry-leading degradation rates and long-term reliability. Combined with AMECO's 40-year equipment warranty through the Owens Corning Solar Protect program. Homeowners get integrated protection for both their solar panels and roof that far exceeds the 25-year industry standard. This combination of premium equipment and extended warranty coverage ensures your system performs at its best for decades to come.
Why Degradation Matters for California Homeowners
In California, solar panel degradation over time is more than just a tech spec. Our local climate and high power costs change how you should look at your system. If you live in a hot spot like the Central Valley or Inland Empire, your panels work harder every day. High heat can make solar parts wear out faster than in cooler coastal areas. This makes your choice of gear very important for long-term savings.
Heat and solar wear in California
Heat is one of the main causes of solar wear. Parts of California see many days over 100 degrees. Research from the National Renewable Energy Laboratory shows that very high heat can speed up how fast panels lose power. This thermal stress can cause small cracks in the cells. It makes it vital to pick panels that handle heat well. When you choose premium gear, you protect your power yield for the next few decades.
High utility rates and long-term savings
California has some of the highest power rates in the country. Bills from PG&E, SCE, and SDG&E keep going up every year. Because these rates are so high, even a panel that has lost some power is still worth a lot of money. A panel that works at 85% of its original strength still saves you much more than it would in a state with low power costs. This makes the high value of solar stay strong even as the system gets older.
At AMECO Solar & Roofing, we have served the state since 1974. We know that long-term value is key. That is why we offer a 40-year solar panel warranty for integrated systems. This long coverage ensures that your roof and your solar work together for as long as you own your home. It helps you stay ahead of power price hikes even as your panels age. You won't have to worry about your system losing too much value over time.
Maximizing value under net metering
Net metering rules in California also change the math. These rules decide how much the power company pays you for the solar you send to the grid. As panels age, they make less power in the late afternoon. This is when power is often the most expensive. By using high-quality panels with low wear rates, you keep making more power during those peak hours. This ensures you keep saving money on your bill every month.
Adding a battery can also help. California faces frequent power shutoffs due to wildfire risks. A battery lets you store extra solar power for use at night or during an outage. This is true even if your panels have aged. By pairing a low-wear system with a home battery, you can protect your home's energy future. This combo helps you get the most out of your solar investment for twenty-five years or more.
How Solar Panel Warranties Cover Degradation
Solar panel warranties are the primary way manufacturers guarantee their products against excessive degradation. Understanding how these warranties work is critical for any homeowner evaluating solar options, because the warranty terms directly reflect the expected long-term performance of the panels.
Product Warranty vs. Performance Warranty
Solar panels come with two distinct types of coverage. The product warranty covers manufacturing defects, material failures, and premature equipment breakdown, typically lasting 10 to 15 years. The performance warranty (also called a linear power warranty) guarantees that the panel will produce a minimum percentage of its rated output over time. Most manufacturers guarantee at least 90% of original output at year 10 and 80% at year 25. Some premium panels maintain higher thresholds throughout the warranty term.
Degradation Rate and Warranted Output
The degradation rate baked into a panel's performance warranty tells you what the manufacturer is willing to guarantee. Panels with a 0.25% annual degradation rate plus a 3% first-year allowance will still produce approximately 91% of original output at year 25. Panels with a 0.50% rate yield about 85%, and panels at 0.75% yield about 79%. Choosing a panel with a lower warranted degradation rate directly preserves more energy production over the life of your system.
REC's 25-Year Linear Power Warranty
REC, one of the world's leading Tier 1 solar manufacturers, offers a 25-year linear power warranty with an industry-leading degradation rate. REC panels are warranted to retain at least 92% of nominal power output after 25 years, backed by a degradation rate well below the industry average. As a certified REC installer, AMECO Solar offers these premium panels to California homeowners who want maximum long-term energy production.
AMECO's 40-Year Equipment Warranty
AMECO Solar goes beyond standard industry warranties with a 40-year equipment warranty on residential solar systems. Through the Owens Corning Solar Protect program, AMECO provides integrated coverage for both solar panels and roofing when installed as a combined system. This extended warranty reflects the company's confidence in its premium equipment choices, including REC panels, and its commitment to long-term customer satisfaction. Most solar companies offer warranties lasting only 25 years, making AMECO's 40-year coverage a significant differentiator in the California market. Learn more about the 40-year solar panel warranty.
What Warranties Do Not Cover
It is equally important to understand what warranties do not cover. Performance warranties do not cover damage from improper installation, physical abuse, lightning strikes, or unauthorized modifications. This makes the choice of installer as important as the choice of panel. A reputable, certified installer like AMECO ensures your warranty remains valid throughout its term.
How to Minimize Solar Panel Degradation
While you cannot stop solar panel degradation entirely, you can take several practical steps to slow the process and maximize the long-term performance of your solar investment.
- Choose high-quality Tier 1 panels from the start. The single most important decision you will make is selecting the panel itself. Tier 1 monocrystalline panels from manufacturers like REC degrade at 0.25% to 0.50% per year, compared to 0.75% to 1.0% for budget panels. Over 25 years, the difference can mean retaining 5% to 10% more of your original generating capacity. This translates to thousands of dollars in additional energy savings over the system's lifetime. Read our guide to the best solar panels for home for more detail on panel selection.
- Insist on professional installation by experienced, certified installers. Poor installation is one of the leading causes of accelerated degradation. Panels mounted with insufficient structural support, improper torque, or inadequate weather sealing are more vulnerable to microcracks, moisture intrusion, and hot spots. AMECO Solar employs its own installation teams rather than subcontractors, ensuring consistent quality and accountability on every project.
- Perform regular visual inspections and monitoring. Modern solar systems include monitoring platforms that track each panel's output in real time. A sudden drop in production from one panel may indicate a developing hot spot or microcrack issue. Catching these problems early allows for repair or replacement before the damage spreads. Monthly visual checks for visible cracks, discoloration, or debris buildup are also recommended.
- Keep panels clean and free of debris. Dust, pollen, bird droppings, and leaf buildup reduce panel output and can create uneven heating that accelerates degradation. In California, seasonal cleaning two to four times per year is typically sufficient. Use deionized water and a soft brush or squeegee to avoid scratching the glass surface. Read our complete solar panel cleaning guide for best practices.
- Trim nearby trees and vegetation. Shade from overhanging branches not only reduces immediate power production but also creates hot spots on partially shaded cells. Over time, repeated partial shading causes disproportionate degradation in the shaded cells, reducing the panel's overall output. Keep trees trimmed so that panels receive full sun during peak production hours.
- Plan for inverter replacement at the right time. Solar inverters typically last 10 to 15 years, well within the 25- to 40-year lifespan of quality solar panels. Replacing the inverter at the appropriate interval ensures the entire system continues operating efficiently. A degraded panel paired with a failing inverter produces far less power than either problem alone would suggest.
- Choose an integrated solar-plus-roofing approach. Roof replacements and solar installations often happen at different times. But coordinating them through a single provider like AMECO ensures the roof is in optimal condition to support the solar array for decades. An integrated approach prevents the need to remove and reinstall panels for a mid-life roof replacement, eliminating the risk of handling damage. Regular system servicing further extends panel life.
Frequently Asked Questions About Solar Panel Degradation
What is the average solar panel degradation rate per year?
The average solar panel degradation rate is approximately 0.5% to 0.8% per year. Premium monocrystalline panels like REC can degrade as slowly as 0.25% annually. Most panels retain 80% to 90% of their original output after 25 years of operation, depending on panel quality and environmental conditions.
Do solar panels stop working after 25 years?
No, solar panels do not stop working after 25 years. They continue producing electricity at a slightly reduced efficiency. After 25 years. Most panels still operate at 80% to 85% of their original capacity and can continue generating clean energy for years or even decades beyond their warranty period. The 25-year mark is simply the end of the standard performance warranty term, not the end of the panel's useful life.
What causes solar panels to degrade faster?
Solar panels degrade faster due to extreme heat, thermal cycling (repeated day-night expansion and contraction), intense UV exposure, microcracks from physical stress, and poor installation quality. California's hot inland climates, such as the Central Valley, can accelerate degradation compared to milder coastal areas. Choosing premium panels designed for high-temperature environments and ensuring professional installation are the most effective ways to slow degradation.
Is solar panel degradation covered by warranty?
Yes, solar panel degradation is covered by the manufacturer's performance warranty (also called a linear power warranty). Standard terms guarantee at least 90% of original output for the first 10 years and 80% for years 10 through 25. Premium panels like REC offer better terms. AMECO Solar extends this protection further with a 40-year equipment warranty on residential systems through the Owens Corning Solar Protect program. Covering both solar panels and roofing when installed as an integrated system.
Do Tier 1 solar panels degrade slower than budget panels?
Yes, Tier 1 solar panels like REC typically degrade at 0.25% to 0.5% per year, compared to budget panels that may degrade at 0.7% to 1.0% annually. Over a 25-year period, this difference means Tier 1 panels retain approximately 5% to 10% more of their original generating capacity. For a typical California home, that additional output can represent thousands of dollars in energy savings over the life of the system.
Can solar panel degradation be reversed?
No, solar panel degradation cannot be reversed. It is a permanent, cumulative process caused by physical and chemical changes within the panel's materials. However, certain types of degradation like Potential-Induced Degradation (PID) can sometimes be partially mitigated if detected early by correcting the voltage conditions causing the issue. The most effective strategy is to choose high-quality panels, ensure professional installation, and perform regular maintenance to minimize the rate of degradation from the start.
Calculate Your Project With Premium REC Panels
Solar panel degradation is a reality every homeowner should understand before investing in solar energy. The good news is that with premium equipment, professional installation, and proper maintenance, your solar panels will continue producing clean, cost-saving energy for decades. AMECO Solar has been helping California homeowners make smart energy investments since 1974, using only the highest-quality components like REC solar panels with industry-leading degradation rates.
Ready to see how much you can save with a solar system built to perform for the long haul? Calculate your project today and get a custom solar design tailored to your home's energy needs and roof. Your free consultation includes a detailed review of panel options, degradation rates, warranties, and expected long-term energy production.
7.17.2026
California electricity bills are rising faster than nearly any other state. Understanding time of use rates solar California homeowners rely on is the key to controlling those costs. Under these pricing plans, the price you pay for electricity changes throughout the day. Peak rates hit during the late afternoon and evening when solar panels slow their production. A paired solar and battery system lets you store low-cost daytime energy and use it during those expensive peak hours. Under NEM 3.0 rules that reward self-consumption over grid exports, this strategy delivers the most savings for California families.
Get Your Free Solar Savings Estimate Today
Many homeowners find California's changing rate structures confusing. But learning how these billing plans work puts you in control of your monthly energy costs. This guide explains the major utility rate plans, how NEM 3.0 changes the savings equation, and the strategies that help you keep more money in your pocket.
Time of Use Rates Solar California: What Are TOU Rates?
Time-of-Use (TOU) rates are a billing method where the price of electricity changes based on the time of day. Instead of a flat per-kilowatt-hour rate, your utility adjusts pricing based on real-time grid demand. When demand peaks, prices rise. When demand falls, rates drop. This structure helps California's utilities manage grid stress and supports renewable energy integration, as documented by the California Energy Commission.
Peak Hours vs. Off-Peak Hours
Utilities divide the day into specific blocks. The most expensive block is peak hours, typically 4 PM to 9 PM on weekdays when people return home and run heavy appliances. Off-peak hours fall when demand is lowest, usually late night through mid-afternoon. By setting these windows, utilities encourage customers to shift heavy power use to times when the grid faces less strain.

How Southern California Edison Rates Compare
Southern California Edison shows how dramatic the difference can be. SCE's summer TOU-D-4-9PM plan charges an off-peak rate of around 36 cents per kWh. Rising to 71 cents per kWh during peak weekday hours from 5 PM to 8 PM. Using power during the evening peak window costs nearly double what it costs during the day. Most California residential customers with solar are now placed on mandatory time-of-use rate structures, making rate awareness essential.
Why California Shifted to TOU Pricing
Major electricity providers introduced TOU rate plans in the early 2010s. The shift came as California added massive amounts of solar power to the grid. Solar panels produce the most power at midday, creating an oversupply of clean energy when demand is low. Once the sun sets, solar production drops right as household demand climbs. TOU pricing helps utilities balance this daily mismatch and encourages homeowners to use energy when it is cheapest and cleanest.
California Major TOU Rate Plans: Utility-by-Utility Comparison
Every major power provider in California structures its electricity rates differently. To save the most money, you first need to understand how your specific utility bills your home. You can explore solar solutions for your region to see how a customized system offsets these costs.
| Utility Provider | Major Rate Plans | Peak Pricing Hours | Off-Peak Hours |
|---|---|---|---|
| PG&E | E-TOU-C, E-TOU-D, TOU-B | 4 PM - 9 PM or 5 PM - 8 PM (Weekdays) | 12 AM - 4 PM, 9 PM - 12 AM |
| SCE | TOU-D-4-9PM, TOU-D-5-8PM, TOU-D-PRIME | 4 PM - 9 PM or 5 PM - 8 PM (Weekdays) | 8 AM - 4 PM, 9 PM - 8 AM |
| SDG&E | TOU-DR1, TOU-DR2, DR-SES | 4 PM - 9 PM (Every Day) | 6 AM - 4 PM, 9 PM - 6 AM |
| LADWP | R-1A (TOU Optional), TOU-GS-1 | 1 PM - 5 PM or 5 PM - 8 PM (Weekdays) | 8 PM - 1 PM (Weekdays, All Weekend) |
Rate Plan Details and Differences
PG&E customers on the E-TOU-C plan face a peak window from 4 PM to 9 PM every day. While E-TOU-D shifts the peak to 5 PM to 8 PM on weekdays only. SCE offers similar options including its TOU-D-PRIME plan designed for homes with clean energy technology. Which charges a fixed daily fee of 79 cents in exchange for lower off-peak rates. SDG&E features the DR-SES plan made specifically for solar owners with a steady 4 PM to 9 PM peak. Municipal utilities like LADWP offer optional TOU choices under the R-1A schedule that keeps peak hours earlier in the afternoon. The right plan depends on your household usage patterns and whether you own an electric vehicle.
Why NEM 3.0 Makes TOU Optimization Essential
The rules of solar savings in California changed with the Net Billing Tariff, known as NEM 3.0. Under older rules, homeowners sent excess solar power to the grid for full retail credit. Now export rates are cut by about 75 percent, with solar owners receiving a low avoided-cost rate averaging just eight cents per kilowatt-hour. When grid export value is low, managing how you use your own power becomes the primary way to lower costs. Pairing solar with a battery backup system directly shields your home from high evening rates.
The Solar Production and Peak Demand Mismatch
Solar panels produce the most power in the middle of the day when the sun is high and grid demand is low. However, California time of use rates solar California plans structure peak pricing in the late afternoon and evening, when solar output drops and grid demand spikes. Solar panels alone reduce your total energy use but cannot solve the problem of high rates after sunset. To keep bills low, you must store your solar energy instead of exporting it to the grid for minimal credit.
How Battery Storage Changes the Equation
A home battery changes how your system interacts with the grid. Instead of exporting power during the day for small credits, a battery stores that clean energy. You then use that stored power to run your home during peak evening hours when grid rates are highest. This approach maximizes self-consumption, which is the key to making your solar investment pay off under NEM 3.0. To learn more about proper capacity planning, read our guide on NEM 3.0 solar battery sizing in California.
How Solar Plus Battery Systems Beat Peak Rates
Adding a home battery solves the timing mismatch between when you generate energy and when you need it most. A well-designed system stores your daytime solar production and dispatches it during the most expensive hours.
The Savings Math
During the sunny afternoon, solar panels produce power when grid rates are relatively low. Exporting that power under NEM 3.0 earns very little credit. A home battery lets you store cheap power and discharge it from 4 PM to 9 PM when grid rates peak at 48 cents per kWh or more. Offsetting those peak rates with stored solar energy effectively doubles the value of your power. Homeowners who optimize their battery dispatch for time-of-use rates save 15 to 25 percent more than those relying on solar panels alone.
How Smart Batteries Automate Savings
Modern home battery systems like the Tesla Powerwall and Enphase 5P run on smart software that tracks your local utility rates. These systems can be programmed to discharge only during the most expensive peak hours. Instead of pulling power from the grid during high-demand hours, your home runs entirely on stored solar energy. This automation requires no daily effort.
The Value of Custom System Design
Every home has a unique energy footprint. A system that is too small will not cover your peak evening use, while an oversized system costs more than necessary. Working with an expert to design a custom setup ensures your system handles peak rates while keeping costs balanced. Learn more about battery storage solutions for your specific home energy needs.
Practical Strategies for TOU Savings
Managing when and how you use power is essential under California TOU rules. These strategies help you get the most value from your energy system.
Shift Heavy Energy Use to Off-Peak Hours
Peak hours are typically 4 PM to 9 PM on weekdays. Run heavy appliances like laundry, dishwashers, and pool pumps during off-peak morning or midday hours. This simple shift aligns your consumption with times when grid demand is low and rates are lower.
Program Your Battery for Peak Dispatch
Set your home battery to discharge from 4 PM to 9 PM so you avoid buying expensive grid power during those hours. Programming your battery to dispatch based on utility prices is a straightforward way to maximize savings without changing your daily habits. Check our article on California average electric bills to understand how much other homeowners in your area are paying.
Optimize Your Daily Energy Routine
For California homeowners, combining smart habits with solar power offers the best defense against high utility bills. Follow these steps:
- Adjust appliance schedules. Run your clothes dryer and dishwasher before 4 PM or after 9 PM. Set pool pump timers to midday hours.
- Configure your battery. Program your battery to cover your electricity needs during peak evening hours when rates nearly double.
- Time your EV charging. Charge your electric vehicle late at night when many plans offer very low overnight rates.
- Monitor your usage. Check your utility data in your monitoring app to identify savings opportunities.
- Review your annual statement. Examine your true-up statement to confirm your rate plan remains the best fit.
- Consult an expert. Work with a professional team to review your usage patterns and optimize your system.
How to Choose the Best TOU Plan for Your Home
Selecting the right time-of-use rate plan is a key decision that affects your monthly bills. Each major California utility offers several options, and California allows you to switch your plan once per year at no cost.
Analyze Your Usage Patterns
Study when your household uses the most electricity. If you run large appliances during the day, a plan with lower daytime rates may suit you better. If your heavy use falls in the evening, a plan with shorter peak hours is often preferable. Many utilities offer online portals to review your past bills and identify patterns.
Size Your Solar and Battery System Correctly
A solar system with battery storage gives you the most control over your rate plan. Charge your battery during cheap off-peak hours using your solar panels, then use that stored energy during expensive peak evening hours. Because rates are highest in the evening, your battery should be sized to match your peak energy consumption. Read our NEM 3.0 battery sizing guide for detailed recommendations.
Get Expert Guidance
Utility rate structures can be complex. An experienced solar installer can model your production and usage to find the best plan. At AMECO Solar, we analyze your utility data to build a custom rate plan strategy. Schedule a consultation to learn how we can optimize your home energy setup.
Frequently Asked Questions
How do time of use rates in California affect my electricity bills?
Under these plans, utility providers charge different electricity prices depending on the time of day. Energy used during peak hours, usually between 4 PM and 9 PM, costs much more than energy used during off-peak hours. By installing solar panels with a home battery, you can avoid these expensive peak rates by powering your home with stored solar electricity instead of grid power.
Can I switch my California time-of-use rate plan?
Yes. California homeowners on TOU plans can switch to a different available rate plan. Most major investor-owned utilities, including SCE, PG&E, and SDG&E, allow customers to change their rate plan once every twelve months at no cost. Review your hourly usage patterns on your utility portal to find the best plan for your needs.
Do I need a battery with solar on a California TOU plan?
Solar panels alone help lower your daytime bills, but a battery is now essential to maximize savings under California's Net Billing Tariff (NEM 3.0). Storing your daytime solar generation lets you avoid buying grid electricity when peak rates are highest. Choosing the right solar and battery integration is key to long-term energy savings.
Can I charge an electric car on a time-of-use plan?
Yes. Charging an electric vehicle on a TOU plan can save you money if you schedule charging during off-peak hours. Many California utility companies offer specialized TOU rates for EV owners with very low overnight rates. Charging between midnight and 6 AM costs far less than charging during peak daytime or evening hours.
Which California utility has the best time-of-use plan for solar owners?
The best plan depends on your specific usage patterns. SCE's TOU-D-PRIME offers lower off-peak rates with a fixed daily fee, making it attractive for homes with solar and battery. SDG&E's DR-SES plan is designed specifically for solar customers. Compare plans based on your home's energy profile rather than seeking a single best option.
Ready to Optimize Your Rate Plan Strategy?
Understanding your utility time-of-use rate structure is the first step toward lowering your monthly bills. With the right solar and battery system, you can avoid peak pricing, store clean energy, and take control of your home electricity costs. The California energy landscape is changing, but homeowners who act now can lock in meaningful long-term savings.
7.15.2026
Homeowners associations in California cannot legally block you from installing solar panels on your property. As a California solar installer since 1974, we have seen how state laws protect your right to make clean energy and save on utility costs.
California solar rights HOA laws protect your ability to install panels regardless of local association rules. Under Civil Code Section 714, any local rule or restriction that stops you from using a solar energy system is void and cannot be enforced. HOAs can only use fair rules that do not add more than $1,000 in costs or lower system output by more than 10 percent for homeowners. Also, boards must approve or deny solar forms within 45 days, or the project is on its own deemed approved. These laws ensure you can choose clean energy without facing unfair blocks, which protects your investment and helps the state reach green goals.
You might still have questions about how these state laws apply to your own home or land. It is vital to know the details of the law to make sure your project stays on track. To start, let us look at what the California Solar Rights Act actually says and how it protects your right to go solar.
California Solar Rights Hoa: What Is the California Solar Rights Act?
The California Solar Rights Act is a state law that protects your right to use solar power. Passed in 1978, this law stops home associations (HOAs) from placing unfair bans on solar panels. It states that any rule that stops or limits solar use is void. This means your HOA cannot ban solar just because they do not like the look of panels on a roof. As a California solar installer since 1974, AMECO Solar & Roofing helps owners follow these local rules. We ensure your project meets all state standards while keeping your rights secure.
Voiding Unfair HOA Bans
The heart of the law sits in Civil Code §714(a). This part of the code makes any private rule that stops solar use void and not valid. It covers all CC&Rs and bylaws that your HOA might use to block your project. The state wants to remove hurdles that keep people from choosing clean energy at home. This law ensures that the choice to go solar belongs to you and not your neighbors. If your HOA has a ban on roof solar, that rule is mostly not legal under state law.
Defining Fair Rules
HOAs can still make rules, but they must be fair. Under §714(b), a rule is only fair if it does not raise your costs or lower your power output too much. For solar PV systems, a rule is not allowed if it adds more than $1,000 to the price of your system. It is also banned if it lowers your system's output by more than 10 percent. These math rules are the best way to tell if an HOA is being fair. They stop boards from forcing you to pick poor roof spots for looks.
For example, a board cannot make you put panels on the north side if that hurts your power gain. They also cannot force you to buy costly screens that do not help the system work. If an HOA wants you to move your panels, the new spot must work just as well as your first choice. This keeps your solar project both cheap and highly helpful for your power bills.
The 45-Day Approval Window
You do not need to wait months to hear back from your board. The law sets a firm time limit for them to review your plan. An HOA must give you a written yes or no within 45 days of your request. If they fail to send a notice in that time, your plan is seen as approved by law. This keeps the board from stalling your work for no good reason. You can move forward with your setup once that 45-day clock runs out.
If an HOA breaks these rules on purpose, the law provides ways to fix it. Under §714(f), a board that breaks the law can face a fine of up to $1,000. The law even states that the winning side in a legal case can get their lawyer costs paid by the other side. This helps protect people who must go to court to win their solar rights.
The Solar Shade Control Act Explained
While the Solar Rights Act protects your right to install panels, the Solar Shade Control Act ensures those panels can actually see the sun. This law, found in Public Resources Code §25980-25986, protects your solar system from shading by trees and shrubs on a neighbor's lot. It creates a solar easement that keeps your panels working well during the most important hours of the day.
Protection from Shading
The law states that no person should allow a tree or shrub to cast a shadow that covers more than 10% of a solar collector between 10:00 a.m. and 2:00 p.m. This four-hour window is when your system gets the most light and makes the most power. If a neighbor plants a tree that grows too tall and blocks your sun, you have a right to ask them to trim it back.
This protection is vital for homeowners in California who have used a solar installer since 1974 to design efficient systems. Without this rule, a growing tree could make a big investment less helpful over time. The law treats this as a public nuisance, which gives you a clear path to fix the problem through local code enforcement or the courts.
First-Come First-Served Rules
It is important to know that this law follows a first-come, first-served rule. Trees or shrubs that were already there before you put in your solar panels are exempt. If your neighbor has a mature oak tree that shaded your roof before you went solar, the law does not force them to cut it down. You must plan your system around existing shade.
The law only applies to plants set in the ground after you install your solar system. Once your panels are up, any new trees must not grow to block your light. This is why it is smart to schedule a free consultation before you start your project. A pro can help you look at current shade and plan for future growth in the area.
Interaction with the Solar Rights Act
The Solar Shade Control Act works alongside other laws to keep your solar project on track. While this act deals with plants and shadows, the Solar Rights Act stops an HOA from blocking your panels with unfair rules. Together, these laws form a full shield for your energy independence. They ensure that neither a board of directors nor a neighbor's new hedge can take away your power.
Most local jurisdictions in California must follow these state rules. Even in historic districts, state policy aims to remove obstacles to solar use. You can find more detail on these protections in the official state review of solar statutes. Knowing these facts helps you talk to your HOA or neighbors with confidence about your project.
Can My HOA Still Restrict Solar Panels?
The short answer is yes, but only in very limited ways. While the California Solar Rights Act protects your ability to go solar, it still allows homeowners associations (HOAs) to set reasonable rules. These rules must focus on safety or looks without making your project much more expensive or less useful. If your association oversteps, their rules become void under Civil Code §714.
| HOA Action | Allowed by Law? | Why |
|---|---|---|
| Ban solar panels outright | No | Void under §714(a) |
| Add over $1,000 in extra costs | No | Exceeds cost threshold (§714(d)(1)(B)) |
| Reduce efficiency by more than 10% | No | Exceeds efficiency threshold (§714(d)(1)(B)) |
| Require aesthetic relocation | Yes, if comparable cost/efficiency | Reasonable restriction (§714(b)) |
| Demand additional insured status | No | Illegal under §4600 |
| Delay approval past 45 days | No | Deemed approved (§714(e)(2)(B)) |
Aesthetic guidelines and placement
An HOA can ask you to move your panels to a different spot for better looks. However, they can only do this if a better spot exists that does not hurt your system. For solar panels, a rule is only valid if it adds less than $1,000 to your total cost. The change also cannot lower the output of your system by more than 10%. If a request fails either of these tests, you do not have to follow it.
Many boards try to hide panels on the back of a roof where there is less sun. As an experienced California solar installer since 1974, we often help owners show why these spots do not work. If the move makes your panels less helpful or too costly, the state law is on your side. You should always get a solar site survey to prove these facts to your board during the review.
Insurance and legal tactics
Some associations use insurance demands to slow down solar projects. A common trick is asking to be named as "additional insured" on your home policy. This is actually illegal under Civil Code §4600. The law says they can only ask to be listed as "additional interest," which is a big legal difference. They also cannot force you to buy high insurance limits if it makes your solar install too pricey.
If an HOA willfully breaks these rules, they may face a $1,000 civil penalty. They might also have to pay for your actual damages and your legal fees. These high costs often keep boards from blocking clear rights. You can always schedule a free consultation with us to see how we handle these board talks for our clients.
The 45 day approval clock
California law gives HOAs a strict deadline to act on your solar plan. Once you turn in a full plan, the board must approve or deny it in writing within 45 days. If they do not send a notice in that time, your project is deemed approved. You can then move forward with our residential solar installation services as planned.
Keep in mind that the clock only starts when your application is complete. If you leave out key details, the board can pause the 45 day count until you give them the info. To avoid delays, make sure your filing has all the needed roof maps, equipment lists, and city permits. Most boards will play fair if they see a clean, professional plan from the start.
AB 634: Solar Rights for Multi-Tenant Buildings
For a long time, condo owners and renters in shared buildings faced big hurdles when trying to go solar. In 2017, the state passed a law called AB 634 to fix this issue. This law makes it much easier for people in multi-tenant buildings to use their rights under the California Solar Rights Act. It stops groups from banning solar on shared roofs if you live in that same building.
Before this law, many people felt left out of the solar boom. If you shared a roof with neighbors, your home group might have said no. Now, the rules are clear and in your favor. This law helps more people get clean power and lower their monthly bills. It gives condo owners the same power choice that people in single-family homes have had for years.
Access to shared roof space
Some home groups used to block solar by claiming that common roofs were off-limits. Now, an HOA cannot have a general policy that bans solar panels on building roofs. This rule also applies to garages or carports that are set aside for your own use. As a California solar installer since 1974, we have seen how this law helps more people save on power.
Another major win is that the HOA cannot force a vote of all members to approve your roof project. If you live in the building where you want to install the panels, you have a right to use that roof space. This change cuts through the red tape that used to stop many plans. It means you do not have to wait for a long vote from every neighbor in your complex.
Rules and notice for solar owners
While you have the right to install solar, you must still follow certain steps. This helps keep things fair for your neighbors who share the same roof. The law allows HOAs to ask for a solar site survey from a licensed pro. This survey must show that the roof space is shared in a fair way among all owners. You will also need to have a policy to cover the system on the common roof.
When you apply for your system, you must give notice to the other owners in your building. This makes sure that everyone knows what is going on with the shared space. Most homeowners find that working with a pro helps them follow these rules with ease. You can schedule a free consultation to see how these laws apply to your condo or townhome. Our team can help you look at your roof and plan a system that fits your needs.
- Give notice to all other unit owners in your building about your plans.
- Carry a home insurance policy that covers the solar system on the roof.
- Provide a site survey that shows a fair use of the roof area for all.
- Ensure the system meets all local building and safety codes for your area.
Navigating Historic Districts and Local Permitting
Homeowners often worry that living in a historic district means they cannot use solar power. While local governments can set building codes and permit rules, they must follow state law. California Civil Code §714 makes it clear that most restrictions on solar energy systems are void if they stop you from using solar power. This includes rules from cities or counties that would make a system too costly or less efficient.
Building codes and state policy
State policy is to help people use solar energy and remove blocks in their way. Local entities can set safety standards, but they cannot use these rules to effectively ban solar panels. According to section 714(b), any rule that adds more than $1,000 to the cost or cuts efficiency by over 10% is seen as a violation of your solar rights. Public entities that do not follow these laws risk losing their chance for state solar funding.
Historic district requirements
Living in a historic area does not void your rights under the Solar Rights Act. While a city may ask you to place panels where they are less visible from the street, they can only do so if it is a reasonable request. A request is not reasonable if it causes a big drop in power or a large jump in price. As a California solar installer since 1974, we have seen how these local rules play out across different cities.
Working with local jurisdictions
Permit rules vary by city, but they all must align with state goals for green energy. Most cities now have streamlined permit paths for small rooftop systems. If you hit a wall with local rules or district plans, we can help you find a path forward. You can view our residential solar installation services to see how we handle custom designs that meet local codes while giving you the best power output.
What to Do If Your HOA Blocks Your Solar Installation
If your HOA denies your solar request, do not give up. The law is on your side. California has strong rules that protect your right to produce clean power. Most boards back down once they see that you know the law and have expert help. Using a clear plan can help you get your project back on track fast.
Check your denial letter
Start by reading the letter from your board. The California Solar Rights Act says a board must approve or deny your request in writing within 45 days. If they do not, the law treats your project as approved. Any rule they use must be fair. A rule is not fair if it adds more than $1,000 to your cost. It is also void if it cuts your power output by more than 10%.
Follow these steps to win
- Compare the board's rules to the $1,000 and 10% limits. If their rules cost you too much, they are void. Ask the board for proof that their rules are legal.
- Send a written appeal to the board and cite Civil Code §714. This shows the board that you know your rights. It also creates a paper trail if you need to take further steps.
- Reach out to the state solar group (CALSSA). They can send a formal support letter to your HOA on your behalf. This letter cites state laws and usually arrives within one week.
- Talk to a pro about your roof layout and costs. Our team can give you a full site survey to show that your plans meet state standards. Check out our residential solar installation services to see how we help with HOA approvals.
- Warn the board about civil fines. If a board breaks the law on purpose, you can sue for up to $1,000 in fines plus damages. The board may also have to pay for your legal fees if you win.
Use expert data to win
You do not have to fight your HOA alone. Working with a team that knows local rules can make the process easy. A good firm will help you find the best spot for your panels. They can also provide the maps and data you need to win your appeal. This helps you get solar power without a long fight.
Most boards stop blocking a project once they see a pro is involved. We give you the clear facts and data that boards need to see. This lets you focus on saving money and helping the earth while we handle the red tape. Our team has helped many people in our state win their solar rights.
Frequently Asked Questions
Can a California HOA deny solar panels for aesthetic reasons?
An HOA can only enforce look-based rules if they do not greatly increase the cost or lower the power of your system. Under the law, a rule is not allowed if it adds more than $1,000 to the price or cuts energy output by more than 10%. If your HOA asks for a new spot, they must show it works just as well. It must also cost about the same as your first plan.
What is the penalty for an HOA that violates the Solar Rights Act?
If an HOA knowingly breaks the law to block your solar project, they can be held liable for any money you lose. You may also be able to get a fine of up to $1,000 for the bad act. According to the California Civil Code, the person who wins the case in court can also have their legal fees paid by the other side. This helps protect you from high costs when you fight for your rights.
How does the 45-day solar approval rule work in California?
Once you turn in a full plan to your HOA, the board has 45 days to give you a written yes or no. If they do not write back in this time, your plan is approved by law. This rule makes sure that boards cannot stall your project for months without a good reason. It is best to work with a California solar installer since 1974 to make sure your forms are full and correct from the start.
Do I need to notify my neighbors before installing solar in a condo?
Yes, if you live in a shared building and want to use a common roof, you must tell the other owners. While you do not need a vote from the board or members to move ahead, you must follow some steps. You may also need to get a site check from a pro to show that the roof space is used fairly. This law, known as AB 634, helps make sure everyone has a chance to use solar power.
Can my neighbor block my solar panels with a new tree?
No. The Solar Shade Control Act protects your solar panels from new trees or shrubs that cast shade between 10 a.m. and 2 p.m. However, trees that were already in the ground before you installed your panels are allowed to stay. This "first-come, first-served" rule means you should check your neighbor's yard and plans before you start your own solar project. You can find more details in the state's review of solar laws.
Ready to protect your California solar rights?
Every month you wait to set up solar is another month of paying high power bills. These rates keep going up and can take a big bite out of your budget. HOA rules might seem like a wall, but state laws are on your side. If you wait to start your project, you miss out on the savings that solar brings from the very first day. Starting now helps you lock in your costs and avoid the next round of rate hikes. The permit and board approval steps can take some time to finish. It is best to get the work started now so you can enjoy clean power sooner. Our team can help you with our home solar services and handle the forms for you. You do not have to face your HOA alone when you want to switch to solar power.
Ready to take control of your power? Schedule a free consultation to talk to a solar expert today.
7.13.2026
A solar monitoring system is a tool that tracks your solar production and home energy use in real time to help you maximize your monthly power savings. These systems use smart hardware to send energy data to a mobile app so you can check your system health and production from any place at any time. This tool allows you to see each panel and find small issues or shading problems before they lead to a high power bill from your local utility company. According to SolarReviews, these digital tools ensure your equipment is working right so that you do not lose your monthly solar energy savings to hidden system faults.
What Is a Solar Monitoring System?
A solar monitoring system is a digital platform that tracks how much energy your solar panels produce and how much electricity your home uses. It collects data from your inverter and sensors, sends that data to the cloud. And displays it on a phone app or web dashboard so you can see real-time performance, spot faults early, and maximize your energy savings.
A solar monitoring system acts like a smart bridge between your solar equipment and your phone. By using sensors and software, these systems give you a clear look at your energy health in real time. You can see how much power your panels make each hour. You can also check if your home uses more energy than it creates. Key takeaway: Monitoring turns invisible energy flows into actionable data you can view from anywhere.
How energy data reaches you
These systems work by gathering data from your solar inverters. The inverters take the raw power from your panels and change it into energy your home can use. While they do this, they also record information about power levels. This data then travels to the cloud through your home WiFi or a cell link. You can then view this info on a web site or a mobile app to see your system status at any time.
For California homeowners, having a solar monitoring system is now a standard part of any high-quality solar setup. Since AMECO started in 1974, we have seen how these tools have changed from simple dials to rich digital maps. Today, most modern systems provide both real-time data and long history to help you find trends in your power use.
The risk of going without monitoring
Without a way to track your power, small solar issues can stay hidden for a long time. A single bad wire or a shaded panel might reduce your energy output without you ever knowing it. Many people only find out there is a problem when they get a much higher bill months later. According to energy.gov.au, monitoring helps you find these faults early so you do not lose out on months of energy savings.
Module level vs string level views
There are two main ways to look at your solar data. String level monitoring tracks the total power from a whole group of panels at once. This is common with standard string inverters. If one panel in the group slows down, you will see a drop in total power. But you may not know which panel is the cause. This is one reason why many choose Enphase IQ8 microinverters for more detail.
Module level monitoring is the more advanced choice. It tracks each panel one by one. This is made possible by microinverters or power optimizers. With this view, you can see a digital map of your roof and check the health of every single panel. This makes it very easy to find exactly where an issue is. As noted by solarreviews.com, these systems provide deep data on energy production and help keep your system running at its best.
How Does Solar Monitoring Track Your Energy Production?
A solar monitoring system tracks energy by collecting data from your inverter and panel sensors. Sending it to the cloud through your home network, and displaying real-time production numbers, consumption rates, and battery levels on a mobile app. This lets you see exactly how much power each part of your system generates at any moment.
A solar monitoring system works by gathering data from the heart of your setup: the inverters. These devices change the power from your panels into the form your home uses. As they do this work, they track how much energy each part of the system makes. This data then goes to the cloud, where you can see it on your phone or web site. Key takeaway: Your inverter is both a power converter and a data source , it captures every watt your panels produce.
Module level tracking with Enphase
Enphase is a top choice for tracking energy at the panel level. It uses small microinverters that sit under each solar panel on your roof. This setup lets the system track how much power every single panel makes. If one panel gets dirty or stays in the shade, the Enphase app will show you exactly which one it is. You can learn more about how Enphase IQ8 microinverters help your system stay efficient. This level of detail helps you spot small problems before they turn into big ones.
The Enlighten platform uses built in WiFi to send data from your roof to your home network. This gives you a clear view of your home's energy health in real time. According to the Australian Government's energy guide, module level monitoring is the best way to see the output of each panel. This helps you get the most out of your solar investment over many years.
String level data and SolarEdge
SolarEdge takes a different path to track your energy. It uses a string inverter that links groups of panels together. To give you panel level data, it adds power optimizers to each module on the roof. These tools track the power of each panel and send that data to the main inverter. This means you still get to see how each panel is doing, even with one main unit. You can find more details in our brief guide to solar inverters to see which type fits your home.
The SolarEdge app provides a map of your roof to show the status of every panel. This makes it easy for you to see trends and find any faults. This setup is great for homes with complex roofs where panels face different ways. By tracking each part, the system ensures that one slow panel does not drag down the rest of the group.
All in one view with the Tesla app
For many California homeowners, solar is just one part of the energy plan. The Tesla app brings solar production, battery levels, and EV charging into one view. If you have a Tesla Powerwall, the app shows how energy moves between your solar panels, the battery, and the grid. This helps you manage your backup power during fire season or sudden grid outages.
Using one app for all your energy needs makes it simple to stay in control. You can see when your solar panels are making the most power and decide when to charge your car. Data from Energy.gov shows that smart monitoring helps people use more of their own clean energy. This reduces how much power you need to buy from the utility company, which saves you more money over time.
Key Solar Monitoring Platforms Compared: Enphase, SolarEdge, and Tesla
The three main solar monitoring platforms each offer different strengths: Enphase Enlighten provides per-panel detail through microinverters. SolarEdge delivers panel-level data through power optimizers plus a string inverter, and the Tesla app unifies solar, battery, and EV charging into one dashboard. Your choice depends on your hardware and how much detail you want.
Most new solar setups come with a digital tool to track energy. These apps help you see how much power your panels make each day. At AMECO, we focus on the best tools for our clients. We install solar panel systems that use Enphase and SolarEdge technology. These tools give you a clear view of your home power. Many apps also store data for years, so you can track trends over time. Key takeaway: The right monitoring platform turns raw production data into actionable insights that protect your energy savings.
Enphase Enlighten: Detailed Panel Tracking
The Enphase Enlighten app is a top pick for many people. It works with Enphase IQ8 microinverters to track each panel on your roof. This means you can see the exact power from every single panel. If one panel has a shade issue, you will see it on your phone right away. The app uses WiFi to send data to the cloud. You can check your system from anywhere with an internet link. The app shows you clear graphs of your power use and solar gain. It is a simple way to stay in control of your home power and ensure your system is working at its best.
SolarEdge: Panel-Level Data with Power Optimizers
SolarEdge uses a different path to give you panel-level data. This system uses power optimizers on each panel and one main inverter. The SolarEdge app lets you see how your whole system of panels is performing. It also helps teams find and fix faults from a distance. This reduces the need for a technician to visit your home for small checks. You can see how much energy each panel makes and track your savings. It is a strong tool for people who want to boost their solar savings. AMECO has used these systems for years to help California homeowners get the most from the sun.
Tesla App: Unified Home Energy Dashboard
The Tesla app is known for how well it links different parts of your home. It shows your solar power, your home battery, and your car charging in one place. If you have a Tesla Powerwall, this app is a must. You can see when your battery is full and how much energy you send to the grid. It helps you manage your power during a blackout. You can change how your battery works based on your needs. While AMECO does not install Tesla inverters, many of our clients use the app for their battery storage. It provides a clean, modern look at all your home energy in one spot.
| Feature | Enphase Enlighten | SolarEdge | Tesla App |
|---|---|---|---|
| Tracking level | Per-panel (microinverters) | Panel-level (optimizers + string inverter) | System-level (integrated) |
| Key strength | Individual panel health and diagnostics | Remote fault detection and panel mapping | Unified solar, battery, and EV view |
| Hardware type | Microinverters under each panel | Power optimizers + central inverter | Built into Tesla ecosystem |
| Mobile app | Enlighten | mySolarEdge | Tesla |
| AMECO installs | Yes | Yes | Inverters: No |
Why Does Solar Monitoring Matter for California Homeowners Under NEM 3.0?
Solar monitoring matters more than ever for California homeowners under NEM 3.0 because the value of exported solar energy changes hourly. Real-time tracking helps you shift high-consumption tasks to peak production hours. Manage battery storage to avoid expensive evening rates, and catch performance issues before they erode your bill savings.
For California homeowners, solar power used to be a simple way to get grid credits. With the move to NEM 3.0, the value of that energy now changes based on the time of day. A solar monitoring system is no longer just a cool tool. It is a key part of your home that helps you track power flows and protect your savings. Key takeaway: Under NEM 3.0, knowing when you produce and consume energy is just as important as how much you produce.
Handling Time of Use Rates
Under NEM 3.0, power companies use complex rates that change by the hour. The credit you get for solar power sent to the grid is often low during the day. By using an app, you can see when your home makes the most power. This data lets you time big tasks, like laundry or pool pumps, during those hours. Using your own power first is the best way to lower your bill. AMECO's solar solutions include monitoring so you can track and adapt to these rate changes automatically.
Using Your Battery Storage
Most new solar setups in California now include a solar battery backup to store extra power. Monitoring software tracks your battery level and shows how your home uses that power at night. This is very helpful during the evening when grid prices are high. Tracking also helps you manage your power during fire season or grid outages. You can check your app to see how much power you have left to keep your lights on.
Checking System Health
Without a way to track data, a small equipment fault could go unseen for months. A drop in power might only show up on a high bill weeks later. Smart tools give live alerts if a panel or part stops working. This fast notice keeps your home running well. Good performance is key to meeting clean energy goals set by the U.S. Environmental Protection Agency for a green home.
How Do You Access and Use Your Solar Monitoring Data?
You access your solar monitoring data through a mobile app or web portal provided by your system's manufacturer. After installation, you receive an email with account setup instructions. Once logged in, you can view real-time production, historical trends, battery status, and system alerts from anywhere with an internet connection.
Most modern solar setups do not rely on a simple screen on the wall. While some older inverter screens only show current power levels, a new solar monitoring system gives you a full view of your home energy. AMECO includes these online tools with every project we build. Our team helps you get the most out of your clean energy system through every season and weather shift. Key takeaway: Your monitoring app puts a full energy dashboard in your pocket , check it weekly to stay ahead of issues.
Setting Up Your Account
Once your solar panels are live and the grid link is set, you will get an email to set up your new account. This secure link connects your email to the data box inside your home. You can then download the free app on your phone or log in through a web site on your computer. This setup step ensures you are the only person who can see your house data. You will also see how your custom setup fits into AMECO's complete approach to energy care and roofing health. Our team makes sure you have access before we finish the job.
Steps to Track Your Energy
Using your new data tool is simple and fast. Most owners check their app once a week to stay on top of their savings. You can see which panels are catching the most sun and how your house uses that power. Follow these steps to start tracking your solar power today.
- Download the mobile app for your own solar brand from the app store. This could be from Enphase, SolarEdge, or Tesla.
- Log in with the secure account details you set up after your solar project was done.
- Open the main dashboard to see a live view of how much power your panels are making right now.
- Check the battery tab if you have a backup system. This shows your current charge level and how fast you are using power from the cells.
- Look for the alerts or system health tab. This area will show you if any part of your solar array needs a check or repair.
- Sign up for phone alerts so the app can tell you if your system stops making power while you are away.
Viewing Trends and Monthly Reports
Your app does much more than show live power levels. It keeps past data records for you to view at any time. You can compare how much power you made this month versus the same time last year. This helps you find long-term trends and see how California weather affects your total savings. It also shows you if your energy use goes up during the hot summer months. If your output drops for no clear reason, you can call our local team for help. We use these shared reports to keep your system running at its best for many years.
Choosing the Right Solar Monitoring System for Your Home
Choosing the right solar monitoring system depends on your inverter type, how much detail you want, and whether you have battery storage. Module-level monitoring (Enphase) gives per-panel data ideal for catching faults early, while system-level apps (Tesla) work best for homes with multiple energy devices. AMECO installs the monitoring as part of every project.
When you pick a solar monitoring system, you must think about how it works with your panels and inverter. The best tool for you will depend on your hardware and how much data you want to see. Some systems show how much power the whole roof makes. Other tools show how much power each panel makes. You want a system that gives you the data you need to save money. Key takeaway: Your monitoring system should match your hardware and your need for detail , module-level for diagnostics, system-level for simplicity.
Hardware and inverter match
Most systems are made to work with certain inverters. For instance, if you have microinverters, you will use the tool from that brand. AMECO installs top brands like REC solar panels along with Enphase or SolarEdge inverters. These brands are known for being durable and easy to use. We know which tools help people the most, having served California homeowners for decades. Every system we put in comes with professional monitoring as part of the job.
You will not need to buy an extra tool if you work with us. We set up the monitoring for you during the install. This means you can see your power data as soon as the system starts. You get a direct link to the data from the brand that made your equipment. This keeps things simple and helps you get support if you ever need it. AMECO's complete approach ensures your monitoring is configured and working before we hand over your system.
String versus module views
You should choose between string-level and module-level views. A basic system shows the total power for the whole set of panels. This is fine for some, but it can hide small problems. If one panel stops working, the total power will drop. But you may not know why it dropped. Module-level tools show you the health of each single panel. This helps you find a single bad part before it hurts your bill.
High-end tools also show you how your home uses power. They track when you pull power from the grid and when you send it back. Official data says that solar monitoring apps store your past data so you can spot trends over many years. This data is key for seeing how your system acts in the summer versus the winter. It helps you find ways to use more of your own clean power.
App features and system alerts
A good app should be easy to use on your phone or tablet. It should help you stay on top of your energy use and health. Look for these key tools in your monitoring app:
- Quick alerts if a panel stops working or goes offline.
- Real-time data on how much solar power you are making.
- Clear charts that show how much energy you use each day.
- Battery tracking to see your backup power levels.
- Historical logs for long-term energy planning.
These alerts can tell you if a panel is down or if the system has lost its link to the web. You also want a tool that can track your battery if you have one. This helps during power outages or fire season. It shows you how much backup power you have left at all times.
The right system should help you feel in control of your energy. If you want to see how these tools can help your home, schedule a free solar consultation with AMECO today. We can show you how to get the most from your solar setup and find the best way to track your savings for years to come.
Frequently Asked Questions
Can I monitor my solar panels from my phone?
Yes. Most modern systems use a mobile app like Enphase Enlighten or mySolarEdge to track energy. Every solar installation we provide includes access to these apps. You can view your real-time production, historical trends, and system health from anywhere. This makes it easy to spot if a panel is not working or if your system needs a quick check.
Is a solar monitoring system worth the cost?
Yes. Monitoring helps you find underperforming panels or inverter faults early. According to Energy.gov.au, without these tools, issues can go undetected for months. This leads to lower savings and less power. By tracking your energy, you can fix problems fast. This ensures your system runs at its best and helps you get the most value from your clean energy investment.
How do I know if my solar panels are working properly?
Your monitoring app is the best way to check system health. Look for steady daily production that matches seasonal expectations. Most apps show a green checkmark or similar indicator when all panels are working. If the app shows a drop in power or an alert symbol, check for shading, dirt on panels, or inverter error messages. When in doubt, contact your installer for a remote diagnostic check.
What happens if my monitoring system goes offline?
Monitoring apps rely on your home WiFi connection to receive data. If the app goes offline, first check your home internet connection. Restart your router and make sure the monitoring gateway device is still plugged in and powered on. If the issue persists, your installer can remotely check the connection and help restore service. Most systems store data locally during short outages and upload it once the connection returns.
Can solar monitoring help me save money on my electric bill?
Yes. Monitoring helps you see exactly how much power you produce versus how much you use. This data allows you to shift high-consumption activities like laundry and pool pumps to peak sunlight hours when your panels are making the most power. Under California's NEM 3.0 rate structure, consuming your own solar power during peak rate periods can significantly lower your overall electricity costs.
7.10.2026
Thick layers of dust and wildfire ash can quietly slash your solar system output by more than 25 percent. This buildup prevents sunlight from reaching your cells and traps heat that further degrades performance.
Proper solar panel cleaning California relies on a local plan to clear away salt, dust, and ash. Many owners hope that rain will wash their panels, but light rain often leaves spots and thick grime that blocks the sun. Data from academic research shows that dust and small bits of debris on the panel surface slow down energy production at a high rate. Common waste like dirt, pollen, and bird droppings can cut power output by up to 20 percent. When you plan expert care every six months, you keep your system cool and working well. Regular care protects your long-term energy investment and keeps your system ready to handle high power rates.
Keep your solar panels performing at their peak. Contact AMECO Solar & Roofing to schedule a professional cleaning consultation for your California home.
Knowing the local weather and dirt levels is the first step toward better system health. AMECO has provided expert help since 1974 and knows how grime and heat slow down your system. The process starts here.Why California Solar Panels Need Regular Cleaning
California solar panels face a unique set of local weather issues that can slow down power output. Unlike some parts of the country where rain keeps panels clear, California's long dry spells allow dirt to stack up for months. This buildup creates a wall that stops sunlight from reaching the solar cells inside your panels.
Common California dirt types
Homeowners in the Golden State deal with many types of airborne debris. Each region of the state has its own specific risks that can coat your system. These particles often include:
- Farm dust and pollen in the Central Valley.
- Salt air film in coastal areas like Orange County.
- Smog and soot in Los Angeles and other cities.
- Wildfire ash that can cover entire regions in summer.
- Bird droppings and tree sap in leafy suburbs.
Bird droppings are a common problem that rain often cannot wash away. These droppings create "hot spots" where a small part of the panel is shaded while the rest is in full sun. This uneven shade can lead to long-term damage or even cell failure over time.
How buildup kills power
The impact of this dirt is not just about looks. Academic research shows that the buildup of small particles on solar cells can greatly reduce power output. A study published in PMC found that heavy dust can slash power output by more than 25%. Even a light layer of dirt and pollen can reduce your solar panel solutions output by 20% if left dirty.
Many California homeowners rely on their systems to lower power costs. A 20% drop in output can lead to much higher monthly bills. Regular cleaning ensures your system makes the most energy possible in your local area. This is why a pro scrub is so important for your yearly budget.
The heat factor
Dust does more than just block light. It also changes how your panels handle heat. Research shows that dust buildup increases the running heat of solar panels. Since solar panels are less effective at making power as they get hotter, this extra heat further reduces your output. By keeping your panels clean, you help them stay cool and work well during hot California afternoons.
Regular care is a key part of any solar system servicing plan. While some people wait for winter rains, a pro scrub removes the tough grime that light rain leaves behind. This helps your system last longer and produce more power for years to come.
How Often Should You Clean Solar Panels in California?
Most experts suggest a baseline of cleaning your panels every six months. But in California, the weather and area change quickly from one city to the next. A home in a foggy beach town faces different issues than a farm in the Central Valley. Local factors like dust levels and bird activity often mean you need more care to keep your system at its best.
Coastal regions and salt buildup
If you live near the ocean, salt air is your main concern. Sea mist can leave a thin layer of salt on your glass. This film acts like a magnet for dust and ocean fog. Over time, it creates a hazy coat that blocks sunlight. For homes along the coast, a cleaning every three to four months is often best. This care stops salt from crusting onto the panels and keeps your output high.
Fog also plays a role in how dirt sticks to your system. Wet morning air can turn dry dust into a sticky mud. This grime does not always wash away when the sun comes out. Instead, it bakes onto the surface. Checking your panels after a heavy fog season can help you spot when it is time for a wash. Keeping the glass clear ensures you get the most from every hour of California sun. Taking a local approach helps you plan the right solar system servicing schedule for your home.

Farming dust in the Central Valley
The Central Valley has some of the highest dust levels in the state. Farming work, dry soil, and pollen create a thick layer of debris on solar systems. Research shows that dust buildup on panel surfaces can cut energy output by more than 25 percent in some areas. Because the valley is so dry for most of the year, rain rarely helps enough to keep things clean.
Homeowners in this region should aim for a cleaning every three to four months. During peak harvest times, pollen and dirt levels rise fast. If you see a visible layer of brown or yellow on your panels, they need a wash. Waiting for winter rains often leads to months of low power production. Frequent cleanings help you avoid the big power drops that come from heavy soil.
Inland areas and wildfire ash
Inland cities face a mix of city smog and desert dust. For many homes, a six-month cleaning cycle works well. But if you have many trees or bird activity near your roof, you may need a visit every four months. Bird droppings are very tough on panels. They block light and can even lead to hot spots that damage the cells if left for too long.
Wildfire season brings a unique risk to California solar owners. Ash from fires can cover a whole roof in a single day. This gray soot is much thicker than normal dust and blocks nearly all light. You should always check your panels after any ash event. A quick expert cleaning after a fire ensures your system returns to full power. Regular care keeps your investment safe and your energy bills low year after year.
DIY vs Professional Solar Panel Cleaning: What California Homeowners Should Know
Many homeowners think they can save money by cleaning their own solar panels. While using a garden hose might seem easy, it often falls short. In California, dust and salt air can create a thick layer on your glass. This grime can block sun rays and lower your power output.
The risks of climbing your roof
Safety is the biggest concern for any DIY project. Climbing onto a roof is dangerous, especially when you add water and soap. Slips and falls are common risks for people without the right gear. Using the wrong cleaning methods can also damage your custom solar system design. You could crack the glass if you step on the wrong spot. Replacing a broken panel costs much more than a simple cleaning service.
You also risk your roof when you walk on it. AMECO has fixed many roofs damaged by people walking on solar tiles. Since we handle both solar and roofing, we know how to protect your home. Our team uses paths that keep your shingles safe. We make sure your roof stays in good shape while we work.
Why pro tools beat a garden hose
Your tap water often has minerals like calcium. These minerals leave spots on your panels when the water dries. These spots can act like new dirt and block more light. Pros use deionized water to get a streak-free finish. This pure water pulls dirt away without leaving a film. They also use soft brushes that will not scratch the glass. Hard brushes or pressure washers can cause small cracks that ruin your system over time.
Training also makes a big difference. Top crews have special safety training to show they know the best methods. They do not use harsh chemicals that might hurt the environment. Instead, they rely on high-grade tools and pure water. This helps your panels stay clean for a longer time.
| Feature | DIY Cleaning | Professional Service |
|---|---|---|
| Water Type | Hard tap water (leaves spots) | Deionized water (streak-free) |
| Tools Used | Garden hose and shop towels | Soft brushes and safety gear |
| Safety Level | High risk of falls or damage | Safe, insured, and certified |
| Inspection | None | Full visual check for issues |
| Power Gain | Variable results | Up to 20% production jump |
The value of a visual check
A pro cleaning visit is more than just a wash. It also includes a full check of your system. Technicians look for loose wires or nests under the panels. Pigeons and other pests love to hide in the shade of your solar array. They can chew on wires and cause a fire risk. Finding these issues early can save you from big repair bills later. Visual checks find cracks or loose mounts before they cause a total system failure.
Clean panels also stay cooler. Dust can trap heat, which makes your system work harder for less power. Keeping the glass clear helps the cells stay at the right temperature. After a pro visit, many people see a 20% jump in solar output right away. AMECO also tracks your system through app-based monitoring. If we see your power drop, we can help you find out if it is time for a wash.
What Does a Professional Solar Panel Cleaning Include?
A professional solar panel cleaning is much more than a simple rinse with a hose. Expert teams in California use a set plan to keep your solar system safe and running well. A pro team knows how to handle the unique grit found in different regions of the state.
The multi-step cleaning process
The work starts with a safety setup to protect the crew and your home. Workers use special tools to reach your roof without causing damage. Once they are in place, the cleaning starts. Experts use deionized water and soft brushes to scrub each panel. This type of water is pure and does not leave spots or streaks behind. Using soft brushes prevents small scratches that could lower your power output over time. The goal is a clear finish that lets in every bit of light.
After the scrubbing is done, the team gives the panels a final rinse. They use a low-pressure flow to remove any loose dirt or debris that might still be on the glass. Keeping your panels clear is key for your power goals. Research shows that dust can reduce power output by more than 25 percent in some areas. A professional wash ensures your system is ready to catch as much sun as it can each day.
Full system and roof checks
Once the panels are clean, the team does an eye check of your whole setup. They look for cracks in the glass, loose mounts, or signs of pests like birds or squirrels. Finding these issues early can save you from big repair bills later. They also check for bird nests or trash that could trap heat and lower output. If they find any problems, they will list them and share them with you so you can plan the next steps.
Expert cleaners also review your roof and mounting system. They check the flashing to make sure your roof stays dry and leak-free. This is very much needed for systems like the Owens Corning Solar PROtect. This system blends solar and roofing together for a sleek look. By checking the mounts and the roof at the same time, the team helps keep your home dry and your panels safe. They make sure the whole system is tight and secure.
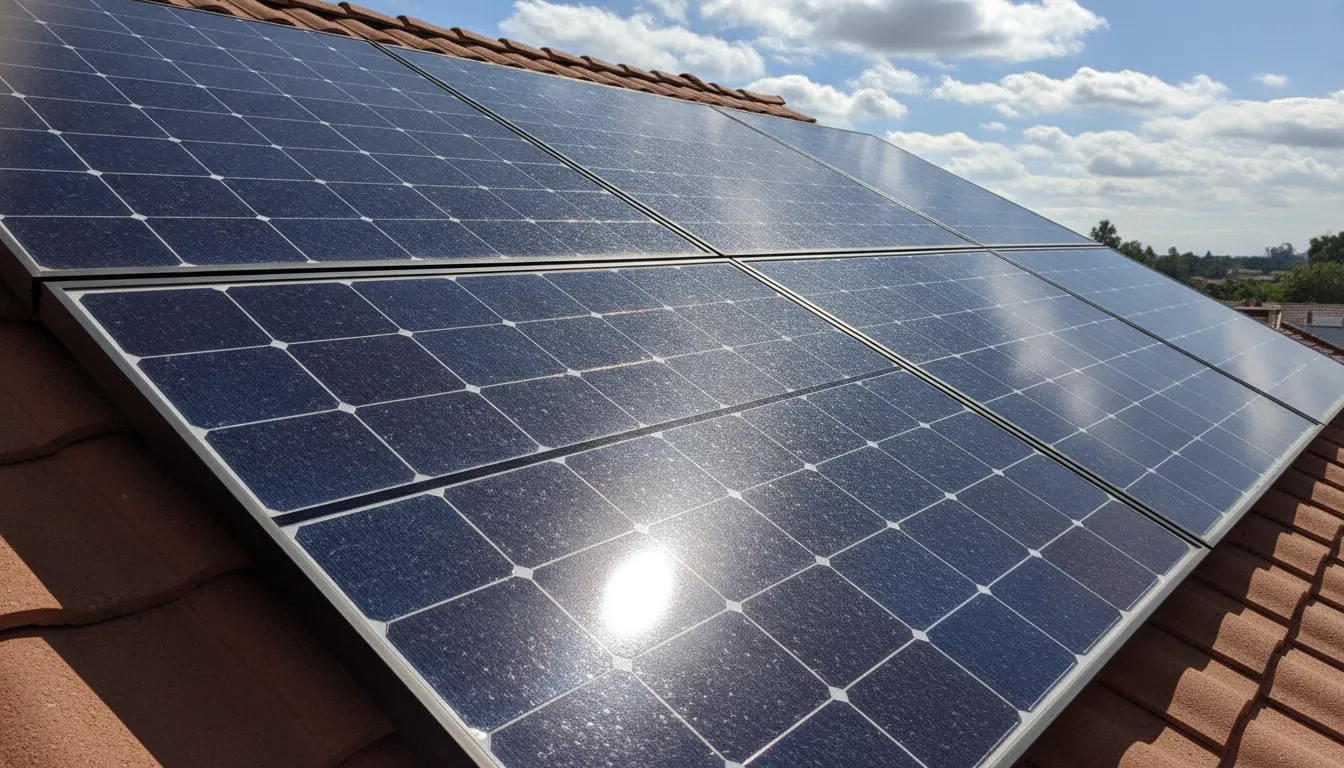
Care plans and expert help
Many companies offer regular care plans to keep your system in top shape. These plans may include two cleanings a year to handle seasonal dust and pollen. AMECO gives you a special help because we are both a solar and a roofing company. We can manage your solar needs and your professional roofing services under one roof. This joined approach means we know how your solar mounts affect your roof for a long time.
Choosing an expert team also gives you peace of mind. Trained crews know how to work on roofs safely and how to handle soft solar parts. They use the right tools to get the job done without voiding your gear plan. They also look for loose wires or signs of wear on the frames. With the right care, your solar system can keep lowering your power bills for many years to come.
Beyond Cleaning: Solar System Monitoring and Maintenance
A high-performing solar setup needs more than just clean glass. While washing away dust is a vital first step, full system health depends on the parts working behind the panels. Keeping a close eye on these parts ensures your home gets the most power from the sun every day.
Tracking health with app monitoring
Modern solar systems come with smart tools that let you track power in real time. Apps from top brands like SolarEdge and Enphase show you how each panel works. If one part of your system stops making as much power as the rest, the app will often send an alert to your phone. This tracking helps you find small problems before they lead to big losses. To stay on top of your system's health, you should follow a regular solar system maintenance checklist to ensure your gear stays connected and accurate.
Maintaining battery storage and inverters
Your inverter is the heart of your solar power system. It turns raw sun energy into the power your lights and tools use. You should check your inverter for any error lights or codes once a month. If you have a battery backup, like a Tesla Powerwall or an Enphase battery, you also need to keep the vents clear of dust. This helps the units stay cool and run safely during hot California days. Proper care for these parts helps you avoid the high costs of repairs and keeps your backup power ready for a utility outage.
Checking roof integrity and mounting
Solar panels add weight and wind load to your roof. Over time, the brackets that hold the panels in place can shift. It is a good idea to have a pro look at your roof and solar mounts every few years. They will look for any signs of loose bolts, damaged shingles, or bird nests under the panels. At AMECO, we help you keep your whole system safe by checking the roof and the solar gear at the same time. You can use our solar and roof cost calculator to see how a full plan fits your budget.
Protect Your Solar Investment Through Proper Maintenance
A home solar system is a big asset. Most owners in California spend about $25,000 to $35,000 to install these setups. While the parts last a long time, they need care to work well. Routine care ensures you get the most power for your money.
Maximize your energy output
The main goal of cleaning is to keep power levels high. When panels get dirty, they cannot catch as much light. Data shows that dust can reduce power output by more than 25% in some areas. In many parts of California, dirt and pollen often cut output by 20%. This drop in power means you buy more energy from the grid. That raises your bill. Clean panels produce the most power possible each month.
Keep your equipment warranty
Pro care does more than just wash away grime. Most high-end panels have long-term coverage. Some last up to 40 years. But these plans often need you to keep the system in good shape. A pro service includes a check for cracks or loose parts. Finding these early helps you use your coverage if a part fails. It also stops pests from nesting under your panels. Pests can harm the wires and the roof below.
Track performance for better savings
New tools make it easy to see how well your system works. AMECO uses software to help you track power in real time. If you see a sudden drop, it may be time for a wash. Rain helps, but it is not enough to remove thick grime or bird waste. A pro wash often costs about $150 to $300. This small cost protects your large investment. It ensures your monthly savings stay high for a long time.
Ready to protect your solar investment? Get a free cleaning estimate from AMECO Solar & Roofing and keep your system producing at its best.
Frequently Asked Questions
Does cleaning increase solar panel production?
Yes. Keeping your solar panels clean can significantly boost their power output. According to research from the National Institutes of Health, a heavy buildup of dust can reduce energy production by more than 25 percent. Removing dirt and bird droppings helps the cells absorb more sunlight. This simple maintenance task ensures your system operates at its best and helps you get a faster return on your solar investment.
How often should you clean solar panels in California?
Most California homeowners should schedule a professional cleaning every six months. Local factors like wildfire ash, coastal salt air, and dust from Central Valley farms can cause debris to pile up quickly. If your home is near trees or has high bird activity, you may need more frequent service to maintain peak efficiency. Regular checkups help find minor issues like cracks or loose mounts before they become costly repairs.
Does rain clean solar panels?
Rain is usually not enough to keep your solar panels fully clean. While a light shower might rinse off some loose dust, it does not remove dried bird droppings, tree sap, or the thin film of grime that builds up over time. In many parts of California, the long dry season means dirt has months to settle. A professional cleaning removes what rain leaves behind and restores your system to full power.
Can dirty solar panels cause damage?
Yes, dirt buildup can lead to permanent damage over time. Bird droppings and other debris create hot spots where part of the panel overheats while the rest runs cooler. This uneven heat can crack the glass or damage the solar cells beneath. Pest nests under panels can also trap moisture and attract rodents, which may chew through wiring. Regular cleaning helps you spot and prevent these issues before they require expensive repairs.
How much does professional solar panel cleaning cost in California?
Professional solar panel cleaning in California typically costs between $150 and $300 for a standard residential system. The exact price depends on your system size, roof type, panel accessibility, and how dirty the panels are. Many companies offer discount pricing when you schedule regular cleanings. Considering that a cleaning can restore up to 20% of lost energy production, the cost is modest compared to the long-term savings on your electric bill.
Schedule Your Solar Panel Cleaning With AMECO
Keeping your solar panels clean is one of the most cost-effective ways to protect your energy investment. From the salty coastal air of Orange County to the farm dust of the Central Valley and the wildfire risks inland, California homeowners face unique challenges that require a professional touch. Regular cleaning keeps your system producing at peak levels, extends equipment life, and helps you maximize the financial benefits of going solar.
AMECO Solar & Roofing has served California homeowners since 1974. As an integrated solar and roofing company, we bring unmatched expertise to every cleaning visit. Our trained technicians use professional-grade deionized water systems and soft-brush techniques to restore your panels without risk of damage. We also inspect your roof, mounts, and electrical connections during every service call.
Contact AMECO today to schedule your professional solar panel cleaning and keep your system running strong year after year. You can also use our solar cost calculator to estimate your potential savings with proper maintenance.
---7.8.2026
Ready to lower your cooling costs? Schedule a free virtual consultation with AMECO Solar & Roofing to explore cool roof shingle options for your California home.
Cool Roof Shingles California: The Science Behind Cool Roof Shingles: How Do They Keep Homes Cool?
Cool roof shingles use highly reflective granules to bounce sunlight away from the roof surface instead of absorbing it as heat. Two scientific principles drive this performance: solar reflectance, which measures how much sunlight the surface reflects. And thermal emittance, which measures how quickly the roof releases any heat it does absorb. Together, these properties keep the roof surface significantly cooler than standard asphalt shingles.
Roofing technology has advanced well beyond simple asphalt and gravel. Modern cool roof shingles embed specially coated ceramic granules into the asphalt base. These granules are engineered to reflect specific wavelengths of visible and infrared light. The result is a roof that looks like a traditional residential shingle but performs like a high-efficiency cooling surface. According to the Environmental Protection Agency, cool roofs reduce the amount of heat transferred into a building, which directly reduces the demand for air conditioning during hot months.
Owens Corning, a leading manufacturer whose shingles AMECO installs, produces a Cool Roof Collection specifically engineered for hot climates like California. These shingles carry the Cool Roof Rating Council (CRRC) certification, which verifies their reflectance and emittance through independent laboratory testing.
For California homeowners weighing a roof replacement, understanding how these technologies work is the first step toward making a confident purchase. Let us walk through the core physics and the practical savings that follow.
What Makes a Roof "Cool"? Solar Reflectance and Thermal Emittance Explained
A roof earns the "cool" designation through two measurable properties: solar reflectance (also called albedo) and thermal emittance. Solar reflectance measures the percentage of sunlight the roof bounces back into the sky. Thermal emittance measures how effectively the roof releases the heat it does absorb. California's Title 24 energy code requires minimum levels of both properties for roofing materials in most climate zones.
Solar reflectance, also known as albedo, is the fraction of incoming sunlight a surface reflects. A perfect mirror has an albedo of 1.0, reflecting 100 percent of light. Standard dark asphalt shingles typically score between 0.05 and 0.15, meaning they reflect only 5 to 15 percent of sunlight and absorb the remaining 85 to 95 percent. Cool-colored asphalt shingles raise that score to 0.20 to 0.30, reflecting roughly twice as much solar energy as their dark counterparts while maintaining a traditional appearance.
| Roof Type | Solar Reflectance | Sunlight Absorbed | Surface Temperature Impact |
|---|---|---|---|
| Standard dark asphalt shingles | 0.05 - 0.15 | 85-95% | 150+F peak temp |
| Cool-colored asphalt shingles | 0.20 - 0.30 | 70-80% | Up to 50F cooler than dark asphalt |
| White painted metal roof | 0.60 - 0.70 | 30-40% | Significantly cooler |
| White PVC/TPO single-ply roof | 0.70 - 0.85 | 15-30% | Coolest residential option |
Thermal emittance is the second critical factor. A material with high thermal emittance releases absorbed heat quickly through infrared radiation. Even a roof that reflects most sunlight will still absorb some heat. High emittance ensures that trapped heat radiates back outward rather than conducting downward into the attic. The Lawrence Berkeley National Laboratory notes that roofs need both high reflectance and high emittance for optimal performance in hot, sunny climates.
Cool roof shingles from Owens Corning achieve both metrics through proprietary granule coatings that reflect near-infrared light while maintaining darker color options. This allows homeowners to choose charcoal, brown, or forest green shingles that still meet Title 24 performance standards.
California Title 24 Cool Roof Requirements Explained
California's Title 24 Building Energy Efficiency Standards (Part 6) requires roofing materials to meet minimum solar reflectance and thermal emittance values in climate zones where cooling loads are highest. Zones 4 and 8 through 15, which include Los Angeles, Sacramento, and most of the Central Valley. Require cool roof products on new construction and reroofing projects covering more than 50 percent of the roof area.
The state divides its territory into 16 climate zones, each with unique energy requirements based on local weather patterns. Homes in climate zones 2, 4. And 8 through 15 must use roofing products with a minimum aged solar reflectance of 0.20 and a minimum thermal emittance of 0.75. Or achieve a Solar Reflectance Index (SRI) of at least 16. These thresholds ensure that new and replacement roofs actively reduce cooling demand rather than adding to the urban heat burden.
Local jurisdictions often layer additional requirements on top of state law. Los Angeles County's Green Building Standards Code mandates cool roof compliance for all new residential construction and major reroofs. The city of Sacramento similarly enforces cool roof provisions through its local energy code. Homeowners should verify both state and local requirements before selecting roofing materials.
The Cool California Roof Product Comparison tool allows homeowners to search rated products by manufacturer, color, and performance range. The Cool Roof Rating Council maintains a searchable database of certified products. Owens Corning's Duration and Berkshire series shingles appear on this list, confirming they meet the state's performance benchmarks while offering the aesthetic variety homeowners expect.
For homeowners who plan to install roofing for solar panels, pairing a Title 24 compliant cool roof with a photovoltaic array delivers compounded energy benefits. The roof reduces cooling load while the solar panels offset the remaining electricity consumption. AMECO designs both systems to work together from the start.
How Cool Roof Shingles Reduce AC Costs in the Central Valley and Los Angeles
Cool roof shingles reduce air conditioning costs by lowering the amount of heat that enters the home through the roof. The EPA estimates this can lower peak indoor temperatures by 2.2 to 5.9 degrees Fahrenheit in unconditioned spaces. For homes with air conditioning, every degree of reduced heat gain translates directly into lower compressor run time and reduced monthly energy bills.
In the Central Valley, where summer temperatures routinely exceed 100 degrees Fahrenheit, a dark roof surface can reach 150 degrees or more. That superheated surface radiates heat downward through the roof deck and into the attic, turning the attic into a thermal battery that continues releasing heat well after sunset. Air conditioners in these homes must overcome both daytime solar gain and stored attic heat before the indoor temperature drops.
The EPA's cool roof research documents measurable energy savings of 7 to 15 percent on cooling costs for properly installed cool roofs in warm climates. Homes with poor attic insulation see the largest percentage gains because the cool roof effect partially compensates for the insulation deficit.
Los Angeles homeowners face a slightly different challenge: the urban heat island effect. Dense concentrations of dark roofs, roads, and parking lots absorb solar energy during the day and release it slowly at night, keeping the city warmer around the clock. The Lawrence Berkeley National Laboratory confirms that widespread adoption of cool roofs can lower ambient air temperatures in dense urban areas by up to 2 degrees Fahrenheit. Reducing citywide cooling demand and improving grid reliability during heat waves.
Measurable benefits at the household level
Homeowners who replace a failing dark roof with cool-rated asphalt shingles typically see these changes during their first summer in the home:
- Lower peak attic temperatures. Less heat radiating through the roof deck means the attic stays closer to outdoor ambient temperature, reducing the thermal load on the HVAC system.
- Reduced AC cycling. The cooling system reaches setpoint faster and stays off longer between cycles, which extends equipment life.
- Improved second-floor comfort. Rooms directly under the attic benefit most from the reduced heat transfer.
- Lower monthly electric bills. Pacific Gas and Electric, Southern California Edison, and Sacramento Municipal Utility District customers report reduced summer cooling costs after cool roof installation.
Pairing Cool Roofs with Solar Panels for Maximum Energy Savings
A cool roof and solar panel system work synergistically. The cool roof reduces the home's overall cooling demand, so the solar array needs to offset less total energy consumption. Additionally, solar panels operate more efficiently when the ambient temperature around them is lower, which a cool roof helps maintain.
Many homeowners assume that solar panels and cool roofs are alternative energy-saving strategies. In reality, they complement each other. Solar photovoltaic panels lose efficiency as their surface temperature rises. Standard silicon panels have a temperature coefficient of roughly 0.4 to 0.5 percent power loss per degree Celsius above 25 degrees C (77 degrees F). On a dark roof that can reach 65 degrees C (150 degrees F). The air immediately surrounding the solar panels is significantly hotter than it would be above a reflective cool roof. This temperature difference directly reduces the panels' electrical output during the peak solar hours when production matters most.
By installing cool roof shingle color options that work with your home's architecture, you create a cooler microclimate for your solar array. The combined system delivers more kilowatt-hours per installed panel and a shorter payback period.
Thermal emittance and solar efficiency
Thermal emittance plays an important role in the solar pairing scenario. A roof surface with high thermal emittance releases absorbed heat quickly, preventing hot air from pooling around the solar racking system. This active cooling effect keeps the solar panels closer to their rated operating temperature throughout the day.
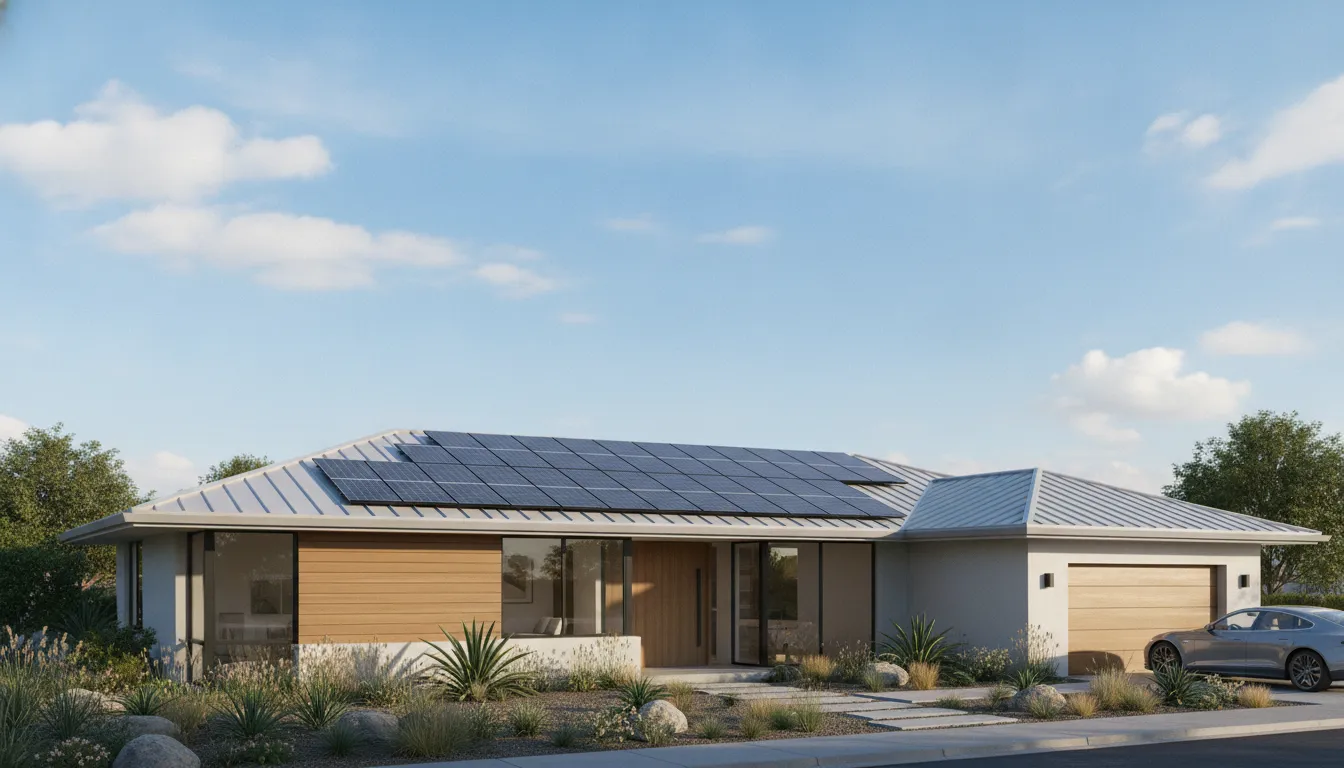
AMECO's integrated approach means one team handles both the roof replacement and the solar installation. This coordination ensures that the roofing and solar systems are designed together from the start. Roof penetrations are flashed correctly for the solar racking, and the roof warranty remains intact because a single contractor oversees both scopes. Homeowners interested in battery backup solutions can add storage at the same time, creating a comprehensive home energy system that generates, stores, and conserves power efficiently.
The REC Gold Tier recognition AMECO earned in 2026 reflects the company's expertise in designing and installing high-performance solar systems that pair with energy-efficient roofing.
Owens Corning Cool Roof Shingles: What Makes Them Effective
Owens Corning cool roof shingles use advanced reflective granule technology embedded in the asphalt surface. These granules are coated with ceramic particles that reflect near-infrared light while absorbing visible light in the desired color range. This allows the shingles to appear in standard roof colors while meeting Title 24 performance requirements.
Owens Corning's Cool Roof Collection spans the Duration and Berkshire product lines. Duration shingles feature a layer of impact-resistant material beneath the reflective granules, providing protection against hail and debris. Berkshire shingles offer a premium look with deeper shadow bands that simulate the appearance of natural slate or wood shakes. Both product lines meet the CRRC-required minimum reflectance of 0.25 for initial solar reflectance under California's Title 24 standards.
The proprietary granule technology works by layering ceramic pigments onto mineral substrates. These pigments are selected to reflect specific wavelengths of infrared light while maintaining color saturation in the visible spectrum. This selective reflection is the engineering breakthrough that makes darker cool roof colors possible. A dark gray Owens Corning Duration shingle can reflect significantly more solar energy than a standard dark gray shingle of the same color. Even though both appear nearly identical from the street.
Key features of Owens Corning cool roof shingles
- StainGuard protection. Algae-resistant technology prevents the dark streaks that form on roofs in humid microclimates.
- SureNail adhesion strip. Enhanced sealant provides wind resistance up to 130 mph, important for California regions with seasonal Santa Ana winds.
- Limited lifetime warranty. Transferable coverage adds resale value for homeowners who sell within the warranty period.
- Cool Roof Collection badge. Products carrying this label have been independently tested and certified for solar reflectance and thermal emittance.
As an Owens Corning preferred contractor, AMECO Solar & Roofing meets the manufacturer's highest standards for installation quality and training. This certification means every cool roof project is backed by both the manufacturer warranty and AMECO's workmanship guarantee.
Why Choose AMECO for Your Cool Roof Installation
AMECO Solar & Roofing has served California homeowners since 1974 as a locally owned, fully integrated solar and roofing contractor. The company handles both the roof replacement and any solar or battery installation under one contract, eliminating coordination gaps between separate trades.
Choosing a contractor for a project as significant as a roof replacement requires confidence in both technical capability and local knowledge. AMECO's five decades of continuous operation in California mean the design and installation teams understand the specific climate challenges of each region the company serves. From the dry heat of the Central Valley to the coastal Mediterranean climate of Los Angeles and Orange County.
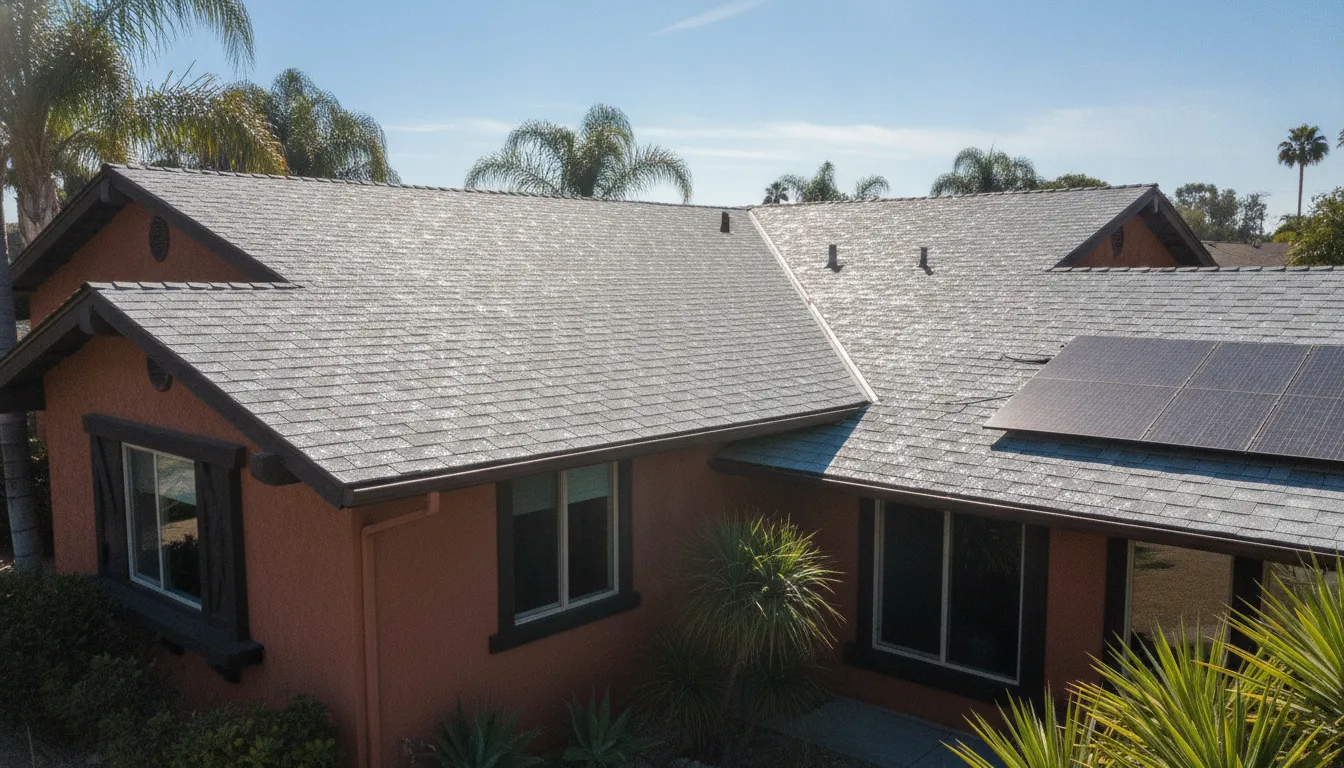
A truly integrated approach
Most roofing companies only replace roofs. Most solar installers only mount panels. AMECO is one of the few California contractors that performs both scopes with in-house crews. This matters because the order of operations matters: the roof must be structurally sound and code-compliant before solar racking attaches to it. When one company manages both phases, the roofing system is designed with the future solar array in mind, and the solar installation does not void the roof warranty.
AMECO's in-house design team develops a custom plan for each property using satellite imagery, utility bill analysis, and local climate data. The company's project managers guide homeowners through material selection, permit coordination, and installation scheduling. After installation, the AMECO support team handles warranty service and ongoing maintenance.
- Free virtual consultation. AMECO reviews your current roof condition, utility bills, and energy goals to recommend the optimal cool roof and solar configuration for your home and climate zone.
- Custom design and material selection. The in-house team selects Owens Corning cool roof shingles matched to your home's architecture and California's Title 24 requirements.
- Professional installation by AMECO crews. Licensed, insured, and factory-trained installers handle every phase with quality checks at each stage.
- Ongoing support and manufacturer-backed warranty. AMECO stands behind every project with local service teams and comprehensive warranty coverage.
Industry recognition and certified quality
AMECO holds multiple certifications that validate its expertise: Owens Corning preferred contractor status, Tesla solar roof certified installer designation, and Enphase silver installer recognition. The company has earned the REC Gold Tier recognition two years in a row for excellence in solar installation. These credentials are independently awarded by the manufacturers and industry bodies that evaluate contractor performance, not by AMECO itself.
All cool roof installations use Owens Corning Solar PROtect underlayment, which adds an extra layer of heat reflection beneath the shingles. This combination of reflective shingles and reflective underlayment creates a multi-layer thermal barrier that exceeds the minimum requirements of Title 24.
Best Practices for Choosing Cool Roof Shingles in California
Selecting the right cool roof shingle for a California home involves evaluating the product's CRRC-rated reflectance and emittance values. Verifying it meets the specific climate zone requirements under Title 24, and choosing an installer who can integrate the roof with planned or existing solar systems.
Homeowners replacing a roof in California have an opportunity to save on cooling costs, meet energy code requirements, and prepare the home for future solar or battery storage. These best practices help ensure the new roof delivers maximum value:
- Check the CRRC rating before buying. Every certified cool roof product has a unique CRRC identifier. Look up the product on the Cool California ratings directory to confirm its aged solar reflectance and thermal emittance values.
- Confirm your climate zone. California's 16 climate zones have different cool roof requirements. Homes in zones 4 and 8 through 15 must use compliant products. Those in zone 16 (high mountain) may qualify for exemptions.
- Choose colors you can live with. Cool technology is available in virtually every shingle color. Darker shades reflect less total sunlight than lighter shades, but they still meet Title 24 thresholds and outperform standard dark shingles by a wide margin.
- Plan for solar at the same time. If you intend to add solar panels within the next five years, designing the roof and solar system together saves money and avoids roof-penetration conflicts later.
- Verify contractor credentials. The installer should hold manufacturer certifications relevant to the product you select. AMECO's Owens Corning preferred contractor status provides independent verification of installation quality.
For a deeper look at how cool roof colors affect home energy performance, read AMECO's guide to cool roof shingle color options. And if you are considering solar alongside your roof replacement, the roofing for solar panels article covers the sequence and design considerations.
Frequently Asked Questions
Are cool roof shingles worth the investment in California?
Yes, for most California homeowners in warmer climate zones. Cool roof shingles reduce cooling costs by 7 to 15 percent according to EPA estimates. Help meet Title 24 requirements that may otherwise force expensive mitigation measures, and create a more comfortable indoor environment during summer months. The incremental cost over standard shingles is typically recouped through lower energy bills within a few cooling seasons.
Do cool roof shingles reduce energy bills year-round?
Cool roof shingles primarily reduce summer cooling costs. In winter, some slight heating penalty exists because less passive solar heat enters the attic. However, in California's milder winter climate, the summer savings far outweigh the minimal winter difference. Building scientists at the Lawrence Berkeley National Laboratory have confirmed that cool roofs deliver net energy savings in climates with more than approximately 1,000 cooling degree days per year, which covers most of California's populated areas.
What is the minimum solar reflectance required by Title 24?
For steep-slope residential roofs, California's Title 24 requires a minimum aged solar reflectance of 0.20 and a minimum thermal emittance of 0.75. Or a Solar Reflectance Index (SRI) of at least 16. These values apply to low-rise residential buildings in climate zones where cool roofs are mandated. Products from the GAF cool roof shingle line and Owens Corning's Cool Roof Collection are designed to meet these benchmarks.
Can you install solar panels on a cool roof?
Yes, and it is the recommended approach. Solar panels perform more efficiently when mounted above a cool roof because the ambient temperature around the panels stays lower. A cool roof with solar panels delivers more total energy savings than either system alone. AMECO specializes in integrated roofing and solar installations that optimize both systems for the specific property.
How long do cool roof shingles last compared to standard shingles?
Cool roof shingles have the same expected lifespan as premium standard shingles from the same manufacturer. The reflective coating is embedded in the granule, not applied as a surface layer, so it does not wear off over time. Owens Corning Duration Series shingles carry a limited lifetime warranty regardless of whether they are cool-rated or standard products.
Reduce Your Cooling Costs with Cool Roof Shingles
California summers are getting hotter, and every degree of heat your roof keeps out is a degree your air conditioner does not have to fight. Cool roof shingles from Owens Corning deliver measurable energy savings, Title 24 compliance, and year-round comfort for homes across the Central Valley, Los Angeles, Sacramento, and Orange County.
Whether you are replacing an aging roof or building new, AMECO Solar & Roofing provides end-to-end design, material selection, and professional installation through a single point of contact. Call (562) 633-4400 or schedule your free virtual consultation today.
7.7.2026
This guide compares Enphase IQ and Tesla Powerwall battery systems to help California homeowners choose the right backup power solution for their specific energy needs during grid outages. Enphase IQ batteries offer modular expandable storage with per-unit control, while Tesla Powerwall delivers high-capacity whole-home backup in a streamlined single unit. Both systems store solar energy for blackout protection and reduce reliance on expensive peak utility rates. According to the U.S. Department of Energy, home batteries enable solar owners to maintain power during utility failures and Public Safety Power Shutoff events. AMECO Solar & Roofing, a California-based installer since 1974, helps homeowners evaluate these options and select the system that fits their home and budget.
➔ Calculate your project to see how battery storage protects your home during the next outage
We compare both systems across the factors that matter most for California homeowners: outage performance, scalability, monitoring, incentives, and installation quality.Best Solar Battery California Outages: Enphase IQ Battery vs Tesla Powerwall 3: Side-by-Side Comparison
Choosing a home battery for California outages comes down to two leading names: Enphase and Tesla. Both brands dominate the home energy storage market, but they take fundamentally different approaches. Tesla focuses on high capacity in a sleek single-unit enclosure, while Enphase uses a modular design that scales in smaller, more affordable increments. As a Tesla certified installer and Enphase silver installer, AMECO helps homeowners weigh these options against their energy goals.
Performance and Storage Specifications
The Tesla Powerwall 3 and Enphase IQ Battery 5P both use lithium iron phosphate (LFP) chemistry for long life and safety. The Powerwall 3 delivers 13.5 kWh of usable capacity per unit with 11.5 kW continuous power output, making it a strong fit for homes with higher energy loads. The Enphase IQ Battery 5P offers 5.0 kWh per unit with 3.84 kW continuous output, allowing homeowners to buy exactly the capacity they need and expand later.
Both systems claim 97.5% round-trip efficiency, meaning nearly all stored solar energy is available when needed. The U.S. Department of Energy notes that most lithium batteries reach 85% to 95% efficiency, placing these premium systems well above average.
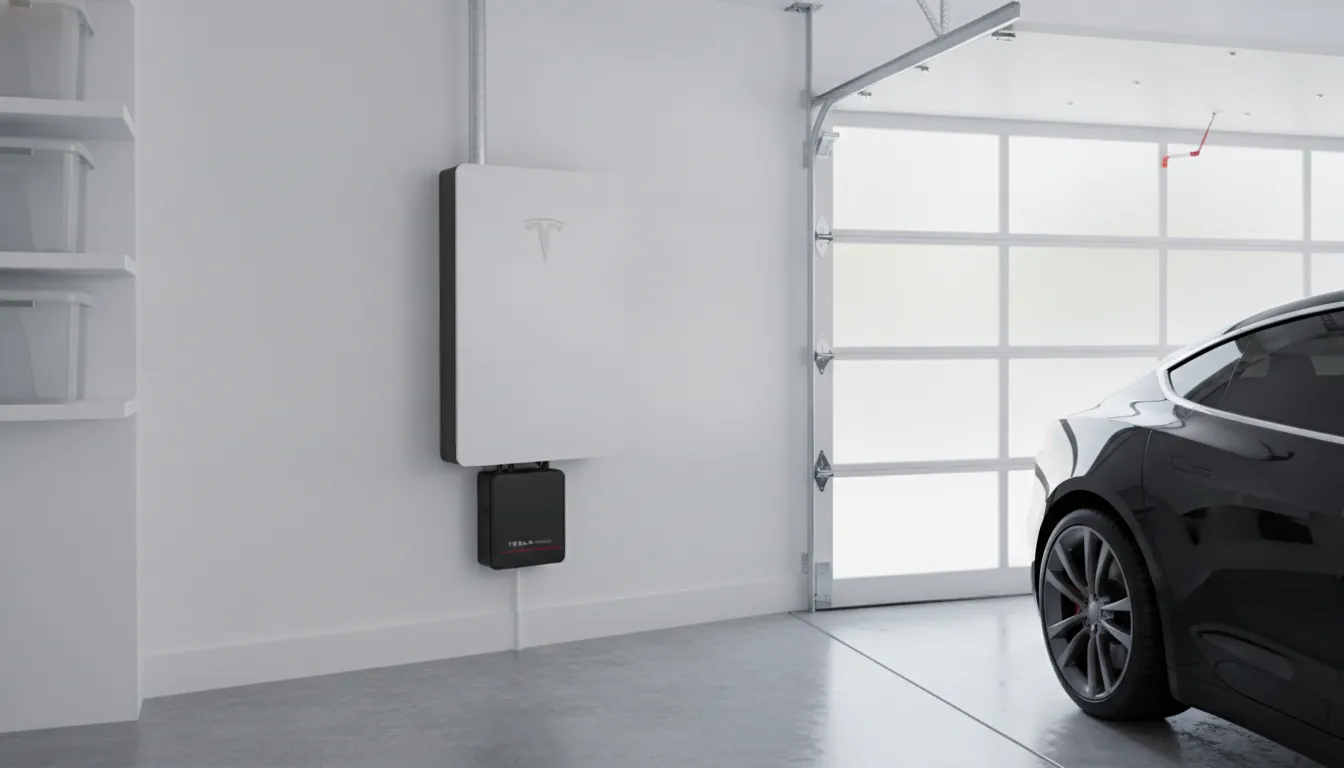
| Feature | Tesla Powerwall 3 | Enphase IQ Battery 5P |
|---|---|---|
| Base Capacity | 13.5 kWh | 5.0 kWh |
| Power Output | 11.5 kW continuous | 3.84 kW continuous |
| Efficiency | 97.5% round-trip | 97.5% round-trip |
| Chemistry | LFP (Lithium Iron Phosphate) | LFP (Lithium Iron Phosphate) |
| Scalability | Up to 4 units (54 kWh max) | Up to 16 units (80 kWh max) |
| Warranty | 10 years | 15 years |
EnergySage Rankings and Market Position
In 2026, EnergySage ranked the Tesla Powerwall 3 as the number one best home battery with a score of 100. The Enphase IQ Battery 10C tied for fifth with a score of 74. While rankings provide a useful benchmark, real-world value depends on your specific energy usage. Homeowners seeking whole-house backup benefit from the Powerwall 3 single-unit capacity, while those targeting specific circuits often prefer the Enphase approach.
Comparing Battery Performance During California Outages
California homeowners experience frequent power disruptions from aging infrastructure and Public Safety Power Shutoff events. A home battery provides reliable backup by storing solar energy for use when the grid fails. Data from the U.S. Department of Energy confirms that battery storage allows homeowners to retain excess solar generation for peak-hour use or blackout coverage. For more on how solar and battery systems work together during outages, read our guide on power outage battery backup solutions.
Backup Power During Public Safety Shutoffs
PSPS events occur during dry windy conditions to prevent wildfire ignition and can last for several days. A solar battery keeps essential circuits running without utility grid dependence. Under California NEM 3.0 rate structure, batteries also provide bill savings through time-of-use load shifting, making them a core component of modern home energy systems. Learn more about sizing batteries under NEM 3.0.
Automatic Backup With Tesla Powerwall 3
The Tesla Powerwall 3 switches to backup power in approximately 10 milliseconds, fast enough that most homeowners never notice the grid has failed. The system supports solar charging during grid-down operation, meaning your panels recharge the battery during daylight while the battery powers your home at night. As a Tesla certified installer, AMECO can design a system sized for your roof and power goals.
Flexible Microgrid Options With Enphase IQ
The Enphase IQ system uses per-unit microinverters to manage power flow at the individual battery level. This distributed design means the system continues operating even if a single component experiences an issue. Enphase uses a specialized controller to create a home microgrid during outages, allowing seamless transition. Homeowners can back up only critical loads or configure whole-home protection.
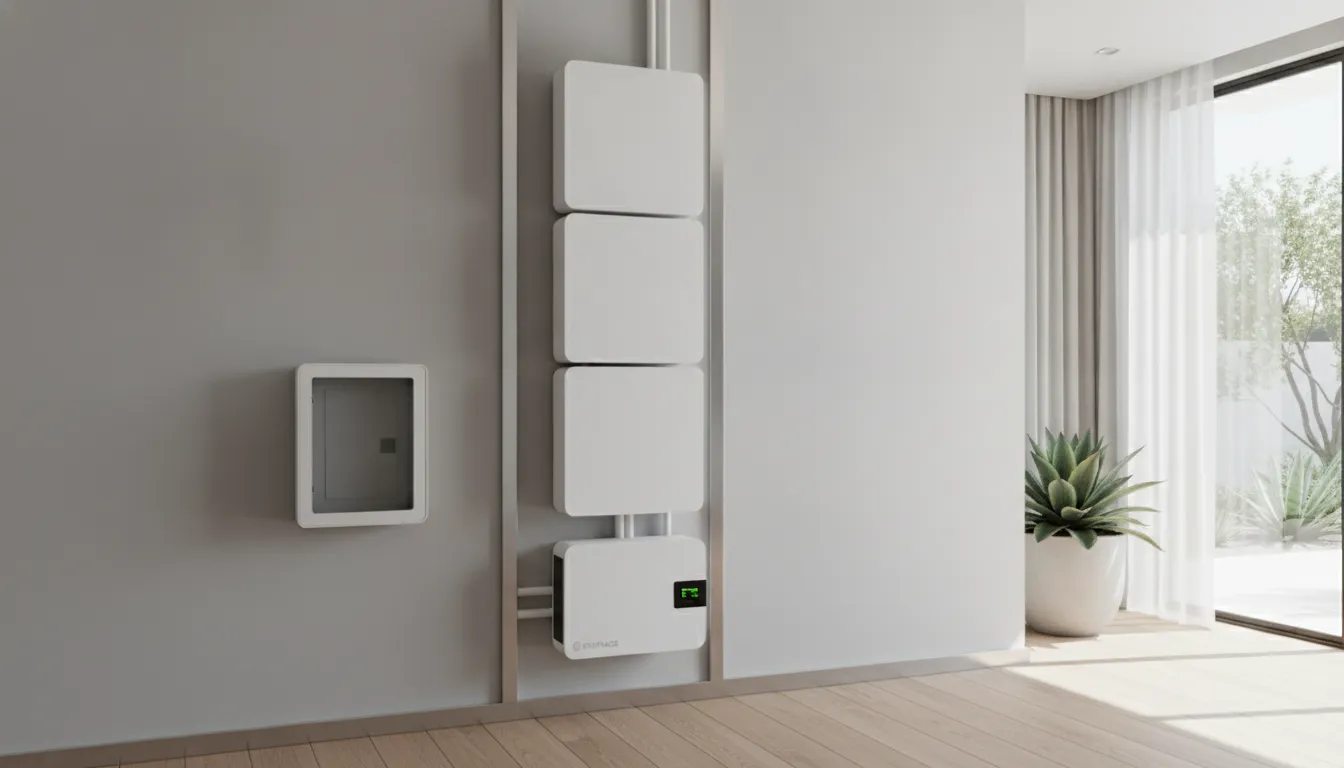
Scalability and Modularity: Which System Grows With You
Your home's energy needs will likely change over time. Adding an electric vehicle, expanding your home, or increasing your appliance load all affect how much backup capacity you need. The system that fits your home today may not be the same as what you need in five years. Enphase and Tesla approach this growth differently. Compare more details on building a custom system in our battery backup and solar panel system guide.
Modular Expansion With Enphase IQ
Each Enphase IQ Battery 5P unit provides 5 kWh of storage. You start with one unit and add more as your budget or energy needs grow, stacking up to 16 units for 80 kWh total. Every unit has its own microinverter, so a single unit failure does not bring down the rest of the system. This redundancy provides extra reliability during extended outages. See how adding a battery to an existing solar system works.
Large-Scale Storage With Tesla Powerwall 3
Each Tesla Powerwall 3 provides 13.5 kWh of storage. Up to four units stack for a total of 54 kWh. The Powerwall 3 works well for homes needing significant backup capacity from the start. While additional units can be added later, each expansion comes in 13.5 kWh increments, less granular than the Enphase 5 kWh building blocks.
Choosing the Right Scalability Approach
If you want to start small and expand gradually as your budget allows over time, Enphase is the better fit. Its modular design lets you match your storage investment to your actual usage. If you need substantial backup power immediately for high-demand appliances or EV charging during an outage, the Tesla Powerwall 3 large single-unit capacity simplifies the installation process. For homes without existing solar, read our guide to home battery backup without solar panels.
App Monitoring and Smart Home Integration
Both Enphase and Tesla provide mobile applications with real-time visibility into energy production, storage levels, and consumption patterns. These tools help you prepare for outages and optimize savings during peak rate periods.
Enphase Enlighten Monitoring
The Enphase Enlighten app delivers per-panel and per-battery performance data. It shows how much power each solar panel generates and how each battery module is performing. A Savings Mode automatically discharges stored power during peak rate hours. When a storm approaches, the system pre-charges batteries to maximize backup capacity.
Tesla App Energy Management
The Tesla app provides a streamlined view of home power usage, grid interaction, and battery state. It integrates vehicle charging data for Tesla car owners. Storm Watch uses weather forecasts to automatically charge the battery before severe weather arrives. The Tesla Gateway enables sub-10-millisecond grid disconnect for seamless outage transition.
Smart Home and Grid Services Integration
Modern battery apps communicate with smart home systems to shed non-critical loads during outages, extending backup duration. Some California utility programs allow batteries to export stored power during grid stress events in exchange for bill credits. Explore how battery monitoring supports solar battery sizing for California homes.
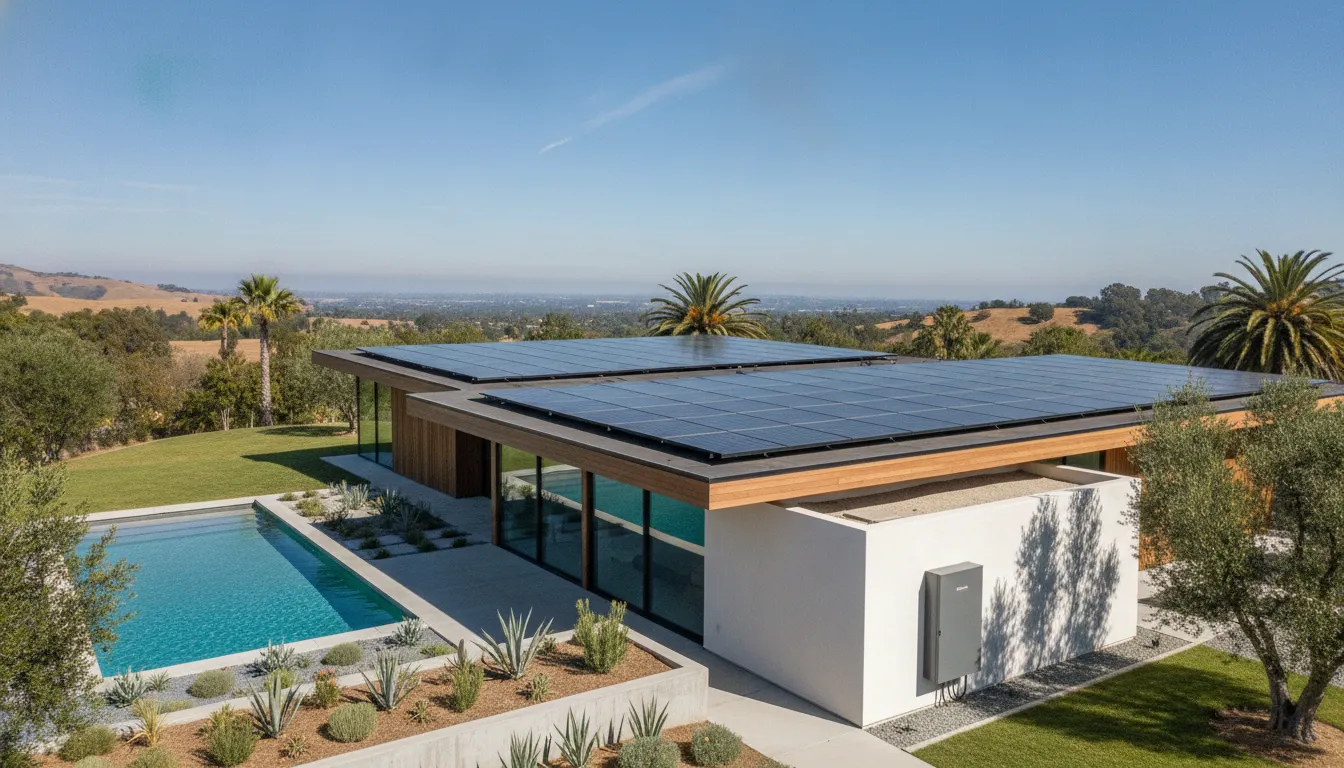
California Incentives and ROI for Battery Storage
Several programs help California homeowners reduce the upfront cost of home battery installation while improving long-term returns.
Federal and State Rebate Programs
The federal government offers a 30% tax credit for home battery storage with at least 3 kilowatt-hours of capacity. This applies to new solar-plus-storage installations and standalone battery additions to existing systems. More details are available at energy.gov.
California Self-Generation Incentive Program (SGIP) provides rebates for energy storage installations. Homeowners in high-fire-threat areas or low-income households may qualify for enhanced rebates through the equity-resilience tier. According to the California Public Utilities Commission, SGIP supports grid stability while making storage more accessible.
Maximizing Value Under NEM 3.0
California NEM 3.0 reduced the export value of excess solar energy sent back to the grid. A battery allows homeowners to store that energy and use it during evening peak hours when retail rates are highest. This load-shifting capability is essential for favorable payback periods under the new tariff structure. See our detailed breakdown of power outage battery backup for more on pairing incentives with system design.
Why AMECO Certifications Matter for Your Battery Installation
Choosing an installer matters as much as the equipment. AMECO Solar & Roofing has served California since 1974, with over 3,780 systems installed and more than 90 MW of clean energy capacity deployed. Our in-house installation crews handle every project from design through final commissioning.
Certified Installation for Both Brands
AMECO holds Tesla certified installer and Enphase silver installer credentials. We also hold the REC Gold Tier recognition for 2026 and Owens-Corning Solar PROtect certification. These credentials ensure your installation meets manufacturer specifications for warranty coverage and long-term performance. Working with a certified installer who supports both premium brands is the first step toward a reliable backup power system.
Quality and Roof Protection
Because AMECO handles both solar and roofing, our crews understand how to integrate battery systems without compromising roof integrity. Every installation includes proper flashing, sealants, and load evaluation to prevent leaks or structural issues.
Making Your Decision: Enphase vs Tesla for California Outages
Both Enphase and Tesla offer excellent home battery solutions for California homeowners facing grid instability and rising electricity costs. Here is a quick decision framework to help you choose:
- Assess your current energy usage. Review your utility bills to determine your average daily kilowatt-hour consumption. This establishes the baseline capacity you need for essential loads during an outage.
- Decide on expansion flexibility. If you prefer to start small and add capacity over time, Enphase modular 5 kWh building blocks offer more granular growth options than Tesla 13.5 kWh increments.
- Evaluate whole-home versus critical-load backup. The Tesla Powerwall 3 single 11.5 kW output handles large appliances and well pumps. Enphase works well when backing up a targeted subset of circuits.
- Factor in warranty and longevity. Enphase's 15-year warranty exceeds Tesla's 10-year coverage, which matters for long-term system ownership.
- Consult a certified installer. Your home's roof configuration, electrical panel capacity, and utility rate plan all influence which system is right for your home.
Enphase modular system suits homeowners who want to build capacity over time and value per-component redundancy. Tesla Powerwall 3 works best for those needing substantial backup capacity in a single streamlined installation. Your specific energy profile, budget, and growth plans determine which backup power solution fits your home. Use our solar cost calculator to estimate your project.
Actual costs, savings, and system sizing depend on your property, roof, energy usage, utility rate plan, and incentive eligibility. AMECO Solar & Roofing provides personalized consultations to evaluate these factors and design a system matched to your home. Check our best battery backup power guide for additional comparison insights.
Frequently Asked Questions
How many Powerwalls do I need to back up my whole home?
One Tesla Powerwall 3 with 13.5 kWh capacity powers essential circuits for 12 to 24 hours depending on usage. Most California homes require two units for whole-home backup. A professional energy audit using your actual utility data provides the most accurate sizing guidance.
Can Enphase IQ batteries work with existing solar panels?
Yes, Enphase IQ batteries integrate with existing Enphase microinverter-based solar systems. AC-coupled configurations also allow pairing with non-Enphase solar arrays, though compatibility should be verified during design.
Do California battery incentives stack with the federal tax credit?
Yes, SGIP rebates and the 30% federal Investment Tax Credit can be combined. The SGIP rebate is typically applied before the tax credit calculation. Exact savings depend on your income tier, utility territory, and fire-threat district.
How long does a home battery last during a PSPS event?
Backup duration depends on battery capacity and connected loads. A 13.5 kWh Powerwall can power a refrigerator, lights, internet, and phone charging for roughly 24 hours. Adding solar panels extends this indefinitely during daylight hours.
Which battery brand offers the best warranty coverage?
Enphase offers a 15-year warranty on its IQ Battery 5P, while Tesla provides a 10-year warranty on Powerwall 3. Both cover defects and capacity retention. Enphase's longer term reflects its modular replaceable component design.
Ready to Find the Right Battery for Your California Home?
Choosing between Enphase and Tesla for California grid resilience requires careful evaluation of your energy usage, budget, and growth plans. AMECO Solar & Roofing brings 50 years of California installation experience and certified credentials for both premium battery brands. Calculate your project to see how battery storage can protect your home during the next outage.
7.6.2026
Schedule Your Free Solar Consultation → Get a custom estimate from a REC Gold Tier certified installer.
A REC Gold Tier solar installer holds the highest designation in the REC Certified Solar Professional program, reserved for companies that meet stringent criteria for training, quality, and customer service. As reported in PV Magazine, AMECO Solar & Roofing earned this Gold Tier distinction for 2026. The certification validates over 50 years of California service and unlocks the REC ProTrust warranty, which includes comprehensive 25-year coverage on product, performance, and labor. For homeowners, this means factory-backed protection that standard installers simply cannot offer.
REC Gold Tier Solar Installer: What Does REC Gold Tier Certification Mean for Homeowners?
Selecting a solar company is one of the most consequential financial decisions you will make as a California homeowner. You need a partner that uses top-tier equipment and maintains the technical proficiency to install it correctly. The REC Certified Solar Professional program was designed to help homeowners identify those elite contractors. This program evaluates installers against rigorous benchmarks for quality assurance and customer care, providing a reliable signal of expertise in a crowded marketplace.
Certification goes far beyond holding a general contractor license. REC Group, one of the world's leading solar panel manufacturers, conducts a comprehensive assessment of each installer's operations, financial stability, and client satisfaction record. Only companies that demonstrate consistent excellence across multiple years earn an invitation to the program. When you see the REC Gold Tier badge, you are working with a firm that has earned the trust of a global manufacturer known for demanding standards. It transforms a complex vendor evaluation into a straightforward quality signal.
The highest tier of solar installation expertise
REC Group established the Gold Tier specifically to recognize the best installation partners in their network. AMECO Solar & Roofing earned REC Gold Tier status for 2026, reflecting a company-wide commitment to transparency and quality workmanship. Only a select group of solar professionals nationwide reach this level. It demonstrates that we have the operational history and technical capacity to manage your home energy project with precision and care.
Achieving this certification means we have proven ourselves as a stable, reliable partner. REC evaluates a firm's project history and its standing within the solar industry. The manufacturer wants assurance that the companies it endorses will remain operational to support homeowners for decades. For you, this translates to confidence that your investment is protected by an organization with deep local roots. You can trust us to design and deliver the most effective path to reduced electricity costs.
REC Alpha Pure panels use heterojunction technology for superior efficiency and long-term power output.
Rigorous technical training and credentialing
Earning Gold Tier certification requires passing comprehensive examinations and completing specialized training programs. Installers undergo extensive instruction on the latest solar technologies and best installation practices. A REC Gold Tier solar installer is authorized to display the official REC program logo, a visual guarantee that they possess the expertise to manage even the most complex residential installations.
The training curriculum spans every phase of solar installation, from optimal panel placement to electrical system integration. This rigorous preparation helps prevent common installation errors that compromise system performance. By maintaining current certifications, our team remains at the forefront of solar technology. We apply proven methods to install the latest REC panel models, ensuring your system delivers maximum energy production and aesthetic integration from day one.
Superior customer experience and support
The Gold Tier designation encompasses more than technical competence. It reflects how an installer treats its clients throughout the solar journey. REC evaluates responsiveness, communication clarity, and overall client satisfaction. The goal is to ensure homeowners experience a smooth, transparent transition to solar energy.
Professional support is critical to maintaining a safe, high-performing system. The U.S. Department of Energy emphasizes that professional solar installation is essential for both safety and optimal energy production. With a Gold Tier provider, you receive end-to-end guidance from initial consultation through system design, permitting, installation, and ongoing support. This comprehensive approach ensures your system delivers its full value over its operational lifespan.
The Rigorous Standards Behind REC Gold Tier Status
The REC Certified Solar Professional program establishes demanding thresholds for quality and expertise. To earn the certified premium solar installations label, a company must navigate a thorough vetting process. This program gives homeowners confidence that they are contracting with professionals who possess deep technical knowledge and a verifiable history of successful projects.
Demonstrated industry experience
A core eligibility requirement is professional tenure. An installer must have at least two years of experience in solar panel installation. This ensures they have worked with diverse roof types, electrical configurations, and permitting environments before taking on your project. AMECO Solar & Roofing exceeds this standard dramatically, with over 50 years of continuous operation throughout California. This longevity reflects an unwavering commitment to stable, long-term client relationships.
Technical credentials and continuing education
Proficiency is validated through both written examination and field experience. Companies must demonstrate advanced knowledge, including holding a NABCEP certification or equivalent industry credential. Installers participate in specialized REC training sessions covering the latest panel technology and installation methodologies. This ongoing education ensures crews remain at the leading edge of the industry, delivering optimal results on every project.
Financial stability and supply chain integrity
A REC Gold Tier solar installer must maintain sound financial health and a strong credit standing with REC and its authorized distributors. This requirement protects homeowners by confirming the company will be available to honor warranties and provide support for the life of the system. Installers must also procure panels through official distribution channels, guaranteeing every component is genuine and meets factory specifications for safety and performance.
Transparent business practices
Beyond technical and financial criteria, the program demands ethical business conduct. AMECO earned its 2026 Gold Tier status through a sustained focus on transparent communication and straightforward project management. This clear, honest approach helps homeowners make confident, informed decisions. By meeting these exacting standards, a contractor demonstrates readiness to handle the complex electrical and structural work required for a safe, high-performance solar energy system.
Why Premium REC Panels Deliver Better Long-Term Performance
Selecting a solar panel involves evaluating performance not just on day one, but over decades of operation. REC panels distinguish themselves through advanced engineering and robust construction that deliver superior energy production across their full lifecycle.
Heterojunction technology for superior efficiency
REC panels utilize heterojunction (HJT) technology, which combines the advantages of two different solar cell architectures into a single, highly efficient design. This innovation enables REC Alpha Pure panels to achieve efficiency ratings of 22% or higher. The panels capture more sunlight and convert it into usable electricity more effectively than conventional alternatives.
Higher efficiency translates to greater energy production from the same roof footprint. For homes with limited south-facing roof area, these panels offer a compelling advantage. Every square foot works harder, generating more savings on monthly utility bills over the system's lifetime.
Superior performance in California heat
Solar panels lose efficiency as temperatures rise, a phenomenon known as the temperature coefficient. In regions like Los Angeles, the San Fernando Valley, and California's Central Valley, rooftop temperatures regularly exceed 140 degrees Fahrenheit. REC panels feature an industry-leading temperature coefficient, producing approximately 16% more power on hot days compared to conventional panel designs.
When the sun is most intense, you need panels that perform at their peak. REC panels are engineered to excel in California's climate, maintaining higher output when other panels would significantly underperform. This translates directly to more energy for your home and greater long-term savings.
Long-term reliability and degradation resistance
Solar energy is a multi-decade investment. REC Alpha Pure panels are engineered to retain at least 92% of their initial power output after 25 years, substantially exceeding the industry average. Most competing panels degrade more rapidly over time, gradually reducing energy production and extending the payback period.
By choosing REC, you lock in strong performance for decades. This durability protects your household budget and preserves your property value. It is one of the primary reasons AMECO specifies REC panels for every high-quality solar equipment installation we perform.
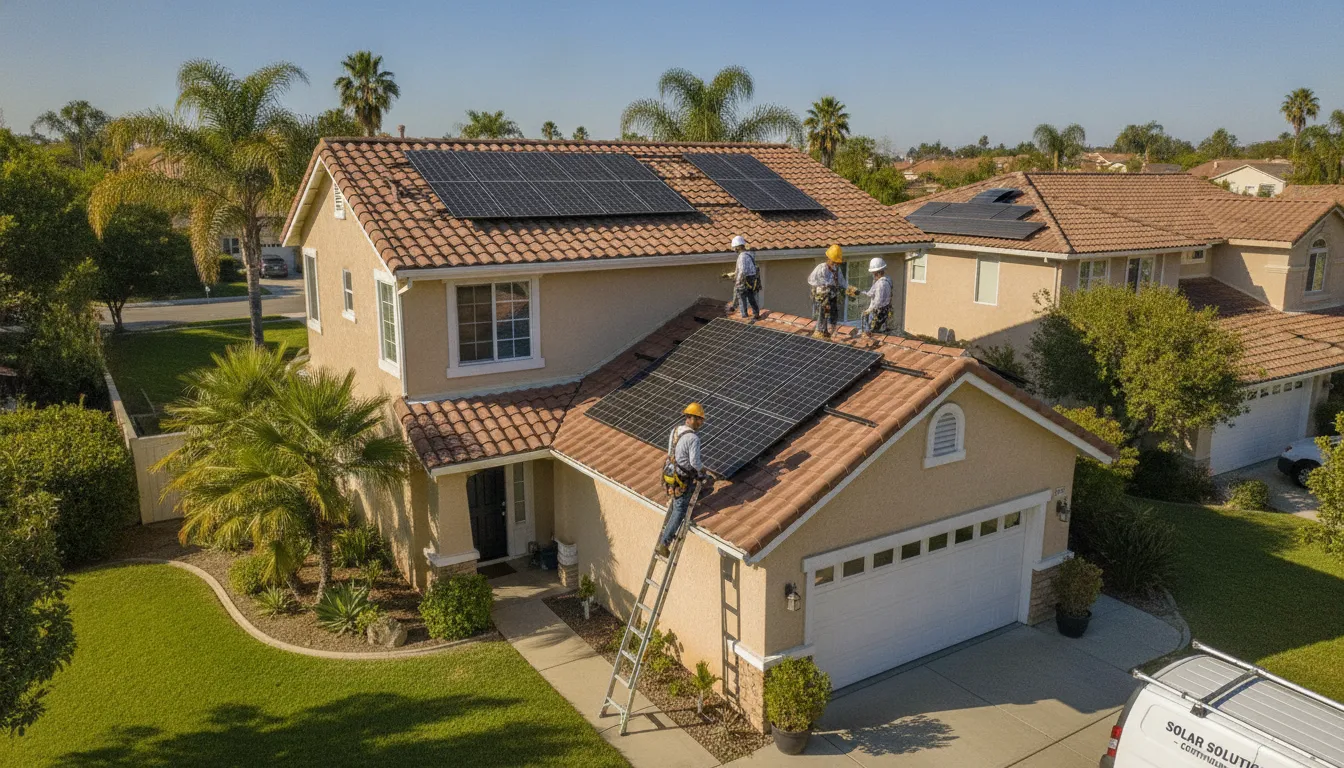
REC Gold Tier certified installers follow precise mounting and wiring procedures for maximum system performance.
Even the highest-quality panels require professional installation to achieve their rated performance. Improper installation creates safety hazards, voids warranties, and significantly reduces energy output. As the U.S. Department of Energy notes, residential solar involves complex electrical work that demands professional expertise to ensure safety and optimal output.
Working with a REC Gold Tier solar installer like AMECO guarantees your system is installed to manufacturer specifications. We follow strict protocols for panel placement, roof attachment, wiring, and system commissioning. This attention to detail ensures you receive the full performance and warranty benefits of your REC panels for 25 years or more.
The REC ProTrust Warranty: A Key Difference for Expert Setups
When you invest in a solar energy system, you are making a long-term commitment to your home's energy future. While most solar panels come with standard warranties, not all provide the same level of protection. The REC ProTrust warranty is a comprehensive coverage plan available exclusively through REC Certified Solar Professionals like AMECO. This warranty transforms a standard equipment purchase into a fully protected home investment.
25-year comprehensive labor coverage
Most manufacturer warranties cover panel replacement if a component fails, but leave the homeowner responsible for the labor costs of diagnosis, removal, and reinstallation. These service fees can easily reach hundreds or thousands of dollars. The ProTrust warranty eliminates this gap by including full labor coverage for 25 years. This means you pay nothing out of pocket if a panel requires service at any point during the warranty period. It is the highest level of protection available in the residential solar market today.
| Coverage Type | REC Standard Warranty | REC ProTrust Warranty |
|---|---|---|
| Product Warranty | 20 Years | 25 Years |
| Power Performance Guarantee | 25 Years | 25 Years |
| Labor Coverage | Not Included | 25 Years |
| Requires Certified Installer | No | Yes |
| Enrollment Method | Automatic | SunSnap App or ProPortal |
Why certified installation unlocks the best warranty
REC reserves the ProTrust warranty exclusively for installations performed by REC Certified Solar Professionals. This policy reflects the manufacturer's confidence that certified installers meet the highest standards for system design and workmanship. Professional solar installation is critical to system safety and long-term performance. AMECO handles the entire process from engineering and permitting through commissioning and warranty enrollment, ensuring your ProTrust coverage is activated correctly. This commitment to quality is why we are recognized for high-quality solar equipment installation on every project.
A legacy of standing behind the work
AMECO has served California homeowners since 1974, witnessing the evolution of solar technology from niche innovation to mainstream energy solution. We understand that a warranty is only as valuable as the company standing behind it. As a REC Gold Tier solar installer, we specify premium components and follow manufacturer-approved installation methods for every project. By combining REC Alpha Pure panels with the ProTrust warranty, we deliver a system engineered for decades of reliable performance. You enjoy the savings while we manage the technical work and long-term support.
Calculate Your Project Cost → See how REC panels and the ProTrust warranty fit your budget.
AMECO's 50-Year Legacy Meets REC's Quality Standards
AMECO Solar & Roofing has served California families since 1974. With more than 3,780 completed solar installations across Southern California, the company has built an enduring reputation for quality and reliability. The team takes a comprehensive approach to home energy, integrating solar power, roofing, battery storage, and EV charging into unified system solutions. Learn more about AMECO's roofing and solar integration services and how combining solar with battery backup for home appliances maximizes your energy independence.
Five decades of integrated solar and roofing expertise
AMECO differentiates itself by offering both solar and roofing services under one company. This integrated approach eliminates the coordination challenges that arise when separate contractors handle roof preparation and solar installation. The team manages everything from initial design consultation through final system commissioning. You can learn more About AMECO Solar and their history of California service. Their project managers oversee every phase, ensuring seamless execution from start to finish.
Partnering with a local company that has operated continuously for half a century provides genuine peace of mind. Many solar installation companies enter and exit the market rapidly, but AMECO has sustained its operations by consistently delivering quality work. The company serves both residential homeowners and commercial property owners with the same commitment to excellence. This dedication to long-term results differentiates their work in a competitive market.
Validating quality through REC Gold Tier recognition
In 2026, AMECO earned the REC Gold Tier award, a distinction noted by PV Magazine. It represents the highest honor within the REC Certified Solar Professional Program and independently validates the installation standards AMECO has maintained for decades. To reach this tier, the team completed advanced training and demonstrated consistent adherence to REC's rigorous installation protocols. The certification confirms both technical capability and financial stability, signaling a company prepared to support its clients over the long term.
Selecting the right installer is one of the most consequential decisions in any solar project. Industry experts consistently advise homeowners to research solar installers thoroughly before signing a contract. The REC Gold Tier certification simplifies this evaluation by providing an independent, manufacturer-backed quality benchmark. When a global solar leader like REC trusts AMECO to represent its premium product line, it offers a clear signal of credibility and competence.
The intersection of experience and innovation
Being a REC Gold Tier solar installer means AMECO meets demanding standards for quality and service while maintaining the flexibility to adapt to evolving technology. The company uses a streamlined process that removes complexity from the solar transition. You can review their certified premium solar installations portfolio to see examples of completed projects. This track record demonstrates consistent delivery on their quality commitments.
AMECO continues to lead by combining time-tested service principles with cutting-edge solar technology. Their team maintains current certifications and invests in ongoing training to ensure every installation meets the latest industry standards. Their five-decade history is not merely a measure of longevity but a foundation for the future they are building for California homeowners. By choosing a Gold Tier partner, you gain both the stability of an established firm and the technical capabilities of an industry leader.
How to Choose a REC Gold Tier Installer for Your Home
Selecting a solar installation partner is a long-term decision with implications for your home's energy costs, property value, and environmental impact. Before signing any agreement, it is essential to research solar installers in your area and verify their credentials. A REC Gold Tier installer offers a specific combination of manufacturer certification, technical training, and warranty protection that standard contractors cannot match.
Verify certification and tier status
The first step is confirming the company holds current REC Certified Solar Professional status. Request to see their official REC program logo, which indicates compliance with rigorous training and quality standards. Verify they have achieved Gold Tier designation for the current year, as this reflects a higher level of experience and a direct relationship with the manufacturer.
Assess local experience and project history
Technical proficiency develops through years of hands-on installation work. The REC program requires a minimum of two years of professional solar experience, but look for a company with substantially deeper local history. Review examples of certified premium solar installations across Southern California. Local experience ensures the installer understands regional permitting requirements, utility interconnection processes, and climate-specific installation best practices. For additional context, read our guide on the benefits of working with a combined solar and roofing company.
Confirm the full warranty package
One of the most valuable benefits of choosing a Gold Tier installer is access to the REC ProTrust warranty. This package covers product defects, power output guarantees, and labor costs for 25 full years. Standard installers without REC certification cannot offer labor coverage, leaving you exposed to potentially significant service costs. Verify that your proposal includes this comprehensive protection. Our solar system planning guide provides additional detail on what to expect during the evaluation process.
- Confirm current REC status. Ask the installer for their 2026 Gold Tier certificate to verify good standing with the manufacturer.
- Review recent project work. Examine completed installations of similar scale and complexity to yours. Ask for references from recent customers.
- Request the full warranty documentation. Ensure the ProTrust warranty is explicitly listed in your contract, including labor coverage terms.
- Compare system designs. A qualified installer will provide a customized system layout based on your home's specific roof dimensions, orientation, and shading conditions.
- Evaluate the company's longevity. A firm with decades of local operations is more likely to remain in business to honor its warranties and service commitments.
Frequently Asked Questions
What is a REC Gold Tier solar installer?
A REC Gold Tier solar installer is a company that holds the highest designation in the REC Certified Solar Professional program. This certification is awarded to installers who meet REC Group's most demanding standards for training, customer service, and financial stability. Gold Tier installers are authorized to offer the REC ProTrust warranty, which includes 25-year labor coverage not available through standard installers.
How is REC Gold Tier different from other REC certifications?
REC offers multiple tiers within its Certified Solar Professional program, with Gold Tier representing the highest level. Gold Tier installers have demonstrated superior technical expertise, longer operational history, stronger financial health, and the ability to offer the comprehensive ProTrust warranty. Lower tiers have access to fewer warranty options and may not meet the same rigorous standards for ongoing training and customer satisfaction.
What is the REC ProTrust warranty and what does it cover?
The REC ProTrust warranty is a comprehensive protection package exclusively available through REC Certified Solar Professionals. It covers product defects for 25 years, guarantees at least 92% power output after 25 years. And covers all labor costs associated with panel repair or replacement during that period. Standard solar warranties typically cover panel replacement but leave the homeowner responsible for labor expenses.
Why does AMECO Solar's REC Gold Tier recognition matter for my installation?
AMECO's REC Gold Tier status for 2026, as reported by PV Magazine, independently validates that the company meets REC Group's highest standards for installation quality and customer service. For your installation, this means you receive authentic REC panels installed to manufacturer specifications. Access to the ProTrust warranty with labor coverage, and the confidence of working with a company that has served California since 1974.
How can I verify a solar installer's REC Gold Tier status?
You can ask the installer to show their current REC Certified Solar Professional certificate and official program logo. You can also verify their status through REC Group's official website or by requesting their REC distributor account number. A legitimate Gold Tier installer should be able to provide written confirmation of their certification status for the current year.
Ready to Secure Your Home with a REC Gold Tier Solar System?
Your home's energy future deserves the highest standard of quality and protection. AMECO Solar & Roofing brings over 50 years of California experience, REC Gold Tier certification, and access to the industry's best warranty to every project. Whether you are exploring solar for the first time or ready to move forward. Our team can help you understand your options and design a system that meets your specific energy needs and budget.
Get Your Free Estimate Today → Start with a personalized solar cost calculation and consultation.
7.3.2026
AMECO Solar and Roofing recommends replacing your roof before solar panels if it has under 15 years of life remaining. Solar systems last 25 to 35 years. Removing panels to replace a failing roof costs $1,000 to $3,000. A single-source approach protects your investment and eliminates that expense.
About 35 percent of older California homes need a new roof before they can safely support solar panels, according to the Department of Energy. That number is not a scare tactic — it is a reality of roof age and solar longevity colliding. A roof that leaks five years after a solar installation turns a money-saving upgrade into a costly repair, because removing and reinstalling panels can run $3,000 or more.
Calculate Your Project to see how a coordinated roof and solar plan fits your home and budget.
Below we walk through the key factors that determine whether you need roof replacement first, what it costs, and why California homeowners increasingly choose one team for both jobs.
Do You Need a New Roof Before Solar Panels in California? Matching Lifespan and Longevity
Modern solar systems produce power for 25 to 35 years. The National Renewable Energy Laboratory and Energy.gov both confirm this operating life. Your roof must hold the mounting equipment for the full duration. If the roof underneath ages out before the panels pay for themselves, you face panel removal, a new roof installation, and reinstallation — a sequence that adds thousands to the total cost.
Roof lifespans by material
Asphalt shingle roofs typically last 20 to 30 years. Clay tile roofs can reach 50 years. Metal roofs fall in a similar 30-50 year range. The Department of Energy notes that the average residential roof replacement costs about $10,000, while the average solar installation runs approximately $19,000 before incentives. When both are done together, homeowners often see combined pricing near $25,000 — lower than paying for two separate projects at different times.
If your home is under 15 years old, the roof likely has enough life left to support a solar system. Homes older than that need a professional evaluation. AMECO's team checks roof age, material condition, and deck integrity during the roof readiness assessment.
How to plan for long solar performance
The highest-risk scenario is installing premium 30-year panels on a roof with 10 years of life remaining. In that case, the roof will fail before the panels finish paying back their energy savings. A coordinated solar plus roofing solution closes that gap by matching both systems to the same 25-40 year timeline.
AMECO provides a 40-year equipment warranty that exceeds the industry standard of 25 years. That warranty coverage makes roof condition even more consequential. A damaged roof beneath a warranted system creates a coverage gap that a single-source contractor eliminates by owning both scopes of work.
Does Your Roof Need Replacing Before Solar Panels? Key Warning Signs
Before committing to solar, inspect your roof for these indicators that replacement should come first.
Visible damage and active leaks
Water stains on ceilings, daylight visible through attic roof boards, or soft spots when walking on the roof deck all point to structural failure. The roof deck — the plywood or OSB layer under the shingles — must be sound enough to hold lag bolts for solar racking. If decking shows rot or sagging, replacement is mandatory before any solar work begins.
Roof age near end of life
Most asphalt shingle roofs need replacement at 20-25 years. If your roof is past 20 years old and you are planning solar, the numbers strongly favor doing both jobs at once. The Department of Energy recommends evaluating the roof structure as part of any solar design. Delaying roof replacement until after solar installation means paying removal and reinstallation fees that can reach $3,000.
Roof deck and structural condition
Sagging ridges, soft spots, or deteriorated sheathing indicate the roof deck cannot hold the weight of solar equipment. California building codes under Title 24 require that roofs meet specific load standards. Replacing decking during a full roof replacement is standard practice for older homes. This ensures the solar array attaches to sound material that will not shift or leak.
Cost Comparison: Replace Your Roof Before or After Solar
The timing of roof replacement changes your total project cost by thousands of dollars. Below are the three most common paths California homeowners take, and the tradeoffs each involves.
Three paths, three cost profiles
Path 1 — Roof first, solar second. You pay for a full roof replacement, then pay for a solar installation later. This ensures a secure base but delays solar savings by months or years. Total cost is the sum of both projects at separate times, with separate permits and separate crews.
Path 2 — Solar now, roof later. You skip the roof replacement and install panels on the existing roof. Upfront costs are lower. But when the roof fails in 5-10 years, you pay $1,000-$3,000 for panel removal and reinstallation on top of the roof replacement itself. You also lose solar production during the roof work.
Path 3 — Integrated, both together. A single team replaces the roof and installs solar in one coordinated project. Combined pricing from a single-source provider often comes in lower than the sum of two separate projects. NREL research cited by Energy.gov supports the cost advantages of concurrent work.
| Project Path | Upfront Cost | Future Cost Risk | Best Fit |
|---|---|---|---|
| Roof first, then solar | Medium | Delayed energy savings | Roof with under 5 years of life |
| Solar now, roof later | Low | $1k-$3k removal + reinstall fees | Roof under 10-15 years old |
| Integrated both together | Higher (but lower total) | None — single warranty, single team | Roof needing replacement within 10 years |
The removal and reinstall trap
Solar panel removal and reinstallation is an out-of-pocket cost that many homeowners overlook. The process involves detaching each panel, storing equipment during roof work, then remounting and rewiring everything. Industry estimates place this cost between $1,000 and $3,000 depending on system size and roof complexity. Planning both projects together eliminates this expense entirely.
How Does California's Solar Mandate Affect Your Roof Decision?
California's building codes create an additional layer of consideration for homeowners evaluating roof and solar timing.
What the law requires
Since the 2020 building code update, all new California homes must include solar panels. The 2023 revisions expanded these requirements to certain additions and major renovations. While existing homes are not required to add solar during a roof replacement, the permit process for a major roof project often triggers a review against current energy standards. Title 24 sets efficiency benchmarks for roofing materials — cool roofs, insulation values, and structural load capacity. AMECO, licensed since 1974 (CSLB #483280), manages these permit requirements for both trades, so homeowners get one coordinated approval process.
How code rules shape your timeline
If your roof needs replacement and solar is on your horizon, the code environment pushes toward doing both now. A new roof installed today under current Title 24 standards will be structurally ready for a future solar array. Adding a "solar-ready" roof now avoids having to upgrade the structure later. AMECO's team works across both solar and roofing permits, simplifying what would otherwise be two separate code processes.
Why Choose a Single-Source Contractor for Solar and Roofing?
Hiring separate companies for roof work and solar installation introduces risks that a single-source contractor eliminates.
Reduced liability and warranty protection
When a solar installer drills into a roof they did not install or inspect, any resulting leak creates a blame loop. The roofer says the solar crew damaged the roof. The solar installer says the roof was already compromised. With one contractor managing both scopes, warranty responsibility is clear. AMECO's 40-year equipment warranty and workmanship guarantees cover both systems under one roof — literally.
Faster, simpler project management
A single-source project moves from design to completion in fewer steps. One site evaluation addresses both the roof condition and the solar layout. One set of permits covers both scopes. One crew schedules the tear-off, decking replacement, flashing, and panel installation in the correct sequence. This approach eliminates the coordination burden of managing two vendors with separate timelines and separate points of contact. It is the solar plus roofing solution that California homeowners increasingly prefer for its simplicity.
Deep California experience
AMECO has served California homeowners since 1974. That track record means the team understands California roof conditions, from coastal salt exposure to Central Valley heat, and designs solar systems that perform across these environments. The integrated model started as a practical response to customer demand: homeowners wanted one company they could trust for both the roof over their heads and the panels generating their power.
How to Assess Whether Your Roof Can Support Solar Panels
A do-it-yourself roof check can catch obvious problems, but a professional inspection is the only way to confirm your roof is solar-ready.
Quick self-inspection checklist
- Check the roof age. Know your roof's installation year and material type. Shingle roofs over 20 years old and tile roofs over 40 years old are candidates for replacement.
- Look for exterior wear. Missing shingles, cracked tiles, curling edges, rusted flashing. Widespread damage means the roof is near end of life.
- Search for interior moisture. Check the attic during daylight for light penetration. Look for water stains, mold, or damp insulation.
- Feel for soft spots. Spongy areas when walking on the roof suggest deck rot below.
- Evaluate remaining life. If your roof has fewer than 15 years of life left, replacement before solar is the financially sound choice.
- Get a professional evaluation. AMECO offers a combined roof and solar assessment that addresses both systems in a single visit. Learn what a roof readiness check includes.
Why a professional inspection matters
Hidden deck damage, inadequate flashing, or undersized rafters are invisible from the ground. A professional inspection reveals these issues before panels go up. For California homeowners who choose AMECO's integrated approach, this inspection covers both the roofing scope and the solar design scope in one appointment — saving time and providing a single, unified recommendation.
Ready to find out if your roof is solar-ready? Get your project estimate or call (800) 400-2852. A combined roof and solar consultation gives you the full picture before you commit to either project.
Frequently Asked Questions
Should I replace my roof before installing solar panels?
Yes, if your roof has fewer than 15 years of usable life left, has visible damage, or is over 20 years old. Solar panels last 25-35 years, and removing them to replace a failing roof costs $1,000-$3,000. Replacing the roof first protects your solar investment and eliminates that expense.
Is it worth going solar in California with an old roof?
Doing both at once is usually the better financial move. If your roof has 20+ years of wear, replacing it before solar prevents panel removal costs later. According to Energy.gov and NREL research, a combined roof and solar project often costs less than two separate projects done years apart.
How much does it cost to remove and reinstall solar panels for a new roof?
Industry estimates place solar panel removal and reinstallation between $1,000 and $3,000 depending on system size and roof complexity. This cost is on top of the roof replacement itself. Coordinating both projects with one contractor eliminates this fee.
Do I need a new roof before solar if my home is less than 15 years old?
In most cases, no. A roof under 15 years old typically has enough life remaining to support a 25-30 year solar system. However, a professional inspection is still recommended to confirm deck condition and verify that the roof meets local building code requirements for solar mounting.
Can the same company handle both my roof replacement and solar installation?
Yes. AMECO Solar & Roofing has provided single-source solar and roofing services since 1974. One team manages the roof tear-off, deck replacement, solar mounting, and panel installation under a single contract and warranty. This eliminates the coordination problems and liability gaps that occur when using two separate contractors.
Ready to Coordinate Your Roof and Solar Project?
Making the right call on roof-before-solar starts with an expert assessment that evaluates both systems together. AMECO Solar & Roofing has been helping California homeowners navigate this decision since 1974. Our integrated team can evaluate your roof's condition and design a solar system that protects your investment for decades.
Calculate Your Project to get a personalized estimate for your roofing and solar needs. Or call (800) 400-2852 to speak with a project advisor.
7.2.2026
The 40 year solar panel warranty is a new standard for home energy safety in California. Most solar plans only last for 25 or 30 years, but this plan keeps your system safe for four decades. This high-end plan covers your solar panels and your roof when they are built as one combined system. Using this approach helps you avoid fights that happen when different teams handle your solar and your roof.
AMECO Solar & Roofing has worked in California since 1974, and we manage the whole job without using outside help. This allows us to offer the Owens Corning Solar Protect plan, which lowers the risk of high repair costs. According to EnergySage, a standard solar plan should have ten years of help, but top options go further.
40 Year Solar Panel Warranty: What Is a 40-Year Solar Panel Warranty, and Is It Real?
A solar warranty is a promise from a company to stand by its work and equipment. For most people, this means a pledge that their panels will produce power for a long time. While most firms offer ten or twenty years of help, a 40-year solar panel warranty pushes that limit much further. It is a bold claim that says your system will last nearly half a century.
Many homeowners in California wonder if such a long plan is real or just a sales trick. The short answer is that it is very real, but it is also rare. This type of plan covers the physical parts and the power output of the panels for four decades.
The rare nature of long-term solar plans
Most solar setups come with a plan that lasts about 25 years. This is because panels lose a small amount of their power each year. A study shows that the median rate for this loss is about 0.5% to 0.75% per year as noted in academic research. Over 25 years, that loss adds up, and companies usually stop their help there.
A 40-year plan is a big step up from this norm. It requires high-quality parts that can brave the sun and heat for much longer than standard units. For people in Los Angeles or the Central Valley, where the sun is strong, having this extra time can mean more peace of mind.
A 40-year solar panel warranty is not just a longer version of a 20-year plan. It often comes from firms that build their own parts or have deep roots in the field. When you are evaluating solar warranties, you should look for the fine print. You want to know if the plan covers labor and shipping, or just the parts. A truly strong plan will help you with the cost of a fix, not just send you a new panel in a box.
This is why these long plans are seen as a game-changer for those who want a life-long energy solution. Most people find that the labor costs to swap a panel are higher than the cost of the part itself. A plan that covers these costs is much better than one that leaves you to pay a crew to come to your roof.
The tech inside these panels must also be top-tier to last for forty years. High-grade glass and strong frames help the unit withstand wind, rain, and hail. The wiring must also be thick and well-made to keep the power flowing without a hitch. Small details like the seal around the edge of the panel can make a big difference in year 35.
If water gets in, the unit will fail fast. That is why premium brands spend more on their build quality and testing. They want to make sure the panel can handle the stress of four decades on a hot California roof. This build quality is the core of what makes a long warranty possible.
Why AMECO can offer 40 years of help
Offering a 40-year plan takes more than just good talk; it takes a long history of success. AMECO Solar & Roofing has been in business since 1974 operating for over fifty years. This long record means the firm has seen how panels age and fail in the real world. Many solar companies today are new and may not be around in ten years.
Choosing a firm that has already outlived a 40-year term is a smart move for your home. It ensures that when you need help in year 30 or 40, the company will still be there to answer the phone.
This long-term help is part of an integrated approach. By handling both the roof and the solar panels at once, a company can ensure a better fit. This reduces the chance of leaks or small breaks that can cause big problems later. Using standard solar panel warranty terms as a floor, premium plans build a ceiling that lasts for a generation.
It means your roof and your power source are tied together in one strong plan. This is a key reason why some California owners now choose these longer terms over the old 25-year mark.
Real value for California homeowners
In the golden state, the cost of power keeps going up. Homeowners from Orange County to Sacramento want to lock in their savings for as long as they can. A 40-year solar panel warranty helps to do just that. It protects your big purchase against the wear and tear of time and weather.
While standard units are good, premium setups with long plans are built to last through many decades of heat. This makes the home worth more and keeps the monthly bills low for a very long time. It is a way to turn a 20-year project into a 40-year asset.
When you look at the total cost of owning solar, the long-term view is what matters most. A system that works well for 40 years will save you much more than one that fails after 20. The peace of mind that comes with a long plan is hard to put a price on.
It means you do not have to worry about the big "what if" of a panel break or a power drop in your senior years. For many, this long-term safety is the final piece that makes solar a clear win for their home and their budget.
The Industry Standard: Why Most Warranties Stop at 25 Years
For many years, the solar power field has viewed a 25-year term as the peak of system life. Most brands offer a standard solar panel warranty that covers parts for at least 10 years, with higher-end models reaching the 25-year mark. While this may seem like a long time, the real needs of a home often go past this window.
This old standard exists because older tech could only prove its worth for about two and a half decades before risk became too high for makers to cover.
Most makers build their business plans around this 25-year limit. They use it as a safe point where they can predict how parts will hold up. But as solar tech gets better, these short terms may not give the full value you need.
If you plan to stay in your home for a long time, a short plan could leave you with high costs later. You must look at why these limits exist and how they affect your long-term energy savings.
Common limits of 25-year solar plans
The main reason for the 25-year cap is the way solar cells break down over time. Most solar panels lose power at a rate of about 0.5% to 0.75% per year. This drop in output is known as degradation. By the time a system hits year 25, it may only produce about 80% of the power it did on day one.
Makers use this data to set their terms, as they do not want to pay for repairs when the system naturally slows down.
Standard plans also tend to split coverage into two parts: product and power. A product plan covers faults in the parts, while a power plan covers how much energy the panels make. Many 25-year plans have short product terms of only 10 or 12 years.
This means if a part breaks in year 15, you might have to pay for it even if the power output is still high. Understanding solar panel warranty coverage helps you see where these gaps might show up in your plan.
The cost of long-term solar upkeep
Keeping a solar system in good shape is a key part of saving money over time. Proper solar panel maintenance is needed to make sure your panels reach their full life. When a plan ends at 25 years, the owner takes on all the risk for the rest of the system's life. This can lead to big bills for fixing leaks, swapping out old parts, or testing the wiring as the system gets older.
In hot areas like the Central Valley, parts can wear out faster due to high heat. While a 25-year plan covers the start of this wear, the years that follow are often when the biggest issues occur. By choosing a plan that stops at the old standard, you may miss out on coverage during the years when you need it most. Protecting your home and your wallet means looking for options that go beyond what most people consider standard today.
Why the 25-year mark is no longer enough
Modern homes use more power than ever, and solar is a big part of how we manage those costs. Relying on a 25-year limit may have worked in the past, but new tech allows for much more. If your roof is built to last 40 or 50 years, your solar system should match that span.
Having a gap between your roof life and your solar life can lead to. Messy repair jobs and extra costs for taking panels off and putting them back on.
A short plan also fails to account for the rise in utility rates over time. As the grid gets more costly, the value of your solar power goes up. If your system fails or slows down after year 25 and has no plan to cover it, you go back to paying those high rates.
Moving past the old standard is a smart way to lock in your energy price for the long haul. It gives you peace of mind that your system will keep working as long as you need it.
Owens Corning Solar Protect: The 40-Year Equipment Warranty Difference
Most home solar systems come with a basic promise that the parts will work for about two decades. While this sounds like a long time, many owners find that their roof or system needs care much sooner. The Owens Corning Solar Protect plan changes this by offering a 40 year solar panel warranty that covers both your solar gear and the roof it sits on.
This long-term promise is rare in the clean energy world. It gives people a way to lock in their savings without worrying about hidden repair costs as the system gets older.
California homeowners often face high heat and heavy sun, which can wear down a roof over time. A 40-year term means you do not have to worry about these costs for a long time. It covers the parts that make power and the parts that keep your home dry. This dual path is the best way to guard a big home asset.
By choosing a plan that lasts as long as your home loan, you make sure your energy stays cheap and your roof stays strong. This long look is what makes the Solar Protect plan stand out from other offers.
How the Solar Protect Plan Works
The Solar Protect plan is not just a simple product guard. It is a full shield for your home energy setup. It covers the solar panels, the rack that holds them, and the roof shingles underneath. This is helpful because most firms only cover one part.
If your roof leaks, the solar firm might blame the roofer. If the solar rack breaks, the roofer might blame the solar team. With this plan, those gaps disappear. You get a single point of safety for the entire system on your house.
This level of care is only possible because of strict training. Not every crew can offer this 40-year deal. AMECO Solar & Roofing is an Owens-Corning solar protect certified installer, which means they meet high goals for build quality. They are also a Tesla solar roof certified installer and an Enphase silver installer.
These badges show that the team knows how to handle the most modern tech while keeping the roof tight. By following these rules, they can offer a long-term solar protection plan that most other teams cannot match.
Why Certifications Matter for Your Roof
When you put solar on your house, you are making holes in the roof. If the team does not have the right skills, those holes can lead to leaks and mold. Certified teams use special tools and methods to seal every spot. They follow rules set by the makers of the roof and the solar gear.
This keeps the roof strong for many years. Because AMECO is a certified Owens Corning roofing contractor, they can offer the full 40-year term. This is much better than the industry standard of 10 to 25 years for basic parts.
Having a team that does both the roof and the solar work is a big plus. It cuts out the middle man and makes the job move faster. You do not have to call two different crews to find out who is at fault for a problem. One team owns the whole project from start to finish.
This helps reduce the risk of long-term maintenance costs that often surprise owners later. When the same hands that laid the roof also set the solar tiles, the fit is much better. This leads to a system that stays dry and keeps making power for decades.
Proper seals are the key to a long life for any roof. A certified team knows how to use flashings and mounts that match your shingle type. They check the wood under the roof before they start. This makes sure the solar weight does not cause a sag. If a problem does pop up, the 40-year plan covers the labor to fix it.
This means you do not have to pay for the work to pull the panels off and put them back on. This labor cost is often the most costly part of a solar repair.
Lowering Risk with Better Gear
Solar panels lose a bit of power every year. This is called a loss rate. Most panels lose about 0.5% to 0.75% of their strength each year, according to academic research on silicon systems. A 40-year plan helps you deal with this slow drop. It ensures that the gear is strong enough to keep working even as it gets old.
If a panel drops too fast or fails, the plan covers the cost to fix it. This keeps your power bills low for twice as long as most other systems.
High-end solar gear is built to last through heat, wind, and rain. But even the best gear can have a bad day. In the past, if a part broke after 26 years, you had to pay for it yourself. With a 40-year plan, you are still safe. This is vital for people who want to stay in their homes for a long time.
It turns a risky buy into a solid asset. You know that your energy costs are set, and your roof is safe, until well into the future. This peace of mind is the real value of the Owens Corning plan.
Using top gear also means you get better power in low light. Some tech works better when the sun is not at its peak. This helps you get the most out of every day. By pairing this tech with a 40-year promise, you lock in your energy future.
You do not have to worry about new fees or rate hikes from the power firm. Your house becomes its own power plant, safe under a roof that is built and guarded by the best in the trade.
Under One Roof: Why Integrated Solar and Roofing Avoids Disputes
When a homeowner chooses separate teams for solar and roofing work, they often face a complex web of tasks. Each company focus only on their own portion of the project. If a leak happens under a panel, the solar firm may blame the roofer. At the same time, the roofer might claim the solar team damaged the tiles.
This finger-pointing leaves the homeowner stuck in the middle with a bill to pay. A better way to avoid this stress is to use an integrated solar and roofing provider that manages both sides of the job.
The Problem with Split Responsibility
Hiring two different companies creates a gap in liability. Most roofing warranties do not cover damage caused by third-party installers. If a solar crew drills holes for mounts, they might void your roof protection. This risk is common in California markets like Los Angeles and Orange County.
Homeowners must often navigate these conflicts alone. Research shows that integrated roofing systems can reduce these risks. They combine the building envelope with power generation. This reduces the chance of errors during the handoff between trades.
When teams do not talk to each other, small mistakes turn into big costs. A solar team might use the wrong flashing for a specific roof type. A roofer might not know the exact layout needed for the racks. These gaps lead to delays and extra labor fees. Dealing with separate crews also means two different schedules to track.
You may have to wait weeks between the roof finishing and the solar start. This slow process keeps you from getting your 40 year solar panel warranty benefits as soon as you could. Choosing one team ensures a smooth path from start to finish.
Eliminating Subcontractors for Quality Control
Many solar firms in the Central Valley use subcontractors for their roofing work. This adds another layer of distance between you and the people doing the job. You may not know who is actually on your roof or what their training looks like. AMECO Solar & Roofing takes a different path.
We are a vertically integrated company that manages the entire lifecycle of your project. We do not use subcontractors. Every person on the job works for the same team and follows the same high standards for every home.
Using one crew for both solar and roofing ensures that everyone has the same goal. The team that prepares your roof also installs the panels. They know exactly where every bolt and wire will go before they start. This unified plan protects the integrity of your home. It also makes it easy to offer a durable solar and roofing solution that lasts.
When one company is responsible for the whole system, there is no one else to blame for a problem. This accountability gives you peace of mind for decades to come without the fear of hidden costs.
Lowering Risk with a Single Warranty
One of the biggest wins of integration is the single source of protection. When two companies are involved, you have two different warranties to track. If a part fails, you have to figure out which one covers the fix. This can be hard if the problem involves both the roof and the solar panels.
By using one team, you get one clear promise. This setup removes the stress of trying to get two firms to agree on a solution. It ensures that any issue is handled fast and right the first time.
A single warranty also helps protect the resale value of your home. If you sell your house, a buyer will want to know about the roof and solar status. It is much easier to show one valid contract from a trusted name. This clarity makes the home more attractive to buyers.
They will see that the whole system was built to work as one. This integrated approach shows a level of care that split projects often lack. It proves that you chose a path of quality and long-term safety for your home.
Streamlining Your Solar Project
An integrated approach also saves you time and money. You only have one point of contact for the whole project. You do not have to call two different offices to check on a permit. One team handles all the paperwork, planning, and installation steps. This keeps the project moving fast and reduces the risk of errors.
Since we have been in business since 1974, we have refined this process to be as smooth as possible. We focus on clear talk so you always know what is happening next at every step.
By picking a single partner, you also get better protection for your investment. Our status as an integrated provider allows us to offer the 40 year solar panel warranty with confidence. We know the roof and the solar system will work together because we put them both there.
This full coverage is hard to find when you split the work. It ensures that your home stays safe and your power stays on. This simple choice helps you avoid the disputes that often plague split-contractor projects and provides a solid path to energy independence.
Key Differences: Product vs. Power Warranties Explained
When you choose a long-term solar protection plan, you must know what each part of the contract covers. Most solar deals split protection into two main paths: the product warranty and the power warranty. While they work together to protect your home, they cover very different issues. One focuses on the physical build of the panels. The other tracks how much energy they produce over time.
What Does a Product Warranty Cover?
A product warranty covers the physical parts of your solar panel. Some people call this an equipment or materials warranty. It protects you against factory errors, such as loose frames or faulty cells. If a panel stops working because of a build mistake, the warranty covers the cost of a new one. A standard solar panel warranty usually covers at least 10 years for these types of physical defects (EnergySage). Many high-quality brands now offer 25 years of protection.
This coverage is vital because it protects you from early failures that could hurt your total savings. If a panel frame warps or the glass cracks due to poor build quality, you should not have to pay for the fix. Most firms now push for longer product terms to match the long life of modern solar cells. For California homeowners, a strong physical guarantee is the first step toward a safe, durable system that lasts for decades.
How Power Warranties Track Performance
A power warranty is different because it guarantees how much power your panels will make. All solar panels lose a little bit of their power each year as they age. This slow drop is called degradation. Research shows that solar panels face a median power loss rate of about 0.5% to 0.75% per year (Pianezzola et al.).
The power warranty sets a floor for this loss. It ensures your panels do not drop below a specific level of energy output.
If your panels degrade faster than the contract says they should, the firm must fix or replace them. For example, a good warranty might promise that your panels will still make 90% of their original power after 25 years. This gives you a clear way to see if your system is working well.
By tracking this energy floor, you can ensure your utility bill savings stay high even as the gear gets older. It turns a technical guess into a hard promise of power production.
Comparison of Warranty Types and Lengths
The table below shows the difference between standard industry terms and premium plans. While many firms stop at 25 years, top-tier options like the 40 year solar panel warranty offer much longer peace of mind. Knowing these limits helps you avoid surprise costs later in the life of your solar system. Use this table to compare how standard coverage stacks up against the best plans on the market today.
| Coverage Parameter | Standard Product Warranty | Standard Power Warranty | AMECO Premium Limit |
|---|---|---|---|
| Primary Focus | Physical Build and Parts | Energy Output Levels | Total System Protection |
| Typical Length | 10 to 12 Years | 25 Years | 40 Years |
| What is Covered | Factory Defects | Annual Power Loss | Parts and Performance |
| Standard Degradation Floor | N/A | 80% to 85% at Year 25 | 90%+ at Year 40 |
| Labor and Shipping | Rarely Included | Usually Excluded | Fully Integrated Coverage |
Why the 40-Year Integrated Approach Wins
Most homeowners do not want to manage two or three different claims if something goes wrong. Standard warranties often leave out the cost of labor to remove a broken panel. They may also exclude the shipping to send it back to the factory. This can turn a "free" replacement into a bill for hundreds of dollars.
By using an integrated plan, you get one point of contact for both the parts and the energy output. This removes the stress of dealing with many firms that might blame each other for a system flaw.
When you look at solar panel warranty coverage, you should check if it covers the whole life of the roof too. Since AMECO handles both the solar and the roof, the warranty protects the entire structure. This view is rare in the solar field. It ensures that your power generation and your home's seal stay strong for 40 years. This long-term view is why many people in the Central Valley and Los Angeles choose to upgrade their plan.
How to Secure Your 40-Year Warranty with AMECO Solar
AMECO Solar & Roofing has helped people in California since 1974. We have seen how solar tech changes over the years. Most solar panel plans only last for 25 years. But our team offers a solar panel warranty coverage that lasts for 40 years. This long-term plan gives you peace of mind for decades. To get this coverage, you need to work with a team that knows both solar and roofs.
We manage the whole job from start to finish. This ensures your home stays dry and your power stays on. We have been in business longer than most warranties last. This history shows that we will be here to help you if you ever need it.
The Benefit of One-Team Solar Design
Getting a 40 year solar panel warranty is about more than just buying good panels. It is about how the whole system is built. We use an integrated way of working. This means we look at your roof and your solar panels as one unit. Research shows that integrated solar systems can lower costs and help the gear last longer.
When you have one firm handle both parts, there is less risk of leaks or failed parts. You do not have to worry about two different firms blaming each other if a problem occurs. We take full ownership of the entire project.
A long-term plan also helps you save money on fixes. You will not have to worry about big costs if a part breaks in the future. We are a Tesla solar roof certified installer. We also hold an Owens-Corning solar protect certification. These honors show that we meet high goals for every job we do.
We do not use outside teams to do the work. Our own crew handles every step. This makes it easier for us to stand behind our 40-year promise. When evaluating solar warranties, look for a firm with this level of skill and history.
Your Roadmap to Long-Term Protection
Securing your long-term coverage is a clear process. We guide you through each part to ensure your home is ready for the next 40 years. We start with a deep look at your current power use. This helps us build a system that meets your needs now and later. Our team makes sure every part of the plan is solid before we start any work on your home.
- Contact us for a free solar talk. We will chat about your power needs and look at your energy bills. This helps us see if a solar and battery system is right for your home and your budget.
- Our pros will visit your home to check your roof and power panel. We look for any issues that could affect the solar panels later. This check ensures your roof can support the system for many years without any trouble.
- We create a custom plan for your solar layout. Our team picks the best spots for the panels to get the most sun. We also plan the roof work to make sure it is strong and fits the new gear perfectly.
- Our expert crew installs the system using the best parts. We use tools and ways that keep your roof safe and dry during the whole process. Once the job is done, we help you set up the warranty papers with the brand.
We take pride in our high quality of work and our service. This is why we earned the REC Gold Tier recognition for our team. This honor is given to firms that show great skill and care. It means we have the training to install REC panels the right way every time. Using a gold-tier team is the best way to keep your warranty safe and active.
You can trust that your solar investment will work well for a long time. Our goal is to make solar simple and stress-free for every homeowner in California. We want you to feel sure that your home is safe and your energy costs are low.
Frequently Asked Questions
What does a 40 year solar panel warranty cover?
A 40 year solar panel warranty usually covers both the equipment and its power output. Most industry standards only offer 25 years of protection. According to EnergySage, premium options now extend this coverage to provide longer peace of mind. For homeowners, this means the installer or maker will repair or replace parts that fail due to defects. It also ensures the panels keep making enough power for four full decades.
Are 40 year solar panel warranties common?
No, a 40 year solar panel warranty is much longer than the usual 25 year industry standard. Only a few top tier brands and installers offer this level of solar panel warranty coverage today. Most panels lose about 0.5 to 0.75 percent of their power each year. A longer warranty shows the maker has high trust in the build quality of their product. It helps owners avoid high costs for a very long time.
Which solar panel has the longest warranty?
Maxeon panels currently offer one of the longest warranties at 40 years for both the product and its power. This far exceeds the 10 to 25 years found with most other brands. By choosing high quality gear, owners can secure long-term solar protection for their homes. This coverage is often part of an integrated system. It helps ensure the roof and the panels work well together for many years without extra repair bills.
Is a 40 year warranty better than a 25 year warranty?
Yes, a 40 year warranty is better because it offers 15 more years of protected use. This long term coverage reduces the risk of paying for parts or labor later in the life of the system. According to AMECO Solar & Roofing, this extended warranty helps lower the cost of maintenance over time. Since most solar systems are a major investment, having a guarantee that lasts nearly twice as long provides much better value for homeowners.
Are you ready to lock in 40 years of solar and roof coverage?
Waiting to fix your roof or add solar panels can lead to higher repair costs as utility rates in California keep going up each year. You should not wait to make these key updates to your house while solar rates in California are still low. Starting your project today helps you lock in our best 40-year protection plan and ensures your home stays safe for many years of use.
Are you ready to schedule a free solar and roofing consultation? Call (562) 633-4400 to talk to a local solar expert right now. We can help you get a free consultation and a plan for your California home.
7.1.2026
If you’ve ever walked into your house on a hot afternoon and felt like you’ve stepped into an oven, you know the power of the California sun. While we love the sunshine, we don’t love what it does to our home’s internal temperature and our AC units. A cool roof is a simple, effective solution designed to reflect sunlight and absorb less heat. This keeps your living space more comfortable without constantly blasting the air conditioning. We’ll walk you through how they work, the best materials for your home, and what to expect for the 'cool roof installation cost', making this powerful upgrade feel achievable.
Key Takeaways
- Reduce Your Energy Bills: A cool roof reflects sunlight to keep your home cooler, which means your air conditioner runs less and you save money, especially during hot California summers.
- Factor in Costs and Rebates: While the total price depends on your roof's size and materials, you can lower the investment significantly by exploring California's utility rebates, tax credits, and local incentive programs.
- Invest in Longevity and Community: A cool roof is a smart upgrade that goes beyond savings; it protects your roofing materials from heat damage, potentially extending their lifespan, and contributes to a cooler, healthier environment for your whole neighborhood.
What Is a Cool Roof and How Does It Work?
If you’ve ever chosen a light-colored shirt over a black one on a hot, sunny day, you already understand the basic idea behind a cool roof. A cool roof is a roofing system designed to reflect more sunlight and absorb less heat than a standard roof. This simple concept can have a huge impact on your home’s internal temperature, your energy bills, and even the lifespan of your roof. By keeping your home cooler, you rely less on air conditioning, which is a major win for both your wallet and the environment, especially during those long California summers. It’s a smart, practical upgrade that works behind the scenes to improve your home’s comfort and efficiency.
How They Reflect Heat
A cool roof uses materials with high solar reflectance, meaning they are very good at bouncing the sun's visible, infrared, and ultraviolet rays away from your house. Instead of absorbing that solar energy and transferring it inside as heat, the roof sends it back into the atmosphere. This reflective capability helps to reduce the heat absorbed by buildings, leading to lower indoor temperatures. This process not only keeps your living space more comfortable but also significantly cuts down on the energy your air conditioner needs to run, saving you money month after month.
Cool Roofs vs. Traditional Roofs
The temperature difference between a cool roof and a traditional one can be staggering. On a hot summer afternoon, a standard dark-colored roof can reach temperatures of 150°F or even higher. In contrast, a cool roof under the same conditions can stay more than 50°F cooler. This massive temperature reduction means less heat seeps into your home, easing the burden on your HVAC system. Over time, this also helps protect the roofing materials from the damaging effects of extreme heat, potentially extending the life of your roof. Exploring different roofing solutions can help you find the best fit to achieve these benefits for your home.
Popular Cool Roof Materials
You don’t have to sacrifice style for efficiency. Cool roofs come in a wide variety of materials, colors, and finishes to match your home’s aesthetic and your budget. Some of the most common options include single-ply membranes like TPO and PVC, special reflective coatings that can be applied to an existing roof, metal roofing, cool asphalt shingles, and classic clay or concrete tiles. The best material for you depends on your roof's shape and your personal preferences. You can even use a 3D home visualizer to see how different options would look on your house, making it easier to choose a style you’ll love for years to come.
How Much Does a Cool Roof Cost?
Thinking about a cool roof is a smart move for any California homeowner, but the first question on everyone’s mind is always about the price. The total cost of a cool roof isn't a single number; it depends on several factors, including the materials you choose, the size of your roof, and whether you’re applying a coating or doing a full replacement. Understanding these variables will help you set a realistic budget and see how this energy-efficient upgrade can fit into your financial plans. Let's walk through the numbers so you can get a clearer picture of the investment.
Breaking Down the Average Cost
On average, you can expect a cool roof installation to cost around $10,000. However, that’s just a starting point. Most homeowners find their final costs land somewhere between $7,500 and $30,000. For a simple project, like applying a reflective coating to a small, flat roof, you might see costs as low as $6,000. On the other hand, a large, complex roof using premium materials could reach upwards of $40,000. This range seems wide, but it reflects the variety of homes and materials out there. To get a number that’s specific to your home, you can use an estimate calculator to start planning.
Cost by Material Type
The material you select is one of the biggest factors determining your final cost. Each option comes with a different price tag, lifespan, and level of performance. Some materials, like reflective coatings, are applied over your existing roof, making them a more affordable entry point. Others, like standing-seam metal, involve a full replacement but offer incredible durability and energy savings over decades. We offer a range of roofing solutions to fit different needs and budgets. Let’s look at some of the most popular cool roof materials and what they typically cost.
Cool Roof Coatings
If your current roof is in good shape, a reflective coating is an excellent and budget-friendly option. These fluid-applied coatings create a bright, reflective surface that bounces sunlight away from your home. The cost for a professional application generally ranges from $0.75 to $3.00 per square foot. It’s a straightforward way to turn your existing roof into a cool roof without the expense of a full tear-off and replacement.
Single-Ply Membranes (TPO and PVC)
Often used on flat or low-slope roofs common in modern architecture, single-ply membranes like TPO and PVC are highly effective cool roofing materials. These sheets are inherently reflective, bouncing back 70% to 85% of the sun's rays. They are also quite durable, with a typical lifespan of 20 to 30 years. While the initial cost is higher than a simple coating, their longevity and performance make them a solid investment for the right type of roof.
Metal Roofing
Metal is a fantastic choice for durability and energy efficiency. A metal roof can last between 40 and 60 years, making it one of the most long-lasting options available. Modern metal roofs come in a variety of factory-finished colors that are specially formulated to reflect solar heat, keeping your home cooler. While the upfront investment is higher, the extended lifespan and minimal maintenance often make it the most cost-effective choice over the long run.
Cool Asphalt Shingles
If you love the classic look of asphalt shingles, you don’t have to miss out on cool roof benefits. Cool asphalt shingles are designed with special granules that reflect more sunlight than traditional shingles. The best part? This upgrade is surprisingly affordable, often adding only about $0.10 to $0.20 per square foot to the cost of a standard shingle roof. It’s an easy way to improve your home’s efficiency during a routine roof replacement.
How Roof Size Affects Price
It’s no surprise that the bigger your roof, the more your project will cost. Pricing is almost always calculated on a per-square-foot basis, so size is a primary driver of your total investment. For example, applying a cool roof coating can cost between $4.00 and $7.00 per square foot. If you’re looking at a complete roof replacement with new materials, the price often starts at around $10.00 per square foot and goes up from there depending on the material. You can get a sense of your roof’s dimensions and how different materials might look by playing with a 3D home visualizer, which can help you start to connect the dots between size, style, and budget.
What Factors Influence Your Cool Roof Cost?
When you start looking into a cool roof, one of the first questions you'll have is, "How much will this cost?" While it’s tempting to look for a single number, the price of a cool roof depends entirely on your specific home. Think of it less like buying a product off the shelf and more like a custom project tailored to your needs. The final cost is a mix of several key factors that can cause the price to vary significantly from one house to the next.
The size and complexity of your roof, the materials you choose, local labor rates, and the condition of your current roof all play a significant role in the total price. Understanding these elements will help you get a clearer picture of your potential investment and what to expect when you start getting quotes. Let's break down each of these factors so you can feel confident in your decisions.
Your Roof's Size and Shape
It makes sense that the bigger your roof, the more it will cost to cover. You’ll need more materials and more hours of labor to get the job done. For a rough idea, installing a cool roof on a 1,500-square-foot home can cost around $10,000, but this is just a starting point. The final cool roof cost can vary quite a bit based on the details of your project.
Beyond simple square footage, the shape and pitch of your roof are also important. A simple, gently sloping roof is much easier and faster for a crew to work on than one with steep angles, multiple dormers, and skylights. Complex rooflines require more precise cuts and careful installation, which increases the labor time and, therefore, the overall cost.
Your Choice of Materials
You have a few different paths you can take when it comes to cool roof materials, and your choice will have a big impact on your budget. Many standard roofing materials, like shingles and metal, are now available in cool versions that are designed to reflect sunlight instead of absorbing it.
If you're not ready for a full replacement, applying a reflective coating is another great option. A cool roof coating can be applied over your existing roof and typically costs less upfront than a full replacement. On the other hand, choosing a material like a single-ply membrane or standing-seam metal for a new roof is a larger investment that comes with its own long-term benefits.
Labor Costs and Your Location
The cost of labor is a major component of any roofing project. These costs can vary depending on your location in California and the specific contractor you hire. A professional, experienced crew might have higher rates, but they also bring the expertise to ensure your roof is installed correctly and will last for decades.
The complexity of the job also affects labor costs. Applying a coating to a flat roof is generally less labor-intensive than a full tear-off and replacement on a sloped, multi-level roof. When you get a quote, make sure it clearly separates the cost of materials from the cost of labor. This transparency helps you understand exactly what you're paying for and compare different roofing solutions accurately.
The Condition of Your Current Roof
This is a big one. The ideal time to install a cool roof is when your existing roof is already at the end of its life. It rarely makes financial sense to tear off a perfectly good roof just to replace it with a cool one. In fact, state resources like Cool California advise against replacing a roof that still has years of service left.
If your current roof has issues like leaks, water damage, or sagging, those problems must be addressed before any new materials can be installed. These repairs will add to the total cost of your project. A thorough inspection is the first step to determine if your roof's structure is sound or if it needs some work before the cool roof can go on.
Can You Get Rebates for a Cool Roof in California?
One of the best parts about living in California is the state’s commitment to green energy. This means that when you choose an energy-efficient upgrade like a cool roof, you can often get some financial help to make it happen. Several programs are available to help homeowners like you offset the installation cost through rebates, tax credits, and other incentives. It’s worth taking a little time to explore these options, as they can significantly reduce your initial investment and make your decision to switch even easier. Let's walk through the main types of financial assistance you might find.
Rebates from Your Utility Company
Many California utility companies are eager to help you save energy, and they’ll often pay you to do it. They offer rebates and special programs to encourage homeowners to install energy-efficient upgrades, including cool roofs. These incentives can make a real dent in the overall cost of your new roof. The idea is simple: when you use less energy to cool your home, it reduces the strain on the power grid. It’s a win-win for everyone. You can often find specific details about these programs directly on your utility provider’s website or through state resources that track cool roof savings.
State and Local Government Incentives
On top of what your utility company might offer, it’s a good idea to check for incentives from state and local governments. California is a leader in promoting energy efficiency, and many local municipalities have their own programs to support homeowners. These financial perks, combined with the money you’ll save on your monthly energy bills, can help you recoup the cost of your new roof over time. For many homeowners, the combination of lower bills and incentives means the initial investment in a cool roof pays for itself within about a decade, making it a sound financial decision for the long run.
Federal Tax Credits
Don't forget to look at the federal level, too. The U.S. government often provides tax credits for homeowners who make energy-efficient improvements to their homes. If you install qualifying cool roofing materials, you may be eligible for a federal tax credit. This isn't a rebate, but a credit that reduces the amount of tax you owe, which can feel just as good when tax season rolls around. These credits can further lower the total cool roof cost, making it an even more appealing and affordable project for your home. Be sure to check the latest federal guidelines to see what's available.
How Incentives Lower Your Upfront Cost
When you add it all up, the combination of utility rebates, government incentives, and federal tax credits can make a big difference in your budget. The great news is that many cool roofs don't cost that much more than traditional roofing materials to begin with. When you factor in the available financial assistance, the upfront investment becomes very manageable. Plus, you start saving money on your energy bills from day one. This multi-layered approach to savings makes choosing a cool roof a practical and financially smart decision for any California homeowner looking to go green and reduce expenses.
Is a Cool Roof a Smart Investment?
Deciding on a new roof is a big deal, and it’s about more than just picking a color. A cool roof is an investment in your home’s comfort, efficiency, and future. When you live in a sunny state like California, your roof takes a constant beating from the sun. A cool roof fights back by reflecting that solar radiation instead of absorbing it. This simple change can have a ripple effect, leading to some impressive financial and environmental returns. Let's break down what makes a cool roof a smart choice for so many homeowners.
Lower Your Energy Bills
The most immediate benefit you’ll notice is the relief for your air conditioner and your wallet. A cool roof keeps your attic and the rest of your home cooler, so your AC doesn't have to work nearly as hard to maintain a comfortable temperature. This translates directly into lower energy bills, especially during those long, hot California summers.
On average, you can save between seven and ten cents per square foot on annual cooling costs. For a typical 2,000-square-foot home, that adds up to around $140 to $200 in savings each year. It can also lower your home's peak electricity demand by up to 20%, easing the strain on the power grid during heatwaves. You can get a better idea of your potential savings by using an estimate calculator to see how your energy use might change.
Extend Your Roof's Lifespan and Increase Property Value
Constant exposure to intense heat and UV rays breaks down traditional roofing materials over time, leading to cracks, warping, and premature aging. Because a cool roof stays at a lower temperature, it experiences less thermal stress. This simple fact can help your roof last longer, pushing back the date of your next big replacement project.
A home with lower energy bills is also a more attractive asset to potential buyers. When you can show that your home is energy-efficient, it can increase its overall property value. Investing in one of our modern roofing solutions isn't just a repair; it's an upgrade that pays you back in multiple ways, both now and if you decide to sell later.
Benefits for the Environment and Your Community
Choosing a cool roof does more than just help your own household. When many homes in a neighborhood have them, it can help lower the overall temperature of the area, combating what’s known as the "urban heat island effect." This leads to cleaner air and less energy consumption for the entire community.
By reducing your reliance on air conditioning, you also shrink your home's carbon footprint. Less electricity use means power plants burn fewer fossil fuels. According to the U.S. Department of Energy, cool roofs are a simple but effective way to contribute to a healthier environment, making your home part of the solution to climate change.
Answering Common Cool Roof Questions
It's natural to have questions before making a significant home improvement. Let's clear up a few common concerns about cool roofs.
Do cool roofs work in mild California climates?
Yes, absolutely. While California has diverse microclimates, the vast majority of the state experiences enough sun and heat to make a cool roof beneficial. In fact, for many homeowners in warm regions, the combination of lower energy bills and available rebates means you can often recoup the initial cost within about ten years.
Will a cool roof raise my heating bills in winter?
This is a valid question. Because a cool roof is designed to reflect solar heat, it will absorb less warmth from the sun during the winter. This is sometimes called a "winter heating penalty." However, for California's climate, this effect is minimal. Leading energy organizations have found that the substantial savings you gain during our long, hot summers far outweigh the slight increase in heating needs during our relatively mild winters.
Are cool roofs only for commercial buildings?
Not at all. While you often see cool roofs on large commercial buildings, the technology and benefits are just as applicable to residential customers. Any building that gets a lot of sun can benefit. The decision to install a cool roof should be based on your local climate and energy goals, not the size or type of your building.
Related Articles
- ENERGY STAR Shingles: What to Know in 2026
- ENERGY STAR Metal Roofing: The Ultimate Guide
- Roofing Services | Roofing Company | AMECO Solar and Roofing
- Solar Roofing: The Perfect Bundle
- Exploring Residential Roof Shingles: Types and Styles | AMECO Solar
Frequently Asked Questions
Should I replace my roof before installing solar panels? This is a fantastic question, and thinking about it puts you ahead of the game. We generally recommend addressing your roof's condition before going solar. Since solar panels have a lifespan of 25 years or more, you want the roof underneath them to last just as long. Installing a new cool roof first ensures you have a solid, energy-efficient foundation for your solar array. This approach saves you the future cost and hassle of removing and reinstalling your panels just to fix the roof later.
Do I have to get a white roof to get the benefits of a cool roof? Not at all. While a bright white roof is highly reflective, modern roofing materials come in a variety of "cool colors," including darker shades of gray, brown, and green. These products use special pigments that are designed to reflect the sun's infrared light, which is the primary source of heat. This means you can choose a color that complements your home's style and still enjoy significant energy savings.
How much maintenance does a cool roof need? A cool roof requires similar upkeep to a traditional roof. The main goal is to keep the surface clean so it can effectively reflect sunlight. We recommend periodic inspections and gentle cleaning to remove any dirt, leaves, or debris that might accumulate. The specific maintenance schedule depends on the material you choose and your local environment, but a little care goes a long way in preserving your roof's performance and lifespan.
How does a cool roof affect my home's resale value? A cool roof can be a very attractive feature for potential buyers. The promise of lower monthly energy bills is a powerful selling point in California. It also signals that your home is modern, well-maintained, and environmentally friendly. These qualities can make your home more desirable on the market and contribute to a higher overall property value when it comes time to sell.
Is a cool roof coating a good option for me? A reflective coating can be an excellent and cost-effective choice if your current roof is still in good structural shape. It's a way to gain the benefits of a cool roof without the expense of a full replacement. However, if your roof has existing damage, leaks, or is nearing the end of its functional life, a coating would just be a temporary fix. In that case, a full replacement is the more durable and sensible long-term investment.
7.1.2026
NEM 3.0 solar battery sizing California aims at storing more solar power for home use instead of sending it back to the power grid. Under the new Net Billing Tariff, the California Public Utilities Commission cut export credits by about 75%; using your own power is now worth more. Owners should size their storage to cover all night energy needs; this prevents selling extra power during the day only to buy it back later. Most California homes now need a battery that matches 100% to 120% of their daily energy use to handle these new utility rules and blackouts. Finding the right size ensures your system saves you money and provides reliable backup power during sudden grid blackouts and common utility outages.
Ready to calculate your solar battery savings? Schedule a free consultation today with California's longest-running solar integrator to get a custom quote.
Picking the right storage size is the key choice for new solar buyers, and AMECO Solar has helped owners find the best fit since 1974. To get the best results, you must first look at how the new utility rules changed the price of your energy. Our guide to Understanding NEM 3.0: Why Battery Sizing is More Critical Than Ever explains these changes; the path begins with...NEM 3.0 Solar Battery Sizing California Guide: Why Battery Sizing is More Critical Than Ever
California recently moved to a new solar rule called the Net Billing Tariff or NEM 3.0. This change has shifted how people save money on their power bills. In the past, you could sell extra solar power back to the grid for a high price. Now, those rates are much lower. AMECO Solar has worked in this field since 1974. We have seen many changes in how solar works. We help you find the best way to use your clean power.
The shift in export value
Under NEM 2.0, selling power back to the grid was helpful and paid well. But NEM 3.0 has cut those credit rates by about 75 to 80 percent. This means sending power back to the power company gives you much less value than before. According to the California Public Utilities Commission, the new rates reflect the value of that power to the grid at set times. For most of the day, that value is quite low.
Because of this drop, you should not plan to sell your extra power for a profit. Instead, the goal is to keep that power at home. You can use a battery to store energy during the day. Then, you can use it at night when rates are high. This makes the size of your battery very important. If the battery is too small, you will still end up buying power from the grid when the sun goes down.
The need for self-consumption
To get the best savings now, you must focus on self-consumption. This means you use as much of your own solar power as possible. A well-sized battery lets you do this. It captures the power your panels make while you are at work or away. When you come home, you can run your lights and tools using that stored energy. This avoids high peak rates from your power company.
Many people are now looking into NEM 3.0 battery requirements to see what they need. A battery that is too small will fill up too fast. Once it is full, your extra power goes back to the grid for very little credit. A battery that is the right size will hold enough power to get you through the evening. This keeps your costs low and your savings high over time.
Avoiding the sizing mistake
Choosing the wrong size for your storage system can be a big mistake. If you undersize your battery, you miss out on the full value of your solar panels. Most experts now suggest that you size your system to cover 100 to 120 percent of your yearly power use. This helps you stay clear of the high costs of grid power during peak times. It also gives you a backup if the grid goes down for a few hours.
Nearly 70 percent of new solar customers in California now choose to add a battery. This is because storage is now a core part of a good solar plan. To get the best results, you should think about your daily habits. Here are a few things that affect your sizing needs:
- How much power you use during the late evening and night.
- If you plan to add an electric car in the next few years.
- The size of your roof and how many panels it can hold.
- If you want to run big items like a pool pump or air unit during an outage.
Getting the size right helps you get the most out of your project. It turns your home into its own small power plant. This gives you more control over your bills. It also makes your home more strong during power shutoffs. AMECO Solar can help you look at your past bills to find the perfect fit for your needs.
What is the Recommended Battery-to-Solar Ratio Under NEM 3.0?
Finding the right mix of panels and storage is key to saving money in California now. Under the Net Billing Tariff, also known as NEM 3.0, you want to use as much of your own power as you can. If you send power back to the grid during the day, you get much less credit than you did in the past. Most pros now suggest a 2:1 ratio for battery sizing to panels.
The standard 2:1 sizing rule
A common rule is to install 10 kWh of battery storage for every 5 kW of solar panels. This ratio helps you store the bulk of the power your panels make while the sun is up. Instead of selling that energy for a low rate, you keep it for the evening when grid prices go up. This setup is a smart way to boost solar battery cost efficiency for your home.
Having enough storage keeps you from wasting the clean energy your roof produces. If your battery is too small, it will fill up fast, and you will have to export the rest for a small credit. Sizing your system to cover 100% to 120% of your usage is the best way to get a good return on your NEM 3.0 battery requirements.
Matching storage to peak energy use
Your battery needs to hold enough power to get you through the peak price hours of the late afternoon and night. California utilities often charge the most when the sun goes down and grid demand is high. A 2:1 ratio usually gives you enough juice to run your lights, fridge, and AC without needing grid power. This helps you avoid the high rates that start when the sun is no longer out.
AMECO Solar and Roofing can help you find the best fit for your energy needs. As California's longest-running solar firm, we know how to design a system that works for your home. We can look at your bills and find the best solar battery sizing California setup to help you save the most money over time.
Comparing the Best Home Solar Battery Options: Enphase IQ vs. Tesla Powerwall
Homeowners in California now face new rules for solar power. Under the Net Billing Tariff, the value of sending solar energy to the grid has dropped. This makes battery storage a key part of any new system. Storing your own power helps you avoid high utility rates and keeps your lights on during a blackout. Choosing the right battery is the first step to energy independence.
Key differences in battery tech
Both Enphase and Tesla use Lithium Iron Phosphate (LFP) chemistry. This tech is safer and lasts longer than older battery types. The Enphase IQ Battery 5P uses a modular design. You can start small and add more units as your needs grow. This is helpful for NEM 3.0 solar battery sizing California residents need to master. By matching your storage to your use, you get the best return on your spend.
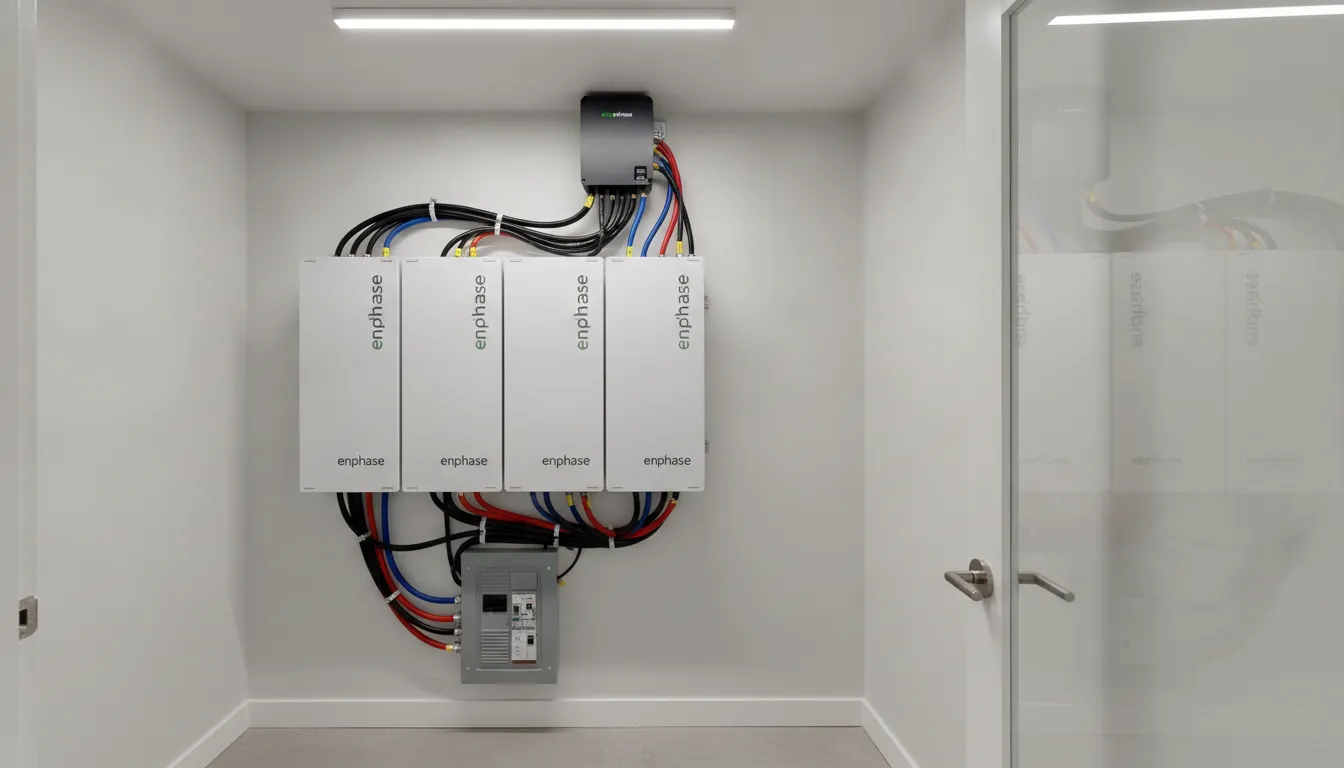
High power for big loads
The Tesla Powerwall 3 offers high power in a single unit. It can start large tools like air conditioners without a struggle. While Enphase offers more control over small steps in size, Tesla provides a lot of energy in one box. AMECO Solar helps you find the right fit. We are a Tesla solar roof certified installer and an Enphase Gold Installer. We know how to set up both systems to work with your roof and your home.
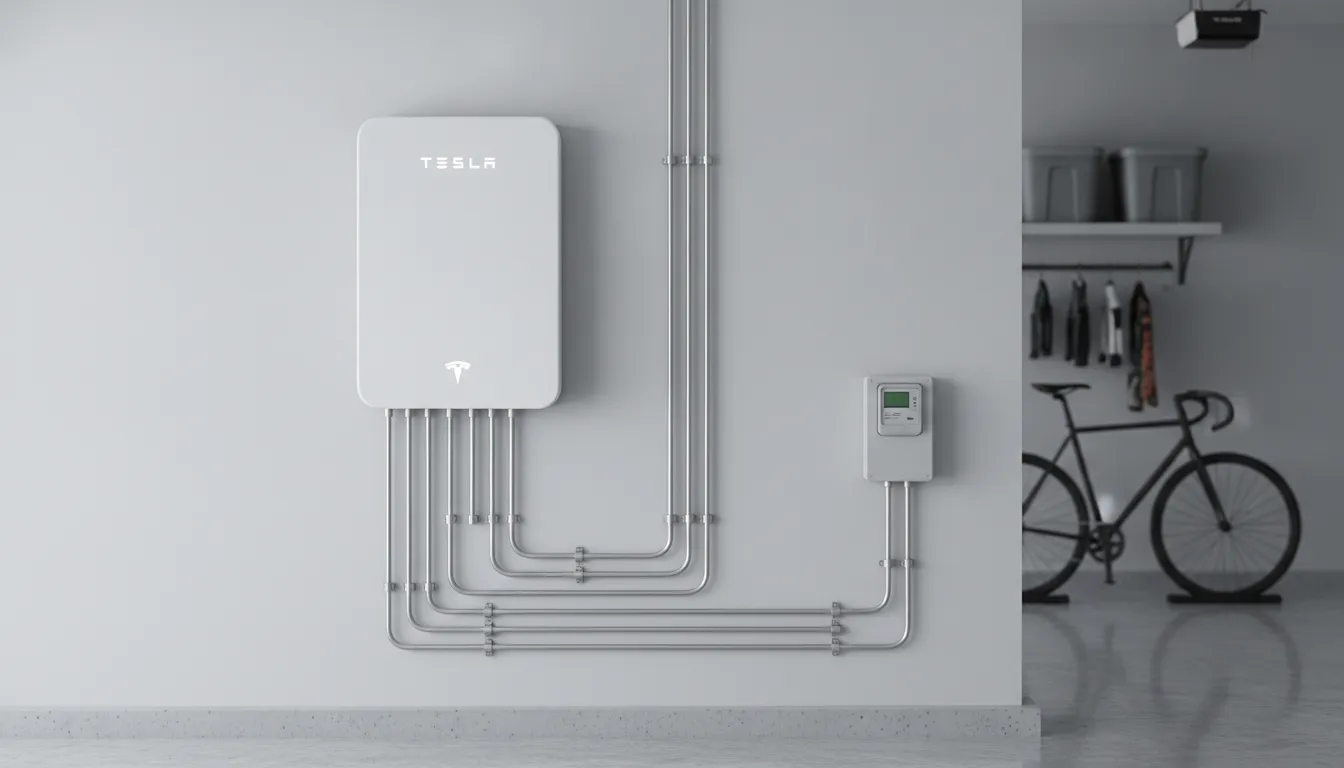
Sizing your system for NEM 3.0
Under new state rules, most people should pair solar with a battery. In fact, nearly 70% of new solar customers in California now add storage to their homes. You can read more about these trends from the California Public Utilities Commission. The goal is to use as much of your own solar power as you can. This is better than selling it back to the grid for a low price.
For the best results, we suggest sizing your system to cover 100% to 120% of your annual use. Undersizing your battery is a common error that can cost you money over time. A well-sized system lets you run your home on clean power even after the sun goes down. You can use our solar cost calculator to see what size fits your specific energy needs.
| Feature | Enphase IQ Battery 5P | Tesla Powerwall 3 |
|---|---|---|
| Usable Energy | 5.0 kWh per unit | 13.5 kWh |
| Power Output | 3.84 kW continuous | 11.5 kW continuous |
| Chemistry | LFP battery chemistry. | LFP battery chemistry. |
| Scaling | Highly modular | Large single units |
| Warranty | 15 years. | 10 years. |
How Do I Calculate the Right Solar Battery Size for My Home?
Choosing the best solar battery size is vital for your home. Under new California rules, your goal is to store power for your own use and avoid sending energy back to the grid when rates are low. This makes NEM 3.0 solar battery sizing California a key part of your plan. Sizing your system right helps you save more money and stay powered during outages.
Checking Your Past Energy Use
The first step is to see how much power your home needs, which you can find on your old utility bills. Look for your total kilowatt-hour (kWh) use over a full year to see how your needs change with the seasons. You should also check your daily use during the summer. This is when your air units usually draw the most power.
Knowing your annual use lets you size your solar panels too. Most experts say you should aim for a system that covers 100% to 120% of your power needs. This helps ensure you have enough solar energy to charge your battery every day. You can use a solar cost tool to get a rough idea of your system size and possible savings.
Find Your Peak Hours
You need to know when you use the most power. For many people in California, peak use happens from 4 PM to 9 PM when people get home and turn on lights and tools. Under NEM 3.0 rules, utility rates are much higher during these hours. Storing solar power from the morning to use at night is the best way to cut your bill.
Check your smart meter data if your utility provides it. This data shows your use in small chunks of time. It helps you see how much energy you need to cover those expensive peak hours. If you use a lot of power at night, you may need a larger battery to keep your home running without grid power.
Match Battery to Usage
Once you have your data, you can pick a battery size since most home batteries hold between 10 kWh and 14 kWh of power. If your nightly peak use is 10 kWh, a single unit might be enough. If you have an electric car, you may need two or more units to be safe. It is also good to plan for extra power in case of a grid shutoff.
- Get your utility bills from the last 12 months. Find the total kWh you used for the year and for each month.
- Log in to your utility site to view your hourly power use. Focus on the hours after the sun goes down.
- List the big things in your home that use power at night. This includes your fridge, lights, and heat or air units.
- Add up the kWh those units use during peak hours. This gives you a baseline for your daily storage need.
- Think about future needs like an EV charger. Adding this now is easier than doing it later.
- Compare your total peak use to the size of popular batteries. Check if one unit or a stack of units fits best.
- Talk to a pro about NEM 3.0 battery needs to finalize your plan. They can help you pick the right brand for your roof.
Getting the size right is a smart move. A system that is too small won't save you as much money. A system that is too big costs more than you need to spend. By following these steps, you can find a balance that works for your budget and your home's energy needs.
Maximizing Self-Consumption to Beat High Time-of-Use Rates
California power firms like PG&E, SCE, and SDG&E now use a Net Billing Tariff. This plan changes what your solar power is worth. Under this new rule, export credit rates for extra solar energy are lower than retail costs for most hours. This means the best way to save cash is to use your own solar power at home instead of sending it to the grid.
How Time-of-Use Rates Work
Time-of-use (TOU) rates mean you pay more for power when grid use is high. This often happens from 4 p.m. to 9 p.m. When you have solar with no battery, you often send power to the grid in the sunny morning when rates are low. Then, you buy power back in the evening when rates are at their peak. A battery lets you store that cheap morning sun to use during the costly night hours.
Smart NEM 3.0 battery requirements help you shift your use to avoid these high costs. In a "self-use mode," your system stops sending power to the grid during the day. Instead, it fills your battery so you can stay off the grid when utility prices jump. This setup helps you keep more of the value your solar panels make.
Exporting for Extra Credits
Using your own power is the main goal, but sometimes sending it back makes sense. On some late summer nights, grid use hits very high levels. During these times, the value of export credits can rise far above the normal retail rate. Smart software can find these peaks and send stored power back to the grid for a high gain.
To use these spikes, your system needs the right size. If your battery is too small, you will not have enough power left to send back after you use what you need for your home. Proper solar battery cost efficiency relies on having enough storage to cover your night use while still having extra for high-value sales to the grid.
Picking the Right System Size
Choosing the right size for your system is the most vital step to beat high rates. Most pros suggest a solar and battery system sized at 100% to 120% of your yearly energy use. This range makes sure you have enough power to fill your batteries even on short winter days. It also gives you a buffer for high-use months in the summer when your air cooling runs more often.
Finding the best NEM 3.0 solar battery sizing California needs a look at your peak daily use. If you have a large home or use a lot of power in the evening, you may need two or more battery units. A system that is too small will force you to buy costly grid power. Getting the size right from the start is the key to long term savings.
Ready to maximize your savings? Calculate your project cost today with our free online calculator.
Avoiding Sizing Pitfalls: Seasonal Usage and Future Energy Demand
Choosing the right size for a battery is a key part of your home energy plan. Many people make the mistake of getting a battery that is too small. In California, the Net Billing Tariff (NBT) system means you get less credit for the power you send back to the grid. Because of this, NEM 3.0 battery requirements focus on storing your own solar power to use later. A battery that is too small can leave you paying high utility rates when the sun goes down.
Planning for Seasonal Energy Shifts
Your energy needs change with the weather. In the summer, air cooling can use a lot of power. If your battery is not big enough, you may run out of stored energy before the night ends. This forces you to buy power from the grid when prices are at their peak. It is best to look at your highest use months to find the right NEM 3.0 solar battery sizing California home owners need. A system sized at 100% to 120% of your annual use can help maximize your ROI.
Winter brings other tasks. Shorter days mean your solar panels have less time to charge the battery. Cloud cover and rain can also reduce how much power you make. A good plan will account for these low sun periods. This ensures you have enough power for daily use even when the sun does not shine as much. Expert design helps balance summer peaks with winter lows to keep your home running smoothly all year.
Preparing for Future Growth
Your home energy use will likely grow over time. Many people now add electric car chargers or heat pumps to their homes. These new tools use much more power than old ones. The NBT rate design makes it cheaper to power these electric options during the day. But you will still need a large battery to keep them running at night. Planning for this growth now can save you money on future upgrades.
At AMECO Solar, we help you look ahead. We have served California as an integrated solar and roofing company since 1974. We can help you pick a battery that fits your home today and your plans for next year. A future-proof system will have space for more storage or more solar panels. This way, you stay in control of your energy bill even as your life and the grid change.
Frequently Asked Questions
Does NEM 3.0 require a battery for every solar installation?
No, you do not have to install a battery with your solar panels. However, the new rules in California make solar less profitable without one. According to the CPUC, export rates for excess power have dropped a lot. Without storage, you must sell your extra energy to the grid for a very low price. Adding a battery lets you save that power for use at night. This helps you avoid high utility rates and makes your system a better investment.
Can I add more battery storage later if my solar battery is too small?
Yes, you can usually add more batteries to your system in the future. Many popular brands like Enphase and Tesla allow for easy expansion. It is often cheaper to install the right size from the start to save on labor costs. If you find your current storage does not cover your nightly use, adding another unit is a smart move. An expert at AMECO can help you plan for future growth. This ensures your home stays powered during a grid outage.
How do seasonal energy changes affect battery sizing for California homes?
Your energy needs change with the weather. In hot California summers, AC units use a lot of power. You may need a larger battery to stay cool during peak evening hours. During the winter, you will produce less solar energy to fill your storage. A well-sized system accounts for these shifts to maximize your savings year-round. According to AMECO Solar, sizing your system at 100 to 120 percent of your annual use is often the best choice for ROI.
Are there tax benefits for installing a solar battery in California?
Yes, there are several ways to save on your installation. The federal tax credit allows you to deduct 30 percent of the total cost from your taxes. In California, you may also qualify for property tax exclusions on your solar and battery upgrades. This means your home value can go up without raising your taxes. According to AMECO Solar, these incentives help make clean energy easier to buy for local families. Always talk to a tax expert to see what you can get.
Ready to secure your energy independence? Call 562-633-4400 today to get started with AMECO Solar & Roofing.
Ready to calculate your solar battery savings?
Every day you wait to get a home battery is a day you lose money and pay high bills to the grid you could save. When you act now, you can protect your home from sudden power cuts and keep your lights on when the power lines go down. See how much you will save on our solar calculator page to keep cash in your own pocket each month and help your budget. It takes time to set up a new system, so start your move today to stop the cost of doing nothing from eating your cash. Making the choice to switch now is the best way to gain energy freedom and secure your home for the long term starting today.
Ready to calculate your project savings? Call 562-633-4400 to talk to a solar expert and find the best battery for your home today.
7.1.2026
Choosing solar panels can feel overwhelming with all the technical specs and competing brands. How do you separate the real performers from the slick marketing? You turn to an unbiased expert. For decades, homeowners have trusted Consumer Reports for their independent, non-profit product testing. They don’t accept advertising, so their only goal is to give you the facts. They test for efficiency, durability, and performance in extreme heat, giving you a true picture of long-term value. This guide will walk you through their findings and highlight the consumer reports best solar panels for home, making your decision much simpler.
Key Takeaways
- Look beyond the initial price tag: The best value comes from long-term performance, not the lowest upfront cost. Prioritize panels with high efficiency ratings and strong durability to maximize your energy savings for decades.
- Vet your installer as carefully as your equipment: Your installer's expertise is crucial for your system's success. Choose a licensed, experienced partner with deep local knowledge who can manage everything from roof assessments to permits, ensuring a seamless installation.
- Plan for a complete energy solution: A successful solar project involves more than just panels. Ensure your roof is in good condition, claim all available financial incentives, and consider a battery backup for energy security during blackouts.
How Does Consumer Reports Test Solar Panels?
When you’re making a big investment in your home, you want to know you’re choosing a quality product. That’s where the independent, unbiased testing from Consumer Reports comes in. They don’t just look at marketing brochures; they put solar panels through a series of tough, real-world tests to see how they actually perform. To get the most accurate results, they partner with Kiwa PVEL, a specialized lab that knows exactly what to look for. Their goal is to cut through the noise and give homeowners a clear picture of a panel’s power, durability, and long-term value. Let’s look at exactly what they test for.
Power Output in Sun vs. Clouds
A solar panel’s main job is to produce electricity, but its performance can change depending on the weather. We get plenty of sunshine in California, but we also have our share of cloudy or hazy days. Consumer Reports uses a sun simulator to measure how much power a panel generates in both bright, direct sunlight and in low-light conditions that mimic a cloudy day. This test shows which panels are most effective at capturing energy no matter the weather, ensuring your system is still productive even when the sun isn’t perfectly shining. This is a key factor in maximizing your home’s energy production year-round with our solar solutions.
Performance in High Heat
It might seem counterintuitive, but extreme heat can actually make solar panels less efficient. As the surface of a panel gets hotter, its power output can drop. Since California rooftops can get incredibly hot during the summer, this is a critical factor to consider. Consumer Reports tests for this by heating panels to temperatures as high as 167°F to see how well they hold up. Panels that maintain their performance under intense heat are a much better choice for our climate, ensuring you get the most electricity and the biggest savings during the hottest, sunniest parts of the year.
Durability and Strength
Your solar panels will be on your roof for decades, so they need to be tough enough to withstand years of sun, wind, and rain. Consumer Reports conducts a thorough inspection to check the build quality of each panel. They use visual checks, X-rays, and other methods to find hidden flaws like tiny cracks, faulty wiring, or potential for water leakage. A well-built panel is a reliable panel. This focus on durability is why it’s also essential to ensure your roof is in good shape before installation. A strong foundation is key to a long-lasting solar system, which is why we always assess your roof as part of our approach.
Long-Term Reliability
A good solar panel is a long-term investment that should last 25 to 30 years, or even longer. Over time, all panels experience a slight, gradual decline in their power output; this is called the degradation rate. A lower degradation rate means the panel will produce more electricity over its lifespan, giving you a better return on your investment. Consumer Reports evaluates this by looking at the materials and manufacturing quality. Choosing a panel with a low degradation rate helps you secure your energy independence for decades to come, especially when paired with a reliable battery backup system.
Consumer Reports' Top Solar Panel Picks
When you’re making a big investment for your home, it helps to have an unbiased expert in your corner. That’s where Consumer Reports comes in. They put solar panels through a series of tough tests to see which ones truly deliver on their promises. While the "best" panel always depends on your specific home and energy goals, their top-rated list is an excellent place to start your research. Here are a few standout models that consistently earn high marks for performance and reliability.
1. Hyundai HIS-S410YH(BK)
The Hyundai HIS-S410YH(BK) is a real workhorse. In testing, it proved its ability to generate consistent power, which is exactly what you want for keeping your energy bills down. Consumer Reports noted its reliable output and durable design, meaning it’s built to last on your roof for years to come. For homeowners who want a dependable panel that performs well across the board, this is a fantastic option to consider. We believe in using only high-quality equipment, which is a core part of our approach to every installation.
2. Maxeon SPR-MAX6-425-BLK
If top-tier efficiency is your main goal, the Maxeon SPR-MAX6-425-BLK is hard to beat. This panel is engineered to squeeze the most energy possible out of every ray of sunshine, even on cloudy days or in less-than-perfect conditions. Its robust construction makes it a durable choice that maximizes your energy production over the long haul. For homeowners who want to get the absolute most out of their roof space, this high-performance panel is a leading contender in the world of solar solutions.
3. Trina Solar TSM-420-NE09RC.05
Trina Solar’s TSM-420-NE09RC.05 strikes an impressive balance between performance and affordability. According to Consumer Reports' reviews, this panel delivers reliable power without the premium price tag of some other high-efficiency models. It’s a great value-driven choice for homeowners who are mindful of their budget but still want a system that meets their energy needs effectively. This model proves you don’t have to compromise on quality to make a smart financial investment in your home’s energy future.
Key Features to Compare Before You Buy
When you start shopping for solar panels, the technical specs can feel a little overwhelming. But you don’t need an engineering degree to make a smart choice. Focusing on a few key features will help you compare your options and find the best fit for your home and budget. Think of it like buying a car; you don’t need to know how the engine works, but you do want to compare things like mileage, safety ratings, and warranty. It’s about looking past the sticker price to understand the real, long-term value you’re getting. This is especially true for a major home improvement project that will impact your finances and lifestyle for decades to come.
Understanding these details ensures you get a system that not only works on day one but also delivers reliable, clean energy for years. It’s about finding that sweet spot between price, performance, and longevity. A great solar panel system should be a dependable part of your home, quietly saving you money and giving you more control over your energy supply. We’ll walk through the most important factors to consider, from efficiency to warranties, so you can feel confident in your decision to go solar and choose a system that truly meets the needs of your family and your home.
What Do Efficiency Ratings Really Mean?
You’ll see an efficiency rating on every solar panel, usually expressed as a percentage. This number simply tells you how much of the sunlight hitting the panel gets converted into usable electricity. For example, if a panel has a 20% efficiency rating, it turns 20% of the sun’s energy into power for your home. Higher efficiency means more power from a smaller surface area. This is especially important if you have limited roof space but still want to maximize your energy production. While a higher rating often comes with a higher price tag, it can be a worthwhile investment for generating more power and achieving greater energy independence in the long run.
How Panels Handle California's Climate
California is famous for its sunshine, but our climate also brings intense heat and, depending on your location, periods of shade from trees or nearby buildings. Solar panels are tested to see how well they perform in these exact conditions. A panel’s temperature coefficient tells you how much its output will drop as temperatures rise. Panels that perform well in high heat will give you more reliable energy output during those long, hot summer afternoons. A knowledgeable installer can recommend solar solutions specifically designed to handle the weather in your part of California, ensuring your system performs optimally year-round.
How Long Will Your Panels Last?
A solar panel system is a long-term investment, so you want to know it’s built to last. Most high-quality solar panels have a lifespan of 25 to 30 years. Manufacturers typically provide a performance warranty guaranteeing that the panels will still produce at least 80% to 90% of their original output after 25 years. This durability is a testament to the technology’s reliability. When you invest in solar, you’re not just buying a product for today; you’re securing decades of lower energy bills and greater energy independence for your family. It’s a powerful way to plan for your home’s future.
Understanding Your Warranty: Product vs. Performance
When you look at solar panel warranties, you’ll notice there are two main types: product and performance. It’s important to understand the difference. A product warranty covers defects in the panel itself, like manufacturing flaws or premature wear and tear. This usually lasts anywhere from 10 to 25 years. The performance warranty, on the other hand, guarantees a certain level of energy output over time, typically 25 years. A reputable company will be transparent about both warranties and help you understand what’s covered, giving you peace of mind that your investment is protected for the long haul.
Why Your Installer's Reputation Matters
You can buy the best, most efficient solar panels on the market, but they won’t perform well if they’re not installed correctly. Your installer’s expertise is just as important as the quality of the equipment. A reputable installer ensures your system is designed for maximum production, securely mounted, and wired safely. Look for a company with a long history of local experience, positive customer reviews, and proper certifications. Choosing an experienced team like AMECO, with over 50 years of combined solar and roofing solutions expertise, makes all the difference in your system’s performance and longevity.
Monocrystalline vs. Polycrystalline: Which Is Right for You?
As you start comparing solar panels, you’ll quickly run into two main types: monocrystalline and polycrystalline. Think of them as two different paths to the same goal of energy independence. The names sound technical, but they just refer to how the silicon inside is structured. Monocrystalline panels are made from a single, pure silicon crystal, while polycrystalline panels are made from many silicon fragments melted together. This difference in manufacturing leads to distinct looks, performance, and costs.
Choosing between them isn't about finding the "best" panel overall, but about finding the best fit for your home, budget, and energy goals. A home with a small, shady roof in a coastal area has different needs than a large home in a hot, inland valley. That's why a personalized solar solution is so important. Let's break down the key differences to help you decide.
When to Choose Monocrystalline Panels
Monocrystalline panels are the go-to choice if you want top-tier performance and have limited roof space. Because they are made from a single crystal, they are more efficient, meaning they can generate more electricity per square foot. They also perform better in high temperatures, a huge plus for those hot California summers. This means they lose less power output as the thermometer climbs. On top of that, many homeowners prefer their sleek, uniform black appearance, which creates a more seamless look on your roof. If maximizing energy production on a smaller roof is your priority, monocrystalline panels are likely your best bet.
When Polycrystalline Panels Make Sense
If you have a large, south-facing roof and are looking for a more budget-friendly option, polycrystalline panels are an excellent choice. Their manufacturing process is less complex, which brings down the cost. While they are slightly less efficient than their monocrystalline counterparts, they are a proven and reliable technology that will still significantly reduce your electricity bills for decades. You can spot them by their signature blue, marbled look. For homeowners with plenty of space to work with, polycrystalline panels offer a fantastic return on investment and a lower upfront cost to get started with solar energy.
Ultimately, the right panel depends entirely on your specific circumstances. A professional consultation can help you weigh the efficiency gains of monocrystalline panels against the cost savings of polycrystalline panels. This ensures you get a system that perfectly matches your home's needs, which is a core part of our approach to every installation.
Breaking Down Solar Costs and Your Return on Investment
Let’s talk numbers. Understanding the cost of solar panels and your potential return on investment is one of the most important steps in your decision-making process. While the initial price tag is a key factor, it’s only part of the story. The real value comes from long-term energy savings, tax credits, and increased home value. Think of it as an investment in your home’s future and your energy independence. We’ll break down the costs and savings so you can see the complete financial picture.
The Average Cost of a Home Solar Installation
The cost of a home solar installation typically ranges from $15,000 to $25,000 before any incentives. This is a broad range because the final price depends on your specific needs, including the size of your system, your home's energy consumption, and the equipment you choose. The solar panels themselves usually make up a large portion of this cost. For a standard 6kW system, the panels alone might cost between $6,000 and $8,000. The best way to get a clear idea of the cost for your home is to get a personalized quote. A custom solar estimate will account for your unique situation.
How Tax Credits and Incentives Lower the Price
The great news is that you won't pay the full sticker price for your solar system. The federal government offers a significant incentive called the Residential Clean Energy Credit, which allows you to deduct 30% of your solar installation cost from your federal taxes. This isn't just a small rebate; it's a substantial credit that dramatically lowers your net cost. On top of the federal credit, many state and local programs in California offer additional rebates or incentives. A knowledgeable installer can help you identify all the savings you qualify for, ensuring you get the best possible price for your solar solution.
Calculating Your Payback Period and Long-Term Savings
Your solar payback period is the time it takes for your electricity bill savings to equal your initial investment. For most homeowners who purchase their system, this period is around ten years. Once you hit that milestone, the energy your panels produce is essentially free for the rest of the system's 25+ year lifespan. To figure out your return on investment, you can divide the total profit you'll make over the panels' lifetime by your initial cost. For many residential customers, going solar proves to be one of the smartest financial decisions they can make for their homes, providing decades of savings.
5 Common Mistakes to Avoid When Buying Solar Panels
Making the decision to go solar is a huge, exciting step. It’s a major investment in your home, your financial future, and a more sustainable lifestyle. But like any significant home improvement project, the process can feel a little overwhelming. There are so many brands, installers, and financing options to consider, and it’s easy to feel like you might miss something important. The good news is that you don’t have to be a solar expert to make a great decision. By learning from the common missteps others have made, you can equip yourself with the knowledge to move forward with confidence.
Think of this as your friendly guide to getting it right from the start. A solar energy system is designed to last for 25 years or more, so a little extra diligence now pays off for decades to come. Avoiding these five common mistakes will not only save you from potential headaches and unexpected costs but will also ensure your system delivers the performance, savings, and energy independence you’re looking for. We want you to feel empowered and excited about your solar journey, and that begins with making a well-informed choice that’s perfectly tailored to your home and your family.
Focusing Only on Price, Not Quality
It’s tempting to sort quotes from lowest to highest, but with solar, the cheapest option is rarely the best value. A lower price tag can often hide inferior equipment that will cost you more in the long run through poor performance and a shorter lifespan. High-quality panels are more efficient, meaning they produce more power in the same amount of space. They also degrade more slowly and perform better in high heat, which is a must for California summers. Investing in premium solar solutions from the start ensures you generate more electricity over the 25+ year life of your system, leading to greater savings and a better return on your investment.
Forgetting to Compare Installer Quotes
Getting multiple quotes is smart, but it’s crucial to compare more than just the bottom-line price. A quality installer provides a comprehensive proposal, not just a number. This includes a detailed breakdown of the specific panels and inverters they plan to use, their system design, and a projection of your system’s energy production. Look for an installer with a strong local reputation, proper licensing and insurance, and extensive experience. Our personalized approach involves a thorough consultation to understand your energy goals, ensuring the system we design is the perfect fit for your home and budget, with no surprises.
Leaving Money on the Table (aka Missing Rebates)
One of the most significant financial mistakes is not taking full advantage of the available incentives. The federal Residential Clean Energy Credit allows you to deduct 30% of the total cost of your solar system from your federal taxes, which is a massive saving. Many homeowners are unaware of this or other local incentives that can further reduce the upfront cost. A reputable solar partner will guide you through all available credits and rebates and provide the necessary documentation to make claiming them simple. You can use our solar estimate calculator to see how these incentives can dramatically lower your net cost.
Ignoring the Condition of Your Roof
Your roof is the foundation for your solar array, and its health is non-negotiable. Installing a brand-new solar system, which has a lifespan of over 25 years, on an old roof that needs to be replaced in five years is a recipe for a costly headache. Having to pay to remove and then reinstall your panels later adds a significant and completely avoidable expense. This is where working with a single company that specializes in both solar and roofing solutions is a huge advantage. We always start with a roof assessment to ensure it’s ready for solar, saving you the hassle and cost of coordinating two separate projects.
Skipping a Battery Backup System
In California, a solar system without a battery is only doing half the job. While panels generate power during the day, a battery stores that excess energy for you to use at night, maximizing your savings under Time-of-Use (TOU) utility rates. More importantly, a battery backup provides true energy independence by keeping your lights and essential appliances running during a blackout or Public Safety Power Shutoff (PSPS). Many homeowners who initially skip a battery end up regretting it. Integrating a battery with your initial solar installation is far more seamless and cost-effective than adding one later, giving you peace of mind from day one.
How to Choose the Right Solar Installer
Choosing your solar installer is just as important as choosing your panels. This is the team that will design your system, secure it to your roof, and handle all the wiring and permits. The right partner makes the entire process feel seamless and ensures your system performs optimally for decades. A great installer is a long-term partner in your home’s energy future, so it’s worth taking the time to find a team you trust.
Think of it like hiring any expert to work on your home. You want someone with experience, proper credentials, and a solid reputation. The good news is that finding a qualified solar installer is straightforward when you know what to look for. From verifying licenses to understanding the value of local knowledge, a few key steps can help you select a professional who will get the job done right.
Key Questions to Ask Before You Sign
Before you commit, it’s time to do a little homework. Start by creating a shortlist of potential installers using comparison websites like EnergySage or SolarReviews. Once you have a few names, ask for proof that they are licensed and insured to operate in your city. You can also check their standing with the Better Business Bureau to see if any complaints have been filed. A key credential to look for is certification from the North American Board of Certified Energy Practitioners (NABCEP), which is the gold standard for technical expertise in the solar industry. Don’t be shy about asking for references from past customers, either.
The Value of Local California Expertise
Working with an installer who has deep roots in California is a huge advantage. Our state has specific rules, building codes, and incentive programs that can vary from one county to the next. A local expert will be familiar with the permitting process in your town and know exactly how to connect your system to the grid without delays. They should also conduct a free, thorough roof assessment as part of their consultation. This helps identify any potential issues, like shading from trees or structural concerns, that could impact your system’s energy production down the line. This local knowledge ensures your project runs smoothly.
How We Make Going Solar Simple
We believe that switching to solar should be an exciting and empowering process, not a confusing one. A big part of that is understanding the financials. The federal solar tax credit, for example, allows you to deduct 30% of your system’s cost from your federal taxes, which significantly lowers the overall price. Our team walks you through every available incentive and helps you understand your return on investment. We provide a clear, personalized solar estimate so you can see the long-term savings for yourself. We handle the paperwork, the permits, and the planning, simplifying every step so you can focus on the benefits of clean energy.
Related Articles
- The Ultimate Guide to How Solar Panels Work
- Best Practices for Buying Solar Panels in 2024 | AMECO Solar
- Solar Proposals: Comparing Solar Energy Options | AMECO Solar
- Solar Panel Home Installation Cost: What to Expect
- Professional Solar Installation: A Complete Guide
Frequently Asked Questions
What's more important: the quality of the solar panel or the quality of the installer? They are equally important, and one is not effective without the other. You can have the most efficient, durable solar panel on the market, but it won’t deliver the expected savings or performance if it’s installed incorrectly. A great installer ensures your system is designed for your specific home, securely mounted, and wired for optimal production. Think of it as a team effort; the equipment and the expertise must work together to give you a reliable system that lasts for decades.
My roof is a bit old. Do I need to replace it before I can get solar panels? Not always, but it’s essential to have it professionally assessed. A solar panel system is a 25-year investment, so you want to be confident your roof can support it for that entire lifespan. A thorough inspection will determine if your roof has enough life left or if a repair or replacement would be a smarter long-term decision. Addressing this upfront prevents the significant and avoidable cost of having to remove and reinstall your panels in just a few years.
Is a battery backup system really worth the extra cost in California? For most homeowners here, the answer is a definite yes. A battery does more than just provide power during an outage, which is a huge benefit on its own. It also allows you to store the excess solar energy your panels generate during the day so you can use it at night. This helps you avoid buying expensive electricity from the grid during peak evening hours, maximizing your savings and giving you true control over your home's power.
With so many brands, how do I choose a panel without getting overwhelmed by technical details? You can simplify the process by focusing on three key factors: efficiency, warranty, and performance in heat. A panel's efficiency rating tells you how much power it can generate in a given space, making it important for smaller roofs. The product and performance warranties protect your investment against defects and guarantee output for years to come. Finally, good heat tolerance is a must for our climate. A good installer can help you compare a few top options that balance these factors for your home and budget.
How can I be sure I'm getting the best possible price after all the credits and rebates? The best way to ensure you get the lowest net cost is to work with an experienced installer who is an expert on all available incentives. The 30% federal tax credit provides the largest savings, but other state or local programs can reduce the price even further. A reputable company will provide a clear, detailed quote and walk you through every single credit you qualify for, so you have a transparent understanding of your final investment.
6.30.2026
Split crews for solar and roofing often blame each other when the first leak appears. This lack of accountability leaves California homeowners stuck with repair bills that neither company wants to pay. Coordination is the key to a lasting install.
Hiring an integrated solar and roofing company ensures your roof installation and solar panels are backed by a single, comprehensive warranty. This unified approach eliminates finger-pointing between separate crews, prevents damage to your new roof. Streamlines project scheduling, and keeps your entire home upgrade fully protected under a single point of contact.
Want to see how much you can save with a single, coordinated project? Call 562-633-4400 today to schedule your free consultation with AMECO Solar & Roofing.
Homeowners in California often face high costs when they try to manage these projects on their own. You need to know how split teams can lead to gaps in your coverage and unexpected repair bills. Understanding these costly pitfalls is the first step toward a successful home upgrade.
The Costly Pitfalls of Hiring Separate Solar and Roofing Contractors
Key Takeaway: Hiring separate contractors for your roof and solar panels often leads to schedule conflicts, finger-pointing when leaks occur, and high risk of voiding your manufacturer roof warranty.
Many people hire one team for a new roof and a second team for solar. This seems like a smart way to find the best deal. But it often leads to high costs and deep stress. When you hire a top solar and roofing company, you get a team that knows both worlds. Without one, two firms work on one roof and they do not talk to each other. This causes gaps in the work and messy plans. You may end up paying much more for a project that takes way too long. It is hard to keep track of two sets of staff, tools, and bills.
Gaps in duty and finger pointing
One big risk is the lack of a single point of contact. If your roof leaks after the solar panels go up, you will face a tough choice. Who do you call first? The roofer may claim that the solar team damaged the tiles while they worked. The solar team might say the roof was already bad before they arrived. This blame game is very common in the home repair world. It leaves you stuck in the middle with a leak and no one to fix it.
A single integrated solar and roofing contractor solves this by taking full duty for the whole job. They handle the roof and the solar panels together. This keeps the lines of talk open and clear. If a problem pops up, you have only one phone call to make. The same firm that set up the roof also set up the solar gear. They cannot blame someone else because they did all the work.
Scheduling delays and project friction
Setting up two crews requires a lot of hard work from you. You have to align two separate timelines that may not fit well. If the roofers are late because of rain, the solar team must move their start date. These firms often have full lists of clients. If you lose your spot, you might wait for weeks or months. Broken plans can waste your time and make your home a work zone for a long stay.
Working with one solar and roofing company helps you avoid these long waits. They plan the work in steps that make sense for your home. First, they check if the roof can hold the heavy panels. Then they do the roofing and solar work in one smooth flow. They do not have to wait for a third party to finish a task. As per the U.S. Department of Energy, it is a great time to add solar when you replace your roof.
Risks to your roof warranty
Split teams can also put your roof warranty at risk. Many roofing firms will void your shield if a third party drills into the new tiles. Solar crews might use tools that do not respect the roof's health. You need pros who know how to protect the build. If a solar crew breaks a shingle and does not fix it, water can get into your home. This can lead to rot and mold that costs a lot to clean up.
Research from Louisiana State University shows that solar panels can change wind forces on a roof. These panels can reduce wind stress by 45% to 63% on some roofs. But they must be set up right to get these gains. If the setup is bad, the roof frame may fail under the load. A joined team ensures that every step follows the rules to keep your warranty safe. They know how to link the panels to the roof without causing leaks or damage.
How an Integrated Solar and Roofing Company Simplifies Your Home Upgrade
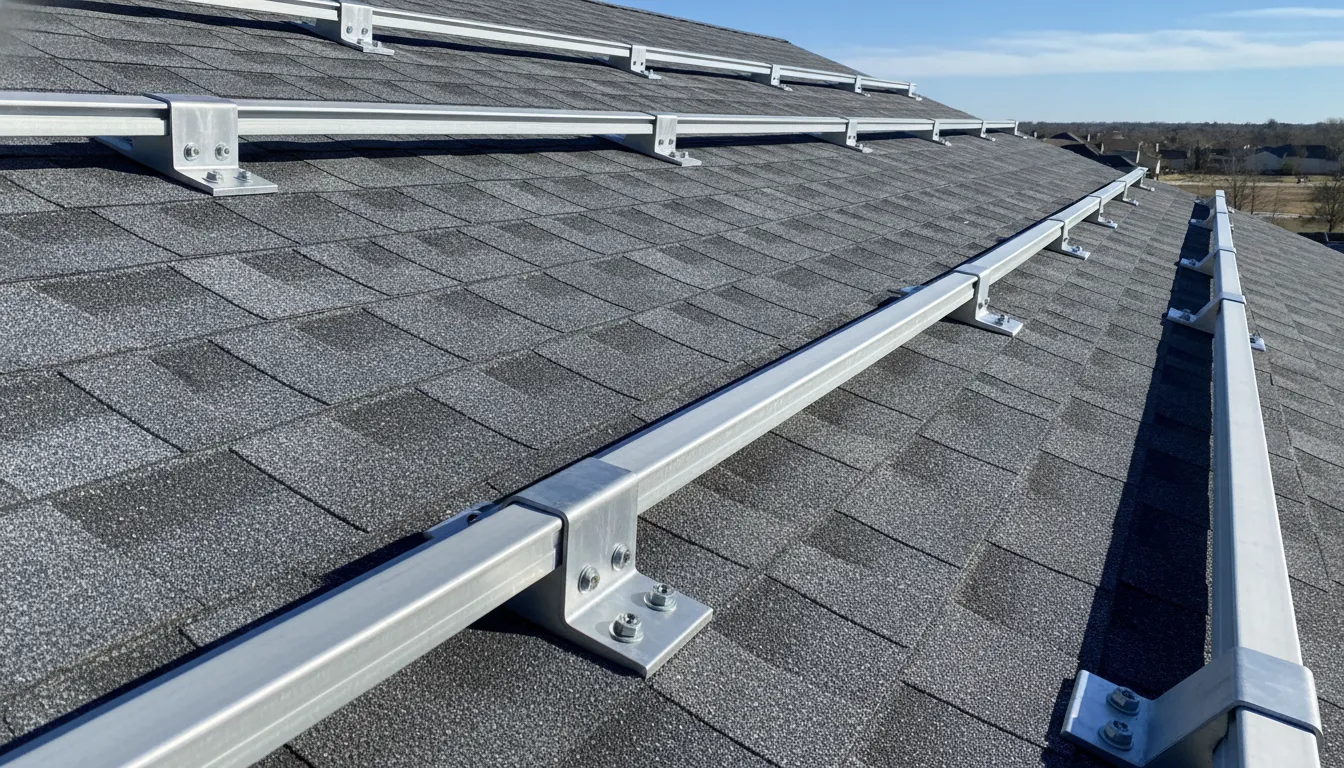
Key Takeaway: An integrated contractor provides a single point of contact, holds proper dual California licenses (C-39 and C-46), coordinates timelines, and guarantees the entire project under one combined warranty.
Picking two other crews for solar and roofing often leads to extra stress and big mistakes. One team handles both jobs at an integrated solar and roofing company. This means the same group plans and builds your project from start to finish. You get one point of contact instead of guiding many workers and plans.
One Team and One Plan
Hiring one team stops the blame game since they cannot blame another crew for leaks. A single integrated solar and roofing contractor owns the whole job. This setup protects your home because one team is in charge of both the roof and the panels. They make sure every part works together to keep your home dry and safe.
Proper State Licenses
In California, a solar and roofing company needs exact legal papers. A pro team must have a C-39 license for roofing and a C-46 license for solar. Many solar shops use outside help for the roof because they lack these licenses. This can lower the grade of work and may even hurt your roof warranty.
Working with licensed pros ensures the job meets all local rules. These experts follow strict building codes to keep your family safe. They also know how to match your roof parts with the best solar tools for a tight fit. This careful work helps you avoid leaks or loose parts so you can trust the work is done right.
Faster Timelines and Less Extra Cost
Working with two teams takes more time because you must wait for the roofers to finish first. A combined team plans these steps at once to save you time. They can often finish the roof and start the solar work in just a few days. This removes the stress of guiding many project plans on your own.
This model also makes future help very simple for you. If you ever have a problem, you only make one call for support. You do not have to guess which team needs to fix a specific issue. The table below compares the integrated approach to using separate teams:
| Feature | Integrated Contractor | Separate Contractors |
|---|---|---|
| Accountability | Single point of contact; one company owns both trades and guarantees the entire project. | Divided responsibility; potential for finger-pointing over roof damage or warranty issues. |
| Licensing & Quality | Holds dual C-39 (Roofing) and C-46 (Solar) licenses; all work is handled in-house. | Usually subcontractor-reliant or lacks specialized roofing expertise and certifications. |
| Warranty Protection | Aligns roofing and solar warranties; pre-installation planning keeps warranties fully intact. | One trade may void the other's coverage; separate installers often refuse to honor repairs. |
| Project Timelines | Coordinated scheduling; roofing finishes and solar installation begins seamlessly. | Frequent delays due to conflicting schedules, multiple managers, and miscommunication. |
Simplify your home improvement project. Request a free roofing and solar estimate online or call our team at 562-633-4400.
Does Installing Solar Panels Affect Your Roof Warranty?
Key Takeaway: Adding solar panels can void your roof warranty if done by uncertified installers. Working with a certified solar and roofing specialist ensures your structural protection remains completely intact.
Many homeowners worry that adding solar panels will void their roof warranty. This fear is valid when you work with two different firms. Most roof makers only allow certified teams to make holes in their products. If a standard solar firm drills into your roof without the right training, your warranty could end. This leaves you with no cover if a leak or other issue occurs later. It is vital to check your contract before you start any work.
When you use separate teams, you often face "finger-pointing." If your roof fails, the solar firm might blame the roofers. The roofers may claim the solar setup caused the damage. This gap in trust can cost you thousands of dollars in repairs. Working with a qualified solar and roofing company helps you avoid this trap. One team handles the whole job and stands behind every part of the work.
The value of a pre-install assessment
A strong roof is the base for any solar project. Before you add panels, you must check the roof structure. The U.S. Department of Energy notes that homeowners should verify their roof is ready for the new load. An expert team looks at the age and health of your shingles. They ensure the wood below can hold the extra weight for twenty years or more. This check prevents early roof failure and keeps your home safe.
If your roof is near the end of its life, it is best to fix it first. Adding panels to a weak roof is a big risk. You would have to pay to remove the panels, fix the roof, and put the panels back later. A combined team finds these issues early. They plan the roof and solar work together so everything lasts a long time. This simple step protects your wallet from big surprise costs down the road.
Why certifications matter for solar
Not all solar setups are the same. Elite teams hold special status to keep your warranty safe. AMECO holds the Owens Corning Solar PROtect status. This ensures our roof work meets the strict needs of a solar system. We are a vertically integrated firm, which means our own staff does all the work. We do not use outside help that might not follow our high standards. This gives you one point of contact for the life of your system.
Keeping your home protection intact
An integrated team ensures your roof warranty stays in place. We align the solar racks with the roof flashings to prevent leaks. Since we know both trades, we use tools that do not harm the roof seal. Our team follows the maker's rules to the letter. This means you do not have to worry about who is to blame if something goes wrong. We take full ownership of the project from the first day to the last.
Coordinated Planning: Why Pre-Installation Roof Assessment Matters
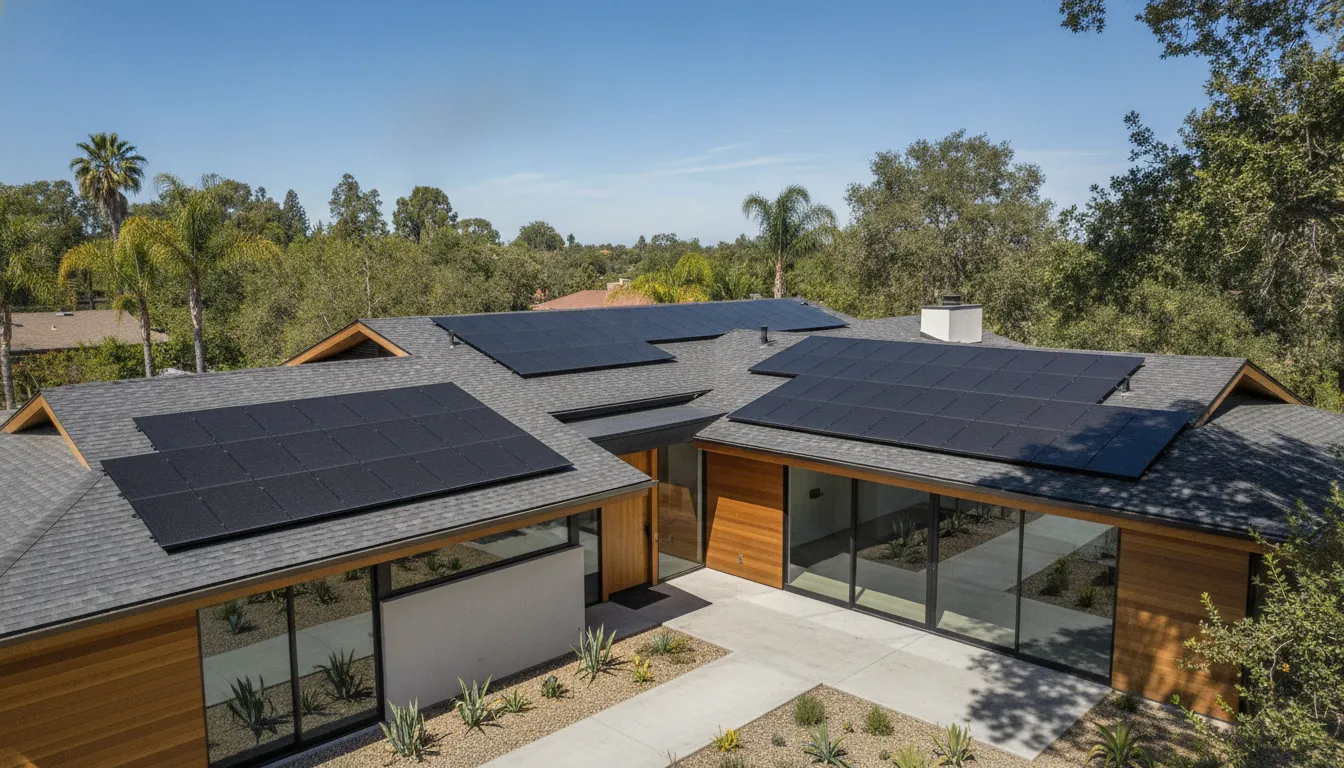
Key Takeaway: A rigorous 7-step pre-installation assessment evaluates structural load capacity, shingles lifespan, and material compatibility to prevent premature roof failure or unexpected removals.
Before you place heavy solar panels on your home, you must know if your roof can handle the weight. A professional integrated solar and roofing contractor will start with a full roof check. This step finds small leaks or weak spots that could become big problems later. It ensures your roof has enough life left to match the long span of a solar system.
Check structural strength and life span
Solar panels add a lot of weight to your home. A proper site check looks at the roof load and your home's frame. The U.S. Department of Energy notes that checking your site is a key part of the process. If your roof is old or weak, it is much better to fix it now. This saves you from the huge cost of taking panels off to fix the roof in just a few years.
An integrated team conducts a systematic pre-installation assessment in these four steps:
- Initial Surface Inspection: Examining the shingles, flashing, and underlayment for signs of damage or leaks.
- Structural Engineering Review: Calculating the rafters' and trusses' load-bearing capacity to confirm they can safely support the solar array.
- Roof Lifespan Valuation: Assessing the remaining age of the roofing material to ensure it aligns with the 25-to-30-year operational life of the solar system.
- Component Compatibility Mapping: Verifying that the existing roofing materials (e.g., asphalt shingle, tile, or metal) are compatible with specific solar mounts and watertight flashing systems.
- Wind and Seismic Load Stress Testing: Evaluating local wind and seismic factors (crucial under California building codes) to design secure panel attachment points.
- Electrical and Conduit Path Planning: Mapping out the safest, least intrusive pathways for electrical conduit lines from the roof to the main panel, protecting both the roof's seal and home aesthetics.
- Final Warranty Alignment Check: Cross-referencing the proposed mounting designs with the original roof manufacturer's guidelines to guarantee the existing warranty remains 100% intact.
A good check also looks at the materials. Some roofing materials compatible with solar work better than others. An expert will see if your current roof fits the new gear. They will also look for any signs of mold or rot that could hurt the roof's grip on the panels.
Protect your long term roof warranty
Working with one solar and roofing company keeps your warranties safe. When you use two different teams, they may blame each other if a leak happens. This "finger-pointing" can leave you with no help when you need it most. A single team takes full care of both the roof and the solar gear. This means one firm is at fault for any issues, which gives you peace of mind.
Integrated teams also use tools that protect the roof's seal. Some solar mounts can even help with wind forces. A study at Louisiana State University shows that panels can lower wind force on parts of a roof by up to 63%. A team that knows both fields can set up your system to maximize these perks. They make sure every bolt and seal meets high standards for both solar power and roof safety.
Can You Coordinate Solar and Roofing Installation at the Same Time?
Key Takeaway: Coordinating both installations at once provides significant cost savings. Creates an ideal weather shield that can reduce wind forces by 45% to 63%, and gives you complete project peace of mind.
Yes, you can plan your roof and solar work for the same time. Many experts say this is the best way to upgrade your home. Doing both at once makes the job easier and saves you stress. It also helps your home stay strong for years to come.
Per the Department of Energy, fixing your roof is a great time to add solar. This move lets you start fresh with a solid base for your panels. You won't have to worry about taking panels down later to fix a leak. A solar and roofing company can manage both parts of the job to make sure they fit right.
Cost and Building Gains
Mixing these two jobs offers clear cost gains. You only have to deal with one team and one set of papers. This saves you time and cuts down on extra costs. It also makes sure your roof can hold the weight of the new panels.
Your solar choice also adds strength to your home. New tests show that adding panels can help protect your roof from bad weather. This makes your house a safer place to live. Using an integrated solar and roofing contractor makes sure your home stays sound during the work.
Weather Strength and Wind Shielding
Research shows that solar panels do more than just make power. They act like a shield against high winds. On a gable roof, solar panels can cut wind forces by 45% to 63%. This keeps your roof parts from blowing loose during a storm.
This shield effect helps your roof last longer. It takes the brunt of the wind and sun. This means your roof stays in good shape for more years. By choosing a pro team, you get a setup that guards your house from the elements.
One Team for Full Trust
When you use one team for both jobs, you avoid big risks. Many people hire two different firms and face issues later. If a leak happens, each firm might blame the other. This makes it hard to use your warranty.
A single firm takes full duty for all the work. They make sure the roofing materials compatible with solar are used from the start. This gives you peace of mind and keeps your home safe. You get one clear point of contact for any help you need in the future.
How Does an Integrated Contractor Impact Future Maintenance and Service?
Key Takeaway: Working with a single company simplifies long-term maintenance, streamlines warranty repairs, and makes it seamless to add future technologies like battery storage and EV chargers under NEM 3.0.
Choosing an integrated solar and roofing contractor changes how you handle home care for years. When one team handles both the roof and the panels, you get clear lines of work. This setup prevents finger-pointing if a leak or a technical issue occurs down the road. Instead of calling two separate shops, you have one point of contact for every repair and check-up.
Unified Warranty and Repairs
One of the best wins for homeowners is having a single warranty. If you use two firms, they may blame each other for problems. The roofer might say the solar team caused a leak. The solar team might say the roof was too old. An integrated company owns the whole project, so they fix any issue that comes up. This coordinated planning ensures your roof stays sound and your panels stay powered.
Future service is easier when the same team knows your home. They have the plans for how the panels attach to the roof. This knowledge helps them find and fix issues fast. They also ensure that any roofing services you need later do not harm your solar setup. You avoid the risk of a new crew making a costly mistake on your roof.
Support for California Energy Needs
In California, energy rules change fast. Under NEM 3.0, many people now add battery storage systems to their solar plans. An integrated contractor can manage these tools while keeping your roof safe. They ensure that mounts and wiring do not create paths for water to damage your home. This full view is vital as utility rates and storage needs grow over time.
Regular checks are also simpler to book. You can schedule a roof check and a solar cleaning at the same time. This saves you time and often cuts the cost of service calls. Since the team knows how solar loads affect the roof, they can spot wear before it turns into a leak. This care helps protect your long-term investment in clean power.
Frequently Asked Questions
What are the benefits of hiring one solar and roofing company?
Hiring one solar and roofing company makes the whole job much simpler for you. You only have to talk to one team for all your needs. This means less stress and a better plan from start to finish. It also stops other groups from blaming each other if a problem comes up later. Based on AMECO Solar, using one team makes it clear who is in charge of your warranties. This keeps your home safe.
Does installing solar panels affect my roof warranty?
Installing solar panels can void your roof warranty if the work is not done right. This is why you should pick a skilled solar and roofing company. They use ways that keep your roof strong and safe. By doing both jobs at once, the team makes sure the solar mounts do not cause leaks. According to AMECO Solar, expert pros follow rules that protect your old roof warranty. This helps you avoid high costs if your roof needs help in the future.
Why should I check my roof before getting solar panels?
Checking your roof first is a key step for any solar plan. A solar and roofing company will look for weak spots or old tiles. This makes sure your roof is strong enough to hold the heavy panels for many years. You do not want to put panels on a roof that needs a new one soon. The Department of Energy says this saves you from paying to move the panels later.
How does using one company for solar and roofing help with repairs?
If you need help later, you only have to call one place. A solar and roofing company knows how both parts work together. They will not blame another group for a leak or a broken panel. This makes getting repairs much faster and less costly for you. One team can check your roof and your solar system at the same time. This keeps your whole home energy system working well and saves you time on care.
Ready to simplify your home solar and roofing project?
Hiring two different firms often leads to blame and costly delays, so you should act now to save on your bills and protect your own home. If you wait to start your project, you risk missing out on power savings and the state tax perks that are only open for a short time. Working with a single team ensures that your roof is safe and your solar panels are set up the right way from the very start. Our roofing services team handles the full job for you so you get one solid warranty and a clear path to lower bills for years.
Ready to schedule your free consultation? Call 562-633-4400 to request your free estimate and book your expert site inspection with our local team today to start saving.
6.30.2026
Specific questions to ask solar contractor candidates include topics like licensing, roof health, and equipment quality. You must check that your installer holds an active state license, which ensures they follow building and safety laws while working on your roof. A strong checklist includes detailed questions about permit handling and utility setup while checking if the company uses in-house crews for the work. You must also always review your warranty support and roof protection plans to ensure your system design fits your long-term energy needs today. This process ensures your solar investment remains highly productive and secure for thirty years without the risk of leaks, failed inspections, or hardware failure.
Questions To Ask Solar Contractor: Why Interviewing Your Solar and Roofing Contractor is Your Most Critical Decision
Buying solar panels and a new roof is a big step for any home. In California, these systems must work well for years to save you money on power bills. Picking the wrong team can lead to leaks, broken parts, and lost savings. This is why asking the right questions to ask solar contractor teams is the best way to protect your home. A good talk helps you see who has the skills and who is just trying to sell you a fast deal. You need to know that your crew knows the weather and building codes in your local area.
Risks of poor vetting
When you do not check a contractor well, you risk more than just a bad job. Poor work can void your roof warranty or lead to safety issues with your wiring. In California, new rules from Assembly Bill 1070 now require contractors to show specific safety and licensing facts to every buyer. These laws help stop scams and make sure every job meets high standards. If a pro cannot answer basic questions about their license or their past work, they may not be the right fit for your project. You should also look for these red flags:
- Lack of a real office in your area.
- Pressure to sign a deal before you read all the fine print.
- Vague answers about who will do the actual roof work.
- No proof of insurance for their staff.
Benefits of integrated specialists
Choosing a team that handles both solar and roofing in one shop is a smart move. When one firm does all the work, you have just one point of contact for your whole system. This stops different crews from blaming each other if a leak starts later. Integrated pros also know how to check your roof for strength before any panels go up. This plan can even save you about $4,000 on the total cost of the work according to NREL research. It makes sure your roof is ready to hold the weight of a solar array for its full life.
Success for your solar project
A strong talk gives you the peace of mind you need. You can find out if the crew works for the firm or if they use outside workers who might not know the area. Asking questions to ask your solar contractor about their past work helps you find a partner you can trust. You want a team that has been around long enough to stand by their work. This is vital when you look at long-term savings and system care. Use the next checklist to guide your search and pick the best team for your California home.
Are You Licensed, Insured, and Bonded in California?
Before you sign a contract, you must know if your solar team is legal. In California, a solar job often needs two types of skills. A C-10 Electrical license covers the wiring and power setup. A C-39 Roofing license is for the work on your roof. Hiring a team with both helps you avoid leaks and keep your roof warranty safe.
AMECO Solar & Roofing has been a leader in this field for a long time. We hold California license #483280, which has been active since 1985. We handle both solar and roofing under one roof. This way, you do not have to deal with two different groups. Having a single point of contact makes the whole job much easier for you.
Checking for the Right Licenses
Checking for a license is just the start of your search. You should also ask about insurance. General liability insurance covers damage to your home. Workers' compensation protects the crew while they are on your roof. A bond is like a safety net for your money. It ensures the work gets done as promised by the team.
A good solar team will share these details with you. They should prove they are ready to protect you and your home. You can verify a solar contractor's license through the state board. This step shows that they follow safety and building rules. It gives you peace of mind before the work starts.
Top Questions to Ask Your Solar Contractor
Finding the right help for your home means asking the right things. You need a pro who knows local laws and grid rules. Use these steps to vet your options and find the best fit for your project.
- Ask for the company's state license number. Verify the number on the state board website to see if it is active. AMECO has used license #483280 for decades to serve local families.
- Confirm the team holds both C-10 and C-39 classes. This ensures the crew knows how to wire your system and protect your roof. Mixing these tasks can also save you about $4,000 on project costs.
- Request proof of current insurance. Make sure they have liability coverage and workers' comp for every person on your job site.
- Check if the company is bonded. A bond protects you if the contractor fails to finish the work or pay their bills.
- Ask how long they have worked in California. Long-term teams like AMECO understand local grid rules and utility needs. You can price out your project online to get started today.
What Strong Answers Look Like
A strong pro will not wait to show you their proof. They will explain why their licenses matter for your specific roof. They will also talk about how they work with local power groups. If a team cannot show these proofs, it is best to keep looking. Protecting your home is worth the extra time. A true expert will always put your safety and your home's health first.
Who Handles My Roof Condition and Warranty Under the Solar Panels?
The risk of separate teams
Many people worry about what happens to their roof after solar panels go up. If you hire one team for the roof and a new team for solar, you might face a big problem later. When a leak happens, the solar team may blame the roofers. The roofers might say the solar install caused the damage. This "finger-pointing" can leave you with a broken roof and a voided warranty. It is one of the most key questions to ask your solar contractor before you sign any deal.
Working with two separate firms can lead to gaps in help. A roofing firm may not want to fix a leak if they think the solar mounts caused it. At the same time, the solar firm may claim the roof was already in bad shape. This back-and-forth can cost you thousands of dollars in repairs. You need to know who is in charge of the area under the panels for the next two decades.
Why integrated firms help
Choosing a firm that does both roofing and solar can save you from these headaches. AMECO Solar & Roofing is a full firm that handles both jobs under one roof. We are Owens Corning Solar PROtect certified. This status means we follow strict rules to keep your roof safe while adding panels. Having one point of contact means there is no one else to blame if a problem starts. You get a clear path to help and a warranty that covers the whole system.
This approach makes sure that every mount and seal meets high standards. Our team knows how solar loads affect different roof types. We do not just bolt things down; we make sure the roof stays watertight. This is one of the key questions for solar installers you should check during your search. It is better to have one team own the entire outcome of your project.
Checking your roof first
A good team will always check your roof before they put panels on it. Most solar panels and roof materials last about 25 to 30 years, according to the U.S. Department of Energy. If your roof is old, it makes sense to replace it at the same time you get solar. This avoids the high cost of taking the panels off and putting them back on later. Our experts look for soft spots, leaks, and structural issues before we ever start the install.
At AMECO, we offer a 40-year equipment warranty to give you long-term peace of mind. This far exceeds the standard 25-year plans most other firms offer. We also make sure your project meets the state license rules set by the California Contractors State License Board. By checking everything first, we help you avoid surprises and keep your home safe for years to come.
What Specific Equipment Brands and System Design Do You Recommend?
One of the top questions to ask solar contractor teams is what brands they use. The gear on your roof must last for many years. We use brands with a long track record of success. Our team picks parts that work best for the California sun.
High Power Solar Panels and Inverters
We suggest REC panels for their high power and strength. In 2026, AMECO earned the REC Gold Tier award for our work. This status shows our skill with their tech. These panels pair well with Enphase microinverters. As an Enphase Silver installer, we know how to set up these parts for the best results.
Enphase microinverters sit behind each panel. They help your system keep working even if one panel is in the shade. This design is great for homes with complex roofs. It also makes it easy to track how much power each panel makes through a phone app. You can find more questions about solar energy bids to help you choose the right parts.
Reliable Battery Storage and Roofing
Many owners now want a battery to store power. We are a Tesla solar roof certified team. We often set up the Tesla Powerwall for battery backup. This system uses lithium-ion cells, which are the most common battery chemistry for home use today. A battery helps you keep the lights on during a grid power loss.
We also look at your roof before we start. AMECO has the Owens Corning Solar PROtect badge. This means we know how to seal your roof so it does not leak. A good team should check if your roof can hold the weight of the new panels. We offer a 40-year gear warranty that is much longer than the industry standard.
Compare Your Gear Options
Different homes have different needs. We offer three tiers of gear to fit your budget and goals. You can Calculate Your Project to see which tier fits your home best. Use this table to compare our top choices.
| Items. | Premium Tier. | Power Tier. | Value Tier. |
|---|---|---|---|
| Solar Panel Brand. | REC Alpha Pure-R. | Q Cells G10+. | Silfab Prime. |
| Inverter Type. | Enphase IQ8 Series. | Enphase IQ8 Series. | String Inverter. |
| Battery Ready. | Built-in Support. | Add-on Support. | Basic Support. |
| Warranty Length. | 40 Years Total. | 25 Years Total. | 25 Years Total. |
| Roof Protection. | Full Badge. | Standard Seal. | Standard Seal. |
Choosing the right brands is just the start. You also need a smart design that fits your roof shape and energy use. Our team designs each system to get the most sun all year long. This helps you save the most on your power bills over time.
How Are California Permits, Interconnection, and Project Timelines Managed?
Setting up solar power in California involves many steps. A strong team will handle the hard parts for you. They should take care of all city permits and utility paperwork. This lets you focus on the savings. Knowing what to expect helps you plan your home project.
Managing the Permit Process
Every solar system needs a permit from the building office. This ensures the design is safe and meets state codes. In California, you should check that your team has an active state license to get these permits. A good team creates the plans and files them with the city. They also handle the final check once the work is done.
When you look for a team, one of the top questions to ask solar contractor firms is how they handle delays. Cities can take a few days or weeks to approve a permit. A local firm knows how to move through this process fast. This saves you time and stress. They can also tell you if your city has specific rules for roof work or solar panels.
Working with California Utilities
Your system must connect to the power grid to work well. This step is called interconnection. It is even more vital now under the new NEM 3.0 rules. These rules are also known as the Net Billing Tariff. Your firm must send a formal request to your utility company to get permission to operate.
We have deep skill with all major California utilities. This includes PG&E, SCE, SDG&E, and LADWP. We manage the full paperwork for you. We make sure your system meets the utility rules so you can start saving right away. A good contractor will track this request every day until it is approved.
The Solar Project Timeline
A professional solar project often takes about two months. This starts when you sign the contract. The first big step is a site visit. An expert will check your roof and power panel. They make sure your home is ready for solar. After that, they create a custom design for your system.
The build only takes one or two days. The rest of the time is for city checks. Most of this time is spent waiting for the city or the utility company to act. We track every step to keep things moving. A clear timeline is one of the most vital key questions for solar installers to answer.
The permits and utility checks often take the most time. Having one contact for solar and roofing helps avoid conflicts. This keeps the project on track. It also ensures your warranties stay strong for years to come.
What Financing Options Are Available for California Solar?
Buying solar panels is a big choice for most people in California. You can choose to buy your system or lease it. Each way has its own perks. Buying lets you own the gear and get tax breaks. Leasing often costs less at first, but you do not own the panels. A good contractor will help you see which path fits your home and budget best.
Choosing Between Purchase and Lease
When you buy a solar system, you pay for the whole thing yourself or with a loan. This path lets you take the federal tax credit and other help. Over time, owning your panels can save you the most money. If you want to see what your project might cost, you can calculate your project online to get a quick idea.
Solar leases or power purchase plans are different. With a lease, a company owns the panels on your roof. You pay a set fee each month to use the power they make. This is often good for people who do not want to pay a lot of money upfront. You can also look into prepaid leasing. This lets you pay the lease costs all at once, which can save you money over a monthly plan.
Understanding Tax Perks and PACE
The state and federal groups offer help to make solar cheaper. The federal tax credit is a major perk. This credit now lets you take 30% of your system cost off your federal taxes. Trusted firms will give you clear facts on these tax breaks and local perks for your job. It is vital to talk to a tax pro to see how much you can save.
California also has PACE financing. This lets you pay for solar through your property taxes. But there are strict rules for this. You must get a PACE disclosure form before you sign a deal. This form shows you the full cost and terms so you are not surprised later. Always check that your solar firm knows these rules well.
Key Questions for Your Solar Contractor
You should ask your solar firm many things about how you will pay. A strong contractor will be open about every cost. Ask them how they handle permit bids and talk to the utility firm. They should manage all permit steps and work with the power company to get your system online fast. This is one of the key questions for solar installers you should ask.
Also, ask to see the system disclosure papers. California law says these forms and your contract must be in the same language used during the sales talk. This protects you by making sure you know what you are signing. If a firm avoids these questions, it may be a sign to look for a different team.
What Post-Installation Support and Warranties Are Guaranteed?
Buying a solar system is a big step for any home. You want to know that your project will last for a long time. This is why warranties matter so much. They give you peace of mind and protect your cash.
When you look at other teams, ask how they handle help after the job is done. This is one of the top questions to ask solar contractor pros before you sign.
Forty years of gear coverage
Most solar panels are built to be tough and last for many years. AMECO gives a 40-year gear warranty on residential solar systems. This long-term plan makes sure your panels keep making power as they should.
Having a solid hedge against risks helps you save more money over time. High grade parts also help improve the power quality and reliability of your home energy supply.
This long plan is much better than the field norm. It covers the parts that make up your system. If a panel fails or stops working well, the warranty helps fix the issue. Reliability is key to getting the most out of your sun power.
You can use our Calculate Your Project tool to see how long-term savings add up when your system is safe for years. Trust is vital to a good solar plan.
Installer versus manufacturer warranties
It is vital to know the gap between two types of coverage. A manufacturer warranty covers the gear itself. This includes the panels and the inverter.
An installer warranty covers the real work done on your roof. This is often called a workmanship vow. It makes sure that the team put the system in right and that your roof stays dry and safe.
AMECO has been in work since 1974. This history and way of working means we have seen how solar tech has changed over 50 years. Many new firms might offer a long warranty but then go out of business.
You need a partner that will be there if you have a leak or a tech flaw ten years from now. Our deep roots in California mean we stay close to the homes we serve.
Ongoing system support
Support does not end once the panels are on your roof. You may need help with your system monitor or have things to ask about your bill. A good contractor will offer a clear way to get help when you need it.
This includes help for battery units and EV chargers too. We want to make sure your system works at its best from day one through year forty.
When you talk to solar teams, ask how fast they reply to service calls. Ask if they have a local crew or if they hire outside help.
A local team that owns their work will often give you better care. We take pride in our full service. From the first plan to the final check, we are the only team you need to call for any solar or roof needs.
Frequently Asked Questions
How do I check a solar company's license?
You should check if a pro holds an active state license. In California, the Contractors State License Board sets strict safety rules for solar work. A firm with a long history, like AMECO Solar & Roofing which has served people since 1974, shows they can handle tough jobs. Ask how long they have worked in your area and if they use their own teams. This helps you find a stable partner for your home solar project.
Does my roof need to be new for solar?
Your roof does not need to be new, but a pro should check its strength before starting. Since panels last about 25 to 30 years, your roof must be in top shape to support them. According to the Department of Energy, you can save about $4,000 by fixing your roof and adding solar at the same time. This avoids the cost of taking panels down later for repairs.
What are the best solar panel brands to use?
The best brands offer high power and last for a long time. Your installer should explain why they pick certain parts for your home. For example, AMECO is a Tesla trained installer and an Enphase Silver installer. Most new systems use lithium-ion batteries because they are the best way to store power for later use. Choosing well-known brands helps ensure your system stays strong and steady for decades.
How do you handle permits and utility setup?
A skilled pro manages the full permit process for you. They must work with local offices and your power firm to get your system online. In California, this means knowing the rules for utilities like PG&E, SCE, and LADWP. According to AMECO Solar & Roofing, your pro should handle all the forms and setup steps. This keeps your project on track and ensures your system meets all local safety codes before it starts running.
What solar warranties should I look for?
You should look for clear terms that cover both the parts and the work. Some firms give better safety than the basic field standards. For instance, AMECO provides a 40-year warranty on parts. Having one company handle both your solar and your roof also prevents fights over who is at fault if a leak happens. This single point of contact makes it easier to get help if you have a problem with your system in the future.
Are you ready to book your free solar and roofing consultation with AMECO now?
High power bills in California stay high, and each month you wait is more money lost to the grid as rates go up each year. Starting your solar and roofing work now lets you lock in costs today and avoid missing out on tax breaks that could end soon. Our team handles the design and permits for you, and you can even check your savings with our solar calculator before our first meeting.
Ready to get started? Call 562-633-4400 to schedule a free solar and roofing consultation with AMECO Solar & Roofing. Find out how much you can save on your energy bill each month starting today.
6.30.2026
At first glance, a solar panel is a solar panel. But the system powering a family home is fundamentally different from the one on a sprawling commercial facility. It’s like comparing a home kitchen to a professional restaurant kitchen. Both are used for cooking, but the equipment, layout, and scale are designed for completely different purposes. The same is true when comparing commercial solar panels vs residential systems. One is tailored for household efficiency and aesthetics, while the other is engineered for maximum power output and financial return. Understanding this distinction is the first step in your solar journey, ensuring the system you choose is perfectly suited to your energy needs and property.
Key Takeaways
- Home vs. Business Goals: A residential system is tailored to your family's energy use and your home's appearance. A commercial system is a powerful workhorse designed to maximize energy production and offset a business's substantial operating costs.
- Understand the Investment: Homeowners can expect a smaller total cost and accessible financing options. Businesses make a larger initial investment but benefit from a lower cost per watt and unique tax advantages that create a strong financial return.
- Expect Different Timelines: A home solar installation is a quick project, often finished in just a few days with very little long-term maintenance. A commercial installation is a more complex process with a longer timeline for permits and construction.
Commercial vs. Residential Solar: What's the Real Difference?
When you see solar panels on a neighbor’s house and then on the roof of a large warehouse, you might assume they’re pretty much the same. While the fundamental technology is identical, the design, scale, and goals for residential and commercial solar projects are worlds apart. Think of it like the difference between a family car and a commercial delivery truck. Both have engines and wheels, but they’re built for entirely different jobs. A homeowner wants a system that blends with their home and covers their family’s energy use, while a business owner needs a powerhouse system to offset massive operational costs.
Understanding these distinctions will help you appreciate what goes into designing the right system for your specific needs. It’s not just about putting panels on a roof; it’s about creating a tailored energy solution that aligns with your property, your power consumption, and your financial goals. Let’s break down the key differences so you can feel confident about the path you choose for your home or business.
Comparing Size, Design, and Power
The most obvious difference between residential and commercial solar is scale. A typical home solar system is designed to offset the energy use of a single family, usually producing between 5 and 20 kilowatts (kW) of power. In contrast, a commercial system for a business or factory needs to support much heavier electrical loads and can easily scale to 100 kW or more.
This difference in power output is directly related to the panels themselves. Residential panels are smaller, often containing 60 to 120 solar cells, and are designed to fit neatly on the varied angles of a home’s roof. Commercial panels are physically larger, with 72 or more cells, to maximize energy production in a large, open space. They are built to be workhorses, prioritizing maximum output over fitting into a tight spot.
Understanding Panel Efficiency: Mono vs. Poly
Panel efficiency is simply a measure of how well a panel converts sunlight into usable electricity. While you might see a lot of technical jargon, the difference between residential and commercial panels is pretty straightforward. Commercial panels often have a slight edge in efficiency, typically ranging from 20% to 22%, because every square foot of roof space needs to generate as much power as possible to offset high energy costs.
Residential panels are incredibly effective as well, usually hovering between 18% and 21% efficiency. For a homeowner, the goal is to find a sweet spot between high performance and overall cost. This is why our solar solutions are always tailored to find this perfect balance for your home's unique energy profile and your budget, often using highly efficient monocrystalline panels that also offer a sleek, uniform look.
Reviewing Mounting Options and Aesthetics
Where and how panels are installed also differs greatly. For homeowners, aesthetics matter. You want a system that looks great and integrates seamlessly with your home’s architecture. Residential installations are typically mounted directly onto sloped roofs, following the existing roofline for a low-profile look. You can even see how panels might look on your own home with our 3D Home Visualizer.
Commercial buildings, on the other hand, often have large, flat roofs. This provides an ideal platform for mounting panels on tilted racks that can be angled perfectly toward the sun to maximize energy capture. Since we are also a roofing company, we have the expertise to ensure any installation, whether on a sloped or flat roof, maintains the integrity of the structure underneath for decades to come.
What Does the Installation Process Look Like?
Getting solar panels installed on your property is an exciting step, but it’s natural to wonder what the process actually involves. The journey from our initial consultation to flipping the switch on your new system is a well-planned project. The timeline and steps can vary quite a bit depending on whether we’re working on a home or a commercial building. A big piece of the puzzle is the behind-the-scenes work, like design, engineering, and securing permits, which happens before our crew even arrives.
At AMECO, we’ve refined this process over decades to make it as smooth and transparent as possible for you. We believe that a great installation experience is just as important as the quality of the panels themselves. Our approach is centered on clear communication and expert project management, so you always know what’s happening and when. We handle the complexities so you can focus on the future benefits of clean, reliable energy. Let’s walk through what you can typically expect for both residential and commercial installations.
The Residential Installation Process
For most homeowners, the physical installation of solar panels is surprisingly quick. Once your system design is finalized and all the necessary permits are approved, our professional crew can typically complete the entire on-site installation in just one to three days. We coordinate everything to minimize disruption to your daily routine. Our team works efficiently to mount the racking, install the panels, and connect the electrical components. We pride ourselves on leaving your property as clean as we found it. This streamlined process is one of the biggest perks for our residential customers, getting you closer to energy independence without a lengthy construction project.
The Commercial Installation Process
A commercial solar installation is a larger-scale project and naturally has a longer timeline. Due to the size and complexity, these installations can take several weeks or even months to complete. The process involves extensive structural evaluations of your building, close coordination with utility companies, and often more intricate mounting systems, especially for large, flat roofs. While it’s a more involved undertaking, our team manages every detail to ensure the project progresses smoothly. We understand that for commercial customers, time is money, so we work diligently to complete the installation efficiently while ensuring the final system is safe, robust, and built to perform for decades.
Breaking Down Permits, Approvals, and Timelines
A significant portion of any solar project timeline is dedicated to paperwork, not physical labor. Before we can install a single panel, we need to secure permits from your local city or county and get approval from the utility company. For residential systems, this process is often straightforward and can move relatively quickly. However, commercial permitting is much more complex, involving detailed engineering reviews that can take weeks. This administrative phase is critical for ensuring your system is safe and compliant with all regulations. Handling this is a key part of our approach; we manage all the applications, follow-ups, and inspections so you don’t have to.
Let's Talk Cost: What's the Investment?
Okay, let's get straight to the point: what does a solar system actually cost? It’s the number one question on everyone’s mind, and the answer depends entirely on your unique situation. Thinking of it as an investment, not just a purchase, is the right mindset. You’re investing in lower energy bills, a more stable power supply, and a healthier planet. The initial price tag for a home is very different from that of a business, and understanding why will help you see the full picture of your return on investment.
While the final number varies, the path to figuring it out is straightforward. It involves looking at your current energy usage, the size of your property, and the specific components you need. For example, adding a battery backup system will change the total cost, but it also gives you priceless energy independence during a blackout. The good news is that you don’t have to guess. You can get a clear idea of your potential costs and savings by using an estimate calculator to start planning your budget. From there, we can help you explore financing options and incentives that make the switch to solar more accessible than ever.
Calculating Costs for Your Home
For homeowners, the journey to solar is personal. Your system is designed specifically for your roof and your family’s energy needs. While the cost per watt can be a bit higher for residential projects compared to large-scale commercial ones, the total investment is significantly smaller and more manageable. Think of it like buying groceries; you’re not buying in the same bulk as a restaurant, so your total bill is much lower.
Most homeowners don’t pay for the entire system upfront. There are fantastic financing options, like solar loans, that allow you to get started with little to no down payment. These options often result in a monthly payment that is less than your current utility bill, so you start saving from day one. We can walk you through the numbers for your specific home, ensuring you find a path that fits your budget and financial goals as a residential customer.
Calculating Costs for Your Business
For a business, going solar is a major strategic move. The upfront investment is larger because the systems are bigger and more powerful, designed to offset significant energy consumption. However, this scale works in your favor. The cost per watt is typically lower for commercial projects, meaning you get more power for your money. This efficiency, combined with powerful financial incentives, leads to a very strong long-term return on investment.
Businesses can take advantage of incentives that aren't available to homeowners, including accelerated depreciation, which can provide a substantial tax benefit. When you combine these savings with the dramatic reduction in your monthly operating costs, the financial case for solar becomes incredibly compelling. We help our commercial customers analyze these factors to build a clear projection of their long-term savings and profitability.
Cost Per Watt vs. Total Investment
It might seem counterintuitive, but a project with a higher total cost can actually be the better deal on a per-unit basis. This is where the concept of "cost per watt" comes in. Commercial solar projects have a lower cost per watt because of economies of scale. When we buy panels and equipment in bulk for a large installation, the price per item goes down. Fixed costs, like project management and transportation, are also spread across a much larger system, further reducing the per-watt price.
So, while a business owner writes a bigger check initially, they are paying less for each unit of power their system will generate. For a homeowner, the total investment is smaller and more contained, but the cost for each watt is slightly higher because the project is smaller. Understanding this difference helps clarify why pricing is structured the way it is.
Factoring in Batteries and Other Components
Your solar panels are the star of the show, but they are part of a complete energy system. Other components, especially batteries, play a crucial role in how you use your power. In California, where power outages are a real concern, adding a battery backup is one of the smartest decisions you can make. It allows you to store the excess energy your panels produce during the day and use it at night or during a grid failure, giving you true energy independence.
Of course, adding a battery increases the initial investment, but the peace of mind and uninterrupted power it provides are invaluable. Beyond batteries, your system includes inverters, which convert solar energy into usable electricity for your home, and monitoring software. Modern systems make it easy to track your energy production right from an app on your phone, so you can see your investment at work in real time.
How Can You Save on Your Solar System?
Thinking about the price tag of a new solar system can feel a little daunting, but the initial investment is just one part of the story. The great news is that there are several powerful incentives and programs designed to make solar more affordable for both homeowners and businesses. These aren't just small discounts; they are significant financial tools that can dramatically reduce your upfront costs and shorten the time it takes to see a return on your investment. From federal tax credits that put money back in your pocket to state programs that pay you for the extra energy you produce, the path to solar savings is clearer than you might think.
Whether you're a homeowner looking to cut down on monthly utility bills or a business owner aiming to improve your bottom line, understanding these financial benefits is the first step. We'll walk through the most impactful ways you can save, including the federal solar tax credit, special depreciation rules for businesses, and net metering programs. We'll also touch on financing options that make the switch to solar accessible, even without a large upfront payment. You can even get a preliminary idea of your costs with our solar estimate calculator before diving into the details.
The Federal Investment Tax Credit (ITC)
One of the most significant financial incentives available is the federal solar tax credit, also known as the Investment Tax Credit (ITC). This isn't just a deduction; it's a dollar-for-dollar credit that reduces the federal income tax you owe. The ITC allows both homeowners and businesses to deduct a percentage of their total solar installation costs directly from their taxes. This can substantially lower the net cost of your system, making the switch to solar much more manageable from day one. The credit applies to the total cost of the system, including panels, inverters, mounting equipment, and labor. It’s a powerful tool for making your solar solution more affordable.
Accelerated Depreciation for Businesses (MACRS)
If you're a business owner, there's an additional tax benefit you can use. The Modified Accelerated Cost Recovery System (MACRS) allows businesses to recover the cost of their solar energy systems through depreciation. Instead of spreading that deduction over the entire lifespan of the equipment, MACRS lets you accelerate it over a much shorter period, typically five years. This front-loads your tax savings, which can provide a substantial improvement to your cash flow in the years immediately following your installation. This incentive makes going solar an even smarter financial decision for our commercial customers looking to reduce operating expenses and invest in sustainable infrastructure.
How Net Metering Benefits Homeowners
For homeowners, net metering is a fantastic benefit that helps you get the most value out of your solar panels. Here’s how it works: when your panels produce more electricity than your home is using, that excess power is sent back to the grid. Your utility company then gives you credits for that energy. These credits are applied to your electricity bill, offsetting the cost of any power you pull from the grid at night or on cloudy days. Net metering allows you to significantly lower your monthly electricity bills and ensures that none of the clean energy you generate goes to waste. It’s a key part of what makes solar a great long-term investment for residential customers.
Exploring Your Financing Options
You don't need to have all the cash on hand to go solar. There are plenty of financing options available to help you manage the upfront expense. Homeowners often use solar loans, which allow you to pay for your system over time with predictable monthly payments. For businesses, the options are even broader, including loans, leases, and other models that can make a large-scale installation financially feasible. Our team can walk you through the different paths to ownership and help you find a plan that fits your budget. Our personalized consultation process is designed to ensure you feel confident and informed about your financial choices every step of the way.
What to Expect for Efficiency and Maintenance
Once your solar panels are installed, what comes next? It’s natural to wonder about performance and upkeep. While both residential and commercial solar systems are built to last, their day-to-day efficiency and maintenance needs look a little different. The main reason for this is scale. A system designed for a family home has different priorities than one powering a large commercial building, and understanding these distinctions will help you know exactly what to expect from your investment.
For homeowners, the focus is on reliable, long-term performance that fits your roof and your budget. The hardware is designed to integrate smoothly with your home’s electrical system, and maintenance is refreshingly straightforward. For businesses, the goal is to maximize every square foot of space to generate as much power as possible, which often means more complex technology and monitoring. Understanding these differences helps set clear expectations for your own solar journey. Our approach is to customize every system, ensuring that its performance and maintenance plan are perfectly suited to your specific needs, whether it's for your home or business.
Decoding Panel Efficiency Ratings
When you see a panel’s efficiency rating, it’s just a measure of how much sunlight it can convert into usable electricity. For residential customers, panels typically have an efficiency between 18% and 21%. This range provides a fantastic balance of performance, durability, and cost, making it ideal for powering a home. These panels are optimized to work with standard home inverters and electrical setups.
Commercial systems, on the other hand, often push for maximum output, with efficiency ratings between 20% and 22%. Because businesses have higher energy demands and larger roofs, they might use advanced panels with features like half-cut cells to capture more energy. While a couple of percentage points might not sound like much, on a massive commercial array, it adds up to significant power generation.
Sizing Your System to Your Energy Needs
The size of a solar system is measured in kilowatts (kW), and it’s directly tied to how much electricity you use. A typical residential system produces between 5 and 20 kW, which is usually more than enough to cover a family’s daily energy consumption. We design these systems to fit neatly on your roof while generating the power you need to reduce or even eliminate your utility bill.
Commercial systems are on a completely different scale. Designed to power everything from office lights to heavy machinery, these arrays can easily exceed 100 kW. They are custom-engineered to meet the high energy demands of a business running all day. You can get a rough idea of your own energy needs by using an estimate calculator to see what size system might be right for your home.
A Look at Cleaning and Routine Inspections
One of the best things about residential solar is how low-maintenance it is. For the most part, your panels just need an occasional cleaning to wash away any dust or debris that might block the sun. California’s seasonal rain often takes care of this for you. Beyond that, a quick check of your monitoring app is all you need to ensure everything is running smoothly.
Because commercial systems are larger investments tied to business operations, their maintenance is a bit more involved. They often rely on sophisticated remote monitoring to track performance in real-time and identify any issues immediately. Regular professional inspections are also more common to protect the asset and ensure consistent output. The health of your roof is also key, so having solid roofing solutions in place is foundational to any good solar installation.
How to Monitor Your System's Performance
Keeping an eye on your solar system’s performance is simple and empowering. As a homeowner, you’ll typically use a straightforward mobile app that connects to your system. With just a few taps on your phone, you can see how much energy your panels are producing, track your home’s energy consumption, and watch your savings grow. It’s an easy way to feel connected to your energy production and understand your environmental impact.
Commercial monitoring is more granular. Businesses often use specialized software that provides detailed, real-time data on every part of the array. This allows facility managers to track output, predict energy generation, and ensure the system is performing at peak efficiency to support their operational needs. For homeowners, our solar solutions always include user-friendly monitoring to put the power of information right in your hands.
Debunking Common Solar Myths
Going solar is a big decision, and it’s easy to get tangled up in the myths and misinformation floating around. You’ve probably heard a few things that made you pause and wonder if solar is really the right move. Let's clear the air and tackle some of the most common misconceptions head-on. Getting the facts straight is the first step toward making a confident choice for your home and your energy future.
Myth: "Solar is too expensive for my home."
This is probably the biggest hurdle for most people, but the idea that solar is out of reach is outdated. While there is an upfront investment, it's more affordable than ever. Think of it less as an expense and more as a long-term investment in your home's value and your financial future. Financial incentives, like the federal solar tax credit, can significantly reduce the initial cost. Over time, the money you save on your electricity bills adds up, and the system eventually pays for itself. You can even use our estimate calculator to get a clearer picture of the costs and potential savings for your specific home.
Myth: "Solar panels only work when it's sunny."
It’s a logical assumption, but thankfully, it’s not true. Solar panels generate electricity from daylight, not just direct, blistering sunlight. While they are most productive on clear, sunny days, they continue to produce energy even when it's cloudy. Modern panels are highly efficient and can capture diffuse sunlight that passes through clouds. Here in California, we get plenty of sunshine to maximize production, but you can rest easy knowing your system is still working for you on those overcast days. Our solar solutions are designed to perform reliably in real-world weather conditions, ensuring you get consistent power.
Myth: "My system will work during a blackout."
This is a common and potentially dangerous misunderstanding. For safety reasons, standard grid-tied solar systems are designed to automatically shut down during a power outage. This prevents your panels from sending electricity back to the grid while utility workers are trying to fix it. However, this doesn't mean you have to be left in the dark. By pairing your solar panels with a battery backup system, you can store excess energy to use when the grid goes down. This combination is what gives you true energy independence and keeps your lights on during a blackout.
Myth: "Commercial and residential maintenance are the same."
While both systems use similar technology, their maintenance needs are quite different. Commercial solar installations are often massive and complex, requiring specialized monitoring and more frequent, intensive upkeep. In contrast, the systems designed for residential customers are built for durability and simplicity. Your home solar system requires very little maintenance, usually just an occasional cleaning to remove any dust or debris that might accumulate. We design residential systems to be a "set it and forget it" solution, so you can enjoy the benefits without adding a major chore to your to-do list.
How to Choose the Right Solar System
Deciding on a solar system can feel like a huge undertaking, but it doesn't have to be complicated. The "right" system is simply the one that fits your unique energy needs, property, and financial goals. The path to choosing a system looks a little different for homeowners than it does for business owners, but the core idea is the same: creating a solution that works for you.
Whether you’re looking to power your home or your business, the first step is understanding your specific requirements. How much energy do you use each month? What are the physical characteristics of your roof and property? What’s your budget, and what are your long-term financial goals? Answering these questions will help you determine the ideal size, type, and configuration for your solar installation. From there, you can explore the different incentives and financing options available to make your transition to solar as smooth as possible.
Key Considerations for Homeowners
As a homeowner, your solar system is all about meeting your family’s daily energy needs. Residential solar systems are designed specifically for this, typically producing between 5 and 20 kilowatts of power. Don’t let the initial cost intimidate you; many homeowners use financing options like solar loans to manage the upfront expense. Plus, going solar is a smart financial move for the future. Homes with solar panels often have a higher resale value, making it an investment that pays you back when it’s time to sell. AMECO offers a variety of solar solutions tailored for residential properties.
Key Considerations for Business Owners
For business owners, a solar installation is a strategic investment in your company’s future. Commercial solar systems are built on a much larger scale to handle higher energy demands, often exceeding 100 kilowatts. While the initial investment is larger, so are the financial rewards. Businesses can take advantage of significant incentives, including federal tax credits and accelerated depreciation, which can lead to a strong long-term return on investment. This makes solar a powerful tool for reducing operating costs and improving your bottom line. You can explore how AMECO supports commercial customers in achieving their energy goals.
Get Started with AMECO Solar & Roofing
The single most important step in choosing the right solar system is getting a professional assessment. This is where an expert evaluates your property, analyzes your energy consumption, and discusses your financial goals to design a system that’s a perfect fit. This personalized consultation ensures you get a solution tailored to your specific circumstances, whether you're a homeowner or a business owner. To see what this process looks like, you can learn more about our approach and how we create a seamless plan for your switch to solar.
Related Articles
- How to Use a Commercial Solar Panel Cost Calculator
- Solar Panels for Your Business: A Complete Guide
- Commercial Solar Panel | Solar Panel Company | AMECO Solar
- Residential Solar Panel | Solar Panel Company | AMECO Solar
- Professional Solar Installation: A Complete Guide
Frequently Asked Questions
Do I need to replace my roof before installing solar panels? That’s a great question, and the answer depends on the age and condition of your current roof. Solar panels are built to last for 25 years or more, so you want to be sure your roof is just as durable. During our initial assessment, we conduct a thorough inspection of your roof’s structure and health. Since we are also a roofing company, we can give you an honest, expert opinion and handle any necessary repairs or replacements, ensuring your entire system is solid from the foundation up.
How do I know if a battery backup is the right choice for me? A battery is a fantastic addition if your main goals are energy independence and peace of mind. If you want to keep your lights and essential appliances running during a power outage, a battery is the way to do it. It stores the extra solar energy you produce during the day so you can use it at night or when the grid goes down. For many California homeowners, knowing they won't be left in the dark during an outage makes a battery an essential part of their solar system.
What's the very first step I should take if I'm considering solar for my home? The best first step is to get a clear picture of your energy needs and potential savings. A great starting point is to use an online tool, like our solar estimate calculator, to get a preliminary idea of costs. After that, the next move is to schedule a professional consultation. This allows us to look at your specific property, analyze your utility bills, and design a system that is perfectly tailored to your home and your financial goals.
How long does the entire solar process take, from the first call to flipping the switch? The full timeline involves more than just the on-site installation. After our initial consultation and your design approval, a significant portion of the time is dedicated to securing permits from your local city and getting approval from the utility company. This administrative phase can take several weeks. Once we have the green light, the physical installation on your home is surprisingly fast, usually taking just one to three days. We manage the entire process so it feels seamless for you.
What happens to the solar panels if I decide to sell my house? Solar panels are a permanent fixture that adds significant value to your property. Studies have shown that homes with solar panels often sell faster and for a higher price than comparable homes without them. The system is typically transferred to the new owner along with the home, making it a very attractive feature for potential buyers who are excited about the prospect of lower electricity bills from day one.
6.29.2026
Solar panels for heat pump use can help a California homeowner manage the electricity added by all-electric heating and cooling. The right design starts with the home's actual consumption, the heat pump's expected load, local weather, roof conditions, and the utility rate plan. It should also account for when the system will use electricity, not only how much it may use over a year.
Request a customized solar and heat pump estimate from AMECO Solar & Roofing.
A heat pump moves heat rather than creating it by burning fuel. It can provide both heating and cooling, but converting from gas heating adds a significant new electrical load. Solar can produce energy to offset part or most of that load, depending on the property's design and goals. It does not mean the heat pump runs only when sunlight is available. Most grid-connected homes use a combination of direct solar production, utility electricity, and, when installed, stored battery energy.
California planning requires special attention to seasonal consumption and time-of-use rates. A coastal home with mild winters has a different profile from a Central Valley home that experiences hot summers and cold nights. A customized analysis is more useful than a universal panel count or savings claim.
Solar Panels For Heat Pump: Can solar panels power a heat pump?
Yes. A properly designed solar array can produce electricity to offset a heat pump's annual energy use. The panels often generate most during daytime hours, while the heat pump may run at other times. Grid service or a battery balances the difference between solar production and household demand.
Annual offset and direct daytime use
When the sun is shining and household demand is below solar production, the heat pump can use electricity produced by the panels. When demand exceeds production, the home draws the difference from the grid or a battery. At night, solar panels are not producing, so the heat pump relies on another source. This is why system design should compare production and consumption across different hours and seasons.
For many homeowners, the practical goal is an annual energy offset rather than operating the heat pump directly from solar every minute. An annual offset compares the array's projected yearly production with the home's projected yearly electricity use. It is a helpful starting point, but it does not fully explain utility costs because California rate plans assign different values to electricity at different times.
The load added by electrification
The change in electricity use depends on what the heat pump replaces. Switching from a gas furnace adds winter electricity consumption that is not visible in past electric bills. Replacing electric resistance heating may reduce heating electricity use. Replacing an older air conditioner can also change summer consumption. Equipment efficiency, thermostat settings, insulation, duct condition, home size, and local climate all affect the result.
Start by reviewing at least 12 months of utility bills and interval data when available. This establishes the existing base load and reveals summer and winter peaks. AMECO's guide to household electricity consumption can help explain the measurements before a project-specific analysis.
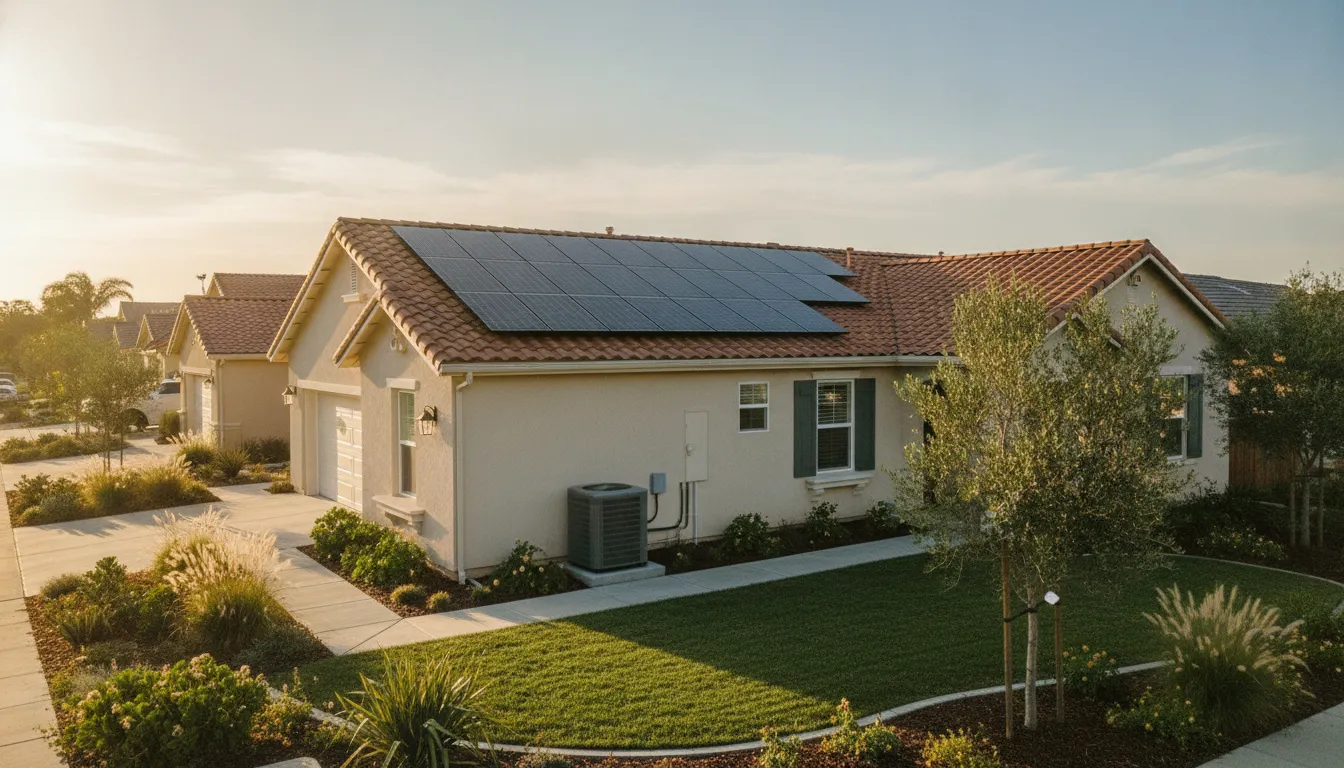
How do you size solar for a heat pump?
Size solar for a heat pump by adding the equipment's estimated annual electricity use to the home's current annual use. Then modeling production for the specific roof and location. Refine the design using seasonal demand, time-of-use rates, shade, roof orientation, future loads, and the homeowner's energy goals.
Build a reliable consumption baseline
A useful baseline separates current consumption from planned changes. Gather one full year of bills, note major changes in occupancy or equipment, and identify gas appliances that may become electric. If the heat pump is already installed, interval data can show its effect. If it is not installed, use the HVAC contractor's load calculation and equipment performance information rather than a generic national average.
Heating demand is not the same in every part of California. Los Angeles and Orange County homes may have modest winter heating requirements, while inland and northern communities can experience much greater seasonal swings. Cooling demand can also be substantial during Central Valley summers. A good model uses the home's climate zone and operating habits instead of assuming that every heat pump has the same annual consumption.
Convert the projected load into a solar design
Once the projected annual load is known, a solar designer models how much electricity an array can produce on that particular roof. Panel rating is only one input. Roof direction, tilt, shade, local solar resource, inverter design, and available roof area all influence output. Two homes with the same annual consumption can require different array layouts.
The planning process generally follows these steps:
- Collect 12 months of electric bills and available interval data.
- Estimate the heat pump's heating and cooling consumption using equipment and home-specific information.
- Add other planned loads, such as an EV charger, electric water heater, or induction range.
- Model expected solar production for the roof, shade conditions, and California location.
- Compare production and consumption by season and time of day.
- Evaluate utility rate rules, export credits, and battery options.
- Confirm the roof, electrical panel, and service can support the proposed design.
Homeowners can review the broader process in this guide to estimating solar panel needs. The final panel count should come from a site-specific design, not a fixed rule based only on square footage.
Plan the roof and electrical work together
Solar panels are a long-term roof installation. Before designing the array, inspect the roof's age, condition, material, drainage, and usable area. If roofing work is likely soon, coordinating it with solar can reduce the risk of removing and reinstalling panels later. AMECO Solar & Roofing can coordinate these scopes as one integrated project.
The electrical review matters too. The designer should consider the main service panel, available breaker space, heat pump circuit, inverter output, battery equipment, and other planned electric loads. A well-coordinated project helps avoid discovering late in the process that the electrical plan or roof layout needs to change.
For a site-specific layout and load analysis, explore AMECO's residential solar installation services and request a customized estimate.
Why does seasonal electricity use change the design?
Seasonal use changes solar design because heat pumps and panels do not follow the same production pattern. Heating can raise winter demand when days are shorter, while cooling can drive summer peaks. Reviewing a full year helps the designer account for both conditions instead of sizing from one month's bill.
Winter heating and shorter solar days
A heat pump may run most during early mornings, evenings, and cold periods. Those hours often occur when solar output is low or unavailable. Winter also brings fewer daylight hours and different sun angles, so an array usually produces less than it does in summer. Even if annual solar production matches annual consumption, the household may still import electricity during winter heating hours.
This does not make the pairing impractical. It means the design should show how energy flows across the year and how the utility treats imports and exports. A homeowner can then decide whether the preferred goal is annual offset, greater self-consumption, lower peak-period purchases, outage support, or a balanced combination.
Summer cooling and inland heat
California heat waves can create long cooling cycles. Solar production often overlaps with daytime cooling, which can make direct solar use valuable. However, many homes continue cooling into late afternoon and evening as solar production falls. Time-of-use rates can make that timing important even when the array produces substantial energy earlier in the day.
Efficiency improvements can reduce the load before the array is sized. Air sealing, insulation, duct repair, thoughtful thermostat settings, shade, and properly sized HVAC equipment may all influence consumption. These measures should be evaluated based on the home's needs, costs, and comfort priorities.
Future consumption and reasonable design margins
A solar plan should consider foreseeable changes without automatically oversizing the project. An EV, electric water heater, pool equipment, home addition, or changing household occupancy can alter the load. Discussing likely upgrades helps the designer evaluate whether the initial layout, electrical equipment, and inverter strategy should allow for future expansion.
Forecasts always involve uncertainty. Weather changes from year to year, and household behavior can shift. A customized estimate should explain its assumptions and present reasonable scenarios rather than promising a specific bill or guaranteed savings.
How do California rate plans affect solar and heat pumps?
California rate plans affect the value of solar and heat pump energy based on when electricity is produced, imported, or exported. Time-of-use pricing often makes late afternoon and evening electricity more expensive. A useful design therefore evaluates hourly consumption, export compensation, load shifting, and possible battery storage.
Time-of-use timing
Many California households pay different rates depending on the hour. A heat pump that runs during a high-price evening period may draw utility electricity after solar production has declined. In contrast, daytime operation may overlap with solar output. Utility schedules and rate details vary, so confirm the current plan and applicable rules before finalizing the project.
Some homeowners use controlled pre-cooling or pre-heating while solar production is strong, then reduce demand during peak-rate hours. The practical result depends on comfort preferences, the home's ability to retain temperature, weather, and equipment controls. Load shifting is a planning option, not a reason to sacrifice safe indoor temperatures.
Self-consumption and exports
Self-consumption means using solar electricity at the property when it is generated. Exports occur when the system produces more than the home is using and sends the excess to the grid. Under California's current net billing environment, the value of exported energy can differ from the retail price of imported electricity. This makes hourly modeling more important than a simple annual total.
The following comparison shows common operating patterns:
| Operating pattern | Primary source | Planning focus |
|---|---|---|
| Midday heat pump use | Direct solar plus grid as needed | Match daytime load with production |
| Evening heating or cooling | Grid or stored energy | Review peak rates and battery dispatch |
| Overnight heating | Grid or stored energy | Estimate duration and total consumption |
| Grid outage | Battery-backed circuits, if designed | Confirm power, capacity, and critical loads |
Use AMECO's solar quote calculator as an initial planning tool, then request a customized estimate that reflects the property's roof, energy use, rate plan, and equipment.
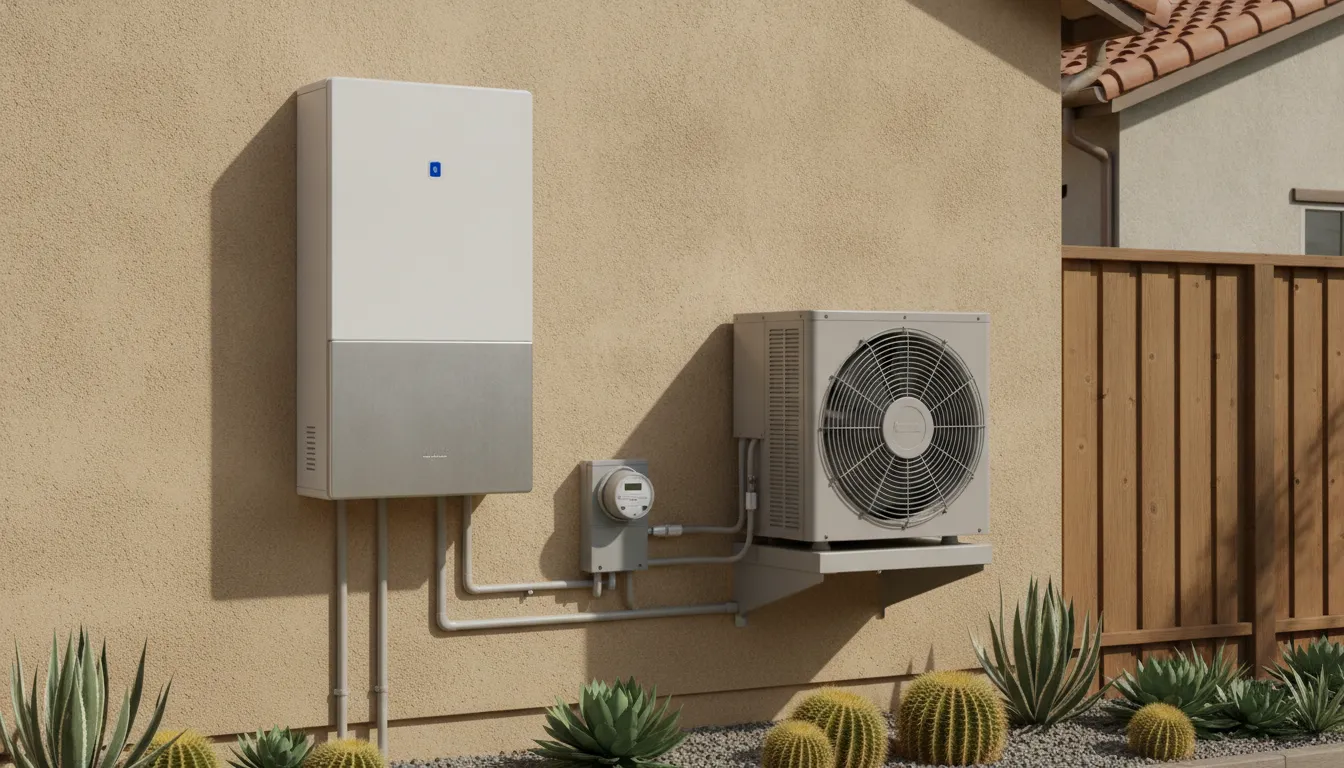
Can a battery keep a heat pump running?
A battery can run some heat pumps during a blackout if the storage system is designed for the equipment's starting power, running power, and desired backup duration. The design must also account for other critical loads and the solar array's ability to recharge the battery during an extended outage.
Power and energy are separate limits
Battery planning requires two different checks. Power, measured in kilowatts, describes how much electricity the battery can deliver at one moment. Energy, measured in kilowatt-hours, describes how long it can sustain loads. A battery may store enough energy for several hours but still be unable to start a large compressor if its power output is too low.
Variable-speed heat pumps may have different startup behavior from older single-stage equipment, but model-specific data is essential. The battery designer should review the heat pump's electrical specifications and any required control equipment. The plan must also identify whether the heat pump is on the backed-up circuits.
Critical-load priorities during a blackout
Running a heat pump during a blackout competes with refrigeration, lighting, medical equipment, communications, well pumps, and other priorities. Whole-home backup and partial-home backup are different design goals. Homeowners should decide what must operate, what can be turned off, and how long the desired loads should run without the grid.
A battery does not create energy. During an extended outage, stored energy can be depleted faster during extreme heating or cooling demand. Solar may recharge it the next day, but recharge performance depends on weather, array production, household use, and system controls. Resilience planning should use realistic scenarios rather than assuming uninterrupted operation under every condition.
Learn more about AMECO's battery backup options and ask for an evaluation based on the exact heat pump and critical-load plan.
What should a coordinated project plan include?
A coordinated solar and heat pump plan should include current and projected consumption, HVAC specifications. Roof and shade conditions, electrical capacity, utility rates, battery goals, critical loads, and future electrification. It should document assumptions and provide a customized estimate rather than relying on universal pricing or savings claims.
Information to gather before design
Good information improves the estimate and reduces surprises. Gather utility bills, interval data, the current rate-plan name, the heat pump proposal, equipment specifications, and any available roof records. Note planned upgrades and explain how the household uses heating and cooling. If comfort settings or occupancy will change after installation, include that too.
It is also helpful to define priorities. One homeowner may care most about reducing purchases during peak-rate periods. Another may prioritize backup cooling during a summer blackout. A third may want the roof and solar completed before installing a heat pump later. These goals can lead to different designs even for similar homes.
Questions to ask during the estimate
- What consumption assumptions were used for the proposed heat pump?
- How does projected solar production change by season?
- How does the design respond to the current utility rate plan?
- Which roof areas are used, and how were shade and roof condition evaluated?
- If a battery is included, can it start the heat pump and for how long under the modeled load?
- Which circuits remain powered during a blackout?
- What future loads or expansion options are included?
- Which project costs, incentives, and eligibility assumptions require confirmation?
A clear proposal should distinguish estimates from guarantees. Solar production, heat pump consumption, utility bills, incentives, and backup duration depend on conditions that can change. The most useful design explains those variables so the homeowner can make an informed decision.
A practical California planning example
Consider a homeowner replacing gas heating and an older air conditioner with a heat pump. The home's past electric bills show the existing appliance and cooling load, but they do not show the electricity that the new system will use for winter heating. The project team estimates that new load using the HVAC design, local climate, home envelope, and expected thermostat schedule.
Next, the solar designer adds the projected heat pump consumption to the existing baseline and any planned EV or appliance loads. The designer models production for the roof, checks the rate plan, and compares daytime generation with afternoon and overnight demand. If the homeowner wants backup heating or cooling, the battery analysis checks both instantaneous power and expected duration.
The final design might prioritize direct daytime use, shift some energy into evening hours, or reserve battery capacity for a blackout. The correct balance depends on the homeowner's priorities and site conditions. It should not be based on a universal panel count, a standard battery size, or a promised percentage of savings.
Frequently asked questions
Can a heat pump run entirely on solar panels?
A solar array can produce enough annual energy to offset a heat pump's use. But the heat pump will often run when panels are producing little or no electricity. Grid service or a properly designed battery supplies the difference. Off-grid operation requires a separate, detailed analysis of production, storage, power, and seasonal demand.
How many solar panels are needed for a heat pump?
There is no universal number. The answer depends on heat pump consumption, existing household use, panel output, roof orientation, shade, climate, and project goals. A designer should estimate the equipment's annual load and model production for the specific property before recommending an array size.
Does a heat pump work with solar during winter?
Yes. Solar continues producing during winter, but shorter days and weather can reduce output while heating demand rises. The home may use grid electricity or stored energy when the heat pump runs outside solar production hours. Full-year modeling helps show this seasonal mismatch and informs the design.
Is a battery required for solar panels and a heat pump?
No. A grid-connected solar system can offset heat pump electricity without a battery. Storage may improve self-consumption, shift energy to higher-rate hours, and support selected circuits during a blackout. Whether it is appropriate depends on the homeowner's rate plan, resilience goals, equipment, budget, and site design.
Get a customized solar and heat pump estimate
Pairing solar with a heat pump can support a broader home electrification plan, but the details matter. Seasonal demand, utility timing, roof readiness, battery resilience, and future loads should be reviewed together. AMECO Solar & Roofing has served California since 1974 and coordinates solar and roofing through one team.
Schedule a solar and heat pump consultation to receive a customized estimate based on your home, energy use, roof, rate plan, and goals.
6.27.2026
When business owners hear about the solar tax credit, they usually think of the panels on the roof. But the federal Solar Investment Tax Credit (ITC) is far more comprehensive than that. It’s designed to cover the total cost of getting your system up and running, which includes many expenses you might not expect. The credit covers the core hardware, but it also applies to installation labor, engineering fees, and even sales tax on your equipment. If you add a battery for energy storage, that’s covered too. Understanding the full scope of the commercial solar tax credit 2023 is the first step to maximizing your savings. We’ll walk you through all the eligible costs so you can build a complete financial picture and see just how affordable a solar investment can be for your business.
Key Takeaways
- The ITC is a direct reduction of your tax bill: The 30% federal credit is not a deduction; it's a dollar-for-dollar credit that applies to your total project cost. This includes the equipment, installation labor, battery storage, and even sales tax, making your initial investment much lower.
- You can stack credits for even greater savings: Your project may qualify for bonus credits of 10% or more by using American-made parts or building in designated energy communities. You can combine these federal add-ons with state and local incentives to get the best possible return.
- Timing and documentation are critical for success: The full 30% credit is scheduled to decrease, so starting your project soon is key to locking in the highest rate. To claim the credit successfully, you must keep detailed records of all costs and meet important "commence construction" deadlines.
What Is the Commercial Solar Tax Credit (ITC)?
If you’re considering solar for your business, the Solar Investment Tax Credit (ITC) is one of the most important financial incentives to understand. In short, the commercial ITC is a federal incentive that allows businesses to deduct 30% of the total cost of a solar energy system from their federal taxes. This isn't just a small discount; it's a significant credit designed to make switching to solar more affordable for commercial customers like you. Think of it as the government’s way of rewarding businesses for investing in clean energy.
By installing a solar system, you’re not only reducing your own energy costs and gaining independence from the grid, but you’re also contributing to a more sustainable future. The ITC helps make the financial case for this investment even stronger. It applies to a wide range of project costs, from the solar panels themselves to the labor involved in the installation. The recent Inflation Reduction Act extended and modified this credit, making it a powerful tool for companies ready to adopt green energy. Understanding how to use this credit is a key first step in planning your company’s transition to solar power and maximizing your return on investment.
How the ITC Works
It’s important to know that the ITC is not a rebate or a loan. Instead, it’s a dollar-for-dollar reduction in the income taxes your business owes. For every dollar of credit you claim, your tax bill goes down by one dollar. This is much more powerful than a tax deduction, which only reduces your taxable income. A tax credit directly cuts down the final amount you have to pay, putting real money back into your business. This direct financial benefit makes the upfront investment in a solar solution much more manageable for businesses of all sizes.
What the 30% Credit Means for Your Business
Let's put that 30% into perspective. For example, if your total solar project costs $500,000, the ITC allows you to claim a massive $150,000 back in federal tax credits. This substantially lowers the net cost of your system and dramatically shortens the payback period. For many businesses, this incentive is the deciding factor that makes a solar project financially viable. It transforms a long-term investment into one with immediate and impactful financial returns, freeing up capital that you can reinvest elsewhere in your company.
How the Inflation Reduction Act Impacts the ITC
The Inflation Reduction Act of 2022 brought significant updates to the ITC, including some important deadlines you need to know. The new federal bill sets strict timelines for commercial solar projects to receive the full 30% tax credit. According to the Clean Energy Districts, for projects that begin construction after July 4, 2026, the credit is only available if the project is placed in service by December 31, 2027. This means that planning is more critical than ever. Working with an experienced partner who understands these timelines is essential to ensure your project qualifies for the maximum credit available.
Does Your Business Qualify for the ITC?
The commercial Solar Investment Tax Credit (ITC) is a fantastic incentive, but before you start planning how to use those savings, it’s important to confirm your business is eligible. The good news is that the qualifications are fairly straightforward. For most for-profit businesses in the United States, the answer is likely yes, as long as you meet a few key requirements related to ownership and the type of equipment you install. The ITC is designed to encourage businesses of all sizes to adopt clean energy. Whether you run a small manufacturing plant, a retail store, or a large agricultural operation, you can likely take advantage of this credit.
The rules ensure the incentive goes toward legitimate, new solar energy projects. We’ll walk through the main criteria below, including the rules for ownership, what equipment qualifies, and a special provision that now helps nonprofits get in on the savings. Understanding these points will give you the confidence to move forward with your commercial solar project. This credit isn't just for large corporations; it's a powerful tool for any business looking to reduce long-term energy costs and operate more sustainably. By meeting the criteria, you can significantly lower the upfront cost of a solar installation, making the switch to clean energy more financially viable than ever.
Key Ownership and Installation Rules
First things first, to claim the ITC, your business must be the legal owner of the solar panel system. This is a critical rule. If you lease a system from a third party, the leasing company typically claims the tax credit, not you. To get the full financial benefit, ownership is a must. This is why purchasing a system outright is often the most financially advantageous path for businesses looking to maximize their return on investment.
Additionally, the solar system must be installed on a property that your business either owns or leases within the United States. This gives you flexibility even if you don’t own your commercial building. As long as you have a lease and the rights to install equipment, you can qualify. Our team follows a clear approach to verify these details early on, ensuring your project is set up for success from day one.
Eligible Equipment and Locations
The ITC applies to what the government calls "energy property." This includes all the essential components of your solar energy system. Think of the core hardware: the solar panels themselves, the inverters that convert solar energy into usable electricity, and the racking that mounts the panels to your roof or property. The system must also be new; you can’t claim a credit for used equipment.
Beyond the main components, other costs directly related to the system’s installation are also covered. This makes the credit even more valuable. When you partner with a full-service installer, we ensure that all eligible solar solutions and associated costs are properly documented, so you can claim the maximum credit you’re entitled to. This comprehensive coverage helps make the switch to solar more affordable and accessible for businesses.
What About Nonprofits and the ITC?
For years, nonprofits like schools, churches, and community centers couldn't take advantage of the ITC because they don't pay federal income taxes. Thankfully, the Inflation Reduction Act introduced a game-changing provision called "direct pay." Now, instead of a tax credit, tax-exempt organizations can receive a direct payment from the IRS equal to 30% of their solar installation cost.
This change makes solar energy a much more attainable goal for organizations dedicated to serving their communities. It puts them on a level playing field with for-profit businesses, allowing them to reduce their operating costs and redirect those savings toward their missions. If you’re a leader at a nonprofit, this is a powerful opportunity to make a lasting financial and environmental impact. We can help your organization explore its eligibility and plan a project that fits your needs.
What Costs Does the ITC Cover?
When you hear "solar tax credit," you probably think of solar panels. But the Investment Tax Credit (ITC) is much more comprehensive than that. It’s designed to cover the total cost of your solar energy system, which includes a wide range of expenses beyond just the core hardware. Understanding what qualifies is key to making the most of this powerful incentive for your business. From the equipment itself to the labor required to get it running, let's break down exactly what costs are covered.
Core Solar Equipment
First and foremost, the ITC applies to the essential components of your solar energy system. This includes the solar panels that capture sunlight, the inverters that convert it into usable electricity for your business, and the racking that mounts the system to your property. Essentially, all the main parts that are necessary for your system to generate power are covered. When you invest in a complete solar solution, you can be confident that the cost of this fundamental equipment forms the basis of your 30% tax credit calculation.
Installation and Labor Costs
A solar project involves more than just purchasing equipment; it requires professional installation to ensure safety, efficiency, and longevity. The good news is that the ITC is based on the total cost of your system, which includes all associated labor for on-site preparation and installation. This means the wages for the skilled technicians who design, assemble, and connect your system are eligible for the credit. This provision recognizes that expert installation is a critical part of your investment, allowing you to claim the credit on the full, real-world cost of going solar.
Battery Storage and Grid Connections
To increase your energy independence and protect your business from blackouts, you might add a battery to your system. The ITC covers expenses for battery backup systems with a capacity of 5 kilowatt-hours or more. What's particularly great is that the battery doesn't even have to be charged by your solar panels to qualify. Additionally, for smaller projects (under 5 megawatts), any costs your business incurs to connect the solar system to the local power grid are also included, making the entire process more affordable from start to finish.
Sales Tax and Other Covered Costs
Many people overlook this, but the ITC allows you to claim back the sales tax you pay on your solar equipment. Depending on your location, this can add up to a significant amount, further reducing the net cost of your project. The credit is calculated on the total gross investment, so including sales tax helps you maximize your financial return. If your project requires structural updates, like a new roof to support the panels, it's wise to consult with an expert. Our integrated roofing solutions ensure your property is fully prepared for a seamless solar installation.
Can You Claim Additional Bonus Credits?
The 30% tax credit is a fantastic starting point, but your savings might not have to stop there. The Inflation Reduction Act introduced several "bonus" credits that can be added on top of the base credit, potentially increasing your total tax benefit. These bonuses are designed to encourage specific goals, like supporting American manufacturing and investing in communities that are transitioning to clean energy. If your project meets certain criteria, you could see your credit climb to 40%, 50%, or even higher.
Understanding these add-ons is key to getting the most out of your solar investment. While the rules can seem a bit detailed, they represent a huge opportunity for businesses to make their solar projects even more affordable. This is an area where working with an experienced partner can make a real difference, as we help our commercial customers identify every single incentive they're eligible for. Let's walk through what these bonus credits are and how your business might qualify for them.
Domestic Content Bonus
You can earn an additional 10% credit if you use American-made materials for your solar project. To qualify for the Domestic Content Bonus, you need to ensure that all the steel and iron in your installation is produced in the United States. Additionally, a specific percentage of the other manufactured components must also be sourced domestically. This incentive is a great way to support the national economy while also getting a larger return on your investment. The Department of Energy provides detailed guidance on these requirements, which can help you and your solar partner plan your project accordingly to meet the criteria.
Energy Community Bonus
If your business is located in an area with a history tied to the fossil fuel industry, you may be eligible for another 10% bonus credit. This Energy Community Bonus applies to projects built in places like former coal mining towns or near retired coal-fired power plants. The goal is to direct clean energy investments toward communities that are transitioning economically. You can check if your project is in a qualifying area using the DOE's designated map. By installing solar in one of these zones, your business not only gets a bigger tax credit but also contributes to the local area's shift toward a sustainable future.
Low-Income Communities Bonus
There is also a significant bonus available for projects that serve low-income communities. This credit provides an extra 10% to 20% for solar systems that are 5 megawatts or smaller. You can qualify if your project is located within a low-income community, on Tribal land, or is part of a qualified low-income residential or economic benefit project. This incentive is designed to promote equitable access to clean energy, ensuring the benefits of solar power are shared broadly. The Low-Income Communities Bonus Credit program makes going solar more accessible for small businesses and organizations working to support their local communities.
Finding State and Local Incentives
Beyond the federal ITC and its bonus credits, many states and local utilities offer their own incentives. California, for example, has various programs that can further reduce the cost of your commercial solar installation. These can include direct rebates, state-level tax credits, or performance-based incentives that pay you for the energy your system produces. The application process for these programs can sometimes be complex, but the extra savings are well worth the effort. Exploring these options is a critical step in building the complete financial picture for your solar solutions and ensuring you get the best possible return on your investment.
Can You Stack Your Incentives?
Yes, you absolutely can, and you should. This is where the financial benefits of going solar get really exciting. You can combine, or "stack," the federal ITC with state and local incentives. For instance, you could claim the 30% federal credit and also take advantage of a rebate from your local utility company. This strategy allows you to maximize your savings and significantly shorten the payback period for your solar installation. Our approach always involves a comprehensive review of all available incentives to make sure you leave no money on the table. Properly stacking incentives makes your transition to clean energy as financially rewarding as possible.
The Future of the Commercial Solar Tax Credit
The federal Investment Tax Credit (ITC) is one of the most significant financial incentives for businesses switching to solar, but it won’t be around forever. The program is scheduled to change in the coming years, which means the time to plan your project is now. Understanding the timeline and the steps to claim the credit is key to maximizing your return on investment and securing your energy future.
For commercial customers, this isn't just about saving money on a project; it's about making a strategic financial decision that will pay dividends for decades. The following steps will help you get familiar with the process so you can take full advantage of the current incentives before they begin to phase out. Let's walk through what you need to know.
Understanding the Credit Reduction Timeline
The 30% tax credit has been a powerful motivator for businesses to adopt solar energy, but this rate is not permanent. The credit is scheduled to decrease in the coming years, so timing is critical. To secure the full 30% credit, your project must meet specific "commence construction" deadlines. While the rules can seem complex, the main takeaway is simple: the window to claim the maximum credit is closing. Waiting too long could mean settling for a smaller credit and leaving money on the table.
Why Acting Now Maximizes Your Savings
If your business is considering a switch to solar, acting now ensures you can lock in the full 30% federal tax credit while it’s available. Delaying your project could mean facing a reduced credit, which directly impacts your project's total cost and your long-term savings. By starting the process today, you give yourself plenty of time to plan, design, and begin construction without rushing. You can see how these savings might apply to your property with our estimate calculator and start building a clear financial picture for your investment.
Your Guide to Claiming the Credit
So, what exactly is the commercial Solar Investment Tax Credit? It’s a federal incentive that allows a business to deduct 30% of the total cost of its solar energy system directly from its federal taxes. This is a dollar-for-dollar reduction in the taxes you owe, not just a deduction from your taxable income. Claiming the credit involves filing the correct IRS forms with your annual tax return. The process requires careful attention to detail, which is why our approach includes guiding you through the necessary steps to ensure you’re well-prepared.
Document Every Eligible Expense
To claim the full value of the ITC, you need to keep meticulous records of all eligible project costs. Proper documentation is non-negotiable and ensures your solar installation qualifies for the tax credit without any issues. These expenses typically include solar panels, inverters, racking, and wiring. They also cover the costs of labor for installation, engineering and design fees, and even sales tax on equipment. Keeping a detailed file of all invoices and receipts is the best way to make sure you account for every dollar your project is worth.
File in the Correct Tax Year
One of the most important details about the ITC is the "commence construction" rule. To qualify for the credit in a specific year, your project doesn't need to be fully completed, but construction must have officially started. This can mean either performing significant physical work on the site or spending at least 5% of the total project cost. This rule gives businesses some flexibility with project timelines. As long as you meet the commence construction requirement before the deadlines, you can claim the credit for the year the system is placed in service.
Partner with Solar and Tax Experts
The application process for solar incentives can feel complicated, but you don’t have to go through it alone. Working with a team that understands both solar technology and tax regulations is essential. An experienced partner can help you identify all eligible costs, maintain proper documentation, and understand how to claim the ITC and any other local or state incentives. At AMECO, our solar solutions are designed with your financial success in mind, and we’re here to help you make the most of every available credit and rebate.
Related Articles
- How the Federal Tax Credit Works for Solar Owners
- Commercial Solar Investment Tax Credit Explained
- Business Solar Tax Credit 2026: What You Must Know
- Exploring Solar Energy Rebates and Incentives | AMECO Solar
- Importance of Solar Tax Credit | Ameco Solar US
Frequently Asked Questions
What happens if my tax liability is less than the 30% credit? This is a great question and a common scenario for many businesses. You don't lose the value of the credit if you can't use it all in one year. The federal government allows you to carry the unused portion of the credit back three years or forward for up to 22 years. This flexibility ensures you can eventually take full advantage of the financial benefit, applying it against your tax liability in future years as your business grows.
Do I have to own my commercial building to qualify for the ITC? No, you don't necessarily have to own the property. To be eligible for the credit, your business must be the legal owner of the solar panel system itself. The system can be installed on a property that you either own or lease. As long as your lease agreement gives you the right to install the equipment, you can still qualify for the full tax credit, making solar an accessible option even for businesses that rent their facilities.
How can I be sure I'm getting all the bonus credits I'm eligible for? The bonus credits for domestic content, energy communities, and low-income areas can be a huge financial advantage, but the requirements are specific. The best way to ensure you don't miss out is to work with an experienced solar partner. We stay current on the detailed guidance from the Department of Energy and can help you determine if your project's location and materials meet the criteria for these valuable add-on credits.
What's the difference between leasing and owning a solar system when it comes to the tax credit? This is a critical distinction. To claim the Investment Tax Credit, your business must own the solar system. If you choose to lease a system from a third-party provider, the leasing company (as the owner) is the one that claims the tax credit, not your business. While leasing can offer lower upfront costs, purchasing the system allows you to directly benefit from the 30% federal credit and maximize your long-term financial return.
What does "commence construction" actually mean? The "commence construction" rule is important for meeting the ITC deadlines. It doesn't mean your project has to be finished, but it does require you to have officially started. You can meet this requirement in one of two ways: either by beginning significant physical work on the project site or by spending at least 5% of the total project costs. This rule provides some helpful flexibility in your project timeline while still allowing you to lock in the credit.
6.26.2026
AMECO Solar & Roofing approaches solar battery sizing by matching usable storage and power output to a home's essential loads, outage goals, solar production, and utility rate plan. The right design is not simply the largest battery; it is a balanced system that can support the appliances a homeowner values most.
Explore AMECO battery backup options for your California home.
Start With a Clear Backup Goal
Battery capacity only becomes meaningful after you define what the system should accomplish. One homeowner may want a refrigerator, lights, internet, and medical equipment to operate during a brief outage. Another may want to run larger loads, reduce grid use during expensive evening hours, or maintain essential service through a multi-day disruption.
Begin by separating must-have loads from nice-to-have loads. That decision affects required storage capacity, battery power output, electrical panel configuration, and the amount of solar energy available for recharging. It also keeps the design focused on real household priorities instead of an arbitrary battery count.
Know the Difference Between kW and kWh
Two measurements guide every battery design. Kilowatts, or kW, measure power, meaning how much electricity the battery can deliver at one moment. Kilowatt-hours, or kWh, measure energy, meaning how much electricity the battery can store and supply over time.
A battery could have enough kWh to operate essential loads overnight but lack enough kW to start a large air conditioner or pump. Conversely, it could deliver high power briefly yet run out of stored energy before morning. A sound design checks continuous output, short-duration surge output, and usable capacity together.
Choose an Outage Strategy
There are three practical starting strategies. Essential-load backup supports a limited group of circuits. Whole-home backup makes more circuits available but still requires active energy management. Rate optimization charges and discharges storage around a utility schedule, while preserving a selected reserve for outages. Many homeowners combine the last two goals.
The phrase "whole-home backup" does not mean every appliance can run without limits for any duration. Available power, stored energy, weather, and household behavior still matter. A homeowner who turns off pool equipment and avoids simultaneous high-draw appliances during an outage can make the same battery bank last substantially longer.
How Do You Calculate Essential Backup Loads?
Calculate essential backup loads by listing each appliance that must run, recording its watts, estimating daily operating hours, and converting the result to kWh. Then account for startup surges, battery reserve, conversion losses, and desired outage duration. This produces a practical starting estimate, which a site-specific design can validate.
Build a Household Load Inventory
Use appliance labels, manuals, monitoring data, or a qualified assessment to estimate demand. A nameplate rating may show the maximum draw rather than typical consumption, so actual operating data is especially useful for variable loads. Review at least a year of utility bills to understand seasonal changes, then examine hourly usage when that information is available.
A useful inventory includes the following seven items:
- List the circuits and appliances that must remain available during an outage.
- Record each item's running watts and any startup or surge requirement.
- Estimate how many hours per day each item will operate.
- Multiply watts by operating hours, then divide by 1,000 to estimate kWh.
- Add the daily kWh for all selected loads.
- Choose the number of outage hours or days the system should support.
- Add an appropriate design margin for reserve settings and conversion losses.
For example, a 100-watt load used for five hours consumes about 0.5 kWh. An appliance that cycles on and off should be estimated using its expected total run time, not all 24 hours. Actual consumption varies by equipment, age, settings, climate, and household behavior.
Check Simultaneous Demand
Daily kWh alone cannot confirm whether a battery can operate the selected loads. Add the power demand of appliances likely to run at the same time, then check for motor startup surges. Refrigerators, pumps, heating and cooling equipment, and some power tools may briefly demand more power when starting.
A load-management plan can reduce the required peak output. Homeowners might avoid using an electric oven, dryer, and air conditioner simultaneously during an outage. Critical-load panels and smart controls can also prioritize important circuits. Read more about planning home solar battery backup before deciding which loads belong in the backup plan.
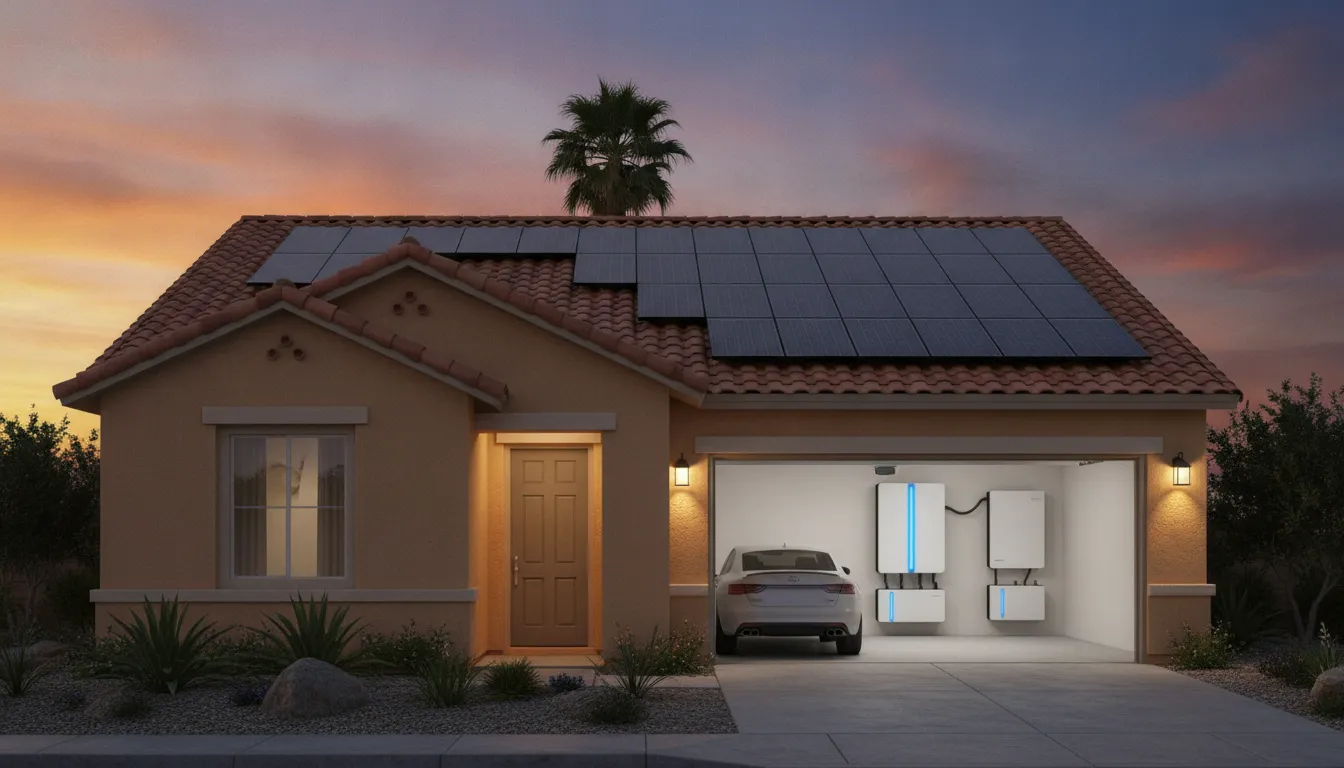
Usable Capacity and Power Rating Both Matter
A battery specification sheet may show nameplate capacity, usable capacity, continuous power, and peak power. Nameplate capacity is the total energy stored under defined conditions. Usable capacity is the portion available to the homeowner under the manufacturer's operating limits and system settings. Continuous and peak power describe how quickly that energy can be delivered.
Reserve settings are equally important. A battery used for evening rate optimization could reach its selected minimum before an outage begins. Keeping a larger backup reserve improves outage readiness but leaves less stored energy available for daily rate shifting. The appropriate setting depends on outage risk, utility plan, season, and homeowner priorities.
| Design Factor | What It Tells You | Why It Matters |
|---|---|---|
| Usable capacity | Energy available from the battery in kWh | Helps estimate how long selected loads can run |
| Continuous power | Power the system can steadily deliver in kW | Limits the loads that can operate together |
| Peak or surge power | Short-duration power available for startup | Helps motors and compressors start successfully |
| Backup reserve | Stored energy held for a possible outage | Balances outage readiness with daily savings goals |
| Solar recharge potential | Energy the array may provide after household use | Influences recovery during an extended outage |
Use a Sizing Formula as a Starting Point
A simplified energy calculation is: selected daily load in kWh multiplied by desired backup days, then adjusted for usable capacity, reserve, and expected system losses. This is a planning estimate, not a final equipment design. Actual performance depends on operating conditions, equipment compatibility, solar availability, and changing household demand.
Discuss a tailored battery storage and backup design with AMECO.
Modular systems can provide flexibility because capacity and power may increase when compatible units are added. However, adding batteries later is not always identical to installing them together. Equipment generations, available electrical capacity, permitting requirements, and manufacturer rules can affect expansion, so future plans should be discussed during the initial design.
Can Your Solar Array Recharge the Battery?
A solar array can recharge a battery only when its available production exceeds the home's active demand and the system can direct that surplus into storage. Recharge time changes with array size, weather, season, shading, battery state of charge, and equipment limits. Storage and solar should therefore be sized as one coordinated system.
Plan for the Lowest-Production Periods
California has strong solar resources, but production still changes through the year. Shorter winter days, clouds, smoke, shading, panel orientation, and soiling can reduce output. A battery bank that recharges easily on a clear summer day may recover more slowly during a winter storm or a period of heavy smoke.
During a grid outage, solar energy may need to serve current household loads before replenishing storage. If daytime demand consumes nearly all available production, little remains for the battery. Load management becomes especially valuable during an extended outage because reducing daytime consumption can improve the chance of restoring charge for overnight essentials.
Balance Array Size, Storage, and Controls
More storage is not automatically more resilience. A large battery bank paired with an undersized or shaded array may take too long to recharge. Likewise, a large array needs compatible inverters, controls, and storage charging capability to deliver useful backup performance. AMECO's integrated approach can coordinate residential solar design, storage, and roofing conditions as part of one project review.
Roof condition also matters because panels and storage are long-term home investments. If a roof needs attention, coordinating the work can reduce avoidable disruption. Homeowners considering both projects can review AMECO roofing services and learn about the benefits of planning solar and roofing together.
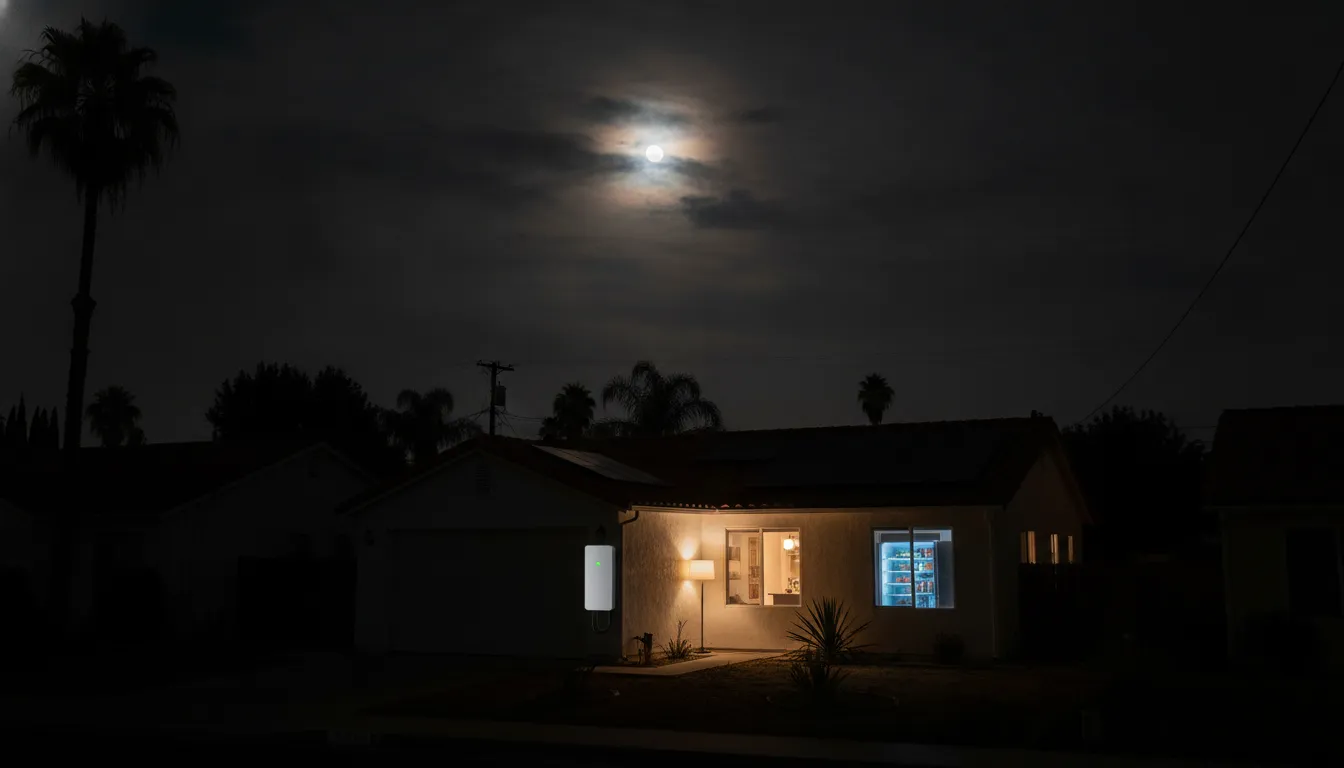
How California Rate Plans Shape Battery Size
Battery sizing for bill management begins with the homeowner's utility tariff and hourly consumption pattern. Under a time-of-use plan, a battery may charge from solar during lower-value periods and discharge when grid electricity is more expensive. The useful capacity for this goal depends on how much energy the home typically uses during the targeted hours.
Export compensation, seasonal rates, weekday schedules, and special rate programs vary by utility and can change. A design should use the homeowner's current plan and recent interval data rather than a statewide assumption. Incentive eligibility and program rules also require verification for the specific property and applicant.
Balance Daily Cycling With Outage Reserve
A homeowner focused on rate optimization may want the battery to discharge deeply each evening. A homeowner focused on outage protection may prefer to retain a larger reserve. A hybrid strategy can adjust the reserve by season or weather risk, subject to system capabilities. There is no universal setting that maximizes both savings and backup duration at all times.
System economics also depend on solar production, consumption, equipment, financing, utility rules, and available incentives. For a project-specific starting point, use the solar project cost calculator, then confirm assumptions through a detailed assessment.
Calculate your project and explore a solar-plus-storage estimate.
Account for Future Electrical Loads
Today's utility bills may not represent tomorrow's demand. An electric vehicle, heat pump, induction range, pool equipment, home addition, or new air-conditioning system can change both total kWh and peak kW. Tell the designer about planned upgrades so the electrical infrastructure, solar array, and storage strategy can be evaluated together.
EV charging is often a flexible load because it can be scheduled outside an outage or shifted to favorable hours. Homeowners planning electrification can explore home EV charging options and discuss how charging will interact with solar and storage.
What Does a Solar Battery Sizing Example Look Like?
A practical solar battery sizing example starts with a homeowner's selected circuits, not a generic battery count. Add the expected daily energy for those loads, confirm their simultaneous and startup power, select the desired backup duration and reserve, then test whether the solar array can replenish storage under realistic seasonal conditions.
Example: Essential Loads Through the Night
Consider a homeowner who wants to support refrigeration, several LED lights, internet equipment, device charging, and a few outlets during an outage. The homeowner estimates each load's runtime, totals expected overnight kWh, and checks the maximum power if several items operate together. The designer then validates surge needs, usable battery capacity, reserve settings, and electrical panel compatibility.
If the homeowner later adds central air conditioning to the backup goal, both the energy requirement and power requirement may rise sharply. Rather than assuming another battery solves every constraint, the designer should evaluate startup demand, compatible equipment, circuit controls, and solar recharge potential. Strategic load shedding may provide a better result than unrestricted operation.
Example: Evening Rate Optimization Plus Backup
Another homeowner may want to cover a recurring block of evening consumption while retaining energy for outages. Interval utility data shows how many kWh the home typically uses during that period and which appliances drive peaks. The design can then compare battery configurations and reserve settings without promising a fixed savings amount.
A professional assessment should also review installation location, temperature exposure, clearances, local codes, interconnection requirements, and equipment compatibility. AMECO Solar & Roofing can coordinate a custom evaluation through its California battery backup service. Homeowners interested in a broader combined project can also review integrated solar and roofing solutions.
Questions to Bring to a Design Consultation
Bring recent utility bills, interval usage data if available, and a list of the circuits you want backed up. Note planned electrical upgrades, frequent outage conditions, and whether bill management or resilience is the higher priority. Ask the designer to explain usable capacity, continuous and surge power, expected seasonal recharge behavior, reserve settings, equipment compatibility, and the assumptions used in any performance estimate.
Also ask what happens when household demand exceeds available battery power, how essential circuits will be selected, and whether the proposed system can be expanded. A clear operating plan is part of good sizing. It helps everyone in the household understand which loads to limit during an outage and how to preserve stored energy when solar production is lower than expected.
Frequently Asked Questions
How many batteries does a California home need?
The number depends on the home's selected backup loads, required power output, desired runtime, solar recharge potential, utility plan, and equipment specifications. One battery may support a limited group of essentials, while broader or longer-duration goals may require additional compatible storage. A load-based assessment is more reliable than a generic battery count.
What is the difference between battery kW and kWh?
Battery kW measures how much power the system can deliver at one time, while kWh measures how much energy it can store and provide over time. Both matter: kW affects which appliances can run together, and usable kWh affects how long those appliances can operate.
Can solar panels recharge a home battery during an outage?
A properly configured solar-plus-storage system may recharge during an outage when solar production exceeds active household demand. The amount and speed of recharging depend on weather, season, shading, array output, battery state of charge, and equipment limits. Managing daytime loads can leave more solar energy available for storage.
Should battery sizing include future home upgrades?
Yes. Planned electric vehicles, heat pumps, air conditioning, pool equipment, additions, or other electrification projects can change total energy use and peak demand. Sharing those plans during design helps determine whether the solar array, storage, controls, and electrical infrastructure should accommodate future loads.
6.26.2026
New detached accessory dwelling units in California require a solar energy system to follow state building rules. These laws lower energy use and reduce the load on the electrical grid. Selecting the right setup ensures your new unit is legal and efficient.
Plan your ADU solar project with AMECO's solar cost calculator.
Installing solar panels for ADU California projects is required for most newly built detached units under the Title 24 Energy Code. New homes need a solar system sized around the expected electrical load. The California Energy Commission explains the rules and exceptions. Many additions and conversions are exempt. Confirm your project's status with the local building department before finalizing plans.
Understanding state laws and local permits can be the hardest part of adding a small home. Start by confirming whether your project falls under the latest energy rules.
Solar Panels For Adu California: When are solar panels required for a California ADU?
California building rules now make solar energy a standard part of home building. Under the current Title 24 Energy Code, most new homes must have solar power. This rule applies to any newly built detached accessory dwelling unit (ADU). Because the state views these as new homes, they must meet the same green energy goals as any other new house.
Rules for detached units
If you build a new stand-alone ADU, you will likely need to install a solar system. The state needs a photovoltaic system for all newly built single-family homes. This includes any detached structure meant for living. Your local building office will check for solar plans before they give you a permit. You can calculate your project costs online to see how this fits your budget.
Exemptions for additions
Not every ADU project needs solar. If you change a garage or add a room to your main house, you might not need it. These additions to existing buildings do not usually fall under the new-build solar rule. This also applies to junior ADUs that stay within your home. If your space is under 500 square feet and inside the main house, you likely skip the solar need.
Checking your local rules
While state laws set the floor, local cities can have their own rules. Some small systems under 1.8 kW may not be needed in every zone. You should always check with your city building office to be sure. A pro can help you find the best path. You may want to get an estimate from an expert who knows both solar and roofing. This helps your new roof stay safe while you add clean power.
Shared service or separate meter: which design fits?
When you add solar panels for an ADU in California, you must decide how to connect to the grid. You can share the main house service or set up a new meter. Each choice changes how you pay for power and how the system works. Your final choice often depends on your long-term goals for the home. It is best to plan this early to avoid extra costs later.
How shared electrical service works
A shared service ties the ADU solar system into your main home's electrical panel. This is often the simplest path for owners who want to keep things easy. It usually costs less to set up because you do not need new power company gear. It also makes permits move faster in many California cities. You may need to upgrade your main panel if it cannot handle the new solar load.
This setup works well if family members live in the unit. You can use the extra power from the ADU solar panels to lower the bill for the whole site. But if you plan to rent the space, tracking power use becomes harder. You would have to split the bill with your tenant by hand. Some owners use sub-meters to track use without a second utility account.
Benefits of a separate utility meter
A separate meter gives the ADU its own account with the power company. This design is common for rental units where the tenant pays for their own power. It provides a clear line between the main house and the back unit. This can prevent fights about high energy bills. It also makes it easier to sell the home later if the buyer wants a clear rental income.
While it offers more control, this path adds more cost. You will need to pay for a new meter box and more wire work. The power company may also charge a fee to start a new service line. You can calculate your project costs to see if this spend makes sense for your budget. Most owners find the cost is worth it for long-term rentals.
Choosing the best fit for your project
Think about how you will use the space in five or ten years. If you want a battery backup system, a shared service might be better. It allows the battery to power both the main house and the ADU during a blackout. This helps you get the most out of your solar panels for ADU California installation. Working with a company that handles both solar and roofing ensures your roof stays safe while you add new power lines.
| Feature | Shared Service | Separate Meter |
|---|---|---|
| Setup Cost | Lower upfront costs | Higher initial spend |
| Permits | Faster and easier | More complex process |
| Billing | One combined bill | Two separate accounts |
| Rental Use | Harder to track use | Best for clear rentals |
| Outage Power | Easier to share backup | Harder to share power |
How should you size solar for an ADU?
Sizing solar panels for ADU California homes starts with a look at how you will use power. You must plan for the daily needs of the people living there. A small unit for one person uses less energy than a full guest house. A good plan helps you avoid buying too many panels or having too little power for your tools.
Plan for electrical loads
Most new ADUs in the state are all-electric. This means your heating, cooling, and water heater all run on the grid. These machines pull a lot of power. You should list every large tool in the unit to find your total load. Heat pumps are common for air and water because they save energy. Even so, they still add to your total power needs. You can Get An Estimate to see how these loads will affect your setup.
Kitchen tools also play a big role. Electric stoves and ovens need more power than gas units. If the unit has a washer and dryer, your load will go up. It is best to use high-grade machines that do not waste power. This makes it easier to meet your needs with fewer panels on the roof.
Consider future energy needs
Think about what you might add in the next few years. Many owners now want to add an EV charger for their tenants or guests. An EV charger adds a heavy load to the home's main panel. Planning for this now saves you from a costly upgrade later. You may also want to look at battery backup systems to keep the lights on during a grid outage. These systems provide energy freedom and protect your gear from power spikes.
Adding a battery also helps you use more of the power you make. In many parts of the state, utility rates go up in the evening. A battery lets you store solar power from the day to use at night. This is a smart way to lower your bills and gain peace of mind.
Follow state sizing rules
The California Energy Code sets the floor for how much solar you need. For new detached units, the state looks at your climate zone and floor size. They want the system to offset about as much power as a standard home would use. These rules ensure that every new home helps reach state green goals. You can Calculate Your Project based on these floor area rules.
Your main home's panel must be strong enough for the new load. If your panel is old, we may need to set up a new one. We also check the roof area to see how many panels will fit. AMECO can help you find the best balance between state rules and your actual power use.
Roof and site details to solve before installation
When you plan for solar panels for ADU California, you must think about the roof and site first. A good plan ensures your system works well for decades. You should check the roof size and how much sun it gets before you start to build. This helps you avoid costly changes later.
Optimal roof direction and size
The way your roof faces changes how much power your panels make. In California, south-facing roofs get the most sun throughout the day. If your ADU roof faces south, your system will be stronger. You also need enough space on the roof for the panels. The California Energy Code calls this space the Solar Access Roof Area. It includes any roof part that can support a solar system.
Shade from trees or other buildings can also lower your power output. You should check for shade at different times of the year. If a large tree blocks the sun, you might need to trim it. A clear path for the sun is key to getting the best results from your solar panels for ADU California. You can use a tool to see how much power your roof can make.
Structural health and equipment layout
Your ADU roof must be strong enough to hold the weight of the panels and the mounting gear. If you are building a new ADU, this is easy to plan for in the design. For older roofs, you should have a pro check the structural health. They will look for any signs of damage or weak spots. It is best to fix these issues before you set up any solar gear.
You also need to plan where the rest of the equipment will go. This includes the inverter and the main panel. Local rules often require specific gaps from the edges of the roof for fire safety. These rules can change the usable space on your roof. You should talk to an expert to get an estimate for your project and check local code needs.
Planning roofing and solar together
One of the best moves you can make is to plan your roof and solar at the same time. This is helpful when you build a new ADU. By doing both together, you can ensure the roof seal stays tight. This protects your roof warranty and prevents leaks. A pro who does both roofing and solar can manage the whole job from start to finish.
This combined approach also makes the work faster. The team can set up the roof mounts while they build the roof. This saves time and cuts the risk of mistakes. When you solve these details early, you set your ADU up for long-term energy success.
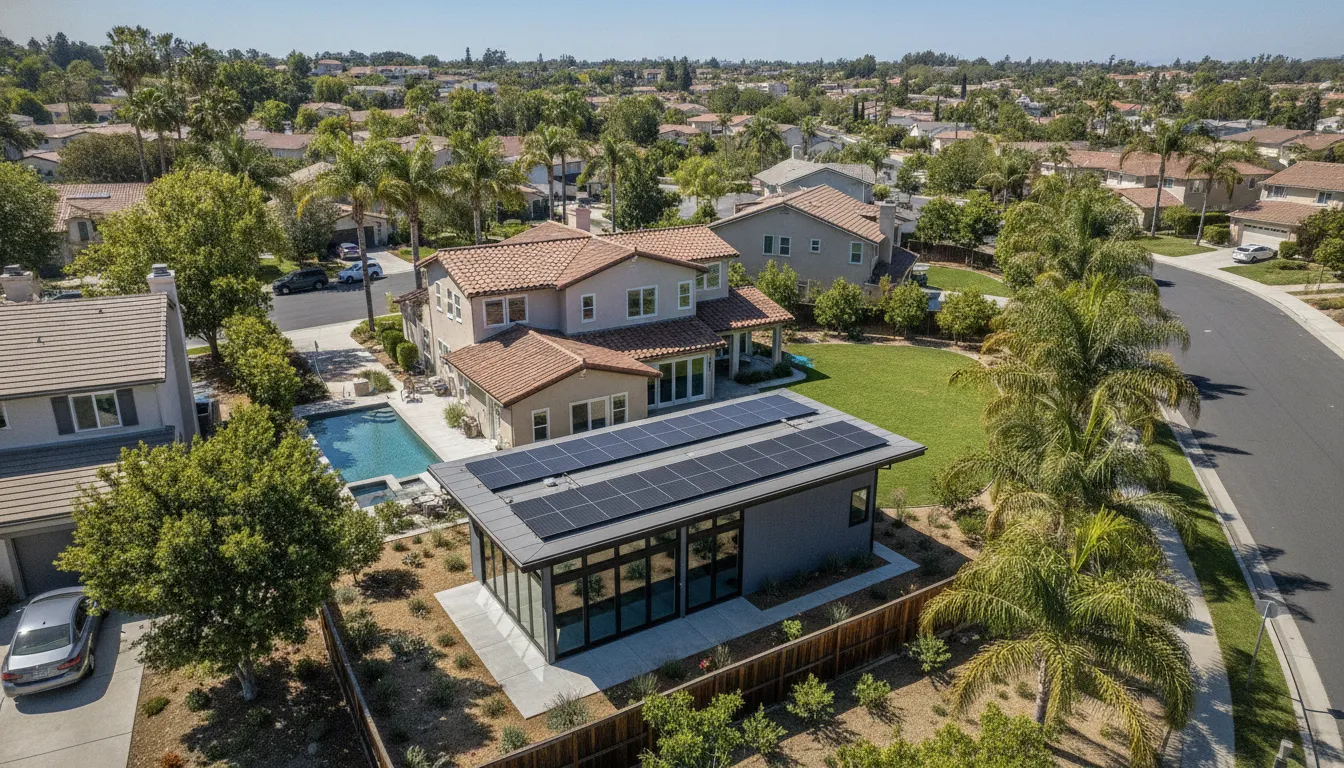
How do ADU solar permits and utility approvals work?
Adding solar panels for ADU California projects takes a few detailed steps. You must work with both your local building office and your power company. This work ensures your system follows safety codes and grid rules. Following these rules can be hard, but a clear plan helps you avoid long wait times and extra costs. Proper planning ensures that your new solar setup is safe for your family and ready to save you money on day one.
The solar approval process
Most projects follow a set path to go from a plan to making power. Each stage needs certain papers and checks. This process shows that your solar panels for ADU California meet state energy rules for new homes. City staff must review your roof support and wiring plans to ensure the roof is strong and the wires are secure. Following these steps keeps your project on track and helps you get your system turned on fast.
- Design and energy modeling. Experts create a plan that meets state energy codes. This model shows how much power the ADU will use and how much solar it needs to stay legal.
- Permit filing. Your builder sends the plans to the city or county office. Staff check for safety and power rules before they give you a permit.
- Grid link form. You must apply to link your system with your power company. They review how your new solar setup will join the local grid safely.
- Setup and check. Once you have permits, crews set up the panels and wires. A city inspector then visits your home to sign off on the work.
- Right to use power. The power company does a final check of your system and meter. They then grant the Right to Operate, which lets you turn on the system and start saving.
Working with your power company
Your power company plays a big part in how you use your solar power. They decide if you need a new meter or if you can share power with the main house. A shared link can make getting an estimate and filing permits easier for some owners. But a separate meter might give you more control over your power bills if you plan to rent out the unit. Your choice will depend on your local grid setup and your goals for the property.
Power company rules can change between cities like Los Angeles or areas in the Central Valley. Some places have faster review times than others. It is helpful to work with a team that knows local power rules and can talk to staff for you. This skill can help you plan your costs and timeline with more trust. Knowing which forms to file and when can save you weeks of waiting during the peak summer season.
You can use a solar cost calculator to see how these choices change your project. A good design will plan for both your power needs and grid rules from the start. This path helps you get the most from your costs while staying in line with state laws. Working with an expert who handles both solar and roofing ensures that your roof warranty stays safe during the entire process.
What affects the cost of solar panels for an ADU?
The total price for solar panels for an ADU California homeowners build depends on many things. Each site is unique and has its own needs. You should look at both the parts and the labor to get a full view of your budget. Planning for these costs early will help you avoid problems as you build your unit.
Key factors for system size and gear
The size of your solar array is a big part of the price. Larger systems need more panels and more time to set up. In California, the law has specific rules for system size. The California Energy Code says that new detached units must have solar to offset their planned power use. This helps you save on bills but means you must plan for the right system size from the start.
The type of gear you choose also changes the cost. High-grade panels and smart inverters often cost more up front. But they can give you more power and last longer. You might also want a battery to store power for when the sun goes down. A battery adds to the bill but helps if the grid goes out. You can use a tool to Calculate Your Project based on your specific power needs.
Grid links and panel upgrades
How your unit links to the power grid is a major cost driver. Some ADUs can share the main house panel. This is often the cheapest way to go. But some units need their own meter or a new panel. A panel upgrade can add a few thousand dollars to your total project cost. Your solar expert will check your current service to see what you need.
Trenching is another cost that people often forget. If the ADU is far from the main house, you must dig a path for wires. This work can be slow and hard, which adds to the price. Long runs of wire also cost more in parts and work time. Getting an expert view early helps you find the best path for these lines.
Permit fees and roof prep
Local cities and power firms charge fees for permits. These costs vary by where you live in California. Some places have low fees, while others cost more. Your team will handle the forms, but you still pay the fees. This is a normal part of every solar project for a new home unit.
The state of your roof also matters. If you build a new ADU, the roof will be ready for solar. But if you change an old shed or garage, you might need to fix the roof first. Working with a firm that does both solar and roofing keeps your roof warranty safe. You can Get An Estimate that covers both the roof work and the solar setup to save time and money.
A planning checklist before asking for an ADU solar quote
Getting a quote for solar panels for ADU California projects is faster when you have the right facts. A solar pro needs data to give you a fair price. Having these items ready saves time and money. It also helps you meet state laws.
Find your ADU type and size
Start by knowing the scope of your work. California law has strict rules for other types of units. Most new detached units must follow the California Energy Code. This means they must have solar power to pass state checks. Units that are built onto a home often do not have this rule. You will need to share the floor area of the unit in square feet. The size of the build helps us guess how much power you will use each day. Large units need more panels to meet your goals.
You should also have your site plans ready. These plans show where the ADU sits on your land. They help the solar team see if trees or other homes will cast a shadow on your roof. Shade can greatly lower the power your panels make. If you know about shade issues now, we can plan for them. This helps us find the best spot for panels to keep you on track.
Check your power and roof setup
Your power panel is a key part of the plan. You should decide if you want the ADU to have its own meter. A shared meter is often cheaper to set up. But a separate meter lets you track power use with ease. You also need to look at your roof plans. Clear plans show the slope and the way the roof faces. This is a good time to book a project quote to review your site. We check if your panel needs an upgrade to handle the new load.
Think about what will use power in the ADU. Will you have a heat pump or an EV charger? These high-load items change how we size the solar array. A full load list helps us build a system that won't leave you short. We also check the roof type to make sure the mounts will be safe. Using a pro who handles both roofing and solar can help keep your roof warranty in place.
Plan for your power needs
Next, think about your future power goals. Do you want to be fully green? Or do you just want to meet state rules for new builds? Many owners now choose to add a battery to their system. This keeps the lights on if the grid goes down. It also helps you use your own power when grid rates are high. Having a clear goal for power use makes the design process much smoother. You can Calculate Your Project online to see how other sizes affect your savings.
Finding info early saves time for all. It helps you get a quote that is firm and fair. You should also make a list of questions for your solar team. Ask about permit times and how they handle the grid link. Knowing the steps for permits can help you plan your build. A good pro will guide you through the rules.
- Copy of the ADU site plan and roof layout
- Load list for new items (HVAC, EV charging)
- Recent utility bill for the main house
- Choice on shared or separate power meters
- Photos of the main power panel and roof
Frequently Asked Questions
Does California require solar panels for new ADUs?
Yes, California's Title 24 Energy Code requires solar panels for all newly built detached ADUs. Because these units are new homes, they must meet the same green standards as any other house in the state. According to the California Energy Commission, these systems help offset the power the building uses. This rule ensures every new unit helps California reach its energy goals while lowering utility bills for the people living inside.
Is solar required for a garage conversion ADU?
No, solar panels are usually not needed if you convert an existing garage or add a room to your main home. The state views these as additions rather than new builds. Under Title 24 rules, the solar requirement only applies to new detached structures. If you are not building a stand-alone unit from the ground up, you likely skip this part of the code. You should check with your city building office to confirm your specific project type.
What is the minimum solar system size for a new ADU?
The state picks your solar size based on your climate zone and floor area. They want the system to cover about as much power as a standard home in that area would use. However, you do not need a system if the required size is less than 1.8 kilowatts. According to data from SnapADU, very small units can sometimes skip the solar rule if their power needs are low enough.
Can I put ADU solar panels on my main home's roof?
Yes, you can place the solar panels for your new unit on any structure on your property that gets good sun. This includes your main home, a shed, or even a carport. This space is called the Solar Access Roof Area. This plan helps if the ADU roof is too small or sits in the shade. It allows you to follow the law while getting the most power from your setup.
Should I get a battery for my ADU solar system?
A battery backup is a smart choice for most California homeowners today. It stores the solar power you make during the day to use when the sun goes down or if the grid fails. According to AMECO Solar, batteries protect you from power outages and help you save money when utility rates are high. This setup gives you more energy freedom and ensures your guests or tenants always have power, even during a storm.
Are you ready to add solar power to your ADU?
Every day you wait to put solar panels on your ADU is one more day of paying high costs for grid power. Rates in California keep going up, so acting now helps you avoid these price hikes and run into fewer permit hurdles later on. Starting today lets you take control of your energy bills and ensures your new home is ready for the future with clean energy. You can also Calculate Your Project to see your likely savings and get a better idea of your setup and costs.
Ready to get started? Get An Estimate to talk to a solar expert about your project.
6.25.2026
Many homeowners are surprised to learn their solar panels won't work during a blackout. For safety reasons, most solar systems are designed to shut down when the grid goes dark. This is where a power outage battery backup becomes the missing piece of your energy independence puzzle. By pairing a battery with your solar array, you create a self-sufficient microgrid for your home. Your panels can continue to generate and store clean energy, keeping your lights on and your home running, no matter what’s happening with the utility lines. Let's explore how this powerful duo works.
Key Takeaways
- Keep Your Home Running Through Outages: A battery backup delivers instant, quiet power when the grid fails, keeping your essentials on without the hassle of a generator. It is also what allows your solar panels to continue working during an outage.
- Take Charge of Your Utility Costs: Storing your own solar energy or cheaper off-peak power lets you use it when electricity rates are highest. This reduces your reliance on the utility company and gives you more control over your monthly bills.
- Choose a System That Fits Your Life: The best battery is the one tailored to you, so start by deciding what you need to power. Focusing on key features like capacity, power output, and solar compatibility will help you find your perfect match.
What Is a Power Outage Battery Backup?
Think of a power outage battery backup as a giant, rechargeable power bank for your home. It’s a system designed to store electricity and automatically deliver it to your home when the main power grid goes down. Unlike small portable chargers for your phone, a home battery backup system is powerful enough to run essential appliances, lights, and medical devices, keeping your life uninterrupted during an outage.
These systems are designed to provide electricity for a set amount of time, which depends on the battery's capacity and how much power your connected devices need. Whether you want to keep just the refrigerator and Wi-Fi running or power a larger portion of your home, you can find a system that fits your needs. For homeowners in California, where power outages can be a frequent concern, having a reliable backup source offers incredible peace of mind and security. It ensures your home remains a safe and functional sanctuary, no matter what’s happening with the grid.
How Does It Work?
The magic of a battery backup system lies in its simplicity. The system charges by drawing electricity from your home’s electrical panel or, even better, from your solar panels. This energy is then stored in the battery, ready for when you need it most. The entire process is managed by smart technology that constantly monitors your home's connection to the power grid.
When the system detects a power outage, it instantly and seamlessly switches over to battery power. The transition is so quick you might not even notice the grid went down, except for the fact that your lights are still on. This ensures your essential appliances and devices stay operational, allowing your home to remain functional when it matters most. By pairing it with solar panels, you can even recharge your battery during the day, creating a truly self-sufficient energy solution.
Battery Backup vs. Generator: What's the Difference?
While both battery backups and traditional generators provide power during an outage, they work in very different ways. A generator creates electricity by burning fuel like gasoline or natural gas. This process can be noisy, produces exhaust fumes, and requires you to keep a supply of fuel on hand. Generators also need regular maintenance to ensure they’ll start when you need them.
A home battery backup, on the other hand, functions silently and without any emissions. It stores energy instead of creating it, offering a cleaner and quieter solution. Because they can be charged with renewable energy from solar panels, battery systems align perfectly with a sustainable lifestyle. This reflects a modern approach to energy that prioritizes both reliability and environmental responsibility, giving you security without the noise and pollution of a generator.
Why You Need a Battery Backup in California
Living in California means enjoying beautiful weather, but it also comes with a unique set of energy challenges. From seasonal wildfires to an aging power grid, the reality is that power outages are becoming more common. A battery backup system isn't just a convenience; it's a powerful tool for securing your home's energy supply and taking control of your utility bills. Think of it as your personal energy reserve, ready to kick in when you need it most and save you money when you don't. It offers peace of mind that is hard to put a price on, ensuring your family stays safe and comfortable no matter what's happening with the grid.
Bracing for California's Power Outages
With frequent power outages becoming the norm, a reliable backup plan is more important than ever for homeowners. A battery backup is an energy storage system designed to keep your home’s essential appliances and devices running when the grid goes down. Instead of fumbling for flashlights, you can maintain a sense of normalcy. Your lights stay on, your refrigerator keeps running, and your Wi-Fi remains connected. Modern, scalable battery solutions can connect directly to your home and power an entire household, including HVAC systems, for days at a time. This ensures your home remains a safe and comfortable haven during extended outages, providing security when you need it most.
Gain Energy Independence and Control Utility Costs
Beyond outage protection, a battery backup system gives you a new level of energy independence. When you pair it with one of our solar solutions, you can store the clean energy your panels produce during the day and use it at night or during peak hours when electricity rates are highest. This strategy helps you stabilize energy costs and reduce your reliance on the utility company. For both residential and commercial property owners, this means significant long-term savings and greater control over your monthly expenses. It’s like having an automatic backup generator, but without the noise or dirty fuel, giving you clean, quiet, and reliable power on your own terms.
Exploring the Types of Battery Backup Systems
When you start looking into battery backups, you’ll quickly realize it’s not a one-size-fits-all solution. The right system for you depends entirely on your goals. Are you just trying to keep your phone charged and the Wi-Fi on, or do you want to run your entire home without interruption when the grid goes down? Understanding the different types of systems is the first step toward finding the perfect match for your needs.
From small, portable units to comprehensive systems that integrate with your home’s electrical panel, each option offers a different level of power and convenience. Think of it as choosing a vehicle: a scooter is great for quick trips around the block, but you’ll need an SUV for a family road trip. We’ll walk through the main categories, from portable power stations to whole-home and solar-integrated storage, so you can confidently decide which path to energy independence is right for you.
Portable Power Stations
Think of portable power stations as supercharged battery packs. They are standalone, rechargeable units with built-in outlets that you can use to plug devices directly into. These are fantastic for keeping small electronics running for hours, like your laptop, phone, and internet router. Some larger models can even power a small appliance like a mini-fridge or a TV.
Their biggest advantage is their grab-and-go nature. You can easily move them from room to room or even take them with you on a camping trip. However, they are a temporary fix. A portable station won’t power your home’s built-in lighting, your central air conditioning, or your refrigerator. They are a great entry point for emergency preparedness but aren’t designed for whole-home support.
Whole-Home Battery Systems
A whole-home battery system is a more permanent and powerful solution. This type of system is professionally installed and integrates directly with your home’s electrical panel. It’s an energy storage system designed to keep your home’s essential appliances and devices running automatically when the grid goes down. You won’t have to fumble for flashlights or extension cords; the power transition is seamless.
These systems provide true security and peace of mind, ensuring your refrigerator stays cold, your lights stay on, and critical medical equipment remains operational. It’s like having your own personal power grid on standby. For homeowners looking for reliable, hands-off protection during an outage, a whole-home system is a game-changer for your residential property.
Solar-Integrated Storage
This is where battery backup truly shines, creating a powerful cycle of energy independence. A solar-integrated system pairs a whole-home battery with a rooftop solar panel installation. During the day, your solar panels generate electricity. Any excess power you don’t use is stored in your battery instead of being sent back to the grid. Then, you can use that stored energy at night or, most importantly, during a power outage.
Many people are surprised to learn that most solar solutions don't work during an outage unless they are paired with a battery. Without a battery, grid-tied solar systems are required to shut down for safety reasons. By adding a battery, you create a self-sufficient ecosystem where your panels can continue generating and storing power, keeping your home running for days.
What Can You Power During an Outage?
When the power goes out, the first question on everyone’s mind is, "What still works?" With a home battery backup, the answer can be surprisingly reassuring. A modern battery system isn't just for keeping a single lamp on; it’s designed to seamlessly power the parts of your home you rely on most. The key is understanding that you get to decide what stays on. During your system's design, you'll identify "essential loads," which are the circuits your battery will prioritize during an outage.
This could be anything from your refrigerator to your home office setup. While a smaller battery might focus on the absolute basics, a larger system, especially one paired with solar panels, can power a significant portion of your home for an extended period. This capability provides more than just convenience; it offers genuine security and peace of mind, knowing your family can remain safe and comfortable no matter what’s happening with the grid. Our approach involves a personalized consultation to help you determine exactly which appliances and systems are most critical for your household. This ensures your battery backup is perfectly tailored to your needs when you need it most.
Keeping Your Essential Appliances Running
A backup battery is an energy storage system designed to keep your home’s essential appliances and devices running when the grid goes down. First on the list for most people is the kitchen. With a battery backup, you can keep your refrigerator and freezer running, preventing hundreds of dollars worth of food from spoiling. You can also power smaller appliances like your microwave to heat up meals, a coffee maker to get your morning started, or an electric kettle. For anyone relying on powered medical equipment, such as a CPAP machine, a battery backup is a non-negotiable for ensuring health and safety during an outage.
Maintaining Your Home Office and Connectivity
In an age where many of us work from home, staying connected during an outage is crucial. A battery backup can easily power your internet modem and router, keeping your Wi-Fi online so you can stay in touch with family, get news updates, and continue working without interruption. You can also keep your laptop, phone, and other devices charged and ready to go. Many modern battery backup systems include an energy management app that lets you track your power usage and battery status right from your phone, giving you full control and visibility even when the grid is dark. This ensures your home office remains a productive space.
Powering Your Lights, Heating, and Cooling
Comfort and safety are paramount during a power outage, and a battery backup helps maintain both. You can keep essential lights on in key areas like the kitchen, bathrooms, and hallways, so you aren't fumbling around in the dark. Depending on the size of your system, you can also power your home’s heating and cooling. While a large central air conditioner requires a lot of energy, a battery can often run a high-efficiency furnace, a window AC unit, or ceiling fans to keep your home at a comfortable temperature. With a proper setup that includes solar solutions, a battery backup can keep these appliances running for up to a few days.
What to Look for in a Battery Backup System
Choosing the right battery backup system can feel a lot like picking out a new car. You wouldn't buy a two-seater sports car for a family of five, and you probably wouldn't choose a minivan for serious off-roading. It’s all about matching the features to your specific needs. When you start comparing battery systems, you’ll see a lot of technical terms that can feel overwhelming. But don't worry, I'm here to walk you through the seven key features to look for. Understanding these will help you feel confident in your decision and find the perfect fit for your home.
From how long it will last during an outage to how it integrates with solar panels, each feature plays a vital role in creating a reliable and efficient energy solution. We'll cover capacity, battery chemistry, power output, and more. By the end of this section, you'll have a clear checklist to help you select a battery backup that gives you true energy independence and peace of mind. Let's get started.
How Long Will It Last? (Capacity and Runtime)
The first question on everyone's mind is, "How long will it keep my lights on?" The answer lies in the battery's capacity, which is measured in kilowatt-hours (kWh). Think of capacity as the size of your battery's fuel tank; a higher kWh means more stored energy. However, the runtime isn't a fixed number. It depends entirely on how much power you're using. If you're only running a few lights and your fridge, your battery will last much longer than if you're also powering an air conditioner. A professional installer can help you calculate your needs to ensure your system can power your essential devices for as long as you need during an outage.
Built to Last: Understanding Battery Chemistry and Lifespan
Not all batteries are created equal, and their internal chemistry makes a huge difference in performance and safety. Most modern home battery systems use a type of lithium-ion chemistry, with Lithium Iron Phosphate (LFP) being the gold standard. LFP batteries are known for their superior safety, stability, and long lifespan. A battery's life is measured in cycles, where one cycle is a full charge and discharge. High-quality batteries are typically warrantied for 10 years or thousands of cycles, making them a reliable power source for years to come. This durable chemistry is a key component of our solar solutions, ensuring your investment is protected.
Will It Power Your Devices? (Output and Compatibility)
While capacity tells you how much energy is stored, power output tells you how much electricity the battery can deliver at one time. Measured in kilowatts (kW), this determines which devices you can run simultaneously. For example, a battery might have a large capacity (10 kWh) but a low power output (3 kW), meaning it can power a few small things for a long time. A system with a higher output, say 6 kW, can run more demanding appliances like a well pump or an AC unit. It’s crucial to match the output to the needs of your residential household to avoid issues when you need power most.
Choosing the Right Inverter: Pure vs. Modified Sine Wave
The inverter is the part of your system that converts the DC power stored in the battery to the AC power your home uses. There are two main types: pure sine wave and modified sine wave. Pure sine wave inverters produce clean, high-quality electricity that is identical to what you get from the grid. This is essential for running sensitive electronics like computers, modern refrigerators, and medical equipment without risking damage. Modified sine wave inverters are cheaper but produce a "choppier" electrical signal that can harm certain devices. For a whole-home system, a pure sine wave inverter is the only way to go, reflecting a commitment to quality components in our approach.
Seamless Power: Why Automatic Switchover Matters
One of the best features of a modern battery backup system is its ability to switch on the instant the grid goes down. This is handled by an automatic transfer switch. The transition is so seamless that you might not even notice your lights flicker. You won't have to go outside in the dark to flip a switch or start a generator. Your power stays on, your Wi-Fi keeps running, and your daily life continues without interruption. This instant-on capability is a core requirement for a truly reliable battery backup and provides incredible peace of mind, especially during California's unpredictable outages.
Take Control with Smart Monitoring and Management
Modern battery systems come with powerful and user-friendly apps for your smartphone or computer. These energy management tools give you a real-time look at your home's energy ecosystem. You can track your battery's charge level, see how much power your solar panels are producing, and monitor your home's overall energy consumption. Some apps even send you alerts when an outage occurs or when your battery is fully charged. This level of control and insight allows you to make smarter energy decisions and truly manage your power. It's as intuitive as the tools we provide, like our 3D Home Visualizer.
Planning for the Future: Scalability and Solar Integration
Your energy needs might change over time. You might buy an electric vehicle, add an extension to your home, or simply find you want more backup capacity. That's why scalability is so important. Many systems are modular, meaning you can easily add more battery units to increase your storage capacity later on. It's also critical that your system is designed to integrate perfectly with solar panels. Pairing your battery with solar allows you to store the free, clean energy you generate during the day and use it at night or during an outage, creating one of our truly independent solar solutions.
A Look at Top Battery Backup Brands
Once you know what features you need, it’s time to look at the brands that bring these systems to life. The battery backup market has grown significantly, giving you plenty of great choices. At AMECO, we partner with the industry’s most trusted manufacturers to ensure you get a reliable and high-performing system. Our focus is on providing battery backup solutions that offer security and peace of mind. Let's explore some of the top players in the space, from systems that can power your entire home to more targeted options.
Leading Whole-Home Options
For homeowners who want comprehensive, uninterrupted power, whole-home systems are the gold standard. Brands like Tesla and Enphase are leaders in this category, offering powerful batteries that integrate directly with your home’s electrical panel and solar array. Think of a home backup battery as an automatic, clean-energy generator. When the grid goes down, it kicks in instantly to keep everything from your lights to your refrigerator running. These systems are designed to work seamlessly with your solar solutions, storing excess energy during the day so you can use it anytime, giving you true energy independence and security.
Reliable Portable and Mid-Range Options
If you don't need to power your entire house, there are excellent mid-range and even portable options available. Brands like FranklinWH offer sleek, wall-mounted units that blend right into your garage or utility space. These systems are perfect for running essential circuits, like your home office, kitchen appliances, and medical devices. A mid-range battery might offer around 5 to 10 kWh of capacity, which is plenty to get you through a typical outage without skipping a beat. These systems provide a fantastic balance of performance and affordability, and you can always start with one and add more later. You can use our estimate calculator to get a better idea of what size system fits your needs and budget.
How Much Does a Power Outage Battery Backup Cost?
Let's talk about the elephant in the room: the price tag. A home battery backup system is a significant investment, and it’s smart to understand the costs involved before you commit. The final price depends on several factors, including the battery's capacity, brand, and the complexity of the installation.
However, thinking about the upfront cost is only half the story. It’s also important to consider the long-term savings and the invaluable peace of mind that comes with having a reliable power source. Plus, a variety of financial incentives are available that can make installing a battery system much more affordable. Let's break down what you can expect.
Weighing the Upfront Cost vs. Long-Term Savings
The initial cost of a home battery backup can feel daunting, but its real value becomes clear over time. Think of it less as an expense and more as an investment in your home's security and your family's comfort. During an outage, a battery system can keep your essential devices running, from the refrigerator and medical equipment to your home office Wi-Fi. This isn't just about convenience; it's about maintaining normalcy when the grid is down.
Unlike a noisy, fuel-dependent generator, a battery provides silent, automatic power without ongoing fuel costs or fumes. Over the years, this adds up to significant savings and less hassle. When you factor in the ability to store cheap, off-peak energy or your own solar power, you gain more control over your utility bills. It’s about having peace of mind, knowing your home is protected.
How to Save with Incentives and Tax Credits
You don’t have to cover the entire cost of a battery system on your own. Several programs are available to make energy storage more accessible for homeowners. The most significant is the federal Residential Clean Energy Credit, which allows you to claim a credit for 30% of the cost of a new battery storage system with a capacity of 3 kilowatt-hours or more.
Here in California, homeowners may also qualify for the state’s Self-Generation Incentive Program (SGIP), which offers a rebate for installing a new battery. These incentives can substantially reduce your initial investment. Understanding and applying for these programs can feel complex, but our team follows an approach that handles the details for you, ensuring you get every available credit and rebate.
Battery Backup vs. Generator: Which Is Better for You?
When the power goes out, having a backup plan is essential. For years, the go-to solution was a generator, but now, home battery backups present a modern, compelling alternative. So, which one is right for you? A generator works by burning fuel, like gasoline or natural gas, to create electricity on the spot. Think of it as a personal power plant you can fire up when you need it. A
While both can keep your lights on, they operate very differently. Generators require regular maintenance, a steady supply of fuel, and manual startup (unless you have a more expensive standby model). They're also noisy and produce exhaust fumes, which means you need to place them carefully. Batteries, however, are quiet, produce no emissions, and kick in automatically. The best choice depends on your priorities, from maintenance and noise levels to long-term energy costs and environmental impact. Let's look at what makes a battery backup system such a strong contender, especially for California homeowners.
The Upside of Battery Backup Systems
The biggest draw for many homeowners is how seamlessly a battery backup fits into daily life. Unlike a loud, gas-powered generator, a battery system is silent and produces no fumes. It provides security and peace of mind, acting as an automatic backup without the noise or dirty fuel. When the grid goes down, the switch is instantaneous; you might not even notice the power went out. Plus, modern systems have a sleek, wall-mounted design that blends right into your garage or utility space. When paired with solar solutions, a battery can store the clean energy you produce during the day, giving you power through the night and helping you save on utility bills.
What to Consider Before Choosing a Battery
Before you choose a battery, think about what you truly need during an outage. Do you want to keep just the essentials running, like the refrigerator and Wi-Fi, or power more of your home? Your answer determines the capacity you’ll need. Next, consider your charging source. A battery backup can draw power from the grid, often during cheaper off-peak hours, or it can store energy from your solar panels. Most systems also include a handy management app that lets you track your energy usage and see how much backup power you have left. Ultimately, the system should operate automatically, giving you a reliable source of power without any extra effort when the grid is unstable.
Debunking Common Myths About Battery Backups
When you start researching battery backups, you’ll find a lot of information out there, and not all of it is accurate. It’s easy to get tangled up in misinformation that can make the decision feel more complicated than it needs to be. Let’s clear the air and tackle some of the most common myths head-on. By separating fiction from fact, you can get a much clearer picture of what a battery backup can do for your home and your peace of mind.
Myth: "My Solar Panels Will Work During an Outage."
This is one of the most common and surprising misconceptions for new solar owners. The truth is, most grid-tied solar panel systems are designed to automatically shut down during a power outage. This is a critical safety feature called "anti-islanding," which prevents your system from sending electricity back to the grid and potentially harming utility workers making repairs. Your solar panels will only continue to power your home during an outage if they are paired with a battery backup system. The battery safely disconnects your home from the grid, creating your own personal microgrid and allowing you to use the solar energy you’re generating.
Myth: "They're Too Expensive to Be Worth It."
While there is an upfront investment, framing a battery backup as just an expense misses the bigger picture. Think of it as an investment in security, comfort, and energy independence. During an outage, a battery keeps your lights on, your food fresh, and your essential devices running. Beyond outage protection, a battery can also help you save money on your utility bills by storing cheap solar energy to use during expensive peak hours. When you consider the cost of spoiled groceries, lost work, or simply the stress of being without power, the value of a reliable battery system becomes much clearer.
Myth: "All Battery Systems Are Basically the Same."
This couldn't be further from the truth. Battery backup systems vary significantly in capacity, power output, chemistry, and features. Capacity determines how much energy the battery can store, which translates to how long it can power your home. Power output dictates which appliances it can run simultaneously. Some systems are designed to back up a few essential circuits, while others can power your entire house. The right system for you depends entirely on your specific needs and goals. That’s why a customized approach is so important to ensure you get a solution that perfectly fits your home and lifestyle.
Myth: "Batteries Require a Lot of Maintenance."
Unlike traditional generators that need fuel, oil changes, and regular tune-ups, modern home battery systems are remarkably low-maintenance. They are quiet, self-contained units with no moving parts to service. Once professionally installed in a suitable location like a garage, a battery operates automatically in the background, ready to kick in the moment you need it. The system’s software manages its health and performance, and you can often monitor it from a simple smartphone app. This "set it and forget it" convenience is a major reason why so many homeowners are choosing to pair solar solutions with battery storage.
Is a Solar Battery Backup Right for You?
Deciding on a solar battery backup often comes down to one simple question: How much is your peace of mind worth? For many homeowners, adding a battery backup isn’t about preparing for a far-fetched, worst-case scenario. It’s about knowing you have a reliable source of power for your daily life, especially when the grid is unpredictable. A backup battery is an energy storage system designed to keep your home’s essential appliances and devices running when the grid goes down. This means you can keep the lights on, the refrigerator cold, and your essential medical devices powered during an outage, without a second thought.
Beyond just emergencies, a battery system helps you manage your energy usage more effectively. It stores the excess solar power your panels generate during the day so you can use it at night. This strategy is particularly smart for dealing with California's time-of-use utility rates, allowing you to draw from your own stored energy when grid prices are highest. This gives you more control over your monthly bills and reduces your reliance on the utility company. Ultimately, a home backup battery provides security and a greater sense of control over your home's energy. It’s about creating a more resilient and independent home, ready for whatever comes its way.
How to Find the Right Size System for Your Home
Finding the right size battery system is less about getting the biggest one available and more about matching it to your specific needs. Start by thinking about what you absolutely need to power during an outage. Is it your refrigerator and a few lights? Or is it your entire home office, including your Wi-Fi router? Make a list of these "must-have" appliances. A professional can help you perform an energy audit to determine the exact power requirements. Most modern systems also include a handy energy management app that lets you track your battery’s charge and monitor your power flow right from your phone, giving you complete visibility and control.
The Power Duo: Pairing Solar Panels with Battery Storage
Here’s a common misconception: many people assume their solar panels will keep the power on during an outage. In reality, most grid-tied solar systems are designed to shut down when the grid goes offline. This is a safety measure to protect utility workers from energy feeding back into the lines they're repairing. This is where a battery backup becomes essential. When you pair your solar panels with a battery, you create a self-sufficient microgrid for your home. Your panels charge the battery during the day, and the battery provides power to your home when the sun goes down or the grid fails, giving you true energy independence.
Related Articles
- Solar Battery Backup for Home: A Complete Guide
- 6 Best Home Battery Backup Systems for CA Homes
- The Ultimate Guide to Battery Backup for Home Appliances
- The Real Cost to Add Battery to Solar System
- Solar Battery vs Generator: Which One Is Better for Your Home? | AMECO Solar
Frequently Asked Questions
I already have solar panels. Do I still need a battery for power outages? This is a great question, and the answer surprises many solar owners. For safety reasons, most solar panel systems are designed to automatically shut down during a grid outage. This prevents them from sending power back to the grid where workers might be making repairs. A battery backup is the key to unlocking your solar power when the grid is down. It safely disconnects your home from the utility, creating a personal microgrid so your panels can continue to generate and store electricity, keeping your home powered.
Why should I choose a battery backup instead of a traditional generator? While a generator can certainly provide power, a battery backup offers a much more seamless and pleasant experience. Battery systems are completely silent and produce no exhaust fumes, so you can install them in a garage without worrying about noise or ventilation. They also switch on automatically the moment an outage occurs, so you might not even notice the grid went down. Generators, on the other hand, are noisy, require a steady supply of fuel, and need regular maintenance to ensure they will start when you need them.
How long will a battery keep my power on during an outage? The runtime of a battery isn't a single number; it depends on two things: the battery's capacity (how much energy it can store) and how much power you are using. If you are only running essential items like your refrigerator, lights, and Wi-Fi, a standard battery can last for many hours or even a full day. If you add heavy-duty appliances like an air conditioner, the runtime will be shorter. During a consultation, we can help you calculate your specific needs to ensure your system provides power for as long as you need it.
Will a battery backup power my entire house during an outage? It certainly can, but it doesn't have to. You have the flexibility to decide what gets power. Some homeowners choose a larger system capable of running their entire home just as it would normally. However, a more common approach is to connect the battery to your home's most essential circuits. This could include your kitchen for the refrigerator and microwave, your home office for the Wi-Fi, and key lights and outlets. This strategy maximizes your battery's runtime and ensures your most critical needs are always met.
Are there any programs that make a battery backup system more affordable? Yes, absolutely. You don't have to bear the full cost alone. The federal government offers a Residential Clean Energy Credit, which allows you to claim a tax credit for 30% of the total cost of your battery storage system. Additionally, California has its own program called the Self-Generation Incentive Program (SGIP), which provides a direct rebate to homeowners who install a new battery. These incentives can significantly reduce your upfront investment, making energy independence much more attainable.
6.25.2026
A solar array can serve your home for decades, but it can only perform well when the roof beneath it is ready. Many California homeowners should replace roof before solar panels when an inspection finds leaks, damaged decking, widespread material failure, or limited remaining life. A newer roof in sound condition may need only targeted repairs. The right choice starts with an assessment that connects the roof's condition to the proposed solar design.
Get a project-specific roof and solar estimate from AMECO Solar & Roofing.
Making this decision before installation can prevent avoidable panel removal later. It also gives the roofing and solar teams time to coordinate mounting locations, flashing, drainage, and future access. This guide walks through the signs to evaluate, the tradeoffs for common roof materials, and the questions to ask before signing a solar contract.
Should you replace roof before solar panels?
You should seriously consider roof replacement before solar when an inspection finds active leaks, moisture-damaged decking. You should also consider replacement when there is broad material failure or the roof is unlikely to remain serviceable for much of the solar system's life. Installing an array over a failing roof does not solve the underlying problem. It can make the eventual roofing work more involved because the solar equipment may need to be safely removed and reinstalled.
Age alone does not decide the issue. Installation quality, material, ventilation, weather exposure, past repairs, and maintenance all affect roof condition. Two roofs installed in the same year can have very different needs. A documented roof assessment is more useful than relying on a general age rule.
When replacement is usually practical
- There are active leaks, recurring water stains, or moisture damage.
- Shingles, tiles, seams, or flashing show widespread failure rather than one isolated defect.
- Decking has deterioration, movement, or areas that cannot support the planned work.
- The roof has several patched areas and the original problem keeps returning.
- The remaining useful life appears short compared with the planned solar project.
When repairs may be enough
A sound roof with isolated defects may need only targeted repairs. A roofer may replace damaged materials, correct flashing, and prepare mounting areas before the solar crew begins. The recommendation should identify what was inspected, what needs attention, and why repair is suitable. Ask how repaired areas will interact with attachment points and whether any sections beneath the planned array need special preparation.
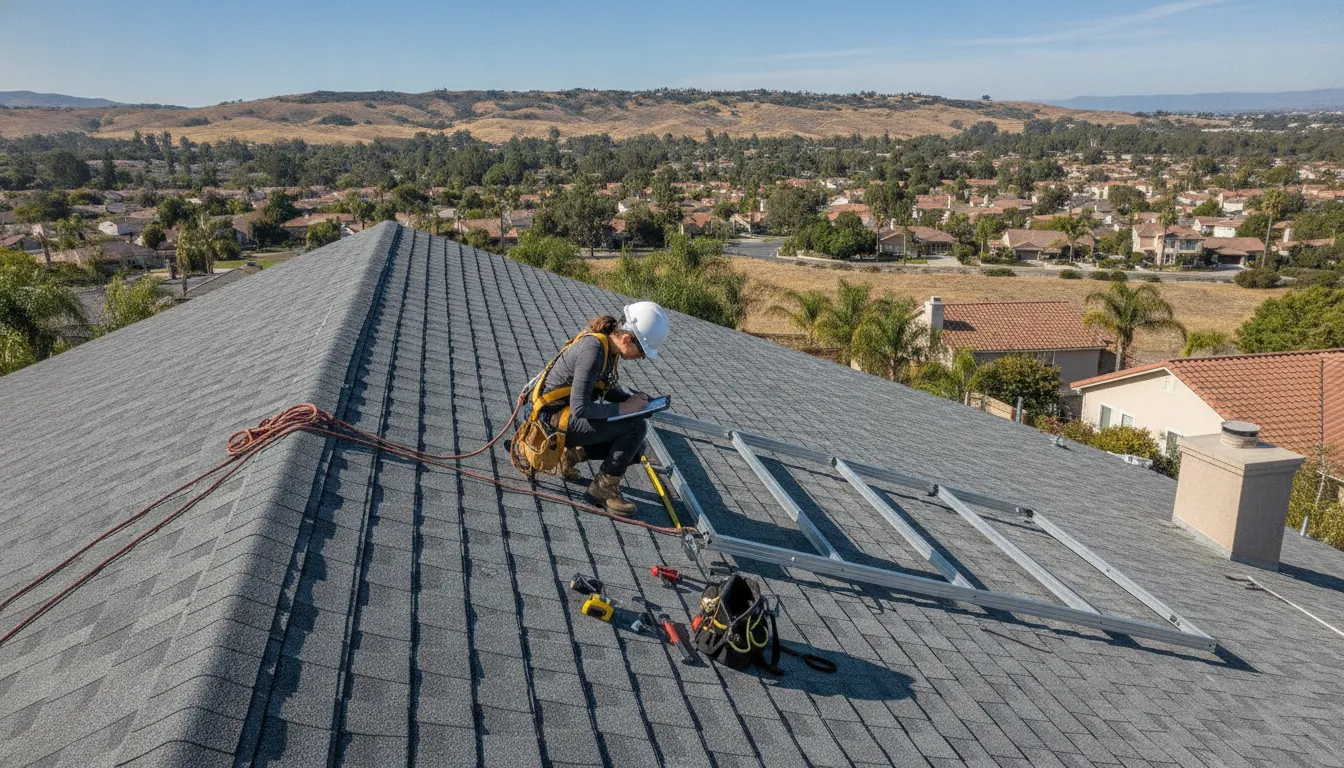
How to assess your roof before going solar
A useful assessment goes beyond a quick view from the ground. It connects the roof's present condition with the places where the array, conduits, and electrical equipment may be installed. Ask for findings in writing so you can compare recommendations from different contractors.
- Review the roof history. Gather installation records, repair invoices, leak history, and any warranty documents.
- Inspect the exterior. Review materials, flashing, drainage, edges, penetrations, and areas exposed to concentrated wear.
- Inspect accessible interior areas. Look for staining, moisture, daylight, damaged decking, and ventilation concerns.
- Map the solar layout. Identify how attachments and pathways interact with valleys, vents, drains, and other roof features.
- Compare options. Ask for a clear explanation of repair, partial work, and full replacement recommendations.
Warning signs homeowners can notice
Water stains, missing materials, cracked tiles, lifted edges, excessive granule buildup, sagging areas, and repeated repairs deserve attention. These signs do not automatically mean full replacement is required. They do mean the roof should be assessed before solar equipment is attached. Interior staining can also indicate a flashing or ventilation issue that is not obvious from outside.
Why decking and flashing matter
The visible roof covering is only one part of the assembly. Decking provides a base for attachments, while flashing directs water away from vulnerable transitions and penetrations. Problems in either area can change the scope. Some conditions only become fully visible after roof materials are removed, so the proposal should explain how unexpected findings will be handled.
Ask for a written recommendation
A good recommendation should distinguish observed facts from assumptions. It should explain the areas inspected, any access limitations, the repairs or replacement proposed, and how that work supports solar installation. It should also clarify whether the quoted scope changes if concealed damage is found. This creates a practical record for making the decision rather than relying on a verbal opinion.
How roof materials affect solar installation
Roofing material shapes the mounting approach, labor needs, and repair strategy. An experienced integrated contractor can plan around the specific assembly instead of applying one method to every home. AMECO's roofing services include work with common California residential and low-slope roof types. Homeowners who want to preview possible exterior changes can also use AMECO's 3D home visualizer before discussing the final scope.
| Roof type | Solar planning focus | Questions to ask |
|---|---|---|
| Asphalt shingles | Shingle condition, flashing, and attachment locations | Are brittle or worn areas present beneath the planned array? |
| Concrete or clay tile | Tile condition, access, replacement pieces, and compatible mounting | How will broken or displaced tiles be handled? |
| Metal roofing | Panel profile, seams, coatings, and approved attachment method | Can the mounting method work with this exact roof system? |
| Flat or low-slope roofing | Membrane condition, drainage, load, and equipment placement | How will the design protect drainage and the membrane? |
Asphalt shingles
Asphalt shingles are common and often straightforward for solar mounting when they are in sound condition. The roofer should look for brittleness, curling, missing granules, damaged flashing, and past patchwork. If only one small area is worn, a repair may be reasonable. If the planned array would cover broad areas with widespread wear, replacement may be the more practical long-term choice.
Tile roofs
Tile can be durable, but individual pieces can crack during access or because of prior damage. The project team should define how it will identify, replace, and work around damaged tiles. It should also explain the mounting method planned for the specific tile assembly. Replacement tiles and safe access procedures should be planned before work starts.
Low-slope and metal roofs
On low-slope roofs, array placement must account for drainage paths and service access. Equipment should not create avoidable water collection or make routine roof work unnecessarily difficult. Metal roof planning depends on the panel profile, seam type, condition, and coating. In both cases, the exact mounting approach should match the roof system rather than a generic detail.
What happens if you replace the roof after solar?
Reroofing a home with an existing solar array is possible, but it normally adds coordination. The solar equipment may need to be made safe, removed or repositioned, stored, and reinstalled after roofing work. The exact process depends on the system, roof, access, and contractor responsibilities.
Panel removal and reinstallation add steps
Removing and reinstalling panels can add labor, scheduling needs, inspections, and a temporary interruption in solar production. The crew also needs a safe plan for protecting equipment while roofing work proceeds. Final cost and timing vary by array size, roof conditions, equipment, access, and local requirements. A project-specific estimate is the reliable way to understand those factors.
More handoffs create more questions
Homeowners need to know who will disconnect equipment, protect components, coordinate inspections, and confirm the system operates after reinstallation. They should also clarify responsibility if roof or solar issues appear later. Written scopes make these responsibilities easier to understand. When separate roofing and solar contractors are involved, ask who owns the schedule and how the teams will communicate.
Design for future service access
Even a new roof will eventually need inspection and maintenance. A thoughtful layout provides reasonable access to important roof features and solar components. Discussing service access during design can make future work safer and simpler. The U.S. Department of Energy's solar planning guidance also encourages homeowners to evaluate roof condition before installing a home solar system.
Why coordinate roofing and solar with one contractor?
Using one integrated roofing and solar contractor can reduce handoffs between separate teams. It allows one company to assess the roof, plan the array, sequence the work, and explain how the scopes interact. That coordination is especially valuable when roof work is needed before installation.
AMECO Solar & Roofing has served California since 1974 and provides both solar installation and roofing services. Its integrated project approach helps homeowners understand how the roof assessment, solar design, installation, and support fit together. Homeowners can discuss the roof and energy project together rather than trying to reconcile separate recommendations.
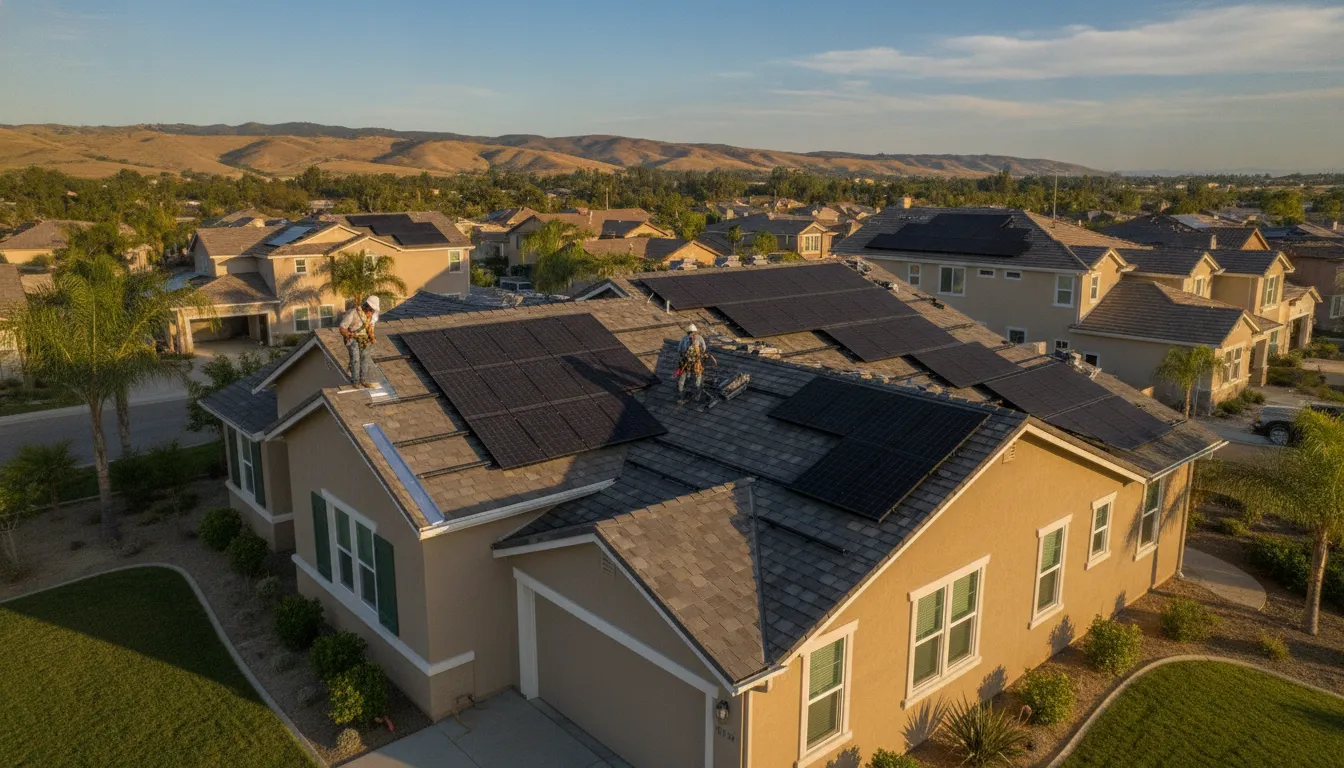
A shared assessment supports a compatible design
When roofing and solar planning happen together, attachment zones and equipment pathways can be considered before reroofing begins. The teams can discuss flashing, material compatibility, drainage, and future access. This helps the homeowner understand one complete project rather than two disconnected scopes.
Sequencing becomes clearer
An integrated plan defines which work happens first and what each phase needs from the next. It can reduce uncertainty about who answers questions when field conditions change. Homeowners should still request a detailed written scope and review warranty terms. Coordination does not replace due diligence, but it can make responsibilities easier to follow.
Questions to ask an integrated contractor
- Who performs and documents the roof assessment?
- How does the roof recommendation affect the solar layout?
- Who is responsible for penetrations, flashing, and repairs?
- How are unexpected decking or material conditions handled?
- What inspections and approvals are included?
Talk with AMECO about coordinating your roof and solar project.
California planning considerations for roof and solar
California homes face varied conditions. Coastal moisture, inland heat, wind exposure, shade, wildfire considerations, and local building requirements can influence a project. Utility territory and permitting processes also vary. A recommendation suitable for one property may not fit another.
Heat, sun, and local exposure
Strong sun exposure is useful for solar production, but heat and ultraviolet exposure can affect roofing materials over time. Coastal air, nearby trees, debris, and wind may create different wear patterns. An assessment should consider the roof's actual condition rather than assumptions based only on age. Ventilation and assembly details can matter too.
Permits and utility coordination
Solar projects generally involve local requirements and utility coordination. Roofing scope can affect project documents and sequencing. Ask who will manage each step and what information may be needed from you. Avoid relying on a universal timeline because requirements and review periods differ by location and project.
Energy goals should guide the design
The roof decision is one part of a broader energy plan. Current electricity use, future loads, available roof area, shade, and budget all influence design. If outage protection is important, review battery backup options at the same planning stage. That helps the contractor design the roof, array, electrical work, and storage around one set of goals.
Questions to ask before signing a solar contract
A clear proposal should explain the present roof condition and how the project addresses it. Before signing, ask direct questions and request written answers for anything that affects scope, responsibility, or future service.
Questions about the roof
- What roof areas were inspected, and what limitations affected the inspection?
- What defects were found, and which require action before solar?
- Why is repair or replacement recommended?
- How will existing penetrations, flashing, and drainage be handled?
- What happens if concealed deck damage is discovered?
Questions about the solar installation
- What mounting method is planned for this roofing material?
- How will attachment points be protected?
- Does the layout preserve practical roof access?
- Who verifies system operation after installation?
- How will roof work affect the solar project scope?
Questions about future work and estimates
- What happens if the roof needs service after solar is installed?
- Who can remove and reinstall panels if future roofing work is required?
- How could that work affect warranties?
- Which costs and responsibilities are included in writing?
These questions help you compare proposals on more than price. They reveal whether the roof and solar designs were genuinely coordinated around your property. Use AMECO's solar and roof cost calculator for an initial ballpark, then request a property-specific assessment before making a final decision.
Frequently asked questions
Can solar panels be installed on an older roof?
Sometimes. Age alone is not decisive. A qualified assessment should confirm the roof's condition, remaining useful life, suitability, and compatibility with the planned mounting system. If defects are isolated and the broader roof is sound, repairs may be enough. Widespread failure or limited remaining life can make replacement more practical.
Can a roof be replaced without removing solar panels?
Roofing beneath an array usually requires affected solar equipment to be removed or repositioned. The exact approach depends on the layout and roofing scope. Ask for a written plan that assigns responsibility for removal, equipment protection, reinstallation, inspections, and system testing.
Will solar panels cause roof leaks?
A properly designed and installed system should use methods intended to protect the roof. Leak risk depends on roof condition, mounting details, flashing, workmanship, and maintenance. Confirm who is responsible for attachment points and related repairs before work starts.
How much remaining roof life is needed before solar?
There is no universal remaining-life threshold for every home. Roofing material, condition, climate exposure, installation quality, project goals, and the proposed array all matter. An inspection can support a property-specific recommendation and explain whether repair or replacement is appropriate.
Is it cheaper to replace the roof before solar?
Coordinating both scopes may avoid a later panel removal and reinstallation project. However, final costs depend on the property, roof, solar system, access, materials, and scope. Request a detailed estimate for your home rather than relying on a universal price claim.
Get a coordinated roof and solar estimate
The best time to resolve roof questions is before solar installation begins. AMECO Solar & Roofing can evaluate your California property, explain practical options, and prepare a project-specific estimate for coordinated roofing and solar work. Final recommendations, costs, savings, and timing depend on your property, roof, equipment, energy use, utility territory, and project scope.
Contact AMECO Solar & Roofing to schedule your project assessment.
6.25.2026
Solar panel removal for roof replacement is a coordinated project, not just a matter of lifting modules off the roof. The array must be shut down safely, its wiring and layout documented, the equipment protected during roofing work, and the system reinstalled and tested afterward. Planning those handoffs before work begins can protect the roof, the solar equipment, and the homeowner's expectations about cost and downtime.
Need a roof assessment for a home with solar? Explore AMECO's roofing solutions and ask about coordinating both sides of the project.
When do solar panels need to be removed for roof work?
Panels usually need to come off when roofers must access the roofing material, flashing, or roof deck beneath the array. A full roof replacement is the clearest example. Removal may also be needed for substantial leak repairs, damaged decking, structural work, or replacement of a large roof section under the panels.
Not every roofing project requires the entire array to be removed. If the work is limited to a section away from the system, a contractor may determine that some or all panels can remain in place. That decision should come after the roof and solar layout have been inspected. Working around an array without enough clearance can limit access and make it harder to complete roofing details correctly.
If the roof is nearing the end of its useful life and solar has not been installed yet, it often makes sense to address the roof first. AMECO's guide to determining whether a roof is ready for solar explains the conditions worth checking before a new installation.
How solar panel removal and reinstallation works
A strong plan treats removal, roofing, and reinstallation as one connected sequence. The details vary by home, roof type, equipment, and local requirements, but homeowners can generally expect the following stages.
1. Inspect the roof and solar system
Before anyone disconnects equipment, the project team should confirm the roofing scope and inspect the existing solar system. This review can identify damaged modules, aging components, roof leaks, electrical concerns, and access constraints that may affect the work.
The team should also document the current array. Photos, equipment details, panel locations, wiring paths, and monitoring status provide a record that supports an orderly reinstall. Homeowners should ask who is responsible for this documentation and how pre-existing issues will be reported.
2. Define responsibilities and sequencing
The solar crew and roofing crew need a shared schedule and a clear division of responsibility. The plan should state who shuts down the system, who removes and stores the equipment, when the roof will be ready for solar work, and who tests the system after reinstallation.
This is where many avoidable delays begin. If the roofer finishes but the solar crew is not scheduled, the system stays offline longer. If the solar crew arrives before roofing has passed its internal quality checks, another visit may be needed. One written project sequence helps everyone work from the same expectations.
3. Safely shut down and remove the array
A qualified solar professional should follow the system manufacturer's shutdown procedures and applicable electrical safety practices. Modules, conductors, racking parts, and related components should be detached carefully and labeled so the array can be reconstructed as planned.
Removal is also an opportunity to evaluate whether mounting hardware or other components should be replaced rather than reused. That determination depends on equipment condition, compatibility, roof scope, and manufacturer guidance. It should be discussed before the quote is finalized, not discovered as an unexplained charge midway through the job.
4. Protect and store the equipment
Solar modules and electrical components need a secure storage plan while the roof is open. Panels should be protected from impact, moisture, theft, and foot traffic. Ask whether equipment will stay on-site or be transported, where it will be stored, and who is responsible if damage occurs.
Good labeling matters here. A neatly documented array is easier to reinstall and troubleshoot than a pile of unidentified parts. Photos and an equipment inventory also give the homeowner a useful record of what was removed.
5. Complete the roof replacement
With the array out of the way, the roofing crew can remove old material, inspect the exposed deck, complete necessary repairs, and install the new roof system. Any hidden damage found after tear-off should be communicated promptly because it may change the scope and affect the date for solar reinstallation.
Roofing details beneath and around the array deserve careful attention. The new installation needs to support proper attachment and weatherproofing when solar is returned to the roof. Homeowners comparing options can learn more about AMECO's approach to a combined solar and roofing project.
6. Reinstall, recommission, and monitor
Once the roof is ready, the solar crew reinstalls the approved mounting system and array, reconnects the electrical components, and checks the system before returning it to service. The exact inspection, permitting, or utility steps depend on the project's scope and local jurisdiction.
Recommissioning should be more than flipping a switch. Ask the contractor to confirm that the system is operating, that monitoring is connected, and that any issues identified during the process are documented. Homeowners should continue checking production after the project and report unexpected alerts or performance changes.
Planning a roof and solar project together? See how AMECO coordinates the process from assessment through installation and support.
What affects the cost of solar panel removal for roof replacement?
There is no universal removal and reinstallation price. A useful quote should reflect the home's actual array, roof, access, equipment condition, and project requirements. The following factors commonly influence the total:
- System size and configuration: More modules, multiple roof planes, complex wiring, and added equipment can increase the labor involved.
- Roof height, pitch, and access: Steep or difficult-to-reach areas may require more time, equipment, or safety planning.
- Roof material and replacement scope: Tile, shingle, and flat roof systems have different removal, attachment, and weatherproofing considerations.
- Condition and compatibility of components: Damaged, aging, or incompatible mounting and electrical parts may need to be replaced.
- Storage and transportation: Secure off-site storage or additional equipment handling may add cost.
- Permits and inspections: Requirements vary by jurisdiction and by the work being performed.
- Coordination: Separate mobilizations, schedule gaps, and unclear handoffs can add labor or extend the period without solar production.
Ask for an itemized written proposal that separates roofing work from solar removal and reinstallation. It should identify included labor, storage, replacement parts, permits or inspections if applicable, recommissioning, and the process for approving changes. A low initial quote is less useful if basic responsibilities are omitted.
How long will the solar system be offline?
The system will stop producing energy before removal and remain offline through roofing, reinstallation, and any required approvals. The length of that period depends on the scope of roof work, equipment condition, weather, local requirements, and how closely the crews are coordinated.
Homeowners should plan for more than the hands-on removal and reinstall time. The gap between crews is often just as important. Before signing, request a project sequence with expected milestones and ask what happens if hidden roof damage, weather, or inspection timing changes the plan.
While the array is offline, the home will draw more electricity from the utility than it does when solar is producing. If the property has battery storage, ask how the project affects backup operation and whether the battery needs separate shutdown or testing. The answer depends on the system design.
Should you hire separate solar and roofing contractors?
Homeowners can use separate contractors, but doing so creates an extra coordination job. Each company must understand where its responsibility begins and ends, and both schedules must align. Written agreements should address roof access, equipment handling, weatherproofing, damage, change orders, and final testing.
An integrated solar and roofing contractor can reduce the number of handoffs because one company can plan both scopes together. That does not remove the need for a detailed proposal or careful review, but it can make accountability and scheduling easier to understand.
AMECO Solar & Roofing has served California since 1974 and coordinates solar and roofing under one company. Its teams can assess how roof condition, solar equipment, and project sequencing fit together. Homeowners considering additional energy upgrades can also review AMECO's solar solutions.
Questions to ask before hiring contractors
A contractor's answers should be specific to the property and equipment, not generic assurances. Bring these questions to the first consultation:
- Who will inspect the existing roof and solar system before work begins?
- Who is responsible for shutting down, removing, storing, reinstalling, and recommissioning the array?
- Will the solar equipment be photographed, labeled, and inventoried before removal?
- Where will modules and other components be stored, and how will they be protected?
- Which mounting or electrical parts are expected to be reused, and what could require replacement?
- How will roof penetrations and attachment points be planned and weatherproofed?
- What licenses, insurance, and relevant manufacturer qualifications does each contractor hold?
- Could this work affect existing roof, solar, equipment, or workmanship warranties?
- Which permits, inspections, or utility steps may apply, and who handles them?
- What is the expected sequence, and how will delays or hidden roof damage be managed?
- How will system operation and monitoring be verified after reinstallation?
- What is included in the quote, and how are change orders approved?
Also review the original solar agreement, equipment warranties, roofing warranty, and homeowner's insurance requirements before authorizing work. Do not assume that any contractor can remove the system without affecting those terms. Ask the relevant providers for written clarification when needed.
Warning signs in a removal and reinstallation quote
Price matters, but omissions can be more revealing than the total. Pause and ask for clarification if a proposal does not identify who performs the electrical work, provides no storage plan, excludes final system testing, or promises that no components will need replacement before anyone has inspected them.
Other concerns include vague statements about permits, pressure to begin without checking warranties, and no process for documenting existing damage. A trustworthy contractor should be willing to explain assumptions, responsibilities, and possible changes in writing.
Plan the roof and solar work as one project
Successful solar panel removal for roof replacement depends on the details between the major steps. Safe shutdown, accurate documentation, protected storage, clear crew handoffs, careful reinstallation, and verified system operation all matter. The right plan gives the roofers room to build a sound roof while protecting the solar investment above it.
For California homeowners, AMECO's integrated solar and roofing team can evaluate the property and build a project-specific plan. Final cost, timing, equipment needs, and applicable approvals depend on the home, roof, array, and local requirements.
Ready to understand your options? Calculate your project and request a project-specific estimate from AMECO Solar & Roofing.
6.24.2026
As a business owner, you’re used to turning expenses into assets. You invest in equipment that improves efficiency and property that appreciates in value. It’s time to start thinking about your electricity bill the same way. Right now, it’s a volatile and uncontrollable operating expense. A commercial solar installation transforms that liability into a predictable, power-generating asset that adds value to your property. Understanding the commercial solar panel cost is the first step in taking control of your energy future. This guide will walk you through the real numbers, from initial investment to long-term returns, showing you how to turn your roof into one of your company’s hardest-working assets.
Key Takeaways
- Look beyond the initial price to see the net cost: Your actual investment is the sticker price minus major financial incentives. The 30% federal tax credit and accelerated depreciation can drastically lower what you actually pay, making solar more affordable than you think.
- Recognize that your final cost is unique to your business: The price is customized based on your energy needs, system size, equipment quality, and your building's specific conditions. This is why a one-size-fits-all price doesn't exist and a professional site assessment is essential.
- Calculate your payback period to understand the real return: Your return on investment becomes clear when you see how quickly your energy savings pay off the system. After that payback period, the energy your system produces is pure profit that protects your business from rising utility rates.
What's the Real Cost of Commercial Solar?
When you start looking into solar for your business, the first question is always about the price. It’s a significant investment, and you need to know if the numbers make sense for your bottom line. The good news is that commercial solar is more affordable than ever, and understanding the cost isn't as complicated as it might seem. Instead of getting a single sticker price, the industry typically prices solar projects on a "cost per watt" basis. This simple metric helps you compare different systems and providers fairly.
Thinking about solar as a long-term asset rather than just an expense is key. It’s a move that can drastically reduce or even eliminate your electricity bills, protect your business from rising energy rates, and demonstrate a commitment to sustainability that resonates with modern customers. For commercial customers, the financial benefits are backed by powerful incentives that can shorten your payback period significantly. Let's break down what goes into the cost so you can see the full picture.
The Average Cost Per Watt
The most common way to measure the cost of a commercial solar installation is in dollars per watt. Before any incentives are applied, most commercial solar systems in the U.S. cost between $1.45 and $2.95 per watt. The national average hovers around $1.71 per watt. So, if you were installing a 100,000-watt (or 100-kilowatt) system, you could expect the initial cost to be somewhere around $171,000. This price gives you a solid baseline for budgeting and helps you compare quotes from different installers on an equal footing. It’s a straightforward way to begin your financial planning for a solar project.
Why Per-Watt Pricing Is Key
Focusing on the per-watt price is crucial because it helps you evaluate the true value of your investment. A lower per-watt cost generally means you're getting more power-generating capacity for your money. This metric is the foundation for calculating your long-term savings and return on investment. When you understand the cost per watt, you can more accurately project how incentives, like the federal tax credit, will reduce your overall expense. At AMECO, our approach involves walking you through these numbers, ensuring you see exactly how the upfront cost translates into decades of energy savings and financial stability for your business.
How System Size Affects Your Price
Just like buying in bulk, larger solar panel systems typically have a lower cost per watt. This is because of economies of scale; the fixed costs associated with project management, permitting, and engineering are spread out over a larger system. While the total project cost will be higher for a bigger system, the price per unit of power goes down. For example, a small 30 kW system might have a higher per-watt cost than a massive 200 kW system. This is an important factor for businesses planning for future growth, as investing in a larger system now can deliver greater long-term value and a more attractive ROI for your solar solutions.
Breaking Down Costs by System Size
One of the first questions every business owner asks is, "How much is this going to cost?" It's a fair question, and the answer isn't one-size-fits-all. While the final price tag depends on your specific site and energy needs, we can look at typical system sizes to get a solid idea of the investment. Think of these numbers as a starting point for your budget. The cost of a commercial solar installation scales with its size, which is measured in kilowatts (kW). A larger system will have a higher initial cost but will also generate more electricity, leading to greater long-term savings.
The key is to find the sweet spot: a system large enough to make a serious impact on your energy bills without being excessive for your needs. Whether you run a small retail shop or a large manufacturing plant, there is a solar solution that fits. These examples will help you visualize what's possible for your business. Remember, these are industry estimates, and the best way to get a precise figure is through a personalized consultation where we assess your property and goals. You can begin to explore your potential savings with our solar estimate calculator to get a preliminary idea of what a system could do for your bottom line. This will help you frame the conversation around real numbers for your company.
30 kW System Cost Example
A 30 kW solar system is a fantastic entry point for many small to medium-sized businesses. With an estimated cost between $50,000 and $85,000, this size is a great fit for businesses like local retail stores, independent restaurants, or small professional offices. A system of this size can offset a significant portion of your electricity bill, freeing up cash flow for other parts of your business. It’s a powerful way to lower your monthly operating expenses while visibly demonstrating your company’s commitment to sustainability to your customers and community.
50 kW System Cost Example
For businesses with a bit more square footage or higher energy consumption, a 50 kW system is a popular choice. The investment for a system this size typically ranges from $80,000 to $140,000. This is ideal for larger office buildings, medical clinics, or small grocery stores. Because a 50 kW system generates more power, it can lead to a quicker return on your investment. For many businesses, this size is enough to cover the majority of their daytime energy usage, which drastically reduces reliance on the utility grid and protects against rising electricity rates.
100 kW System Cost Example
When you move up to a 100 kW system, you’re looking at a serious energy-generating asset for your business. The cost generally falls between $145,000 and $295,000. This scale is well-suited for operations with substantial energy needs, such as manufacturing facilities, large auto dealerships, or multi-story commercial buildings. An investment of this size is a strategic financial decision that provides significant long-term savings and can even generate revenue under certain utility programs. Our comprehensive solar solutions are designed to maximize these financial benefits for larger commercial clients.
200 kW System Cost Example
A 200 kW system is a powerhouse designed for large commercial and industrial applications. With a cost ranging from $280,000 to $550,000, this system is built for properties like industrial warehouses, agricultural operations, or corporate campuses. While the upfront investment is significant, the financial returns are massive. A system this large can power your entire operation, support a fleet of electric vehicles, and provide incredible energy independence. When paired with a commercial battery backup system, it also offers unmatched protection from grid outages, ensuring your business can continue running no matter what.
What Factors Influence Your Commercial Solar Cost?
When you start looking into solar for your business, you’ll quickly find that the final price is more than just the cost of the panels. Several key factors influence your total investment, and understanding them will help you see the full picture of your project. Think of it like a custom-tailored suit; the final cost depends on the fabric, the fit, and all the fine details that make it uniquely yours. From the size of your system to the condition of your roof, each element plays a role. Our customized approach ensures we consider every variable to design a system that perfectly fits your business's needs and budget.
System Size and Equipment Quality
The most direct factor in your total cost is the size of the solar system you need, which is measured in kilowatts (kW). A larger system will naturally have a higher upfront cost; commercial installations can range anywhere from $50,000 to over $600,000. However, larger systems often have a lower cost per watt, giving you more generating power for your dollar.
Beyond size, the quality of the equipment matters. Opting for higher-efficiency panels and inverters might mean a larger initial investment, but it pays off with greater energy production and durability over the system's 25+ year lifespan. We can help you choose from a range of high-quality solar solutions to find the right balance between performance and price for your business.
Panel Technology
Solar technology is constantly improving, and these advancements can affect both cost and performance. One of the most exciting developments is bifacial panel technology. Unlike traditional panels that only capture sunlight from the top, bifacial panels can also absorb light reflected onto their underside. This can significantly increase your energy production without taking up any extra space on your roof.
While this advanced technology might come with a slightly higher price tag, the boost in efficiency often leads to a much faster return on your investment. By generating more power from each panel, you save more on your electricity bills over the long run, making it a smart choice for many commercial customers.
Your Roof and Site Conditions
Your building itself plays a huge role in the design and cost of your solar installation. The age, material, and condition of your roof are critical. If your roof needs repairs or a replacement, it’s best to handle that before installing panels, which can add to the project's scope. As a company with deep roots in both solar and roofing, we can provide integrated roofing solutions to ensure your property is fully prepared.
Other site conditions, like the roof's angle, its orientation toward the sun, and any shading from nearby trees or buildings, also impact system design. An ideal roof has plenty of unshaded, south-facing space, but our team can design an effective system for nearly any property.
Location and Labor Rates
Where your business is located also influences the final cost. Labor rates for experienced solar installers can vary by region, and these costs are a significant part of the total price. In addition, the cost of materials and equipment can fluctuate based on local supply chains and demand.
Working with a local, established installer is a major advantage. A company with a long history in your area, like AMECO, has a deep understanding of the local market and a network of trusted suppliers. This local expertise helps streamline the installation process and can prevent unexpected costs, ensuring your project runs smoothly from start to finish.
Local Permitting and Regulations
Before a single panel can be installed, your project needs to be approved by your local municipality and utility company. This process involves securing permits and following a web of local regulations, which can be surprisingly complex and time-consuming. Each city has its own set of rules, and delays in the permitting process can add unexpected costs to your project.
An experienced solar contractor knows how to handle this administrative work efficiently. We manage all the necessary paperwork and inspections to ensure your system is fully compliant with all local codes. This expertise helps avoid costly delays and ensures your project moves forward without a hitch. You can use our solar estimate calculator to get a preliminary idea of what a system might cost for your property.
Beyond the Panels: Other Costs to Consider
When you’re budgeting for a commercial solar installation, the price of the panels is just the starting point. To get a full picture of your investment, you need to account for a few other key expenses. Thinking about these costs upfront ensures there are no surprises down the road and helps you calculate a more accurate return on investment. Let’s walk through the three main areas to consider: your building’s readiness, administrative fees, and long-term care.
Roof Upgrades and Site Prep
Your roof is the foundation for your solar array, so its condition is critical. If your roof is nearing the end of its lifespan or needs structural reinforcement, you’ll want to address that before installing panels that will be there for 25 years or more. As a company with decades of experience in both solar and roofing, we can tell you it’s far more cost-effective to handle any necessary roofing solutions first. The cost of your project is also tied more to your building's energy consumption than its square footage, so a professional site assessment is essential to determine what preparation your specific property requires.
Permitting and Interconnection Fees
Navigating local regulations and utility requirements is a standard part of any solar project. Every city has its own permitting process, and each utility has specific rules for connecting your system to the grid, known as interconnection. These steps come with associated fees and paperwork that can vary depending on your location. While it might sound like a headache, this is a routine part of the installation. An experienced solar partner will manage this entire process for you, ensuring everything is filed correctly and on time. This is a core part of our approach and lets you focus on your business while we handle the logistics.
Ongoing Maintenance and Repairs
Modern solar panels are incredibly durable, but planning for routine maintenance will keep your system running at peak performance. To get the most out of your investment, we recommend budgeting for annual inspections and periodic cleanings. Professional cleaning can cost between $10 to $30 per panel, while a yearly inspection might run from $200 to $600. Factoring in these minor long-term costs helps you create a realistic savings forecast and ensures your system generates maximum power for decades. We see it as a small price to pay to protect a major asset for our commercial customers.
Debunking Common Myths About Solar Costs
It’s easy to get sticker shock when you first look into commercial solar. Many business owners are interested in the financial and environmental benefits but get discouraged by what they think it will cost. These assumptions are often based on outdated information or common misconceptions that don't account for the full financial picture, including long-term savings and powerful incentives. The truth is, the solar industry has changed dramatically, and what was true ten or even five years ago may not be accurate today. Technology has improved, costs have come down, and financial tools have made solar more accessible than ever.
Let's clear up some of the most persistent myths about the cost of going solar. Understanding the reality behind the price tag can help you see commercial solar for what it is: a strategic investment in your company's future. It’s not just about buying panels; it’s about taking control of one of your largest operating expenses. We'll look at the real factors that determine your return on investment and show you how accessible a solar installation can be for your business.
Myth: "Solar is too expensive for my business."
This is probably the most common concern we hear, and it’s completely understandable. The idea that solar is a luxury reserved for massive corporations is a persistent one, but it’s simply not true anymore. While a solar installation is a significant investment, the initial price doesn't reflect the true cost. Financial incentives like tax credits and depreciation can dramatically lower the net expense.
More importantly, a solar system starts generating savings from day one by reducing your reliance on the utility grid. Over time, these savings add up, making solar a practical and profitable decision for commercial customers of all sizes. It’s less about the upfront expense and more about the long-term financial strategy.
Myth: "The ROI isn't worth it."
Some business owners worry that even if they can afford solar, it will take too long to see a return on their investment. In reality, commercial solar panels offer one of the most reliable and predictable returns you can find. By generating your own electricity, you significantly cut down your monthly operating expenses. In a state like California with high electricity rates, the payback period is often much shorter than you might expect.
Think of it this way: you are already paying a hefty electricity bill every month with no return. Investing in solar redirects that expense into an asset that saves you money, increases your property value, and gives you predictable energy costs for decades. You can even use our solar panels costs calculator to get a preliminary estimate of your potential savings.
Myth: "The upfront cost is too high."
The thought of a large capital expenditure can be a major hurdle for any business. The good news is you don’t always need a massive amount of cash on hand to go solar. Many solar providers, including AMECO, offer a variety of financing options that can make a solar project possible with little to no upfront cost.
These financing solutions allow you to install a system and pay for it over time, often with payments that are lower than your current utility bill. This turns the project into a manageable monthly operating expense instead of a major capital investment. Our approach is to work with you to find a financial path that aligns with your budget and business goals, making the switch to solar seamless and affordable.
How to Save Money with Solar Incentives and Tax Credits
Going solar is a smart financial move, and a big reason for that is the variety of incentives designed to lower your initial investment. These programs can dramatically reduce the net cost of your system and shorten your payback period. From federal tax credits to state-level programs and special depreciation rules, these savings make solar an even more attractive option for commercial customers. Understanding how to use these incentives is key to maximizing your return on investment. Let’s walk through the most impactful ones available for your business.
The Federal Solar Tax Credit (ITC)
Think of the Federal Solar Tax Credit, also known as the Investment Tax Credit (ITC), as your first big win in making solar affordable. This powerful incentive allows your business to claim a tax credit for 30% of the total cost of your solar energy system. A tax credit is a dollar-for-dollar reduction of the income tax you owe, which makes it much more valuable than a simple deduction. This significant credit applies to the entire cost of the installation, helping you recover a huge portion of your initial investment right away and making the financial case for solar even stronger.
ITC Bonus Adders
On top of the 30% base credit, your project might qualify for bonus "adders" that can increase your total tax credit even further. These bonuses are designed to encourage specific types of solar development. You could earn an extra 10% credit if your solar components are sourced from the U.S. (Domestic Content) or another 10% if your project is in a designated energy community, like an area historically reliant on coal. There are also competitive 10% or 20% bonuses for smaller systems built in low-income communities. These add-ons can stack, making your project’s financials look even better.
MACRS and Bonus Depreciation
Beyond the ITC, businesses can take advantage of powerful tax deductions. The Modified Accelerated Cost Recovery System (MACRS) lets you deduct the cost of your solar equipment over a five-year schedule, reducing your taxable income. Even better, your business may be eligible for 100% Bonus Depreciation. This allows you to deduct the vast majority of your system’s cost in the very first year of service. Our team can help you understand how these depreciation rules fit into our approach to designing a financially sound solar project for your business.
California's Net Billing Tariff (NEM 3.0)
California’s Net Billing Tariff (NEM 3.0) is the program that governs how you get compensated for the extra solar energy you generate. When your panels produce more power than your business is using, that excess energy is sent to the grid. In return, you receive credits on your utility bill, which helps lower your overall energy costs. To get the most value out of NEM 3.0, we highly recommend pairing your solar panels with a battery backup system. This allows you to store your excess solar energy and use it during peak hours when electricity from the grid is most expensive.
Financing, Leases, and PPAs
A high upfront cost shouldn't be a barrier to going solar. Today, there are more financing options than ever to make a commercial solar installation accessible. While a cash purchase often provides the best long-term return, you can also explore solar loans or Commercial Property Assessed Clean Energy (C-PACE) financing, which ties the payment to your property taxes. Alternatively, Power Purchase Agreements (PPAs) and operating leases allow you to get solar with little to no upfront cost. You can use our solar estimate calculator to get a preliminary idea of costs and explore which financial path best suits your business goals.
How Your Location Impacts Your Solar ROI
Where your business operates has a major impact on how quickly you’ll see a return on your solar investment. Local electricity rates, weather patterns, and state-level incentives all play a part in your payback period. For businesses in California, the combination of high utility costs and abundant sunshine creates a powerful financial case for switching to solar. Understanding these local factors is key to accurately projecting your savings and long-term gains.
Why High Electricity Rates Mean a Faster Payback
It might sound counterintuitive, but the higher your current electricity bill, the faster your solar panel system will pay for itself. Think of it this way: every kilowatt-hour of energy your panels produce is one you don’t have to buy from the utility company. When electricity prices are high, the value of each of those self-generated kilowatt-hours is also high.
For example, if your business pays $1,000 a month for electricity, a solar system could potentially cut that bill down to around $250, saving you $750 each month. That adds up to $9,000 in savings per year, which could help you pay off the entire system in just a few years. This is why focusing on the initial price tag alone is misleading; the real story is in the long-term savings you’ll accumulate.
The California Advantage
California is one of the best places in the country for a commercial solar investment, largely because the state has some of the highest electricity rates. This makes going solar an especially effective strategy for reducing your operating costs. When you generate your own power, you protect your business from unpredictable rate hikes and gain control over your energy expenses.
Fortunately, the cost of solar panels has dropped significantly, making the upfront investment more manageable than ever. While your exact savings will depend on your building’s energy consumption and the size of your system, the financial benefits for commercial customers in California are clear. Choosing solar here isn’t just a green initiative; it’s a smart financial move that delivers a strong, predictable return.
How to Calculate Your Commercial Solar ROI
Figuring out the return on investment for a commercial solar system might seem complicated, but it boils down to a few key numbers. Understanding your potential savings, payback period, and long-term financial benefits will give you a clear picture of how solar can be a powerful financial tool for your business. It’s about looking beyond the initial price tag to see the full value a solar installation delivers over its lifetime. Let's walk through how you can calculate these figures for your own business.
Estimate Your Annual Energy Savings
The first step is to look at what you currently spend on electricity. Your utility bills are the baseline for measuring potential savings. For example, if your business typically pays $1,000 a month for electricity, a solar system could reduce that bill to just a few hundred dollars, saving you around $750 each month. That adds up to approximately $9,000 in savings per year. These savings are what will ultimately pay for your system over time. To get a personalized idea of what you could save, you can use an estimate calculator to input your current energy usage and see the numbers for yourself.
Calculate Your Payback Period
Your payback period is the amount of time it takes for your solar system to pay for itself through energy savings. You can find this by taking your total installed cost, subtracting any incentives you receive, and then dividing that number by your annual energy savings. For many businesses, the payback period for a solar installation is between three and seven years. After that point, every bit of energy your system produces represents pure profit for your business. Our team helps commercial customers map out this timeline so you know exactly when to expect a return on your investment.
Understand the Long-Term Financial Gains
The financial benefits of solar extend far beyond the payback period. With the cost of commercial solar panels dropping significantly over the past decade, the long-term value is greater than ever. Many business owners get stuck on the initial expense, but this overlooks the substantial savings and incentives available. Once your system is paid for, you gain decades of protection against rising utility rates. Think of it as locking in your energy costs for the next 25 years or more. Exploring modern solar solutions reveals how this technology has become one of the most reliable and financially sound investments a business can make.
Is Commercial Solar a Smart Investment for Your Business?
After looking at the costs, incentives, and potential ROI, the big question remains: is going solar a smart move for your business? The short answer is a definite yes. Thinking of solar panels as a luxury is an outdated idea. Today, they are a strategic investment that can seriously reduce your operating costs and secure a reliable source of power for years to come. Many business owners worry about the initial expense, but this view often overlooks the long-term savings and powerful financial incentives available.
The cost of commercial solar has dropped by more than 66% over the last decade, making it more accessible than ever. Plus, advancements in technology mean that modern panels are incredibly efficient, so you need fewer of them to meet your energy needs. This is great news for businesses with limited roof space. At AMECO, we’ve seen firsthand how our commercial customers transform their energy expenses into an asset. By generating your own power, you gain control over a volatile expense and protect your business from unpredictable rate hikes.
Beyond the numbers, a solar installation is a visible commitment to sustainability that can enhance your brand and attract new customers. It’s a powerful way to invest in your business’s future, your community, and the planet. With modern monitoring tools, managing your system is straightforward, ensuring it performs at its best. Our customized approach ensures your solar solution is designed to maximize these benefits, turning your roof into a revenue-generating asset.
Related Articles
- How to Use a Commercial Solar Panel Cost Calculator
- Solar Installation Costs Continue To Fall
- Solar Panel Installation Cost Calculator: A 2026 Guide
- The Inflation Reduction Act: Everything You Need To Know | AMECO Solar
- How Much Do Solar Panels Cost for a House? A Full Guide
Frequently Asked Questions
Is my business too small for solar to be worthwhile? Not at all. Solar is a scalable investment that works for businesses of all sizes, from small retail shops to large industrial facilities. A smaller system, like the 30 kW example, can still make a huge dent in your monthly electricity bill and free up cash for other business needs. The key is that the savings are proportional to your energy use, so even if your bills aren't massive, the financial and environmental benefits are still very real.
Do I have to pay for the entire system upfront? This is a common concern, but the answer is no. While paying with cash often yields the best long-term return, it's not the only path. There are many financing options available, including solar loans and leases, that allow you to get started with little or no initial payment. Often, the monthly payment on a loan is less than what you were paying the utility company, so you can start saving from day one without a major capital expense.
My roof is a bit old. Do I need to replace it before installing solar panels? It’s a great question, and generally, yes. A solar panel system is designed to last for 25 years or more, so you want the roof underneath it to be just as durable. It is much more practical and cost-effective to handle any necessary roof repairs or replacements before the solar installation begins. Addressing this first ensures you won't have to remove and reinstall the panels later, which would be a significant extra cost.
How do I figure out the right system size for my business? The ideal system size isn't based on your building's square footage but on your energy consumption. The first step is to look at your past utility bills to see how much electricity you use throughout the year. A professional solar consultant will analyze this data, assess your property for factors like roof space and sun exposure, and then design a system that meets your specific energy needs and financial goals.
Besides the federal tax credit, are there other financial benefits I should know about? Yes, definitely. Beyond the 30% tax credit, your business can also benefit from accelerated depreciation (MACRS), which allows you to deduct the system's cost from your taxable income over just a few years. The most significant long-term benefit, however, is gaining control over your energy costs. By generating your own power, you protect your business from unpredictable utility rate hikes for decades to come.
6.24.2026
Let’s clear the air on a few things. Many business owners I talk to believe that solar is a luxury reserved for massive corporations with huge budgets. They see the potential commercial solar panel installation cost and assume it’s out of reach. Years ago, they might have been right, but the financial landscape has completely changed. Thanks to powerful tax incentives, flexible financing options, and more efficient technology, solar is more accessible than ever for businesses of all sizes. This guide will debunk the common myths about cost and show you how a well-designed solar system is a practical, attainable investment for your small or mid-sized business.
Key Takeaways
- Your true cost is unique to your business: Commercial solar pricing is tailored to your company's energy consumption and property. A custom quote is the best way to understand your specific investment and see how it translates into decades of energy savings.
- Incentives will significantly lower your final price: The initial quote is just a starting point. Powerful financial tools like the 30% federal tax credit and accelerated depreciation are available to slash your net cost and shorten your payback period.
- You have flexible ways to pay for your system: Going solar doesn't require a huge upfront cash payment. With options like solar loans, leases, and Power Purchase Agreements (PPAs), there are accessible financing routes that allow you to start saving immediately.
How Much Does Commercial Solar Cost?
Thinking about solar for your business is a big step, and one of the first questions on your mind is likely about the price. The truth is, there’s no single price tag for a commercial solar installation. The final cost depends on your business’s size, energy consumption, and the specifics of your property. While it is a significant investment, it’s one that pays for itself over time by drastically reducing or even eliminating your electricity bills.
The best way to understand the exact cost for your business is to get a personalized quote. Every company's energy needs are unique, which is why a custom assessment is so important. At AMECO, our commercial solar solutions are designed specifically for your operational goals and budget. We look at your energy usage patterns and property to design a system that delivers the best possible return. To get a preliminary idea, you can start with an estimate calculator to see some initial numbers based on your location and average energy bill. This can give you a solid starting point before diving into a detailed consultation.
Average cost per watt
When you start researching solar, you’ll often see prices listed as a "cost per watt." This is the industry standard for comparing the price of different solar energy systems. Think of it like the price per square foot when you’re looking at real estate; it helps you make an apples-to-apples comparison. On average, commercial solar costs around $1.46 per watt.
So, if you were installing a 100-kilowatt (kW) system, you could multiply 100,000 watts by $1.46 to get a rough estimate. Keep in mind that this is just an average. The final cost per watt for your project will depend on the equipment you choose, the complexity of the installation, and other factors. Generally, larger systems tend to have a lower cost per watt because of economies of scale.
System cost ranges by business size
To give you a clearer picture, most commercial solar panel systems cost somewhere between $50,000 and $600,000. The average cost often lands around $325,000. That’s a wide range because businesses themselves vary so much. A small local café will have very different energy needs and roof space than a large warehouse or manufacturing plant.
A smaller system for a local business might be on the lower end of that spectrum, while a large-scale industrial project will naturally be on the higher end. The key is to match the system size to your specific energy consumption. Our approach involves a detailed analysis of your energy bills to ensure we design a system that’s the perfect fit for your business, maximizing your savings without overspending on unnecessary capacity.
A full cost breakdown: What are you paying for?
The total price of a commercial solar project covers much more than just the panels. The hardware itself is only one piece of the puzzle. Your investment also includes the cost of inverters, mounting hardware, and wiring. Beyond the equipment, you’re paying for the expertise required to get the job done right. This includes system design and engineering, project management, and installation labor.
Other expenses, often called "soft costs," include things like permitting fees, inspection costs, and interconnection agreements with your local utility. Factors like your building’s location, your roof’s angle and condition, and even your current electricity rates can influence the final price. We handle all these details to provide a seamless transition to solar energy for your business.
What Factors Influence Your Final Price?
When you get a quote for a commercial solar installation, you’re looking at more than just the price of the panels. The final cost is a comprehensive figure that reflects a customized energy solution for your specific business. Think of it like a tailored suit versus one off the rack; it’s designed to fit your needs perfectly. Several key variables come into play, and understanding them will help you see the full value in your investment.
The size of your system, the quality of the equipment you choose, and the current condition of your roof are some of the biggest drivers of cost. But it doesn’t stop there. Factors you might not have considered, like local labor rates, city permitting fees, and even how easy it is for crews to access your roof, all play a role in shaping the final price. A trustworthy installer will walk you through each of these elements, ensuring there are no surprises. Our approach is to provide a transparent breakdown so you know exactly what you’re paying for and why it’s the right fit for your business goals.
System size and energy needs
The most significant factor in your total cost is the size of the solar system, which is directly tied to your business's energy consumption. A large warehouse with heavy machinery will have different needs than a small office building. We’ll analyze your utility bills to determine how much power you use and design a system to match.
Interestingly, while a larger system has a higher sticker price, it often has a lower cost per watt. This is an economy of scale; you get more bang for your buck with a bigger installation. It’s a long-term investment, and our goal is to design a system that meets your energy needs efficiently, setting you up for decades of savings. You can use an estimate calculator to get a starting point.
Panel type and equipment quality
Not all solar panels are created equal. You’ll have a choice between different types of panels that vary in efficiency, appearance, and cost. High-efficiency panels cost more upfront but generate more power in a smaller amount of space. This makes them a great option for businesses with limited roof area. If you have a large, open roof, standard-efficiency panels might be a more cost-effective choice.
Beyond the panels, the quality of other components like inverters and racking systems is just as important for the longevity and performance of your investment. We can help you weigh the pros and cons of different solar solutions to find the perfect balance of performance and price for your business, ensuring your system operates reliably for years to come.
Your roof's condition and site prep
A solar panel system is expected to last for 25 years or more, so the roof underneath it needs to be in excellent shape. Before any panels are installed, a thorough roof inspection is essential. If your roof is older or has existing damage, it will likely need repairs or even a full replacement to support the weight and hardware of a solar array.
This is where our dual expertise in solar and roofing becomes a huge advantage. We can identify and address any structural issues, providing the necessary roofing solutions to ensure your building is solar-ready. Handling both the roofing and solar installation with one trusted company streamlines the entire process, preventing delays and ensuring a seamless, worry-free project from start to finish.
Local labor and permitting fees
While the cost of solar panel technology has decreased over the years, the "soft costs" like labor and permitting have become a larger part of the overall price. These fees are unavoidable and are crucial for a safe, legal, and high-quality installation. Labor costs cover the skilled technicians who will be on your roof, and permitting fees are paid to your local municipality to ensure the project meets all building and electrical codes.
Working with an experienced local installer is key. We have a deep understanding of the permitting processes across different California cities and counties. This expertise helps prevent costly delays and ensures your project moves forward smoothly, getting your system up and running without unnecessary administrative headaches.
Site accessibility
The unique characteristics of your property can also influence the final installation cost. A simple, flat, wide-open roof is the easiest and least expensive scenario for an installation crew. However, many commercial buildings have complexities that require more time and labor.
Factors like a steep roof pitch, multiple levels, or numerous obstacles like HVAC units, vents, and skylights can make the installation more challenging and, therefore, more expensive. Shading from nearby trees or adjacent buildings also has to be factored into the system’s design to maximize energy production. We carefully assess every site to create a precise installation plan for our commercial customers, accounting for any access challenges to ensure an accurate quote and an efficient build.
Common Myths About Commercial Solar Costs
When it comes to commercial solar, a lot of business owners I talk to have the same initial worries, especially about the price tag. It’s completely understandable. Making a big investment in your business is a serious decision, and it’s easy to get stuck on a few common assumptions. Let's clear the air and look at what’s really going on with commercial solar costs, so you can see the real opportunities for your business.
Myth: "The upfront cost is too high."
This is probably the number one concern I hear, and it’s a valid one. The idea of a huge upfront investment can feel like a non-starter. But thinking about the initial price alone doesn't give you the full financial picture. What this view often misses are the powerful financial incentives and long-term savings that dramatically change the equation. Federal tax credits, local rebates, and accelerated depreciation can slash the net cost right from the beginning. Instead of seeing it as just an expense, it helps to see it as an investment that starts paying you back immediately through lower energy bills. You can even use an estimate calculator to get a clearer idea of what the numbers look like for your specific business.
Myth: "It only makes sense for large corporations."
It’s easy to assume that solar is a luxury reserved for massive corporations with sprawling rooftops and huge budgets. That might have been true years ago, but the landscape has completely changed. Thanks to more efficient technology, rising traditional energy costs, and fantastic tax incentives, solar is more accessible than ever for businesses of all sizes. We work with a wide range of commercial customers, from small family-owned shops to mid-sized manufacturing facilities. The key is designing a system that fits your specific energy needs and budget, not trying to match what a giant corporation is doing. Solar is a scalable solution that can be tailored to help any business gain control over its energy costs.
Myth: "There aren't enough financing options."
Many business owners I speak with are surprised to learn how flexible solar financing has become. The assumption that you need a huge pile of cash on hand is a major roadblock for many, but it’s simply not the case. There are actually several ways to fund a commercial solar project, ensuring there’s a path forward for almost any financial situation. Beyond a direct cash purchase, you can explore solar loans, which function like any other business loan. There are also options like Power Purchase Agreements (PPAs) and solar leases, which can allow you to go solar with little to no upfront cost. Our approach is to find the right financial fit that helps you achieve your goals.
How to Lower Your Commercial Solar Costs
The initial investment for commercial solar can seem like a big number, but it's rarely the price you actually pay. A combination of federal, state, and local incentives can dramatically reduce the net cost of your system, making the switch to solar one of the smartest financial decisions for your business. These programs are designed to encourage businesses like yours to adopt clean energy, and taking full advantage of them is key to maximizing your return on investment.
Think of these incentives as a toolkit for making your project more affordable. From direct tax credits that reduce your federal tax liability to accelerated depreciation that improves your cash flow, each one plays a role in shortening your payback period. At AMECO, our approach involves guiding you through every available incentive to find the best financial path for your business. We'll help you identify which credits you qualify for and ensure all the paperwork is handled correctly, so you don't leave any money on the table. Understanding these cost-reducing measures is the first step toward seeing just how attainable and profitable a solar investment can be for your company.
The federal investment tax credit (ITC)
The biggest financial incentive available for commercial customers is the federal investment tax credit, or ITC. This isn't a simple deduction; it's a dollar-for-dollar credit that directly reduces the federal income tax you owe. The base credit allows you to claim 30% of your total system cost. For a $100,000 solar project, that’s a $30,000 credit right off the bat. This powerful incentive makes a huge impact on the overall project cost and significantly shortens your payback period. To qualify, your project just needs to begin construction before the program's deadlines, giving you a clear window to plan your investment and secure these savings.
Earning extra credits with bonus adders
On top of the 30% ITC, your business may qualify for "bonus adders" that can make your tax credit even larger. These are extra credits, typically 10% each, for meeting specific criteria set by the government. For example, you could earn a bonus for using American-made components (Domestic Content) or for locating your project in a designated Energy Community. There are also bonuses for projects that serve low-income communities. By stacking these adders, it's possible to increase your total tax credit to 50% or even more, turning a great investment into an incredible one. We can help you determine if your project is eligible for these valuable additions.
Accelerated depreciation benefits (MACRS)
Beyond tax credits, the federal government allows businesses to recover the cost of their solar investment through accelerated depreciation. Using the Modified Accelerated Cost Recovery System (MACRS), you can deduct the vast majority of your solar system's value from your business income over just five years. Even better, current bonus depreciation rules may allow you to deduct most of the cost in the very first year. This provides a significant, immediate tax benefit that can greatly improve your company's cash flow right after the installation is complete, making the upfront investment much easier to manage.
California state and local incentives
As a California business, you have access to some of the best state and local solar incentives in the country. While the specifics can vary depending on your utility provider and city, these programs offer another layer of savings. You might find rebates that lower the initial installation cost or performance-based incentives that pay you for the energy your system produces. The Database of State Incentives for Renewables & Efficiency (DSIRE) is a great resource for exploring these options. Our team stays on top of these regional programs to ensure you capture every available incentive in your area.
Property and sales tax exemptions
Many business owners worry that adding a valuable solar array will increase their property taxes, but California has that covered. The state offers a property tax exclusion for commercial solar systems, meaning your property tax bill won't go up even though you've increased your property's value. This is a huge long-term benefit that protects your bottom line for years to come. Depending on your location, you may also be exempt from paying sales tax on the solar equipment itself, which can save you thousands of dollars on the initial purchase.
Your Financing Options for Commercial Solar
Figuring out how to pay for a commercial solar system is just as important as choosing the right panels. The good news is you have several paths you can take, and the best one for you really depends on your business’s financial goals, cash flow, and tax situation. There’s no single right answer, which is why we believe in a personalized consultation to walk you through the specifics for your company. Generally, your options fall into four main categories: buying the system outright with cash, taking out a solar loan, or using a third-party ownership model like a Power Purchase Agreement (PPA) or a solar lease. Let's break down what each one means for your business.
Cash purchases
Paying with cash is the most straightforward way to finance your solar project. When you buy the system outright, you own it from day one, no strings attached. This means your business gets to claim all the financial benefits directly, including the federal investment tax credit (ITC) and any state or local incentives. While it requires a significant upfront investment, a cash purchase delivers the highest and fastest return over the system's life because you won’t have any interest payments. If your business has the available capital, this option maximizes your long-term savings and gives you complete control over your energy asset.
Solar loans
A solar loan allows your business to finance the purchase of a solar system, much like you would for any other major equipment upgrade. The key advantage here is that you still own the system. This ownership is crucial because it means you are eligible for all the valuable incentives, including the federal ITC and accelerated depreciation (MACRS), which can significantly reduce your tax liability. You can use these benefits to help offset the cost of the loan. With a loan, you can go solar with little to no upfront payment while building equity in an asset that will save you money for decades.
Power purchase agreements (PPAs)
A Power Purchase Agreement, or PPA, is a great option if you want the savings from solar without the responsibility of owning the system. With a PPA, a solar provider like AMECO installs, owns, and maintains the solar panels on your property at no upfront cost to you. Instead of buying the equipment, you simply agree to purchase the electricity it generates at a fixed rate that is typically lower than your utility’s price. This gives you immediate energy savings and predictable costs, making it a popular choice for many commercial customers.
Solar leases
A solar lease is similar to a PPA in that you don't have to pay for the system upfront. The main difference is how you pay. Instead of paying for the power produced, you pay a fixed monthly fee to lease the solar equipment. The solar provider continues to own and maintain the system, so you get all the benefits of clean energy without any of the operational responsibilities. This is an excellent choice for businesses that want a simple, predictable monthly payment and aren't in a position to use the tax benefits that come with ownership.
How Much Can Your Business Save with Solar?
Let's get straight to the point. Installing a commercial solar system is a big decision, and you need to know if the numbers make sense. Beyond the initial investment, solar panels offer several powerful ways to save money and build a more resilient business. Let's break down the financial benefits you can expect.
Monthly and annual energy bill savings
This is the most immediate and obvious financial win. By generating your own electricity, you drastically reduce what you pull from the grid, which slashes your monthly utility bill. On average, commercial solar panels can cut a business’s energy costs by about 75%. Imagine your $4,000 monthly electricity bill dropping to just $1,000. Annually, that’s a savings of $36,000 that goes right back into your business. These savings start from day one, providing immediate relief to your operating budget and improving your cash flow. It's a direct and impactful way to lower your overhead for your commercial property.
Long-term savings over the system's lifespan
Think of solar as a long-term asset, not just a monthly saving. Your solar panels are built to last, with a productive lifespan of 25 years or more. When you add up those monthly savings over decades, the numbers become truly impressive. A business can save hundreds of thousands, or even millions, of dollars over the life of its solar system. This isn't just about cutting costs; it's about making a strategic investment that pays for itself many times over. Our customized approach ensures your system is designed for maximum efficiency and longevity, securing these savings for years to come.
Increased commercial property value
A solar energy system is a significant upgrade that can increase your property's value. Think of it like a major renovation, but one that generates income. Buildings with solar panels are more attractive to potential buyers and tenants who want lower utility bills. This makes your property more competitive in the real estate market. It’s a strategic investment that supports both your financial and sustainability goals. Combining a solar installation with our expert roofing solutions further protects your investment and enhances your building's overall value and structural integrity.
Energy independence and rate hike protection
Utility rates are unpredictable and consistently trend upward. With solar, you generate your own power at a fixed cost, effectively locking in your electricity rates for decades. This protects your business from volatile energy markets and unexpected rate hikes, making your budget more stable and predictable. For California businesses, adding a battery backup system provides an even greater level of security. It keeps your essential operations running smoothly during grid outages and blackouts, giving you true energy independence and peace of mind.
What's the ROI on Commercial Solar?
When you think about return on investment, or ROI, for a commercial solar project, it’s easy to get stuck on the upfront cost. But the real story is in the long-term financial and operational benefits. Installing a solar system is one of the most effective ways to take control of your company’s energy expenses. Instead of being at the mercy of unpredictable utility rate hikes, you generate your own power at a fixed, predictable cost. This stability can be a game-changer for budgeting and long-term financial planning.
The ROI on solar isn't just about saving money on your electricity bill, though that’s a huge part of it. It’s also about increasing your property value, demonstrating a commitment to sustainability that resonates with modern customers, and achieving greater energy independence. For commercial customers in California, the combination of high electricity rates and strong solar incentives makes the financial case even more compelling. The question quickly shifts from "if" solar is a good investment to "how soon" you'll see a return. You can start exploring your potential savings with our solar estimate calculator to get a preliminary idea of what solar could do for your business.
How to calculate your return on investment
Figuring out your solar payback period doesn't require a degree in finance. A simple formula can give you a solid estimate of how long it will take for your system to pay for itself. To get your payback period in years, you just need to divide your net system cost by your annual energy savings.
The basic calculation looks like this: Payback Period = (Total Installed Cost – Incentives) ÷ Annual Savings.
Let’s break that down. Your total installed cost is the full price of the equipment and installation. From that, you subtract all the financial incentives you qualify for, like the federal tax credit and any state or local rebates. The result is your net cost. Then, you divide that number by your estimated annual savings on electricity bills. For the most accurate picture, remember to subtract any minor maintenance costs from your annual savings before you do the math.
Typical payback periods for commercial systems
So, how long does it actually take to break even? While every project is unique, the payback time for a commercial solar investment is often less than ten years. Many California businesses see an even faster return thanks to our state’s sunny climate and favorable solar policies. However, your specific payback period will vary based on a few key factors.
Things like your utility’s net metering rates, your local installation costs, and the price you currently pay per kilowatt-hour all play a significant role. Your building’s energy demand patterns can also influence the timeline. A business that uses most of its power during peak daylight hours will likely see a quicker return. The best way to get a clear and accurate projection is to work with an experienced installer who can analyze your specific situation and design the right solar solutions for your needs.
How your financing choice affects the overall return
How you pay for your solar system has a direct impact on your overall ROI. If your company has the cash to buy the system outright, you’ll typically see the fastest and most significant financial return. That’s because you immediately become the system owner and can claim all the valuable incentives for yourself. This includes the 30% federal investment tax credit (ITC), accelerated depreciation benefits, and any state or local rebates.
Of course, a cash purchase isn't feasible for every business. Thankfully, there are numerous solar panel financing options available for commercial customers, including solar loans and power purchase agreements (PPAs). While these options change the ROI calculation, they still allow you to reduce or eliminate your monthly electricity bill with little to no upfront cost. Our approach involves walking you through each option to find the financial path that best aligns with your company’s goals.
Is Solar Worth It for Your Small or Mid-Sized Business?
Deciding to go solar is a major business decision, and it’s one that often comes with a lot of questions. Is it truly affordable for a business my size? Will the savings justify the initial investment? And what does it really mean for my bottom line? The short answer is yes, solar is a powerful strategic move for California businesses, but the "why" deserves a closer look. It’s about more than just saving money; it’s about creating a more resilient, sustainable, and competitive business for the long haul. Let's break down what that actually looks like.
Scalable solutions for businesses of all sizes
It’s a common misconception that solar is only a viable option for huge corporations with sprawling rooftops. The reality is that solar is incredibly scalable. In fact, commercial solar systems often benefit from economies of scale, meaning the cost per watt can be lower for a larger system compared to a residential one. A professional installer won’t offer you a one-size-fits-all package. Instead, they’ll work with you to design a system tailored to your specific energy consumption, property, and budget. Whether you run a small retail shop or a mid-sized manufacturing facility, there are customized solutions that can fit your needs perfectly.
Upfront costs vs. long-term savings: An honest look
Let’s be direct: a commercial solar installation is an investment. While the initial price tag might seem high compared to your monthly utility bill, it’s crucial to look at the bigger financial picture. That upfront cost is the start of substantial long-term savings. Once your system is operational, you’ll see a dramatic reduction in your electricity bills, giving you immediate operational savings. Over the 25+ year lifespan of your solar panels, those savings add up significantly, protecting your business from unpredictable and rising utility rates. Think of it less as an expense and more as a strategic investment in your company's financial future.
How sustainability goals impact your bottom line
Adopting solar energy does more than just lower your operating costs; it sends a powerful message to your customers, employees, and community. Committing to sustainability can strengthen your brand and attract a growing base of environmentally conscious consumers. Beyond the goodwill, this decision comes with tangible financial rewards. Federal, state, and local incentives are designed to make solar more accessible for businesses. This move also provides greater energy independence, shielding you from grid instability and blackouts that can halt operations. It’s a smart business decision that aligns your financial goals with your company’s values.
How to Choose the Right Commercial Solar Installer
Choosing an installer for your commercial solar project is one of the most critical decisions you'll make. This isn't just about hiring a contractor; it's about finding a long-term partner who will guide your business toward energy independence and financial savings. The right installer brings technical expertise, financial knowledge, and local insight to the table. They ensure your system is designed for maximum performance and that your investment pays off for decades. Let's walk through what to look for to find a partner you can trust.
A quality installer does more than just put panels on your roof. They should act as your guide through the entire process, from the initial site assessment and financial modeling to permitting, installation, and ongoing support. Their expertise can be the difference between a project that simply works and one that delivers exceptional returns. When you find a company that combines deep experience with a commitment to customer education, you know you're in good hands. This partnership is the foundation of a successful and profitable solar investment for your business.
Experience and credentials to look for
When you're vetting installers, start with their track record. A company with decades of experience has a proven history of successful projects and has seen the industry evolve. Look for installers who specialize in commercial solutions and, if your project requires it, also have integrated roofing expertise. Check for essential credentials, including a valid California contractor's license (like a C-10 for electrical work), full insurance, and certifications from groups like the North American Board of Certified Energy Practitioners (NABCEP). An experienced partner will also confidently explain the different financing options for commercial solar, helping you weigh the pros and cons of a cash purchase versus a loan or PPA.
Key questions to ask before you sign
Before you commit, it’s important to ask detailed questions to ensure a potential installer is the right fit. A great installer will welcome your questions and provide clear, transparent answers. Start by asking about their site evaluation process. A superficial glance isn't enough; they should perform a thorough analysis of your roof's condition, electrical infrastructure, and potential shading. Next, ask for a complete breakdown of all costs, projected savings, and the financial incentives they will help you secure. Finally, clarify who is responsible for the logistics. Ask them: "Do you handle all the permitting and utility interconnection paperwork?" A full-service installer will manage the entire process for you, making your transition to solar seamless.
The advantage of a local California installer
While national companies have a wide reach, a local California installer offers unique advantages. They have firsthand experience with the specific building codes, permitting quirks, and utility requirements in your city or county. This local knowledge prevents delays and ensures your project complies with all regulations. A California-based team is also an expert on state-specific incentives and tax programs that can significantly reduce your costs. Beyond the initial installation, having a local partner means they are right here when you need them for maintenance or service. Choosing a local installer is about more than just convenience; it’s about partnering with a company that is invested in the community and understands how to help California businesses achieve their sustainability goals.
Related Articles
- How to Use a Commercial Solar Panel Cost Calculator
- Enjoying More Energy-Efficient Holidays with Solar Power
- Blog | Solar Panel News | Solar Panel Company | AMECO Solar
Frequently Asked Questions
What's the best way to get an accurate price for my business? While an online calculator can give you a general idea, the only way to get a truly accurate price is through a professional consultation. The final cost depends on your specific energy usage, your building's characteristics, and your business goals. A thorough assessment involves analyzing your past utility bills and inspecting your property to design a system that provides the best financial return for your company.
My roof is old. Do I need to replace it before installing solar panels? That's a great question, and the answer is possibly. A solar panel system is a long-term asset with a lifespan of 25 years or more, so the roof underneath it must be in solid condition to last just as long. A professional installer will always start with a roof inspection. If it turns out your roof needs repairs or a replacement, it’s best to handle that before the solar installation begins to avoid problems down the road.
I don't have the cash for a big upfront payment. Can I still go solar? Absolutely. Not having a large amount of cash on hand shouldn't stop you from considering solar. There are several excellent financing options available for businesses. You can get a solar loan, which allows you to own the system and take full advantage of the tax credits. Alternatively, you could opt for a Power Purchase Agreement (PPA) or a solar lease, where a third party owns the system and you simply pay a low, fixed rate for the clean energy it produces, often with no upfront cost.
How quickly will my solar system pay for itself? The payback period varies for every business, but it’s often faster than you might think, with many California businesses seeing a return in under ten years. Your specific timeline depends on the final net cost of your system after incentives, how much you save on electricity each year, and the financing option you choose. A detailed proposal from an installer will give you a clear projection of your payback period and long-term return on investment.
Are the tax credits and incentives really that significant? Yes, they are a huge factor in the final cost. The federal investment tax credit (ITC) alone can reduce your system's cost by 30% or more, and it's a direct credit, not just a deduction. When you add accelerated depreciation benefits (MACRS) and any state or local rebates, the total net cost of your project can be substantially lower than the initial sticker price. These incentives are designed to make solar a smart and accessible investment for businesses.
6.23.2026
One of the biggest hesitations homeowners have about installing solar is the idea of drilling holes into a perfectly good roof. It’s a valid concern, as every penetration creates a potential point for future leaks if not handled correctly. The great news is that with the right roof, you can avoid drilling altogether. This is where the synergy between solar and metal roofing truly shines. Certain metal roof designs allow for a completely drill-free installation, using clamps that attach directly to the roof’s seams. This guide will walk you through the options to help you find the best metal roofing for solar panels, protecting your roof’s integrity and giving you total peace of mind.
Key Takeaways
- Prioritize a drill-free installation: Standing seam metal roofing is the ideal partner for solar because it allows for a clamp-based mounting system. This means no holes are drilled into your roof, which protects its integrity and keeps your warranty intact.
- Match your roof's lifespan to your solar panels: A metal roof can last 50 years or more, while solar panels have a 25-year lifespan. Syncing these two major investments means you will not have to pay to remove and reinstall your solar array for a mid-life roof replacement.
- Know that other metal roofs are still great options: Even if you do not have a standing seam roof, solar is still very possible. Roofs like corrugated metal or metal shingles simply require a professional installation with specialized brackets and sealants to ensure a secure, watertight fit.
What Are the Best Metal Roofs for Solar?
If you're planning to pair solar panels with a metal roof, you're making a smart choice for durability and longevity. But it's important to know that the type of metal roof you choose can make a big difference in the installation process and the long-term health of your roof. Some metal roofing styles are practically designed for solar, while others require a few extra steps. Let's walk through the most common options so you can feel confident about your home's solar solutions.
Standing Seam Metal Roofing
Standing seam metal roofing is the top choice for a solar installation, and for good reason. Its design features raised, interlocking seams that run vertically up the roof. This allows solar panel mounts to clamp directly onto the seams without drilling a single hole into the roof's surface. This no-penetration method is a huge advantage because it nearly eliminates the risk of leaks and protects your roof's integrity. Plus, standing seam roofs are incredibly durable, often lasting 50 years or more. This lifespan means your roof will likely outlast your solar panels, so you won't have to remove a perfectly good solar array just to replace your roof down the line.
Corrugated Metal Roofing
You've probably seen corrugated metal roofs, with their classic wavy or ribbed pattern. While you can certainly install solar panels on this type of roof, the process is a bit more involved than with standing seam. Because there are no raised seams to clamp onto, the installation requires drilling through the roof to attach the mounting hardware. Installers use specialized brackets and sealing methods to secure the panels and prevent leaks. While our professional roofing solutions always ensure a watertight seal, it's a factor to consider. Corrugated roofs are a workable option, but they don't offer the same seamless, drill-free benefits as a standing seam system.
Metal Shingles
Metal shingles or tiles offer the durability of metal with the look of traditional materials like slate or asphalt. This makes them a great option if you love the aesthetic of a classic shingle but want the longevity of metal. For solar, metal shingles are a solid choice. Similar to corrugated roofs, they typically require penetrations to install the mounting brackets. However, one of the biggest perks is that if you're installing a new roof and solar system at the same time, the solar mounts can be integrated during the shingle installation. This coordinated approach helps ensure everything is perfectly placed and sealed from the start. You can even use a home visualizer to see how different shingle styles would look on your house.
Why Standing Seam Is the Top Choice for Solar
When you're planning a solar installation, the roof underneath is just as important as the panels on top. While solar can be installed on many roof types, standing seam metal roofing is in a class of its own. It’s the ideal partner for a solar energy system, creating a powerful combination of durability, efficiency, and long-term value. This type of roofing simplifies the installation process, aligns with the lifespan of your solar panels, and even helps lower your energy bills before your panels produce a single watt. If you're thinking about going solar, especially if a new roof is also on your to-do list, understanding why standing seam is the gold standard will help you make a confident and informed decision for your home.
Enjoy a Drill-Free Installation
One of the biggest hesitations homeowners have about solar is the idea of drilling holes into their roof. With a standing seam metal roof, that worry disappears. The design features raised vertical seams, or ribs, that run from the top of the roof to the bottom. Installers use special clamps that attach directly to these seams, creating an incredibly secure base for your solar panels without a single penetration. This drill-free method is a game-changer because it completely eliminates the risk of leaks that can come with traditional mounting. It’s a smarter, safer way to secure your solar investment while protecting the integrity of your roofing solution.
A Lifespan That Matches Your Solar System
Your solar panels are built to last for 25 years or more, so it only makes sense that your roof should too. A standing seam metal roof is one of the most durable options available, often lasting 50 years or longer. This incredible longevity means you won't face the expensive and disruptive task of removing your entire solar array just to replace a failing roof halfway through the panels' lifespan. By pairing a long-lasting roof with your solar system, you’re creating a cohesive, long-term asset for your home. You can set it and forget it, knowing both investments are built to go the distance together.
Improve Energy Efficiency and Curb Appeal
A standing seam roof starts saving you money even before your solar panels are turned on. Metal is naturally reflective, bouncing the sun's heat away from your home. This "cool roof" effect can significantly reduce your air conditioning costs during hot California summers. Beyond the practical benefits, this combination just looks great. The clean, modern lines of a standing seam roof provide a sleek and stable platform for solar panels, enhancing your home's curb appeal. You can even use a 3D home visualizer to see how this powerful and stylish duo would look on your own house.
Keep Your Roof Warranty Intact
A new roof is a major investment, and the last thing you want to do is void its warranty. Because a standing seam installation doesn't require drilling, your roof manufacturer's warranty remains fully intact. This gives you complete peace of mind, knowing that both your roof and your solar panels are protected. Choosing an installer with deep expertise in both roofing and solar is key to ensuring everything is done correctly. With the right approach, you can be confident that your warranties are secure and your home is protected for decades to come.
How Solar Installation Varies by Metal Roof
The way your solar panels are attached depends entirely on the type of metal roof you have. It’s not a one-size-fits-all process, and understanding the differences can help you know what to expect on installation day. The main distinction comes down to a simple question: to drill or not to drill? Some metal roof profiles allow for a completely drill-free installation, while others require penetrations to securely mount the solar array.
Don't worry, even if your roof requires drilling, it’s a standard and completely safe procedure when handled by experienced professionals. A certified installer uses specialized hardware and sealants to ensure every attachment point is completely waterproof and structurally sound for decades to come. This is where having a team that understands both roofing and solar is a huge advantage. With our integrated approach, we assess your specific roof type to determine the safest and most effective mounting method, ensuring your roof and your solar system work together perfectly. We'll look at the material, the profile, and the underlying structure to create a custom plan. Below, we’ll walk through the installation process for the three most common types of metal roofs.
Standing Seam: Clamp-Based Mounting
If you have a standing seam metal roof, you’re in luck. This is the ideal roof type for a solar installation because it requires zero penetrations. Standing seam roofs feature raised vertical ribs, or seams, that run from the peak to the edge of the roof. Instead of drilling into the roof deck, we attach your solar system using specialized clamps that grip directly onto these seams.
This non-penetrating method creates an incredibly strong connection without making a single hole in your roof. It’s a straightforward process that fully protects your roof’s integrity and warranty. Because there’s no drilling or sealing involved, the installation is often quicker and eliminates any concerns about potential leaks down the road.
Corrugated Metal: Penetrative Mounting
Corrugated metal roofs are very common, and they are also great candidates for solar. This installation method typically requires drilling, but it’s a process we’ve perfected over thousands of projects. To mount panels on a corrugated roof, we drill through the metal and use specialized brackets and blocks designed to fit the roof’s unique trapezoidal or wavy profile.
The key to a secure and leak-proof installation is using the right hardware. We use heavy-duty sealants and flashing around every penetration point to create a permanent, watertight seal that protects your home from the elements. This is where our deep roofing expertise becomes essential, as we ensure every attachment is done right to protect your roof’s structure and longevity.
Metal Shingles: Bracket-Based Mounting
Metal shingles, tiles, or shakes offer the look of traditional roofing materials with the durability of metal. While less common than standing seam or corrugated profiles, they are fully compatible with solar. The installation process involves attaching mounting brackets directly to your roof structure, similar to how panels are installed on asphalt shingle roofs.
The most important factor here is protecting your roof’s warranty. It’s best to work with an installer who is familiar with your specific shingle system or can coordinate with the original manufacturer. This ensures the correct flashing and mounting techniques are used for these types of residential projects. Proper coordination guarantees your solar array is secure and your roof warranty remains completely intact.
Is a Metal Roof a Good Investment for Solar?
Thinking about going solar is exciting, but it often brings up another big question: is your roof ready for it? If you're considering a roof replacement along with your solar project, a metal roof is an excellent choice. Pairing solar panels with a metal roof isn't just possible; it's one of the smartest long-term investments you can make for your home. This combination offers a powerful one-two punch of durability and energy efficiency that’s hard to beat, especially for California homeowners. Let's look at why a metal roof is such a great partner for a solar energy system.
Durability and Longevity
One of the biggest headaches for homeowners with solar is discovering their roof needs to be replaced halfway through the life of their panels. This means paying to have the entire system removed and reinstalled. A metal roof helps you avoid this completely. High-quality metal roofs can last 50 years or more, which is often double the lifespan of a typical 25-year solar panel warranty. By choosing one of our durable roofing solutions, you can be confident your roof will outlast your solar system. This syncs up your home improvement timelines perfectly, saving you from future costs and hassles. It’s a true set-it-and-forget-it scenario.
Stands Up to Wind and Weather
In California, we see everything from intense sun to strong winds. You need a roof and solar setup that can handle it all. Metal roofs are known for their exceptional strength and resilience against the elements. When you add professionally installed solar panels, that durability isn't compromised. The panels are mounted securely to withstand high winds, often rated for speeds of 135 miles per hour or more. This robust combination ensures your home is protected and your energy production stays consistent, no matter the weather. Our approach to installation prioritizes safety and security, giving you peace of mind that your investment is built to last.
Reflect Heat and Lower Cooling Costs
Keeping your home cool during hot California summers can be a major expense. A metal roof gives you an immediate advantage by reflecting solar radiation away from your home, which naturally keeps the interior cooler. When you install solar panels on top, you get an extra layer of cooling. The panels absorb sunlight for energy production while also shading a large portion of your roof's surface. This dual effect can significantly reduce the amount of heat your home absorbs, leading to lower air conditioning bills. It’s a fantastic way to save money on energy even before your panels produce a single kilowatt.
Upfront Cost vs. Long-Term Savings
It's true that a metal roof has a higher initial cost than traditional materials like asphalt shingles. However, it's important to look at the bigger picture. Because a metal roof can last 50 to 75 years, you won't face the expense of removing and reinstalling your solar panels for a mid-life roof replacement. When you factor in the energy savings from its reflective properties and the longevity that protects your solar investment, the long-term value becomes clear. You can start to see how the numbers work for your home by using our solar estimate calculator to explore your potential savings.
What to Look for in a Metal Roof for Solar
Choosing a metal roof is a smart move, but if you have solar panels in your future, a little extra planning will make the installation process much smoother. Not all metal roofs are created equal, and picking the right one from the start ensures your home is perfectly prepped for a solar energy system. By considering a few key factors, you can create a seamless foundation for your panels that will last for decades.
Think of it like this: you’re building a complete system where the roof and the solar panels work together. Making sure they’re compatible from day one saves you time, money, and potential headaches down the road. Here’s what to keep in mind as you explore your roofing solutions to find the perfect match for your future solar array.
Check the Gauge and Load Capacity
When it comes to supporting solar panels, the thickness of your metal roof matters. This thickness is measured in gauge, and a lower number means thicker, stronger metal. For solar installations, you’ll want to aim for a 26-gauge or even a 24-gauge steel roof. Thinner options, like 29-gauge metal, often aren't sturdy enough for the mounting hardware to get a secure grip. A thicker gauge provides the necessary strength and load capacity to hold your solar array safely in place for its entire lifespan, giving you peace of mind that your investment is well-supported.
Consider Your Roof's Pitch and Climate
Metal naturally expands and contracts with temperature changes, a process known as thermal movement. In a place like California with its sunny days and cooler nights, this is an important factor. Your solar installer should use a racking system that allows the metal panels to move without straining the mounting points or the roof itself. A professional will account for your roof’s pitch and our local climate to ensure the entire system, both roof and solar solutions, can adapt to temperature swings without compromising its integrity or performance.
Account for Potential Shading
Here’s a benefit you might not have expected: solar panels can help keep your home cooler. Metal roofs are already great at reflecting sunlight and reducing heat absorption. When you add solar panels on top, they provide an extra layer of shade for your roof. This combination can significantly lower the temperature in your attic and living spaces, which means your air conditioner won't have to work as hard. For California homeowners, this added cooling effect can lead to even greater energy savings during our long, sunny summers.
Ensure Racking Compatibility
The type of metal roof you choose directly impacts how solar panels are attached. This is where standing seam metal roofs really shine. Their design allows installers to attach solar mounts using clamps that grip onto the raised seams, creating an incredibly strong connection without drilling a single hole into the roof’s surface. This non-penetrative method is the gold standard because it eliminates potential leak points and protects your roof’s warranty. Other roof types may require drilling, so confirming racking compatibility beforehand is key to a secure, watertight installation.
Talk to Your Roofer About Solar Early
If you’re planning to install a new roof now and add solar panels later, communication is everything. Let your roofer know about your solar ambitions from the very beginning. They can help you select a roof profile that is compatible with standard solar mounting hardware, like standing seam clips. An experienced roofer might even add extra clips or reinforcements on the sunniest parts of your roof to prepare it for the future installation. Working with a company that understands both roofing and solar, like AMECO, simplifies this process and ensures your home is ready for a smooth transition to solar energy. Our integrated Our Approach guarantees both systems are designed to work together perfectly.
Common Myths About Solar on Metal Roofs
Metal roofs and solar panels are a fantastic combination, but there's a lot of outdated information out there. When you’re making a big investment in your home, you need clear, accurate facts. Let's clear up some of the most common myths you might hear so you can feel confident about your decision. Understanding the truth about how these two systems work together is the first step toward a more energy-efficient home.
"Metal roofs aren't compatible with solar panels."
This is one of the biggest misconceptions. In reality, metal roofs are one of the best partners for a solar panel system. A quality metal roof can last 50 years or more, which is double the lifespan of a typical asphalt shingle roof. Since solar panels are warrantied for 25 to 30 years, pairing them with a long-lasting metal roof means you likely won't have to remove your panels for a roof replacement down the line. This synergy makes AMECO's integrated roofing solutions a smart, long-term investment for any homeowner.
"Installation always requires drilling."
While some roof types require drilling and penetration, that’s not always the case with metal. For standing seam metal roofs, installers can use a clamp-based mounting system. These clamps attach directly to the raised seams of the roof, creating a secure anchor for your solar panels without making a single hole. This drill-free method completely eliminates the risk of leaks and preserves the integrity of your roof. Our professional approach ensures we use the best mounting technique for your specific roof type, protecting your home and your investment.
"All metal roofs work the same way."
Many people assume a metal roof will absorb the sun's rays and make their home hotter, but the opposite is often true. Modern metal roofs are frequently finished with special coatings that reflect solar radiation, keeping your attic and home cooler. These "cool roofs" can significantly reduce your air conditioning costs, especially during hot California summers. When you pair a reflective metal roof with a solar panel system, you’re getting a powerful one-two punch of energy efficiency that lowers your utility bills from two different angles.
"Solar panels will void my roof warranty."
Any improper installation can risk a roof’s warranty, but that’s not an issue when you work with experienced professionals. A reputable installer uses mounting hardware specifically designed for your roof type to ensure the warranty remains intact. For standing seam roofs, clamp-to-seam attachments are designed to work with the roof, not against it. The key is choosing a company with deep expertise in both roofing and solar. With over 50 years of combined experience, we know how to install your system correctly to protect your roof and its warranty.
"Metal roofs are too noisy."
The idea of hearing every raindrop pinging on a tin roof is a thing of the past. Modern metal roofs are installed over a solid substrate, like plywood, and often include a layer of insulation underneath. This structure alone significantly dampens noise from rain or hail. Adding solar panels provides another sound-absorbing layer, making your metal roof even quieter than many other roofing types. You can enjoy the durability and efficiency of a metal roof without worrying about the noise.
Related Articles
- ENERGY STAR Metal Roofing: The Ultimate Guide
- Roofing Materials for Solar Panel Installation | AMECO Solar
- Choosing the Perfect Flat Roof System for Your Home | AMECO Solar
Frequently Asked Questions
My metal roof isn't a standing seam style. Can I still install solar panels? Absolutely. While standing seam roofs are ideal because they allow for a drill-free installation, you can definitely install solar on other metal roofs like corrugated or metal shingle styles. The process for those roofs involves creating secure, sealed penetrations to attach the mounting hardware. When done by an experienced team that understands both roofing and solar, it's a completely safe and standard procedure that ensures a watertight and durable system for decades.
I'm worried about drilling into my roof for the installation. Is that safe? It's a common concern, but yes, it is completely safe when handled by professionals. For roofs that require penetrations, like corrugated metal, installers use specialized brackets, flashing, and industrial-grade sealants designed specifically for that roof profile. Each attachment point is meticulously sealed to prevent any chance of leaks and to protect the structural integrity of your roof. This is a standard practice we've perfected over thousands of installations.
Does a metal roof really save me money beyond the solar panels? Yes, it does. Many modern metal roofs are considered "cool roofs" because they are finished with a reflective coating that bounces sunlight and heat away from your home. This can keep your attic and living spaces cooler, reducing the strain on your air conditioner during hot months. When you add solar panels, they provide an additional layer of shade, further lowering your cooling costs. It's a double benefit that starts saving you money right away.
What happens if I need to replace my roof, but my solar panels are still working? This is one of the main reasons why pairing solar with a metal roof is such a smart investment. Solar panels are warrantied for 25 years or more, while a metal roof can last for 50 years. By installing them together, you sync up their lifespans. This means you avoid the costly and disruptive process of having to remove and reinstall a perfectly good solar array just because a shorter-lived roof, like asphalt shingle, has failed.
If I'm getting a new roof, should I tell my roofer I plan to add solar later? Definitely. Giving your roofer a heads-up about your future solar plans is a great idea. An experienced roofer can help you choose a material and profile, like standing seam, that will make the future solar installation easier and more cost-effective. They can also ensure the roof structure is perfectly prepared to support the system. This kind of proactive planning ensures both your roof and your future solar array will work together seamlessly.
6.19.2026
A solar panel system is designed to produce clean energy for 25 years or more. But will your roof last that long? Installing panels on an aging roof is a common but costly mistake. It creates a timeline mismatch that forces you to pay for panel removal and reinstallation just to handle a standard roof replacement. To avoid this expensive headache, it’s essential to sync up your investments. This guide explains how to assess your roof’s current condition and lifespan, so you can confidently choose the best roof type for solar panels and ensure your home is prepared for a durable, long-lasting energy solution.
Key Takeaways
- Sync your roof and solar timelines: Since solar panels last 25 years or more, your roof should too. Replacing an aging roof before installing panels prevents the costly process of removing and reinstalling your system later on.
- Most roofs work with solar, but the material matters: Whether you have asphalt, tile, or metal, a successful installation depends on using the correct mounting techniques. An experienced installer knows how to attach panels securely without causing leaks, regardless of the surface.
- A professional roof check is non-negotiable: Before you commit, have an expert assess your roof's condition and structural strength. This step confirms your roof can handle the weight and identifies any issues beforehand, protecting both your home and your investment.
Which Roofs Are Best for Solar Panels?
When you decide to go solar, you’re making a long-term investment in your home’s energy future. Your roof is the foundation for that investment, so it’s important to know if it’s up to the task. While solar panels can be installed on almost any type of roof, some materials make the process smoother, more secure, and more cost-effective than others. The ideal roof is one that is durable, strong, and will last as long as your solar panel system, which is typically 25 years or more.
Thinking about your roof type early on can save you from major headaches down the road. The last thing you want is to pay to have your brand-new solar panels removed and reinstalled just a few years later because your roof needs replacing. That’s why we often perform a roof replacement and solar installation at the same time. Understanding the pros and cons of your specific roof material is the first step. Let’s look at some of the most common roofing solutions and see how they stack up for a solar installation.
Asphalt Shingles
Asphalt shingles are the most common roofing material in the country, so it’s no surprise that most solar installations happen on them. They are affordable and installers are very familiar with the process, which involves securing mounts directly to your roof’s structure. The main consideration with asphalt shingles is their lifespan. A typical shingle roof lasts about 12 to 20 years, while your solar panels are warrantied for 25 years or more. If your roof is already more than 10 years old, it’s a smart move to replace it before installing panels. This prevents you from having to pay for costly panel removal and reinstallation when your roof eventually needs an upgrade.
Metal Roofs
Metal roofs are an excellent choice for solar panels, especially standing seam metal roofs. Their durability is a huge advantage, with a lifespan of 40 to 70 years, meaning your roof will easily outlast your solar panels. A major benefit of standing seam roofs is that solar panels can be clamped directly onto the seams without drilling any holes. This significantly reduces the risk of leaks and makes for a secure, streamlined installation. Metal roofs also reflect heat, which can help keep your solar panels cooler and operating at peak efficiency. While the upfront cost is higher than asphalt, their longevity and solar-friendly design make them a fantastic long-term investment for any residential customer.
Tile Roofs (Clay and Concrete)
Tile roofs are very popular in California for their classic look and impressive durability. They can certainly support a solar panel system, but the installation requires special care. Clay and concrete tiles are quite fragile and can crack or break during the installation process if not handled by an experienced crew. Installers need to use specialized mounting hardware that lifts the panels above the tiles to prevent damage and ensure a secure fit. Because of their weight and the delicate nature of the work, installing solar on a tile roof can be more complex and expensive. It’s crucial to work with a company that has proven expertise with solar solutions for tile roofs to protect your home.
Flat Roofs
If your home has a flat or low-slope roof, you have a unique advantage when it comes to solar. Unlike sloped roofs where the panel angle is predetermined, flat roofs allow for total control. Installers can use ballasted or tilted mounting systems to position your panels at the perfect angle and direction to capture the maximum amount of sunlight throughout the day. This flexibility can lead to higher energy production. These systems are common on commercial buildings but work just as well for homes. With a lifespan of 20 to 30 years for materials like TPO or EPDM, a flat roof in good condition is a great candidate for a solar installation.
Roofs to Avoid
While most roofs are compatible with solar, a few types are generally not recommended. Wood shake roofs are a primary concern because they are flammable and can be easily damaged during installation. Many jurisdictions have building codes that restrict or ban solar installations on wood roofs for safety reasons. Slate roofs are another challenging material. Although incredibly durable, slate is extremely brittle and expensive to repair if tiles break. The installation requires specialized, costly mounting hardware and a highly skilled team to avoid causing significant damage. If you have a wood shake or slate roof, your best and safest option is to replace it before moving forward with solar.
Comparing Your Roofing Options for Solar
Your roof is the foundation for your entire solar energy system, so its material, age, and condition are incredibly important. While solar panels can be installed on most roof types, some are better suited for the job than others. Understanding the pros and cons of each option helps you plan a successful installation that lasts for decades. A great solar project starts with a solid roof, and combining a roofing replacement with a solar installation can save you time and money in the long run. Let’s walk through the most common roofing materials for California homes.
Asphalt Shingles: Affordable but with a Shorter Lifespan
Asphalt shingles are the most common roofing material in the country, mainly because they are affordable and easy to install. However, their shorter lifespan is a major consideration for solar. A typical asphalt shingle roof lasts about 12 to 20 years, while solar panels are warrantied for 25 years or more. If your roof is already more than 10 years old, it’s smart to replace it before going solar. Otherwise, you’ll face the significant cost of removing your panels to replace the roof down the line and then paying to reinstall them. Planning ahead ensures your roof’s lifespan matches your solar investment.
Metal Roofs: Durable and Solar-Ready
Metal roofs are an excellent choice for solar installations, and for good reason. They are incredibly durable, with a lifespan of 40 to 70 years, meaning your roof will likely outlast your solar panels. Metal is also lightweight and reflects sunlight, which helps keep your attic and home cooler. For solar, standing seam metal roofs are the gold standard. They allow installers to clamp the solar racking directly onto the seams without drilling any holes into the roof itself. This preserves the roof's integrity and provides a secure foundation for your solar solutions.
Tile Roofs: Long-Lasting but Delicate
Tile roofs, whether clay or concrete, offer a beautiful aesthetic and an impressive lifespan of 50 to 100 years. While they are long-lasting, the tiles themselves can be quite fragile. During a solar installation, there's a risk of tiles cracking or breaking under the weight of installers and equipment. This makes the installation process more complex, time-consuming, and often more expensive. Any future roof repairs can also be difficult, as they may require removing the panels first. An experienced team that understands our approach to working with delicate materials is essential for a successful tile roof installation.
Flat Roofs: Flexible but Need Special Mounts
Flat roofs are common in many parts of California and offer a unique advantage for solar: flexibility. On a flat surface, installers can use tilted mounts to angle the solar panels for optimal sun exposure throughout the day, maximizing your energy production. However, this requires specialized racking and careful planning to ensure the system doesn't interfere with drainage or block any vents. The mounting system also adds weight, so it’s crucial to confirm the roof can support the load. You can use an estimate calculator to get a preliminary idea of what a system might cost for your home.
What Structural Factors Affect a Solar Installation?
Beyond the material on top, the structure of your roof plays a huge role in a successful solar installation. Think of it as the foundation for your new energy system. The angle, direction, strength, and even the amount of open space all determine how well solar panels will work for your home. Getting these details right from the start ensures your system is safe, efficient, and built to last. Let's walk through the key structural factors a professional will assess.
Your Roof's Strength and Weight Capacity
First things first: your roof needs to be strong enough to hold the entire solar panel system without any strain. While panels are sleek, they add weight. A good rule of thumb is that your roof framing should be able to support about three to four pounds per square foot for the panels, in addition to its other loads. A professional installer will always conduct a thorough assessment to confirm your roof is up to the task. This is a standard part of our approach to ensure every installation is secure and protects your home's structural integrity for decades to come.
Roof Angle and Direction for Maximum Sun
To get the most out of your solar panels, they need to soak up as much sun as possible. In California, the ideal setup is a south-facing roof, which gets consistent sun all day. West-facing roofs are also great, as they capture the intense afternoon sun when energy demand is often highest. The perfect angle, or pitch, is typically between 15 and 40 degrees. Don't worry if your roof doesn't fit this exact description. Experienced installers can design custom solar solutions and use specialized mounting equipment to optimize energy production for almost any roof.
Available Space, Shade, and Future Plans
Your roof needs enough clear, unobstructed space for the panels. An installer will map out your roof, noting things like vents, chimneys, and skylights that take up room. They’ll also look for shade from nearby trees or buildings that could reduce your energy output. It’s also important to consider your roof's age. If your roof is nearing the end of its life, it’s far more cost-effective to replace it before going solar. Removing and reinstalling panels later is a costly process. Combining a new roof with a solar installation is a smart move, which is why we offer integrated roofing solutions to streamline the entire project.
Does Your Roof's Age and Condition Matter?
Yes, absolutely. Think of your roof as the foundation for your solar panel system. Before you invest in a system designed to last for decades, you need to be sure the surface it’s sitting on is just as durable. Installing brand-new solar panels on an old or damaged roof is a recipe for future headaches and expensive, avoidable repairs. A healthy roof is the first step to a successful solar installation, ensuring your investment is secure from day one.
Matching Your Roof's Lifespan to Your Panels
High-quality solar solutions are built to last, typically for 25 to 30 years. Your roof should have a comparable lifespan. If it doesn’t, you’ll face a costly problem down the road. Imagine having to pay a crew to remove your entire solar array just a few years into its life, replace the roof, and then reinstall the panels. By making sure your roof's lifespan matches your panels' from the start, you sync up your investments and prevent the need for a disruptive and expensive mid-life roof replacement.
Warning Signs: When to Replace Your Roof First
So, how do you know if your roof is ready? A good rule of thumb is to replace it if it has less than 10 years of life left. For asphalt shingle roofs, this often means considering a replacement if they are already 10 to 15 years old. Other red flags include cracked or curling shingles, missing granules, active leaks, or visible sagging. If you spot any of these issues, it’s a clear sign you should explore roofing solutions before moving forward with a solar installation.
The Real Cost of Waiting: Removal and Reinstallation Fees
Putting off a necessary roof replacement might seem like a way to save money now, but it almost always costs more in the long run. If your roof fails after your panels are installed, you’ll have to pay for their removal and reinstallation (often called R&R). This process alone can cost anywhere from $1,500 to over $6,000, not including the cost of the new roof itself. This is an entirely avoidable expense. A professional assessment as part of our approach helps you make the smart financial choice, ensuring your home is fully prepared for a seamless transition to solar.
What Installation Looks Like for Each Roof Type
The way solar panels are attached to your home depends entirely on your roof's material. A professional installer will use different techniques and hardware to ensure your system is secure, efficient, and leak-proof for decades to come. Understanding the process for your specific roof type can help you know what to expect on installation day and ask the right questions. Let's walk through what the installation process looks like for the most common roofing materials in California.
Installing on Asphalt Shingles
Asphalt shingles are the most common roofing material, so installers are very familiar with them. The process involves drilling through the shingles to attach mounts directly to your roof's rafters. To prevent any leaks, installers use a metal plate called "flashing" that slides under the shingle above the penetration point and creates a watertight seal around the mount.
Because asphalt shingle roofs typically have a shorter lifespan than solar panels, it’s crucial to assess their condition. If your roof is nearing the end of its life, it’s much more cost-effective to handle a replacement before the panels go on. A combined solar and roofing expert can provide the best guidance on roofing solutions that fit your solar project.
Installing on Metal Roofs
If you have a standing seam metal roof, you’re in luck. This is one of the best surfaces for a solar installation. The raised seams on the roof allow installers to attach the solar panel racking using special clamps. This means there’s no need to drill a single hole into your roof, which eliminates the risk of leaks and makes the installation process quicker and simpler. Metal roofs are also incredibly durable and reflect heat, which can help your panels operate more efficiently. These benefits make them an ideal partner for a long-term solar solutions investment.
Installing on Tile Roofs
Installing solar on a clay or concrete tile roof is more complex, but it's very doable with an experienced team. Because tiles are fragile and can crack under pressure, installers must handle them with care. The process often involves removing a few tiles, attaching a mount to the underlying roof deck, and then replacing the original tile or a specialized flashing piece that fits around the mount. This method requires precision and expertise to avoid damage and ensure a perfect seal. It’s a great example of why a company’s approach to installation and experience with different roof types matters so much.
Installing on Flat Roofs
Flat roofs offer a unique advantage: flexibility. Since there's no natural slope, installers can use a ballasted or tilted racking system to position your panels at the perfect angle for maximum sun exposure. This can significantly improve your system's energy production. The installation requires careful planning to ensure the system doesn't block drainage paths or cover up important vents. The mounting systems are designed to hold the panels securely without compromising the roof's integrity, making flat roofs a great, though specialized, candidate for solar solutions.
How to Know If Your Roof Is Ready for Solar
Before you get too far into planning your solar panel system, it’s smart to take a good, hard look at your roof. Think of your roof as the foundation for your solar investment. Placing brand-new solar panels, which can last for 25 years or more, on an old or damaged roof is a recipe for trouble. You’d have to pay to remove the entire system just to make basic roof repairs down the line, which is a costly and frustrating setback.
Getting your roof evaluated is a critical first step. A professional assessment will tell you if your roof is in good shape, how much life it has left, and if it’s strong enough to support a solar array. This is where working with a company that specializes in both solar and roofing can save you a lot of headaches. An integrated team can give you a complete picture of your home’s readiness and create a seamless plan for your project, ensuring your roof is just as durable as the solar system sitting on top of it.
Check for Damage and Weak Spots
You don’t have to be a roofing expert to spot some obvious red flags. Take a look at your roof from the ground or a safe vantage point. Do you see shingles that are curling at the edges, cracked, or missing altogether? These are clear signs of wear and tear.
Other warning signs include soft or spongy spots when walked on, visible leaks in your attic, or signs of mold and moisture. Also, check the flashing, which is the metal material around chimneys, vents, and skylights. If it’s damaged or rusted, it can’t do its job of preventing water from seeping in. If you notice any of these issues, your roof likely needs repairs or a replacement before you can even think about adding panels.
Confirm Your Roof Can Handle the Weight
Solar panels are heavy. A single panel weighs around 40 pounds, so a typical residential system of 15 to 21 panels can add over 800 pounds of weight to your roof. Your roof’s structure must be strong enough to support this additional, permanent load without sagging or sustaining damage.
A qualified solar installer will always conduct a structural review as part of their process. They’ll assess your roof’s framework to ensure it can handle the weight of the panels and mounting equipment, plus any additional pressure from wind. This isn't a step you can skip. Ensuring your roof is structurally sound is fundamental to a safe and successful installation, which is a core part of our approach to every project.
When to Call a Structural Engineer
In most cases, a visual inspection and structural review by your solar company are enough. However, sometimes it’s necessary to bring in a structural engineer for a more detailed assessment. This is especially common for older homes, where building codes and construction methods were different, or for roofs with unique designs.
Your solar installer will let you know if an engineer’s report is required. While it may seem like an extra step, it’s a crucial one for ensuring the long-term safety and integrity of your home. Think of it as an investment in peace of mind. A professional sign-off confirms your home is ready, protecting both your house and your solar system for decades to come, which is our goal for all our residential customers.
Choosing the Right Roof for Solar in California
Living in the Golden State means we get plenty of sunshine, making it a perfect place for solar energy. But before you picture those sleek panels on your home, let's talk about what’s underneath them: your roof. The right roof is the foundation of a successful solar installation. It ensures your system is safe, secure, and performs well for decades. Making a smart choice here means thinking about your home as a complete system where the roof and solar panels work together.
Key Factors to Consider Before You Decide
The best roof for solar panels is one that’s strong and durable. Since solar panels are designed to last for 25 years or more, your roof should have a similar lifespan. If it doesn’t, you’ll face the costly hassle of removing the panels to replace the roof down the line. While most common roofing materials work with solar, some are better suited than others. You’ll want to think about the material’s strength, its current age, and its overall condition. A solid, well-maintained roof provides the perfect base for your investment in solar solutions.
How California's Climate Affects Your Choice
California’s climate brings intense sun and, in many areas, a risk of wildfires. Your roof choice can help manage both. For example, metal roofs are a fantastic option because they are fire-resistant and can last up to 70 years. They also reflect sunlight, which helps keep your home cooler and reduces your air conditioning costs even before you factor in solar power. Choosing a material that stands up to our state’s unique weather patterns is a key part of a smart roofing strategy. This ensures your home is protected while supporting your energy goals.
Why You Might Replace Your Roof First
If your roof is already showing its age, especially if it's an asphalt shingle roof over 10 years old, replacing it before installing solar panels is almost always the right move. Think of it this way: paying to remove and reinstall a full solar panel system just a few years after installation is an expensive and avoidable headache. Combining a roof replacement with a solar installation streamlines the process. You get one team, one project, and one long-term solution for your home. This approach saves you significant money and ensures your entire system is built to last.
Get a Professional Roof Assessment
You shouldn't have to guess whether your roof is ready for solar. Before any work begins, a qualified professional should perform a thorough assessment. An expert will inspect your roof's structure, check its strength, and identify any potential issues that could complicate an installation. This step is non-negotiable for a safe and effective solar project. At AMECO, this is a core part of our approach, as it guarantees your home is fully prepared for the transition to clean energy. A professional evaluation gives you the confidence that your investment is built on a solid foundation.
Related Articles
- Roofing Materials for Solar Panel Installation | AMECO Solar
- Solar Roof vs. Traditional Roof: Which One to Choose?
- Is Your Roof Ready for Solar Energy?
Frequently Asked Questions
My asphalt shingle roof is about 15 years old. Do I really need to replace it before installing solar panels? It’s a very smart move to replace it. A typical solar panel system is warrantied for 25 years, while an asphalt roof of that age likely has less than 10 years of good life left. If you install panels now, you will almost certainly have to pay to have them removed and reinstalled in a few years when the roof fails. Tackling the roof replacement and solar installation at the same time saves you from that significant future expense and disruption.
What if my roof doesn't face south? Is solar still a good investment? Yes, absolutely. While a south-facing roof is traditionally considered ideal in California, it's not the only option for a great solar system. West-facing roofs are also excellent because they capture strong afternoon sun, which is when electricity demand and utility rates are often at their highest. An experienced installer can design a system that maximizes production for your specific roof, regardless of its direction.
Is it more expensive to install solar panels on a tile roof? It can be. Tile roofs require a more delicate and specialized installation process. The tiles themselves are fragile and can break, so installers need to use specific mounting hardware and take extra care, which makes the job more labor-intensive. This is why it’s so important to choose an installation team with proven experience working on tile roofs to protect your home and ensure a secure, long-lasting system.
What happens if my roof starts leaking after the solar panels are installed? This is a common concern, but a professional installation is designed to prevent it entirely. Installers use a technique with metal plates called flashing, which creates a watertight seal around every attachment point. A reputable company will also provide a workmanship warranty that covers their installation. This means if a leak were to occur due to their work, they would be responsible for the repair.
Why should I work with a company that does both roofing and solar? Working with an integrated company simplifies the entire process and ensures nothing gets missed. Instead of you having to coordinate between a roofer and a solar installer, one team handles everything. They can provide a single, comprehensive assessment of your home’s needs, making sure your new roof and solar system are perfectly compatible. This streamlined approach often saves time, prevents miscommunication, and gives you one point of contact for your entire project.
6.18.2026
Relying on the public utility grid can feel like you’re not in control of your own home’s power. Between scheduled blackouts, unexpected outages, and ever-changing electricity rates, you’re often left at the mercy of the utility company. A battery backup solar panel system changes that dynamic completely. It empowers you to create your own reliable, independent power source, giving you control over your energy supply and costs. This guide is for anyone ready to stop worrying about the grid. We’ll explore how adding a battery gives you the freedom and security to power your home on your own terms, no matter what’s happening outside your door.
Key Takeaways
- Secure your power and your wallet: A solar battery acts as your personal energy reserve, keeping your home running during outages. It also helps you save money by using stored solar power during peak utility rate hours instead of buying expensive grid electricity.
- Choose a battery based on key metrics: Compare a battery's capacity (kWh) to know what it can power, its round-trip efficiency for less wasted energy, and its cycle life warranty for long-term performance. Matching these details to your goals is the best way to find the right fit.
- Use incentives and hire a professional: Lower your upfront investment by exploring federal tax credits and state-level rebates. For a safe and reliable setup, always have a certified professional handle the installation, as it involves complex electrical work and ensures your system performs correctly.
What Is a Solar Battery Backup System?
Think of a solar battery as a personal energy piggy bank for your home. When your solar panels produce more electricity than your home is using, the extra power doesn't go to waste. Instead, a solar battery backup system captures and stores that excess energy for you to use later. It’s a smart way to get the most out of your solar investment and a powerful tool for keeping your lights on when the grid goes down.
For many California homeowners, the threat of power outages is a real concern. A battery backup system provides peace of mind by acting as your home's personal power plant. When it detects a grid failure, it automatically switches over to provide electricity to your essential appliances, like your refrigerator, lights, and medical devices. This happens so seamlessly you might not even notice the power went out. It’s not just about convenience; it’s about security and maintaining control over your home's energy supply, no matter what’s happening with the local utility.
How Does It Work?
The process is beautifully simple and completely automated. During the day, your solar panels are hard at work converting sunlight into electricity. This power flows into your home first, running your appliances and electronics. Any extra energy produced is used to charge your battery. Once the sun sets or on a cloudy day when solar production drops, your home automatically draws power from the battery instead of pulling it from the grid.
When a grid outage occurs, the system’s transfer switch immediately disconnects your home from the utility lines. This is a critical safety feature that prevents your system from sending power back to the grid, a process called back-feeding, which could endanger utility workers. Your home then runs on the stored battery power, creating an independent and self-sufficient energy island. An essential guide to home solar batteries can provide more technical details on this process.
Grid-Tied, Off-Grid, and Hybrid: What's the Difference?
Understanding the type of solar system you have or want is key to choosing the right battery setup. Most residential solar installations are grid-tied, meaning they are connected to the public utility grid. These systems can send excess power back to the utility, often for credit, but they typically shut down during an outage for safety reasons unless they have a battery.
An off-grid system operates completely independently of the utility grid. This setup is common for remote properties where connecting to the grid is impossible or too expensive. For an off-grid system, battery storage isn't just an option; it's a necessity to ensure you have power at night and during periods of low sunlight. A hybrid system offers the best of both worlds. It remains connected to the grid but also includes a battery backup. This allows you to enjoy the reliability of the grid while having the security of stored power for outages and the flexibility to use your own solar energy whenever you want.
Why Add a Battery to Your Solar System?
Pairing solar panels with a battery is one of the smartest moves you can make for your home’s energy setup. While solar panels are fantastic for generating power during the day, a battery stores that excess energy for you to use whenever you need it, like at night or during a power outage. Think of it as your personal energy reserve. Adding a battery backup system gives you more control, security, and financial flexibility, turning your solar installation into a complete home energy solution. Let’s look at the key reasons why a battery is a powerful addition to your solar panels.
Gain Energy Independence and Blackout Protection
For many California homeowners, the biggest draw of a solar battery is the peace of mind it provides. When the power grid goes down, a standard grid-tied solar system automatically shuts off to prevent sending power back into the lines and endangering utility workers. With a battery, your home seamlessly switches over to its stored energy. This means your lights stay on, your refrigerator keeps running, and your essential devices remain powered. A solar battery effectively acts as a miniature power plant for your home, giving you true energy independence and protecting you from unexpected blackouts.
Save Money with Time-of-Use and Net Metering
A solar battery isn't just for emergencies; it's also a strategic tool for saving money. Many utility companies in California use Time-of-Use (TOU) rates, where electricity costs more during peak demand hours, typically in the late afternoon and evening. A battery allows you to store the free, clean energy your panels produce during the day and use it during these expensive peak hours instead of buying power from the grid. This strategy helps you maximize the value of your solar investment and significantly lower your monthly electricity bills. You can even calculate your potential savings to see how a battery impacts your return on investment.
Choose Your Backup: Whole-Home vs. Essential Appliances
When planning for a battery, you can decide what you want to power during an outage. You can opt for an "essential loads" setup, which backs up critical appliances like your refrigerator, lights, Wi-Fi, and medical equipment. This typically requires around 10 to 20 kWh of storage. Alternatively, you can choose a "whole-home" backup system that powers everything, including large appliances like your air conditioner. This more robust setup usually needs 20 to 40 kWh of storage or more. Our approach involves designing a system that’s perfectly tailored to your family’s specific needs and budget, ensuring you have the right amount of power when you need it most.
A Look at Popular Solar Battery Options
Once you decide to add a battery to your solar setup, the next step is figuring out which one is right for you. The market is full of great options, and it can feel a little overwhelming at first. But don't worry, we're here to walk you through some of the most popular choices so you can get a feel for what's out there. Think of it like car shopping: some are built for performance, others for efficiency, and some are all-around family vehicles. The best one for you depends entirely on your home's energy habits, your budget, and what you want to power during an outage.
Each battery comes with its own set of features, from capacity and power output to warranty and smart home integration. Some are designed to provide just enough power for your essential appliances, like the refrigerator and lights, while others can support your entire home, including your air conditioner. To help you get started, we’ve broken down a few of the top contenders. While we at AMECO have our preferred partners based on decades of experience, understanding the landscape is a great first step. Choosing the right battery backup system is a big decision, and it’s all about finding the perfect match for your home’s unique needs. Let's look at what makes each of these batteries stand out.
Tesla Powerwall
You’ve probably heard of the Tesla Powerwall, and for good reason. It’s one of the most well-known home batteries available. With 13.5 kWh of usable capacity, a single Powerwall can keep your essential appliances running for hours during a blackout. It’s designed to work seamlessly with your solar panels, storing the extra energy you generate during the day so you can use it at night or when the grid goes down. Its sleek, minimalist design also means it won't be an eyesore on the side of your house, blending in smoothly with your home’s exterior.
Enphase IQ Battery
If you love the idea of starting with what you need now and adding more later, the Enphase IQ Battery is a fantastic choice. Its modular design means you can begin with a smaller capacity and expand your storage as your family or energy needs grow. Enphase gives you a ton of control right from your phone, with smart apps that let you monitor your energy production and consumption in real time. This flexibility makes it a versatile and future-proof option for homeowners who want to stay in command of their power.
EcoFlow DELTA Pro
For those who want serious power and flexibility, the EcoFlow DELTA Pro is a true powerhouse. What makes it stand out is its incredible modularity. You can expand its capacity from a solid 6 kWh all the way up to a massive 90 kWh, which is enough to run even heavy-duty appliances like your central air conditioning. This makes it an amazing solution for whole-home backup, especially during those California heatwaves. It’s also designed to be a plug-and-play system, offering a straightforward approach to powerful energy storage.
Anker SOLIX E10
The Anker SOLIX E10 is another excellent choice for homeowners who appreciate a customizable and user-friendly system. It features a clean, stackable design that allows you to expand your capacity up to 12 kWh, letting you tailor your storage to your specific needs. Like other modern batteries, it comes with an intelligent app that gives you full control over your energy management. You can easily monitor your usage and make adjustments from anywhere. This makes the SOLIX E10 a strong contender for those who want a smart, adaptable energy solution for their home.
How to Compare Solar Batteries
Choosing the right solar battery can feel like a big decision, but it doesn't have to be complicated. When you know what to look for, you can confidently pick a battery that fits your home's needs and your budget. Think of it like shopping for any major appliance; you want to compare a few key features to find the best match. We'll walk through the four most important factors: capacity, efficiency, lifespan, and cost. Breaking it down this way makes it much easier to see which battery will give you the reliable power and peace of mind you're looking for.
Understanding Capacity and Backup Duration
A battery's capacity, measured in kilowatt-hours (kWh), tells you how much energy it can store. Think of it as the size of your energy savings account. A smaller 10 kWh battery is great for keeping essentials running during an outage, like your refrigerator, lights, and Wi-Fi. If you want to power your entire home, including your air conditioner, you might look at a larger 30 kWh system. The right capacity for you depends entirely on what you want to keep on when the grid goes down. Our team can help you figure out the perfect size with a personalized battery backup consultation.
Comparing Efficiency and Battery Chemistry
Not all batteries are built the same. Most modern home solar batteries use lithium-ion chemistry because it's efficient and reliable. Within that category, some types are better than others. For example, many top-tier systems use Lithium Iron Phosphate (LFP) batteries, which are known for being exceptionally safe and long-lasting. You'll also want to look at the battery's round-trip efficiency. This number tells you how much power you get back for every bit of power you put in. A higher efficiency rating means less energy is wasted during the charging and discharging process, giving you more value from your solar solutions.
Evaluating Cycle Life and Warranties
A battery's lifespan is measured in "cycles." One cycle is a full charge and discharge. A battery with a higher cycle life will last you longer, so it's a critical number to check. Just as important is the warranty. Most top brands offer a 10-year warranty, but you'll want to read the fine print. Does it guarantee a certain capacity level after 10 years? A strong warranty is a sign that the manufacturer stands behind its product. It's also wise to consider the company's history. A warranty is only useful if the company is still around to honor it, which is why our approach emphasizes partnerships with established, reputable manufacturers.
Breaking Down the Costs
Let's talk about the price. Installing a solar battery is a significant investment, often ranging from $10,000 to $20,000. However, that initial number doesn't tell the whole story. Federal tax credits and local incentives can dramatically lower your out-of-pocket cost, making it much more affordable. It's helpful to think of a battery not as a purchase but as an investment in your home's energy independence and security. Over time, it can save you money on utility bills, especially if your provider has time-of-use rates. You can use an estimate calculator to get a clearer picture of your potential costs and savings.
What's the Price Tag on a Solar Battery System?
Let's talk numbers. Adding a solar battery backup system is a significant home upgrade, and the price is often the first thing on everyone's mind. Generally, you can expect the cost of a residential solar battery to fall somewhere between $10,000 and $20,000. That range can feel wide, but it reflects the variety of options available to fit different homes and energy goals. Think of it like buying a car; the final price depends on the model, features, and performance you choose. This investment covers more than just the battery itself. It includes the hardware, professional installation, and the peace of mind that comes with having a reliable power source during an outage.
While the upfront cost is considerable, it’s also the key to unlocking greater energy independence and protecting your family from unpredictable blackouts. The right system can also lead to long-term savings on your utility bills, especially with California's changing energy rates. Before you get sticker shock, remember that this initial figure doesn't account for the various incentives and tax credits that can significantly lower your out-of-pocket expense. We'll get into those in a moment. To get a clearer picture of what a system might cost for your specific home, you can use an estimate calculator to explore different scenarios. The final price tag is shaped by a few key factors, from the battery's capacity to available financial incentives.
Key Factors That Influence Cost
The main driver of a battery's cost is its capacity, which is measured in kilowatt-hours (kWh). A smaller, 10 kWh battery might be perfect for keeping essentials like your refrigerator, lights, and medical devices running for a few days during an outage. A larger, 30 kWh system could power nearly your entire home, including your air conditioning. The brand you choose, the complexity of the installation, and whether you’re adding it to an existing solar array also play a role. Our customized approach helps you determine the right size and setup for your home, ensuring you only pay for what you truly need.
How to Save with Tax Credits and Incentives
The good news is that you likely won't have to pay the full sticker price. Several financial incentives can make a solar battery much more affordable. For starters, you may qualify for the federal solar tax credit, which allows you to deduct a portion of the hardware and installation costs from your federal taxes. As a California resident, you can also take advantage of state-level programs like the Self-Generation Incentive Program (SGIP), which offers generous rebates for battery installations. On top of that, some utility providers have programs that let you earn credits or cash by sending your stored energy back to the grid during peak demand.
Is a Solar Battery Backup Worth the Investment?
Deciding whether to add a battery to your solar panel system is a big question, and the answer really depends on your goals. For many California homeowners, the constant worry about power outages and rising electricity costs makes a battery a compelling option. It’s not just about saving money; it’s about gaining security and independence from a grid that can sometimes feel unreliable. Think of it as an investment in your home’s resilience.
A solar battery stores the excess energy your panels produce during the day, so you can use it whenever you need it: at night, on a cloudy day, or most importantly, during a blackout. This stored power can keep your lights on, your refrigerator running, and your family safe when the neighborhood goes dark. But it’s also a significant financial commitment. The best way to decide is to weigh the clear advantages against the costs and clear up a few common myths along the way. Let's break it down so you can see if a battery backup is the right move for you.
The Upsides
The most immediate benefit of a solar battery is uninterrupted power. When a blackout hits, a battery backup system can automatically switch on, keeping your essential appliances running without a flicker. This means your lights, refrigerator, and Wi-Fi stay on, providing a sense of security and normalcy. Beyond emergencies, a battery helps you take full control of your energy. You can use your stored solar power during peak evening hours when utility rates are highest, which can lead to significant savings on your electricity bill. This gives you true energy independence, reducing your reliance on the grid and protecting you from unpredictable rate hikes.
The Downsides
Let’s be direct: the biggest hurdle is the initial cost. A home battery is a major investment, often ranging from $10,000 to $20,000 or more, depending on the size and brand you choose. While incentives can help, it’s a significant upfront expense. For some, the return on investment isn't purely financial. It’s helpful to think of a battery as an insurance policy. It may not pay for itself in monthly savings alone, but its value becomes undeniable the moment you need it during an extended outage. You can use an estimate calculator to get a clearer picture of the costs and potential savings for your specific home.
Clearing Up Common Misconceptions
There's a lot of confusing information out there about solar batteries, so let's set the record straight. First, most grid-tied solar panel systems do not work during a power outage unless you have a battery. For safety reasons, they automatically shut down to prevent sending electricity back to the grid while utility workers are making repairs. Another myth is that a bigger battery means you can run everything at once. In reality, your inverter's power output limits how many appliances you can run simultaneously. A professional can help you understand the balance between battery capacity and inverter power, which is a key part of our approach to designing the right system for your home.
Your Pre-Installation Checklist
Getting ready for your solar battery installation is exciting. It’s the final step before you can enjoy more energy independence and peace of mind. To make sure everything goes smoothly, it helps to have a clear checklist of what to expect and consider. Think of this as your game plan. It will help you ask the right questions and feel confident as your home gets its power upgrade.
We’ll walk through the key things to think about before the installation team arrives. From figuring out the right battery size for your family’s needs to understanding how you’ll monitor your new system, being prepared makes the entire process feel seamless. Let’s get you ready for installation day.
Size Your System for Your Home's Needs
First things first, let's talk about size. Solar battery capacity is measured in kilowatt-hours (kWh), which tells you how much energy it can store. The right size depends entirely on what you want to power during an outage. A 10 kWh battery, for example, can typically run essential appliances like your refrigerator, lights, and Wi-Fi for a day or more. If you’re looking for whole-home backup, a larger system of 20-30 kWh might be a better fit to keep things like your air conditioning running. You can use an estimate calculator to get a clearer picture of your energy needs and what size system would work best for your home.
Check Your Space, Inverter, and Solar Setup
Your solar battery system is more than just the battery itself. It includes an inverter to convert solar energy into usable power for your home, racking to mount everything securely, and a monitoring system. You’ll need a dedicated space for the battery, usually in a garage or on an exterior wall, that’s cool, dry, and out of direct sunlight. During your consultation, a professional will assess your current solar setup and home layout to find the perfect spot. They’ll make sure everything is placed for optimal performance and safety, so you don’t have to worry about the technical details.
Plan for Monitoring and Maintenance
One of the best parts of a modern solar battery is the technology that comes with it. Most systems include a user-friendly app for your phone or computer that lets you see exactly how much energy you’re generating, storing, and using in real time. You can track your savings, see your home’s energy patterns, and even customize how your battery is used. For example, you can set it to charge during off-peak hours when electricity is cheaper. This level of control makes it easy to get the most out of your investment and stay on top of your system’s health without any guesswork.
Consider Battery Lifespan and Replacement Costs
A solar battery is a long-term investment, so it’s smart to think about its lifespan from the start. Most solar batteries are designed to last between 10 and 15 years, and many come with warranties that guarantee a certain level of performance over that time. While the initial cost is a significant factor, remember that this system will provide energy security and savings for years to come. When you discuss your battery backup options, be sure to ask about the warranty details and the expected lifespan of the specific models you’re considering. This helps you plan for the future and understand the full value of your system.
Why You Should Always Hire a Professional
While the idea of a DIY project can be tempting, installing a solar battery is a job for certified professionals. These systems involve high-voltage electricity and need to be perfectly integrated with your home’s electrical panel and your solar array. A professional installer ensures everything is done safely and up to code, protecting your home and your investment. Experts like our team at AMECO handle everything from permitting to the final connection, following a proven approach that guarantees your system works flawlessly from day one. Hiring a pro gives you the confidence that your battery backup will be reliable when you need it most.
Power Your Home with an AMECO Solar Battery
An AMECO solar battery is the perfect partner for your solar panels, giving you a reliable source of power day and night. It works by storing the extra electricity your panels generate during sunny afternoons. Then, when the sun goes down or the grid experiences an outage, your home automatically draws from that stored energy. Think of it as a personal power plant for your house. When a blackout hits, the system switches over instantly, so your lights, refrigerator, and other essential devices keep running without a flicker. This gives you true energy independence right when you need it most.
Every home’s energy needs are different, which is why we don’t believe in one-size-fits-all solutions. Our Approach is to design a system that fits your specific lifestyle. You can choose a setup that backs up just the essentials, like your fridge and Wi-Fi, or one that can power your entire home. For example, a 10 kWh battery can keep your critical appliances running for several days. If you want to power almost everything, including your air conditioning, a larger 30 kWh system might be a better match. We’ll help you figure out exactly what you need to feel secure.
Adding a battery backup is a significant home improvement, with installations typically ranging from $10,000 to $20,000 depending on the size and brand. While it's a considerable investment, it's also an investment in your family's comfort and security. For many California homeowners, the peace of mind that comes from knowing you'll have power during an extended outage is invaluable. It means your food stays cold, your medical devices stay on, and your life can continue with minimal disruption. It’s about taking control of your home's energy and being prepared for anything.
Related Articles
- Solar Battery Backup for Home: A Complete Guide
- The Ultimate Guide to Battery Backup for Home Appliances
- The Real Cost to Add Battery to Solar System
- 6 Best Home Battery Backup Systems for CA Homes
- Battery Backup
Frequently Asked Questions
Do my solar panels still work during a blackout if I don't have a battery? This is a fantastic question, and the answer surprises many people. For safety reasons, a standard grid-tied solar panel system automatically shuts down during a power outage. This prevents it from sending electricity back to the grid, which could be dangerous for utility workers. A solar battery is the key that allows your home to safely disconnect from the grid and continue using the power your panels generate.
How long will a battery actually power my home during an outage? The duration really depends on two things: the size of your battery and what you choose to run. A smaller battery, around 10 kWh, is typically designed to power your essential appliances (like the refrigerator, lights, and Wi-Fi) for a day or more. If you opt for a larger system to provide whole-home backup, you could run nearly everything, including your air conditioner, for many hours. We can help you calculate your specific needs to find the perfect fit.
Can I add a battery to the solar panel system I already have? Yes, in most cases you absolutely can. This process is called retrofitting, and it's a popular option for homeowners who installed solar panels a few years ago and now want the security of a battery. A professional will need to assess your current system, particularly your inverter, to ensure compatibility and design the most efficient way to integrate the new battery.
How much maintenance does a solar battery require? You'll be happy to hear that modern solar batteries are designed to be very low-maintenance. They are self-contained units that manage their own charging and discharging automatically. The best part is that they come with monitoring software, usually an app on your phone, that lets you keep an eye on performance without any hands-on work.
Besides blackout protection, how does a battery save me money? A battery is a smart financial tool, especially in California where many utilities use Time-of-Use rates. This means electricity costs more during peak hours, like in the evening when you get home from work. Your battery allows you to store the free, clean energy your panels produce during the day and use that stored power during these expensive peak hours, instead of buying it from the utility company.
6.18.2026
Each year, as we prepare our homes for the cooler months, we go through a familiar checklist: clean the gutters, check the furnace, and maybe even reverse the ceiling fans. But there’s one more task that should be on every solar homeowner’s list: optimizing your panels for the winter sun. The sun’s lower path across the sky means your panels need a different tilt to catch its rays effectively. This simple seasonal adjustment is one of the easiest ways to ensure your system performs at its peak. We’ll explain how to find the best angle for solar panels in winter as part of your smart seasonal routine.
Key Takeaways
- Adjust Your Angle for the Winter Sun: Your panels need a steeper tilt in winter to face the sun's lower path across the sky. A simple rule of thumb is to add 15 degrees to your city's latitude; this adjustment helps your system collect more direct sunlight during shorter days.
- Your Roof and Mounts Dictate Your Strategy: The best approach depends on your home and goals. Adjustable mounts allow for seasonal changes to maximize output, while a fixed system set at a balanced, year-round angle is a reliable and maintenance-free choice that works with your existing roof pitch.
- Look Beyond the Angle for Winter Resilience: A steep winter tilt has the added benefit of helping rain and debris slide off, keeping your panels clean. For true energy independence, consider pairing your system with a battery backup to store power for cloudy days and protect your home from grid outages.
How the Winter Sun Affects Your Solar Panels
Even in sunny California, the winter months bring changes that affect your solar system's performance. While it’s a common myth that solar panels don’t work in the winter, the reality is a bit more nuanced. Your panels will absolutely keep generating clean energy, but how much energy they produce depends on a few key factors, primarily the sun's position in the sky.
The shorter days and potential for more cloud cover play a role, but one of the most significant impacts comes from the angle of your solar panels relative to the winter sun. Getting this angle right is crucial for maximizing your energy production when daylight is at a premium. Understanding how the sun’s seasonal path affects your panels is the first step toward ensuring your system is working as efficiently as possible all year long. At AMECO, our customized approach always accounts for these seasonal shifts to design a system that performs optimally for your specific home.
Understanding the Sun's Lower Path in Winter
Think about how the sun feels in the summer versus the winter. In the summer, it’s high overhead, beating down directly. During winter, the sun travels a much lower, shorter arc across the sky. This change happens because of the Earth's tilt on its axis as it orbits the sun.
For your solar panels, this lower trajectory means the sunlight hits them at a less direct angle if they’re positioned for the summer sun. Since solar panels generate the most electricity when sunlight strikes them perpendicularly, a fixed, summer-optimized angle can be less effective in the winter. Adjusting your panels to face the lower sun more directly can make a significant difference in the energy they capture during these shorter days.
The Impact of an Unoptimized Panel Angle
So, how much does the angle really matter? The impact is surprisingly large. If your panels are set at a suboptimal angle for the season, you could be missing out on a substantial amount of free, clean energy. Research shows that an improper angle can reduce your system's energy production by 10% to 40%. Even a 15-degree difference from the ideal tilt can decrease output by a noticeable margin.
This loss happens because a poorly angled panel presents a smaller surface area to the sun's rays, capturing less solar energy. It’s like trying to catch rain in a bucket held sideways. By ensuring your panels have the best possible tilt, you maximize your investment in solar solutions and keep your home powered efficiently, even when the days are short.
What's the Best Angle for Solar Panels in Winter?
Getting the most out of your solar panels in winter comes down to one key factor: the angle. Because the sun sits lower in the sky during these colder months, your panels need to be tilted just right to catch as many rays as possible. While it might sound technical, understanding the best angle is pretty straightforward. Let's walk through the general rules and how they apply specifically to us here in California.
Explaining the "Latitude + 15°" Formula
A great rule of thumb for finding the best winter angle is the "latitude + 15°" formula. First, you find your city’s latitude. Then, you add 15 degrees to that number to get your ideal winter tilt. For example, a city at 40° latitude would have a recommended winter panel angle of 55°. This steeper angle helps your panels face the sun more directly as it travels along its lower winter path. It’s a simple and effective starting point for optimizing your solar solutions when the days get shorter and the sun isn't as high in the sky.
Adjusting for Your Specific Latitude
While the "latitude + 15°" rule is a solid guideline, you can get even more energy by adjusting your panels seasonally. Homeowners who change their panel tilt two to four times a year can see a significant increase in their energy production. The general formulas are simple: add 15° to your latitude for winter, subtract 15° for summer, and set the angle to match your latitude in the spring and fall. This proactive approach ensures your system is always in the best position to capture sunlight. Our customized approach always considers your specific location to maximize your system's output year-round.
Winter Angle Guide for California Regions
For those of us in California, we can use a more precise formula to find the perfect winter angle. Since our state spans a wide range of latitudes, the calculation changes depending on where you live. If your home is between 25° and 50° latitude, which covers most of California, the formula is: (your latitude x 0.76) + 3.1 degrees. This specific calculation helps your panels capture more energy throughout the entire day, not just at peak noon hours. Don't worry about breaking out the calculator, though. A professional installation for residential customers includes finding the perfect, optimized angle for your unique home and location.
How to Calculate Your Ideal Winter Solar Angle
Figuring out the best angle for your solar panels might sound technical, but it’s actually a straightforward, three-step process. With a little bit of basic math, you can find the ideal tilt to help your panels capture as much sunlight as possible during the shorter days of winter. This calculation gives you a target to aim for, whether you have adjustable mounts or are planning a new installation with our team. Getting this angle right means you’re not leaving precious energy on the table when daylight hours are at a premium, helping you maintain your energy independence.
Think of it like adjusting a plant on your windowsill to get more light. You wouldn't just leave it in the shade if the sun has moved. The same principle applies to your solar panels. By tilting them correctly, you ensure the sun's rays hit the surface as directly as possible, which is the key to maximizing energy production. This is especially important for California homeowners who rely on solar to reduce energy bills and maintain power during potential outages. A well-angled panel can make a surprising difference in your daily energy generation. Let's walk through how to find that perfect number for your home so you can feel confident in your system's performance all year long.
Step 1: Find Your Home's Latitude
First things first, you need to know your home’s latitude. This geographical coordinate is the starting point for determining your ideal solar panel angle. The easiest way to find it is to simply search online for your city’s name followed by the word "latitude." For example, the latitude of Los Angeles is about 34 degrees, while Sacramento is around 38.5 degrees. This number represents your position on the globe relative to the equator and is the foundation for getting your panel tilt just right for every season. Knowing this single number is the most important piece of the puzzle for optimizing your entire solar array.
Step 2: Apply the Winter Angle Formula
Once you have your latitude, you can use a straightforward formula to find the best angle for winter. The general rule is: Latitude + 15 degrees = Ideal Winter Angle. Why add 15 degrees? In the winter, the sun travels along a much lower path in the sky. Tilting your panels up by an extra 15 degrees helps them face the sun more directly, allowing them to absorb more energy when the sun's rays are less intense. So, if you live in a city with a latitude of 36 degrees, your ideal winter tilt would be around 51 degrees. This simple adjustment helps compensate for the seasonal change in the sun's position.
Step 3: Account for Your Roof Pitch and Environment
The formula gives you a perfect number, but you also have to consider your home’s unique structure and surroundings. The existing pitch of your roof plays a big role. While our team can use mounting hardware to adjust the tilt, we always work with your home’s specific design. A steeper angle in winter also has a practical benefit: it helps snow and debris slide right off. After all, snow-covered panels can’t produce power. Our integrated approach ensures your roofing solutions can support your solar array safely, providing a stable foundation for optimal energy production year-round and giving you peace of mind.
How Panel Angle Impacts Winter Energy Production
You might think that just having solar panels is enough, but how they’re positioned on your roof plays a huge role in their performance, especially during winter. The angle of your panels can be the difference between a system that just gets by and one that truly maximizes your energy savings. It’s not just about catching some sun; it’s about catching it in the most effective way possible when daylight is a precious commodity. Let's look at how a simple tilt adjustment can make a big impact on your energy production.
The Production Difference an Optimal Angle Makes
Your solar panels are at their best when sunlight hits them straight on. Think of it like trying to catch a ball; you want to be right in its path. When your panels are angled incorrectly for the season, you could be missing out on a lot of potential energy, sometimes between 10% and 40%. That’s a significant chunk of power and savings left on the table. By simply adjusting your panels to the optimal winter angle, you can capture more direct sunlight and see a real difference in your system's output. AMECO’s customized approach ensures your panels are positioned for peak performance from day one.
How Steeper Angles Handle Debris and Shade
A steeper winter angle does more than just chase the sun. It also helps your panels stay clean and clear. In many parts of California, a steeper tilt allows rain to wash away dust and leaves more effectively. For those in mountain communities, it helps snow slide right off instead of piling up and blocking production. Since a covered panel is a panel that isn't working, this self-cleaning aspect is a huge plus. A steeper angle can also help your panels "see" over low-hanging winter shadows from trees or other buildings. We always consider your roof's structure to ensure it can support the ideal angle, integrating our roofing solutions for a secure and efficient setup.
Get the Most Out of Shorter Winter Days
During winter, the sun travels along a much lower path in the sky. If your panels are still at a flatter, summer-optimized angle, a lot of that precious winter sunlight will just glance off the surface. By tilting your panels up to a steeper angle, you position them to face the low-hanging sun more directly. This is why the "latitude + 15°" rule of thumb works so well; it compensates for the sun's lower position. Making this adjustment helps your system capture the maximum amount of energy during the shorter daylight hours, ensuring your solar solution works hard for you all year long.
Fixed vs. Adjustable Mounts: What's Best for Winter?
When you're planning your solar installation, one of the key decisions you'll make is about the mounting system. This hardware is what secures the panels to your roof, and you have two main options: fixed or adjustable. Each has its own set of benefits, and the right choice for you depends on your budget, your home's location, and how hands-on you want to be with your system. Let's look at how they stack up, especially for getting the most out of the winter sun.
The Pros and Cons of Adjustable Mounts
If you want to get every possible bit of energy from your panels, adjustable mounts are an attractive option. These systems allow you to manually change the tilt of your panels throughout the year, aligning them perfectly with the sun's seasonal path. This flexibility can increase your energy production by 15% to 25%, which is a significant gain during the shorter days of winter. While they require a larger upfront investment, that extra power generation often means the mounts pay for themselves within a few years. For homeowners who enjoy optimizing their system for peak performance, adjustable mounts are a fantastic part of a complete solar solution.
When a Fixed Angle Is the Smarter Choice
On the other hand, maybe you prefer a "set it and forget it" approach. That's where fixed mounts shine. A fixed system is installed at a single, optimized angle that provides a great balance of year-round energy production without any need for adjustments. While you might see about 10% to 15% less energy production compared to a perfectly adjusted system, fixed mounts are less expensive and require virtually no maintenance. They are an incredibly reliable and popular choice for homeowners who want a simple, effective system. Determining the best fixed angle for your specific roof and goals is a key part of our customized approach to every installation.
Does Your Roof Pitch Affect the Panel Angle?
Yes, your roof's pitch absolutely plays a role in your solar panel angle. Think of your roof as the foundation for your entire solar energy system. In most residential installations, solar panels are mounted flush with the roof, meaning they follow its existing slope. This is often the most straightforward and cost-effective approach.
However, your roof’s pitch might not perfectly match the ideal winter angle we discussed earlier. Does that mean you can’t get great solar production? Not at all. It just means we need a smart strategy. The goal is to find the sweet spot between the perfect angle on paper and the practical realities of your home’s structure.
An experienced solar installer will know how to work with your roof’s specific characteristics to maximize energy generation. They can assess whether a standard flush mount is best or if adjustments are needed. It’s all part of a customized approach that considers every variable, from your roofline to your energy goals. While the "perfect" angle is a helpful guide, a well-designed system on a less-than-perfect roof can still deliver fantastic results.
How to Work With Your Existing Roof Slope
For most homeowners, the best way to work with an existing roof slope is to embrace it. Installing panels parallel to your roof is the standard for a reason: it’s secure, looks clean, and requires less specialized mounting hardware. While it might not be the textbook optimal angle for winter, it’s often the most sensible solution.
Interestingly, a steeper roof pitch can be a hidden advantage during winter. A higher tilt helps snow, rain, and debris slide right off, keeping your panels clear and ready to soak up the sun. Since panels covered in snow won't generate power, this natural clearing mechanism is a big plus. A professional installation also ensures your roofing integrity is maintained, which is just as important as the panels themselves.
What to Do When Your Roof Pitch and Ideal Angle Differ
If there’s a significant difference between your roof’s pitch and the ideal winter angle, you have options. For homes with flat or very low-slope roofs, we can use special mounting racks to tilt the panels up to a steeper, more effective angle. This allows you to capture more of that low-hanging winter sun.
However, this kind of installation requires careful planning. Adding tilted racks puts additional weight and wind load on your roof structure. It’s critical to have a professional assess your roof to ensure it can handle the extra hardware safely. This is not a DIY job. A qualified team will perform the necessary calculations to create a safe and effective solar solution that gets you the best possible production without compromising your home’s structural integrity.
Tools to Help You Find the Best Winter Angle
While the "latitude + 15°" rule is a fantastic guideline, you don't have to rely on mental math alone. Thankfully, there are some excellent online tools that can help you pinpoint the perfect winter angle for your solar panels with much greater accuracy. These calculators use detailed geographic and solar data to take the guesswork out of the equation, ensuring you’re set up to capture as much precious winter sunlight as possible. Think of them as your digital assistants for solar optimization. Let's walk through a few of the most reliable options available to you.
PVWatts Calculator
The PVWatts Calculator is a go-to resource developed by the National Renewable Energy Laboratory, and for good reason. It’s a powerful yet straightforward tool that estimates the energy production of a solar array. All you have to do is enter your address, and you can start experimenting with different tilt angles to see how they affect your potential output. Don't be surprised if it suggests an angle that seems unusually steep, sometimes over 70 degrees for peak winter performance. This just shows how valuable a data-driven approach can be. Playing around with the calculator can give you a much clearer picture of what’s truly optimal for your specific spot on the map.
NOAA Solar and Tilt Calculators
Another trusted source for solar data comes from the National Oceanic and Atmospheric Administration (NOAA). The agency offers a solar position calculator that helps you understand the sun’s path and position throughout the year for your exact location. By providing precise solar elevation and azimuth information for any day of the year, this tool helps you confirm the ideal angle for maximizing your energy capture during the winter months. It’s a great way to cross-reference the numbers you get from other calculators and build confidence in your setup. This data is exactly what professionals use to design high-performance solar energy systems.
SunCalc
If you’re a visual person, you’ll love SunCalc. This simple online tool shows you the sun’s path on a map for any location and time of day. It’s incredibly helpful for determining the best orientation for your panels, not just the tilt. One important tip: your phone’s compass points to magnetic south, which can be slightly different from true south. SunCalc helps you find true south, but you can also look up the magnetic declination for your area to make sure your panels are perfectly aligned. This helps you avoid having your panels face slightly away from the sun’s peak path, ensuring better performance.
AMECO Solar's Custom Tools
Here at AMECO, we believe in making solar simple and effective for every homeowner. That’s why our personalized approach includes using advanced software to design a system perfectly tailored to your home and energy goals. We take all the guesswork out of finding the optimal angle by analyzing your specific roof, location, and seasonal sun exposure. While you’re exploring your options, you can use our Estimate Calculator to get a sense of your potential savings or our 3D Home Visualizer to picture how great solar will look on your roof. Ultimately, a professional consultation is the best tool for a flawless installation.
What Else Affects Winter Solar Production?
Getting the right angle for your solar panels is a huge step, but it’s not the only thing that influences your energy output during the winter months. The season brings a unique set of challenges, from shorter, cloudier days to potential debris on your panels. Understanding these factors helps you set realistic expectations and create a more resilient energy system for your home. By looking at the complete picture, you can ensure you’re getting the most from your solar investment, even when the sun is at its lowest. Let's walk through the other key elements that play a role in your winter solar performance.
Coping with Clouds, Shade, and Less Daylight
It’s no secret that winter days are shorter and often cloudier. This means there’s simply less sunlight available for your panels to convert into electricity. While solar panels can still generate power on overcast days by capturing diffuse light, their output will be lower than on a bright, sunny day. Another winter-specific issue is the "long shadow" problem. The sun’s low arc in the sky can cause trees, chimneys, or even neighboring buildings to cast new, longer shadows across your roof that aren't a problem in the summer. A professional consultation can help map out seasonal shading to ensure your panel placement is optimized year-round, which is a key part of our approach to system design.
Keeping Your Panels Clean and Clear
A steeper panel angle in winter does more than just catch the sun; it also helps keep your panels clean. In many parts of California, winter brings more rain, which is great for washing away the dust and grime that accumulate during drier months. For homes in higher elevations that see snow, a steeper tilt helps it slide off naturally. A panel covered in snow, leaves, or heavy debris can’t produce power, so this self-cleaning aspect is a major plus. Keeping your panels clear ensures that every available sunbeam can reach the solar cells, maximizing your production on those short winter days. This is another reason why pairing your solar project with professional roofing solutions is so important for long-term performance.
Why Battery Backup Is a Winter Essential
Winter’s lower solar production and the increased risk of storm-related grid outages make a strong case for energy storage. A battery backup system allows you to store the solar energy you generate during the sunniest part of the day and use it later that night. This means you rely less on the grid when your panels aren't producing. On a practical level, it gives you energy independence and peace of mind, knowing you’ll have power even if a winter storm knocks out the grid. If your system is designed to meet your needs during the challenging winter months, you can feel confident it will perform exceptionally well the rest of the year.
Is Optimizing Your Panel Angle for Winter Worth It?
So, after all this, is it really worth the effort to optimize your panel angle for winter? The short answer is yes, but the best approach depends on your system and your goals. If your panels are angled incorrectly, you could be missing out on a significant amount of energy. In fact, making seasonal adjustments can help you capture 10% to 25% more power, which makes a real difference in your utility bills and energy independence, especially during the darker months.
For homeowners who want to get every last drop of sunshine, investing in adjustable mounts is a fantastic option. While they require a bit more effort to adjust a few times a year, they can increase your energy production by up to 25%. This often means the mounts pay for themselves within a few years. A steeper winter angle also has the practical benefit of helping rain, debris, and even snow slide right off, keeping your panels clear and productive.
If you have a fixed-mount system, don't worry. You can't change your angle seasonally, but a professional installer will have set your panels at an angle that balances energy production throughout the entire year. The key is ensuring your system is designed with your specific location and needs in mind from the very beginning. A thoughtful solar and roofing approach considers these factors to give you the best year-round performance, so you can feel confident your system is working hard for you, no matter the season.
Related Articles
- Solar Panel Tilt Angle Calculator: Get It Right
- Solar Panel Alignment: How Location Affects the Efficiency of Solar Panels | AMECO Solar
- How to Use a Solar Power Calculator kWh Accurately
Frequently Asked Questions
Do my solar panels stop working if they're covered in snow or leaves? A covered panel cannot generate electricity, so keeping them clear is important. The good news is that a steeper winter angle, which is already great for capturing more sun, also helps debris like leaves, dust, and even snow slide right off. This self-cleaning aspect is a huge benefit, as it means your panels stay productive without you having to climb on the roof.
My roof doesn't seem to have the "perfect" slope. Does that mean solar won't work for me? Not at all. While the formulas provide a perfect angle on paper, the reality is that every home is unique. A professional installation team works with your home's specific structure. Most of the time, mounting panels flush with your existing roof is the most secure and sensible solution. If your roof is flat, we can use special racks to create the ideal tilt, ensuring you get great performance no matter what your roofline looks like.
I like the idea of adjustable mounts, but is it difficult or dangerous to change the angle myself? Adjusting the panels yourself is a task that requires you to be comfortable and safe working on your roof a few times a year. While it can improve your energy generation, it's not the right fit for everyone. For many homeowners, a professionally installed fixed system is the smarter choice. It provides excellent, balanced performance all year long with absolutely no maintenance or adjustments needed on your part.
My panels are already installed with a fixed angle. Did I make a mistake? Absolutely not. A fixed-mount system is a fantastic, reliable choice and the most common type of residential installation for a reason. When designed by a professional, your fixed angle was chosen to provide the best overall balance of energy production throughout the entire year, not just one season. Think of it as the perfect "set it and forget it" solution that works hard for you in summer and winter.
Besides the angle, what's the single most important thing for winter solar performance? If you want true energy security during the winter, pairing your solar panels with a battery backup is essential. Winter brings shorter days, potential storms, and a less reliable grid. A battery allows you to store the solar energy you produce during the day and use it at night or during an outage. It gives you peace of mind knowing your lights will stay on, no matter what the weather brings.
6.16.2026
The idea of energy independence is appealing, but the thought of a full solar and battery installation can feel overwhelming and expensive. What if you could get the security you need now and leave the door open for more later? That’s exactly what a standalone battery system offers. It’s a manageable, powerful first step that solves your most immediate problem: keeping the lights on during an outage. Most modern systems are designed to be "solar-ready," so you can easily add panels in the future. This guide will help you find the best home battery backup without solar for your current needs, giving you a flexible solution that grows with you.
Key Takeaways
- Get Backup Power Without Solar: A home battery can be installed on its own, charging from the grid to provide reliable power during blackouts and help you manage energy costs, all without needing solar panels.
- Manage Costs and Gain Security: A battery offers more than just blackout protection; it lets you store low-cost grid energy to use during expensive peak hours, a smart strategy for California's time-of-use rates. While it's a significant investment, federal tax credits can help lower the overall cost.
- Prioritize Key Features for Your Home: When selecting a battery, focus on capacity to meet your power needs, smart features for automatic load management, and expandability for future growth. Always rely on professional installation to guarantee safety and proper integration with your home's electrical system.
Can You Get a Home Battery Without Solar?
Let’s get straight to the point: Yes, you can absolutely get a home battery without installing solar panels. It’s a common question, and the answer is a relief for many California homeowners who want energy security without committing to a full solar setup just yet. A standalone battery system is a powerful tool for keeping your home running during an outage and can even help you manage your electricity costs. It acts as your personal energy reserve, storing power from the grid to use whenever you need it most. Let's break down how it works and clear up some common misconceptions.
How It Works
A home battery backup is essentially a large, rechargeable battery that connects to your home’s electrical system. Its job is to store electricity for later use. In a standalone setup, the battery charges by drawing power directly from the electrical grid. You can program it to charge during off-peak hours when electricity rates are lowest, which is a smart way to save money.
When a power outage occurs, the system’s inverter immediately kicks in. This device converts the stored DC energy in the battery into the AC energy your home’s appliances use. The transition is so seamless you might not even notice the grid went down, except that your lights will still be on while your neighbors' are not.
Standalone vs. Solar-Paired Batteries
The main difference comes down to the charging source. A standalone battery, which is the focus here, pulls its energy from the utility grid. This is an excellent option if you want backup power for outages or want to take advantage of time-of-use billing by charging when rates are low and using the stored power when rates are high.
A solar-paired battery, on the other hand, stores the excess energy your solar panels generate during the day. This allows you to use clean, self-generated power at night or during an outage. While combining solar and battery storage offers the greatest energy independence, a standalone battery is a powerful and practical solution on its own.
Common Myths About Battery-Only Systems
The biggest myth is that you need solar panels to have a battery system. As we've covered, that's simply not true. Many homeowners aren't ready or able to install solar panels for various reasons, like budget, roof suitability, or living in a rental. A standalone battery provides a way to get the energy security you need without the prerequisite of a solar installation.
Another misconception is that it’s not as effective. While you aren't generating your own free energy from the sun, a battery-only system is incredibly effective at its primary jobs: providing instant backup power and helping you manage energy costs. It’s a flexible solution that lets you find the right solution for your current needs while leaving the door open for adding solar later.
The Perks of a Standalone Battery
Even without solar panels, a home battery offers some serious advantages for California homeowners. Think of it as your personal energy reserve, ready to step in when you need it most. From keeping your home running during an outage to helping you save on your monthly utility bill, a standalone battery backup is a powerful first step toward energy independence. Let's walk through the biggest benefits of adding a battery to your home.
Keep the Lights On During Blackouts
A home battery is like a safety net for your power supply. It stores electricity and connects directly to your home’s electrical system. When the grid goes down, whether from a storm, a planned public safety power shutoff, or an unexpected equipment failure, your battery can automatically kick in. This means you can keep essential devices like your refrigerator, lights, and Wi-Fi running without interruption. For many homeowners, this peace of mind is the primary reason to invest in a battery, ensuring your family stays safe and comfortable no matter what’s happening with the grid.
Lower Your Bill with Off-Peak Charging
One of the smartest financial perks of a standalone battery is its ability to help you manage time-of-use electricity rates. In California, electricity costs more during peak hours (usually late afternoon and early evening) and less during off-peak hours. With a battery, you can charge it from the grid overnight when electricity is cheapest. Then, during those expensive peak hours, you can power your home with the cheap energy you stored instead of buying it from the utility. This strategy, known as load shifting, can make a noticeable difference in your monthly energy bills.
Enjoy Quiet, Clean, Low-Maintenance Power
If you’ve ever used a gas-powered generator, you know they are loud, smelly, and require regular maintenance. A home battery backup is the complete opposite. It operates silently, so you’ll barely notice it’s running. Because it doesn’t burn fossil fuels, it produces no harmful fumes, making it a cleaner and more environmentally friendly option for your home and neighborhood. Plus, batteries require very little maintenance, giving you a reliable power source without the extra work. This fits perfectly with a modern, sustainable lifestyle.
Leave the Door Open for Solar
Choosing a battery-only system now doesn't close the door on going solar later. Most modern home battery systems are designed to be "solar-ready," meaning you can easily add solar panels to your setup in the future. This allows you to address your immediate need for backup power while spreading out the investment of a full solar installation. You can start with a battery for blackout protection and energy savings, and when you’re ready, you can integrate solar solutions to generate your own clean energy and achieve even greater independence from the grid.
What Are the Downsides of a Battery-Only System?
While a standalone battery is a fantastic tool for energy management and blackout protection, it’s important to look at the full picture. Like any major home upgrade, a battery-only system has its own set of limitations you’ll want to consider. Thinking through these points will help you decide if it’s the right fit for your home right now, or if a combined solar and battery solution might be a better long-term goal. The main things to weigh are its reliance on the grid for power, the initial investment, and the specifics of available tax credits.
Grid Dependence and Backup Power Limits
A standalone battery is a bit like a giant, rechargeable power bank for your house. It gets its energy by charging from the grid, usually during off-peak hours when electricity is cheaper. This works perfectly for short-term outages. But what happens during a prolonged, widespread blackout that lasts for days? Since the battery needs the grid to recharge, its power is finite.
Without a way to generate your own electricity, like with solar panels, your backup power is limited to what the battery can hold. Once it’s drained, you’ll be in the dark just like everyone else until grid power is restored. For many California homeowners, a few hours or even a day of backup is enough. But if your goal is true energy independence, especially during extended outages, this is a significant limitation to keep in mind.
Weighing the Upfront Cost
Let’s talk about the elephant in the room: the price. A home battery system is a significant investment, and the upfront cost is typically higher than that of a traditional gas generator. Depending on the size and brand, you can expect the price tag for a professionally installed system to be substantial. It’s a serious purchase that requires careful budgeting and planning.
That said, it’s helpful to frame it as an investment in your home’s security and comfort. You’re paying for quiet, clean, and automatic power that keeps your essentials running without any effort on your part. To get a clearer idea of what a system might cost for your specific home, using an estimate calculator can give you a personalized look at the numbers. This helps you move from a general price range to a more concrete budget.
Understanding Tax Credits Without Solar
For a long time, the best financial incentives for home batteries were tied to installing them with a solar panel system. The good news is that this has changed. Thanks to the Inflation Reduction Act, you can now claim a federal tax credit for a standalone battery, as long as it has a capacity of 3 kWh or more. This is a huge step forward and makes battery-only systems more accessible.
However, navigating tax incentives can still be a little confusing. The rules can be specific, and it’s always wise to make sure you qualify before you bank on the savings. Working with an experienced installer is key, as they can guide you through the available credits and rebates. At AMECO, our approach is to walk you through every step, ensuring you have a clear understanding of the costs and incentives from the very beginning.
Top Home Battery Systems (No Solar Required)
Choosing the right battery can feel overwhelming, but it doesn't have to be. While many options are available, a few consistently stand out for their performance, reliability, and smart features, especially for homes without solar panels. A standalone battery is a fantastic way to protect your home from blackouts and manage energy costs. At AMECO, our battery backup solutions are designed to give you peace of mind and greater control over your home's power.
We've worked with countless systems over the years, and we’ve learned what truly makes a difference for homeowners. It’s not just about the brand name; it’s about finding a system that fits your specific needs, from the amount of power you require to the smart features that make life easier during an outage. The right battery should integrate smoothly into your home and provide dependable power when you need it most. Let’s look at a few of our top recommendations for battery-only setups.
Our Recommended Battery Solutions
When we evaluate battery systems, we look for a combination of powerful capacity, intelligent energy management, and long-term reliability. The goal is to find a solution that offers more than just backup power; it should also provide value every single day. The models we recommend are leaders in the industry for a reason. They offer robust performance for whole-home backup and include smart technology that helps you conserve energy efficiently. Our approach is to match you with a system that aligns with your lifestyle and budget, ensuring you get a dependable solution built to last.
FranklinWH aPower 2
The FranklinWH aPower 2 is a top contender for whole-home backup, and for good reason. Each unit provides a substantial 15 kWh of capacity, which is plenty of power to keep your home running smoothly during an outage. What really sets it apart is its intelligent controller. This smart feature automatically manages your home's energy use by pausing high-draw appliances, like your clothes dryer, to conserve power when the grid is down. This thoughtful energy management ensures your battery lasts as long as possible, giving you reliable power when you need it most.
EcoFlow DELTA Pro Ultra
If you value flexibility and the ability to expand your system over time, the EcoFlow DELTA Pro Ultra is an excellent choice. This system is highly modular, meaning you can stack battery units to increase your storage capacity as your needs or budget grow, starting from 6 kWh and going all the way up to 90 kWh. Another unique benefit is that it doesn’t require permanent wall mounting. You can simply plug in extra battery bricks when you need more power. This adaptability makes it a great fit for homeowners who want to start with a smaller system and scale up later.
Tesla Powerwall 3
The Tesla Powerwall 3 is a powerhouse, featuring a built-in inverter that delivers 11 kW of output and a solid 13.5 kWh of capacity. It’s designed to handle the demands of a modern home, easily managing heavy appliances without skipping a beat. One of its most valuable features for California residents is its ability to draw and store electricity from the grid during off-peak hours when rates are lowest. This process, known as load shifting, allows you to use that cheaper stored energy during peak hours, directly reducing your utility bills and making it a smart investment for any residential customer.
What's the Price Tag on a Home Battery System?
Let’s talk about one of the biggest questions on your mind: the cost. A home battery is a significant investment in your home's security and your family's peace of mind, so it’s important to understand the full financial picture. The final price tag depends on a few key factors, including the system's size, the brand you choose, and the specifics of your home's setup. While the initial number might seem high, remember that it’s not the whole story. Federal and local incentives can make a real difference, bringing the total cost down considerably. Let's break down what you can expect to pay and how you can save.
Breaking Down the Costs
The upfront cost for a home battery system typically falls between $10,000 and $25,000. This price includes the battery itself, other necessary hardware, and professional installation. The main reason for this wide range is capacity. A larger battery that can power more of your home for a longer period will naturally cost more than a smaller one designed to just keep the essentials running. Think of it like buying a car; a sedan and an SUV have very different price points because they offer different capabilities. Your unique energy needs will determine the right size and, therefore, the right price point for your home.
How Incentives Can Lower the Price
Now for the good news. You likely won’t have to pay that full sticker price. Several financial incentives exist to make energy storage more affordable for homeowners. The most significant is the federal tax credit, which can cover 30% of the cost for qualifying battery systems with a capacity of at least 3 kWh. This isn't just a small discount; it's a substantial credit that can save you thousands of dollars. A professional consultation can help you understand all the savings you’re eligible for, as there may be other state or local rebates available. Exploring these options is a key part of planning your battery backup project.
How to Choose the Right Home Battery
Picking the right home battery feels like a big decision, but it gets a lot simpler when you break it down. It’s not just about finding a box that stores power; it’s about finding a system that fits your home, your lifestyle, and your future plans. Think about what you want to achieve, whether it’s keeping the lights on during an outage or just having more control over your energy. Let's walk through the key factors to consider so you can make a choice you feel great about.
Capacity: How Much Power Do You Actually Need?
First things first, let's talk about capacity. This is measured in kilowatt-hours (kWh) and tells you how much energy the battery can store. The right capacity for you depends entirely on your goals. Do you want to power just the essentials, like your refrigerator, Wi-Fi, and a few lights during an outage? Or are you aiming for a whole-home backup? A home battery stores energy to use when the grid goes down or to offset high electricity costs. To figure out your needs, you can start by looking at your utility bill to understand your average daily usage. A professional can help you perform a more detailed load calculation to ensure your battery has the power you need, right when you need it.
Smart Features: Automatic Power and Load Management
Modern home batteries are much more than just storage. The best systems come with smart features that manage your power automatically. An advanced controller can optimize how and when your battery charges, often pulling power from the grid when it’s cheapest. During an outage, these systems can intelligently manage your home's electrical loads, directing power to your most critical appliances without you having to lift a finger. This level of automation not only makes your life easier but also increases the efficiency of your entire system. When exploring battery backup options, look for systems that offer this kind of intelligent, hands-off power management.
Room to Grow: Expandable Storage Options
Your energy needs might change over time. Maybe you’ll buy an electric vehicle, add an air conditioning unit, or decide to install solar panels down the road. Choosing an expandable battery system gives you the flexibility to increase your storage capacity later. This approach allows you to start with a system that fits your current budget and needs, while leaving the door open for future upgrades. By adding more storage, you can prepare your home for future solar solutions or simply increase your energy independence. It’s a smart way to future-proof your investment without overspending today.
Ensuring It Works with Your Home's Wiring
A home battery isn't a standalone appliance; it integrates directly into your home’s electrical panel. This connection is what allows it to act as a safety net, seamlessly taking over when grid power is cut. Because of this, it’s absolutely critical that the system you choose is compatible with your home’s existing wiring. An incompatible system can be inefficient or even unsafe. This is where professional expertise is non-negotiable. A qualified installer will assess your electrical setup to ensure a smooth and safe integration, making sure your battery works perfectly with your home from day one.
The Importance of Safety and Professional Installation
When it comes to installing a powerful electrical system in your home, safety is the top priority. This is not a DIY project. A professional installation ensures that your battery is set up according to all local codes and safety standards, protecting your home and your family. An expert will assess your household's specific energy needs and recommend the right system for you. Following a proven installation approach guarantees that your system will operate safely and efficiently for years to come. Investing in a professional installation gives you peace of mind, knowing the job was done right.
Is a Battery-Only System Right for Your California Home?
Deciding on a home energy solution is a big step, and it’s smart to weigh all your options. For many California homeowners, the idea of adding a battery backup system without solar panels is becoming more and more appealing. It’s a practical way to gain peace of mind and take more control over your home's power, especially when you consider the state of the grid. If you're looking for reliability without committing to a full solar installation just yet, a standalone battery might be the perfect fit for you. This approach allows you to address immediate concerns, like power outages, while leaving the door open for future upgrades. Let's look at how a battery-only system can specifically benefit you as a California resident.
A Solution for California's Unreliable Grid
Living in California means dealing with an unpredictable power grid. Between planned public safety power shutoffs and unexpected outages, losing electricity has become a frustratingly common part of life. A battery backup system works as a reliable safety net for your home’s power needs. At its core, it’s a rechargeable energy storage system that conserves electricity for you to use whenever you need it. You can charge the battery with grid power during off-peak hours when electricity is cheapest. Then, when an outage hits, the system automatically kicks in to keep your lights and essential appliances running, so you can get through blackouts without disruption.
Your First Step Toward Energy Independence
A standalone battery is a fantastic first step toward greater energy independence for residential customers. These systems are designed to store electricity for backup needs. When the power goes out, an inverter converts the stored energy into usable electricity, seamlessly powering your home. You won’t have to fumble for flashlights or worry about the food in your refrigerator spoiling. Beyond just backup power, this system gives you more control over your utility bills. By storing low-cost, off-peak energy, you can use it during more expensive peak rate periods, which is a smart financial move. It’s a practical way to reduce your reliance on the utility company on your own terms.
Ready to Secure Your Home's Power?
Making the move to a home battery backup system is a powerful step toward protecting your home and family from unexpected outages. It’s about creating a reliable safety net that gives you peace of mind, knowing your lights will stay on and your essential devices will keep running, no matter what’s happening with the grid. Whether you pair it with solar now or later, a battery gives you more control over your energy and your budget. It’s a practical investment in the comfort and security of your home.
At AMECO, we’ve spent nearly 50 years helping California homeowners find the right energy solutions. We understand that every home and family has unique needs. That’s why our approach starts with a conversation, not a sales pitch. We’ll help you figure out the right size and type of system for your lifestyle, ensuring you get a solution that fits perfectly. We handle everything from design to professional installation, so you can feel confident in your new system from day one.
If you’re ready to take control of your home's energy, we’re here to help. Learn more about our battery backup options or use our simple estimate calculator to get a preliminary idea of costs. When you’re ready to talk, our team can provide a personalized consultation to answer all your questions and design a system that works for you.
Related Articles
- Solar Battery Backup for Home: A Complete Guide
- batterybackup
- The Ultimate Guide to Battery Backup for Home Appliances
- The Real Cost to Add Battery to Solar System
- Solar Battery vs Generator: Which One Is Better for Your Home? | AMECO Solar
Frequently Asked Questions
How long can a battery power my home during a blackout? The runtime depends on two things: the battery's capacity and how much electricity you use. A larger battery can store more power, while running fewer appliances will make that power last longer. A system designed for whole-home backup can keep things running for many hours, while a smaller setup might focus on just the essentials like your fridge and Wi-Fi. A professional can help you calculate your specific needs to ensure you have enough power to get through a typical outage.
Can I really save money with a battery if I'm just charging it from the grid? Yes, you absolutely can, thanks to time-of-use electricity rates. The strategy is simple: your system charges the battery at night when electricity is cheapest. Then, during the expensive peak hours in the afternoon and evening, your home draws power from the battery instead of the grid. This process, called load shifting, lets you avoid the highest utility rates and can lead to noticeable savings on your monthly bill.
Can I add solar panels to my battery system later on? Yes, and this is one of the biggest advantages of starting with a battery-only system. Most modern batteries are designed to be "solar-ready," which means they can be easily integrated with solar panels in the future. This allows you to address your immediate need for blackout protection now and add the ability to generate your own clean energy when the time is right for your budget.
What makes a battery different from a regular gas generator? The experience is completely different. A battery backup system is silent, produces no fumes, and requires very little maintenance. It's connected to your home's electrical system, so it kicks in automatically the moment the power goes out. A gas generator, on the other hand, is loud, needs a constant supply of fuel, produces exhaust, and often requires you to manually start it and connect it to your appliances.
Is the installation process disruptive to my home? A professional installation is designed to be as smooth and non-disruptive as possible. The process involves integrating the battery system with your home's main electrical panel, which is a precise job best left to certified experts. A good installation team will handle all the technical work, ensure everything is up to code, and walk you through how your new system works, giving you confidence and peace of mind.
6.16.2026
For many homeowners, the goal isn't just to survive the next blackout but to achieve true energy independence. A battery backup system is a powerful step in that direction. When paired with solar panels, it transforms from a simple emergency device into a long-term investment that can lower your utility bills and give you control over your home's power. This setup allows you to store clean energy from the sun and use it whenever you need it most. We’ll explore how these systems work and help you decide if a solar-paired solution is the best battery backup for power outage resilience and your financial goals.
Key Takeaways
- Define Your Backup Goal: First, decide if you need a flexible, portable station to power a few devices or a permanent, whole-home system for uninterrupted living. Your primary goal, whether it's basic convenience or complete home resilience, is the most important factor.
- Understand the Key Specs: Pay attention to capacity (kWh), which tells you how long the battery lasts, and power output (W), which determines what you can run. A system that recharges with solar panels is the best way to achieve true energy independence during a long outage.
- Invest in a Safer, Smarter Solution: A battery backup is a better long-term investment than a generator; it's silent, fume-free, and requires no maintenance or fuel. Pairing it with solar panels also lets you store free energy from the sun, helping to lower your electricity bills year-round.
Portable Power Stations vs. Whole-Home Batteries: What's the Difference?
When you start looking into backup power, you'll find two main players: portable power stations and whole-home battery systems. Think of it as the difference between a powerful, grab-and-go charger for a few devices and a fully integrated power source for your entire house. Portable stations offer flexibility and are great for specific situations, like keeping your phone charged and the fridge running for a few hours. On the other hand, whole-home systems provide a seamless, automatic safety net against blackouts, ensuring life goes on as usual.
Choosing between them really comes down to what you want to accomplish during an outage. Are you okay with roughing it a bit, or do you want to maintain a sense of normalcy, keeping the lights on, the AC running, and your work-from-home setup uninterrupted when the grid goes down? Both options are a huge step up from noisy, fume-producing gas generators, but they serve very different purposes. Understanding these differences is the first step in finding the right battery backup for your home and your peace of mind. This decision will shape how you experience the next power outage, turning a potential crisis into a minor inconvenience.
The Grab-and-Go Option: Portable Power Stations
A portable power station is essentially a large, rechargeable battery in a box. You can think of it as a supercharged power bank, holding much more energy and equipped with standard AC outlets to plug your appliances directly into it. They’re a popular choice for camping trips or for keeping a few essential devices running during a short power outage.
Because they don't burn fuel, they're quiet and safe to use indoors. When the power comes back on, you simply recharge the station by plugging it into a wall outlet. While they are incredibly useful for their size, their capacity is limited. They can power a mini-fridge or a laptop for several hours, but they won’t run your whole house.
The Seamless Solution: Whole-Home Battery Systems
A whole-home battery system is a more robust and integrated solution designed to power your entire home. These systems are professionally installed and connected to your home’s electrical panel. They store a large amount of electrical energy, often from solar panels, and can automatically switch on the moment an outage is detected. You might not even notice the grid went down.
This setup provides a continuous power supply, allowing you to run major appliances like your air conditioner, refrigerator, and medical equipment without interruption. Beyond just blackout protection, a whole-home battery can also help you save money by storing cheap solar energy during the day to use during expensive peak hours. It’s a true investment in your home’s resilience and energy independence.
Decoding the Specs: What Really Matters in a Battery Backup
When you start comparing battery backups, the technical specifications can feel a little overwhelming. But you don’t need an engineering degree to figure it out. Understanding a few key terms will help you cut through the noise and find a system that truly fits your home’s needs. Think of it like reading a nutrition label; once you know what to look for, you can quickly tell what’s good for you. Let’s break down the most important specs so you can choose your battery backup with confidence.
Capacity (Wh): How Long Will Your Battery Last?
Capacity, measured in watt-hours (Wh) or kilowatt-hours (kWh), tells you how much energy a battery can store. Simply put, this is the spec that determines how long your battery will last during an outage. A higher capacity means more stored energy and longer runtimes for your appliances. For example, a 1,000 Wh battery can power a 100-watt device for 10 hours. To figure out what you need, think about which essentials you want to keep running (like your fridge, lights, and Wi-Fi router) and for how long. A quality battery backup system is designed to store this energy efficiently, so you have power when the grid goes down.
Power Output (W): What Can You Actually Power?
Power output, measured in watts (W), is different from capacity. It tells you how much electricity the battery can deliver at any given moment. This determines what kinds of devices you can run, and how many you can run at once. Some appliances, like refrigerators or power tools, need a high surge of power just to start up. Your battery’s power output must be able to handle that initial demand. Make sure you check both the continuous power rating (what it can supply steadily) and the peak or surge rating (the short burst it can handle). You can use an estimate calculator to get a better idea of your home's power demands.
Battery Chemistry: Why It Matters for Safety and Lifespan
The type of battery chemistry used in your system is a big deal for both safety and long-term value. Many modern home batteries use Lithium Iron Phosphate (LiFePO4) chemistry, and for good reason. LiFePO4 batteries are more stable and less prone to overheating than older lithium-ion types, making them a safer choice for your home. They also have a much longer lifespan, often lasting for 3,000 charge cycles or more, which can translate to over 10 years of reliable use. Choosing a company that follows a quality-first approach ensures you get a system built with durable, safe components.
Inverter Type: Protecting Your Sensitive Electronics
Every battery backup system has an inverter, which is a device that converts the DC power stored in the battery into the AC power your home appliances use. There are two main types: modified sine wave and pure sine wave. For your home, you’ll want a pure sine wave inverter. It produces clean, stable electricity that’s just like what you get from the grid. This is crucial for safely powering sensitive electronics like laptops, TVs, and medical equipment. A modified sine wave inverter can damage these devices over time. High-quality systems for residential customers will always use a pure sine wave inverter to protect your valuable electronics.
Charging Methods: How Will You Refuel?
You need a reliable way to recharge your battery, both before and during an outage. Most systems can be charged from a standard wall outlet. However, the real game-changer is solar charging. By pairing your battery with solar panels, you can create your own personal power plant. During a prolonged blackout, you can recharge your battery using just the sun, giving you true energy independence. This turns your battery from a temporary fix into a sustainable, long-term power source. Investing in solar solutions alongside your battery is the smartest way to prepare for any grid interruption.
Future-Proofing: Expandability and Uninterrupted Power
Your energy needs might change over time, so it’s wise to choose a system that can grow with you. Many modern home battery systems are modular, meaning you can add more battery units later to increase your storage capacity. This expandability gives you flexibility without needing to replace your entire setup. Another key feature is the ability to act as an Uninterruptible Power Supply (UPS). This means the system can switch from grid power to battery power instantly when an outage occurs, so your connected devices never lose power. This seamless transition is perfect for keeping your home office or essential medical equipment running without a single hiccup.
Battery Backup vs. Generator: Which One Comes Out on Top?
When the power goes out, having a backup plan is essential. For years, the go-to solution was a noisy, gas-powered generator. But now, home battery systems offer a quiet, clean, and modern alternative. Deciding between the two comes down to more than just keeping the lights on; it’s about safety, convenience, and long-term value. While both can get the job done during an outage, they operate in fundamentally different ways.
A generator creates electricity by burning fuel, while a battery backup stores electricity for you to use later. This core difference impacts everything from where you can place the unit to how much maintenance it requires and its effect on the environment. If you're weighing your options, it helps to look at a side-by-side comparison. Let's break down how they stack up in three key areas: safety and noise, ease of use, and overall investment. Understanding these distinctions will help you choose the right solution to protect your home and family during the next blackout.
Safety and Noise: Can You Use It Indoors?
This is one of the most significant distinctions between the two. Gas generators are loud and produce toxic carbon monoxide fumes, meaning they must run outdoors and a safe distance from any windows or doors. You can’t just tuck one away in your garage. In contrast, battery backups are a clear winner for indoor safety. They operate silently and produce zero emissions, so you can place them inside your home without any risk. This means you can keep essential appliances running without the constant drone of an engine or worrying about harmful exhaust. As noted by experts at Popular Mechanics, this quiet, fume-free operation is a major advantage, especially for families.
Ease of Use, Maintenance, and Long-Term Costs
When the power is out, the last thing you want is a complicated setup. Generators require a hands-on approach. You need to have fresh fuel on hand, manually start the engine, and run extension cords to your appliances. They also need regular maintenance like oil changes to ensure they’ll work when you need them most. A whole-home battery backup system is designed for seamless integration. It automatically kicks in the moment an outage is detected, often so quickly you won’t even notice the switch. With no moving parts or fuel to worry about, they are virtually maintenance-free, saving you time and hassle over the long run.
Your Footprint and Your Wallet: The Greener Investment
If sustainability and long-term savings are important to you, a battery backup is the smarter choice. Generators burn fossil fuels, releasing pollutants into the air. A battery system, on the other hand, simply stores energy. When you pair it with solar panels, you can store clean, renewable energy to power your home day and night. This not only reduces your carbon footprint but also makes your home more resilient. Plus, a battery can save you money even when the grid is stable. By storing energy when electricity rates are low (like midday with solar) and using it during expensive peak hours, you can significantly lower your utility bills.
A Closer Look at Portable Power Stations
Portable power stations are a fantastic entry point into the world of backup power. Think of them as supercharged power banks, often with wheels and a handle for easy transport. They’re self-contained units with a battery, an inverter, and multiple outlets (AC, DC, and USB) all packed into one box. Unlike gas generators, they’re quiet, produce no fumes, and are safe to use indoors. They offer a flexible way to keep your essential devices running when the grid goes down, without the commitment of a permanent installation. Let’s break down what you can expect from different sizes and when a portable unit is the perfect fit for your home.
For the Essentials: Small to Mid-Size Options
If your main goal is to get through a shorter outage without major disruptions, a small or mid-size portable power station is likely all you need. These units are great for keeping the lights on, your phones and laptops charged, and even running small appliances. Many models hit a sweet spot for portability and price, weighing under 30 pounds while providing enough power for a small refrigerator or critical medical equipment like a CPAP machine. They are incredibly useful during power outages for keeping those key appliances running and maintaining a sense of normalcy until the power is restored. They give you just enough power to stay comfortable and connected without a huge investment.
For Bigger Needs: High-Capacity Stations
For those who want more than just the basics, high-capacity portable stations are blurring the lines between portable power and whole-home backup. Models from brands like EcoFlow or Anker offer massive capacity and output, capable of running power-hungry appliances like a full-size refrigerator, a microwave, or even a window air conditioner. Some of these heavy-duty solutions are even expandable, allowing you to connect multiple batteries to power your home for days. While they are heavier and more expensive, they provide serious peace of mind and can act as a robust, temporary backup for a large portion of your home during an extended outage.
When Does a Portable System Make the Most Sense?
A portable power station is an ideal choice if you're looking for flexibility and a lower upfront cost. They can be a much cheaper option than installing a full home backup system, which requires a more involved process with permits and professional installation. Portables are ready to go right out of the box. Their versatility is another huge plus. You can use them to power your home office during an outage, then take them on a camping trip or use them to run tools in the backyard. They are a practical, multi-purpose investment for anyone who wants a simple, effective solution for temporary power needs.
Exploring Whole-Home Battery Systems
If the idea of manually setting up a power station in the dark doesn't appeal to you, a whole-home battery system might be the perfect fit. This is the next level of backup power. Instead of a portable box, it’s a fully integrated solution that connects directly to your home’s electrical panel. It works silently in the background, ready to take over the moment you need it. Think of it as your home’s personal energy reserve, providing seamless power, security, and true energy independence, especially when paired with solar panels.
What Can a Whole-Home System Actually Run?
A whole-home system is designed to power your life, not just a few gadgets. When the grid goes down, these systems convert stored energy to run your essential household appliances and electronics. Depending on the size of your system, you can keep everything from your refrigerator and lights to your Wi-Fi router and medical devices running smoothly. For residential customers, this means no more spoiled food or searching for flashlights. The goal is to customize a system that fits your specific needs, ensuring you have power for what matters most to you, whether that's your home office or your family's entertainment center.
How Long Will a Home Battery Backup Last?
The answer really depends on two things: the size of your battery and how much power you use. A larger battery system will naturally last longer, but your usage habits during an outage are just as important. A well-designed battery backup system can power your essential appliances for many hours, or even days. The real magic happens when you pair your battery with solar panels. With a solar and battery combination, your system can recharge every day using sunlight. This creates a self-sufficient loop of energy, giving you the ability to ride out extended blackouts without ever relying on the grid.
Automatic Switchover: Why It Matters During an Outage
This is one of the best features of a whole-home battery system. When a power outage hits, the system’s automatic transfer switch instantly detects the loss of grid power and seamlessly switches over to your battery reserves. The transition is so fast and smooth, you probably won’t even notice it happened; your lights won't even flicker. This means no frantic search for flashlights and no need to go outside to start a noisy generator. It provides a continuous source of electricity during an emergency, which is a huge relief for anyone who works from home or has family members who rely on powered medical equipment.
How Much Does a Battery Backup System Cost?
Let’s talk about one of the biggest questions on everyone’s mind: what’s the price tag? The cost of a battery backup system can vary widely, from a few hundred dollars for a small portable unit to tens of thousands for a comprehensive whole-home solution. The right choice for you depends on your budget, your power needs, and your long-term goals for energy independence. Think of it less as a simple purchase and more as an investment in your home's resilience and comfort.
The Cost of Portable Power
Portable power stations are the most accessible entry point into battery backup. You can find small units for a few hundred dollars, perfect for charging phones and laptops. Larger, more capable models that can run a small appliance like a mini-fridge can cost a few thousand dollars. The price is directly tied to the battery's capacity and power output. While the upfront cost is lower, it's a standalone solution. You're buying a single device, and if your needs grow, you'll have to buy another one. It's a good starting point, but it's worth using an estimate calculator to see how these costs compare to long-term energy savings from a larger system.
The Investment in a Whole-Home System
A whole-home battery is a significant upgrade for your home's infrastructure, and its price reflects that. The total cost includes not just the high-capacity battery itself but also a sophisticated inverter and professional installation to integrate it safely with your home's electrical panel. When you add a battery backup system, you’re investing in seamless, automatic power during an outage and the ability to store your own energy. Paired with solar panels, it allows you to capture free energy from the sun and use it whenever you want, giving you true independence from the grid and its rising costs. It’s a powerful solution for long-term resilience.
Don't Forget: Available Incentives and Tax Credits
The initial price of a whole-home battery system isn't the final number you'll pay. Homeowners in California can take advantage of several financial incentives that make these systems much more affordable. The federal solar tax credit, for example, allows you to deduct a percentage of the cost of your solar and battery storage system from your federal taxes. There are also state-level programs that can further reduce the cost. A good solar partner will have an approach that includes helping you identify and apply for every available credit and rebate, making the investment in energy independence much more manageable.
Common Myths About Battery Backups (Debunked)
As battery backups become more popular, a lot of confusing information has started to circulate. It can be tough to sort fact from fiction when you’re trying to find the right solution for your home. Let's clear the air and debunk a few of the most common myths so you can feel confident in your decision to secure your home’s power.
Myth #1: Advertised Capacity is Usable Capacity
It’s easy to look at the big number on the box and assume that’s exactly how much power you’ll get, but it’s not that simple. Always remember that the actual usable power you get from a battery is less than what the manufacturer advertises. This isn't a bait-and-switch; it's due to energy being lost during the process of converting DC power from the battery to the AC power your appliances use. Think of it like pouring water from one container to another, you might spill a little along the way. A good rule of thumb is to expect about 85% to 90% of the advertised capacity.
Myth #2: They Aren't Safe for Indoor Use
This myth likely comes from confusion with old-school gas generators. Unlike fuel-powered generators that produce deadly carbon monoxide and must be run outdoors, modern battery backups are perfectly safe for indoor use. Both portable power stations and professionally installed whole-home battery systems are quiet and don't create fumes. This means you can keep your essentials running right inside your house during an outage without worrying about noise or dangerous emissions. It’s a much safer and more convenient way to keep the lights on, especially if you have children or pets at home.
Myth #3: You Can't Recharge During a Blackout
The fear of a battery dying mid-outage is real, but the idea that you can't recharge it is a total myth. This is where pairing a battery with solar becomes a true game-changer. Many battery systems can be recharged using solar panels, which is an incredible advantage during longer outages. As long as the sun is out, you can keep your battery running and your home powered. This creates a self-sufficient loop of energy, giving you genuine energy independence when the grid is down. By pairing a battery with solar, you’re not just preparing for an outage; you’re building a resilient system that can sustain itself.
Is a Solar-Paired Battery the Smarter Long-Term Investment?
If you're already considering a battery backup, you might be wondering if it's worth pairing it with solar panels. The short answer is a resounding yes. While a standalone battery can get you through an outage, combining it with a solar energy system transforms it from a temporary fix into a powerful tool for long-term energy independence and savings. This combination isn't just about preparing for blackouts; it's about fundamentally changing your relationship with energy, giving you more control over your power and your bills.
Why Pairing Your Battery with Solar is a Game-Changer
Here’s a surprising fact: most solar panel systems don't provide power during a grid outage. For safety reasons, they're designed to shut down. This is where a battery backup changes everything. It allows you to capture and store the excess solar power your panels generate during the sunniest parts of the day. Instead of sending that extra energy back to the grid, you save it for later. You can use this stored power at night, during peak hours when electricity rates are highest, or to keep your lights on during an outage. This makes your home more resilient and can lead to significant savings on your utility bills over time, all while reducing your carbon footprint.
Grid-Tied vs. Off-Grid: What California Homeowners Should Know
When you pair solar with a battery, you’re not going completely "off-grid." Most homeowners opt for a grid-tied system, which offers the best of both worlds. You remain connected to the utility grid for backup, but you primarily run your home on the clean energy you generate and store yourself. Your solar solutions work to power your home and charge your battery during the day. At night or during an outage, your system automatically switches to battery power, ensuring a seamless and continuous supply. This approach gives you the energy independence you want without the extreme costs and limitations of a fully off-grid setup, making it the most practical choice for California homeowners.
Your Quick-Start Guide to Choosing the Right System
Feeling ready to find the right battery backup but not sure where to begin? It’s easier than you think. Breaking the decision down into a few simple steps helps clear away the confusion and lets you focus on what truly matters for your home and family. This quick guide will walk you through figuring out your power needs, matching a solution to your budget, and thinking through the practical side of installation. By the end, you’ll have a clear path toward choosing the perfect battery backup system for lasting peace of mind.
Step 1: Figure Out Your Power Needs
Before you look at any specific products, start by making a list of what you absolutely need to run during a power outage. Is it just for keeping your phones charged and a few lights on? Or do you need to power essential appliances like your refrigerator, a medical device, or your Wi-Fi router? Think about a typical outage and write down your non-negotiables. This simple exercise is the most important step, as it helps you determine the battery capacity you’ll need. A system for basic charging is very different from one that can support your entire residential setup.
Step 2: Match Your Budget to the Right Solution
Battery backup systems come in a wide range of prices, so it’s helpful to have a budget in mind. The cost is mainly influenced by the battery’s capacity, power output, and brand. While it can be tempting to go for the cheapest option, it’s better to think in terms of value. Will a small, inexpensive unit actually meet the needs you listed in step one? Investing in a system that reliably powers your essentials is key. You can use an estimate calculator to get a general idea of costs for larger systems, which can help you weigh your options realistically.
Step 3: Consider Portability and Installation
Finally, think about how a battery system will physically fit into your home and lifestyle. Portable power stations are convenient, plug-and-play devices you can move around the house or even take on the road. Whole-home batteries, on the other hand, are professionally installed and integrate seamlessly with your home’s electrical system. These systems often pair with solar solutions to store the excess energy you generate, giving you a truly independent power source. Considering whether you want a grab-and-go option or a permanent, automated solution will help you make the right choice for your home.
Related Articles
- The Ultimate Guide to Battery Backup for Home Appliances
- Solar Battery vs Generator: Which One Is Better for Your Home? | AMECO Solar
- 6 Best Home Battery Backup Systems for CA Homes
Frequently Asked Questions
How do I decide between a portable power station and a whole-home battery system? The best way to decide is to think about what you want to accomplish during an outage. If you're looking for a flexible, lower-cost option to keep a few essentials like your phone, laptop, and a small lamp running for a few hours, a portable station is a great choice. However, if you want a seamless, automatic solution that powers major appliances and keeps your entire home running without interruption, a professionally installed whole-home system is the right path. It really comes down to convenience versus comprehensiveness.
How long can a battery backup actually power my home during an outage? This depends on two main factors: the size of your battery (its capacity) and what you choose to run. A larger battery can power more things for a longer time. If you only use it for essentials like the refrigerator and some lights, it could last for many hours or even a full day. The real game-changer, however, is pairing your battery with solar panels. With solar, your battery can recharge every day using sunlight, giving you the ability to power your home through a multi-day blackout.
Do I really need solar panels for my home battery, or is the battery enough on its own? While a battery can work on its own by storing energy from the grid, pairing it with solar panels transforms it into a much more powerful tool. A standalone battery is like a large water bottle you fill from the tap; once it's empty, you need the tap to work again. A solar-paired battery is like having a spring in your backyard that refills the bottle for free every day. It gives you true energy independence, allowing you to recharge and stay powered even during a prolonged grid outage.
Besides the initial price, what are the long-term financial benefits of a whole-home battery? A whole-home battery is an investment that pays you back over time, especially when paired with solar. It allows you to store the free, clean energy you generate during the day and use it at night or during peak hours when utility electricity rates are most expensive. This strategy can significantly lower your monthly energy bills. Furthermore, installing a solar and battery system often makes you eligible for valuable tax credits and local incentives, which can reduce the overall cost and improve your home's value.
I see specs like 'capacity' and 'power output'. What do I actually need to pay attention to? It's helpful to understand both, as they answer two different questions. Capacity, measured in kilowatt-hours (kWh), tells you how long your battery will last; think of it as the size of your energy fuel tank. Power output, measured in watts (W), tells you what you can run at the same time. A high power output is needed to start up large appliances like a refrigerator or air conditioner. You need enough capacity to get through an outage and enough power output to run your essential devices simultaneously.
6.12.2026
Let’s talk about energy independence. With California’s grid becoming less predictable, the ability to power your own home isn't a luxury—it's a necessity. A robust solar system, built around high-output 500W panels, is your ticket to keeping the lights on during blackouts and controlling your energy costs. But building that system requires a smart plan. Before you start searching for 500w solar panels for sale, it’s crucial to understand how they fit into a complete solution with battery backup and the right hardware. This article breaks down how to design a system that gives you true peace of mind.
Key Takeaways
- Look beyond the wattage rating: A panel's real-world performance depends on its efficiency, durability, and technology, like monocrystalline cells, which determine how much power you actually get from the sun.
- Think in terms of a complete system: Your total cost and savings are determined by the entire setup, including the right number of panels, an inverter, and an optional battery. Federal and state incentives can significantly lower the final price.
- Optimize placement and perform simple care: A professional site assessment is key to positioning panels for maximum sun exposure and avoiding shade. Once installed, simple cleaning is all it takes to keep your system running efficiently for decades.
What is a 500W Solar Panel?
When you see a solar panel labeled "500W," that number represents its power rating. Think of it as the panel's maximum potential output under perfect, standardized test conditions, like a sunny day in a science lab. While you won't always get exactly 500 watts of power every second, this rating is a great starting point for comparing different panels. It tells you how powerful the panel is, which helps determine how many you’ll need for your home. Understanding this number is the first step in designing a system that meets your energy goals, whether you're a residential or commercial customer.
How much power does it really produce?
In the real world, a single 500W panel can generate about 2 to 3 kilowatt-hours (kWh) of electricity per day. The exact amount depends on factors like how many hours of direct sunlight your roof gets, the time of year, and local weather. A kilowatt-hour is the standard unit of energy your utility company uses on your bill, so this gives you a direct way to see how much a panel can offset your costs. To get a clearer picture of your home's potential, you can calculate your specific needs and see how different system sizes would perform.
Monocrystalline vs. Polycrystalline: What's the difference?
When you start looking at panels, you'll hear two main terms: monocrystalline and polycrystalline. The difference comes down to how the silicon cells inside the panel are made. Monocrystalline panels, which are typically black, are made from a single, pure silicon crystal. This uniform structure makes them more efficient at converting sunlight into electricity. Polycrystalline panels, on the other hand, are made from multiple silicon fragments melted together, which often gives them a blue, speckled appearance. This manufacturing process is less complex, which can affect their performance and cost.
Comparing efficiency, performance, and style
Your choice between monocrystalline and polycrystalline panels often involves a trade-off between efficiency, aesthetics, and budget. Monocrystalline panels are the more efficient option, meaning they produce more power per square foot. Their sleek, black appearance is also a popular choice for homeowners. This higher performance makes them ideal if you have limited roof space. Polycrystalline panels are generally less expensive, but their lower efficiency means you might need more of them to achieve the same power output. We can help you explore different solar solutions to find the perfect fit for your home’s architecture and your family’s energy goals.
What to Look for in a 500W Solar Panel
Once you start shopping for 500W solar panels, you’ll quickly realize they aren’t all the same. Two panels with the same wattage rating can differ in efficiency, durability, and even physical size. Making the right choice means looking beyond the number on the label to find a panel that fits your home, your climate, and your energy goals.
Think of it like buying a car. You wouldn't just look at the horsepower; you'd also consider its fuel efficiency, safety ratings, and whether it can handle the roads you drive on. The same logic applies to solar panels. Key factors like the underlying technology, weather resistance, and physical dimensions will determine how well your system performs for years to come. A professional consultation can help you sort through these details, ensuring your investment is built on a solid foundation. Our approach is to work with you to design a system that perfectly matches your home's specific needs.
Understand efficiency ratings and technology
A panel's efficiency rating tells you how much of the sunlight hitting it gets converted into usable electricity. Higher efficiency is always better. When you compare panels, you'll see two main types: monocrystalline and polycrystalline. Monocrystalline panels, made from a single crystal structure, are more efficient and have a sleek, uniform black look that many homeowners prefer. Polycrystalline panels are made from multiple silicon fragments and have a blue, speckled appearance. Because monocrystalline panels are more efficient, you can generate more power with less roof space, making them an ideal choice for our comprehensive solar solutions.
Check for durability and weather resistance
Your solar panels are a long-term investment that will sit on your roof for decades, so they need to be tough. Look for panels with high durability ratings that prove they can withstand the elements. Manufacturers often test their panels against heavy snow loads (up to 5400 Pa) and strong winds (up to 2400 Pa). Quality panels are built to last and are typically backed by a 25-year warranty. Since your panels are only as secure as the roof they sit on, it’s always a good idea to confirm your roof is in great shape before installation. We offer professional roofing solutions to ensure your entire system is secure from the bottom up.
Confirm it can handle California's climate
California is blessed with plenty of sunshine, but our climate varies from coastal marine layers to intense desert heat. Your panels need to perform reliably in your specific environment. High temperatures can slightly reduce a panel's efficiency, so look for models with a good temperature coefficient, which indicates how well they perform as things heat up. A professional installer will also assess your property for factors like shading from trees or nearby buildings and determine the optimal orientation for your panels. This ensures your system is designed to capture the most sun possible, a key step for all our residential customers.
Consider size, weight, and mounting options
The physical specifications of a 500W panel are just as important as its power output. A typical 500W panel might measure around 6.8 feet by 3.7 feet and weigh about 56 pounds. These dimensions determine how many panels can fit on your roof and how they will be arranged. Before any installation, your roof's structure must be evaluated to ensure it can safely support the total weight of the system. This is a critical safety check that a qualified solar installer will perform. You can even get a preview of how panels might look on your home with our 3D home visualizer.
How Much Do 500W Solar Panels Cost?
Let’s talk about the number one question on every homeowner's mind: what’s the price tag? For a long time, solar felt out of reach for many families, but the cost of solar technology has dropped significantly over the years. It’s now a practical and affordable investment for many California homeowners. While it’s easy to look up the price of a single panel, that doesn’t tell the whole story. The final cost of your solar project depends on the size of your system, the equipment you choose, and the complexity of the installation.
Instead of focusing on a single panel's price, it’s more helpful to think about the total investment and the incredible value you get in return. A complete solar system is designed to meet your home's specific energy needs, giving you predictable energy costs for decades. It's an upgrade that pays for itself over time through lower electricity bills and increased home value. To get a clear picture of what a system might cost for your home, you can start with a solar estimate calculator. From there, we can break down the costs and explore all the ways to save.
Breaking down the price per watt
When you start comparing solar panels, you’ll often see the term "price per watt." This is the standard way to measure cost, making it easier to compare different panels and brands on an apples-to-apples basis. A single 500W panel might cost anywhere from $160 to over $300, but you’ll rarely buy just one. For a full home installation, you’ll be purchasing multiple panels as part of a complete system.
The good news is that the price per watt is almost always lower when you buy a full system compared to a single panel. A professional installer sources panels in bulk and can build a custom solar solution that is perfectly sized for your home’s energy consumption and roof space, ensuring you get the most efficient system for your money.
Finding savings with discounts and incentives
Beyond the sticker price, there are several ways to reduce the upfront cost of your solar installation. Reputable solar companies often have access to manufacturer rebates or special promotions that aren't available to the general public. Working with an experienced installer means you have a partner who knows the market inside and out and can find the best deals on high-quality equipment for you.
Our team takes a personalized approach to every project, which includes identifying every available discount and incentive. We handle the research so you don’t have to, ensuring you get the best possible value. We’ll walk you through all the options during your consultation, so you can feel confident you’re making a smart financial decision.
Using federal and California tax credits
Tax credits are one of the biggest factors that make going solar so affordable. The federal government offers a Residential Clean Energy Credit, which allows you to deduct a large percentage of your total system cost directly from your federal income taxes. This isn’t just a deduction; it’s a dollar-for-dollar credit that can reduce what you owe. This credit also applies to battery backup systems installed with your solar panels.
On top of the federal credit, California offers its own set of local rebates and incentives that can lower your costs even more. When you combine these savings, the net cost of a solar panel system is often much lower than homeowners expect. These programs make clean energy accessible and help you start saving on your electricity bills faster.
How Location Affects Your Panel's Output
A 500-watt solar panel is rated to produce 500 watts of power, but that’s under perfect, lab-tested conditions. In the real world, how much energy your panels generate depends entirely on your specific situation. Think of it like a garden: you can plant the best seeds, but their growth depends on the soil, sunlight, and water they receive. The same is true for solar panels. Your home’s location, the specifics of your roof, and even your local weather patterns all play a major part in your system's daily energy production. Luckily, living in California gives you a fantastic head start.
What to expect from California sunlight
California is one of the best states for solar energy, thanks to our generous share of sunshine. However, the amount of solar energy you can capture varies depending on where you live. A home in the desert will get more intense, direct sunlight than a home along the coast that sees more morning fog. Your specific latitude and elevation also influence how much power your panels can produce throughout the year. Our solar solutions are always designed with your local climate in mind, ensuring your system is set up to make the most of the sunlight your area receives. We analyze local weather data to give you a realistic picture of your potential energy generation.
Why roof angle and shading matter
The direction and angle of your roof are two of the most important factors for solar production. Ideally, panels should be on a south-facing roof to capture the most sunlight throughout the day. But don't worry if your roof isn't perfectly positioned; east- and west-facing roofs can also be great candidates for solar. What’s more critical is avoiding shade. A single tree, a chimney, or even a neighbor’s new second-story addition can cast a shadow that significantly reduces your panel's output. That's why a professional site assessment is so important. Our approach includes a detailed analysis of your roof and any potential shading to create a layout that maximizes your energy production.
How weather impacts daily performance
It’s a common question: "Will my panels work on cloudy days?" The answer is yes, but they will produce less power. Panels generate the most electricity on clear, sunny days. When clouds roll in, they block some of the sunlight, which reduces output. Rain and fog have a similar effect. While your system's production will fluctuate with the weather, it will still be generating power even on overcast days. In fact, a good rainstorm can even help by washing away dust and grime. To manage these daily fluctuations and have power during outages, many homeowners pair their system with a battery backup for a reliable energy supply, rain or shine.
Is a 500W Panel System Right for Your Home?
Deciding if 500W panels are the right choice for you goes beyond just the number on the label. It’s about creating a complete system that fits your home’s energy consumption, your roof’s characteristics, and your goals for going solar. Are you looking to slash your electricity bill, gain independence from the grid, or simply make a greener choice? The answer will shape your ideal setup, and powerful 500W panels can be a fantastic foundation. But they are just one piece of the puzzle.
Thinking about your system as a whole, including the number of panels, potential battery storage, and the right hardware, is key to a successful installation. For residential customers, this means looking at your unique energy patterns and designing a solution that meets those needs precisely. A professional consultation can help you understand how many panels your roof can accommodate and how to get the most from your investment. Before you make a final decision, it’s important to get a clear picture of your energy needs and explore how different components work together. Let's walk through the three main questions you'll need to answer to build the perfect solar system for your home.
How many panels do you need?
The first step is to figure out your home's daily energy use. You can find this on your utility bill, usually listed in kilowatt-hours (kWh). A 500-watt solar panel can make about 2 to 2.5 kWh of electricity each day, depending on how much direct sunlight it gets. So, if your home uses around 30 kWh per day, you would need approximately 12 to 15 panels to cover your energy needs. This is a starting point, as factors like your roof’s angle and any shading will affect production. Using an estimate calculator can give you a more personalized idea of what your home requires.
Should you add a battery backup?
For many California homeowners, the answer is a resounding yes. A battery backup system gives you true energy independence. While solar panels generate power during the day, a battery stores any excess energy for later use. This means you can power your home with solar energy at night or, more importantly, keep your lights on during a power outage. With grid instability and rolling blackouts becoming more common, having a battery ensures your home remains a comfortable and safe haven. It also allows you to avoid pulling expensive electricity from the grid during peak evening hours, giving you more control over your energy costs.
Choose the right inverter for your system
The inverter is the brain of your solar operation. Inverters are devices that change the direct current (DC) power your solar panels generate into alternating current (AC) power that your home’s appliances can use. There are several types, including grid-tie, hybrid, and microinverters, and the right one for you depends on your system’s design. For example, a hybrid inverter is designed to work with a battery backup, while microinverters are great for roofs with complex angles or partial shading. Choosing the correct inverter is crucial for getting the most efficiency out of your solar solutions and ensuring your system performs reliably for years to come.
Where to Buy 500W Solar Panels
Once you’ve decided that 500W panels are a good fit for your energy goals, the next step is figuring out where to get them. You can find panels for sale in a few different places: directly from manufacturers, through online marketplaces, or as part of a complete package from a local installer. Each path has its pros and cons, and the right choice depends on your comfort level with the technical details and the amount of work you want to do yourself.
Making the right purchasing decision is about more than just finding the lowest price. It’s about ensuring you get high-quality, reliable panels that will perform for decades. Thinking through your options now will save you from headaches and unexpected costs down the road.
DIY vs. professional installation
The idea of a DIY solar project can be appealing, especially if you’re handy and looking to save on labor costs. However, installing a solar system is more complex than it might seem. It involves working with high-voltage electricity and securing heavy equipment to your roof, which carries significant safety risks if you’re not a trained professional. Many homeowners hesitate to go solar because of common myths and misconceptions about the process, and a DIY approach can amplify those concerns.
Working with a certified installer like AMECO ensures the job is done safely and correctly. Professionals handle everything from system design and permitting to the final installation and inspection. This not only protects your home but also guarantees your system is optimized for performance and eligible for warranties. Our professional approach is designed to give you peace of mind.
Red flags to watch for when buying
When you start shopping for panels, you’ll likely see a wide range of prices. If a deal seems too good to be true, it probably is. Be extremely cautious of deeply discounted panels sold on unverified online marketplaces. As one expert wisely put it, "If someone's selling 500W panels for $80, they're either damaged, knockoffs, or about to take your money." These panels might be used, refurbished without certification, or have hidden defects that lead to poor performance.
Another red flag is a seller who can’t provide clear documentation for the product warranty or manufacturer details. Reputable solar panels are a long-term investment, often lasting 25 years or more, and they should come with a strong manufacturer's warranty to match. Always buy from a trusted source that stands behind its products.
Questions to ask before you buy
To make sure you’re making a smart purchase, you need to ask the right questions. Whether you’re talking to an online retailer or a local installer, don’t be shy about getting the details you need to feel confident. A trustworthy seller will be happy to provide clear and honest answers.
Start with these essential questions to consider before buying:
- What is the panel’s efficiency rating and temperature coefficient?
- What does the product and performance warranty cover, and for how long?
- Who is the manufacturer, and what is their reputation in the industry?
- What is the total cost, including shipping, installation, and any other fees?
- Can you provide an estimate of how much I’ll save with federal and state incentives?
- What financing options are available?
Getting answers to these questions will help you compare different panels and suppliers accurately. You can even start exploring costs right now with our solar estimate calculator to get a personalized idea of what a system might look like for your home.
How Long Do 500W Solar Panels Last?
When you invest in a solar system for your home, you’re making a long-term commitment. It’s only natural to wonder how long that investment will actually last. The good news is that modern 500W solar panels are incredibly resilient pieces of technology. They are designed to withstand the elements and continue producing clean energy for your family for decades. Think of it less like buying a new appliance and more like a permanent upgrade to your home’s infrastructure. With the right panels and a quality installation, you can count on reliable performance for many years to come.
Understanding a panel's lifespan
One of the best things about solar technology is its durability. Most high-quality solar panels are built to last 25 years or more, quietly generating power on your rooftop. A panel’s "lifespan" isn't about it suddenly stopping working one day. Instead, panels experience a very gradual, predictable decline in efficiency over time. This process, known as degradation, is perfectly normal. Studies show that most panels only lose a tiny fraction of their efficiency each year. This means that even after 25 years, your system will still be producing a substantial amount of power, ensuring a great long-term return on your solar solution.
What does your warranty really cover?
Your solar panel warranty is your peace of mind, and it’s important to know what it includes. You’ll typically see two types: a product warranty and a performance warranty. The product warranty covers defects in materials or manufacturing, usually for 10 to 25 years. The performance warranty is what guarantees your panel's output over time. A standard 25-year performance warranty ensures the panel will still produce at a high percentage, often around 85%, of its original output by year 25. It’s important to note that while performance warranties typically last 25 years, this doesn't mean the panels will fail immediately afterward. They will simply continue producing power at a slightly reduced rate.
Solar panel maintenance: Myths vs. reality
You might have heard that solar panels are completely maintenance-free, and while they are very low-maintenance, that’s not the whole story. Solar panels don’t require a lot of upkeep, but occasional care can extend their lifespan and ensure they perform efficiently. In California, this usually just means a periodic cleaning to wash away any dust or debris that can accumulate and block sunlight. A good rainstorm can often do the trick. For a more thorough check-up, having a professional inspect your system every few years is a great way to protect your investment and ensure everything, including your roofing, is in top shape.
Are 500W Solar Panels a Good Choice for You?
Deciding if 500W solar panels are the right fit for your home comes down to more than just the panel itself. It’s about understanding your energy goals, your home’s unique characteristics, and how to get the best performance out of your system for years to come. These powerful panels are an excellent option for many California homeowners, offering a fantastic blend of high output and efficient use of roof space. They can significantly reduce your reliance on the grid and lower your electricity bills.
The key is to think of it as a two-part equation. First, you need to ensure the panels can generate as much electricity as possible. This involves a careful look at your property to optimize their placement and setup. Second, you need to protect your investment with simple, consistent care. A solar energy system is a long-term asset, and a little maintenance goes a long way. By focusing on both maximizing output and ensuring longevity, you can confidently determine if 500W panels are the smart, sustainable choice for your family’s future.
Get the most from your solar panels
A single 500-watt solar panel can produce about 2 to 2.5 kilowatt-hours (kWh) of electricity each day, which can make a real dent in your home's energy consumption. However, that number isn't guaranteed. Factors like your roof’s angle, seasonal climate, and even shading from a nearby tree can influence your system's daily output. That’s why a professional evaluation is so important.
Understanding our approach to system design can help you see how experts account for these variables. We analyze your specific situation to make sure your panels are positioned for peak performance. While some panel types, like polycrystalline, are more affordable, they may have slightly lower efficiency. We’ll help you weigh the costs and benefits to find the perfect solution for your home and budget.
Protect your investment with simple habits
Your solar panel system is built to last, and with the right care, it can deliver clean energy for decades. Think of it like any other major home asset. Just a little attention ensures it continues to operate at its best. Regular cleaning is one of the simplest and most effective habits you can adopt. Dust, leaves, and other debris can accumulate on the panel's surface, blocking sunlight and reducing its efficiency.
Keeping your panels clean helps them capture every possible ray of sunshine, ensuring you get the power you expect. This simple step is crucial for achieving excellent long-term performance and making the most of your switch to solar. With proper maintenance, your system will remain a reliable and valuable part of your home for years to come.
Related Articles
- How to Estimate Your Solar Panel Needs: An In-Depth Guide
- Wattage of a Solar Panel: How Many Watts Does a Solar Panel Produce?
- Blog | Solar Panel News | Solar Panel Company | AMECO Solar
Frequently Asked Questions
How many 500W panels will my home actually need? The exact number depends on your family’s energy consumption, which you can find on your monthly utility bill. As a general guide, a single 500W panel produces about 2 to 2.5 kilowatt-hours (kWh) of power per day. If your home uses 30 kWh daily, you would start by looking at a system with around 12 to 15 panels. However, this is just an estimate, as a professional site assessment will give you a precise number based on your roof’s size, angle, and sun exposure.
Are 500W panels always the best choice over lower-wattage panels? Not necessarily, but they are an excellent choice for maximizing power in a limited area. Because 500W panels are highly efficient, they allow you to generate more electricity with fewer panels. This is ideal for smaller roofs or for homeowners who want to leave room for future expansion. The "best" panel is always the one that fits your specific roof, energy needs, and budget as part of a custom-designed system.
Will my solar panels keep my lights on during a power outage? Standard solar panel systems that are tied to the grid are designed to shut down automatically during a power outage. This is a safety measure to protect utility workers who are repairing the power lines. If you want to have power during a blackout, you will need to pair your solar panels with a battery backup system. The battery stores excess solar energy so you can use it to power your home whenever you need it, day or night, grid on or grid off.
How much maintenance do solar panels really require? Solar panels are surprisingly low-maintenance, but not completely maintenance-free. For the most part, rain will do a good job of washing away dust and debris that can accumulate on the surface. If you live in a particularly dusty area or go through a long dry spell, a simple rinse with a hose can help keep them performing at their best. We also recommend a professional inspection every few years to ensure all the components are in great shape.
What is the biggest mistake people make when buying solar panels? The most common mistake is choosing panels based on price alone, especially from unverified online sellers offering deals that seem too good to be true. These deeply discounted panels are often defective, used, or come without a valid manufacturer's warranty, leaving you with no protection if something goes wrong. Your solar system is a long-term investment, and the best way to protect it is by working with a reputable, certified installer who sources high-quality equipment and stands behind their work.
6.11.2026
Having solar panels gives you a taste of energy freedom, but a battery completes the picture. It transforms your home into a personal power station, ready for anything the grid throws at it. For many California homeowners, the peace of mind that comes with having reliable backup power is the biggest benefit of all. The process of adding battery to existing solar system is your path to achieving that security. In this article, we’ll explore how a battery keeps your home running during an outage, helps you gain independence from the utility, and what you need to consider before you get started.
Key Takeaways
- Start with a system check: Before adding a battery, it's important to evaluate your current solar setup. Understanding your inverter type and reviewing your existing warranties are crucial first steps to ensure a smooth, compatible installation.
- Plan for the cost and find savings: A battery is a significant investment, but you can lower the price by taking advantage of federal tax credits and local rebates. These incentives are often time-sensitive, so acting sooner can help you save more.
- Gain more than just energy storage: A battery provides major benefits beyond simply holding power. It offers peace of mind with backup during outages, lowers your bills by helping you avoid peak utility rates, and gives you true energy independence.
Can You Add a Battery to an Existing Solar System?
Yes, you absolutely can add a battery to a solar panel system that's already installed on your home. This process is often called "retrofitting," and it's a fantastic way to get more value out of your solar investment, especially with California's frequent blackouts and changing utility rates. Adding a battery backup allows you to store the extra solar energy your panels produce during the day and use it at night or during a power outage. This gives you greater energy independence and peace of mind.
However, retrofitting isn't quite as simple as just plugging in a new appliance. It requires careful planning to make sure the new battery works seamlessly with your existing setup. One of the first things to consider is your current warranty. According to EcoFlow, adding a battery could potentially void the warranty on some of your solar components, particularly the inverter. Before moving forward, it’s a good idea to review your warranty documents or check with the manufacturer. Working with an experienced installer who understands these details is key to a smooth and successful upgrade.
What If You Have Leased Panels or a PPA?
If you own your solar panel system, you generally have the freedom to add a battery whenever you choose. But what if you’re leasing your panels or have a Power Purchase Agreement (PPA)? In that case, you don't technically own the equipment on your roof. Because of this, you'll likely need to get permission from the solar company that owns the system before you can add a battery. They’ll want to ensure the addition is compatible and doesn't interfere with their equipment. Our team can help you understand the specifics of your agreement and guide you through the right steps.
Common Myths About Adding a Battery, Debunked
There are a few common misconceptions about adding a battery to an existing solar system. Let's clear them up. One myth is that it’s always a complicated and difficult process. The truth is, if your system was designed to be "storage-ready" or already has a hybrid inverter, adding a battery can be quite straightforward.
Another myth is that it costs the same as installing a battery with your initial solar setup. In reality, it’s often a bit more expensive to add a battery later because it requires a separate installation visit. Finally, some people assume any electrician can handle the job. However, battery installation is a specialized skill that many installers find challenging. That’s why it’s so important to work with a company that has deep expertise in both solar and battery solutions.
Is Your Inverter Compatible with a Battery?
Before you can add a battery to your solar panel system, you need to check on your inverter. Think of the inverter as the brain of your solar setup. It’s the essential piece of equipment that converts the direct current (DC) electricity your panels produce into alternating current (AC) electricity that your home can use. Its model and capabilities will determine the path you take to add energy storage.
The good news is that almost any existing solar system can have a battery added to it. The key is understanding what kind of inverter you have and what that means for the installation process. Some inverters are built ready to pair with a battery, while others might require a bit more work or even an upgrade. Knowing your setup is the first step toward adding a reliable battery backup and gaining more control over your home’s power.
Understanding String Inverters
String inverters are the classic, most common type found in residential solar systems. Their job is to connect a series of solar panels (a "string") and convert all the DC power they generate into usable AC power in one central unit. If you have a single box on the side of your house that your panels feed into, you likely have a string inverter. Adding a battery to a system with a string inverter is straightforward and usually involves a method called AC coupling, where the battery has its own inverter to manage charging and discharging.
Understanding Microinverters
If your system has microinverters, it means each individual solar panel has its own small inverter attached to it. This setup is great for maximizing energy production, especially if some of your panels are partially shaded during the day. Because microinverters convert DC to AC power right at the panel, adding a battery works similarly to a string inverter system. You’ll typically add an AC-coupled battery, which integrates smoothly with the AC electricity your microinverters are already producing. This makes it a flexible and popular option for many homeowners.
Understanding Hybrid Inverters
A hybrid inverter is an all-in-one solution designed to work with both solar panels and a battery from the start. It can intelligently manage the flow of electricity between your panels, your home, the battery, and the grid. If you’re installing a new system and know you want a battery, a hybrid inverter is the most streamlined choice. If you have one already, you’re in luck; adding a battery is as simple as plugging it in. This modern inverter technology is perfect for anyone looking for a seamless way to achieve energy independence.
Signs You Might Need a New Inverter
If your solar system is getting older, it’s worth checking on your inverter’s age and capabilities. Most inverters have a lifespan of about 10 to 15 years. If yours is approaching that age, it might be time for an upgrade, especially if you want to add a battery. Older models may not be efficient or have the features needed for battery integration. Adding a battery to an existing system as a retrofit is common, but a new inverter can sometimes make the process smoother and more effective. A system assessment can help you decide if an upgrade makes sense for your home.
AC vs. DC Coupling: Which Is Right for You?
When you add a battery to your solar panel system, the way it connects is called "coupling." Think of it as the technical handshake between your panels and your new battery. The two main ways to do this are with an AC-coupled or a DC-coupled system. Your choice will depend on your current solar setup, your budget, and your efficiency goals. Let's walk through what each option means for you and your home.
How AC-Coupled Systems Work
An AC-coupled system is the most common and straightforward way to add a battery backup to an existing solar installation. In this setup, your battery has its own dedicated inverter, separate from your solar panel system's inverter. It connects directly to your home’s main electrical panel.
This approach is incredibly flexible and works with almost any solar system, no matter the brand or how long you've had it. The DC power from your panels is converted to AC power by your solar inverter, just like it is now. To charge the battery, that AC power is then converted back to DC power by the battery's inverter. It’s a simple and effective solution for retrofitting.
How DC-Coupled Systems Work
A DC-coupled system is a more integrated setup. Instead of two separate inverters, it uses a single, smart "hybrid inverter" that manages both your solar panels and your battery. The DC power generated by your panels can flow directly to your battery for storage without needing to be converted to AC power first.
Because the electricity doesn't have to change form as many times, DC-coupled systems are generally more efficient. This setup is an excellent choice if you're installing a brand new solar solution and battery at the same time. For existing systems, it usually means you’ll need to replace your current inverter with a hybrid model, which can add to the project's cost.
AC vs. DC: A Quick Comparison
So, which one is better? An AC-coupled system is your go-to for flexibility and ease. It’s perfect for adding a battery to virtually any existing solar array without a major overhaul. The trade-off is a slight loss in efficiency because the power has to be converted multiple times.
A DC-coupled system, on the other hand, wins on efficiency. By keeping the power in DC form between the panels and the battery, you get more out of every sunbeam. However, it requires a specific hybrid inverter, making it a better fit for new installations or major upgrades. The best choice really comes down to your home's specific needs, and our customized approach ensures you get the right fit.
What's the Real Cost of Adding a Solar Battery?
Let's talk numbers. Adding a solar battery is a significant investment, but it’s also one that pays you back in reliability and long-term savings. The final price tag depends on a few key things: the battery you choose, your current solar setup, and any available incentives. Think of it less as a single cost and more as a set of components that come together to create your home’s energy storage solution. Understanding these pieces will help you see exactly where your money is going and why it’s a worthwhile addition to your home.
Breaking Down Equipment Costs
The battery itself is the biggest part of your investment. Generally, you can expect the cost to add a battery to an existing solar system to fall between $10,000 and $30,000. For most California homeowners, a single 10-13 kWh battery, including professional installation, lands around the $14,000 mark. This price covers the physical battery unit and the labor needed to integrate it with your solar panels. The exact cost varies based on the brand, capacity, and chemistry of the battery backup system you select, but this range gives you a solid starting point for budgeting.
Factoring in a Potential Inverter Upgrade
Your solar inverter’s job is to convert the DC power from your panels into AC power your home can use. If your current inverter isn’t battery-ready, you’ll need a way to connect your new battery. An AC-coupled system is often the simplest and most affordable way to retrofit a battery. However, if your inverter is already 5 to 10 years old, it might be nearing the end of its lifespan. In that case, upgrading to a DC-coupled system could be a smarter long-term move. It costs more upfront but operates more efficiently, saving you more money over time.
Understanding Installation and Permit Fees
Getting a battery installed isn’t just a plug-and-play situation. Your city and utility company require updated permits to ensure the system is installed safely and interacts correctly with the electrical grid. While this might sound like a headache, don’t worry, your installer handles all of this for you. These fees are typically bundled into your total project cost. At AMECO, our solar solutions include managing the entire permitting process, so you can be confident that your new battery system is fully compliant with all local regulations without having to sort through the paperwork yourself.
How to Save with Tax Credits and Local Incentives
Now for the good part: saving money. The federal government offers a 30% tax credit for new solar battery installations, which can significantly reduce your total cost. However, this incentive is scheduled to end after December 31, 2025. To qualify, your battery must be fully installed and approved by your utility before that deadline. On top of the federal credit, many California utility companies and local governments offer their own rebates and programs. You can use an estimate calculator to get a preliminary idea of your costs and potential savings.
How to Choose the Right Solar Battery
Picking the right solar battery can feel a bit like learning a new language, with all the talk of kilowatts and coupling. But it’s much simpler than it sounds. The best battery for you really comes down to your goals. Are you looking for a reliable backup plan for when the grid goes down? Or is your main objective to slash your electricity bills by storing solar power for use during peak hours?
Thinking about these questions will help you focus on the features that matter most for your home. To make it easier, we can break the decision down into three key areas: the type of battery chemistry, the essential performance specs, and the factors that determine its long-term value. Understanding these will give you the confidence to choose a battery that fits your home and your budget perfectly. At AMECO, our personalized approach ensures we help you find the ideal match for your existing solar system and energy needs.
Lithium-Ion vs. Lead-Acid: Which Is Better?
When you start looking at solar batteries, you'll see two main types: lithium-ion and lead-acid. Lead-acid batteries have been around for a long time and are known for their lower upfront price. They’re a proven technology, but they come with some significant trade-offs. They have a shorter lifespan and a lower depth of discharge, which means you can’t use as much of their stored energy without causing damage.
For most homeowners today, lithium-ion batteries are the clear winner. While they may have a higher initial cost, they deliver far more value over time. They are more efficient, can store more energy in a smaller space, and last much longer. Think of it as an investment in reliability and performance that will serve your home for a decade or more, making them the standard for modern battery backup systems.
Key Specs Explained: Capacity, Power, and Depth of Discharge
Let's clear up some of the technical jargon you'll encounter. The three most important specs to know are capacity, power, and depth of discharge (DoD).
- Capacity (kWh): Think of this as the size of your battery’s energy tank. Measured in kilowatt-hours (kWh), it tells you the total amount of electricity the battery can store. A higher capacity means you can run your home for more hours during an outage.
- Power (kW): This is the rate at which your battery can deliver electricity, measured in kilowatts (kW). A higher power rating means you can run more appliances simultaneously.
- Depth of Discharge (DoD): This indicates how much of the battery's stored energy you can safely use. Lithium-ion batteries typically have a DoD of 90% or more, while lead-acid batteries are often limited to around 50%. A higher DoD means you get to use more of the energy your solar solution has generated.
Long-Term Value: Lifespan, Warranty, and Efficiency
A solar battery is a long-term investment, so it’s important to look beyond the initial price tag. Lifespan is a great place to start. A quality lithium-ion battery typically lasts 10 to 15 years, whereas a lead-acid battery might only last 3 to 7 years. A longer lifespan means you won’t have to worry about a costly replacement anytime soon. The warranty is your protection for that investment, and lithium-ion batteries almost always come with much longer warranty periods, often covering you for at least 10 years.
Finally, consider efficiency. Round-trip efficiency measures how much energy you get back out for every unit of energy you put in. Lithium-ion batteries have a much higher efficiency than lead-acid ones, meaning less energy is wasted during charging and discharging. This small difference adds up over time, giving you more usable electricity and better savings on your utility bills.
Will a Battery Affect Your Warranty or Net Metering?
Adding a battery is an exciting step toward energy independence, but it’s smart to think about how it fits with your current setup. Two of the biggest questions homeowners have are about their existing solar panel warranty and their net metering agreement with the utility company. It’s true that adding a major component like a battery can have an impact, but it’s usually straightforward to manage. When you’ve already invested in a solar panel system, you want to make sure any additions protect that investment and work seamlessly with it.
The key is to do your homework before the installation begins. Understanding your warranty terms and your utility’s rules will ensure a smooth transition and prevent any surprises. A professional installer can handle most of this for you, but knowing what to expect helps you make the best decisions for your home. Think of it as a final check-up to confirm that your new battery will integrate perfectly, both physically with your hardware and financially with your utility agreement. Let’s walk through what you need to know about both.
What Happens to Your Existing Solar Warranty?
It’s possible that adding a battery could affect the warranty on your existing solar components, especially your inverter. Some manufacturers have specific terms that state modifications or additions by an uncertified party can void the warranty. Before moving forward, your first step should be to review your original warranty paperwork for your solar panels and inverter.
If the language seems unclear, don't hesitate to contact the manufacturer directly. Another great option is to work with an installer who is certified to work on your specific brand of equipment. A professional installation process ensures that all components are integrated correctly without compromising your existing coverage. At AMECO, we always review your current system and warranties as part of our approach to create a plan that protects your investment.
How a Battery Changes Your Net Metering
A battery backup system changes how you interact with the grid, which can affect your net metering agreement. Instead of sending all your excess solar power back to the utility for credit, you’ll now be storing that energy for your own use later. This is especially beneficial under California’s NEM 3.0, where storing and using your own power is often more valuable than selling it back to the grid.
Because rules vary between utility providers, it’s a good idea to check with your local utility to understand how adding a battery will alter your billing. If you have a lease or a Power Purchase Agreement (PPA) for your panels, you’ll also need to get permission from the solar provider before adding a battery, as they technically own the system.
Top Benefits of Adding a Solar Battery
Adding a battery to your solar panel system is more than just an upgrade; it’s a strategic move that changes how you interact with your home’s energy. While your panels are great at producing power when the sun is shining, a battery lets you decide when to use that power. This simple addition can provide financial savings, security during outages, and a greater sense of control over your energy future. Think of it as completing your personal power plant. Your panels are the generator, and the battery is your energy reserve, ready to be deployed whenever you need it most. If you’re looking to get the absolute most out of your solar investment, exploring the benefits of a battery is the logical next step.
Gain Peace of Mind with Backup Power
For many California homeowners, the threat of power outages is a constant concern. A solar battery offers a powerful solution by providing reliable backup power when the grid goes down. During the day, your solar panels charge the battery with excess energy. If an outage occurs, your system automatically switches over to battery power, keeping your lights on, your refrigerator running, and your essential devices connected. This means you don’t have to worry about spoiled food or being left in the dark. It’s a seamless transition that provides security and comfort for your family, ensuring your home remains a safe haven no matter what’s happening with the local utility.
Lower Your Bills with Time-of-Use Savings
One of the smartest financial reasons to add a battery is to work around your utility’s Time-of-Use (TOU) rates. With TOU plans, electricity costs more during peak demand hours, which are typically in the late afternoon and evening when you’re home from work and using more power. A solar battery lets you outsmart this system. You can store the free, clean energy your panels generate during the sunny, off-peak hours. Then, when rates spike in the evening, you can draw from your battery instead of pulling expensive power from the grid. This strategy directly reduces your monthly electricity bill and helps you maximize the financial return on your solar system.
Achieve True Energy Independence
A solar battery is your key to greater energy independence. By generating and storing your own electricity, you significantly reduce your reliance on the utility company and its unpredictable rate hikes. You become the one in control of your power source. This not only insulates you from rising energy costs but also contributes to a more stable and sustainable grid. Modern lithium-ion batteries are designed for this purpose, offering high efficiency and long lifespans that make them a dependable part of your home’s energy infrastructure. Taking this step is about more than just saving money; it’s about securing your energy future with a system tailored to your needs, which is central to our approach at AMECO.
Do You Need a Permit to Add a Solar Battery?
Yes, you will almost certainly need a permit to add a battery to your existing solar system. While it might sound like another hurdle, this is a standard and essential part of the process. Think of it as a quality-control check for your home’s energy system. Local city and utility regulations require permits to ensure that any new electrical work, especially involving high-voltage equipment like a battery, is installed safely and up to code. This protects not only your home and family but also the integrity of the public power grid.
The permitting process ensures that your new battery is compatible with your existing solar setup and can safely connect to the grid. Your local building department needs to sign off on the electrical plans, and your utility company needs to grant what’s known as "Permission to Operate" (PTO) before the system can be officially turned on. This prevents issues down the line and confirms that your installation meets all legal and safety requirements. It’s a crucial step that guarantees your system is reliable and secure for years to come.
The good news is that you don’t have to figure this out on your own. A reputable and experienced installer handles the entire permitting process for you. As part of our approach, we manage all the necessary paperwork, from submitting detailed plans to your city’s building department to coordinating inspections and securing final approval from your utility company. Our team takes care of the administrative details so you can focus on the excitement of gaining energy independence without getting bogged down in bureaucracy.
Ready to Add a Battery? Here’s How We Can Help
If you’re thinking about adding a battery to your solar panels, you’re on the right track to greater energy independence and peace of mind. The process might seem complex, but our team is here to make it simple and straightforward. With over 50 years of combined solar and roofing experience, we’ve perfected a process that puts your needs first. We understand that every home and every solar system is unique, which is why we don’t offer one-size-fits-all solutions.
Our first step is always a detailed evaluation of your current solar setup. We’ll take a look at your inverter, your panels, and your overall energy usage to understand your specific situation. If you have a lease or a Power Purchase Agreement (PPA) for your panels, we’ll help you understand the next steps to get the necessary permissions. This personalized start is a key part of our approach and ensures every project begins on the right foot. From there, we’ll determine the best way to connect your new battery, whether it’s through AC or DC coupling, and explain the pros and cons of each in plain English.
We’ll also walk you through choosing the right battery backup for your home and budget. While a battery installation can range from $10,000 to $30,000, we provide a clear, personalized estimate so you know exactly what to expect with no surprises. If your system was installed with a hybrid inverter or designed to be "storage-ready," the process can be even simpler. Our job is to handle all the technical details, from system design to permitting and final installation. We create a seamless plan, leaving you with a reliable and efficient home energy system that’s ready for anything.
Related Articles
- Solar and Battery Pairing: Is It Worth It? | AMECO Solar
- The Real Cost to Add Battery to Solar System
- Solar Battery Backup for Home: A Complete Guide
- Battery Backup
Frequently Asked Questions
What's the very first thing I should do if I'm considering a battery? Before you get too far into planning, it’s a great idea to gather some basic information about your current solar panel system. Find the paperwork for your original installation to check what kind of inverter you have and review its warranty terms. Knowing these details upfront helps an installer give you a more accurate recommendation and ensures that adding a battery won't cause any issues with your existing equipment's coverage.
Do I have to replace my current inverter to add a battery? Not necessarily. For most existing solar systems, we can add a battery using a method called AC coupling, which allows the new battery to work alongside your current inverter without replacing it. This is a very common and flexible solution. However, if your inverter is older (approaching 10 years), it might be a good long-term investment to upgrade to a modern hybrid inverter, which manages both your panels and battery more efficiently.
Is it cheaper to install a battery with my initial solar system, or can I add it later without a big price difference? It is generally more cost-effective to install a battery at the same time as your solar panels. This is because the installation can be done in a single project, saving on labor and permitting costs. Adding a battery later, or retrofitting, requires a separate installation process and its own set of permits, which can make the total project cost slightly higher. That said, retrofitting is still a fantastic and very common way to upgrade your system.
Besides blackout protection, what's the main financial reason to add a battery? The biggest financial benefit after backup power is the ability to manage Time-of-Use (TOU) electricity rates. Your battery can store the solar energy your panels produce during the day when electricity is cheap. Then, during expensive peak hours in the evening, you can power your home with your stored energy instead of buying it from the grid. This simple strategy can significantly lower your monthly utility bills.
How long does the whole process take, from consultation to having a working battery? The timeline can vary, but a typical battery installation project takes a few weeks from start to finish. After our initial consultation and system design, the longest phase is often waiting for permit approval from your city and utility company. Once the permits are secured, the physical installation is usually completed in just a day or two. We handle all the paperwork to make the process as smooth and quick as possible for you.
6.11.2026
For many California homeowners, the question isn’t if the power will go out, but when. Relying on an unpredictable grid can be stressful, especially when you need to keep your lights on, your food cold, and your family connected. A home battery backup offers true peace of mind, and the AC coupled solar battery is a powerful solution. It works with your solar panels to create a personal power reserve for your home. This system can automatically kick in during an outage, keeping your essential appliances running seamlessly. In this article, we’ll explain how this technology provides reliable backup power and helps you gain more control and independence from the utility company.
Key Takeaways
- A simple upgrade for current solar owners: If you already have solar panels, an AC coupled battery is your go-to option because it easily connects to your existing system without needing a major rework.
- Gain control over your energy use: An AC coupled battery gives you the power to store solar energy for nighttime use, charge from the grid during off-peak hours to save money, and keep your lights on during a blackout.
- Understand the cost and efficiency trade-offs: These systems offer great flexibility but come with a higher upfront cost due to needing a second inverter, and they are slightly less efficient because of how they convert power.
What Is an AC Coupled Solar Battery?
Think of an AC-coupled solar battery as a smart and flexible addition to your existing solar panel system. If you already have solar panels on your roof, this type of battery is designed to integrate smoothly with your current setup. It's a fantastic way to start storing the extra energy your panels produce without having to overhaul the entire system you've already invested in. This makes it a popular choice for homeowners who want to add energy storage and gain more independence from the grid.
How It Converts Power
Let's get into how the magic happens. Your solar panels create direct current (DC) power, but your home's appliances run on alternating current (AC) power. A solar inverter already handles this conversion for you. With an AC-coupled system, any extra AC power your panels generate gets sent to a separate battery inverter. This inverter converts the power back to DC to be stored in your battery. When you need that stored energy, like during an evening or a blackout, the battery inverter converts it back to AC for your home to use. It’s a two-way street for electricity, ensuring no solar power goes to waste.
The Key Components
An AC-coupled system relies on two main pieces of equipment working together. First is your solar inverter, which you already have if you have solar panels. Its job is to turn the DC power from your panels into the AC power your home uses. The second, new piece is the battery inverter/charger. This is the brain of the storage operation. It takes excess AC power from your solar system or even the grid and converts it to DC power to charge your battery backup. When it's time to use that stored energy, it reverses the process, turning the battery's DC power back into usable AC power for your home.
How Does an AC Coupled Battery Work?
An AC coupled battery is a smart addition to your home energy system, working alongside your solar panels to give you more control over your power. Think of it as a personal energy reservoir for your house. It stores excess solar power for later and can even help you save money by strategically using grid power. Let's walk through how it operates day-to-day.
Storing Power From Your Solar Panels
It all starts with the sun. Your solar solutions generate direct current (DC) electricity, but your home and the electrical grid run on alternating current (AC). Your system’s existing solar inverter handles this first conversion, turning the DC power into usable AC power. From there, the AC electricity can power your home, be sent to the grid, or get routed to your new battery.
Because it’s an AC coupled battery, it has its own built-in inverter. This second inverter takes the AC power from your solar inverter and converts it back into DC power to store it safely in the battery. This two-step conversion process is what makes AC coupling so flexible, especially for homes that already have solar installed.
Charging From the Grid When Rates Are Low
One of the biggest perks of an AC coupled battery is its ability to charge directly from the electrical grid. Since the battery is connected to your home’s main AC electrical panel, it can pull power from the grid during off-peak hours when electricity rates are at their lowest. This is a game-changer for California homeowners on time-of-use (TOU) plans.
You can use that cheap, stored grid energy to power your home during expensive peak hours in the late afternoon and evening. This strategy, known as "load shifting," helps you avoid high utility charges and maximize your savings. It gives you another layer of control over your energy bills, independent of how much sun you get on a particular day.
Keeping the Lights On During an Outage
For many homeowners, energy independence and security are the main goals. This is where an AC coupled battery backup truly shines. When a power outage hits your neighborhood, your battery system automatically and safely disconnects your home from the grid. This creates a personal, independent power source for your home.
The battery’s inverter then converts the stored DC power back into AC electricity, seamlessly powering your essential appliances. You can keep the lights on, the refrigerator running, and your devices charged while you wait for the grid to be restored. It provides peace of mind, ensuring your home remains a comfortable and functional sanctuary, no matter what’s happening outside.
AC Coupled vs. DC Coupled: What's the Difference?
When you decide to add a solar battery to your home, one of the key technical choices you’ll face is whether to go with an AC coupled or a DC coupled system. Think of it as choosing between two different routes for electricity to travel between your solar panels, your battery, and your home. Both get the job done, but they have distinct differences in efficiency, cost, and how they integrate with your solar panel system. Understanding these differences will help you and your solar installer decide on the best path for your specific home and energy goals.
Comparing Efficiency
The main difference between AC and DC coupled systems comes down to how they handle power conversion. Your solar panels produce direct current (DC) power, but your home’s appliances run on alternating current (AC) power. A solar battery also stores power as DC. In an AC coupled system, the DC power from your panels first goes to a solar inverter to become AC power. To store it, that AC power then goes to a battery inverter to be converted back to DC. When you use the stored energy, it’s converted back to AC one last time. These multiple conversions cause a small amount of energy loss, making AC coupled systems slightly less efficient than their DC counterparts.
Breaking Down the Costs
Generally, an AC coupled system can have a higher upfront cost. This is because it requires more components, specifically two separate inverters (one for the solar panels and one for the battery). In contrast, a DC coupled system often uses a single, more complex hybrid inverter that handles both. This extra hardware for an AC coupled setup contributes to the initial price tag. You can get a clearer picture of what a full system might cost for your home by using an estimate calculator to explore different scenarios and see how the numbers stack up for your specific needs.
New vs. Existing Solar: Which Is Better?
This is where AC coupled systems really shine. If you already have a solar panel system installed on your roof, an AC coupled battery is the perfect choice for an upgrade. It can be added to your existing setup without needing to replace your current solar inverter, making the installation process much simpler. For residential customers building a brand new solar-plus-storage system from scratch, a DC coupled system is often recommended. Since all the components are being installed at once, it’s easier to design a more streamlined and efficient system from the ground up.
The Pros and Cons of an AC Coupled Battery
Deciding on the right solar battery comes down to weighing the benefits against the drawbacks for your specific situation. An AC coupled battery is a fantastic choice for many homeowners, but it’s not a one-size-fits-all solution. Understanding both sides of the coin will help you feel confident in your decision to add a battery backup to your home energy system. Let's walk through the key advantages and potential disadvantages you should consider.
The Upsides
One of the biggest draws of an AC coupled battery is its flexibility. It’s designed to work seamlessly with a wide range of setups, making it an incredibly versatile option for adding energy storage.
A Simple Upgrade for Existing Solar Systems
If you already have a solar panel system installed on your roof, an AC coupled battery is often the most straightforward way to add storage. Because it connects to your home’s electrical panel (the AC side) rather than directly to your solar panels (the DC side), the installation is typically simpler and less disruptive. It’s essentially a plug-and-play upgrade for your existing solar solution.
Works With Most Inverter Brands
AC coupled batteries are brand-agnostic, meaning they don’t have to match the brand of your existing solar inverter. This gives you the freedom to choose the best battery for your needs and budget without being locked into a single manufacturer. This flexibility also makes it easier to place the battery, as AC power can travel longer distances than DC power without losing energy.
Charge From Both Solar and the Grid
This is a major advantage for managing your energy costs. An AC coupled battery can store excess power from your solar panels during the day. It can also pull electricity from the grid during off-peak hours when utility rates are at their lowest. You can then use that stored, cheaper energy during peak hours, giving you more control over your monthly bills.
Easily Expand Your System Later
Your energy needs might change over time. With an AC coupled system, scaling up your storage capacity is simple. If you find you need more backup power, you can easily add more battery units to your setup without having to overhaul the entire system. This makes it a future-proof investment that can grow with your family.
The Downsides
While AC coupled batteries offer great flexibility, there are a few trade-offs to keep in mind. These factors are important to weigh when comparing different battery options.
Slightly Lower Efficiency
When your solar panels generate DC power, it gets converted to AC power for your home. To store it in an AC coupled battery, that power has to be converted back to DC. When you use the stored energy, it’s converted to AC again. Each conversion causes a tiny amount of energy loss. This results in a "round-trip efficiency" of about 90-94%, which is slightly lower than a DC coupled system.
Higher Initial Investment
Because an AC coupled system requires its own inverter in addition to your solar panel system’s inverter, the upfront cost can be higher. You are essentially paying for two separate inverters to manage the flow of energy. While this setup provides a lot of flexibility, it’s a budget consideration you’ll want to discuss when you calculate your estimate.
Potential Inverter Compatibility Issues
While you can mix and match inverter brands, it doesn't mean any battery will work with any solar inverter out of the box. The two inverters (solar and battery) need to be able to communicate and work together correctly. This is where professional installation is key. Our team follows a detailed approach to ensure every component in your system is perfectly integrated for reliable performance.
What's the Real Cost of an AC Coupled Battery?
Let's talk numbers. The cost of adding a battery to your solar system is one of the biggest questions homeowners have, and for good reason. The price tag can vary quite a bit depending on your home, your existing setup, and your energy goals. The good news is that it's an investment with real, tangible returns, from lower electricity bills to the peace of mind that comes with having reliable backup power. We'll break down the costs, look at incentives that can help, and figure out the long-term value for your home.
Understanding the Upfront Costs
AC coupled systems often have a higher upfront cost because they require their own inverter in addition to your solar inverter. Think of it as adding a separate, smart system that needs its own brain to manage the battery's power. While it’s possible to install enough battery backup to power your entire home during an outage, this can get expensive quickly. A whole-home setup could run from $100,000 to $200,000 or more. A more common and affordable approach is to focus on backing up your essential loads, like the refrigerator, lights, and Wi-Fi. This strategy gives you security during a blackout without the premium price tag of a full off-grid system.
California Incentives That Lower the Price
As a California homeowner, you’re in a great position to save on your battery installation. The state offers several incentives to encourage residents to adopt battery storage. These programs can significantly reduce your initial investment. If you already have solar panels, adding a battery introduces what installers call the "coupling question," which is where an AC coupled system shines. Because it's easier to retrofit, it's a popular choice for existing solar owners. Finding the available rebates and tax credits can feel complicated, but working with an experienced installer ensures you won't miss out on any savings. A personalized consultation can help you identify every incentive you qualify for.
Calculating Your Long-Term Savings
It's easy to get lost in the technical details, and studies show that more than half of homeowners find solar and battery systems confusing. That's completely understandable. The real value of an AC coupled battery becomes clear when you look at the long-term picture. You’ll save money by using stored solar energy at night instead of buying it from the grid. During a blackout, you’ll have power when your neighbors don't. To get these results, the system must be sized correctly. A common mistake is pairing a battery with the wrong size inverter, which limits its performance. You can estimate your potential savings and see how a battery could lower your energy bills over time.
Is an AC Coupled Battery Right for You?
Deciding on the right battery system feels like a big choice, but it really comes down to your specific home and goals. An AC coupled battery is a fantastic option for many homeowners, but it’s not a one-size-fits-all solution. Answering a few key questions can help you figure out if it’s the perfect fit for your energy needs.
Do You Already Have Solar Panels?
If you already have a solar panel system installed on your roof, an AC coupled battery is often the most straightforward and cost-effective way to add energy storage. Think of it as a simple upgrade. Because AC coupled systems are designed to be added to existing solar setups, the installation process is much less invasive. There’s no need to replace your current solar inverter or do extensive rewiring. This makes it an easier and quicker way to get the battery backup you need without overhauling the system you’ve already invested in.
What Are Your Main Energy Goals?
Take a moment to think about what you want to achieve with a battery. Are you looking to maximize your savings by storing cheap solar energy for use during expensive peak hours? Or is your top priority having reliable power to keep your home running during a grid outage? An AC coupled battery is especially good for homeowners who want to get more out of their existing solar solutions. It gives you the flexibility to store excess solar power for later and can also be set up to charge from the grid when electricity rates are low, helping you take control of your energy costs.
Is Your Current Inverter Compatible?
This is a slightly more technical question, but it’s an important one. In an AC coupled system, the battery has its own inverter that works alongside the inverter for your solar panels. This setup makes it compatible with almost any type of solar inverter on the market, which is great for flexibility. However, it’s crucial to ensure the two components can communicate effectively. This is where a professional assessment is key. Our team follows a detailed approach to evaluate your current system and guarantee that a new battery will integrate seamlessly, ensuring everything works together efficiently from day one.
How Important Is Backup Power for Your Home?
For many California homeowners, the peace of mind that comes with uninterrupted power is priceless. With rolling blackouts and grid instability becoming more common, having a reliable backup source is a major priority. An AC coupled battery excels at providing backup power. It can keep your essential appliances running when the grid goes down, using the energy it has stored from your solar panels or even from the grid. This ensures that your family stays safe and comfortable during an outage, making it a vital addition for any residential customer concerned about energy independence.
Find the Right Battery Backup for Your Home
Choosing a solar battery isn't a one-size-fits-all decision. The goal is to find a system that meets your specific needs without unnecessary costs. If you already have solar panels, an AC coupled battery is often the most straightforward path to adding energy storage. It’s designed to easily integrate with existing solar setups, converting the DC power from your panels into AC power that your home and the battery can use.
A common question we hear is, "Can a battery power my entire house?" While technically possible, outfitting a home with enough batteries for a complete backup can be incredibly expensive. A more practical and budget-friendly strategy is to focus on what matters most during an outage. Instead of trying to power everything, we can design a battery backup system that keeps your essential loads running, like your refrigerator, lights, Wi-Fi, and any critical medical devices. This ensures you have comfort and safety when the grid goes down, without the premium price tag of a whole-home system.
This is where a personalized plan makes all the difference. By identifying your essential appliances, we can create a tailored solution that provides reliable power exactly where you need it. This customized approach ensures you get the most value from your investment, giving you energy independence that fits your lifestyle and budget. Getting the technical details right, like correctly sizing the battery and inverter to work with your solar array, is key to an effective system. Working with experienced professionals ensures all the components work together seamlessly, giving you a reliable and long-lasting energy storage solution you can count on for years to come.
Related Articles
- Solar and Battery Pairing: Is It Worth It? | AMECO Solar
- Solar Batteries: What You Need to Know | AMECO Solar USA
- Maximize Energy Independence: Integrating Solar Panels With Battery Storage | AMECO Solar
- Battery Backup
Frequently Asked Questions
I already have solar panels. Is an AC coupled battery a good choice for me? Yes, it’s often the perfect choice. An AC coupled battery is specifically designed to be a straightforward addition to existing solar panel systems. Because it connects to your home's main electrical panel, the installation is typically much simpler than other options and doesn't require replacing the solar inverter you already own. Think of it as a smart, seamless upgrade to get more value from the system you've already invested in.
Can this type of battery really save me money on my electricity bill? Absolutely. An AC coupled battery gives you a powerful strategy for managing energy costs, especially if you are on a time-of-use rate plan. You can store the excess solar power your panels generate during the day and use it during the evening when electricity from the grid is most expensive. The system can also be programmed to charge from the grid during the cheapest off-peak hours, giving you another way to avoid high utility charges.
Do I have to power my entire house during an outage, or can I just back up the important stuff? You have complete flexibility here. While powering your entire home is possible, it requires a very large and expensive battery system. A more common and practical approach is to identify your essential needs, such as your refrigerator, some lights, and your Wi-Fi router. We can then design a system that automatically powers just those critical items during an outage, giving you peace of mind and security without the premium cost of a whole-home setup.
Why does an AC coupled system sometimes cost more upfront than other options? The higher initial cost is mainly because an AC coupled system requires two separate inverters: the one you already have for your solar panels and a new, dedicated inverter for the battery. You are essentially buying a second piece of smart equipment to manage your stored energy. While this adds to the price, it's also what provides the incredible flexibility to add a battery to nearly any existing solar installation.
How do I know if my current solar inverter will work with a new battery? This is a great question. The good news is that AC coupled batteries are designed to be compatible with most solar inverters on the market. However, the two inverters (your solar one and the new battery one) must be able to communicate properly to work efficiently. This is why a professional assessment is so important. An expert can verify compatibility and ensure all the components are integrated correctly for safe and reliable performance.
6.9.2026
When you start researching solar, it’s easy to get overwhelmed by conflicting information. You hear that panels are too expensive, don't work on cloudy days, or require constant maintenance. It's hard to know what to believe. Even a straightforward query like, "a solar panel on the roof of a house is what type of energy?" can lead you down a rabbit hole of technical jargon. Let's clear the air. The truth is, modern solar technology is more efficient, affordable, and reliable than ever. We'll debunk the common myths and give you the straight facts you need to make a confident decision for your residential property.
Key Takeaways
- Solar is a smart financial investment: Beyond the environmental benefits, installing solar panels can significantly lower your monthly electricity bills, increase your home's resale value, and become more affordable with incentives like the 30% federal tax credit.
- A successful system is tailored to your home: The performance of your solar panels depends on unique factors like your roof's condition, its angle, and sun exposure. A professional installer is essential to assess these variables and design a system that maximizes your energy output.
- You can have power when the grid is down: Standard solar systems shut down during an outage for safety, but pairing your panels with a battery backup system allows you to store excess energy and maintain power for your home, giving you true energy independence.
What Kind of Energy Do Solar Panels Produce?
When you’re considering adding solar panels to your roof, one of the first questions that comes to mind is probably, "How does it all actually work?" It might seem like a complex piece of technology, but the basic idea is beautifully simple: your panels catch sunlight and turn it into electricity you can use right in your home. This process not only helps you save money on your utility bills but also gives you more control over your energy supply. Let's walk through how your system transforms a sunny California day into power for your lights, appliances, and everything in between.
From Sunlight to Your Outlets
At the heart of every solar panel are photovoltaic (PV) cells. You can think of these as tiny, hardworking power plants. When sunlight hits the PV cells, it excites the electrons within them and gets them moving, which creates an electrical current. This is the magic of the photovoltaic effect. The energy produced by your solar solutions is then collected and sent on its way to power your home. This clean, straightforward process allows you to generate your own electricity, reducing your dependence on the main power grid and lowering your carbon footprint one sunny day at a time.
DC vs. AC: What's the Difference?
Your solar panels produce what’s called direct current (DC) electricity, where the energy flows in a single, constant direction. However, your home’s appliances and the general power grid run on alternating current (AC), where the energy flow reverses direction many times per second. To make the DC power from your panels useful, a device called an inverter is installed as part of your system. The inverter’s job is to convert that DC electricity into AC electricity, making it compatible with your home. Our approach to installation ensures this conversion is seamless, safe, and highly efficient.
Do Solar Panels Work on Cloudy Days?
It’s a common myth that solar panels are useless on overcast days, but that’s simply not true. While they are most productive in direct sunlight, solar panels can still generate a significant amount of electricity on cloudy days. UV rays from the sun still penetrate the cloud cover, and your panels are designed to capture this ambient light. Production might be lower than on a bright, clear day, but your system doesn't just shut down. For total peace of mind, you can pair your panels with a battery backup to store excess energy for when you need it most, rain or shine.
How Solar Panels Turn Sunlight into Power
It might seem like magic, but the way solar panels generate electricity is a straightforward and fascinating process. It all starts with the sun hitting your roof and ends with you powering your coffee maker. Let's walk through how your home can create its own clean energy.
What Is the Photovoltaic Effect?
The science behind solar panels is called the photovoltaic effect, which is just a technical way of saying "turning light into electricity." Your solar panels are made up of many smaller units called photovoltaic (or PV) cells. Think of each cell as a tiny power generator. These cells are typically made from silicon, a material that gets excited when sunlight hits it, causing electrons to move and create an electric current.
One single cell doesn't produce much power on its own. That's why they are linked together to form a solar panel. Multiple panels are then arranged together in what's called an array. This array is the complete set of solar solutions you see on a rooftop, all working together to capture as much sunlight as possible and generate a meaningful amount of electricity for your home.
How Power Moves Through Your Home
Once your solar panels absorb sunlight, they start producing electricity. This electricity is in the form of a direct current, or DC. While DC power is great for charging things like your phone or laptop, the outlets and appliances in your home run on a different type of electricity called alternating current, or AC.
So, how does the DC power from your panels become the AC power your home needs? The energy flows from the panels on your roof through wiring to a crucial piece of equipment called an inverter. We take great care when we design a system to ensure this flow is efficient and safe. The inverter's job is to convert the electricity, and from there, it travels to your home's electrical panel to power everything from your lights to your television.
What Your Solar Inverter Does
The solar inverter is the unsung hero of your home's energy system. It acts as a translator, converting the DC electricity generated by your panels into the usable AC electricity your home requires. Without an inverter, the power produced on your roof would be incompatible with your appliances.
Modern inverters are incredibly smart and efficient. They manage the energy flow, optimize power production from your panels, and provide data so you can see how much electricity your system is generating. The inverter is also a key component if you decide to add a battery backup to your system, as it helps direct excess solar energy to the battery for storage. It’s the brain of the operation, making sure you get clean, reliable power whenever you need it.
What Are the Main Types of Solar Panels?
When you start looking into solar, you’ll quickly realize that not all panels are the same. The three main types you’ll encounter are monocrystalline, polycrystalline, and thin-film. Each has its own set of pros and cons when it comes to efficiency, cost, and appearance. Understanding the differences is the first step toward choosing the right solar solution for your home, budget, and energy goals.
Think of it like choosing a car. You might prioritize fuel efficiency, upfront cost, or a specific design. The same logic applies here. Let’s walk through what makes each type of panel unique so you can feel confident in your decision.
Monocrystalline Panels
If you’re looking for top-tier performance, monocrystalline panels are the gold standard. Made from a single, highly pure silicon crystal, these panels are the most efficient on the market, typically converting 15% to 20% of sunlight into energy. Their uniform black color gives them a sleek, modern look on any roof.
Because of their high efficiency, you need fewer panels to generate the power you need, making them a perfect fit for homes with limited roof space. While they are the most expensive option upfront, their long lifespan, often backed by a 25-year warranty, makes them a solid long-term investment in your home’s energy future. The efficiency and costs are justified by their superior performance and durability.
Polycrystalline Panels
Polycrystalline panels are a fantastic, budget-friendly option that offers a great balance of performance and price. You can spot them by their blue, marbled appearance, which comes from the way they’re made: by melting multiple silicon fragments together. This manufacturing process is simpler and less wasteful, which helps keep costs down.
While they are slightly less efficient than their monocrystalline cousins, with rates around 13% to 16%, they still provide excellent power output for most residential needs. If you have ample roof space, the difference in efficiency may not be a major factor. For many homeowners, the upfront savings make a comparison of monocrystalline vs polycrystalline panels a worthwhile exercise, as polycrystalline panels present a reliable and cost-effective path to going solar.
Thin-Film Panels
Thin-film panels are a different breed of solar technology. Instead of rigid silicon wafers, they are made by placing a super-thin layer of photovoltaic material on a solid surface. This makes them incredibly lightweight, flexible, and versatile. While their efficiency is lower, usually between 10% and 12%, they have some unique advantages.
Their lightweight nature means they can be installed on roofs that can’t support the weight of traditional panels. They also handle high temperatures better than crystalline panels, which can be a real benefit during hot California summers. While they require more space to produce the same amount of power, the advantages and disadvantages of solar cells show that thin-film technology is a great choice for specific applications, like RVs, boats, or unique architectural projects.
What Affects Solar Panel Efficiency?
When you think about solar panel efficiency, you might picture a number on a spec sheet. While the quality of the panel itself is important, your system’s real-world performance depends on a handful of key factors specific to your home. Getting the most energy from your solar panels is about creating the perfect setup, from the angle of your roof to the quality of the installation.
Think of it as a partnership between the technology and your property. Your home provides the foundation, and the panels do the work. To maximize your energy production and savings, it’s essential to consider how your roof’s orientation, local weather, and the installation process all play a role. A professional solar installer will conduct a thorough site assessment to account for these variables, designing a system that’s perfectly tailored to your home’s unique characteristics. This ensures you get the best possible return on your investment for years to come.
Your Roof's Angle and Direction
To generate the most power, your solar panels need to capture as much direct sunlight as possible throughout the day. This is why the direction your roof faces and its angle, or pitch, are so important. In the Northern Hemisphere, the ideal setup is a south-facing roof, as it receives the most consistent sun exposure from morning to evening. A roof slope between 15 and 40 degrees is also considered optimal for maximizing energy collection.
But don’t worry if your roof doesn’t fit this perfect description. Many homes with east- or west-facing roofs are still excellent candidates for solar. A skilled installer can customize a design that works for your property’s specific layout. Our approach always involves a personalized consultation to ensure your system is designed for peak performance, no matter which way your home faces.
Shade, Weather, and Climate
It’s a common myth that solar panels stop working on cloudy days or in the shade. While it’s true that direct, bright sunlight produces the most energy, modern solar panels are highly efficient and can still generate a significant amount of electricity in overcast weather. They convert both direct and indirect sunlight into power, so you’ll still be producing energy even when the sun isn’t shining brightly.
Of course, heavy shading from trees or nearby buildings can reduce your system’s output. During a site evaluation, a solar expert will map out your roof’s sun exposure throughout the day and identify any potential obstructions. This allows them to place panels in the sunniest spots to ensure your system is as productive as possible for your residential needs.
Panel Type and Installation Quality
The type of solar panel you choose certainly impacts efficiency, but the quality of the installation is just as critical. Even the best panels on the market won’t perform well if they’re installed incorrectly. That’s why it’s so important to work with a qualified and experienced professional. A proper installation ensures your panels are securely mounted, correctly wired, and positioned for optimal sun exposure.
Many homeowners also wonder if their roof can handle the extra weight. The good news is that most modern roofs are more than strong enough. Solar panels add only about two to four pounds per square foot, which is well within the structural limits of a typical roof. As a company with decades of experience in both solar and roofing, we can assess your roof’s condition and provide any necessary roofing solutions to guarantee a safe and seamless installation.
What Are the Benefits of Going Solar?
Switching to solar energy is more than just an environmental choice; it's a practical upgrade for your home and your lifestyle. For many California homeowners, going solar means taking control of rising energy costs, securing a reliable power source, and making a smart long-term investment. The advantages are clear, tangible, and can make a real difference in your day-to-day life. From financial savings to energy independence, let’s walk through the biggest benefits you can expect when you make the switch to clean, renewable power.
Lower Your Electricity Bills
One of the most immediate and rewarding benefits of installing solar panels is the significant reduction in your monthly electricity bills. By generating your own power from the sun, you rely less on your utility company, protecting yourself from unpredictable rate hikes. Over time, these savings add up substantially, and the money you save can often outweigh the initial cost of the system. Think of it as a long-term investment in your financial future. Curious about what you could save? You can use an estimate calculator to get a personalized idea of your potential savings based on your home and energy usage.
Gain Energy Independence with Battery Backup
Power outages and rolling blackouts can be a major source of stress. A solar panel system paired with a battery backup solution gives you true energy independence. During the day, your panels power your home and charge your battery. When the sun goes down or the grid goes out, your battery seamlessly takes over, keeping your lights on and your essential appliances running. This means you can utilize your solar energy even when the sun isn't shining, giving you peace of mind and control over your home's power supply, no matter what’s happening with the local grid.
Increase Your Home's Value
Solar panels are a valuable upgrade that can make your home more attractive to potential buyers. Homes equipped with solar energy systems often sell for more than comparable homes without them. Modern buyers are looking for properties that are energy-efficient and have lower long-term running costs. By investing in solar, you’re not just improving your home for yourself; you’re adding a premium feature that can lead to an increase in property value. It’s an investment that pays you back now with lower bills and can pay off again if you ever decide to sell your home.
Find Tax Credits and Rebates
The cost of going solar is more affordable than you might think, thanks to various government incentives. The federal solar Investment Tax Credit (ITC) is a major benefit, allowing homeowners to deduct 30% of the total installation cost directly from their federal taxes. In addition to the ITC, many states and local utilities offer their own rebates and incentives to encourage homeowners to switch to clean energy. These programs can significantly reduce your upfront costs, making the transition to solar an even smarter financial decision for both residential and commercial customers.
Reduce Your Environmental Impact
Choosing solar is a powerful way to reduce your household's carbon footprint and contribute to a healthier planet. Solar panels produce clean, renewable energy without burning fossil fuels or releasing harmful pollutants into the atmosphere. An average home with solar can cut its carbon pollution by three tons or more each year. By powering your home with the sun, you become part of the solution to climate change. It’s a choice you can feel good about, demonstrating a commitment to sustainability that aligns with a forward-thinking approach to energy.
What to Consider Before Installing Solar Panels
Deciding to go solar is a big step, and it’s smart to do your homework before you commit. Thinking through a few key factors will help ensure your solar installation is a success from day one. Your home's unique characteristics, from the state of your roof to your budget, all play a role in creating the perfect solar setup. Taking the time to understand these elements will help you feel confident in your investment and set you up for decades of clean energy and lower electricity bills. Let's walk through the main things you'll want to consider before you make the switch.
Your Roof's Condition
Your roof is the foundation for your solar panel system, so its condition is the first thing to check. Ideally, you want a roof that’s in good shape and has plenty of years left in it. Solar panels can last for 25 years or more, and it’s much easier and more cost-effective to make any necessary roof repairs before the panels are installed. The best roofs for solar generally face south and have a slope between 15 and 40 degrees, which maximizes sun exposure. Don't worry if your roof isn't perfect, though. A professional installer can assess your specific situation and find the best placement. Since we handle both roofing solutions and solar, we can make sure your home is fully prepared for installation.
Installation Costs vs. ROI
The initial cost of solar panels is a big consideration, but it's important to see it as an investment rather than just an expense. The real goal is the long-term return you'll get from generating your own power. Over time, the money you save on your electricity bills can outweigh the upfront cost of the system. The total price will depend on the size of your system, the type of panels you choose, and your home's energy needs. To get a clearer picture of what your investment and savings could look like, you can use an estimate calculator to explore different scenarios. This helps you understand the financial benefits and see how solar can pay for itself.
Financing Options and Incentives
You don't have to pay for a new solar system all at once. There are many financing options and incentives available that make going solar more affordable than ever. The most significant is the federal Residential Clean Energy Credit, which allows you to deduct 30% of the total installation cost from your federal taxes. Many states and local utility companies also offer their own rebates and credits, further reducing the net cost. Exploring these programs is a key part of the process. A good solar provider will help you understand all the available solar solutions and incentives you qualify for, making the financial side of things much clearer.
Long-Term Maintenance Needs
One of the best things about solar panels is how little maintenance they require. Many people worry they’ll have to constantly clean or service them, but that’s rarely the case. For the most part, rain does a good job of washing away any dust or debris that accumulates. A professional cleaning once or twice a year is usually all that’s needed to keep your panels operating at peak efficiency. Modern solar systems are built to be durable and withstand the elements for decades. As part of our approach, we make sure you understand the simple upkeep involved, so you can enjoy your system without any added stress.
Common Myths About Solar Panels
When you start looking into solar energy, you’ll likely come across a lot of opinions and information. It can be tough to sort fact from fiction. Let's clear up some of the most common myths about going solar so you can make a confident decision for your home.
Myth: "Solar panels are too expensive."
I get it, the initial cost of solar panels can seem daunting. But the idea that they’re unaffordable for the average homeowner is outdated. Thanks to federal incentives like the 30% Residential Clean Energy Credit, the price is more accessible than ever. Think of it as a long-term investment. Over time, the money you save on your monthly electricity bills can outweigh the initial cost, putting money back in your pocket. The best way to see if the numbers work for you is to get a personalized estimate. You can use an online calculator to get a ballpark idea of your potential costs and savings.
Myth: "Solar panels don't work in my climate."
Many people believe solar panels only work in perpetually sunny, hot places. The good news is that this isn't true. Solar panels generate electricity from light, not heat, and they can still produce a significant amount of power on cloudy days. Modern panels are incredibly efficient and can capture diffuse sunlight that passes through clouds. Here in California, we get plenty of sunshine, but even on our overcast coastal days or during the winter, your panels will keep working for you. They are designed to be effective in a wide range of weather conditions, so you don't need perfect blue skies to reap the benefits.
Myth: "My roof isn't suitable for solar."
It’s smart to think about your roof’s condition before installing anything on it. However, most modern roofs are more than capable of handling the weight of solar panels. Panels typically add only about two to four pounds per square foot, while your roof is built to support much more. Of course, not every roof is a perfect candidate. That’s why any reputable solar installer will start with a thorough evaluation of your roof’s structure and condition. If any repairs are needed, it’s best to handle them before installation. A company that also specializes in roofing solutions can ensure your home is fully prepared for the switch to solar.
Myth: "Solar panels will power my home during an outage."
This is one of the most common and important misconceptions. A standard grid-tied solar system will automatically shut down during a power outage. This is a critical safety measure to prevent your panels from sending electricity back to the grid, which could endanger utility workers making repairs. If you want to keep your lights on during a blackout, you’ll need to pair your solar panels with a battery backup system. A solar battery stores the excess energy your panels produce, creating your own personal energy reserve that you can tap into whenever the grid goes down.
Is Solar Energy Right for Your Home?
Deciding to go solar is a big step, and you want to be sure it’s the right move for your specific situation. The good news is that for many California homeowners, the answer is a resounding yes. The ideal home for solar panels has a roof that gets plenty of direct sunlight throughout the day. Generally, this means a south-facing roof with a slope between 15 and 40 degrees, and one that isn’t heavily shaded by tall trees or nearby buildings.
The condition of your roof is also a major factor. Since solar panels are a long-term investment, you want to make sure the foundation they sit on is solid. If your roof is older or needs repairs, it’s best to address that before installation. This is where having a company with expertise in both solar and roofing solutions becomes incredibly valuable. A combined expert can assess your entire home energy system, from the shingles up, to ensure you have a setup that’s safe, efficient, and built to last. A professional consultation can help you understand your home’s unique potential and what to expect from an installation.
Estimate Your Potential Savings
One of the most exciting parts of considering solar is figuring out how much you could save on your electricity bills. Your potential savings depend on a few key things: how much electricity your family typically uses, the size of your solar panel system, the amount of sunlight your home receives, and your local utility’s rates. While it might sound complicated, getting a preliminary idea is easier than you think. The cost to install solar has become more affordable over the years, making the return on investment even more attractive. A great first step is to use an online estimate calculator to get a personalized projection based on your address and energy use.
How to Find a Qualified Solar Installer
Choosing the right installer is just as important as choosing the right panels. You want a team that is experienced, trustworthy, and knowledgeable. A key indicator of a quality installer is certification from the North American Board of Certified Energy Practitioners (NABCEP), which is the gold standard in the solar industry. Beyond certifications, look for a company with a long history of successful installations and happy residential customers in your area. With over 50 years of combined experience in both solar and roofing, our team at AMECO has a deep understanding of how to design a system that works perfectly for your home. Our personalized approach ensures you get a solution tailored to your energy goals and budget.
Related Articles
- Understanding Solar Panel Components And How They Work | AMECO Solar
- Solar Panels: The Ultimate Guide to How Solar Panels Work
- Energy Saving Solar Panels: A Homeowner's Guide
Frequently Asked Questions
How long does it take for solar panels to pay for themselves? The time it takes to recoup your initial investment, often called the payback period, varies for every home. It depends on your total system cost, how much electricity you use, and the rates your local utility company charges. For many California homeowners, the combination of lower monthly bills and financial incentives means the system pays for itself in a fraction of its 25-plus-year lifespan. A personalized consultation can give you a much clearer projection for your specific situation.
Will installing solar panels damage my roof? This is a common and valid concern. When installed by a certified and experienced professional, solar panels will not damage your roof. The installation process involves securely mounting the panels and sealing any penetrations to make them completely watertight. Working with a company that has deep expertise in both solar and roofing provides an extra layer of assurance, as they understand exactly how to protect the integrity of your roof while installing your new energy system.
What happens if I don't use all the electricity my panels produce? During sunny days, your system might generate more power than your home is using at that moment. This excess energy doesn't go to waste. Typically, it's sent back to the utility grid, and you may earn credits on your bill for the power you contribute. Alternatively, if you have a battery backup system, that extra power is used to charge your battery. This allows you to store your own solar energy to use at night or during a power outage.
Do I really need to clean my solar panels? Solar panels are surprisingly low-maintenance. For most homeowners, normal rainfall is enough to wash away the dust and debris that can accumulate on the panels. If you live in an area with very little rain or a lot of dust, an occasional cleaning might help keep your system running at peak performance, but it's not something you'll need to worry about constantly.
What's the first step if I'm interested in going solar? The best way to start is by getting a professional assessment of your home. An expert can evaluate your roof's condition and sun exposure, look at your past energy bills, and talk with you about your goals. This initial consultation will give you a clear understanding of what size system you need, what your potential savings could be, and which incentives you qualify for, all without any pressure or commitment.


